boot FIAT 600 2007 1.G Owners Manual
[x] Cancel search | Manufacturer: FIAT, Model Year: 2007, Model line: 600, Model: FIAT 600 2007 1.GPages: 146, PDF Size: 2.05 MB
Page 5 of 146
4GETTING TO KNOW YOUR CAR
SYMBOLS
Special coloured labels have been at-
tached near or actually on some of
the components of your Fiat 600.
These labels bear symbols that remind
you of the precautions to be taken as
regards that particular component.
THE FIAT CODE
SYSTEM
To further protect your car from at-
tempted theft, it has been fitted with
an electronic engine immobiliser sys-
tem called “Fiat CODE”, which is au-
tomatically activated when the ignition
key is removed. The ignition keys, in
fact, are fitted with an electronic de-
vice that transmits a coded signal to
the Fiat CODE control unit; only if
this signal is recognised can the engine
be started.
The modulated signal is a password.
Only if the control unit recognises the
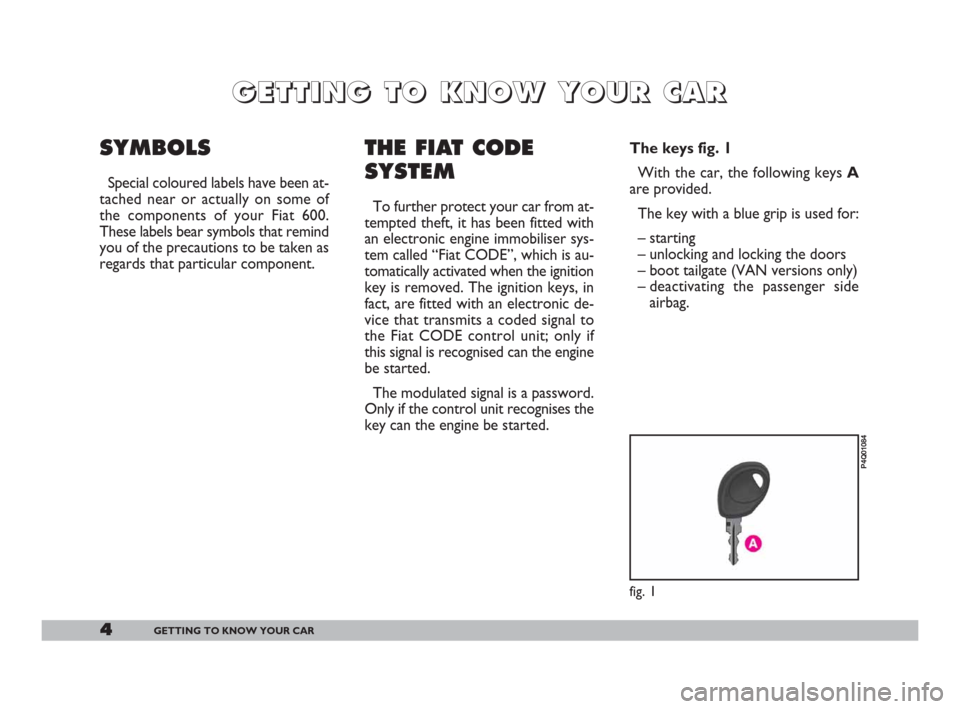
key can the engine be started.The keys fig. 1
With the car, the following keys A
are provided.
The key with a blue grip is used for:
– starting
– unlocking and locking the doors
– boot tailgate (VAN versions only)
– deactivating the passenger side
airbag.
fig. 1
P4Q01084
G G
E E
T T
T T
I I
N N
G G
T T
O O
K K
N N
O O
W W
Y Y
O O
U U
R R
C C
A A
R R
001-069 Seicento GB 22-11-2007 10:49 Pagina 4
Page 48 of 146
47GETTING TO KNOW YOUR CAR
BOOT
OPENING/CLOSING
THE TAILGATE
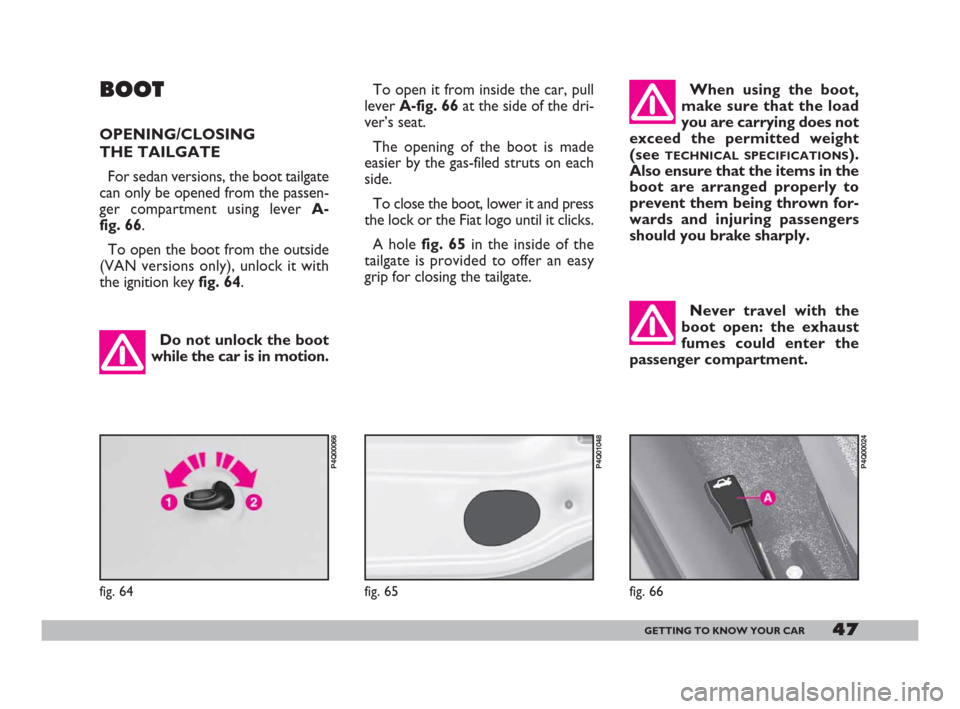
For sedan versions, the boot tailgate
can only be opened from the passen-
ger compartment using lever A-
fig. 66.
To open the boot from the outside
(VAN versions only), unlock it with
the ignition key fig. 64.
fig. 64
P4Q00066
Do not unlock the boot
while the car is in motion.
To open it from inside the car, pull
lever A-fig. 66at the side of the dri-
ver’s seat.
The opening of the boot is made
easier by the gas-filed struts on each
side.
To close the boot, lower it and press
the lock or the Fiat logo until it clicks.
A hole fig. 65in the inside of the
tailgate is provided to offer an easy
grip for closing the tailgate. When using the boot,
make sure that the load
you are carrying does not
exceed the permitted weight
(see
TECHNICAL SPECIFICATIONS).
Also ensure that the items in the
boot are arranged properly to
prevent them being thrown for-
wards and injuring passengers
should you brake sharply.
Never travel with the
boot open: the exhaust
fumes could enter the
passenger compartment.
fig. 65
P4Q01048
fig. 66
P4Q00024
001-069 Seicento GB 22-11-2007 10:49 Pagina 47
Page 49 of 146
48GETTING TO KNOW YOUR CAR
EXTENSION
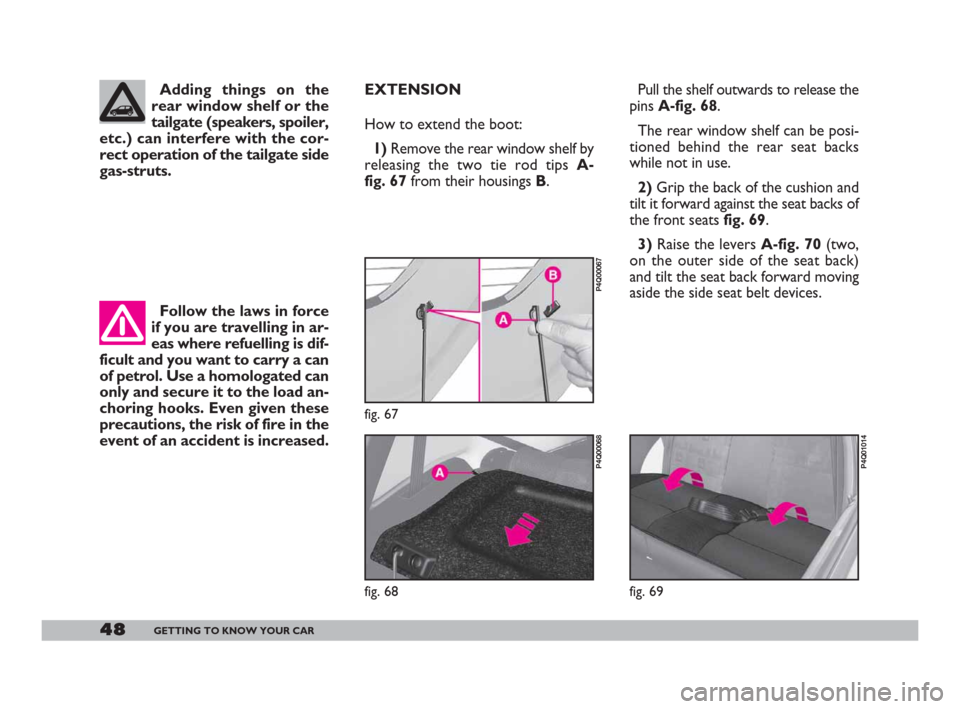
How to extend the boot:
1)Remove the rear window shelf by
releasing the two tie rod tips A-
fig. 67 from their housings B. Pull the shelf outwards to release the
pins A-fig. 68.
The rear window shelf can be posi-
tioned behind the rear seat backs
while not in use.
2)Grip the back of the cushion and
tilt it forward against the seat backs of
the front seats fig. 69.
3)Raise the levers A-fig. 70(two,
on the outer side of the seat back)
and tilt the seat back forward moving
aside the side seat belt devices.
fig. 68
P4Q00068
fig. 67
P4Q00067
fig. 69
P4Q01014
Adding things on the
rear window shelf or the
tailgate (speakers, spoiler,
etc.) can interfere with the cor-
rect operation of the tailgate side
gas-struts.
Follow the laws in force
if you are travelling in ar-
eas where refuelling is dif-
ficult and you want to carry a can
of petrol. Use a homologated can
only and secure it to the load an-
choring hooks. Even given these
precautions, the risk of fire in the
event of an accident is increased.
001-069 Seicento GB 22-11-2007 10:49 Pagina 48
Page 50 of 146
49GETTING TO KNOW YOUR CAR
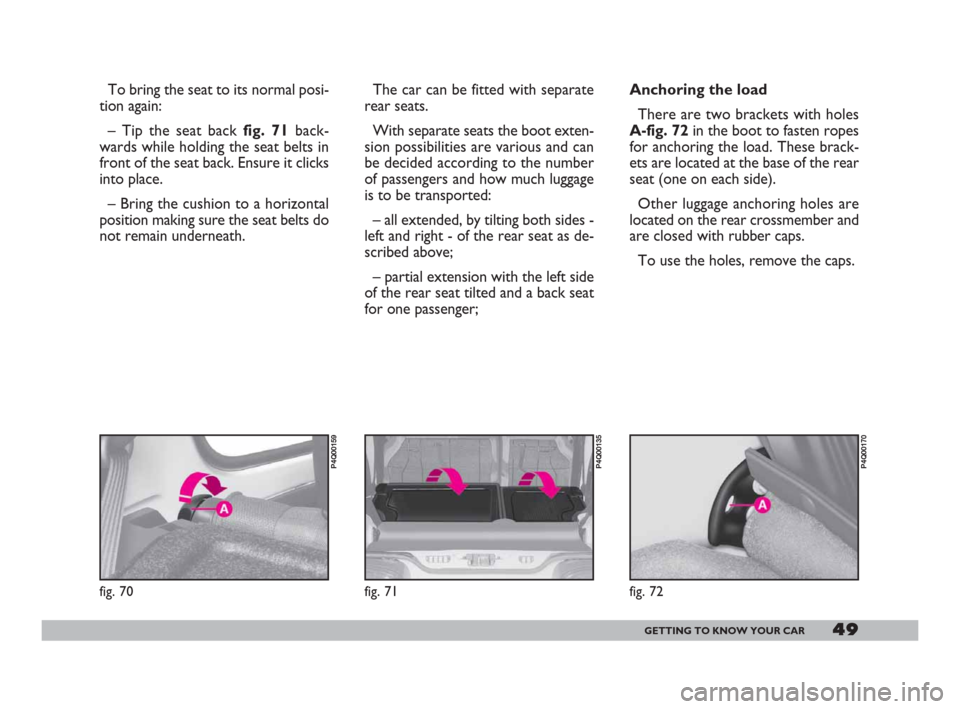
To bring the seat to its normal posi-
tion again:
– Tip the seat back fig. 71back-
wards while holding the seat belts in
front of the seat back. Ensure it clicks
into place.
– Bring the cushion to a horizontal
position making sure the seat belts do
not remain underneath.
fig. 70
P4Q00159
The car can be fitted with separate
rear seats.
With separate seats the boot exten-
sion possibilities are various and can
be decided according to the number
of passengers and how much luggage
is to be transported:
– all extended, by tilting both sides -
left and right - of the rear seat as de-
scribed above;
– partial extension with the left side
of the rear seat tilted and a back seat
for one passenger;Anchoring the load
There are two brackets with holes
A-fig. 72 in the boot to fasten ropes
for anchoring the load. These brack-
ets are located at the base of the rear
seat (one on each side).
Other luggage anchoring holes are
located on the rear crossmember and
are closed with rubber caps.
To use the holes, remove the caps.
fig. 71
P4Q00135
fig. 72
P4Q00170
001-069 Seicento GB 22-11-2007 10:49 Pagina 49
Page 51 of 146
50GETTING TO KNOW YOUR CAR
Heavy loads which are
not securely anchored
could seriously injure pas-
sengers in the event of an acci-
dent.
IMPORTANTCheck and adjust
the height of the dipped headlight
beam when travelling at night with a
rather heavy load in the boot (see
HEADLIGHTSin this chapter).
When refitting the rear
window shelf, fasten the
two side tie-rods fig. 67
passing them on the outside of
the struts.
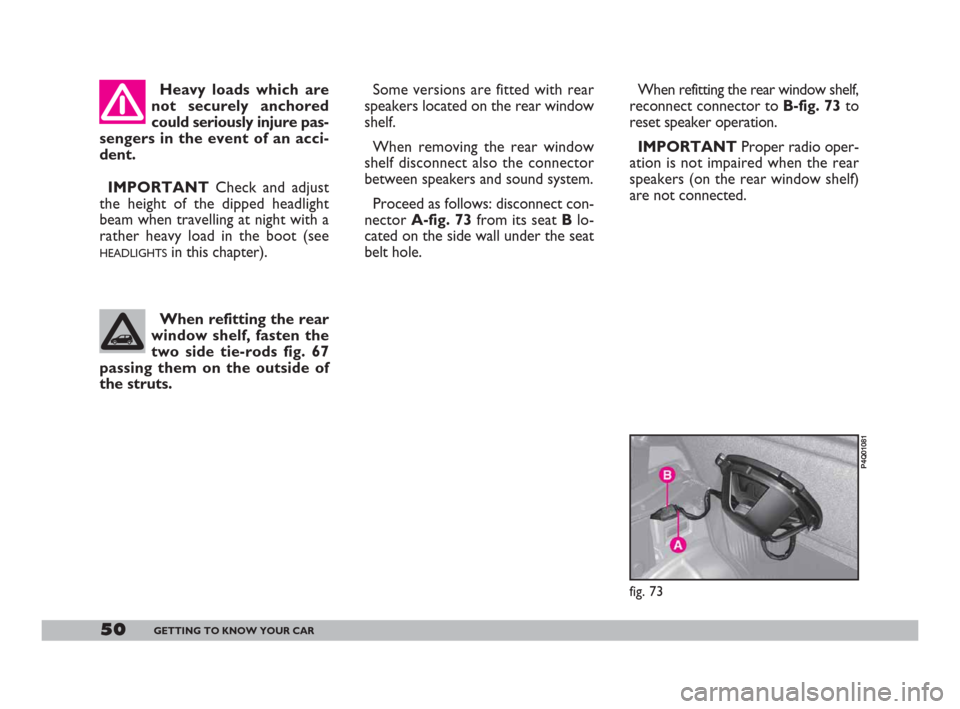
Some versions are fitted with rear
speakers located on the rear window
shelf.
When removing the rear window
shelf disconnect also the connector
between speakers and sound system.
Proceed as follows: disconnect con-
nector A-fig. 73from its seat Blo-
cated on the side wall under the seat
belt hole. When refitting the rear window shelf,
reconnect connector to B-fig. 73to
reset speaker operation.
IMPORTANTProper radio oper-
ation is not impaired when the rear
speakers (on the rear window shelf)
are not connected.
fig. 73
P4Q01081
001-069 Seicento GB 22-11-2007 10:49 Pagina 50
Page 54 of 146
53GETTING TO KNOW YOUR CAR
After travelling a few
kilometres, check that
the screws securing the
attachments are tight.
Never exceed the per-
mitted weight (see
TECH-
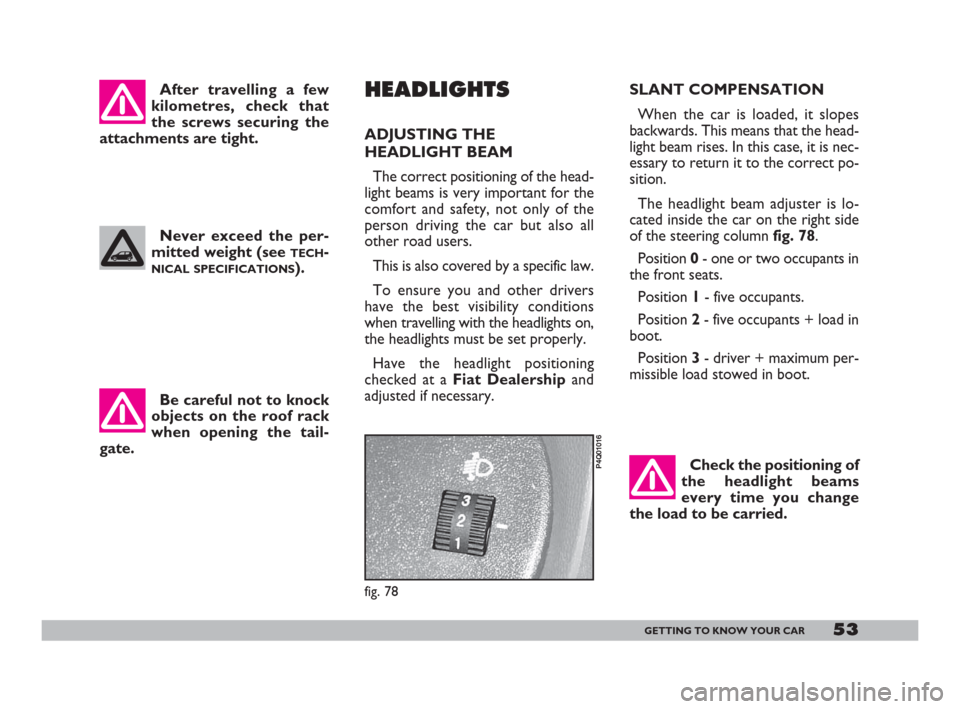
NICAL SPECIFICATIONS). SLANT COMPENSATION
When the car is loaded, it slopes
backwards. This means that the head-
light beam rises. In this case, it is nec-
essary to return it to the correct po-
sition.
The headlight beam adjuster is lo-
cated inside the car on the right side
of the steering column fig. 78.
Position 0- one or two occupants in
the front seats.
Position 1- five occupants.
Position 2- five occupants + load in
boot.
Position 3- driver + maximum per-
missible load stowed in boot.
Be careful not to knock
objects on the roof rack
when opening the tail-
gate.
HEADLIGHTS
ADJUSTING THE
HEADLIGHT BEAM
The correct positioning of the head-
light beams is very important for the
comfort and safety, not only of the
person driving the car but also all
other road users.
This is also covered by a specific law.
To ensure you and other drivers
have the best visibility conditions
when travelling with the headlights on,
the headlights must be set properly.
Have the headlight positioning
checked at a Fiat Dealershipand
adjusted if necessary.
fig. 78
P4Q01016Check the positioning of
the headlight beams
every time you change
the load to be carried.
001-069 Seicento GB 22-11-2007 10:49 Pagina 53
Page 63 of 146
62GETTING TO KNOW YOUR CAR
The system is programmed at the
factory to ensure variable degrees of
assistance according to the require-
ments. In other words, power is in-
creased for parking and reduced as
the car’s speed increases.
The EPAS system only works when
the engine is running to avoid deploy-
ing the battery accidentally. Further-
more, it is equipped with a self-test
function to detect faults and incorrect
signals.
IMPORTANTThe steering wheel
may stiffen slightly in parking manoeu-
vres requiring a great deal of steering:
this is normal and caused by the
power steering motor overheat pro-
tection system tripping. The problem
does not require servicing and the
electric power steering system will
work normally the next time the car
is used.If the warning light comes on, see
chapter
GETTING TO KNOW YOUR CAR,
paragraph
WARNING LIGHTS.
FIAT 600 VAN
The version herein illustrated differs
from Fiat 600 saloon described in this
handbook for the different size of the
boot and the availability of two front
seats only.
Load recommendations
Fiat 600 Van has been designed and
approved on the basis of several set
maximum values:
– kerb weight
– payload
– gross vehicle weight
– total weight on the front axle
– total weight on the rear axle
– towable weight.
Each of these limits must be borne
in mind and must never be exceeded
under any circumstances. It is absolutely forbidden
to carry out whatever af-
ter-market operation in-
volving steering system or steer-
ing column modifications (e.g.: in-
stallation of anti-theft Device)
that could badly affect perfor-
mance and safety, cause the lapse
of warranty and also result in
non-compliance of the car with
homologation requirements.
001-069 Seicento GB 22-11-2007 10:50 Pagina 62
Page 74 of 146
73DRIVING YOUR CAR
IMPORTANT Reverse gear can
only be engaged when the car is com-
pletely stationary. With the engine
running, before engaging the reverse
gear, wait for at least two seconds
with the clutch pedal pressed fully
down to avoid damaging or grating the
gears.
To change the gear
properly (with mechani-
cal clutch) you must push
the clutch pedal fully down. It is
therefore essential that there is
nothing under the pedals. Make
sure mats are lying flat and do
not get in the way of the pedals.CONTAINING
RUNNING COSTS
AND POLLUTION
Some suggestions which may help
you to keep the running costs of the
vehicle down and lower the amount
of toxic emissions released into the
atmosphere are given below.
GENERAL
CONSIDERATIONS
Car maintenance
The overall state of the car is an im-
portant factor which has a marked in-
fluence over fuel consumption and
driving comfort and on the life span of
your car. For this reason care should
be taken to maintain your car by car-
rying out the necessary checks and
regulations in accordance with the
specifications given in the
SERVICE
SCHEDULE
(see sections: SPARK PLUGS,
IDLING, AIR CLEANERS, TIMING). Tyres
Tyre pressure should be checked at
least once every four weeks: if the
pressure is too low fuel consumption
increases as the resistance to the
rolling movement of the tyre is
greater. In this state, tyre wear is in-
creased and vehicle handling suffers
which will effect safety.
Unnecessary loads
Do not travel with too much luggage
stowed in the boot. The weight of the
vehicle and its trim greatly effects con-
sumption and stability.
070-082 Seicento GB 22-11-2007 10:50 Pagina 73
Page 87 of 146
86IN AN EMERGENCY
TAKE OUT THE TOOLS,
JACK AND SPARE WHEEL
These are in the boot.
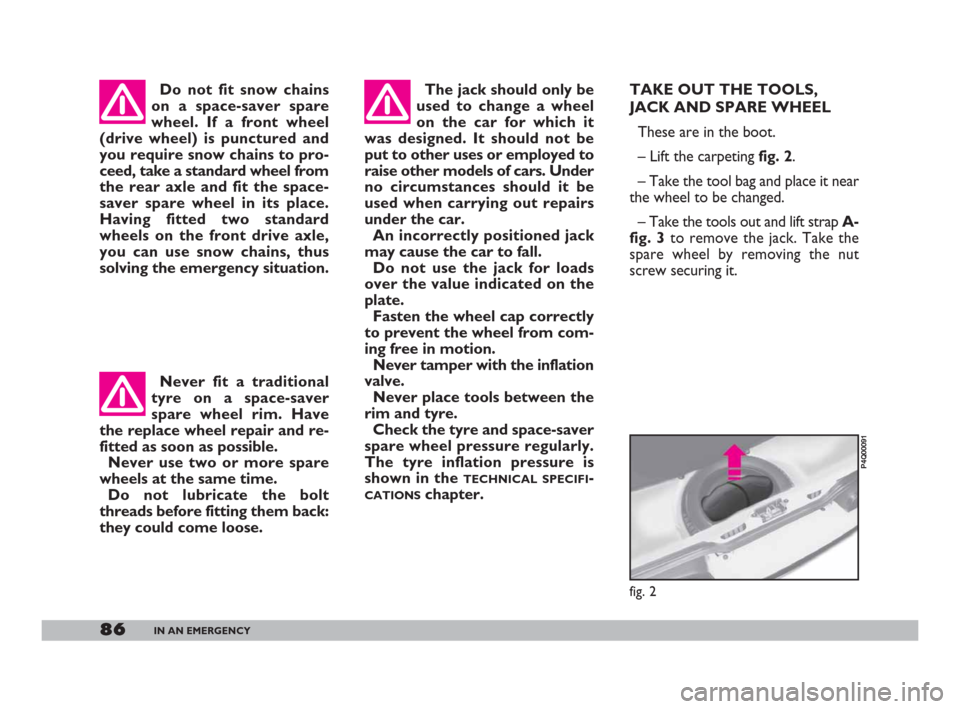
– Lift the carpeting fig. 2.
– Take the tool bag and place it near
the wheel to be changed.
– Take the tools out and lift strap A-
fig. 3to remove the jack. Take the
spare wheel by removing the nut
screw securing it.
fig. 2
P4Q00091
Do not fit snow chains
on a space-saver spare
wheel. If a front wheel
(drive wheel) is punctured and
you require snow chains to pro-
ceed, take a standard wheel from
the rear axle and fit the space-
saver spare wheel in its place.
Having fitted two standard
wheels on the front drive axle,
you can use snow chains, thus
solving the emergency situation. The jack should only be
used to change a wheel
on the car for which it
was designed. It should not be
put to other uses or employed to
raise other models of cars. Under
no circumstances should it be
used when carrying out repairs
under the car.
An incorrectly positioned jack
may cause the car to fall.
Do not use the jack for loads
over the value indicated on the
plate.
Fasten the wheel cap correctly
to prevent the wheel from com-
ing free in motion.
Never tamper with the inflation
valve.
Never place tools between the
rim and tyre.
Check the tyre and space-saver
spare wheel pressure regularly.
The tyre inflation pressure is
shown in the
TECHNICAL SPECIFI-
CATIONSchapter. Never fit a traditional
tyre on a space-saver
spare wheel rim. Have
the replace wheel repair and re-
fitted as soon as possible.
Never use two or more spare
wheels at the same time.
Do not lubricate the bolt
threads before fitting them back:
they could come loose.
083-104 Seicento GB 22-11-2007 10:50 Pagina 86
Page 89 of 146
88IN AN EMERGENCY
5) Lower the car and remove the
jack.
6)Torque the screws in the order
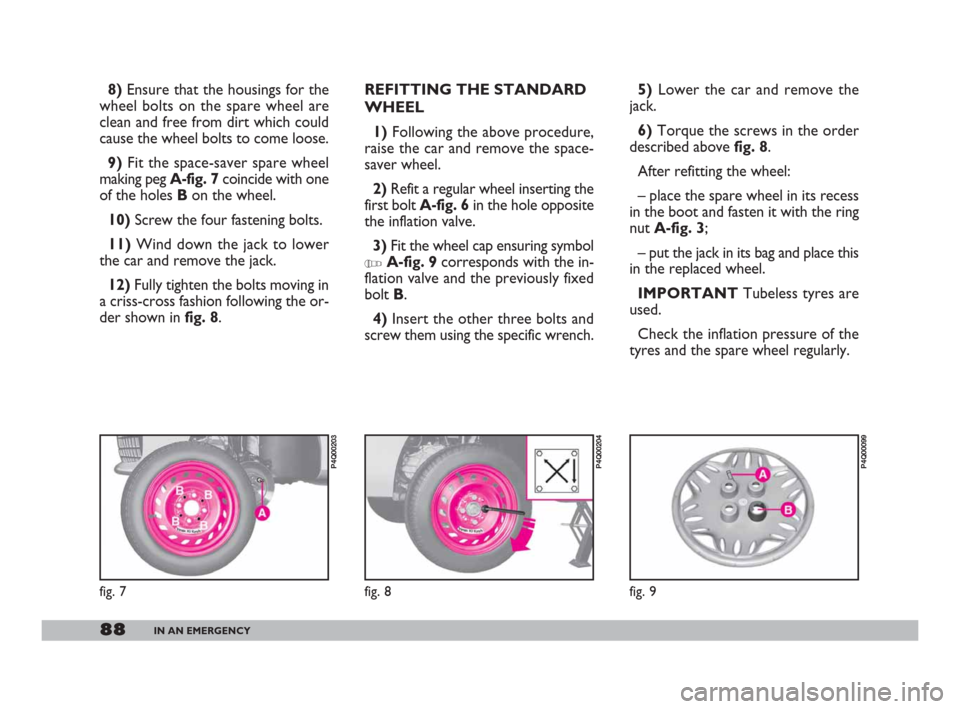
described above fig. 8.
After refitting the wheel:
– place the spare wheel in its recess
in the boot and fasten it with the ring
nut A-fig. 3;
– put the jack in its bag and place this
in the replaced wheel.
IMPORTANTTubeless tyres are
used.
Check the inflation pressure of the
tyres and the spare wheel regularly.
fig. 9
P4Q00099
8) Ensure that the housings for the
wheel bolts on the spare wheel are
clean and free from dirt which could
cause the wheel bolts to come loose.
9) Fit the space-saver spare wheel
making peg A-fig. 7coincide with one
of the holes B on the wheel.
10)Screw the four fastening bolts.
11)Wind down the jack to lower
the car and remove the jack.
12)Fully tighten the bolts moving in
a criss-cross fashion following the or-
der shown in fig. 8.REFITTING THE STANDARD
WHEEL
1)Following the above procedure,
raise the car and remove the space-
saver wheel.
2)Refit a regular wheel inserting the
first bolt A-fig. 6in the hole opposite
the inflation valve.
3)Fit the wheel cap ensuring symbol
YA-fig. 9corresponds with the in-
flation valve and the previously fixed
bolt B.
4)Insert the other three bolts and
screw them using the specific wrench.
fig. 7
P4Q00203
fig. 8
P4Q00204
083-104 Seicento GB 22-11-2007 10:50 Pagina 88