technical specifications FIAT BRAVO 2013 2.G Owner's Guide
[x] Cancel search | Manufacturer: FIAT, Model Year: 2013, Model line: BRAVO, Model: FIAT BRAVO 2013 2.GPages: 299, PDF Size: 5.86 MB
Page 36 of 299
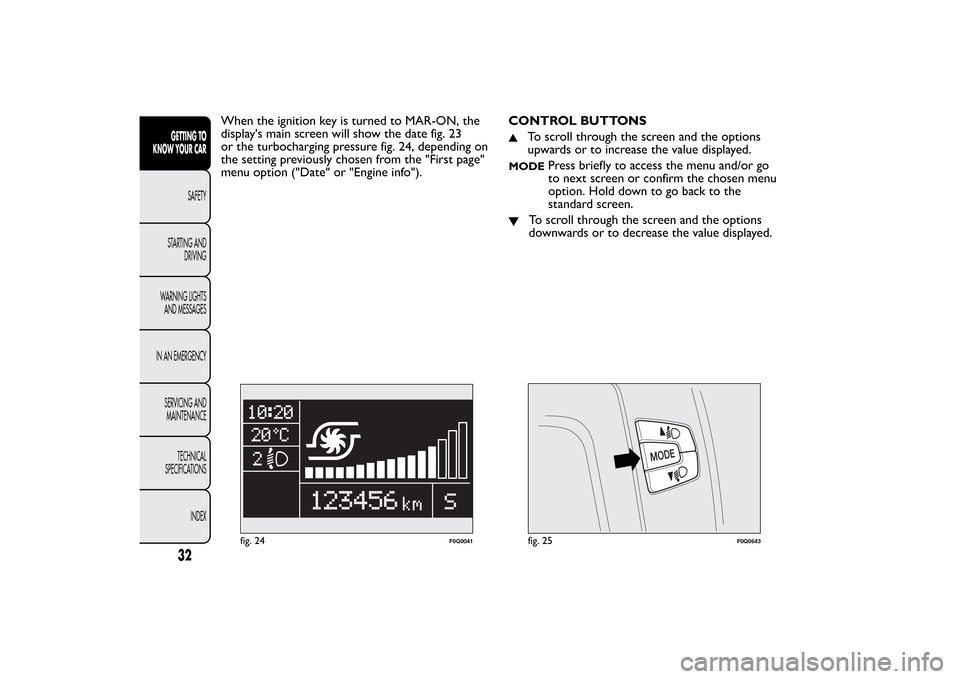
When the ignition key is turned to MAR-ON, the
display's main screen will show the date fig. 23
or the turbocharging pressure fig. 24, depending on
the setting previously chosen from the "First page"
menu option ("Date" or "Engine info").CONTROL BUTTONS
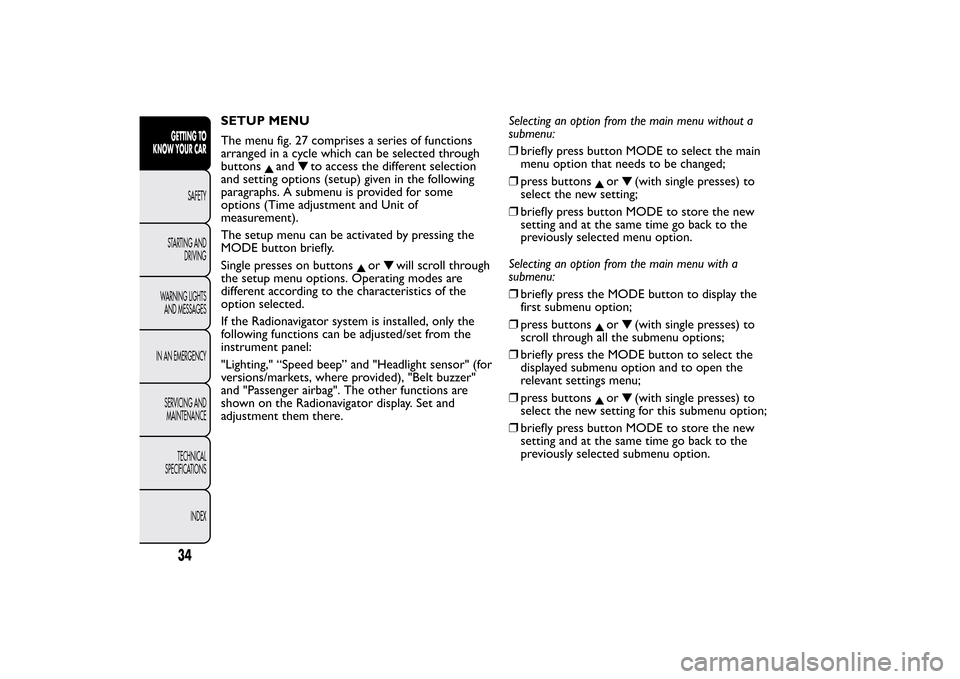
To scroll through the screen and the options
upwards or to increase the value displayed.
MODE
Press briefly to access the menu and/or go
to next screen or confirm the chosen menu
option. Hold down to go back to the
standard screen.
To scroll through the screen and the options
downwards or to decrease the value displayed.
fig. 24
F0Q0041
fig. 25
F0Q0643
32GETTING TO
KNOW YOUR CAR
SAFETY
STARTING AND
DRIVING
WARNING LIGHTS
AND MESSAGES
IN AN EMERGENCY
SERVICING AND
MAINTENANCE
TECHNICAL
SPECIFICATIONS
INDEX
Page 37 of 299
Note Buttons
and
activate different functions
according to the following situations:
❒within the menu, they allow you to scroll up and
down through the options;
❒during settings operations, they increase or
decrease values.
Note When opening one of the front doors, the
display will turn on and show for a few seconds the
time and the distance covered.GEAR SHIFT INDICATOR
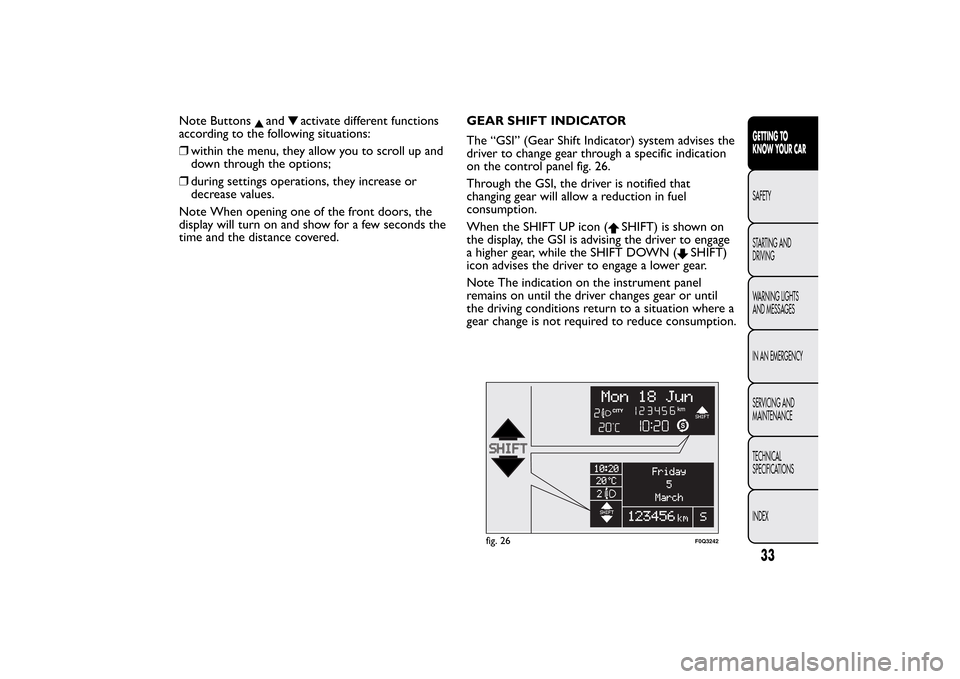
The “GSI” (Gear Shift Indicator) system advises the
driver to change gear through a specific indication
on the control panel fig. 26.
Through the GSI, the driver is notified that
changing gear will allow a reduction in fuel
consumption.
When the SHIFT UP icon (
SHIFT) is shown on
the display, the GSI is advising the driver to engage
a higher gear, while the SHIFT DOWN (
SHIFT)
icon advises the driver to engage a lower gear.
Note The indication on the instrument panel
remains on until the driver changes gear or until
the driving conditions return to a situation where a
gear change is not required to reduce consumption.
fig. 26
F0Q3242
33GETTING TO
KNOW YOUR CARSAFETY
STARTING AND
DRIVING
WARNING LIGHTS
AND MESSAGES
IN AN EMERGENCY
SERVICING AND
MAINTENANCE
TECHNICAL
SPECIFICATIONS
INDEX
Page 38 of 299
SETUP MENU
The menu fig. 27 comprises a series of functions
arranged in a cycle which can be selected through
buttons
and
to access the different selection
and setting options (setup) given in the following
paragraphs. A submenu is provided for some
options (Time adjustment and Unit of
measurement).
The setup menu can be activated by pressing the
MODE button briefly.
Single presses on buttons
or
will scroll through
the setup menu options. Operating modes are
different according to the characteristics of the
option selected.
If the Radionavigator system is installed, only the
following functions can be adjusted/set from the
instrument panel:
"Lighting," “Speed beep” and "Headlight sensor" (for
versions/markets, where provided), "Belt buzzer"
and "Passenger airbag". The other functions are
shown on the Radionavigator display. Set and
adjustment them there.Selecting an option from the main menu without a
submenu:
❒briefly press button MODE to select the main
menu option that needs to be changed;
❒press buttons
or
(with single presses) to
select the new setting;
❒briefly press button MODE to store the new
setting and at the same time go back to the
previously selected menu option.
Selecting an option from the main menu with a
submenu:
❒briefly press the MODE button to display the
first submenu option;
❒press buttons
or
(with single presses) to
scroll through all the submenu options;
❒briefly press the MODE button to select the
displayed submenu option and to open the
relevant settings menu;
❒press buttons
or
(with single presses) to
select the new setting for this submenu option;
❒briefly press button MODE to store the new
setting and at the same time go back to the
previously selected submenu option.
34GETTING TO
KNOW YOUR CAR
SAFETY
STARTING AND
DRIVING
WARNING LIGHTS
AND MESSAGES
IN AN EMERGENCY
SERVICING AND
MAINTENANCE
TECHNICAL
SPECIFICATIONS
INDEX
Page 39 of 299
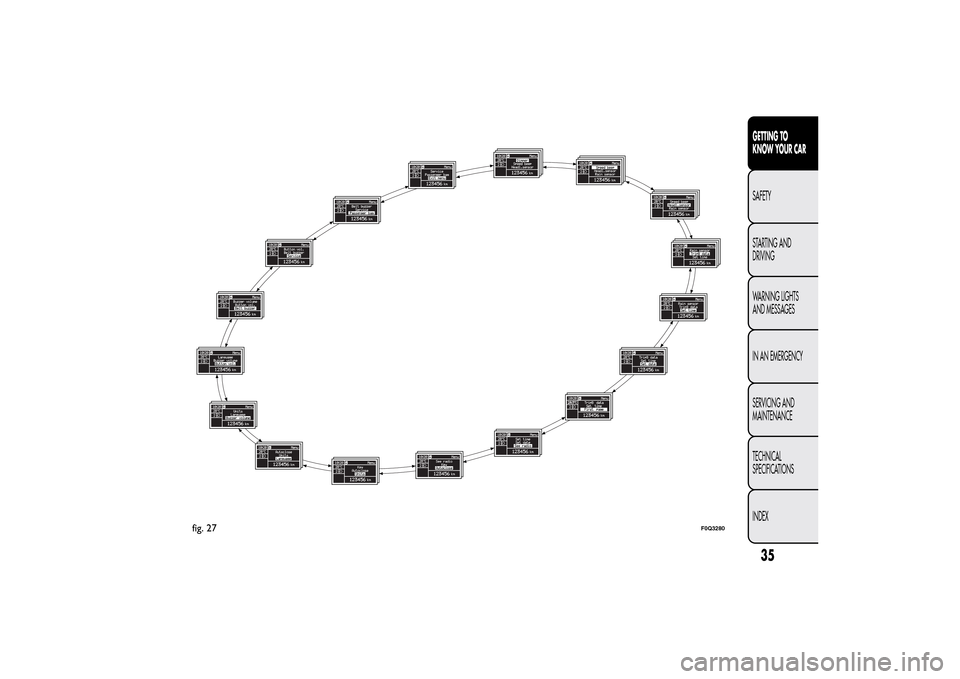
fig. 27
F0Q3280
35GETTING TO
KNOW YOUR CARSAFETY
STARTING AND
DRIVING
WARNING LIGHTS
AND MESSAGES
IN AN EMERGENCY
SERVICING AND
MAINTENANCE
TECHNICAL
SPECIFICATIONS
INDEX
Page 40 of 299
DISPLAY FUNCTIONS(see Multifunction display or Reconfigurable
multifunction display)
Lighting (Interior car lighting adjustment)
(with side lights on only)
With the side lights on, this function is used to set
the brightness of the instrument panel, radio
controls and automatic climate control system
controls (for versions/markets, where provided) to
8 levels.
Proceed as follows to adjust the brightness:
❒briefly press the MODE button: the previously
set level flashes on the display;
❒press button
or
to set the required
brightness level;
❒press the MODE button briefly to return to the
menu screen or hold the button down to return
to the standard screen without memorising.Speed Beep (Speed limit)
This function is used to set the car speed limit
(km/h or mph); the driver is immediately alerted
when this limit is exceeded (see “Warning lights
and messages” chapter).
To set the desired speed limit, proceed as follows:
❒briefly press the MODE button: the display
will show the wording ("Speed Beep");
❒press button
or
to select speed limit
activation ("On") or deactivation ("Off");
❒if the function has been activated ("On"), press
the
or
buttons to select the desired speed
limit and then press MODE to confirm.
Note The speed may be set in the range from 30 to
200 km/h, or from 20 to 125 mph according to
the previously chosen unit (see “Setting the
distance unit (Unit)” described below). The setting
will increase/decrease by five units each time button
/
is pressed. Hold down the
/
button to
automatically increase/decrease the setting rapidly.
36GETTING TO
KNOW YOUR CAR
SAFETY
STARTING AND
DRIVING
WARNING LIGHTS
AND MESSAGES
IN AN EMERGENCY
SERVICING AND
MAINTENANCE
TECHNICAL
SPECIFICATIONS
INDEX
Page 41 of 299
Complete the setting by briefly pressing the button
when you approach the required value.
❒press the MODE button briefly to return to the
menu screen or hold the button down to return
to the standard screen without memorising.
To cancel the setting, proceed as follows:
❒briefly press the MODE button: "On" flashes on
the display;
❒press button
, "Off" will flash on the display;
❒press the MODE button briefly to return to the
menu screen or hold the button down to return
to the standard screen without memorising.Headlight sensor (Automatic headlights/dusk
sensor sensitivity adjustment)
(for versions/markets, where provided)
This function is used to turn the headlights on or
off according to external light conditions.
The dusk sensor sensitivity can be adjusted
according to 3 levels (level 1= minimum sensitivity,
level 2= average sensitivity, level 3= maximum
sensitivity). The higher the sensitivity set, the lesser
is the external light variation needed to switch
the lights on (e.g. with a setting on level 3 at sunset
the headlights come on in advance in relation to
levels 1 and 2).
Proceed as follows to set:
❒briefly press the MODE button: the previously
set level flashes on the display;
❒press
or
to make your choice;
❒press the MODE button briefly to return to the
menu screen or hold the button down to return
to the standard screen without memorising.
37GETTING TO
KNOW YOUR CARSAFETY
STARTING AND
DRIVING
WARNING LIGHTS
AND MESSAGES
IN AN EMERGENCY
SERVICING AND
MAINTENANCE
TECHNICAL
SPECIFICATIONS
INDEX
Page 42 of 299
Trip B data (Activating Trip B)
With this function is possible to turn the Trip B
display (trip meter) on and off.
For further information, see “Trip computer”
paragraph.
Proceed as follows to switch the function on and
off:
❒briefly press the MODE button: On or Off
flashes on the display (according to the previous
setting);
❒press
or
to make your choice;
❒briefly press the MODE button to return to the
menu screen or hold the button down to return
to the standard screen without memorising.
Time adjustment (Clock adjustment)
This function enables to set the clock through two
submenus: “Time” and “Format”.
To carry out the adjustment, proceed as follows:
❒briefly press the MODE button and two
submenus, "Time" and "Format", are displayed;
❒press the button
or
to switch between the
two submenus;
❒once you have selected the submenu to be
changed, press the button MODE briefly;
❒when you select “Time”, briefly pressing the
MODE button makes the hours flash on the
display;❒press the
or
button to make the adjustment;
❒briefly press the MODE button: “minutes” starts
flashing on the display;
❒press the buttonor
for setting.
Note The setting will increase or decrease by one
unit each time
or
is pressed. Hold down the
button to increase/decrease the setting rapidly and
automatically. Complete the setting by briefly
pressing the button when you approach the
required value.
❒if you enter the "Format" submenu, pressing the
MODE button briefly makes the display format
flash on the display;
❒press button
or
to select “24h” or “12h”.
When you have made the adjustment, briefly press
the MODE button to go back to the submenu
screen or hold the button down to go back to the
main menu screen without storing.
❒Hold down MODE button again to return to the
standard screen or to the main menu according
to where you are in the menu.
38GETTING TO
KNOW YOUR CAR
SAFETY
STARTING AND
DRIVING
WARNING LIGHTS
AND MESSAGES
IN AN EMERGENCY
SERVICING AND
MAINTENANCE
TECHNICAL
SPECIFICATIONS
INDEX
Page 43 of 299
Set date (Setting the date)
Using this function it is possible to update the date
(day - month - year).
Proceed as follows to update:
❒briefly press the MODE button: the year starts
flashing on the display;
❒press the
or
button to make the adjustment;
❒briefly press the MODE button: the month
starts flashing on the display;
❒press the
or
button to make the adjustment;
❒briefly press the MODE button: the day starts
flashing on the display;
❒press the buttonor
for setting.
NOTE The setting will increase or decrease by one
unit each time
or
is pressed. Hold down the
button to increase/decrease the setting rapidly and
automatically. Complete the setting by briefly
pressing the button when you approach the
required value.
❒briefly press the MODE button to return to the
menu screen or hold the button down to return
to the standard screen without memorising.First page (Display of information on the
main screen)
This function allows you to choose the information
you would like to display on the main screen.
You can choose to display the date or the
turbocharger boost pressure.
To select either option, proceed as follows:
❒briefly press the MODE button: "First page" will
appear on the display;
❒briefly press the MODE button again to display
the "Date" and "Engine info" options;
❒press
or
to select the information you wish
to see on the main page of the display;
❒briefly press the MODE button to store the
selection and go back to the previous menu
screen or hold the button down to go back to
the standard screen without memorising.
When the key is turned to MAR-ON and the initial
check stage is over, the reconfigurable multifunction
display will show the information previously set via
the “First page” menu function.
39GETTING TO
KNOW YOUR CARSAFETY
STARTING AND
DRIVING
WARNING LIGHTS
AND MESSAGES
IN AN EMERGENCY
SERVICING AND
MAINTENANCE
TECHNICAL
SPECIFICATIONS
INDEX
Page 44 of 299
See radio (Audio information display)
With this function the display shows information
about the sound system.
❒Radio: selected radio station frequency or RDS
message, automatic tuning activation or
AutoSTore;
❒Audio CD, MP3 CDs: track number;
❒CD Changer: CD number and track number;
To show the radio information on the display
("On") or clear it ("Off"), proceed as follows:
❒briefly press the MODE button, the display will
show "On" or "Off" flashing depending on the
previous setting;
❒press
or
to make your choice;
❒briefly press the MODE button to return to the
menu screen or hold the button down to return
to the standard screen without memorising.
Autoclose (Automatic central locking with
the car in motion)
When activated (On), this function locks the doors
automatically when the vehicle speed exceeds 20
km/h.
Proceed as follows to activate or deactivate this
function:
❒briefly press the MODE button to display a
submenu;❒briefly press the MODE button: "On" or "Off"
flashes on the display (according to the previous
setting);
❒press
or
to make your choice;
❒briefly press the MODE button to return to the
submenu screen or hold the button down to
return to the main menu screen without storing;
❒hold down MODE button again to return to the
standard screen or to the main menu according
to where you are in the menu.
Unit of measurement (Setting the unit of
measurement)
With this function it is possible to set the units
through three submenus: "Distances",
"Consumption" and "Temperature".
To set the required unit proceed as follows:
❒briefly press the MODE button to display the
three submenus;
❒press buttonor
to navigate through the
three submenus;
❒once you have selected the submenu to be
changed, press the MODE button briefly;
❒when you select the “Distances” submenu, briefly
pressing the MODE button makes the display
show "km" or "mi" depending on the previous
setting;
40GETTING TO
KNOW YOUR CAR
SAFETY
STARTING AND
DRIVING
WARNING LIGHTS
AND MESSAGES
IN AN EMERGENCY
SERVICING AND
MAINTENANCE
TECHNICAL
SPECIFICATIONS
INDEX
Page 45 of 299
❒press
or
to make your choice;
❒when you select the “Consumption” submenu,
pressing the MODE button makes "km/l", "l/100
km" or "mpg" appear on the display depending on
the previous setting;
If the set distance unit is "km", the fuel
consumption unit will be displayed in km/l or l/100
km.
If the distance unit is set to "mi", fuel consumption
is displayed in "mpg".
❒press
or
to make your choice;
❒when you select the “Temperature” submenu,
briefly pressing the MODE button makes "°C"
or "°F" appear on the display depending on
the previous setting;
❒press
or
to make your choice;
When you have made the required settings, briefly
press the MODE button to go back to the submenu
screen or hold the button down to go back to the
main menu screen without storing the new settings.
❒hold down MODE button again to return to the
standard screen or to the main menu according
to where you are in the menu.Language (Language selection)
Display messages can be shown in different
languages: Italian, German, English, Spanish, French,
Portuguese and Dutch.
To set the desired language, proceed as follows:
❒briefly press the MODE button: the previously
set language starts flashing on the display;
❒press
or
to make your choice;
❒briefly press the MODE button to return to the
menu screen or hold the button down to return
to the standard screen without memorising.
Warnings volume (Adjusting the failure/
warning acoustic signal volume)
With this function the volume of the buzzer which
accompanies the display of any failure/warning
can be adjusted to 8 levels.
To set the desired volume, proceed as follows:
❒press the MODE button briefly, making the
display flash the previously set volume "level";
❒press theor
button to make the adjustment;
❒briefly press the MODE button to return to the
menu screen or hold the button down to return
to the standard screen without memorising.
41GETTING TO
KNOW YOUR CARSAFETY
STARTING AND
DRIVING
WARNING LIGHTS
AND MESSAGES
IN AN EMERGENCY
SERVICING AND
MAINTENANCE
TECHNICAL
SPECIFICATIONS
INDEX