ESP FIAT CROMA 2007 2.G Connect NavPlus Manual
[x] Cancel search | Manufacturer: FIAT, Model Year: 2007, Model line: CROMA, Model: FIAT CROMA 2007 2.GPages: 166, PDF Size: 4.82 MB
Page 110 of 166
109
CONNECT Nav+
DELETE DESTINATION
Select and confirm “Delete destina-
tion” by rotating and pressing the knob
15-fig. 1to delete the last entered
destination.VISUALIZATION
When in the main navigation screen,
select the Visualisation option by turn-
ing knob 15-fig. 1and confirm by
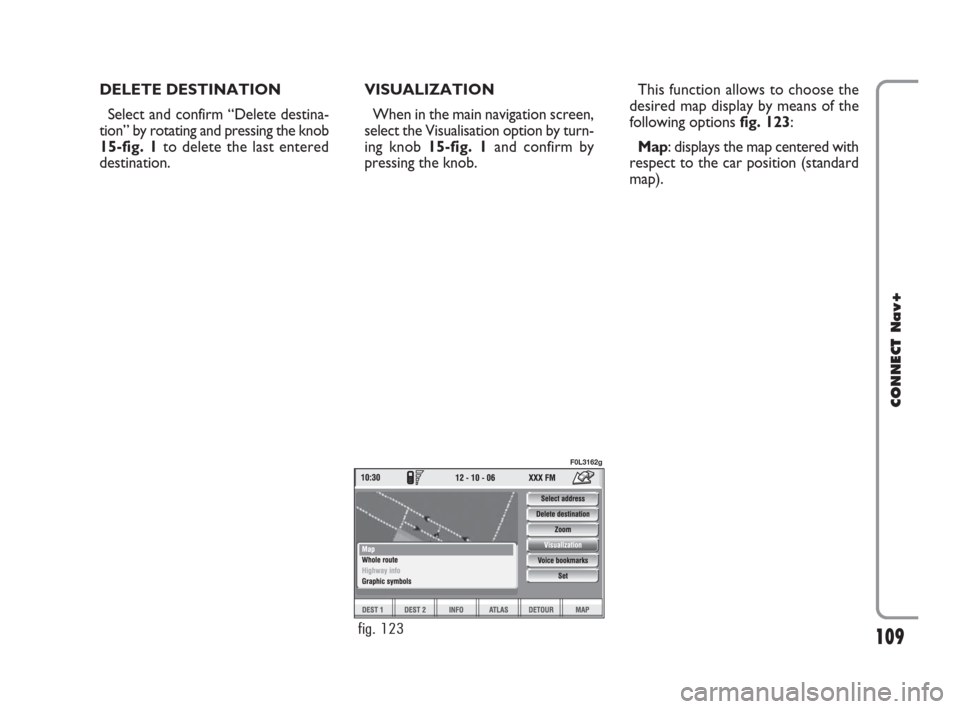
pressing the knob.This function allows to choose the
desired map display by means of the
following options fig. 123:
Map: displays the map centered with
respect to the car position (standard
map).
fig. 123
F0L3162g
092-115 Connect CROMA GB 4-07-2007 14:06 Pagina 109
Page 112 of 166
111
CONNECT Nav+
Voice bookmarks
To select “Voice bookmarks” rotate
the knob 15-fig. 1and then press it to
confirm.
This function enables to control nav-
igator voice directory.
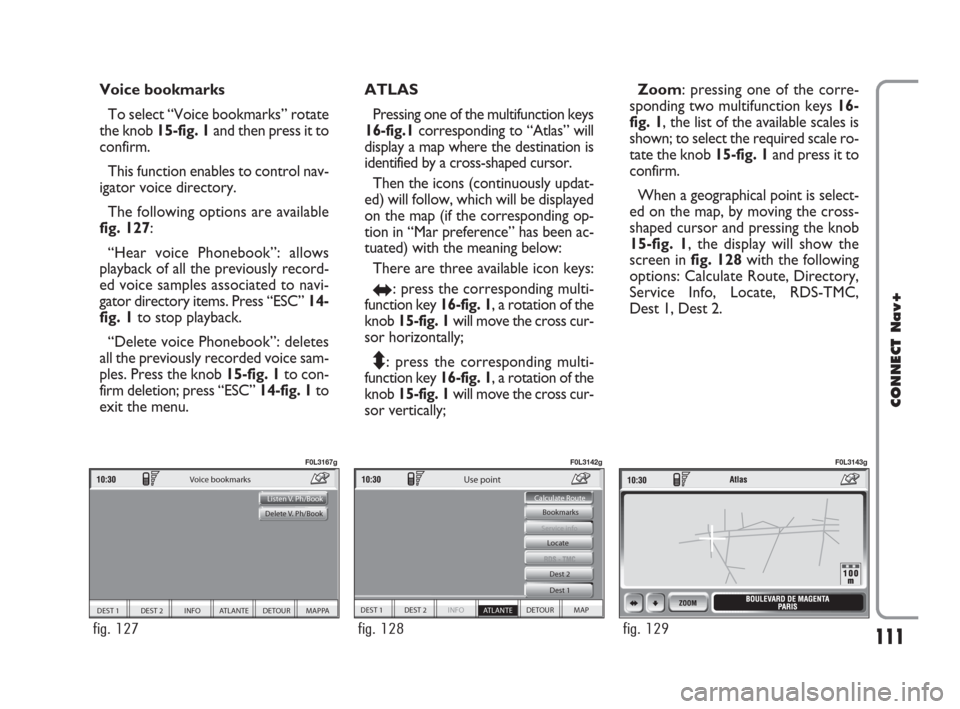
The following options are available
fig. 127:
“Hear voice Phonebook”: allows
playback of all the previously record-
ed voice samples associated to navi-
gator directory items. Press “ESC”14-
fig. 1to stop playback.
“Delete voice Phonebook”: deletes
all the previously recorded voice sam-
ples. Press the knob 15-fig. 1to con-
firm deletion; press “ESC” 14-fig. 1to
exit the menu.ATLAS
Pressing one of the multifunction keys
16-fig.1corresponding to “Atlas” will
display a map where the destination is
identified by a cross-shaped cursor.
Then the icons (continuously updat-
ed) will follow, which will be displayed
on the map (if the corresponding op-
tion in “Mar preference” has been ac-
tuated) with the meaning below:
There are three available icon keys:
RE: press the corresponding multi-
function key 16-fig. 1, a rotation of the
knob 15-fig. 1will move the cross cur-
sor horizontally;
Q
Z: press the corresponding multi-
function key 16-fig. 1, a rotation of the
knob 15-fig. 1will move the cross cur-
sor vertically;Zoom: pressing one of the corre-
sponding two multifunction keys 16-
fig. 1, the list of the available scales is
shown; to select the required scale ro-
tate the knob 15-fig. 1and press it to
confirm.
When a geographical point is select-
ed on the map, by moving the cross-
shaped cursor and pressing the knob
15-fig. 1, the display will show the
screen in fig. 128with the following
options: Calculate Route, Directory,
Service Info, Locate, RDS-TMC,
Dest 1, Dest 2.
DEST 1 DEST 2 INFO ATLANTE DETOUR MAPPA
Voice bookmarks
Listen V. Ph/Book
Delete V. Ph/Book
fig. 127
F0L3167g
DEST 1 DEST 2 INFO
ATLANTE DETOUR MAP Bookmarks
Dest 1 Dest 2
Service info
Calculate Route
Use point
Locate
fig. 128
F0L3142g
fig. 129
F0L3143g
092-115 Connect CROMA GB 4-07-2007 14:06 Pagina 111
Page 121 of 166
120
CONNECT Nav+
– Select one of the three multifunc-
tion keys 16-fig. 1corresponding to
the SYSTEM string to display the
screen for changing certain settings.
– Select “Units” icon key with the
knob 15 fig. 1and then press it to
confirm.
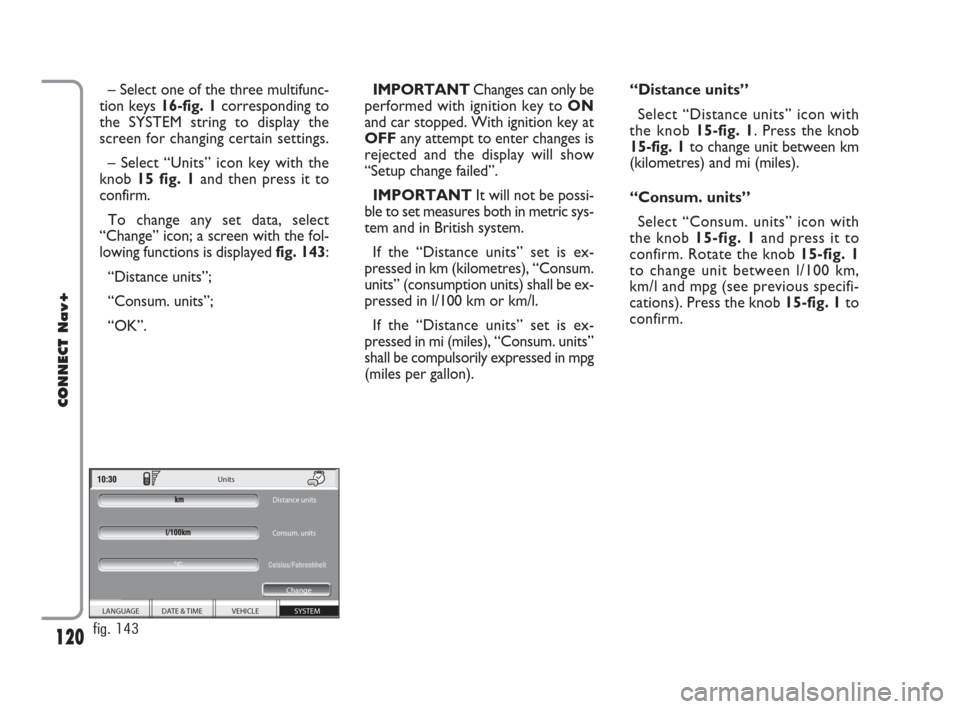
To change any set data, select
“Change” icon; a screen with the fol-
lowing functions is displayed fig. 143:
“Distance units”;
“Consum. units”;
“OK”.IMPORTANTChanges can only be
performed with ignition key to ON
and car stopped. With ignition key at
OFFany attempt to enter changes is
rejected and the display will show
“Setup change failed”.
IMPORTANTIt will not be possi-
ble to set measures both in metric sys-
tem and in British system.
If the “Distance units” set is ex-
pressed in km (kilometres), “Consum.
units” (consumption units) shall be ex-
pressed in l/100 km or km/l.
If the “Distance units” set is ex-
pressed in mi (miles), “Consum. units”
shall be compulsorily expressed in mpg
(miles per gallon).“Distance units”
Select “Distance units” icon with
the knob15-fig. 1. Press the knob
15-fig. 1to change unit between km
(kilometres) and mi (miles).
“Consum. units”
Select “Consum. units” icon with
the knob 15-fig. 1and press it to
confirm. Rotate the knob 15-fig. 1
to change unit between l/100 km,
km/l and mpg (see previous specifi-
cations). Press the knob 15-fig. 1to
confirm.
SYSTEM VEHICLE DATE & TIME
LANGUAGE Units
Distance units
Consum. units
Change
°C
fig. 143
116-123 Connect CROMA GB 2-07-2007 15:43 Pagina 120
Page 122 of 166
121
CONNECT Nav+
“OK”
To confirm selected options select
“OK” with the knob 15-fig. 1and
then press it.
For further details about the “MY
CAR” function see the corresponding
chapter.TRIP: INFO
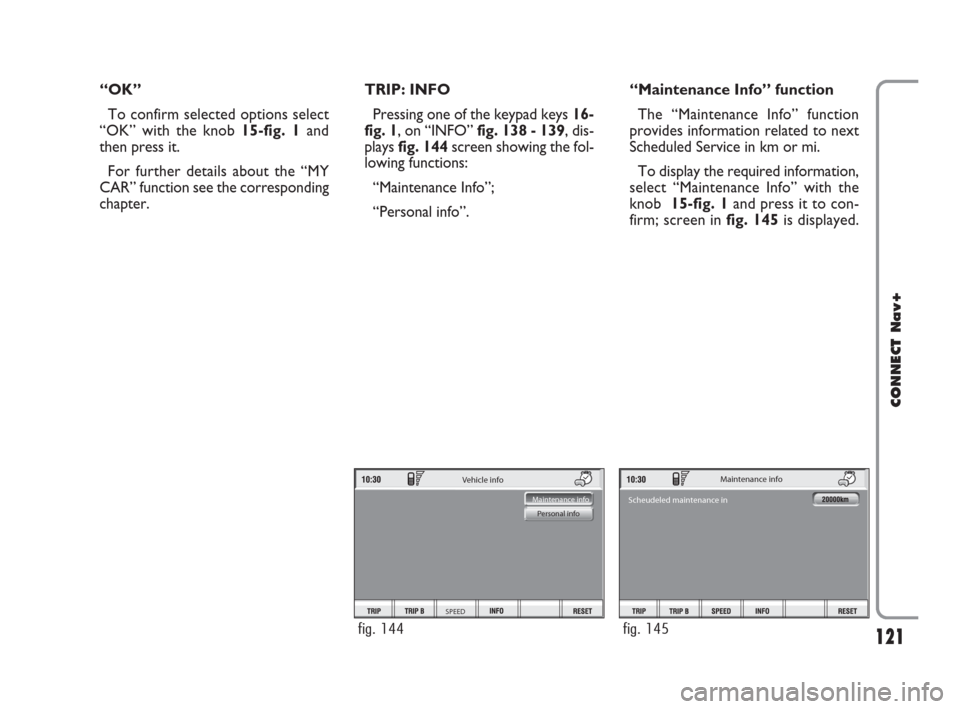
Pressing one of the keypad keys16-
fig. 1, on “INFO” fig. 138 - 139, dis-
plays fig. 144screen showing the fol-
lowing functions:
“Maintenance Info”;
“Personal info”.“Maintenance Info” function
The “Maintenance Info” function
provides information related to next
Scheduled Service in km or mi.
To display the required information,
select “Maintenance Info” with the
knob 15-fig. 1and press it to con-
firm; screen in fig. 145is displayed.
Vehicle info
SPEED
Maintenance info
Personal info
fig. 144
Maintenance info
Scheudeled maintenance in
fig. 145
116-123 Connect CROMA GB 2-07-2007 15:43 Pagina 121
Page 125 of 166
124Nero603 46 620 CONNECT CROMA ING
124
CONNECT Nav+
GENERAL INFORMATION
With the “Voice recognition” func-
tion the user can control the CON-
NECT Nav+ by voice. By means of
“Voice recognition”, the user can
send commands to the system to the
system through a microphone: short
push on
:1-fig. 1set on front pan-
el enables voice command interpre-
tation; CONNECT Nav+ will then
provide voice help to guide the user
get the required function.
Press again
:1-fig. 1to stop pro-
cedure.Voice recognition is performed in
two ways:
– voice recognition without
voice identification;
– voice recognition with voice
identification.
Commands without voice identi-
ficationactivate the main system
functions (TEL, RADIO, CD etc.).
Commands with voice identifica-
tionmakes it possible to enter / recall
names in the phone directory and/or
navigation addresses.
In the first case (voice recognition
without voice identification), the sys-
tem is able to receive the voice com-
mands regardless of the user’s sex and
voice tone and inflexion.No preliminary training phase is re-
quired, just follow the instructions giv-
en by the system each time.
In the second case (voice recognition
with voice identification), the system
is able to recognise the required com-
mand comparing the voice command
pronounced to the corresponding
voice sample previously stored by the
user.
IMPORTANTThe voice recogni-
tion and message store operations are
immediately interrupted in the event
of incoming calls; in this case, at the
end of the call, the whole operation
must be repeated. Conversely, in-
coming SMS text messages do not in-
terrupt the operations.
V V
O O
I I
C C
E E
R R
E E
C C
O O
G G
N N
I I
T T
I I
O O
N N
124-140 Connect CROMA GB 2-07-2007 15:43 Pagina 124
Page 145 of 166
144
CONNECT Nav+
If the function is enabled, pressing the
“SOS” key 12-fig. 1, automatically
opens the screen with the “Automat-
ic medical advice”: function already
highlighted: if the user does not move
the cursor within 15 seconds using the
knob 15-fig. 1and call is not cancelled
for other 10 seconds, the request for
medical assistance will be forwarded
automatically. If not, the call will not
be sent and to activate it at a later
time, the user will have to select again
the “Medical advice” function and to
press the knob 15-fig.1to confirm.
“OK” icon key
To confirm settings, select “OK”
with the knob 15-fig. 1and press it to
confirm.CALLS FOR MEDICAL
ADVICE OR ROADSIDE
ASSISTANCE
During the forwarding of a call for as-
sistance to the operating centre, any
other operations activated are inter-
rupted and the volume of any audio
sources (except the phone) is muted.
These conditions will be maintained as
long as the call for assistance is active,
with the corresponding screen on the
display.
If a phone call is received while for-
warding a request for assistance, the
corresponding alert will not be shown
on the display but the ringer will ring.
If the user decides to accept the call
and briefly presses the
˜3-fig. 1, key,
the assistance call screen goes off the
display.
IMPORTANTThe call for assis-
tance is always forwarded; however, if
you accept the incoming call, the
bCONNECToperator might have
difficulty in contacting you since the
number could be busy. When the call has been sent, the dis-
play shows the corresponding call for-
warded message for about 4 seconds.
If for any reason the call for assis-
tance cannot be sent, the display
shows a warning message and the user
is then asked if he/she wants to acti-
vate a phone call in any case (*) to the
operating centre to avail of the service
required, even if in this case the op-
erating centre will no longer be able
to locate the car.
(*) The call is normally made using the toll-
free number, while it is at the user’s expense
if it is made in roaming conditions.
141-147 Connect CROMA GB 2-07-2007 15:44 Pagina 144
Page 148 of 166
147
CONNECT Nav+
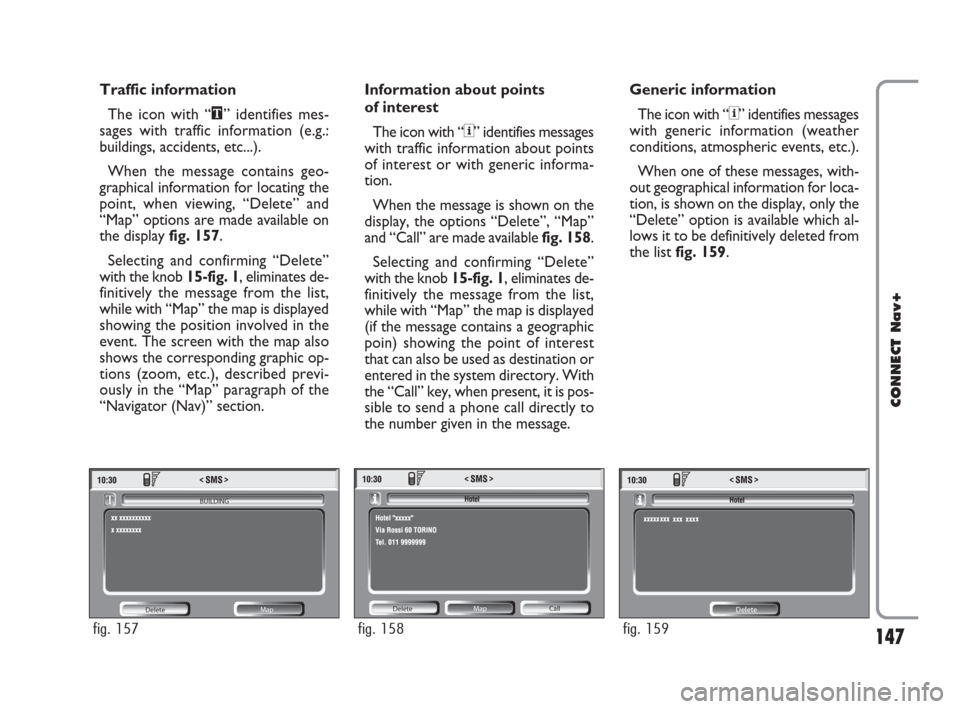
Traffic information
The icon with “\” identifies mes-
sages with traffic information (e.g.:
buildings, accidents, etc...).
When the message contains geo-
graphical information for locating the
point, when viewing, “Delete” and
“Map” options are made available on
the display fig. 157.
Selecting and confirming “Delete”
with the knob 15-fig. 1, eliminates de-
finitively the message from the list,
while with “Map” the map is displayed
showing the position involved in the
event. The screen with the map also
shows the corresponding graphic op-
tions (zoom, etc.), described previ-
ously in the “Map” paragraph of the
“Navigator (Nav)” section.Information about points
of interest
The icon with “<” identifies messages
with traffic information about points
of interest or with generic informa-
tion.
When the message is shown on the
display, the options “Delete”, “Map”
and “Call” are made available fig. 158.
Selecting and confirming “Delete”
with the knob 15-fig. 1, eliminates de-
finitively the message from the list,
while with “Map” the map is displayed
(if the message contains a geographic
poin) showing the point of interest
that can also be used as destination or
entered in the system directory. With
the “Call” key, when present, it is pos-
sible to send a phone call directly to
the number given in the message.Generic information
The icon with “<” identifies messages
with generic information (weather
conditions, atmospheric events, etc.).
When one of these messages, with-
out geographical information for loca-
tion, is shown on the display, only the
“Delete” option is available which al-
lows it to be definitively deleted from
the list fig. 159.
Delete Map BUILDING
fig. 157
Delete Map
Call
fig. 158
Delete
fig. 159
141-147 Connect CROMA GB 2-07-2007 15:44 Pagina 147
Page 153 of 166
152
CONNECT Nav+
VEHICLE
To display the relevant screen page,
press one of the keypad keys 16-
fig. 1under VEHICLE.
Choosing this Setup option two dif-
ferent setting menus are displayed, ac-
cording to the car version.
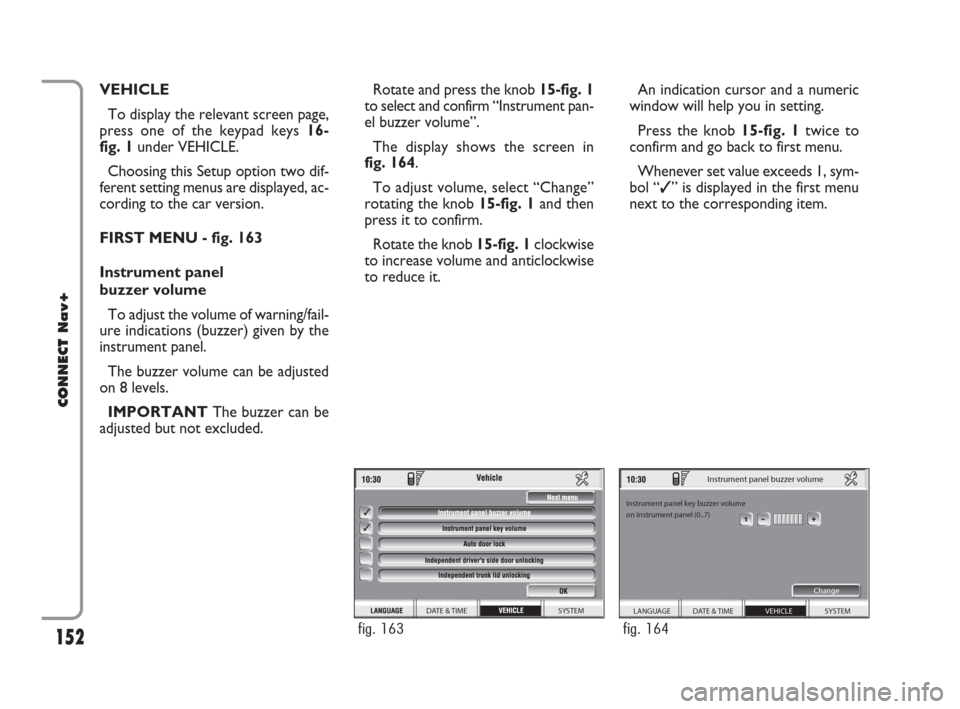
FIRST MENU - fig. 163
Instrument panel
buzzer volume
To adjust the volume of warning/fail-
ure indications (buzzer) given by the
instrument panel.
The buzzer volume can be adjusted
on 8 levels.
IMPORTANT The buzzer can be
adjusted but not excluded.Rotate and press the knob 15-fig. 1
to select and confirm “Instrument pan-
el buzzer volume”.
The display shows the screen in
fig. 164.
To adjust volume, select “Change”
rotating the knob 15-fig. 1and then
press it to confirm.
Rotate the knob 15-fig. 1clockwise
to increase volume and anticlockwise
to reduce it.An indication cursor and a numeric
window will help you in setting.
Press the knob 15-fig. 1twice to
confirm and go back to first menu.
Whenever set value exceeds 1, sym-
bol “✓” is displayed in the first menu
next to the corresponding item.
SYSTEM DATE & TIME
fig. 163
SYSTEM
Instrument panel buzzer volume
Instrument panel key buzzer volume
on instrument panel (0..7)
Change
VEHICLE DATE & TIME LANGUAGE
fig. 164
148-158 Connect CROMA GB 2-07-2007 15:47 Pagina 152
Page 154 of 166
153
CONNECT Nav+
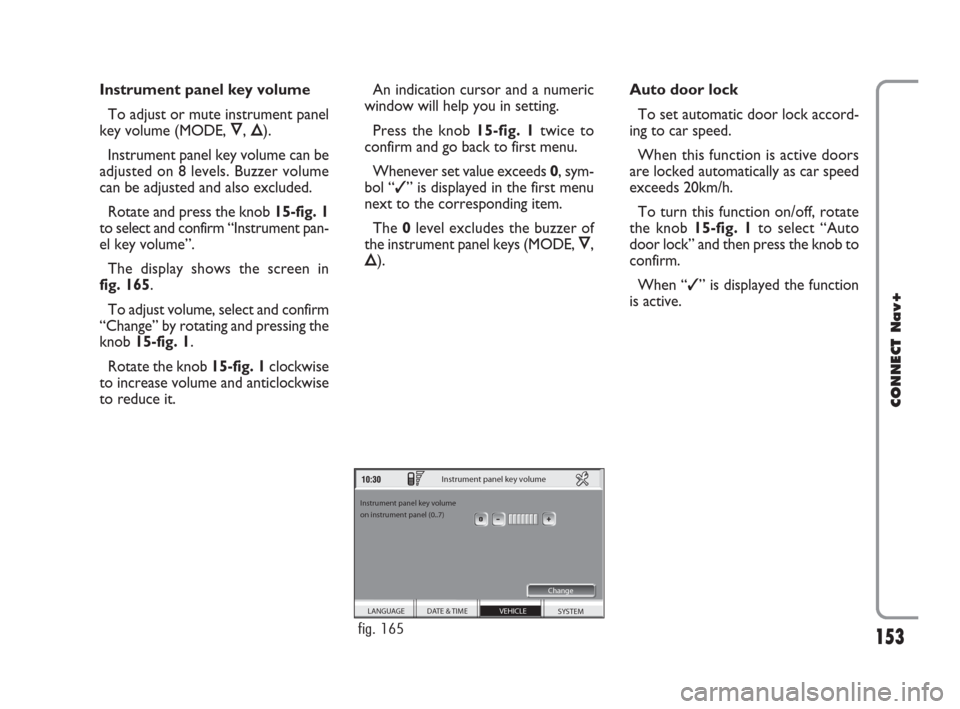
Instrument panel key volume
To adjust or mute instrument panel
key volume (MODE, Ô, Õ).
Instrument panel key volume can be
adjusted on 8 levels. Buzzer volume
can be adjusted and also excluded.
Rotate and press the knob 15-fig. 1
to select and confirm “Instrument pan-
el key volume”.
The display shows the screen in
fig. 165.
To adjust volume, select and confirm
“Change” by rotating and pressing the
knob 15-fig. 1.
Rotate the knob 15-fig. 1clockwise
to increase volume and anticlockwise
to reduce it.An indication cursor and a numeric
window will help you in setting.
Press the knob 15-fig. 1twice to
confirm and go back to first menu.
Whenever set value exceeds 0, sym-
bol “✓” is displayed in the first menu
next to the corresponding item.
The 0level excludes the buzzer of
the instrument panel keys (MODE, Ô,
Õ).Auto door lock
To set automatic door lock accord-
ing to car speed.
When this function is active doors
are locked automatically as car speed
exceeds 20km/h.
To turn this function on/off, rotate
the knob 15-fig. 1to select “Auto
door lock” and then press the knob to
confirm.
When “✓” is displayed the function
is active.
SYSTEM
Instrument panel key volume
Instrument panel key volume
on instrument panel (0..7)
Change
VEHICLE DATE & TIME LANGUAGE
fig. 165
148-158 Connect CROMA GB 2-07-2007 15:47 Pagina 153