dashboard warning lights FIAT DOBLO COMBI 2017 2.G Owners Manual
[x] Cancel search | Manufacturer: FIAT, Model Year: 2017, Model line: DOBLO COMBI, Model: FIAT DOBLO COMBI 2017 2.GPages: 300, PDF Size: 24.91 MB
Page 15 of 300
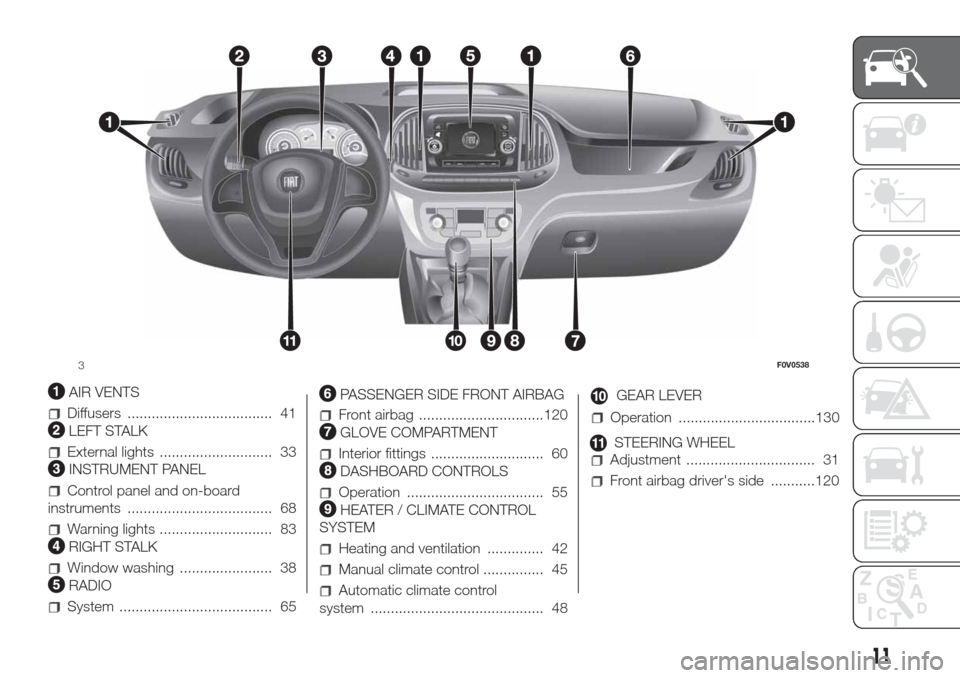
AIR VENTS
Diffusers .................................... 41
LEFT STALK
External lights ............................ 33
INSTRUMENT PANEL
Control panel and on-board
instruments .................................... 68
Warning lights ............................ 83
RIGHT STALK
Window washing ....................... 38
RADIO
System ...................................... 65
PASSENGER SIDE FRONT AIRBAG
Front airbag ...............................120
GLOVE COMPARTMENT
Interior fittings ............................ 60
DASHBOARD CONTROLS
Operation .................................. 55
HEATER / CLIMATE CONTROL
SYSTEM
Heating and ventilation .............. 42
Manual climate control ............... 45
Automatic climate control
system ........................................... 48
GEAR LEVER
Operation ..................................130
STEERING WHEEL
Adjustment ................................ 31
Front airbag driver's side ...........120
3F0V0538
11
Page 37 of 300
WARNING
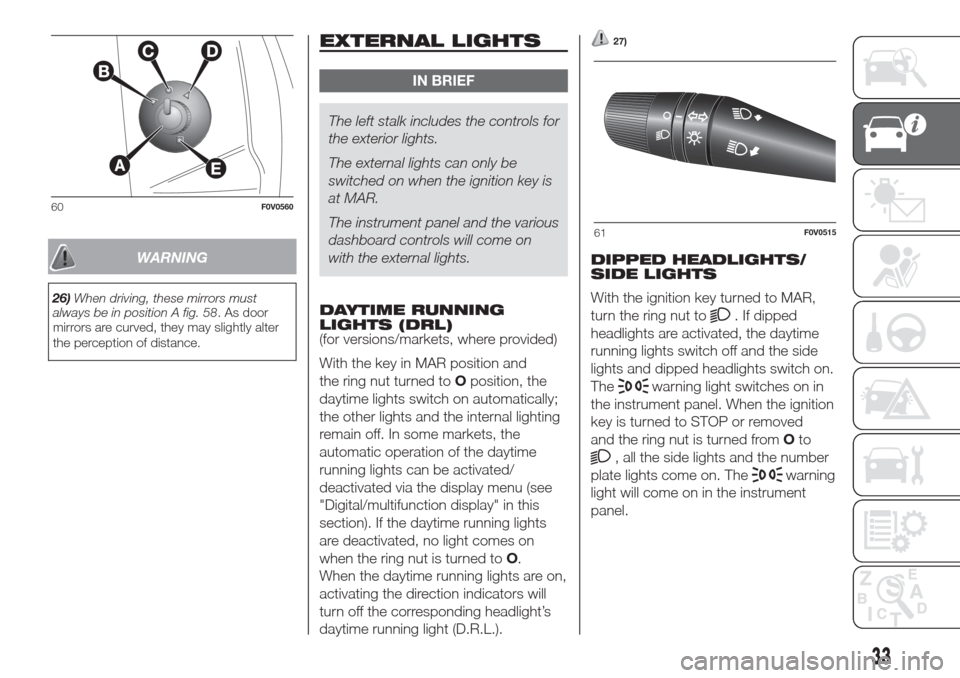
26)When driving, these mirrors must
always be in position A fig. 58. As door
mirrors are curved, they may slightly alter
the perception of distance.
EXTERNAL LIGHTS
IN BRIEF
The left stalk includes the controls for
the exterior lights.
The external lights can only be
switched on when the ignition key is
at MAR.
The instrument panel and the various
dashboard controls will come on
with the external lights.
DAYTIME RUNNING
LIGHTS (DRL)
(for versions/markets, where provided)
With the key in MAR position and
the ring nut turned toOposition, the
daytime lights switch on automatically;
the other lights and the internal lighting
remain off. In some markets, the
automatic operation of the daytime
running lights can be activated/
deactivated via the display menu (see
"Digital/multifunction display" in this
section). If the daytime running lights
are deactivated, no light comes on
when the ring nut is turned toO.
When the daytime running lights are on,
activating the direction indicators will
turn off the corresponding headlight’s
daytime running light (D.R.L.).
27)
DIPPED HEADLIGHTS/
SIDE LIGHTS
With the ignition key turned to MAR,
turn the ring nut to
. If dipped
headlights are activated, the daytime
running lights switch off and the side
lights and dipped headlights switch on.
The
warning light switches on in
the instrument panel. When the ignition
key is turned to STOP or removed
and the ring nut is turned fromOto
, all the side lights and the number
plate lights come on. The
warning
light will come on in the instrument
panel.
60F0V0560
61F0V0515
33
Page 38 of 300
MAIN BEAM HEADLIGHTS
With ring nut in position
, push the
stalk forward toward the dashboard
(stable position). The
warning light
switches on in the instrument panel.
Pulling the stalk towards the steering
wheel, the main beams are turned
off and the dipped headlights on.
FLASHING
You can flash the beams pulling the
stalk toward the steering wheel
(unstable position). The
warning
light switches on in the instrument
panel.
DIRECTION INDICATORS
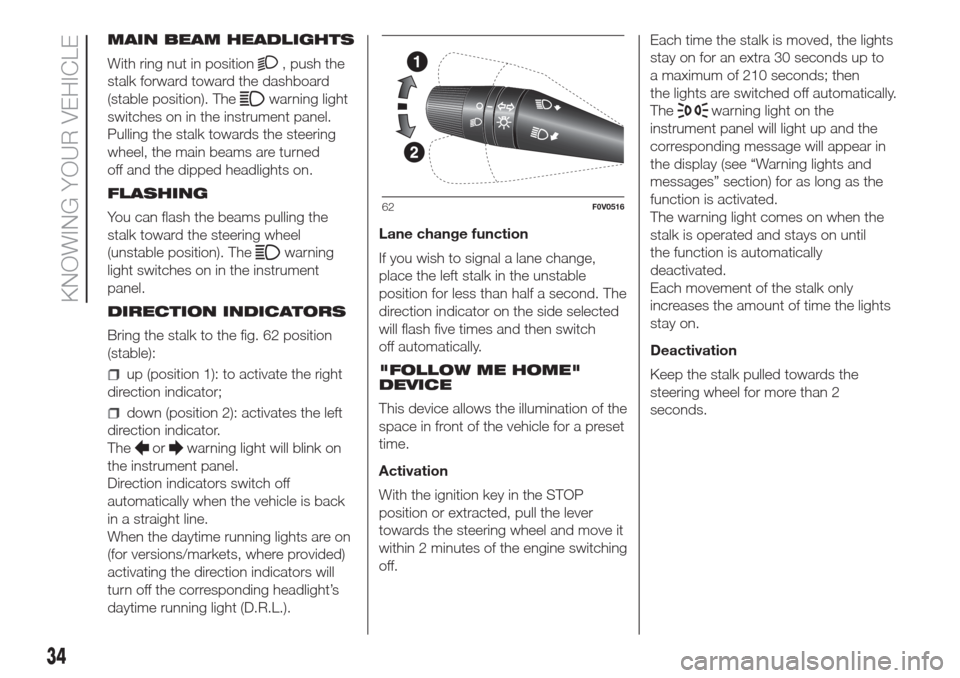
Bring the stalk to the fig. 62 position
(stable):
up (position 1): to activate the right
direction indicator;
down (position 2): activates the left
direction indicator.
The
orwarning light will blink on
the instrument panel.
Direction indicators switch off
automatically when the vehicle is back
in a straight line.
When the daytime running lights are on
(for versions/markets, where provided)
activating the direction indicators will
turn off the corresponding headlight’s
daytime running light (D.R.L.).Lane change function
If you wish to signal a lane change,
place the left stalk in the unstable
position for less than half a second. The
direction indicator on the side selected
will flash five times and then switch
off automatically.
"FOLLOW ME HOME"
DEVICE
This device allows the illumination of the
space in front of the vehicle for a preset
time.
Activation
With the ignition key in the STOP
position or extracted, pull the lever
towards the steering wheel and move it
within 2 minutes of the engine switching
off.Each time the stalk is moved, the lights
stay on for an extra 30 seconds up to
a maximum of 210 seconds; then
the lights are switched off automatically.
The
warning light on the
instrument panel will light up and the
corresponding message will appear in
the display (see “Warning lights and
messages” section) for as long as the
function is activated.
The warning light comes on when the
stalk is operated and stays on until
the function is automatically
deactivated.
Each movement of the stalk only
increases the amount of time the lights
stay on.
Deactivation
Keep the stalk pulled towards the
steering wheel for more than 2
seconds.
62F0V0516
34
KNOWING YOUR VEHICLE
Page 43 of 300
With the windscreen wipers
operational, if reverse gear is engaged,
the rear window wiper is automatically
activated.
3) 4)
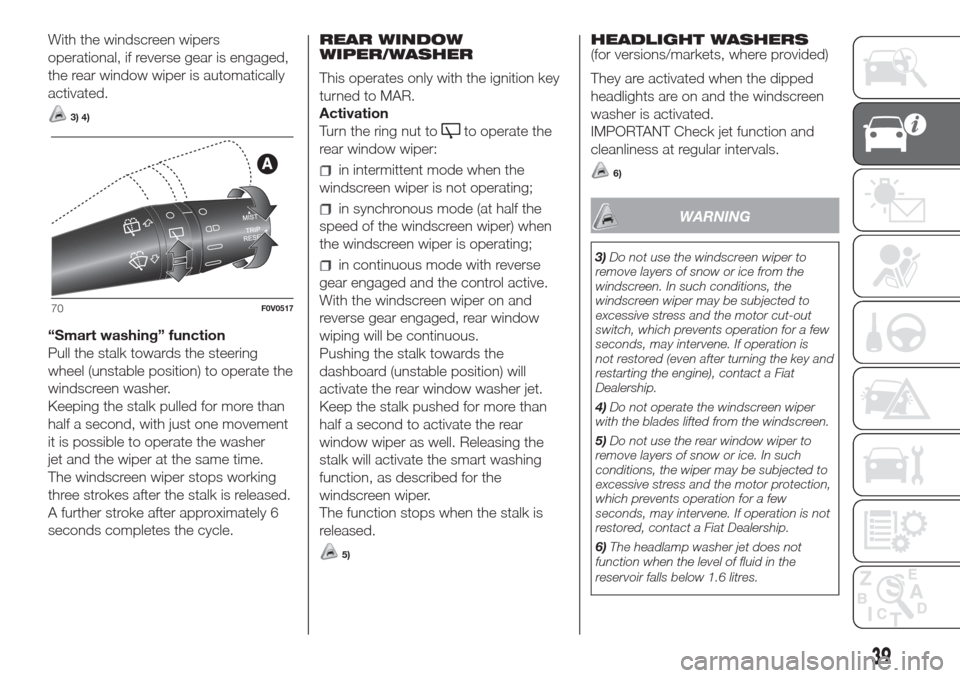
“Smart washing” function
Pull the stalk towards the steering
wheel (unstable position) to operate the
windscreen washer.
Keeping the stalk pulled for more than
half a second, with just one movement
it is possible to operate the washer
jet and the wiper at the same time.
The windscreen wiper stops working
three strokes after the stalk is released.
A further stroke after approximately 6
seconds completes the cycle.REAR WINDOW
WIPER/WASHER
This operates only with the ignition key
turned to MAR.
Activation
Turn the ring nut to
to operate the
rear window wiper:
in intermittent mode when the
windscreen wiper is not operating;
in synchronous mode (at half the
speed of the windscreen wiper) when
the windscreen wiper is operating;
in continuous mode with reverse
gear engaged and the control active.
With the windscreen wiper on and
reverse gear engaged, rear window
wiping will be continuous.
Pushing the stalk towards the
dashboard (unstable position) will
activate the rear window washer jet.
Keep the stalk pushed for more than
half a second to activate the rear
window wiper as well. Releasing the
stalk will activate the smart washing
function, as described for the
windscreen wiper.
The function stops when the stalk is
released.
5)
HEADLIGHT WASHERS
(for versions/markets, where provided)
They are activated when the dipped
headlights are on and the windscreen
washer is activated.
IMPORTANT Check jet function and
cleanliness at regular intervals.
6)
WARNING
3)Do not use the windscreen wiper to
remove layers of snow or ice from the
windscreen. In such conditions, the
windscreen wiper may be subjected to
excessive stress and the motor cut-out
switch, which prevents operation for a few
seconds, may intervene. If operation is
not restored (even after turning the key and
restarting the engine), contact a Fiat
Dealership.
4)Do not operate the windscreen wiper
with the blades lifted from the windscreen.
5)Do not use the rear window wiper to
remove layers of snow or ice. In such
conditions, the wiper may be subjected to
excessive stress and the motor protection,
which prevents operation for a few
seconds, may intervene. If operation is not
restored, contact a Fiat Dealership.
6)The headlamp washer jet does not
function when the level of fluid in the
reservoir falls below 1.6 litres.
70F0V0517
39
Page 99 of 300
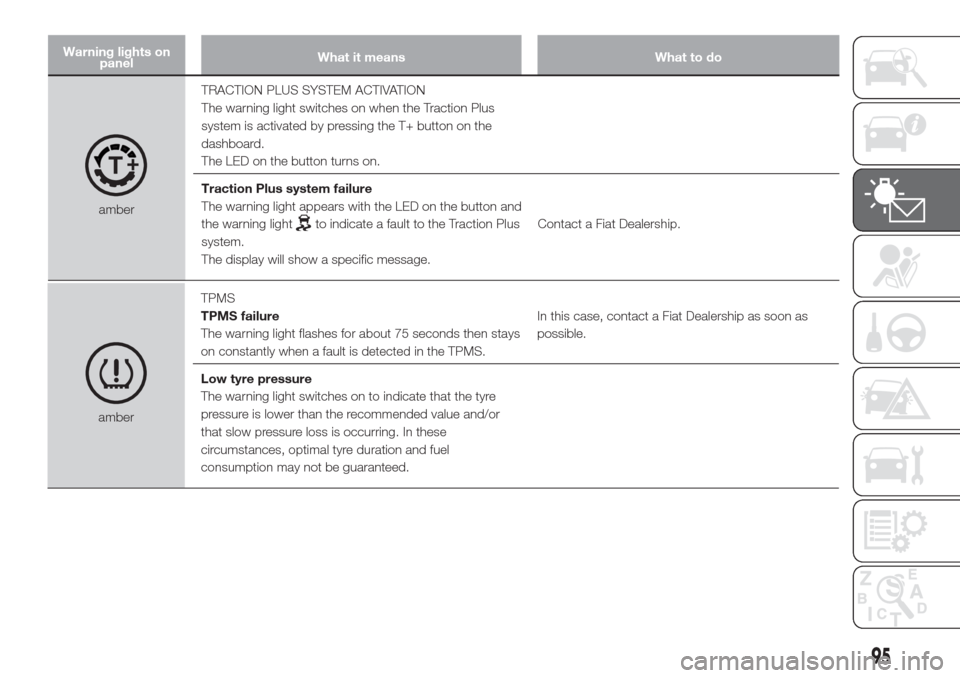
Warning lights on
panelWhat it means What to do
amberTRACTION PLUS SYSTEM ACTIVATION
The warning light switches on when the Traction Plus
system is activated by pressing the T+ button on the
dashboard.
The LED on the button turns on.
Traction Plus system failure
The warning light appears with the LED on the button and
the warning lightto indicate a fault to the Traction Plus
system.
The display will show a specific message.Contact a Fiat Dealership.
amberTPMS
TPMS failure
The warning light flashes for about 75 seconds then stays
on constantly when a fault is detected in the TPMS.In this case, contact a Fiat Dealership as soon as
possible.
Low tyre pressure
The warning light switches on to indicate that the tyre
pressure is lower than the recommended value and/or
that slow pressure loss is occurring. In these
circumstances, optimal tyre duration and fuel
consumption may not be guaranteed.
95
Page 107 of 300
MSR system (engine drive
regulation)
The system prevents the drive wheels
from possibly locking, which could
happen, for example, if the accelerator
pedal is released suddenly or in the
case of a sudden downshifting in
conditions of poor grip.
In this conditions, the engine braking
effect could cause the drive wheels
to slip, resulting in a loss of vehicle
stability. In these situations, the MSR
system intervenes, restoring torque to
the engine in order to conserve vehicle
stability and increase vehicle safety.
Engagement/disengagement of the
ASR system
The ASR system switches on
automatically each time the engine is
started.
Whilst driving, the ASR can be switched
off and subsequently switched on
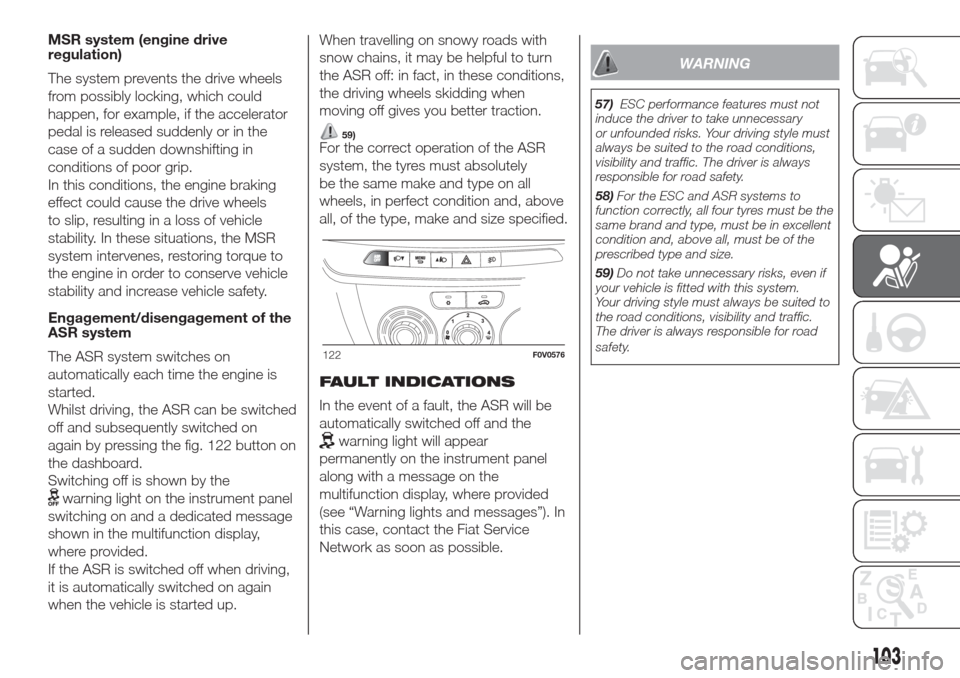
again by pressing the fig. 122 button on
the dashboard.
Switching off is shown by the
warning light on the instrument panel
switching on and a dedicated message
shown in the multifunction display,
where provided.
If the ASR is switched off when driving,
it is automatically switched on again
when the vehicle is started up.When travelling on snowy roads with
snow chains, it may be helpful to turn
the ASR off: in fact, in these conditions,
the driving wheels skidding when
moving off gives you better traction.
59)For the correct operation of the ASR
system, the tyres must absolutely
be the same make and type on all
wheels, in perfect condition and, above
all, of the type, make and size specified.
FAULT INDICATIONS
In the event of a fault, the ASR will be
automatically switched off and the
warning light will appear
permanently on the instrument panel
along with a message on the
multifunction display, where provided
(see “Warning lights and messages”). In
this case, contact the Fiat Service
Network as soon as possible.
WARNING
57)ESC performance features must not
induce the driver to take unnecessary
or unfounded risks. Your driving style must
always be suited to the road conditions,
visibility and traffic. The driver is always
responsible for road safety.
58)For the ESC and ASR systems to
function correctly, all four tyres must be the
same brand and type, must be in excellent
condition and, above all, must be of the
prescribed type and size.
59)Do not take unnecessary risks, even if
your vehicle is fitted with this system.
Your driving style must always be suited to
the road conditions, visibility and traffic.
The driver is always responsible for road
safety.
122F0V0576
103
Page 132 of 300
STARTING THE
ENGINE
The vehicle is fitted with an immobiliser:
if the engine fails to start, see the
paragraph on “The Fiat CODE system”
in the “Dashboard and controls”
section.
The engine may be noisier during the
first few seconds of operation,
especially after a long period of
inactivity. This is due to the hydraulic
tappets, the timing system chosen for
petrol engine versions to reduce the
number of servicing interventions, and
affects neither functionality nor reliability.
17) 18)
95)
PROCEDURE FOR
PETROL VERSIONS
Proceed as follows:
engage the handbrake;
put the gear lever into neutral;
fully depress the clutch pedal,
without touching the accelerator;
turn the ignition key to AVV and
release it as soon as the engine starts.
If the engine does not start at the
first attempt, return the ignition key to
STOP before repeating the starting
procedure.If, when the ignition key is on MAR, the
instrument panel warning light
remains on together with warning
light
, turn the key to STOP and
then back to MAR; if the warning light
remains on, try the other keys provided
with the vehicle. If you are still unable
to start the engine, perform the
emergency starting procedure (see
"Emergency starting" in the "In an
emergency" chapter) and contact a Fiat
Dealership.
PROCEDURE FOR DIESEL
VERSIONS
Proceed as follows:
engage the handbrake;
put the gear lever into neutral;
turn the ignition key to MAR: the
warning lights
andon the
instrument panel will turn on;
wait for the warning lightsand
to switch off. The hotter the engine
is, the quicker this will happen;
fully depress the clutch pedal,
without touching the accelerator;
turn the ignition key to AVV as soon
as warning light
switches off.
Waiting too long will waste the heating
work carried out by the glow plugs.
Release the key as soon as the engine
starts.IMPORTANT With the engine cold, the
accelerator pedal must be fully released
when you turn the ignition key to AVV.
If the engine does not start at the
first attempt, return the ignition key to
STOP before repeating the starting
procedure.
If, when the ignition key is at MAR the
warning light remains lit, turn the
key to STOP and then back to MAR; if
the warning light remains lit, try with the
other keys provided with the vehicle. If
you still cannot start the engine, contact
a Fiat Dealership.
19)
WARMING UP THE
ENGINE JUST AFTER IT
HAS STARTED
Proceed as follows:
drive off slowly, letting the engine
turn at medium revs. Do not accelerate
abruptly;
do not demand full performance at
first. Wait until the engine coolant
temperature gauge starts moving.
EMERGENCY STARTING
If the instrument panel warning light
stays on steadily, you can perform
an emergency starting by using the
code on the CODE card (see the “In an
emergency” section).
20)
128
STARTING AND DRIVING
Page 170 of 300
126)Use your hazard lights, warning
triangle, etc. to show that your vehicle is
stationary according to the regulations
in force. Passengers should get out of the
vehicle, particularly if it is heavily loaded,
and wait for the wheel to be changed away
from the traffic. If you are on a slope or
uneven surface, place wedges or other
suitable objects under the wheels to secure
the vehicle. Have the wheel repaired and
refitted as soon as possible. Do not apply
grease to the bolt threads before
assembly: they might spontaneously
unscrew.
127)Use the jack only to replace wheels
on the vehicle with which it is supplied
or on other vehicles of the same model.
Never use the jack for other purposes,
such as lifting other models. Never use the
jack to carry out repairs under the vehicle.
Incorrect positioning of the jack may cause
the lifted vehicle to fall. Do not use the
jack for loads higher than those shown on
the label.
128)Incorrect hub cap assembly may
cause it to come off when the vehicle is
moving. Never tamper with the inflation
valve. Never introduce tools of any kind
between rim and tyre. Check tyre and
spare wheel pressures regularly, referring to
the values shown in the "Technical
specifications" section.FIX&GO AUTOMATIC
KIT
129) 130)
28)
DESCRIPTION
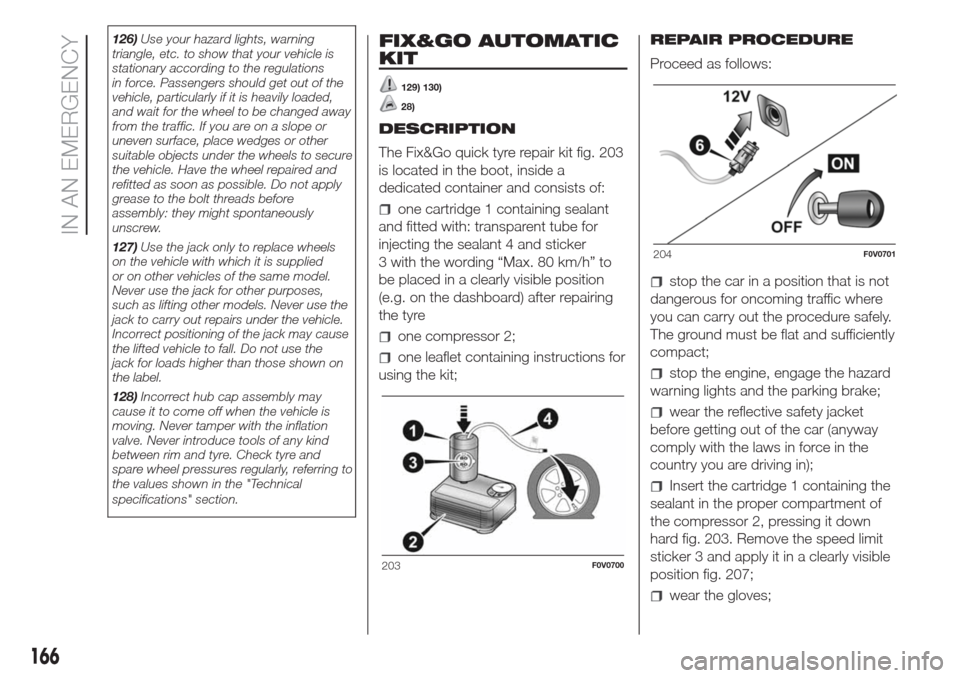
The Fix&Go quick tyre repair kit fig. 203
is located in the boot, inside a
dedicated container and consists of:
one cartridge 1 containing sealant
and fitted with: transparent tube for
injecting the sealant 4 and sticker
3 with the wording “Max. 80 km/h” to
be placed in a clearly visible position
(e.g. on the dashboard) after repairing
the tyre
one compressor 2;
one leaflet containing instructions for
using the kit;REPAIR PROCEDURE
Proceed as follows:
stop the car in a position that is not
dangerous for oncoming traffic where
you can carry out the procedure safely.
The ground must be flat and sufficiently
compact;
stop the engine, engage the hazard
warning lights and the parking brake;
wear the reflective safety jacket
before getting out of the car (anyway
comply with the laws in force in the
country you are driving in);
Insert the cartridge 1 containing the
sealant in the proper compartment of
the compressor 2, pressing it down
hard fig. 203. Remove the speed limit
sticker 3 and apply it in a clearly visible
position fig. 207;
wear the gloves;
203F0V0700
204F0V0701
166
IN AN EMERGENCY
Page 173 of 300
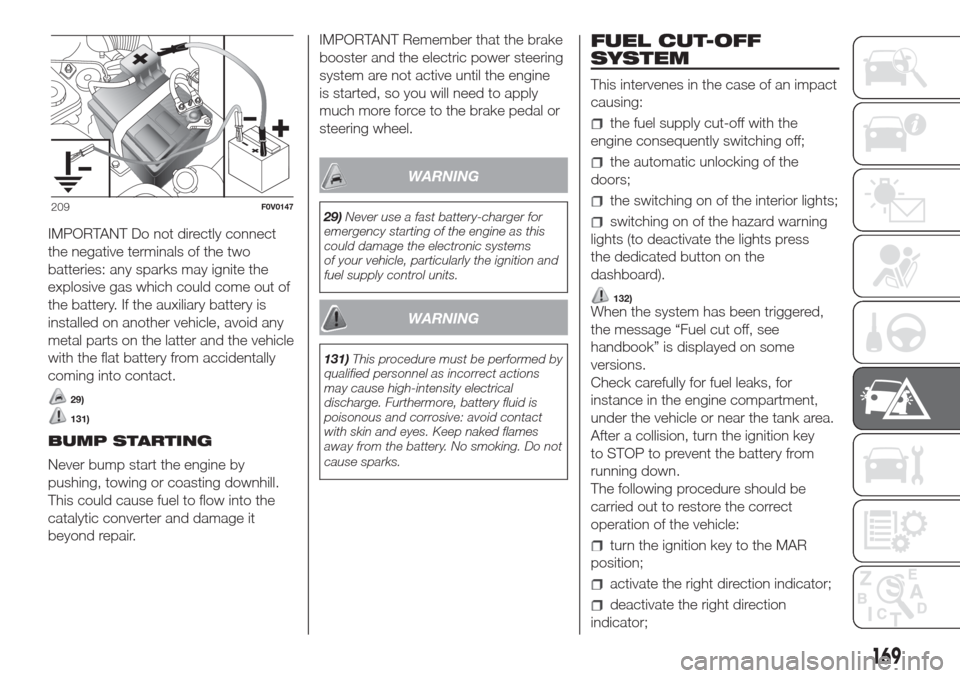
IMPORTANT Do not directly connect
the negative terminals of the two
batteries: any sparks may ignite the
explosive gas which could come out of
the battery. If the auxiliary battery is
installed on another vehicle, avoid any
metal parts on the latter and the vehicle
with the flat battery from accidentally
coming into contact.
29)
131)
BUMP STARTING
Never bump start the engine by
pushing, towing or coasting downhill.
This could cause fuel to flow into the
catalytic converter and damage it
beyond repair.IMPORTANT Remember that the brake
booster and the electric power steering
system are not active until the engine
is started, so you will need to apply
much more force to the brake pedal or
steering wheel.
WARNING
29)Never use a fast battery-charger for
emergency starting of the engine as this
could damage the electronic systems
of your vehicle, particularly the ignition and
fuel supply control units.
WARNING
131)This procedure must be performed by
qualified personnel as incorrect actions
may cause high-intensity electrical
discharge. Furthermore, battery fluid is
poisonous and corrosive: avoid contact
with skin and eyes. Keep naked flames
away from the battery. No smoking. Do not
cause sparks.
FUEL CUT-OFF
SYSTEM
This intervenes in the case of an impact
causing:
the fuel supply cut-off with the
engine consequently switching off;
the automatic unlocking of the
doors;
the switching on of the interior lights;
switching on of the hazard warning
lights (to deactivate the lights press
the dedicated button on the
dashboard).
132)When the system has been triggered,
the message “Fuel cut off, see
handbook” is displayed on some
versions.
Check carefully for fuel leaks, for
instance in the engine compartment,
under the vehicle or near the tank area.
After a collision, turn the ignition key
to STOP to prevent the battery from
running down.
The following procedure should be
carried out to restore the correct
operation of the vehicle:
turn the ignition key to the MAR
position;
activate the right direction indicator;
deactivate the right direction
indicator;
209F0V0147
169