audio FIAT DUCATO 244 2002 3.G Connect NavPlus Manual
[x] Cancel search | Manufacturer: FIAT, Model Year: 2002, Model line: DUCATO 244, Model: FIAT DUCATO 244 2002 3.GPages: 246, PDF Size: 3.39 MB
Page 186 of 246
CONNECT Nav+
185
To choose an option turn and press
the knob 22-fig. 1after selecting the
“Display” function.
To store the option chosen, choose
and confirm “OK” with the knob 22-
fig. 1.“Repeat” function
With this function it is possible to turn
on/off the continuous repetition of the
current track or of the whole CD.
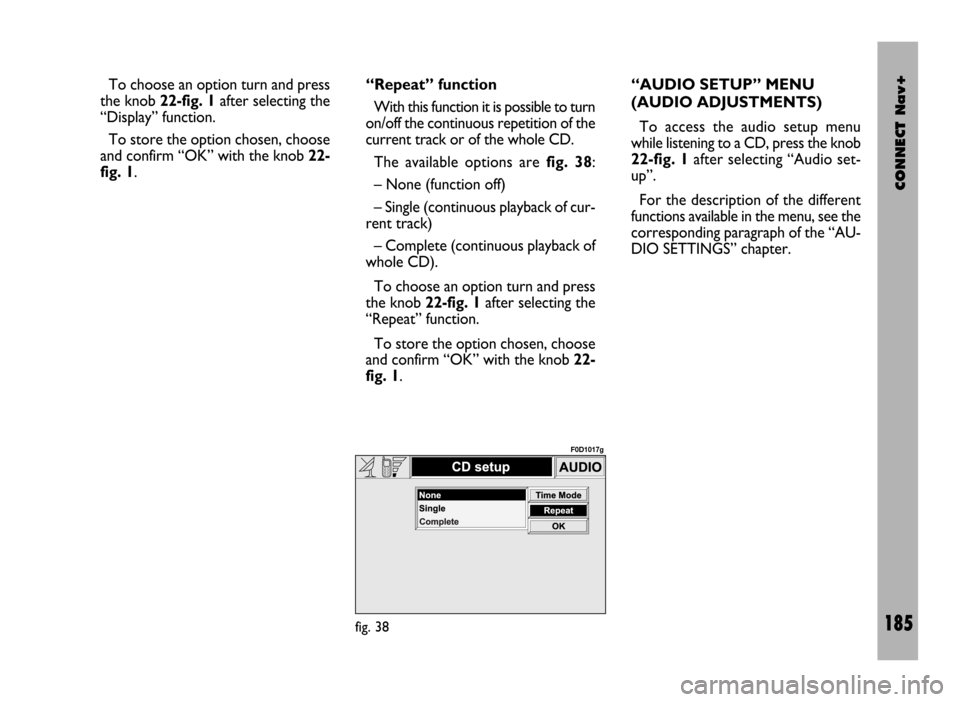
The available options are fig. 38:
– None (function off)
– Single (continuous playback of cur-
rent track)
– Complete (continuous playback of
whole CD).
To choose an option turn and press
the knob 22-fig. 1after selecting the
“Repeat” function.
To store the option chosen, choose
and confirm “OK” with the knob 22-
fig. 1.“AUDIO SETUP” MENU
(AUDIO ADJUSTMENTS)
To access the audio setup menu
while listening to a CD, press the knob
22-fig. 1after selecting “Audio set-
up”.
For the description of the different
functions available in the menu, see the
corresponding paragraph of the “AU-
DIO SETTINGS” chapter.
fig. 38
F0D1017g
Page 201 of 246
CONNECT Nav+
200
SCREEN OPTIONS
AND FUNCTIONS
The main information and functions
provided and managed by the naviga-
tion system are:
ëGPS signal symbol which differs in
colour depending on the quality of re-
ception;
– voice and visual instructions with
indications of distance from the des-
tination and planned arrival time;
– detailed map in different colours
and with different scales to clearly
show the vehicle position, route and
destination;
– customisation of the navigation sys-
tem with possibility of entering pre-
memorised destinations with street
and street number;
– automatic memorising of the last 8
destinations;
– name of current street;– possibility to choose the route ac-
cording to personal preference;
– information on current position;
– information on arrival time;
– system diagnostics and warnings
about possible disturbances.
If the system contains a wrong CD-
ROM, an audio CD or no CD, when-
ever the system asks for the navigation
CD-ROM for route calculation or map
up-date, the insertion prompt will ap-
pear on the display.
Navigation functions are mainly con-
trolled using the knob 22-fig. 1:
– rotate the knob to access the var-
ious map zoom levels;
– press the knob to display the first
menu page;
– use the knob to select and confirm
the “Other menu” item and access the
following menu pages;
– press the knob again and the menu
page will disappear.
GRAPHIC
INSTRUCTIONS
The main navigation function page
and the MAIN page display the ma-
noeuvres to be made using arrows or
symbols.
The downward arrow represents
next manoeuvre (turn left, right,
straight on, U-turn) while the upward
arrow or the symbol on top represent
the next one. The number displayed
under the arrow indicates the vehicle
distance from the turn point.
The small arrow down on the right-
hand side of the display (on the MAIN
page) or in the top box (on the main
navigation function page) indicates the
destination direction. Next to this ar-
row the planned arrival time and the
distance still to be covered are also in-
dicated.
Page 202 of 246
CONNECT Nav+
201
VOICE
INSTRUCTIONS
The voice instructions provided by
the system guide you to your destina-
tion and suggest all manoeuvres to be
carried out in due time: in particular,
the manoeuvres is announced first and
then detailed instructions are given.
Press the “RPT” key 24-fig. 1to re-
peat the last voice instruction.
To adjust the volume of the voice in-
struction turn the knob 16-fig. 1dur-
ing voice information.
If necessary, press the “RPT” key 24-
fig. 1to repeat the voice instruction
and adjust the volume.
NAVIGATION
CD-ROM PLAYER
The navigation CD-ROM player 28-
fig. 1is located on the telematic sys-
tem front panel and it is the same used
for the audio CD. Therefore, it is not
possible to use the player for audio
and navigation CD-ROM at the same
time: however, the navigation system
can operate partially even without in-
serting the navigation CD-ROM.
In this case, when pressing key
26-fig. 1to remove the CD-ROM
with navigation function engaged (to
then insert an audio CD), the follow-
ing two cases may occur:
– the system cannot calculate the re-
quired route at present;
– the route calculated before re-
moving the navigation CD-ROM is still
valid.
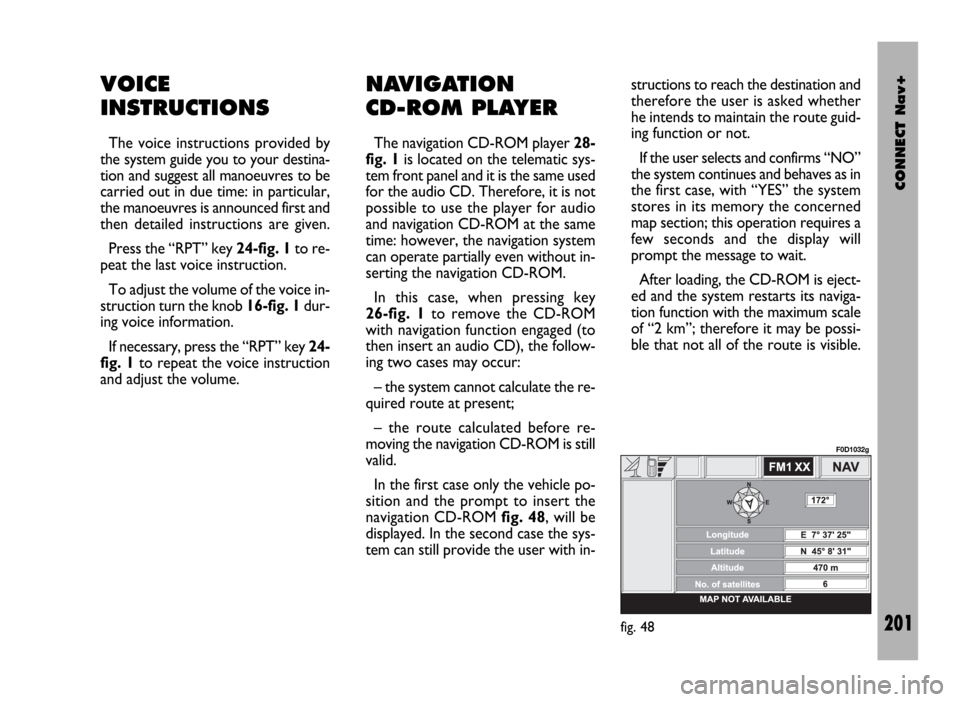
In the first case only the vehicle po-
sition and the prompt to insert the
navigation CD-ROM fig. 48, will be
displayed. In the second case the sys-
tem can still provide the user with in-structions to reach the destination and
therefore the user is asked whether
he intends to maintain the route guid-
ing function or not.
If the user selects and confirms “NO”
the system continues and behaves as in
the first case, with “YES” the system
stores in its memory the concerned
map section; this operation requires a
few seconds and the display will
prompt the message to wait.
After loading, the CD-ROM is eject-
ed and the system restarts its naviga-
tion function with the maximum scale
of “2 km”; therefore it may be possi-
ble that not all of the route is visible.
fig. 48
F0D1032g
Page 234 of 246
CONNECT Nav+
233
“Infomobility” FUNCTION
“Connect”
Selecting “Infomobility” and con-
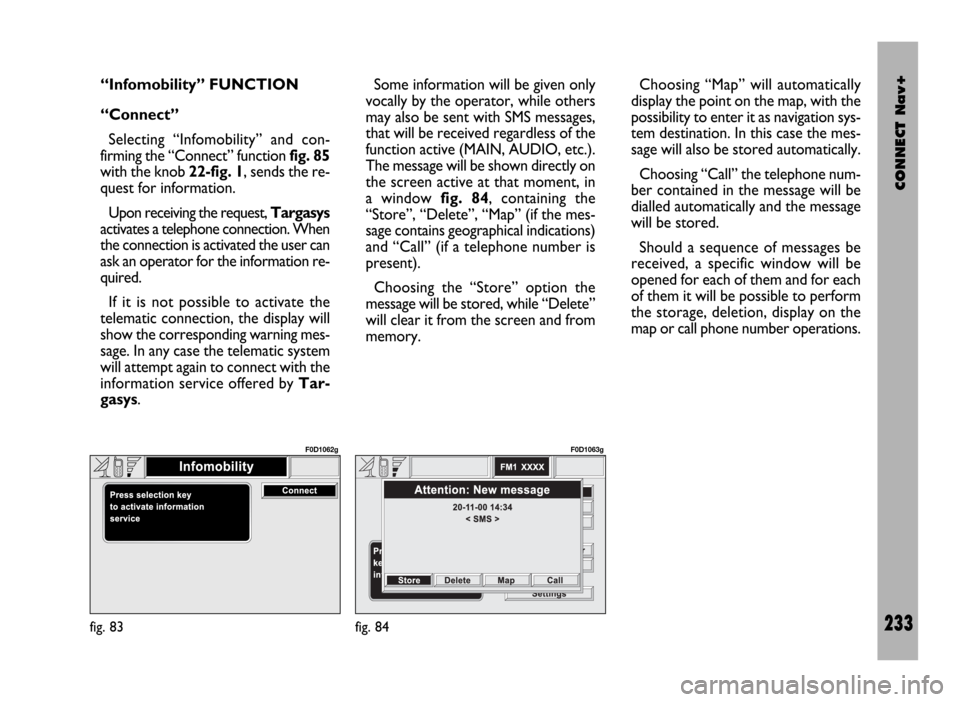
firming the “Connect” function fig. 85
with the knob 22-fig. 1, sends the re-
quest for information.
Upon receiving the request, Targasys
activates a telephone connection. When
the connection is activated the user can
ask an operator for the information re-
quired.
If it is not possible to activate the
telematic connection, the display will
show the corresponding warning mes-
sage. In any case the telematic system
will attempt again to connect with the
information service offered by Tar-
gasys.Some information will be given only
vocally by the operator, while others
may also be sent with SMS messages,
that will be received regardless of the
function active (MAIN, AUDIO, etc.).
The message will be shown directly on
the screen active at that moment, in
a window fig. 84, containing the
“Store”, “Delete”, “Map” (if the mes-
sage contains geographical indications)
and “Call” (if a telephone number is
present).
Choosing the “Store” option the
message will be stored, while “Delete”
will clear it from the screen and from
memory.Choosing “Map” will automatically
display the point on the map, with the
possibility to enter it as navigation sys-
tem destination. In this case the mes-
sage will also be stored automatically.
Choosing “Call” the telephone num-
ber contained in the message will be
dialled automatically and the message
will be stored.
Should a sequence of messages be
received, a specific window will be
opened for each of them and for each
of them it will be possible to perform
the storage, deletion, display on the
map or call phone number operations.
fig. 83
F0D1062g
fig. 84
F0D1063g
Page 239 of 246
CONNECT Nav+
238
CALLS FOR MEDICAL
ADVICE OR ROADSIDE
ASSISTANCE
During the forwarding of a call for as-
sistance to the operating centre, any
other operations activated are inter-
rupted and the volume of any audio
sources (except the phone) is muted.
These conditions will be maintained as
long as the call for assistance is active,
with the corresponding screen on the
display.
If a phone call is received while for-
warding a request for assistance, the
corresponding alert will not be shown
on the display but the ringer will ring.
If the user decides to accept the call
and briefly presses the
òkey 13-
fig. 1, the assistance call screen goes
off the display.IMPORTANTThe call for assis-
tance is always forwarded; however, if
the you accept the incoming call, the
Targasysoperator might have diffi-
culty in contacting you since the num-
ber could be busy.
When the call has been sent, the dis-
play shows the corresponding call for-
warded message for about 4 seconds.If for any reason the call for assis-
tance cannot be sent, the display
shows a warning message and the user
is then asked if he wants to activate a
phone call in any case (*) to the op-
erating centre to avail of the service
required, even if in this case the op-
erating centre will no longer be able
to locate the vehicle.
(*) The call is normally made using
the toll-free number, while it is at the
user’s expense if it is made in roam-
ing conditions.
Page 241 of 246
CONNECT Nav+
240
AUDIO mode
When the telecamera image is dis-
played, the AUDIO mode is enabled:
– “AUDIO” key 18-fig. 1disabled;
– the active source (RADIO, CD)
stays on;
– audio volume setting, knob 16-fig.
1enabled;
– “SRC” key 15-fig. 1enabled;
– station tuning disabled.
TEL mode
When the telecamera image is dis-
played, the TEL mode is enabled:
– “TEL” key 19-fig. 1disabled;
– key ò13-fig. 1enabled.INCOMING CALL WITH DISPLAYED
TELECAMERA IMAGE
When the above condition occurs,
the following takes place:
– automatic display switching to TEL
mode display;
– incoming call number display (if
available);
– briefly press the òkey 13-fig. 1to
accept the incoming call or press it at
length to refuse the call. Just after
pressing the key (with reverse en-
gaged) the display returns to display
the telecamera image and if the in-
coming call is accepted the system will
enable the communication. If during
this phase there is another incoming
call, the display will show the TEL
mode again.
FORWARDING CALL WITH DISPLAYED
TELECAMERA IMAGE
Briefly press the òkey 13-fig. 1to
obtain the following:
– disable the telecamera image;
– display the last dialled number (see
“Cellular telephone” chapter); press
again the òkey 13-fig. 1to forward
a call within 10 seconds. Pressing
“ESC” 23-fig. 1will delete the last di-
alled number and activate the window
to be used for dialling (through the key-
pad) the required telephone number;
pressing the òkey 13-fig. 1again will
forward the call;
– press ESC 23-fig. 1at length to
return to the telecamera image (with
reverse gear engaged).