specifications FIAT DUCATO BASE CAMPER 2015 Owner handbook (in English)
[x] Cancel search | Manufacturer: FIAT, Model Year: 2015, Model line: DUCATO BASE CAMPER, Model: FIAT DUCATO BASE CAMPER 2015Pages: 367, PDF Size: 19.73 MB
Page 5 of 367
Dear Customer,
We would like to congratulate and thank you for choosing a Fiat Ducato. We have written this handbook to help you get to know all the
features of your vehicle and use it in the best possible way. You should read it right through before taking to the road for the first time.
You will find information, tips and important warnings regarding the use of your vehicle to help you get the most from the technological features
of your Fiat Ducato. It also provides a description of special features and essential information for the care and maintenance of your vehicle
over time as well as for safe driving.
We urge you to read the warnings and indications found throughout the text with care, marked with the following symbols:
personal safety;
vehicle integrity;
environmental protection.
NOTE These symbols, when necessary, are reported at the end of each paragraph and are followed by a number. That number recalls the
corresponding warning at the end of the relevant section.
In the attached Warranty Booklet you will also find a description of the Services that Fiat offers to its customers, the Warranty Certificate and
the detail of the terms and conditions for maintaining its validity.
We are sure that these will help you to get in touch with and appreciate your new vehicle and the service provided by the people at Fiat.
Enjoy reading. Happy motoring!
This Owner Handbook describes all Fiat Ducato versions. As a consequence, you should only consider the information
which is related to the trim level, engine and version that you have purchased. All data contained in this publication is
purely indicative. Fiat Group Automobiles can modify the specifications of the vehicle model described in this publication
at any time, for technical or marketing purposes. For further information, contact a Fiat Dealership.
Page 84 of 367
WARNING
45) For safety reasons, the bonnet
must always be perfectly closed
while travelling. Make sure that
the bonnet is perfectly closed and
that the lock is engaged. If you
notice when driving that the
bonnet has not been properly
locked, stop immediately
and close the bonnet correctly.
46) Incorrect positioning of the stay
rod may cause the bonnet to drop
suddenly.
47) Perform these operations only
when the vehicle is stationary.
ROOF RACK/SKI
RACK
To fit the roof/ski rack, with
provision for versions H1 and H2,
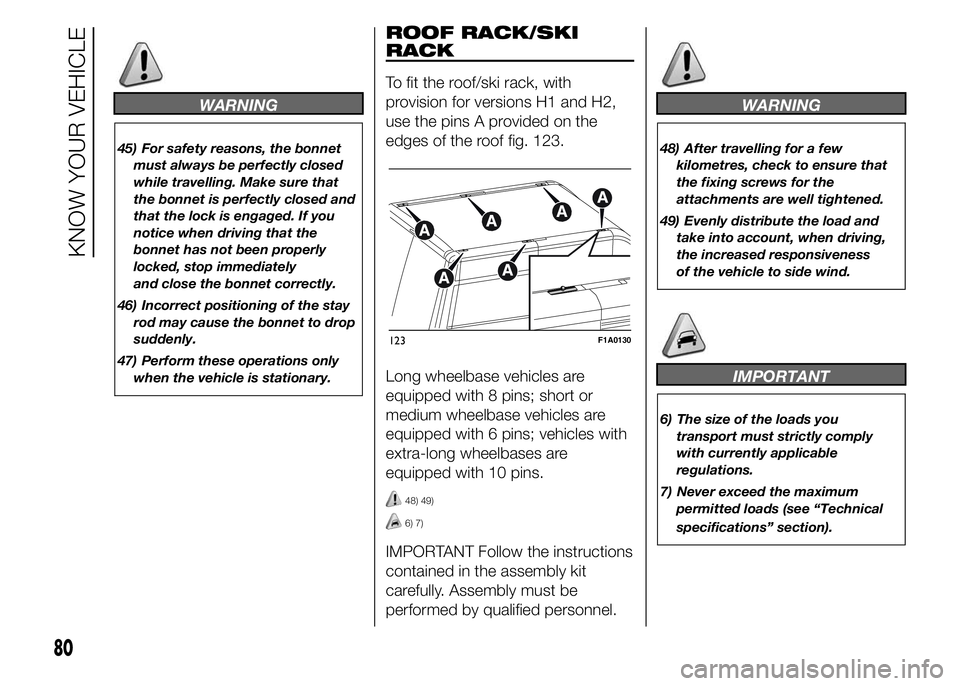
use the pins A provided on the
edges of the roof fig. 123.
Long wheelbase vehicles are
equipped with 8 pins; short or
medium wheelbase vehicles are
equipped with 6 pins; vehicles with
extra-long wheelbases are
equipped with 10 pins.
48) 49)
6) 7)
IMPORTANT Follow the instructions
contained in the assembly kit
carefully. Assembly must be
performed by qualified personnel.
WARNING
48) After travelling for a few
kilometres, check to ensure that
the fixing screws for the
attachments are well tightened.
49) Evenly distribute the load and
take into account, when driving,
the increased responsiveness
of the vehicle to side wind.
IMPORTANT
6) The size of the loads you
transport must strictly comply
with currently applicable
regulations.
7) Never exceed the maximum
permitted loads (see “Technical
specifications” section).
123F1A0130
80
KNOW YOUR VEHICLE
Page 103 of 367
TRAFFIC SIGN
RECOGNITION
(for versions/markets, where
provided)
78) 83) 84) 85)
10) 11) 12) 13) 14) 15) 16)
The system automatically detects
the recognisable traffic signs: speed
limits, no overtaking signs and
signs indicating the end of such
prohibitions.
The camera is fitted behind the
internal rear view mirror. The sensor
always checks the traffic signs
indicating the current speed limit
and possible no overtaking signs.
IMPORTANT The system is
designed to read signs complying
with the specifications of the Vienna
convention.USE OF THE TRAFFIC
SIGN RECOGNITION
System switching on
and off
The system can be activated/
deactivated using the display menu.
Refer to the "Display" paragraph in
the "Knowing the instrument panel"
chapter.
Note: the system condition and
settings do not change throughout
the different on-off cycles.
The system condition can always
be shown on the display.
The system displaying includes the
following two steps:
❒All new traffic signs that can be
recognised are displayed as pop-ups
for 40 seconds over the other
signallings.❒After the preset time, they are
displayed in the dedicated screen on
the panel.
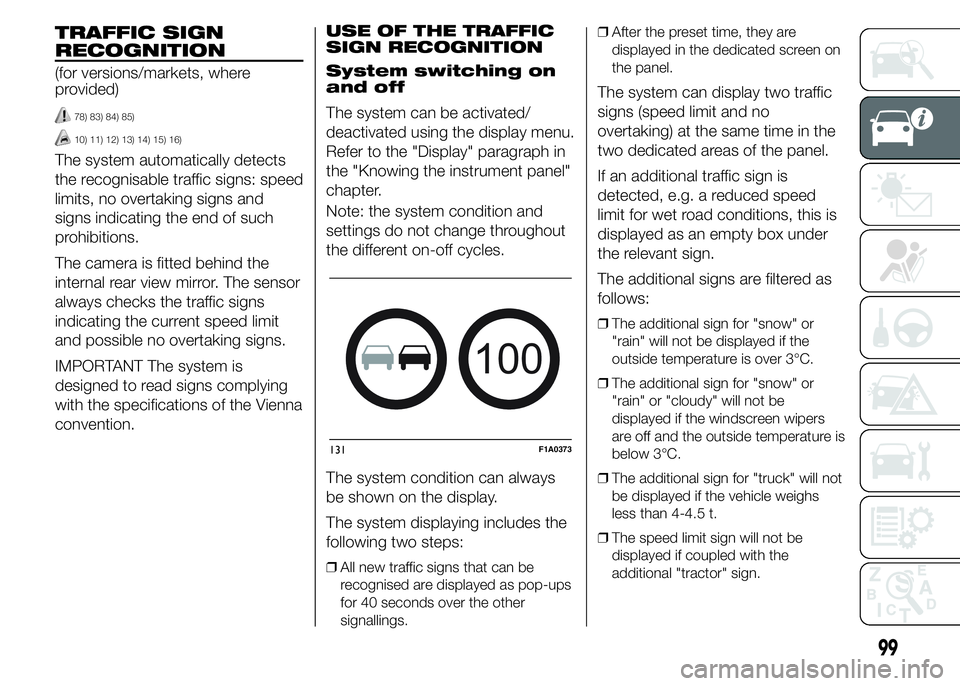
The system can display two traffic
signs (speed limit and no
overtaking) at the same time in the
two dedicated areas of the panel.
If an additional traffic sign is
detected, e.g. a reduced speed
limit for wet road conditions, this is
displayed as an empty box under
the relevant sign.
The additional signs are filtered as
follows:
❒The additional sign for "snow" or
"rain" will not be displayed if the
outside temperature is over 3°C.
❒The additional sign for "snow" or
"rain" or "cloudy" will not be
displayed if the windscreen wipers
are off and the outside temperature is
below 3°C.
❒The additional sign for "truck" will not
be displayed if the vehicle weighs
less than 4-4.5 t.
❒The speed limit sign will not be
displayed if coupled with the
additional "tractor" sign.
100
131F1A0373
99
Page 112 of 367
ACCESSORIES
PURCHASED BY THE
OWNER
If after buying the car, you decide to
install electrical accessories that
require a permanent electric supply
(alarm, satellite antitheft system,
etc.) or accessories that in any case
burden the electric supply, contact
a Fiat Dealership, whose qualified
personnel, besides suggesting
the most suitable devices from
Lineaccessori Fiat, will also evaluate
the overall electric consumption,
checking whether the car's
electrical system is able to
withstand the load required, or
whether it needs to be integrated
with a more powerful battery.
91)
INSTALLING
ELECTRICAL/
ELECTRONIC DEVICES
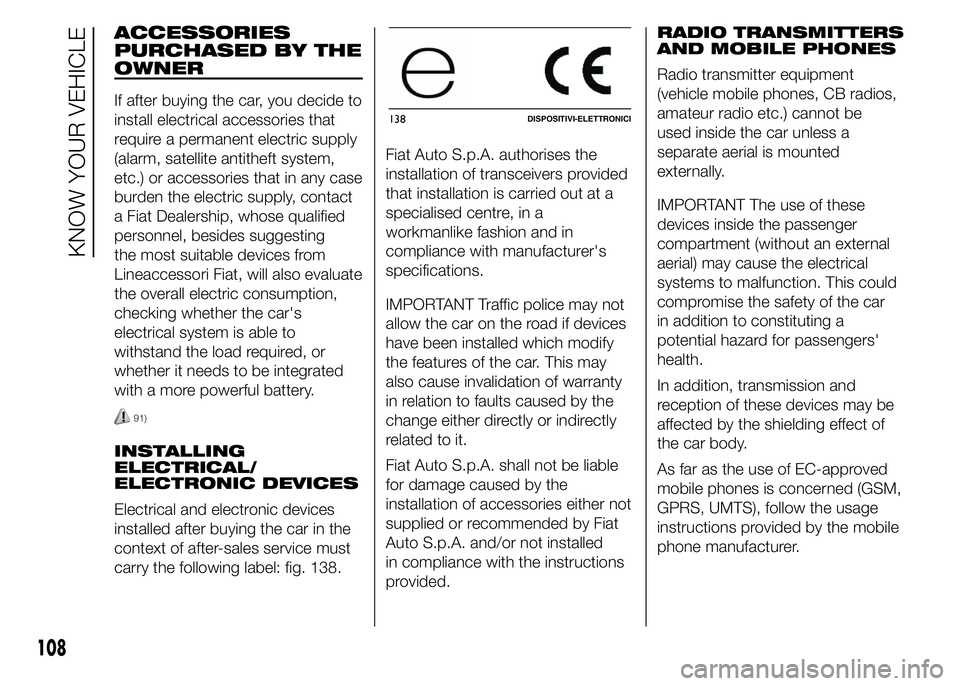
Electrical and electronic devices
installed after buying the car in the
context of after-sales service must
carry the following label: fig. 138.Fiat Auto S.p.A. authorises the
installation of transceivers provided
that installation is carried out at a
specialised centre, in a
workmanlike fashion and in
compliance with manufacturer's
specifications.
IMPORTANT Traffic police may not
allow the car on the road if devices
have been installed which modify
the features of the car. This may
also cause invalidation of warranty
in relation to faults caused by the
change either directly or indirectly
related to it.
Fiat Auto S.p.A. shall not be liable
for damage caused by the
installation of accessories either not
supplied or recommended by Fiat
Auto S.p.A. and/or not installed
in compliance with the instructions
provided.RADIO TRANSMITTERS
AND MOBILE PHONES
Radio transmitter equipment
(vehicle mobile phones, CB radios,
amateur radio etc.) cannot be
used inside the car unless a
separate aerial is mounted
externally.
IMPORTANT The use of these
devices inside the passenger
compartment (without an external
aerial) may cause the electrical
systems to malfunction. This could
compromise the safety of the car
in addition to constituting a
potential hazard for passengers'
health.
In addition, transmission and
reception of these devices may be
affected by the shielding effect of
the car body.
As far as the use of EC-approved
mobile phones is concerned (GSM,
GPRS, UMTS), follow the usage
instructions provided by the mobile
phone manufacturer.
138DISPOSITIVI-ELETTRONICI
108
KNOW YOUR VEHICLE
Page 114 of 367
In order to avoid these problems,
different types of diesel are
distributed according to the
season: summer type, winter type
and arctic type (cold/mountain
areas). If refuelling with diesel fuel
whose specifications are not
suitable for the current temperature,
it is advisable to mix TUTELA
DIESEL ART additive in the
proportions shown on the
container. Pour the additive into the
tank before the diesel fuel.
When using or parking the vehicle
for a long time in the mountains
or cold areas, it is advisable to
refuel using locally available diesel
fuel.
In this case, it is also advisable to
keep the tank over 50% full.
19)
FILLING THE TANK
To fill the tank completely, top-up
twice after the first click of the
fuel supply gun. Further top-ups
could cause faults in the fuel supply
system.FUEL TANK CAP
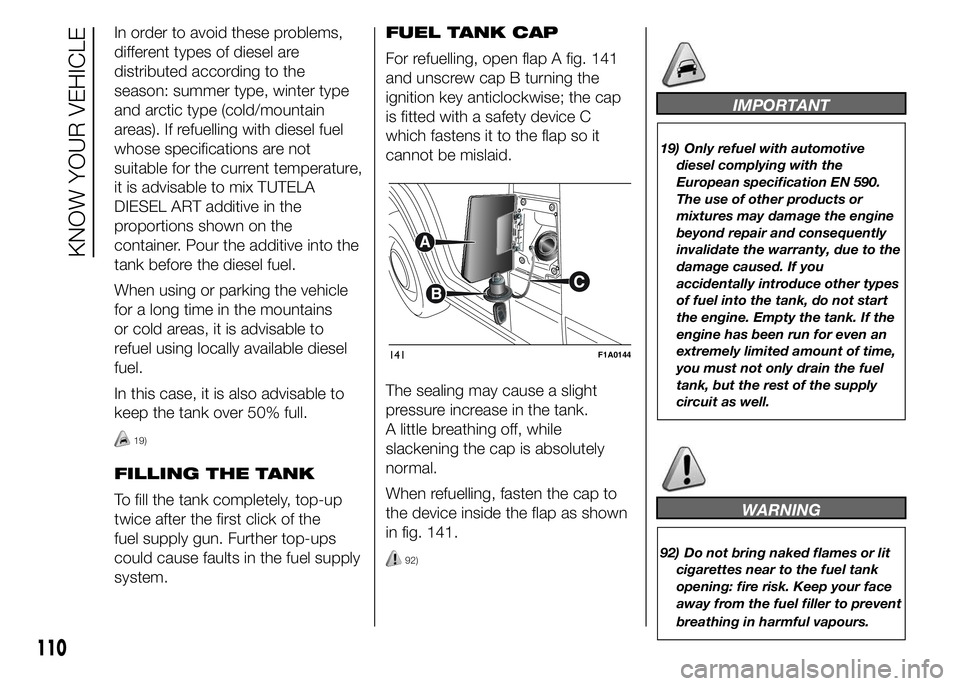
For refuelling, open flap A fig. 141
and unscrew cap B turning the
ignition key anticlockwise; the cap
is fitted with a safety device C
which fastens it to the flap so it
cannot be mislaid.
The sealing may cause a slight
pressure increase in the tank.
A little breathing off, while
slackening the cap is absolutely
normal.
When refuelling, fasten the cap to
the device inside the flap as shown
in fig. 141.
92)
IMPORTANT
19) Only refuel with automotive
diesel complying with the
European specification EN 590.
The use of other products or
mixtures may damage the engine
beyond repair and consequently
invalidate the warranty, due to the
damage caused. If you
accidentally introduce other types
of fuel into the tank, do not start
the engine. Empty the tank. If the
engine has been run for even an
extremely limited amount of time,
you must not only drain the fuel
tank, but the rest of the supply
circuit as well.
WARNING
92) Do not bring naked flames or lit
cigarettes near to the fuel tank
opening: fire risk. Keep your face
away from the fuel filler to prevent
breathing in harmful vapours.
141F1A0144
110
KNOW YOUR VEHICLE
Page 207 of 367
WARNING
141) Use your hazard lights, warning
triangle, etc. to show that your
vehicle is stationary according to
the regulations in force.
Passengers should get out of the
vehicle, particularly if it is heavily
loaded, and wait for the wheel
to be changed away from the
traffic. Apply the handbrake. in
the event of a wheel change on a
slope or on unsurfaced roads,
put any object as stop under the
wheels.
142) The spare wheel supplied (for
versions/markets, where
provided) is specific for your
vehicle. Therefore, it must not be
used on other models. Do not
use spare wheels of other models
on your vehicle. The wheel bolts
are specific for your vehicle: do
not use them on different models
and do not use bolts from other
models on your car.143) Have the wheel repaired and
refitted as soon as possible. Do
not apply grease to the bolt
threads before fitting: they could
come unscrewed.
144) Use the jack only to replace
wheels on the vehicle with which
it is supplied or on other vehicles
of the same model. Never use
the jack for other purposes, such
as lifting other car models. Never
use the jack to carry out repairs
under the vehicle. Incorrect
positioning of the jack may cause
the lifted vehicle to fall. Do not
use the jack for loads higher than
those shown on the label.
145) Never tamper with the inflation
valve. Never introduce tools of any
kind between rim and tyre. Check
tyre and spare wheel pressure
regularly, referring to the values
shown in the "Technical
specifications" section.
146) No tools other than the crank
provided should be used with
the spare wheel lifting device; it
should be operated by hand only.147) On versions equipped with
self-levelling air suspension, never
introduce the head or hands in
the wheel arch: the vehicle could
raise or lower automatically
depending on possible load or
temperature changes.
148) The device should only be
operated by hand, without using
any type of tool other than the
crank provided, like pneumatic or
electrical screwers.
149) The moving components of the
jack (screw and joints) can also
cause injuries: do not touch them.
If you come into contact with
lubricating grease, clean yourself
thoroughly.
150) At the end of the operation of
raising/locking the spare wheel,
after having checked the correct
positioning of the wheel under the
platform (yellow notch inside the
window on the device), the
spanner must be extracted, taking
care not to turn it in the wrong
direction (as in fig. 189) to
facilitate the extraction of the
spanner itself, to prevent the
attachment device from being
released and the wheel assembly
not being securely retained.
203
Page 212 of 367
IMPORTANT
2) Replace the bottle containing the
sealant after the expiry date.
Dispose of the bottle and
the sealant properly. Have the
sealing fluid and the bottle
disposed of in compliance with
national and local regulations.
CHANGING A BULB
GENERAL
INSTRUCTIONS
45)
163) 164)
❒When a light is not working, check
that the corresponding fuse is intact
before changing a bulb. For the
location of fuses, refer to the
paragraph "Replacing fuses" in this
chapter.
❒before changing a bulb check the
contacts for oxidation;
❒burnt bulbs must be replaced by
others of the same type and power;
❒always check the headlight beam
direction after changing a bulb;
IMPORTANT A slight misting may
appear on the internal surface
of the headlight: this does
not indicate a fault and is caused
by low temperature and the degree
of humidity in the air. Misting will
rapidly disappear when the
headlights are switched on. The
presence of drops inside the
headlights indicates infiltration of
water. Contact a Fiat Dealership.
IMPORTANT
45) Halogen bulbs must be handled
by holding the metallic part only.
Touching the transparent part
of the bulb with your fingers may
reduce the intensity of the
emitted light and even reduce the
lifespan of the bulb. In the event
of accidental contact, wipe the
bulb with a cloth moistened with
alcohol and let the bulb dry.
WARNING
163) Modifications or repairs to the
electric system that are not
carried out properly or do not take
the system technical
specifications into account can
cause malfunctions leading to the
risk of fire.
164) Halogen bulbs contain
pressurised gas; in the case of
breakage they may burst.
208
IN AN EMERGENCY
Page 242 of 367
ENGINE OIL
48)
Check the oil level a few minutes
(about 5) after the engine has
stopped, with the vehicle parked on
level ground.
The oil level must be between the
MIN and MAX marks on the
dipstick B fig. 239 - fig. 240 - fig.
241.
The range between the MIN and
MAX marks corresponds to about 1
litre of oil.
If the oil level is near or under the
MIN mark, add oil through the filler
A fig. 239 - fig. 240 - fig. 241,
until it reaches the MAX mark.
The oil level must never exceed the
MAX mark.
Engine oil
consumption
The maximum engine oil
consumption is usually 400 grams
every 1000 km.
When the vehicle is new, the engine
needs to be run in, therefore the
engine oil consumption can only be
considered stabilised after the first
5,000–6,000 km.IMPORTANT The oil consumption
depends on driving style and the
conditions under which the vehicle
is used.
IMPORTANT After adding or
changing the oil, let the engine run
for a few seconds and wait a few
minutes after switching it off before
checking the level.
IMPORTANT Always top up using
engine oil of the same
specifications as that already in the
engine.
ENGINE COOLANT
49)182)
The coolant level must be checked
when the engine is cold and must
range between the MIN and MAX
marks on the reservoir.
If the level is to low, operate as
follows:
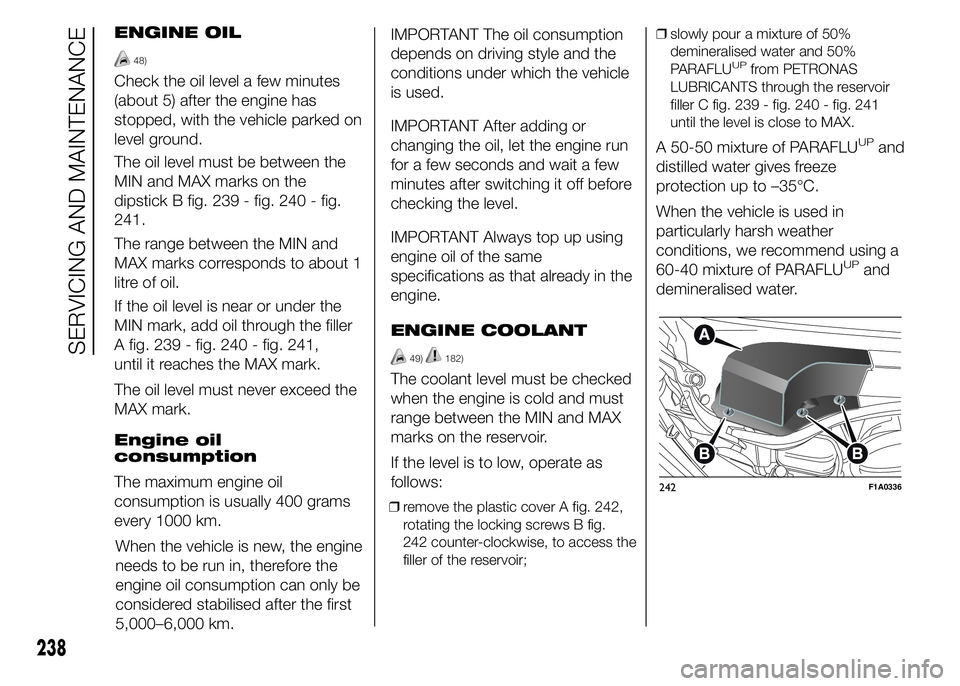
❒remove the plastic cover A fig. 242,
rotating the locking screws B fig.
242 counter-clockwise, to access the
filler of the reservoir;❒slowly pour a mixture of 50%
demineralised water and 50%
PARAFLU
UPfrom PETRONAS
LUBRICANTS through the reservoir
filler C fig. 239 - fig. 240 - fig. 241
until the level is close to MAX.
A 50-50 mixture of PARAFLUUPand
distilled water gives freeze
protection up to –35°C.
When the vehicle is used in
particularly harsh weather
conditions, we recommend using a
60-40 mixture of PARAFLU
UPand
demineralised water.
242F1A0336
238
SERVICING AND MAINTENANCE
Page 243 of 367
POWER STEERING
FLUID
188)
3)
51)
Check that the liquid contained in
the tank is at the maximum level.
This operation must be carried out
with the vehicle level and with
the engine off and cold.
Proceed as follows:
❒remove the plastic cover A fig. 242,
rotating the locking screws B fig.
242 counter-clockwise, to access the
filler of the reservoir;
❒check that the fluid level is up to the
MAX mark on the dipstick attached
to the fuel cap F fig. 239 - fig. 240
- fig. 241 (use the level shown on the
20°C side of the dipstick to check
when cold).
If the level of the fluid in the tank is
lower than the specified level,
top up using only one of the
products indicated in the "Fluid and
lubricants" table in the "Technical
specifications" section, proceeding
as follows:
❒Start the engine and wait for the fluid
level in the tank to stabilise.❒With the engine running, turn the
steering wheel from right to left
fully several times.
❒Top up the fuel to the MAX level and
then retighten the cap.
WINDSCREEN/REAR
WINDOW WASHER
FLUID
183) 184)
To add fluid:
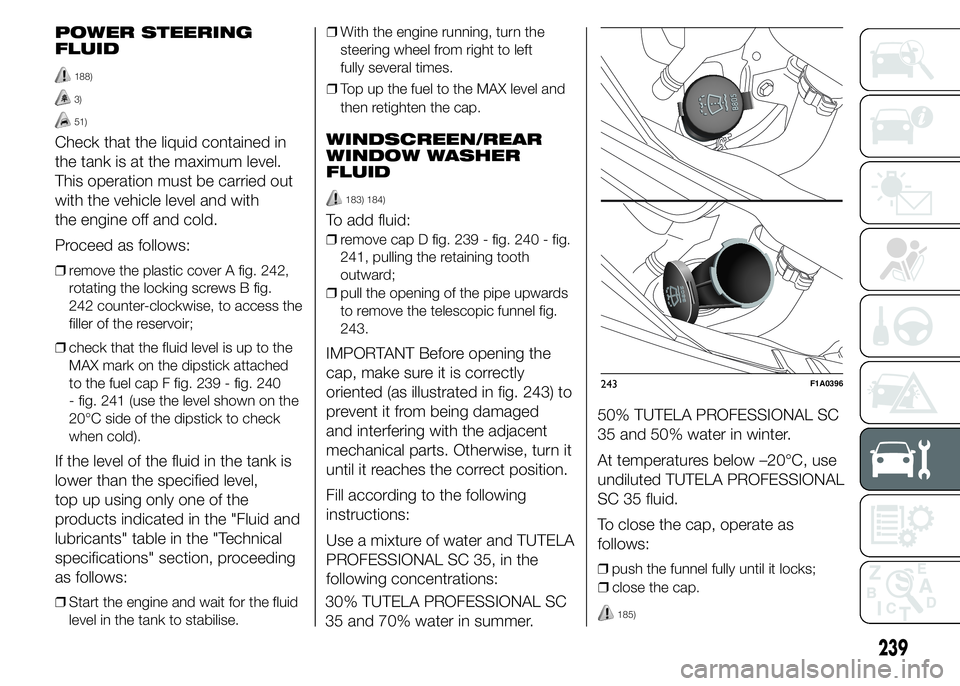
❒remove cap D fig. 239 - fig. 240 - fig.
241, pulling the retaining tooth
outward;
❒pull the opening of the pipe upwards
to remove the telescopic funnel fig.
243.
IMPORTANT Before opening the
cap, make sure it is correctly
oriented (as illustrated in fig. 243) to
prevent it from being damaged
and interfering with the adjacent
mechanical parts. Otherwise, turn it
until it reaches the correct position.
Fill according to the following
instructions:
Use a mixture of water and TUTELA
PROFESSIONAL SC 35, in the
following concentrations:
30% TUTELA PROFESSIONAL SC
35 and 70% water in summer.50% TUTELA PROFESSIONAL SC
35 and 50% water in winter.
At temperatures below –20°C, use
undiluted TUTELA PROFESSIONAL
SC 35 fluid.
To close the cap, operate as
follows:
❒push the funnel fully until it locks;
243F1A0396
239
❒close the cap.
185)
Page 244 of 367
BRAKE FLUID
186) 187)
50)
Undo the cap E fig. 239 - fig. 240 -
fig. 241 and check that the liquid
contained in the reservoir is at
the maximum level.
The fluid level in the reservoir must
not exceed the MAX mark.
Use the brake fluid shown in the
"Fluids and lubricants" table (see
"Technical Specifications").
NOTE Carefully clean the cap of the
reservoir and the surrounding
surface.
Take great care to ensure that
impurities do not enter the reservoir
when the plug is opened.
For topping-up, always use a funnel
with integrated filter with mesh
equal to or lower than 0.12 mm.IMPORTANT Brake fluid absorbs
moisture. For this reason, if the
vehicle is mainly used in areas with
a high degree of atmospheric
humidity, the fluid should be
replaced at more frequent intervals
than specified in the “Scheduled
Servicing Plan”.
IMPORTANT
47) When topping up, take care not
to mix up the various types of
fluids: they are not compatible
with each other and could
seriously damage the car.
48) The used engine oil and the filter
that has been replaced contain
substances that are harmful to
the environment. To change the
oil and filters, we advise you to
contact a Fiat Dealership.49) PARAFLU
UPantifreeze is used in
the engine cooling system. Use
fluid of the same type as that
contained in the cooling system
for any top-ups. PARAFLU
UP
cannot be mixed with any other
type of fluid. If this happens, do
not start the engine and contact a
Fiat Dealership.
50) Avoid allowing brake fluid, which
is extremely corrosive, to come
into contact with painted areas.
Should it happen, wash
immediately with water.
51) Do not press the power steering
end of travel lock for longer than 8
consecutive seconds with the
engine running because it will
cause noise and risk damaging
the system.
WARNING
180) Never smoke when performing
operations in the engine
compartment. Flammable gases
and fumes may be present and
risk igniting.
240
SERVICING AND MAINTENANCE