rear view mirror FIAT DUCATO BASE CAMPER 2016 Owner handbook (in English)
[x] Cancel search | Manufacturer: FIAT, Model Year: 2016, Model line: DUCATO BASE CAMPER, Model: FIAT DUCATO BASE CAMPER 2016Pages: 387, PDF Size: 20.76 MB
Page 13 of 387
KNOW YOUR VEHICLE
In-depth knowledge of your new vehicle
starts here.
The booklet that you are reading simply
and directly explains how it is made
and how it works.
That’s why we advise you to read it
seated comfortably on board, so that
you can see what is described here for
yourself.SYMBOLS ...................................... 11
THE FIAT CODE SYSTEM ............... 11
THE KEYS....................................... 12
ELECTRONIC ALARM..................... 14
IGNITION SWITCH .......................... 15
SEATS ............................................ 16
HEAD RESTRAINTS ........................ 24
STEERING WHEEL ......................... 25
REAR VIEW MIRRORS .................... 25
HEATING AND VENTILATION.......... 28
DIFFUSERS..................................... 29
HEATING AND VENTILATION
CONTROLS .................................... 29
MANUAL CLIMATE CONTROL
SYSTEM ......................................... 32
AUTOMATIC CLIMATE CONTROL
SYSTEM ......................................... 35
ADDITIONAL HEATER ..................... 41
INDEPENDENT ADDITIONAL
HEATER .......................................... 41
EXTERNAL LIGHTS......................... 47
WINDOW CLEANING ...................... 51
CRUISE CONTROL ......................... 54
ROOF LIGHTS ................................ 57
CONTROLS .................................... 59
FUEL CUT-OFF SWITCH ................ 62INTERIOR FITTINGS ...................... 63
TACHOGRAPH ............................... 68
SPEED BLOCK ............................... 69
SELF-LEVELLING AIR
SUSPENSION ................................. 69
DOORS ........................................... 70
ELECTRIC WINDOWS .................... 76
BONNET ......................................... 77
ROOF RACK/SKI RACK .................. 79
HEADLIGHTS.................................. 79
ABS ................................................ 80
ESC (ELECTRONIC STABILITY
CONTROL) SYSTEM ....................... 82
TRACTION PLUS SYSTEM ............. 86
TPMS (TYRE PRESSURE
MONITORING SYSTEM) ................. 87
DRIVING ADVISOR ......................... 90
REAR CAMERA (PARKVIEW®
REAR BACK UP CAMERA) ............. 95
TRAFFIC SIGN RECOGNITION ....... 97
EOBD SYSTEM............................... 98
PARKING SENSORS....................... 99
START&STOP SYSTEM ..................101
ADDITIVE FOR DIESEL EMISSIONS
ADBLUE (UREA)..............................104
9
Page 29 of 387
STEERING WHEEL
The steering wheel position can be
adjusted axially.
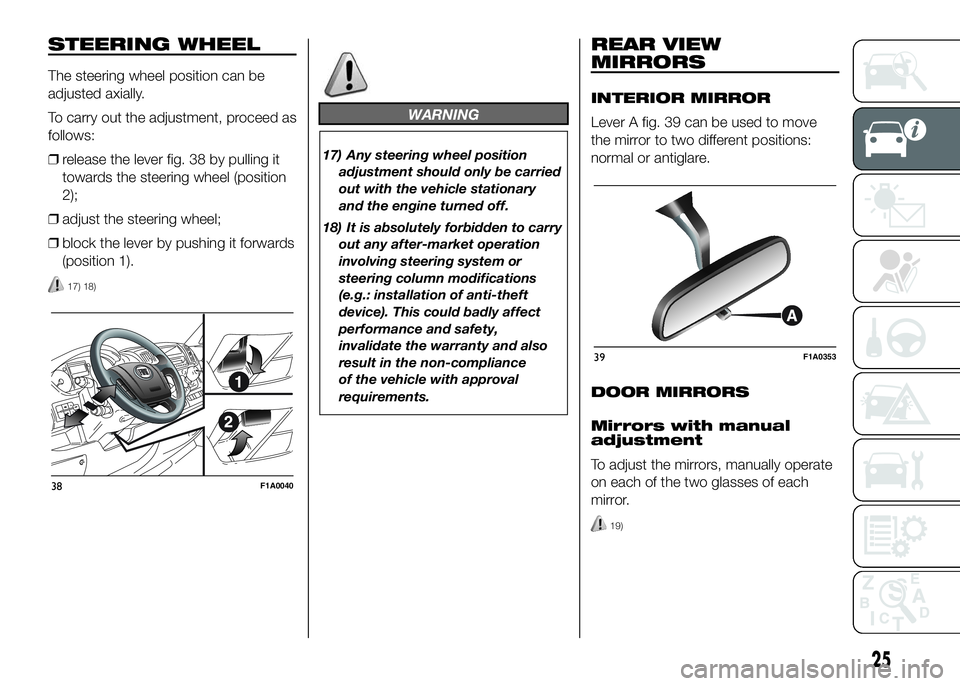
To carry out the adjustment, proceed as
follows:
❒release the lever fig. 38 by pulling it
towards the steering wheel (position
2);
❒adjust the steering wheel;
❒block the lever by pushing it forwards
(position 1).
17) 18)
WARNING
17) Any steering wheel position
adjustment should only be carried
out with the vehicle stationary
and the engine turned off.
18) It is absolutely forbidden to carry
out any after-market operation
involving steering system or
steering column modifications
(e.g.: installation of anti-theft
device). This could badly affect
performance and safety,
invalidate the warranty and also
result in the non-compliance
of the vehicle with approval
requirements.
REAR VIEW
MIRRORS
INTERIOR MIRROR
Lever A fig. 39 can be used to move
the mirror to two different positions:
normal or antiglare.
DOOR MIRRORS
Mirrors with manual
adjustment
To adjust the mirrors, manually operate
on each of the two glasses of each
mirror.
19)
38F1A0040
39F1A0353
25
Page 31 of 387
Manual folding
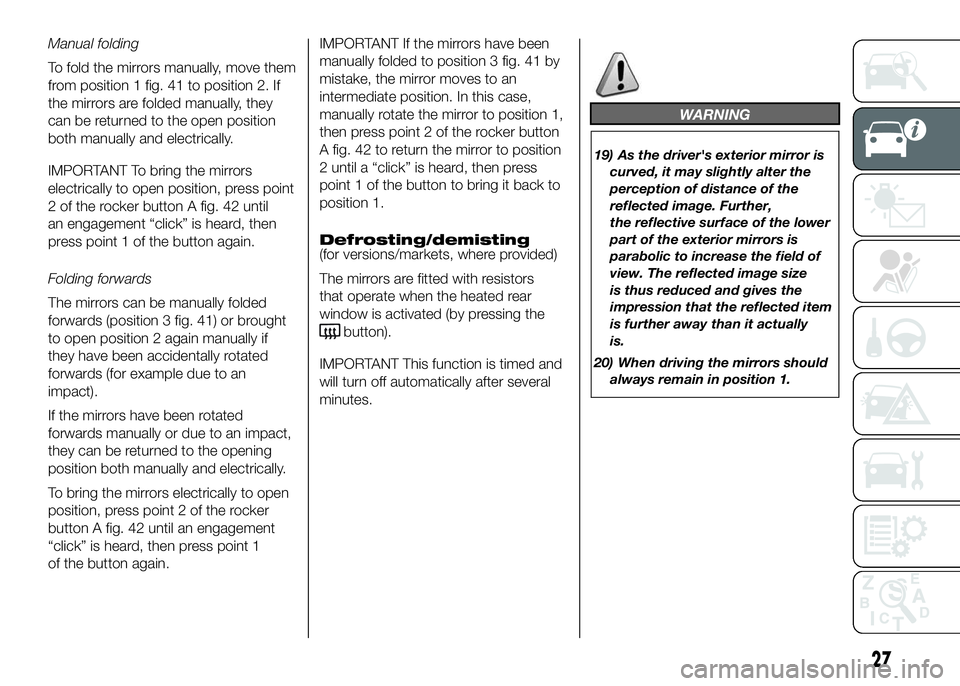
To fold the mirrors manually, move them
from position 1 fig. 41 to position 2. If
the mirrors are folded manually, they
can be returned to the open position
both manually and electrically.
IMPORTANT To bring the mirrors
electrically to open position, press point
2 of the rocker button A fig. 42 until
an engagement “click” is heard, then
press point 1 of the button again.
Folding forwards
The mirrors can be manually folded
forwards (position 3 fig. 41) or brought
to open position 2 again manually if
they have been accidentally rotated
forwards (for example due to an
impact).
If the mirrors have been rotated
forwards manually or due to an impact,
they can be returned to the opening
position both manually and electrically.
To bring the mirrors electrically to open
position, press point 2 of the rocker
button A fig. 42 until an engagement
“click” is heard, then press point 1
of the button again.IMPORTANT If the mirrors have been
manually folded to position 3 fig. 41 by
mistake, the mirror moves to an
intermediate position. In this case,
manually rotate the mirror to position 1,
then press point 2 of the rocker button
A fig. 42 to return the mirror to position
2 until a “click” is heard, then press
point 1 of the button to bring it back to
position 1.
Defrosting/demisting
(for versions/markets, where provided)
The mirrors are fitted with resistors
that operate when the heated rear
window is activated (by pressing the
button).
IMPORTANT This function is timed and
will turn off automatically after several
minutes.
WARNING
19) As the driver's exterior mirror is
curved, it may slightly alter the
perception of distance of the
reflected image. Further,
the reflective surface of the lower
part of the exterior mirrors is
parabolic to increase the field of
view. The reflected image size
is thus reduced and gives the
impression that the reflected item
is further away than it actually
is.
20) When driving the mirrors should
always remain in position 1.
27
Page 40 of 387
The system allows the following
parameters and functions to be set or
altered manually: air temperature,
fan speed (continuous variation); air
distribution in seven positions;
compressor enablement; fast
defrosting/demisting function; air
recirculation; switching off the system;
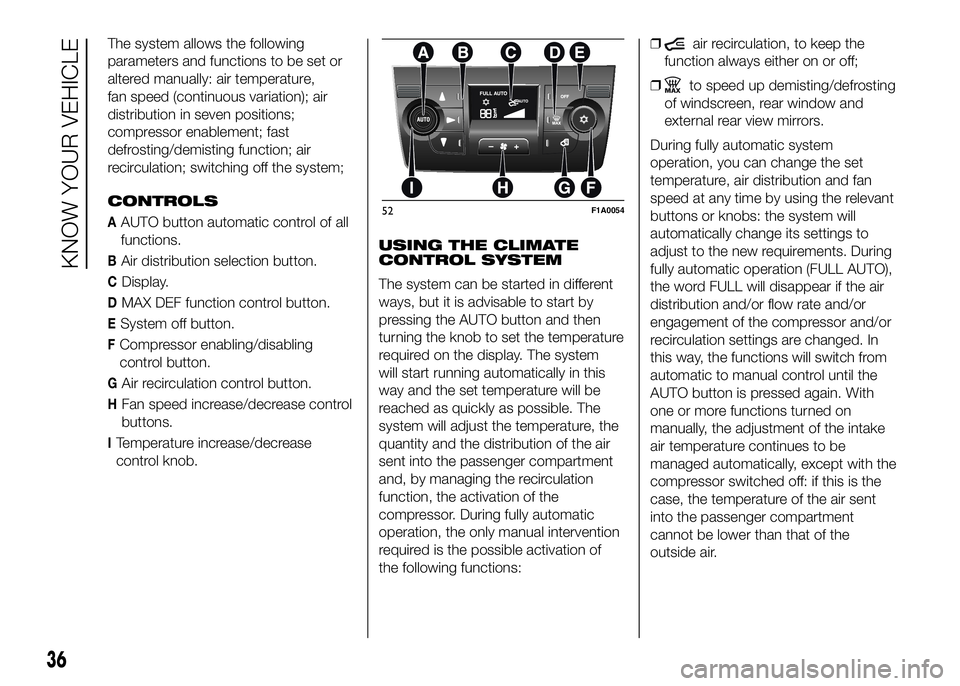
CONTROLS
AAUTO button automatic control of all
functions.
BAir distribution selection button.
CDisplay.
DMAX DEF function control button.
ESystem off button.
FCompressor enabling/disabling
control button.
GAir recirculation control button.
HFan speed increase/decrease control
buttons.
ITemperature increase/decrease
control knob.USING THE CLIMATE
CONTROL SYSTEM
The system can be started in different
ways, but it is advisable to start by
pressing the AUTO button and then
turning the knob to set the temperature
required on the display. The system
will start running automatically in this
way and the set temperature will be
reached as quickly as possible. The
system will adjust the temperature, the
quantity and the distribution of the air
sent into the passenger compartment
and, by managing the recirculation
function, the activation of the
compressor. During fully automatic
operation, the only manual intervention
required is the possible activation of
the following functions:❒
air recirculation, to keep the
function always either on or off;
❒
to speed up demisting/defrosting
of windscreen, rear window and
external rear view mirrors.
During fully automatic system
operation, you can change the set
temperature, air distribution and fan
speed at any time by using the relevant
buttons or knobs: the system will
automatically change its settings to
adjust to the new requirements. During
fully automatic operation (FULL AUTO),
the word FULL will disappear if the air
distribution and/or flow rate and/or
engagement of the compressor and/or
recirculation settings are changed. In
this way, the functions will switch from
automatic to manual control until the
AUTO button is pressed again. With
one or more functions turned on
manually, the adjustment of the intake
air temperature continues to be
managed automatically, except with the
compressor switched off: if this is the
case, the temperature of the air sent
into the passenger compartment
cannot be lower than that of the
outside air.
52F1A0054
36
KNOW YOUR VEHICLE
Page 57 of 387
RAIN SENSOR
(for versions/markets, where provided)
The rain sensor is located behind the
rear view mirror in contact with the
windscreen and has the purpose of
automatically adjusting the frequency of
the windscreen wiper strokes
depending on the intensity of the rain
during intermittent operation.
IMPORTANT Keep the glass in the
sensor area clean.
Activation fig. 64
Move the right lever down by one click
(position B).
The activation of the sensor is signalled
by a "stroke" to show that the
command has been acquired.
Turn the control F to increase the rain
sensor sensitivity.
The increasing of the rain sensor
sensitivity is signalled by a "stroke" to
show that the command has been
acquired.
If the windscreen washer is used with
the rain sensor activated, the normal
washing cycle is performed, after which
the rain sensor resumes its normal
automatic operation.Deactivation fig. 64
Move the lever from position B or turn
the ignition key to OFF. The next time
the vehicle is started (ignition key in ON
position), the sensor is not reactivated
even if the lever is still in position B.
To activate the sensor, move the lever
to position A or C and then back to
position B or turn the ring nut for
adjusting the sensitivity. Rain sensor
activation will be indicated by at least
one wiper “stroke” even if the
windscreen is dry.
The rain sensor is capable of
recognising the difference between day
and night and making the necessary
adjustments automatically.
26)
HEADLIGHT WASHERS
(for versions/markets, where provided)
The headlight washers are “retractable”,
i.e.: they are located inside the front
bumper and they are activated when
(with dipped beams on) the windscreen
washer is operated.
IMPORTANT Check the correct
condition and cleanliness of nozzles at
regular intervals.
IMPORTANT
3) Do not use the screen wiper to
remove layers of snow or ice
from the windscreen. In such
conditions, the windscreen wiper
may be subjected to excessive
stress and the motor cut-out
switch, which prevents operation
for a few seconds, may intervene.
If operation is not restored,
contact a Fiat Dealership.
53
Page 70 of 387
USB PORTS
(for versions/markets where provided)
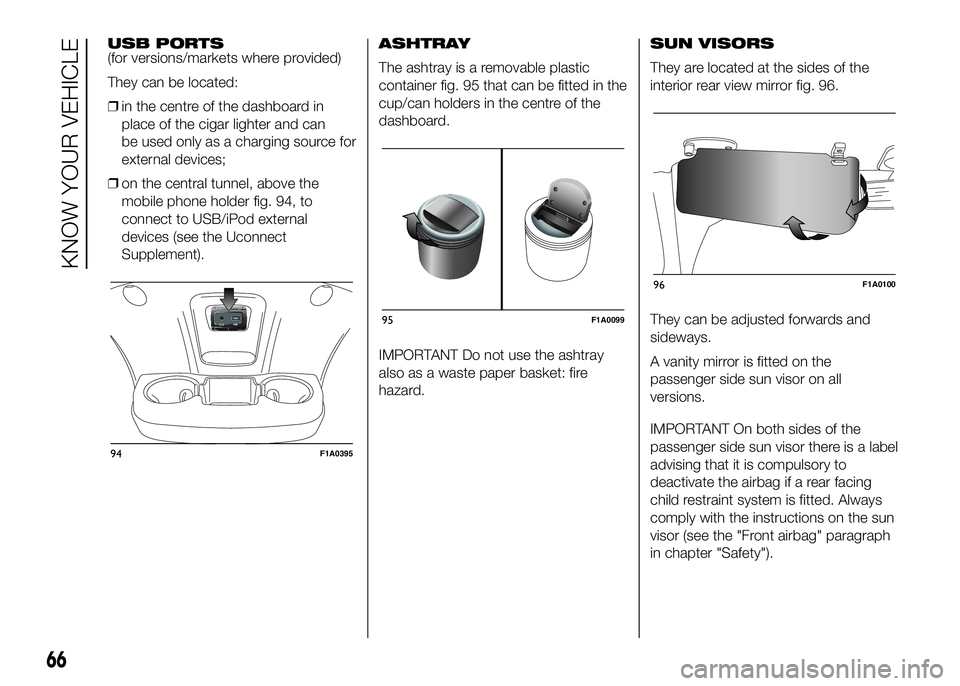
They can be located:
❒in the centre of the dashboard in
place of the cigar lighter and can
be used only as a charging source for
external devices;
❒on the central tunnel, above the
mobile phone holder fig. 94, to
connect to USB/iPod external
devices (see the Uconnect
Supplement).ASHTRAY
The ashtray is a removable plastic
container fig. 95 that can be fitted in the
cup/can holders in the centre of the
dashboard.
IMPORTANT Do not use the ashtray
also as a waste paper basket: fire
hazard.SUN VISORS
They are located at the sides of the
interior rear view mirror fig. 96.
They can be adjusted forwards and
sideways.
A vanity mirror is fitted on the
passenger side sun visor on all
versions.
IMPORTANT On both sides of the
passenger side sun visor there is a label
advising that it is compulsory to
deactivate the airbag if a rear facing
child restraint system is fitted. Always
comply with the instructions on the sun
visor (see the "Front airbag" paragraph
in chapter "Safety").
94F1A0395
95F1A0099
96F1A0100
66
KNOW YOUR VEHICLE
Page 94 of 387
72) Tyre pressure must be checked
with tyres cold. Should it become
necessary for whatever reason
to check pressure with warm
tyres, do not reduce pressure
even if it is higher than the
prescribed value, but repeat the
check when tyres are cold.
73) The TPMS cannot indicate
sudden tyre pressure drops (for
example when a tyre bursts).
In this case, stop the car, braking
with caution and avoiding abrupt
steering.
74) The system only warns that the
tyre pressure is low: it is not able
to inflate them.
75) An insufficient tyre inflation
increases fuel consumption,
reduces the tread duration and
may affect the capacity of driving
safely.
76) Always refit the valve stem cap
after inspecting or adjusting tyre
pressure. This prevents dampness
or dirt from entering the valve
stem and thus the pressure
control sensor from being
damaged.77) The tyre repair kit (Fix&Go)
provided with the car (for
versions/markets, where
provided) is compatible with the
TPMS sensors; using sealants not
equivalent with that in the original
kit may adversely affect its
operation. If sealants not
equivalent with the original one
are used, it is recommended to
have the TPMS sensor operation
checked by a qualified repair
centre.DRIVING ADVISOR
(lane crossing warning)
(for versions/markets, where provided)
82) 79) 80)
The Driving Advisor is a warning system
that notifies the driver if he/she crosses
the lane because he/she has been
distracted.
A video sensor, fitted on the windscreen
near the interior rear view mirror,
detects the lane demarcation lines and
the position of the car in relation to
them.
IMPORTANT On cars with Driving
Advisor, it is advisable to contact a Fiat
Dealership should the windscreen
need to be replaced. If the repair is
carried out at a specialist window
replacement centre, it is still necessary
to go to a Fiat Dealership to have the
camera calibrated.
90
KNOW YOUR VEHICLE
Page 102 of 387
TRAFFIC SIGN
RECOGNITION
(for versions/markets, where provided)
78) 83) 84) 85)
10) 11) 12) 13) 14) 15) 16)
The system automatically detects the
recognisable traffic signs: speed limits,
no overtaking signs and signs indicating
the end of such prohibitions.
The camera is fitted behind the internal
rear view mirror. The sensor always
checks the traffic signs indicating the
current speed limit and possible no
overtaking signs.
IMPORTANT The system is designed to
read signs complying with the
specifications of the Vienna convention.
USE OF THE TRAFFIC
SIGN RECOGNITION
System switching on
and off
The system can be activated/
deactivated using the display menu.
Refer to the "Display" paragraph in the
"Knowing the instrument panel"
chapter.
Note: the system condition and settings
do not change throughout the different
on-off cycles.The system condition can always be
shown on the display.
The system displaying includes the
following two steps:
❒All new traffic signs that can be
recognised are displayed as pop-ups
for 40 seconds over the other
signallings.
❒After the preset time, they are
displayed in the dedicated screen on
the panel.
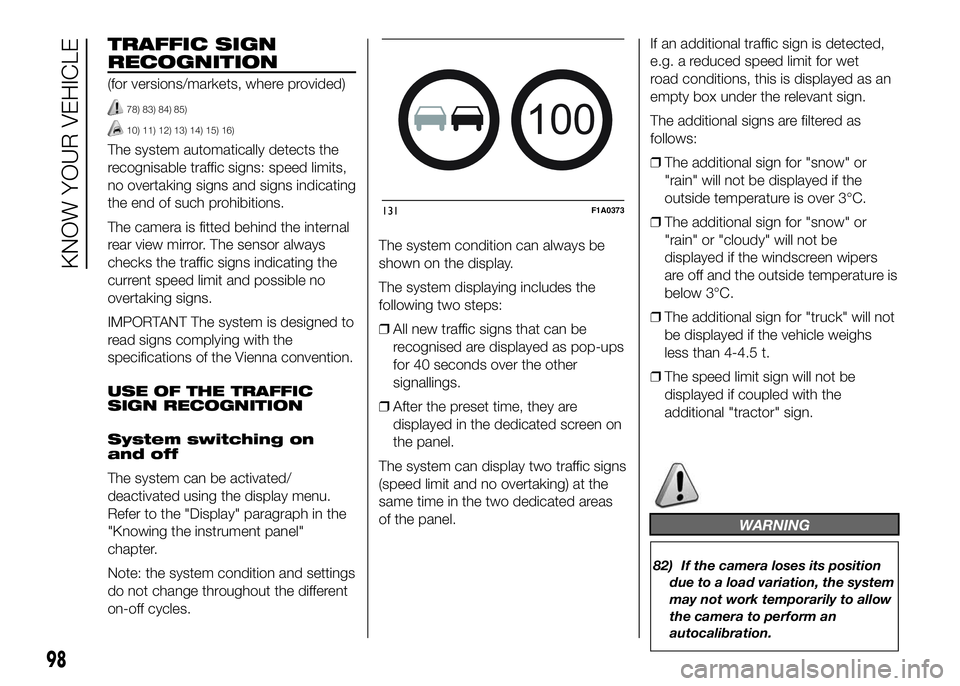
The system can display two traffic signs
(speed limit and no overtaking) at the
same time in the two dedicated areas
of the panel.If an additional traffic sign is detected,
e.g. a reduced speed limit for wet
road conditions, this is displayed as an
empty box under the relevant sign.
The additional signs are filtered as
follows:
❒The additional sign for "snow" or
"rain" will not be displayed if the
outside temperature is over 3°C.
❒The additional sign for "snow" or
"rain" or "cloudy" will not be
displayed if the windscreen wipers
are off and the outside temperature is
below 3°C.
❒The additional sign for "truck" will not
be displayed if the vehicle weighs
less than 4-4.5 t.
❒The speed limit sign will not be
displayed if coupled with the
additional "tractor" sign.
WARNING
82) If the camera loses its position
due to a load variation, the system
may not work temporarily to allow
the camera to perform an
autocalibration.
100
131F1A0373
98
KNOW YOUR VEHICLE
Page 385 of 387
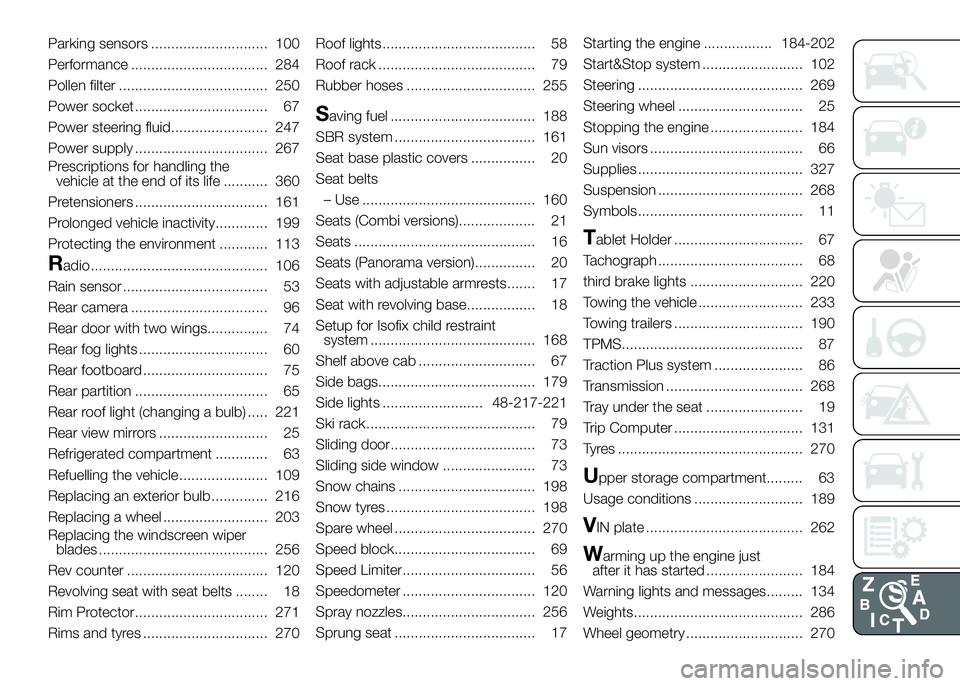
Parking sensors ............................. 100
Performance .................................. 284
Pollen filter ..................................... 250
Power socket ................................. 67
Power steering fluid........................ 247
Power supply ................................. 267
Prescriptions for handling the
vehicle at the end of its life ........... 360
Pretensioners ................................. 161
Prolonged vehicle inactivity............. 199
Protecting the environment ............ 113
Radio ............................................ 106
Rain sensor .................................... 53
Rear camera .................................. 96
Rear door with two wings............... 74
Rear fog lights ................................ 60
Rear footboard ............................... 75
Rear partition ................................. 65
Rear roof light (changing a bulb) ..... 221
Rear view mirrors ........................... 25
Refrigerated compartment ............. 63
Refuelling the vehicle ...................... 109
Replacing an exterior bulb .............. 216
Replacing a wheel .......................... 203
Replacing the windscreen wiper
blades .......................................... 256
Rev counter ................................... 120
Revolving seat with seat belts ........ 18
Rim Protector................................. 271
Rims and tyres ............................... 270Roof lights...................................... 58
Roof rack ....................................... 79
Rubber hoses ................................ 255
Saving fuel .................................... 188
SBR system ................................... 161
Seat base plastic covers ................ 20
Seat belts
– Use ........................................... 160
Seats (Combi versions)................... 21
Seats ............................................. 16
Seats (Panorama version)............... 20
Seats with adjustable armrests....... 17
Seat with revolving base................. 18
Setup for Isofix child restraint
system ......................................... 168
Shelf above cab ............................. 67
Side bags....................................... 179
Side lights ......................... 48-217-221
Ski rack.......................................... 79
Sliding door.................................... 73
Sliding side window ....................... 73
Snow chains .................................. 198
Snow tyres ..................................... 198
Spare wheel ................................... 270
Speed block................................... 69
Speed Limiter................................. 56
Speedometer ................................. 120
Spray nozzles................................. 256
Sprung seat ................................... 17Starting the engine ................. 184-202
Start&Stop system ......................... 102
Steering ......................................... 269
Steering wheel ............................... 25
Stopping the engine ....................... 184
Sun visors ...................................... 66
Supplies ......................................... 327
Suspension .................................... 268
Symbols......................................... 11
Tablet Holder ................................ 67
Tachograph .................................... 68
third brake lights ............................ 220
Towing the vehicle .......................... 233
Towing trailers ................................ 190
TPMS............................................. 87
Traction Plus system ...................... 86
Transmission .................................. 268
Tray under the seat ........................ 19
Trip Computer ................................ 131
Tyres .............................................. 270
Upper storage compartment......... 63
Usage conditions ........................... 189
VIN plate ....................................... 262
Warming up the engine just
after it has started ........................ 184
Warning lights and messages......... 134
Weights.......................................... 286
Wheel geometry ............................. 270