reset FIAT DUCATO BASE CAMPER 2016 Owner handbook (in English)
[x] Cancel search | Manufacturer: FIAT, Model Year: 2016, Model line: DUCATO BASE CAMPER, Model: FIAT DUCATO BASE CAMPER 2016Pages: 387, PDF Size: 20.76 MB
Page 16 of 387
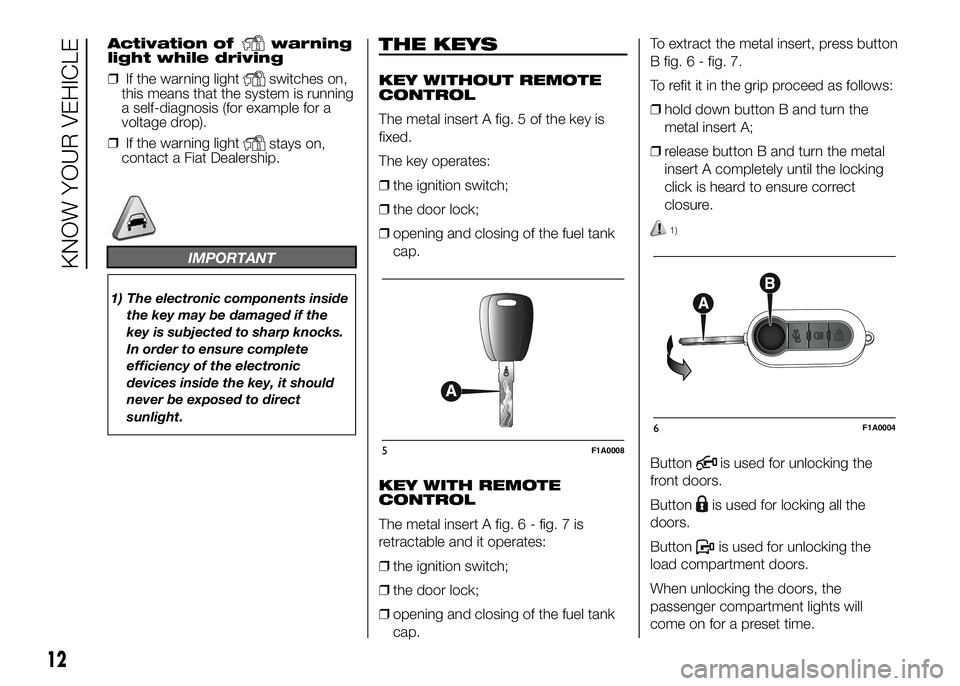
Activation ofwarning
light while driving
❒If the warning light
switches on,
this means that the system is running
a self-diagnosis (for example for a
voltage drop).
❒If the warning light
stays on,
contact a Fiat Dealership.
IMPORTANT
1) The electronic components inside
the key may be damaged if the
key is subjected to sharp knocks.
In order to ensure complete
efficiency of the electronic
devices inside the key, it should
never be exposed to direct
sunlight.
THE KEYS
KEY WITHOUT REMOTE
CONTROL
The metal insert A fig. 5 of the key is
fixed.
The key operates:
❒the ignition switch;
❒the door lock;
❒opening and closing of the fuel tank
cap.
KEY WITH REMOTE
CONTROL
The metal insert A fig.6-fig.7is
retractable and it operates:
❒the ignition switch;
❒the door lock;
❒opening and closing of the fuel tank
cap.To extract the metal insert, press button
B fig. 6 - fig. 7.
To refit it in the grip proceed as follows:
❒hold down button B and turn the
metal insert A;
❒release button B and turn the metal
insert A completely until the locking
click is heard to ensure correct
closure.
1)
Buttonis used for unlocking the
front doors.
Button
is used for locking all the
doors.
Button
is used for unlocking the
load compartment doors.
When unlocking the doors, the
passenger compartment lights will
come on for a preset time.
5F1A0008
6F1A0004
12
KNOW YOUR VEHICLE
Page 49 of 387
Operation duration
setting
Hold the button pressed. At the same
time press button 3 or 8.
The time and warning light 7 are
displayed.
Hold button 4 pressed again. At the
same time press button 3 or 8.
The preset activation duration is
displayed and warning light 9 or 2
flashes.
Set the activation duration with button
3or8.
The set activation duration is stored as
soon as the text in the display
disappears, or pressing button 4.Switching the heating
system off
Deactivation of the system, depending
on the type of activation (automatic
or manual), may be:
❒automaticwhen the programmed
duration is over; when the set time
is over, the display switches off.
❒manualpressing the “immediate
heating” button on the timer again
(flame button 6).
In both cases, the heating warning light,
the display lighting and the passenger
compartment heater fan go off and
burning stops.
The fluid circulation pump continues to
work for around two minutes to
dissipate as much heat as possible; the
heater can be turned back on during
this stage.
22)
IMPORTANT The parking heater goes
off when battery voltage is low to allow
the vehicle to be started.
IMPORTANT Before turning on the
device, ensure that the fuel level is
above the reserve. Otherwise the
device could lock and require
the assistance of a Fiat Dealership.
❒Always turn off the heater when
refuelling and near service stations to
avoid the risk of explosion or fire
hazards.
❒Do not park the vehicle on
inflammable material such as paper,
grass or dry leaves: fire hazard!
❒The temperature near the heater
should not exceed 120°C (e.g. during
oven painting in a body shop). The
electronic control unit components
may be damaged at higher
temperatures.
❒Whilst the heater is operating with the
engine switched off, it absorbs
energy from the battery; the engine
should therefore be left running
for a while to make sure that the
battery is properly recharged.
45
Page 54 of 387
DIRECTION INDICATORS
Bring the stalk into (stable) position fig.
61:
❒up (position 1): to activate the right
direction indicator;
❒down (position 2): to activate the left
direction indicator.
Warning light
orwill blink on the
instrument panel.
Direction indicators switch off
automatically when the vehicle is back
in a straight line.Lane change function
If you wish to signal a lane change,
place the left stalk in the unstable
position for less than half a second. The
direction indicator on the side selected
will flash five times and then switch
off automatically.
“FOLLOW ME HOME”
DEVICE
This device allows the illumination of the
space in front of the vehicle for a preset
time.
Activation
With ignition key at OFF or removed,
pull the stalk towards the steering
wheel fig. 62 and move it within
2 minutes after the engine stops.
Each time the stalk is moved, the lights
stay on for an extra 30 seconds up to
a maximum of 210 seconds; then
the lights are switched off automatically.
The warning light
on the
instrument panel will light up and the
corresponding message will appear in
the display (see “Warning lights and
messages” section) for as long as the
function is activated.The warning light comes on when the
stalk is operated and stays on until
the function is automatically
deactivated.
Each movement of the stalk only
increases the amount of time the lights
stay on.
Deactivation
Keep the stalk pulled towards the
steering wheel fig. 62 for more than two
seconds.61F1A0068
62F1A0069
50
KNOW YOUR VEHICLE
Page 58 of 387
WARNING
26) Streaks of water may cause
unnecessary blade movements.
CRUISE CONTROL
(for versions/markets, where provided)
IN BRIEF
This is an electronic driving aid that
allowsyou to drive at a speed of
above 30 km/h on long and straight
dry roads with few driving changes
(e.g. motorways) at a preset speed
without having to press the
accelerator pedal. It is therefore not
recommended to use this device
on extra-urban roads with traffic. Do
not use it in town.
Switching the device on
Turn ring nut A fig. 66 - fig. 67 to ON
or
(according to the version).The Cruise Control cannot be engaged
in 1st or reverse gear. It is advisable
to engage it in 4th or higher gears.
When travelling downhill with the device
engaged, the vehicle speed may
slightly exceed the stored one.
When the device is activated the
warning light
comes on together
with the relevant message on the
instrument panel.
66 - Versions without Speed LimiterF1A0364
67 - Versions with Speed LimiterF1A0363
54
KNOW YOUR VEHICLE
Page 102 of 387
TRAFFIC SIGN
RECOGNITION
(for versions/markets, where provided)
78) 83) 84) 85)
10) 11) 12) 13) 14) 15) 16)
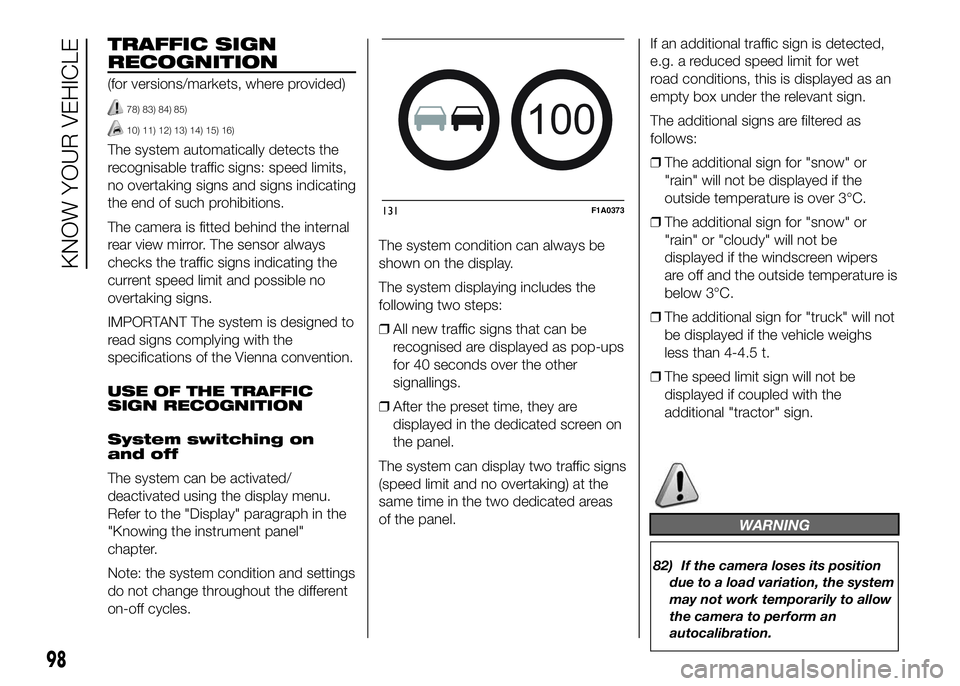
The system automatically detects the
recognisable traffic signs: speed limits,
no overtaking signs and signs indicating
the end of such prohibitions.
The camera is fitted behind the internal
rear view mirror. The sensor always
checks the traffic signs indicating the
current speed limit and possible no
overtaking signs.
IMPORTANT The system is designed to
read signs complying with the
specifications of the Vienna convention.
USE OF THE TRAFFIC
SIGN RECOGNITION
System switching on
and off
The system can be activated/
deactivated using the display menu.
Refer to the "Display" paragraph in the
"Knowing the instrument panel"
chapter.
Note: the system condition and settings
do not change throughout the different
on-off cycles.The system condition can always be
shown on the display.
The system displaying includes the
following two steps:
❒All new traffic signs that can be
recognised are displayed as pop-ups
for 40 seconds over the other
signallings.
❒After the preset time, they are
displayed in the dedicated screen on
the panel.
The system can display two traffic signs
(speed limit and no overtaking) at the
same time in the two dedicated areas
of the panel.If an additional traffic sign is detected,
e.g. a reduced speed limit for wet
road conditions, this is displayed as an
empty box under the relevant sign.
The additional signs are filtered as
follows:
❒The additional sign for "snow" or
"rain" will not be displayed if the
outside temperature is over 3°C.
❒The additional sign for "snow" or
"rain" or "cloudy" will not be
displayed if the windscreen wipers
are off and the outside temperature is
below 3°C.
❒The additional sign for "truck" will not
be displayed if the vehicle weighs
less than 4-4.5 t.
❒The speed limit sign will not be
displayed if coupled with the
additional "tractor" sign.
WARNING
82) If the camera loses its position
due to a load variation, the system
may not work temporarily to allow
the camera to perform an
autocalibration.
100
131F1A0373
98
KNOW YOUR VEHICLE
Page 103 of 387
83) The system only detects the
preset traffic signs. If the
minimum visibility conditions and
distance from the sign are met
it can detect all traffic signs.
84) The system is a driving
assistance system but it does not
relieve the driver of the
responsibility of driving with due
attention and diligence in
compliance with the laws in force.
85) When the system is active, the
driver is responsible for
controlling the vehicle and
monitoring the system, and must
intervene as appropriate if
necessary.
IMPORTANT
10) If the sensor is blocked, the
system may not work.
11) In the case of low temperatures
or harsh weather conditions, the
system may not work.
12) Rain, snow, splashes and strong
light contrast may influence the
sensor.13) Do not repair the area of the
windscreen directly surrounding
the sensor.
14) If the vehicle is equipped with a
non-genuine suspension kit, the
system may not work correctly.
15) Always use genuine spare parts
when replacing the bulbs of the
headlights. Other bulbs may
reduce the system performance.
16) Clean the windscreen from
foreign matters such as bird
droppings, insects, snow or ice.
EOBD SYSTEM
The EOBD system (European On Board
Diagnosis) allows continuous diagnosis
of emission-related components on
the vehicle to be made.
It also alerts the driver, by turning on
the
warning light in the instrument
panel (together with relevant message
in the multifunction display, for
versions/markets where provided) when
these components are no longer in
peak condition (see “Warning lights and
messages” paragraph).
The aim of the system is to:
❒monitor system efficiency;
❒indicate an increase in emissions due
to vehicle malfunction;
❒indicate the need to replace
components which have
deteriorated.
The system also has a connector that
can be interfaced with appropriate
equipment, which makes it possible to
read the error codes stored in the
control unit together with a series of
specific parameters for engine
operation and diagnosis. This check
can also be carried out by traffic control
authorities.
99
Page 133 of 387
- briefly press the MODE button: the
previously set volume "level" will flash
on the display;
- press the
orbutton to
adjust;
- press the MODE button briefly to
return to the menu screen or hold the
button down to return to the standard
screen without storing.
Service
Scheduled servicing
Using this function you can display
information about the mileage intervals
for vehicle servicing.
To consult this information, proceed as
follows:
– briefly press the MODE button: the
display shows service requirements in
km or mi according to the previous
setting (see paragraph “Unit of
measure”);
– briefly press button MODE to go back
to the menu screen or press the button
for longer to go back to the standard
screen.
Oil change
This function displays information
regarding the remaining mileage before
the next oil change.To consult this information, proceed as
follows:
– briefly press the MODE button; the
display shows the estimated km
distance to the next oil change
(depending on the driving mode);
– briefly press button MODE to go back
to the menu screen or press the button
for longer to go back to the standard
screen.NoteThe "Scheduled Servicing Plan"
requires the vehicle to be serviced every
48,000 km (or 30,000 mi). This
indication will appear automatically, with
the key at MAR-ON, starting from
2,000 km (or 1,240 mi) and will be
displayed every 200 km (or 124 mi). Oil
change notification messages are
displayed in the same way. Use the
andbuttons to alternate
between displaying scheduled servicing
and engine oil change information.
Below 200 km servicing indications are
more frequent. The display will be in
km or mi depending on the
measurement unit settings. When the
next scheduled service is approaching,
the word “Service” will appear on the
display, followed by the number of
kilometres or miles left, when the key is
turned to MAR-ON. Contact a Fiat
Dealership to carry out any service
operation in the "Scheduled servicing
plan" and to reset the display.
129
Page 135 of 387
Exit Menu
This is the last function that closes the
cycle of settings listed in the menu
screen.
Pressing the MODE button briefly will
return the display to the standard
screen without storing.
Press button
to return to the first
menu item (Speed Beep).
TRIP COMPUTER
IN BRIEF
The Trip computer is used to display
informationon vehicle operation
when the ignition key is turned to
MAR-ON. This function allows you to
define two separate trips, called
"Trip A" and "Trip B", for monitoring
the "complete mission" (journey)
of the vehicle in a reciprocally
independent manner. Both functions
can be reset (reset means start of
a new journey).
“Trip A” is used to display the figures
relating to:
❒Outside temperature
❒Range
❒Distance travelled A
❒Average consumption A
❒Instant fuel consumption
❒Average speed A
❒Trip time A (driving time).
❒Reset Trip A
"Trip B", available on multifunction
display only, is used to display
the values relating to:❒Distance travelled B
❒Average consumption B
❒Average speed B
❒Trip time B (driving time).21)
Values displayed
Outside temperature
Indicates the temperature outside the
vehicle passenger compartment.
Range (for versions/markets, where
provided)
This indicates the distance that can still
be travelled with the fuel in the tank,
assuming that driving style remains
unvaried. The display will show the
reading '-----' when the following
events take place:
❒range value lower than 50 km (or 30
mi)
❒vehicle is left parked with the engine
running for a long time.
131
Page 136 of 387
IMPORTANT The range can be affected
by several factors: driving style (see
paragraph “Driving style” in the
“Starting and driving” section), type of
route (motorway, towns and cities,
mountain roads, etc…), usage
conditions (load, tyre pressures, etc…).
Trip planning must therefore take the
above into account.
Distance travelled
This value shows the distance covered
from the start of the new journey.
Average consumption (for versions/
markets, where provided)
This value shows the approximate
average fuel consumption from the start
of the new journey.
Instant consumption (for versions/
markets where provided)
This value shows the fuel consumption.
The value is constantly updated. The
display will show “----”ifthecar
is parked with the engine running.Average speed
This value shows the car's average
speed based on the overall time
elapsed since the start of the new
journey.
Trip time
Time elapsed since the start of the new
journey.
IMPORTANT If there is no information,
the Trip computer displays "----" in
place of the value. When normal
operating conditions are restored, the
counting of the various values is
resumed, without either zeroing the
values displayed prior to the problem,
or starting a new mission.
TRIP control button
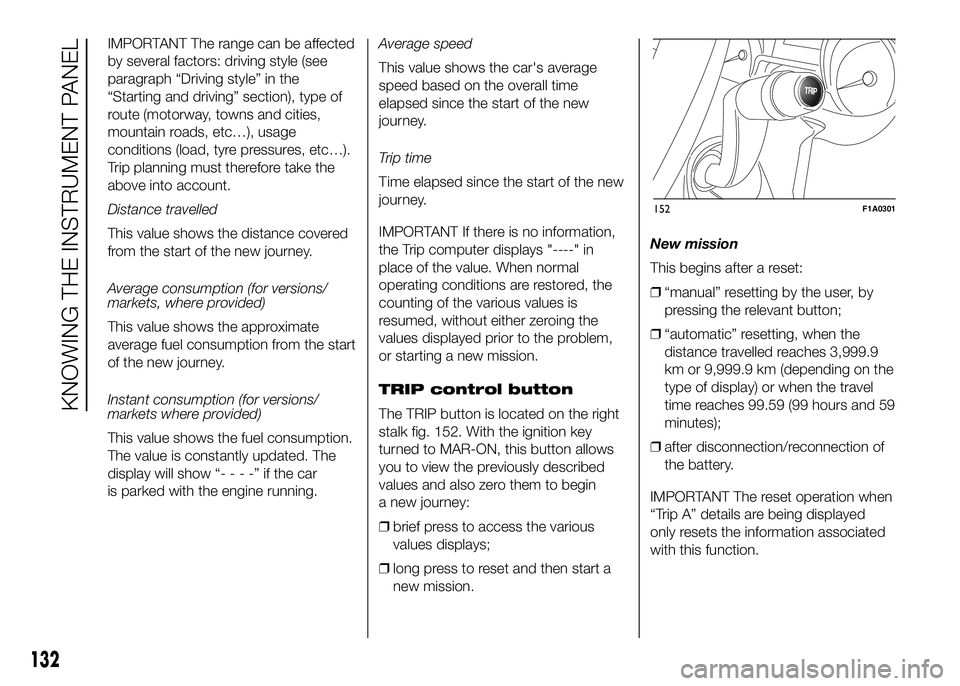
The TRIP button is located on the right
stalk fig. 152. With the ignition key
turned to MAR-ON, this button allows
you to view the previously described
values and also zero them to begin
a new journey:
❒brief press to access the various
values displays;
❒long press to reset and then start a
new mission.New mission
This begins after a reset:
❒“manual” resetting by the user, by
pressing the relevant button;
❒“automatic” resetting, when the
distance travelled reaches 3,999.9
km or 9,999.9 km (depending on the
type of display) or when the travel
time reaches 99.59 (99 hours and 59
minutes);
❒after disconnection/reconnection of
the battery.
IMPORTANT The reset operation when
“Trip A” details are being displayed
only resets the information associated
with this function.
TRIP
152F1A0301
132
KNOWING THE INSTRUMENT PANEL
Page 137 of 387
IMPORTANT The reset operation when
“Trip B” details are being displayed
resets only the information associated
with this function.
Start of journey procedure
With the ignition key in the MAR-ON
position, reset by pressing the TRIP
button and keeping it pressed for more
than 2 seconds.
Trip Exit
You can automatically exit the TRIP
function once all the values have been
displayed or by holding the MODE
button down for more than 1 second.
IMPORTANT
21) The “Trip B” function may be
disabled (see paragraph
“Activating Trip B”). “Range” and
“Instant consumption"
parameters cannot be reset.
133