engine FIAT DUCATO BASE CAMPER 2017 Owner handbook (in English)
[x] Cancel search | Manufacturer: FIAT, Model Year: 2017, Model line: DUCATO BASE CAMPER, Model: FIAT DUCATO BASE CAMPER 2017Pages: 296, PDF Size: 14.44 MB
Page 115 of 296
107)Airbags may be deployed if another
vehicle crashes into yours if the key is
inserted and on, even if the engine is not
running and your vehicle is standing.
Therefore, even if the car is stationary,
when an active front passenger airbag is
fitted, DO NOT install rear facing child
restraint systems on the front passenger
seat. Deployment of the airbag following an
impact could cause fatal injuries to the
child. Therefore, always deactivate the
passenger side airbag when a rearward
facing child restraint system is installed on
the front passenger seat. The front
passenger seat must also be positioned
back as far as possible in order to prevent
the child restraint system from coming
into contact with the dashboard.
Immediately reactivate the passenger
airbag as soon as the child restraint system
has been removed. Also remember that, if
the key is turned to STOP, none of the
safety devices (airbags or pretensioners)
will be deployed in the event of collision.
Non-deployment in such cases does
not indicate a system malfunction.
108)Have the airbag system checked by a
Fiat Dealership if the car was stolen, if
theft was attempted, or if the car was
subjected to vandalism or flooding.
109)By turning the ignition key to MAR
position, the LED on the
button located
on the dashboard lights up (the time it
stays lit up can vary depending on the
market), to check that the button LED is
working correctly.
110)Do not wash the seats with water or
pressurised steam (wash by hand or at
automatic seat washing stations).111)The front airbag is designed to be
deployed for impacts of a greater intensity
than for the pretensioners. For impacts
whose intensity falls between the two
levels, normally, only the pretensioners will
be activated.
112)Do not affix rigid objects to the
garment hooks or support handles.
113)The airbag does not replace seat
belts but increases their efficiency.
Furthermore, since front airbags are not
deployed in low-speed frontal impacts,
side impacts, rear shunts or roll-overs, the
passengers are protected only by the
seat belts which must therefore be
fastened at all times.
114)In some versions, in the event of a
LED
OFFfailure (located on the
dashboard trim), thewarning light on
the instrument panel turns on and the
passenger side bags are deactivated. In
some versions, in the event of a LED
ONfailure (located on the dashboard
trim), thelight on the console turns on.
113
Page 116 of 296
STARTING AND DRIVING
Let’s get to the "heart" of the vehicle:
seeing how you can exploit all of its
potential to the full.
We’ll look at how to drive it safely in any
situation, so that it can be a welcome
companion, with our comfort and
our wallets in mind.STARTING THE ENGINE .................115
WHEN PARKED ..............................116
MANUAL TRANSMISSION ..............117
COMFORT-MATIC GEARBOX .........117
START&STOP SYSTEM ..................119
CRUISE CONTROL (CONSTANT
SPEED REGULATOR) .....................119
SPEED BLOCK ...............................121
PARKING SENSORS.......................122
REAR CAMERA (PARKVIEW®
REAR BACK UP CAMERA) .............123
TRAFFIC SIGN RECOGNITION .......124
REFUELLING THE VEHICLE ...........125
ADDITIVE FOR DIESEL EMISSIONS
ADBLUE (UREA)..............................130
VERSION WITH METHANE
SYSTEM (NATURAL POWER) .........131
LOADING ADVICE...........................133
SAVING FUEL .................................134
TOWING TRAILERS ........................135
PROLONGED VEHICLE
INACTIVITY .....................................141
114
STARTING AND DRIVING
Page 117 of 296
STARTING THE
ENGINE
The vehicle is fitted with an electronic
engine lock device: if the engine fails to
start, see the paragraph “The Fiat
CODE system” in section “Know your
vehicle”.
Before starting the vehicle, adjust the
seat, the interior rear view mirrors,
the door mirrors and fasten the seat
belts correctly. Never press the
accelerator pedal for starting the
engine.
115)
14) 15)
PROCEDURE FOR
VERSIONS WITH MANUAL
TRANSMISSION
Proceed as follows:
engage the handbrake;
put the gear lever into neutral;
turn the ignition key to theMAR
position: the warning lights
and
on the instrument panel will turn on;
wait for the warning lightsand
to turn off, which will happen faster
the warmer the engine is;
fully depress the clutch pedal
without touching the accelerator;
turn the ignition key to the AVV
position as soon as the warning light
turns off. Waiting too long will waste
the heating work carried out by the
plugs.
Release the key as soon as the engine
starts.
PROCEDURE FOR
VERSIONS WITH
COMFORT MATIC
TRANSMISSION
The system allows the engine to be
started both with a gear engaged and
with the gearbox in neutral (N);
however, the brake pedal must be
pressed first with a gear engaged.
It is advisable to place the gear lever in
neutral (N) before starting the engine.
16)
PROCEDURE FOR
NATURAL POWER
VERSIONS
(For versions/markets, where provided)
The various engine cranking methods
are described below:
METHANE tank not on reserve –
petrol tank not empty:
the engine is always started in methane
mode;
METHANE tank empty – petrol tank
not empty:the engine is forced to start on petrol
and it will not switch to methane until
the methane tank has been filled. At the
same time, the reserve warning light
will turn on and the "REFUELLING
REQUIRED" message will be shown on
the instrument panel display;
METHANE tank not on reserve –
petrol tank empty:
the engine is always started in methane
mode.
17) 18) 19) 20) 21)
WARNING
115)It is dangerous to run the engine in
enclosed areas. The engine takes in
oxygen and releases carbon dioxide,
carbon monoxide and other toxic gases.
WARNING
14)It is advisable not to demand maximum
performance from your vehicle (e.g.
excessive acceleration, long distances at
high speeds, excessive intense braking,
etc.) during the initial period of use.
15)When the engine is switched off never
leave the key turned to MAR-ON to prevent
useless current absorption from draining
the battery.
115
Page 118 of 296
16)If the engine fails to start with a gear
engaged, the potentially dangerous
situation due to the fact that the
transmission is automatically placed in
neutral will be signalled by a buzzer.
17)If the warning light
flashes for 60
seconds after starting or during an
extended towing period, this indicates a
problem in the glow plug preheating
system. Use the vehicle normally if the
engine starts, but contact a Fiat Dealership
as soon as possible.
18)Remember that the brake servo and
power steering are not operational until the
engine has been started, so you need to
apply much more force than usual to
the brake pedal and steering wheel.
19)Never bump start the engine by
pushing, towing or coasting downhill. This
could cause fuel to flow into the catalytic
converter and damage it beyond repair.
20)A quick burst on the accelerator before
stopping the engine serves no practical
purpose; it wastes fuel and is especially
damaging to turbocharged engines.
21)In some cases, when the engine
switches off, the fan could activate for max.
120 seconds.
WHEN PARKED
116)
22)
Proceed as follows when parking and
leaving the vehicle:
engage the gear (on a slope, engage
first gear if the vehicle is facing uphill
or reverse if it is facing downhill) and
leave the wheels steered;
stop the engine and engage the
handbrake;
always remove the ignition key.
If the vehicle is parked on a steep
slope, it is advisable to block the
wheels with a wedge or stone.
On versions equipped with automatic
transmission (Comfort matic), wait
for the letterPto appear on the display
before releasing the brake pedal.
IMPORTANTNEVERleave the vehicle
with the gearbox in neutral (or, on
versions equipped with automatic
(Comfort matic) transmission, before
putting the shift lever in thePposition).HANDBRAKE
Handbrake engagement:The
handbrake lever is located to the left of
the driver's seat. Pull the lever upwards
to engage the handbrake and ensure
that the vehicle does not move.
Handbrake disengagement:slightly
raise the lever, hold the button A
pressed and check that the
warning light switches off on the
instrument panel.
Press the brake pedal when carrying
out this operation to prevent the vehicle
from moving accidentally.
WARNING
116)Never leave children unattended in
the vehicle. Always remove the ignition key
when leaving the vehicle and take it out
with you.
WARNING
22)If the vehicle is equipped with
self-levelling air suspension, always check
that there is sufficient space above the roof
and around the vehicle when parking.
Indeed, the vehicle could raise (or lower)
automatically depending on load or
temperature changes.
116
STARTING AND DRIVING
Page 119 of 296
MANUAL
TRANSMISSION
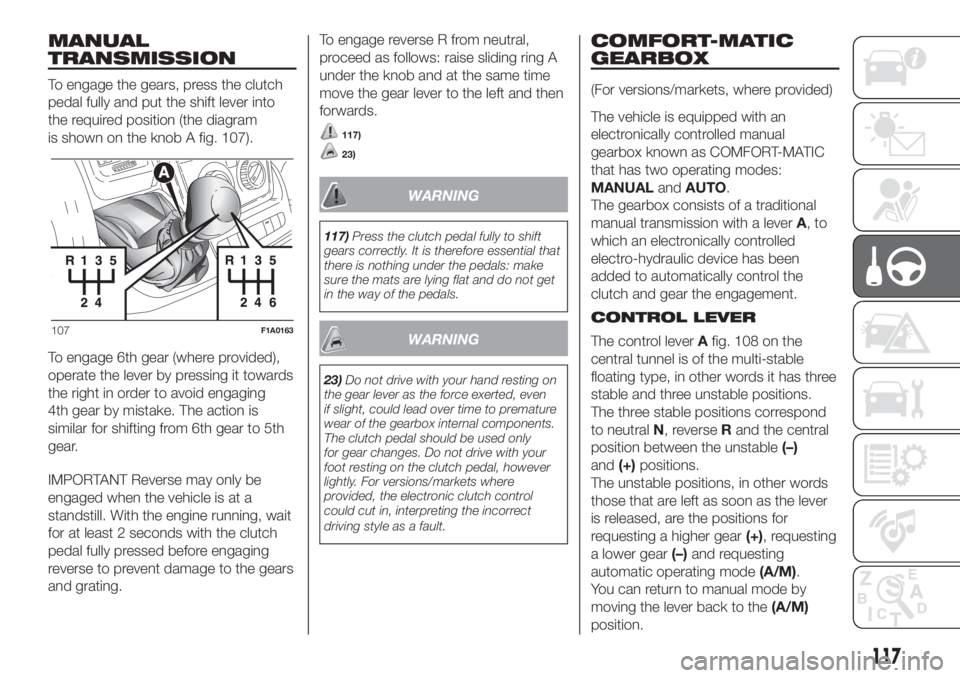
To engage the gears, press the clutch
pedal fully and put the shift lever into
the required position (the diagram
is shown on the knob A fig. 107).
To engage 6th gear (where provided),
operate the lever by pressing it towards
the right in order to avoid engaging
4th gear by mistake. The action is
similar for shifting from 6th gear to 5th
gear.
IMPORTANT Reverse may only be
engaged when the vehicle is at a
standstill. With the engine running, wait
for at least 2 seconds with the clutch
pedal fully pressed before engaging
reverse to prevent damage to the gears
and grating.To engage reverse R from neutral,
proceed as follows: raise sliding ring A
under the knob and at the same time
move the gear lever to the left and then
forwards.
117)
23)
WARNING
117)Press the clutch pedal fully to shift
gears correctly. It is therefore essential that
there is nothing under the pedals: make
sure the mats are lying flat and do not get
in the way of the pedals.
WARNING
23)Do not drive with your hand resting on
the gear lever as the force exerted, even
if slight, could lead over time to premature
wear of the gearbox internal components.
The clutch pedal should be used only
for gear changes. Do not drive with your
foot resting on the clutch pedal, however
lightly. For versions/markets where
provided, the electronic clutch control
could cut in, interpreting the incorrect
driving style as a fault.
COMFORT-MATIC
GEARBOX
(For versions/markets, where provided)
The vehicle is equipped with an
electronically controlled manual
gearbox known as COMFORT-MATIC
that has two operating modes:
MANUALandAUTO.
The gearbox consists of a traditional
manual transmission with a leverA,to
which an electronically controlled
electro-hydraulic device has been
added to automatically control the
clutch and gear the engagement.
CONTROL LEVER
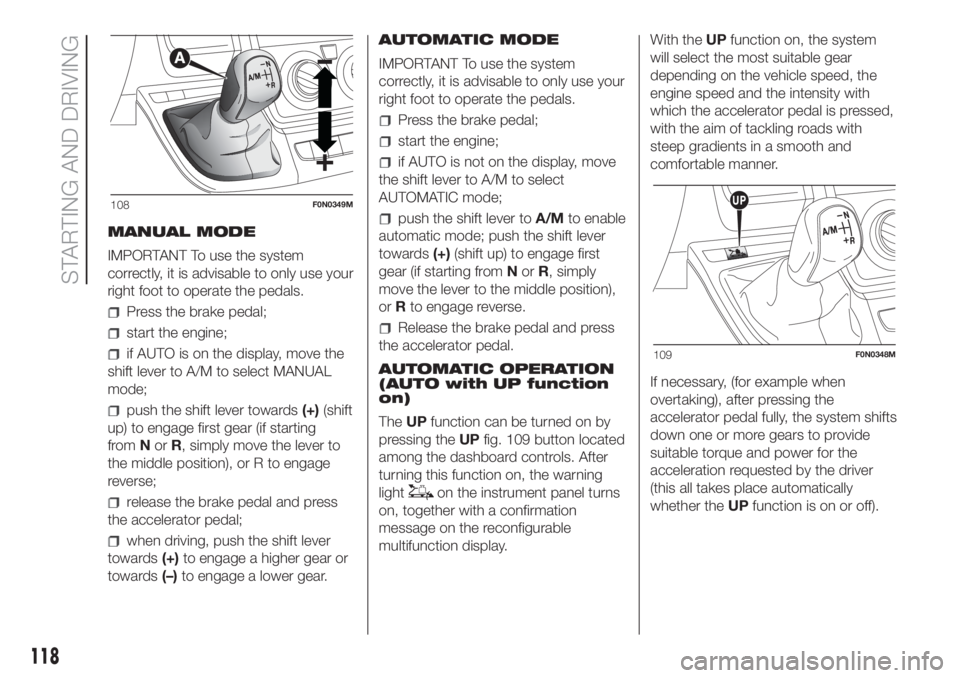
The control leverAfig. 108 on the
central tunnel is of the multi-stable
floating type, in other words it has three
stable and three unstable positions.
The three stable positions correspond
to neutralN, reverseRand the central
position between the unstable(–)
and(+)positions.
The unstable positions, in other words
those that are left as soon as the lever
is released, are the positions for
requesting a higher gear(+), requesting
a lower gear(–)and requesting
automatic operating mode(A/M).
You can return to manual mode by
moving the lever back to the(A/M)
position.
107F1A0163
117
Page 120 of 296
MANUAL MODE
IMPORTANT To use the system
correctly, it is advisable to only use your
right foot to operate the pedals.
Press the brake pedal;
start the engine;
if AUTO is on the display, move the
shift lever to A/M to select MANUAL
mode;
push the shift lever towards(+)(shift
up) to engage first gear (if starting
fromNorR, simply move the lever to
the middle position), or R to engage
reverse;
release the brake pedal and press
the accelerator pedal;
when driving, push the shift lever
towards(+)to engage a higher gear or
towards(–)to engage a lower gear.AUTOMATIC MODE
IMPORTANT To use the system
correctly, it is advisable to only use your
right foot to operate the pedals.
Press the brake pedal;
start the engine;
if AUTO is not on the display, move
the shift lever to A/M to select
AUTOMATIC mode;
push the shift lever toA/Mto enable
automatic mode; push the shift lever
towards(+)(shift up) to engage first
gear (if starting fromNorR, simply
move the lever to the middle position),
orRto engage reverse.
Release the brake pedal and press
the accelerator pedal.
AUTOMATIC OPERATION
(AUTO with UP function
on)
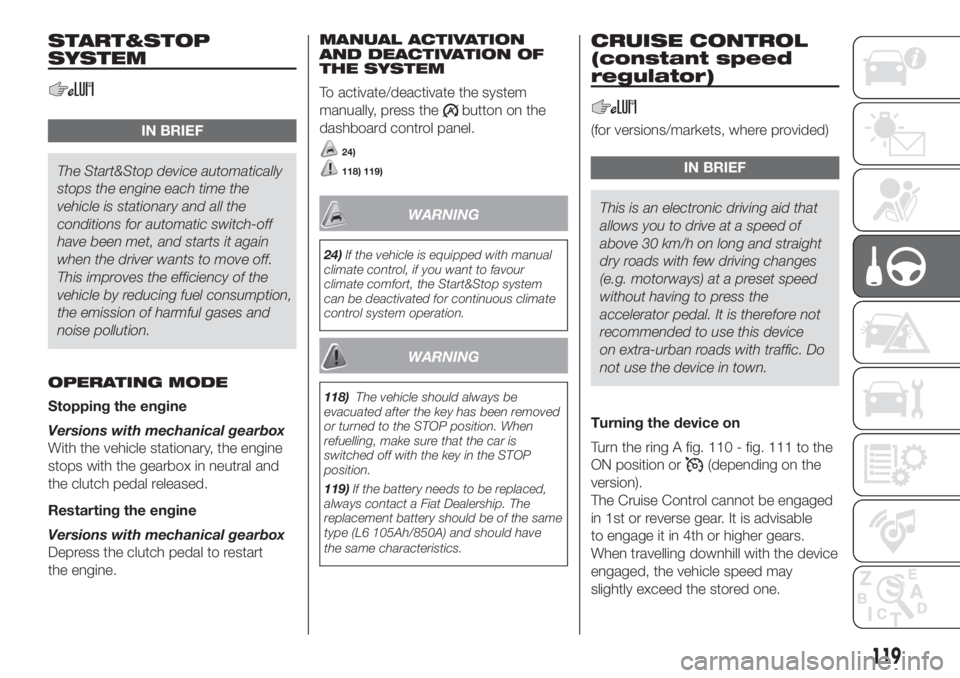
TheUPfunction can be turned on by
pressing theUPfig. 109 button located
among the dashboard controls. After
turning this function on, the warning
light
on the instrument panel turns
on, together with a confirmation
message on the reconfigurable
multifunction display.With theUPfunction on, the system
will select the most suitable gear
depending on the vehicle speed, the
engine speed and the intensity with
which the accelerator pedal is pressed,
with the aim of tackling roads with
steep gradients in a smooth and
comfortable manner.
If necessary, (for example when
overtaking), after pressing the
accelerator pedal fully, the system shifts
down one or more gears to provide
suitable torque and power for the
acceleration requested by the driver
(this all takes place automatically
whether theUPfunction is on or off).
108F0N0349M
109F0N0348M
118
STARTING AND DRIVING
Page 121 of 296
START&STOP
SYSTEM
IN BRIEF
The Start&Stop device automatically
stops the engine each time the
vehicle is stationary and all the
conditions for automatic switch-off
have been met, and starts it again
when the driver wants to move off.
This improves the efficiency of the
vehicle by reducing fuel consumption,
the emission of harmful gases and
noise pollution.
OPERATING MODE
Stopping the engine
Versions with mechanical gearbox
With the vehicle stationary, the engine
stops with the gearbox in neutral and
the clutch pedal released.
Restarting the engine
Versions with mechanical gearbox
Depress the clutch pedal to restart
the engine.MANUAL ACTIVATION
AND DEACTIVATION OF
THE SYSTEM
To activate/deactivate the system
manually, press the
button on the
dashboard control panel.
24)
118) 119)
WARNING
24)If the vehicle is equipped with manual
climate control, if you want to favour
climate comfort, the Start&Stop system
can be deactivated for continuous climate
control system operation.
WARNING
118)The vehicle should always be
evacuated after the key has been removed
or turned to the STOP position. When
refuelling, make sure that the car is
switched off with the key in the STOP
position.
119)If the battery needs to be replaced,
always contact a Fiat Dealership. The
replacement battery should be of the same
type (L6 105Ah/850A) and should have
the same characteristics.
CRUISE CONTROL
(constant speed
regulator)
(for versions/markets, where provided)
IN BRIEF
This is an electronic driving aid that
allows you to drive at a speed of
above 30 km/h on long and straight
dry roads with few driving changes
(e.g. motorways) at a preset speed
without having to press the
accelerator pedal. It is therefore not
recommended to use this device
on extra-urban roads with traffic. Do
not use the device in town.
Turning the device on
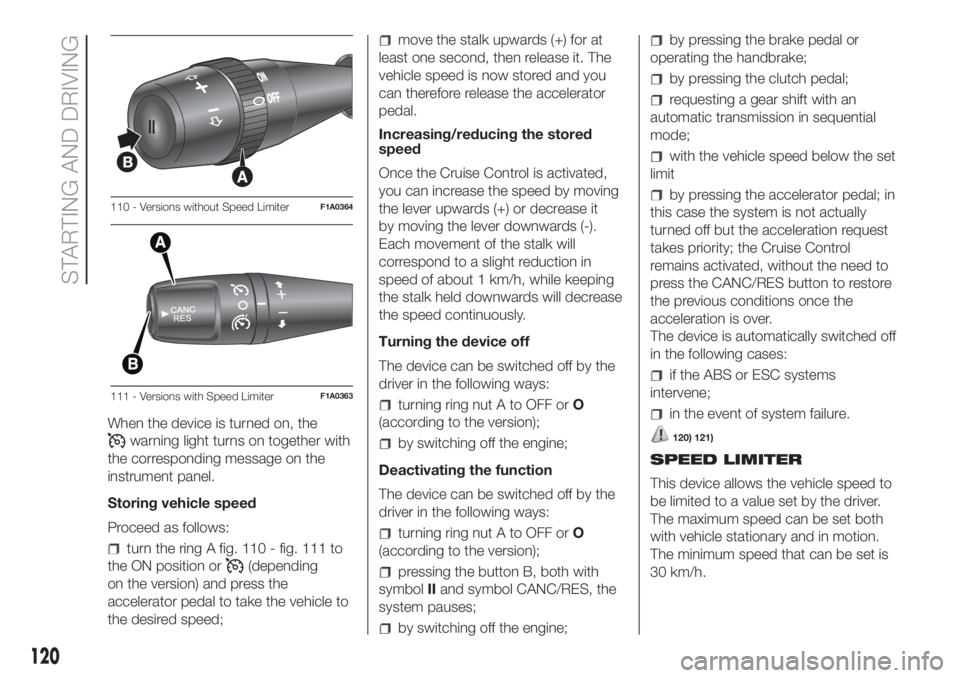
Turn the ring A fig. 110 - fig. 111 to the
ON position or
(depending on the
version).
The Cruise Control cannot be engaged
in 1st or reverse gear. It is advisable
to engage it in 4th or higher gears.
When travelling downhill with the device
engaged, the vehicle speed may
slightly exceed the stored one.
119
Page 122 of 296
When the device is turned on, the
warning light turns on together with
the corresponding message on the
instrument panel.
Storing vehicle speed
Proceed as follows:
turn the ring A fig. 110 - fig. 111 to
the ON position or
(depending
on the version) and press the
accelerator pedal to take the vehicle to
the desired speed;
move the stalk upwards (+) for at
least one second, then release it. The
vehicle speed is now stored and you
can therefore release the accelerator
pedal.
Increasing/reducing the stored
speed
Once the Cruise Control is activated,
you can increase the speed by moving
the lever upwards (+) or decrease it
by moving the lever downwards (-).
Each movement of the stalk will
correspond to a slight reduction in
speed of about 1 km/h, while keeping
the stalk held downwards will decrease
the speed continuously.
Turning the device off
The device can be switched off by the
driver in the following ways:
turning ring nut A to OFF orO
(according to the version);
by switching off the engine;
Deactivating the function
The device can be switched off by the
driver in the following ways:
turning ring nut A to OFF orO
(according to the version);
pressing the button B, both with
symbolIIand symbol CANC/RES, the
system pauses;
by switching off the engine;
by pressing the brake pedal or
operating the handbrake;
by pressing the clutch pedal;
requesting a gear shift with an
automatic transmission in sequential
mode;
with the vehicle speed below the set
limit
by pressing the accelerator pedal; in
this case the system is not actually
turned off but the acceleration request
takes priority; the Cruise Control
remains activated, without the need to
press the CANC/RES button to restore
the previous conditions once the
acceleration is over.
The device is automatically switched off
in the following cases:
if the ABS or ESC systems
intervene;
in the event of system failure.
120) 121)
SPEED LIMITER
This device allows the vehicle speed to
be limited to a value set by the driver.
The maximum speed can be set both
with vehicle stationary and in motion.
The minimum speed that can be set is
30 km/h.
110 - Versions without Speed LimiterF1A0364
111 - Versions with Speed LimiterF1A0363
120
STARTING AND DRIVING
Page 127 of 296
WARNING
124)If the camera loses its position due to
a load variation, the system may not work
temporarily to allow the camera to perform
an auto-calibration.
125)The system only detects the preset
traffic signs. If the minimum visibility
conditions and distance from the sign are
met it can detect all traffic signs.
126)The system is a driving assistance
system but it does not relieve the driver of
the responsibility of driving with due
attention and diligence in compliance with
the laws in force.
127)When the system is active, the driver
is responsible for controlling the vehicle
and monitoring the system, and must
intervene as appropriate if necessary.
WARNING
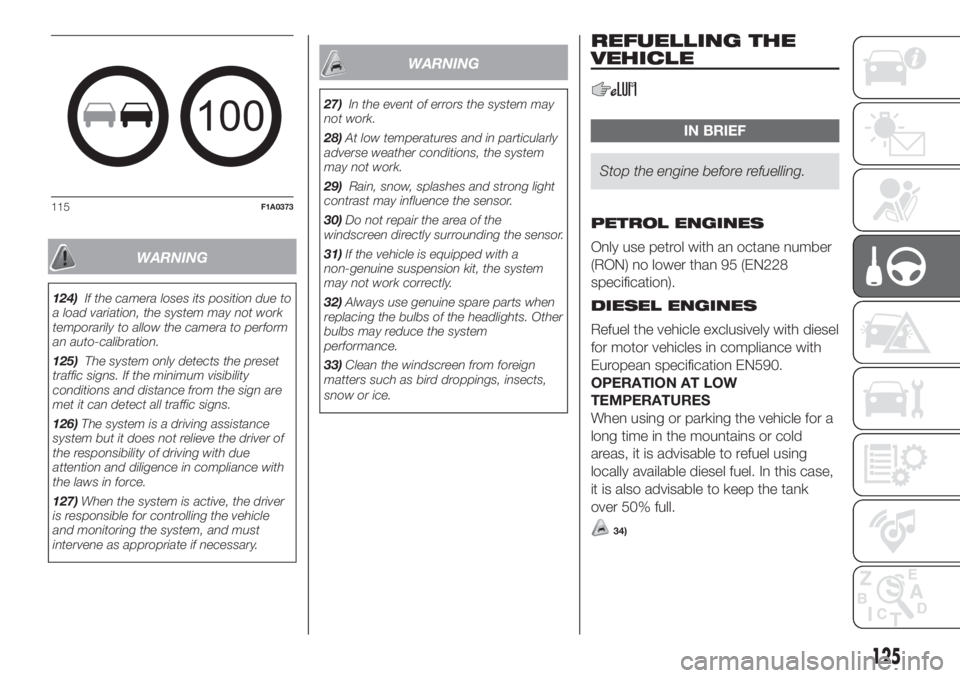
27)In the event of errors the system may
not work.
28)At low temperatures and in particularly
adverse weather conditions, the system
may not work.
29)Rain, snow, splashes and strong light
contrast may influence the sensor.
30)Do not repair the area of the
windscreen directly surrounding the sensor.
31)If the vehicle is equipped with a
non-genuine suspension kit, the system
may not work correctly.
32)Always use genuine spare parts when
replacing the bulbs of the headlights. Other
bulbs may reduce the system
performance.
33)Clean the windscreen from foreign
matters such as bird droppings, insects,
snow or ice.
REFUELLING THE
VEHICLE
IN BRIEF
Stop the engine before refuelling.
PETROL ENGINES
Only use petrol with an octane number
(RON) no lower than 95 (EN228
specification).
DIESEL ENGINES
Refuel the vehicle exclusively with diesel
for motor vehicles in compliance with
European specification EN590.
OPERATION AT LOW
TEMPERATURES
When using or parking the vehicle for a
long time in the mountains or cold
areas, it is advisable to refuel using
locally available diesel fuel. In this case,
it is also advisable to keep the tank
over 50% full.
34)
100
115F1A0373
125
Page 128 of 296
TANK CAPACITY
To ensure that you fill the tank
completely, top up twice after the first
click of the fuel supply gun. Further
top-ups could cause faults in the fuel
feeding system.
FUEL TANK CAP
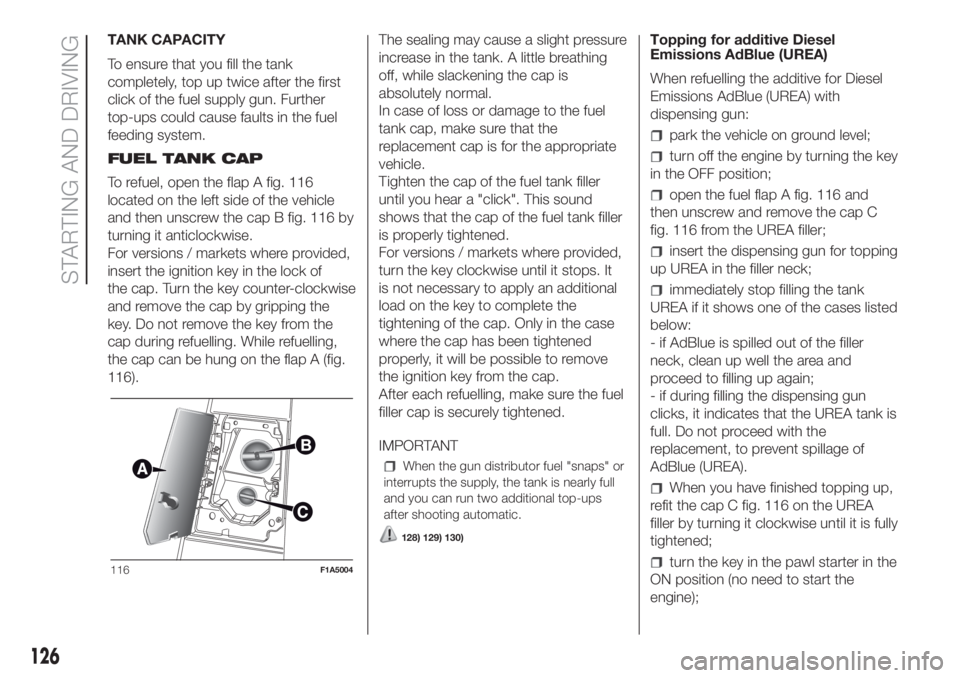
To refuel, open the flap A fig. 116
located on the left side of the vehicle
and then unscrew the cap B fig. 116 by
turning it anticlockwise.
For versions / markets where provided,
insert the ignition key in the lock of
the cap. Turn the key counter-clockwise
and remove the cap by gripping the
key. Do not remove the key from the
cap during refuelling. While refuelling,
the cap can be hung on the flap A (fig.
116).The sealing may cause a slight pressure
increase in the tank. A little breathing
off, while slackening the cap is
absolutely normal.
In case of loss or damage to the fuel
tank cap, make sure that the
replacement cap is for the appropriate
vehicle.
Tighten the cap of the fuel tank filler
until you hear a "click". This sound
shows that the cap of the fuel tank filler
is properly tightened.
For versions / markets where provided,
turn the key clockwise until it stops. It
is not necessary to apply an additional
load on the key to complete the
tightening of the cap. Only in the case
where the cap has been tightened
properly, it will be possible to remove
the ignition key from the cap.
After each refuelling, make sure the fuel
filler cap is securely tightened.
IMPORTANT
When the gun distributor fuel "snaps" or
interrupts the supply, the tank is nearly full
and you can run two additional top-ups
after shooting automatic.
128) 129) 130)
Topping for additive Diesel
Emissions AdBlue (UREA)
When refuelling the additive for Diesel
Emissions AdBlue (UREA) with
dispensing gun:
park the vehicle on ground level;
turn off the engine by turning the key
in the OFF position;
open the fuel flap A fig. 116 and
then unscrew and remove the cap C
fig. 116 from the UREA filler;
insert the dispensing gun for topping
up UREA in the filler neck;
immediately stop filling the tank
UREA if it shows one of the cases listed
below:
- if AdBlue is spilled out of the filler
neck, clean up well the area and
proceed to filling up again;
- if during filling the dispensing gun
clicks, it indicates that the UREA tank is
full. Do not proceed with the
replacement, to prevent spillage of
AdBlue (UREA).
When you have finished topping up,
refit the cap C fig. 116 on the UREA
filler by turning it clockwise until it is fully
tightened;
turn the key in the pawl starter in the
ON position (no need to start the
engine);116F1A5004
126
STARTING AND DRIVING