diagram FIAT DUCATO BASE CAMPER 2017 Owner handbook (in English)
[x] Cancel search | Manufacturer: FIAT, Model Year: 2017, Model line: DUCATO BASE CAMPER, Model: FIAT DUCATO BASE CAMPER 2017Pages: 296, PDF Size: 14.44 MB
Page 119 of 296

MANUAL
TRANSMISSION
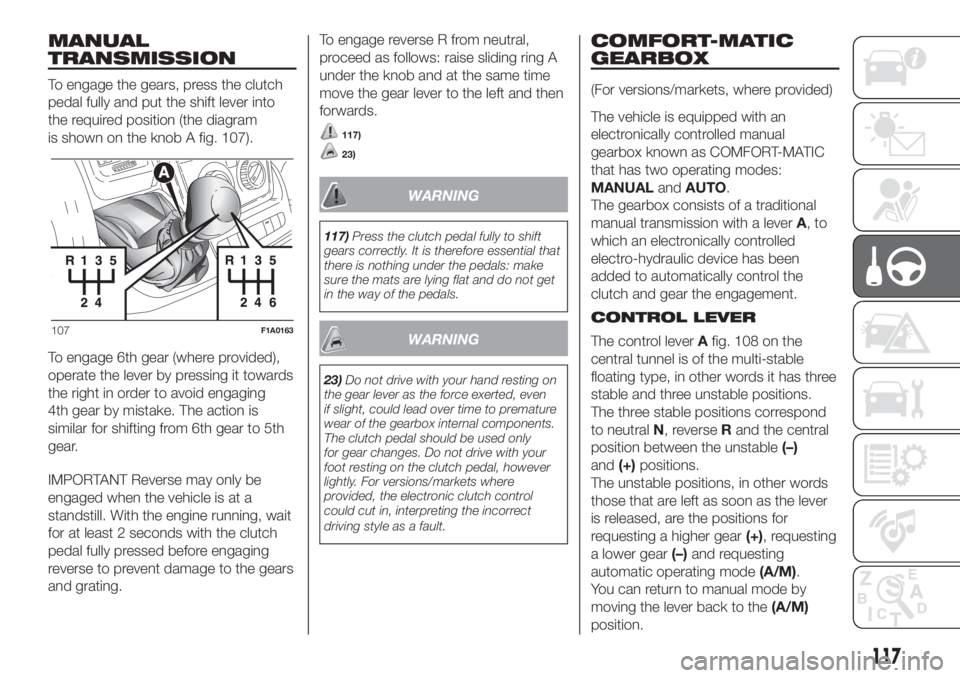
To engage the gears, press the clutch
pedal fully and put the shift lever into
the required position (the diagram
is shown on the knob A fig. 107).
To engage 6th gear (where provided),
operate the lever by pressing it towards
the right in order to avoid engaging
4th gear by mistake. The action is
similar for shifting from 6th gear to 5th
gear.
IMPORTANT Reverse may only be
engaged when the vehicle is at a
standstill. With the engine running, wait
for at least 2 seconds with the clutch
pedal fully pressed before engaging
reverse to prevent damage to the gears
and grating.To engage reverse R from neutral,
proceed as follows: raise sliding ring A
under the knob and at the same time
move the gear lever to the left and then
forwards.
117)
23)
WARNING
117)Press the clutch pedal fully to shift
gears correctly. It is therefore essential that
there is nothing under the pedals: make
sure the mats are lying flat and do not get
in the way of the pedals.
WARNING
23)Do not drive with your hand resting on
the gear lever as the force exerted, even
if slight, could lead over time to premature
wear of the gearbox internal components.
The clutch pedal should be used only
for gear changes. Do not drive with your
foot resting on the clutch pedal, however
lightly. For versions/markets where
provided, the electronic clutch control
could cut in, interpreting the incorrect
driving style as a fault.
COMFORT-MATIC
GEARBOX
(For versions/markets, where provided)
The vehicle is equipped with an
electronically controlled manual
gearbox known as COMFORT-MATIC
that has two operating modes:
MANUALandAUTO.
The gearbox consists of a traditional
manual transmission with a leverA,to
which an electronically controlled
electro-hydraulic device has been
added to automatically control the
clutch and gear the engagement.
CONTROL LEVER
The control leverAfig. 108 on the
central tunnel is of the multi-stable
floating type, in other words it has three
stable and three unstable positions.
The three stable positions correspond
to neutralN, reverseRand the central
position between the unstable(–)
and(+)positions.
The unstable positions, in other words
those that are left as soon as the lever
is released, are the positions for
requesting a higher gear(+), requesting
a lower gear(–)and requesting
automatic operating mode(A/M).
You can return to manual mode by
moving the lever back to the(A/M)
position.
107F1A0163
117
Page 138 of 296

In addition to the electrical branches,
the vehicle's electric system can only
be connected to the supply cable for an
electric brake and to the cable for an
internal light, though not above 15
W. For connections use the preset
control unit with battery cable no less
than 2.5 mm
2.
IMPORTANT The trailer tow hook
contributes to the length of the vehicle.
When installing on long wheelbase
versions, it is only possible to install
removable tow hooks because the total
vehicle length limit of 6 metres is
exceeded.
If no trailer is fitted, the hook must be
removed from the attachment base and
it must not exceed the vehicle's
original length.
IMPORTANT If you wish to leave the
tow hook fitted without towing a trailer,
it is advisable to contact a Fiat
Dealership for the relevant system
update operations because the tow
hook could be detected as an obstacle
by the central sensors.Installation diagram for Van
versions fig. 121
The tow hook structure must be
fastened in the points shown by the
symbol Ø using a total of 6 M10x1.25
screws and 4 M12 screws.
The internal back plates must be at
least 5 mm thick. MAX LOAD ON
BALL: 100/120 kg depending on the
payload (see the “Weights” table in the
“Technical Data” chapter).
138)
To install a tow hook, the bumpers
must be trimmed as described in the
supplier's installation kit.
Installation diagram for Truck and
Chassis Cab versions fig. 122
Another tow hook specific to Truck and
Chassis Cab versions is shown in fig.
122.
The structure Ø must be fixed in the
points indicated using a total of 6
M10x1.25 screws and 4 M12 screws.MAX LOAD ON BALL: 100/120 kg
depending on the payload (see the
“Weights” table in the “Technical Data”
chapter).
WARNING
136)The ABS with which the vehicle may
be equipped will not control the braking
system of the trailer. Particular caution
is required on slippery roads.
137)Never modify the braking system of
the vehicle to control the trailer brake. The
trailer braking system must be fully
independent from the hydraulic system of
the vehicle.
138)After fitting, screw holes must be
sealed to prevent a exhaust gas inlet.
.
136
STARTING AND DRIVING
Page 183 of 296

take the screwdriver provided from
the box and prise up at the point
shown to raise the cap C fig. 183;
take the tow ring D from the box and
screw it onto the threaded pin fig. 183.
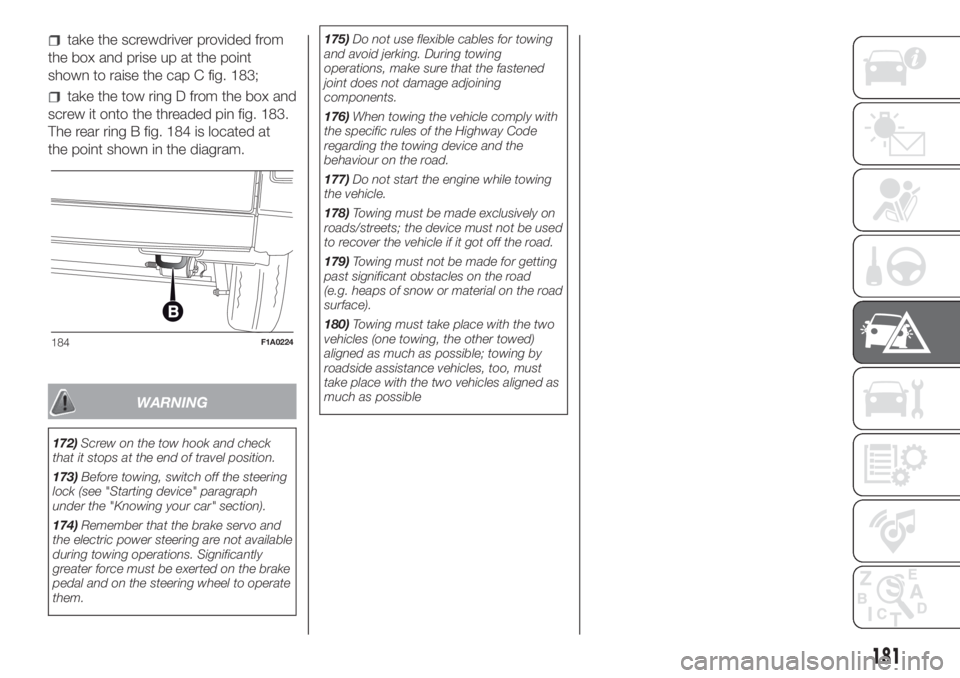
The rear ring B fig. 184 is located at
the point shown in the diagram.
WARNING
172)Screw on the tow hook and check
that it stops at the end of travel position.
173)Before towing, switch off the steering
lock (see "Starting device" paragraph
under the "Knowing your car" section).
174)Remember that the brake servo and
the electric power steering are not available
during towing operations. Significantly
greater force must be exerted on the brake
pedal and on the steering wheel to operate
them.175)Do not use flexible cables for towing
and avoid jerking. During towing
operations, make sure that the fastened
joint does not damage adjoining
components.
176)When towing the vehicle comply with
the specific rules of the Highway Code
regarding the towing device and the
behaviour on the road.
177)Do not start the engine while towing
the vehicle.
178)Towing must be made exclusively on
roads/streets; the device must not be used
to recover the vehicle if it got off the road.
179)Towing must not be made for getting
past significant obstacles on the road
(e.g. heaps of snow or material on the road
surface).
180)Towing must take place with the two
vehicles (one towing, the other towed)
aligned as much as possible; towing by
roadside assistance vehicles, too, must
take place with the two vehicles aligned as
much as possible
184F1A0224
181