display FIAT FIORINO 2018 Owner handbook (in English)
[x] Cancel search | Manufacturer: FIAT, Model Year: 2018, Model line: FIORINO, Model: FIAT FIORINO 2018Pages: 196, PDF Size: 4.99 MB
Page 74 of 196
59)If the vehicle must be placed on a roller
bench (at a speed within 5 and 30 km/h)
for maintenance interventions or if it is
washed in an automatic roller washing
tunnel with an obstacle in the front part
(e.g. another vehicle, a wall or another
obstacle), the system may detect its
presence and activate. In this case the
system must be deactivated through the
display Setup Menu.
WARNING
12)The laser sensor may have limited or
absent operation due to weather
conditions such as: heavy rain, hail, thick
fog, heavy snow, formation of ice layers on
the windscreen.
13)Sensor operation may also be
compromised by the presence of dust,
condensation, dirt or ice on the
windscreen, by traffic conditions (e.g.
vehicles that are driving not aligned with
your vehicle, vehicle driving in a transverse
or opposite way on the same lane, bend
with a small radius of curvature), by road
surface conditions and by driving
conditions (e.g. off-road driving). Make sure
the windscreen is always clean. Use
specific detergents and clean cloths to
avoid scratching the windscreen. The
sensor operation may also be limited or
absent in some driving, traffic and road
surface conditions.14)Projecting loads on the roof of the
vehicle may interfere with the correct
operation of the sensor. Before starting
make sure the load is correctly positioned,
in order not to cover the sensor operating
range.
15)If the windscreen must be replaced
due to scratches, chipping or breakage,
contact exclusively a Fiat Dealership.
Do not replace the windscreen on your
own, risk of malfunction! It is advisable to
replace the windscreen if it is damaged
in the laser sensor area.
16)Do not tamper nor operate on the laser
sensor. Do not close the openings in the
aesthetic cover located under the interior
rear view mirror. In the event of a sensor
failure, contact a Fiat Dealership.
17)If you are driving on roads close to
trees with protruding branches it is
advisable to deactivate the system to
prevent the branches at the height of the
bonnet or the windscreen from interfering
with the system.
18)Do not cover the operating range of the
sensor with stickers or other objects. Also
pay attention to other objects on the
bonnet of the vehicle (e.g. a layer of snow)
and make sure they do not interfere with
the light emitted by the laser.
19)If a trailer or a vehicle is towed the
system must be deactivated with the
display Setup Menu.
20)If the system signals a loss of pressure
on a specific tyre, it is recommended to
check the pressure on all four tyres.
TRACTION PLUS
SYSTEM
(for versions/markets, where provided)
Traction Plus is a driving aid, useful
for setting off in poor grip conditions
(snow, ice, mud, etc.) which allows the
drive force to be distributed in the
best way over the front axle when one
wheel is slipping.
Traction Plus acts by braking the
wheels with poor grip (or those slipping
more than the others), thereby
transferring the drive force to those
which have greater grip on the ground.
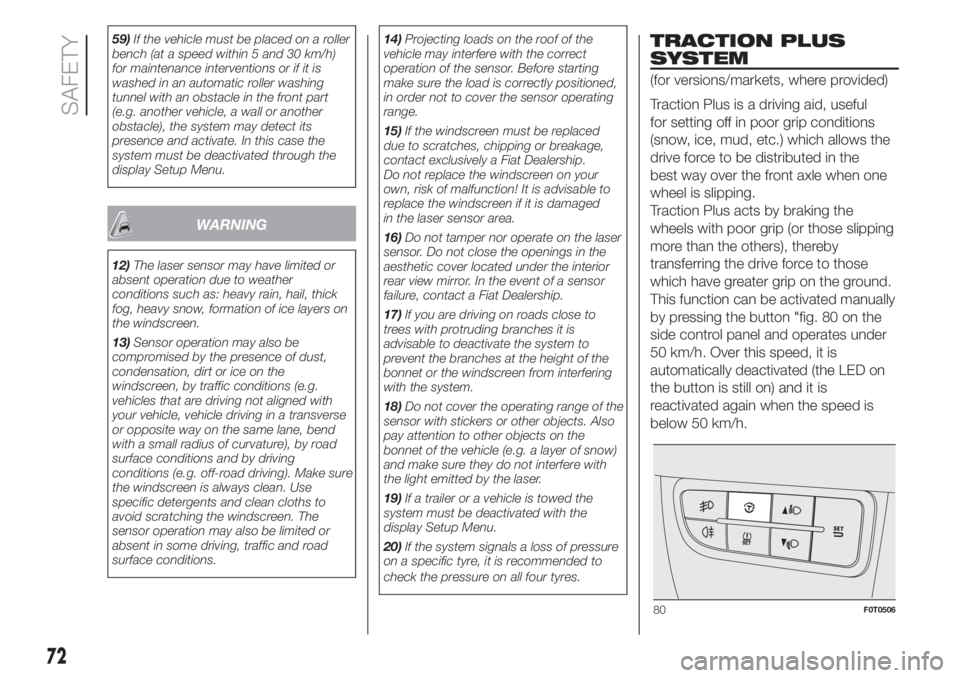
This function can be activated manually
by pressing the button "fig. 80 on the
side control panel and operates under
50 km/h. Over this speed, it is
automatically deactivated (the LED on
the button is still on) and it is
reactivated again when the speed is
below 50 km/h.
80F0T0506
72
SAFETY
Page 87 of 196

The airbags are not deployed in the
event of minor frontal impacts (for
which the restraining action of the seat
belts is sufficient). Seat belts must
always be worn. In the event of a frontal
collision, they ensure the correct
positioning of the occupant.
FRONT AIRBAG DRIVER'S
SIDE
It consists of an instantly inflating bag
contained in a special recess at the
centre of the steering wheel fig. 96.
PASSENGER SIDE FRONT
AIRBAG
(for versions/markets, where provided)
This consists of an instantly inflating
bag contained in a special recess in the
dashboard fig. 97 which has a larger
volume than that of the driver.
79)
FRONT PASSENGER SIDE
AIRBAG AND CHILD
RESTRAINT SYSTEMS
Rearward-facing child restraint systems
must NEVER be fitted on the front
seat with an active passenger's airbag
since in the event of an impact the
airbag activation may cause fatal
injuries to the transported child.
ALWAYScomply with the instructions
on the label fig. 98 stuck on the
passenger side sun visor.Manual deactivation of
front passenger airbag
and chest-pelvis side
bag
(for versions/markets, where provided)
If a child must necessarily be carried on
the front seat in a rear-facing child
restraint system, the front passenger
airbag and chest-pelvis side bag (for
versions/markets, where provided) can
be deactivated.
IMPORTANT To manually deactivate the
front passenger airbag and chest-pelvis
side bag (for versions/markets where
provided), refer to the "Display"
paragraph in the "Knowing the
instrument panel" chapter.
When the passenger front airbag and
chest-pelvis side bag (for versions/
markets where provided) are activated
again, the warning light switches off.
The warning light
on the central
dashboard fig. 99 shows the passenger
protection status.
When the vehicle is started (key in MAR
position), the warning light turns on
for approx. 8 seconds, provided that at
least 5 seconds have elapsed from
the previous switching off. If not,
contact a Fiat Dealership.
96F0T0052
97F0T0033
98F0T0950
85
Page 91 of 196
IMPORTANT NOTES
The front airbags and/or side bags (for
versions/markets, where provided)
may be deployed if the vehicle is
subject to heavy knocks or accidents
involving the underbody area, such
as for example violent shocks against
steps, kerbs or low obstacles, or the
vehicle falling into big potholes or
depressions in the road.
A small amount of dust will be released
when the airbags are deployed. The
dust is not harmful and does not
indicate the beginning of a fire.
Furthermore, the surface of the
deployed bag and the interior of the
vehicle may be covered in a dusty
residue: this may irritate your skin and
eyes. Wash with mild soap and water in
the event of exposure.
Should an accident occur in which any
of the safety devices are activated,
take the vehicle to a Fiat Dealership to
have the activated devices replaced
and to have the whole system checked.
Every control, repair and replacement
operation concerning the airbags must
be carried out only at Fiat Dealerships.If you are having the vehicle scrapped,
have the airbag system deactivated at a
Fiat Dealership first. If the vehicle
changes ownership, the new owner
must be informed of the method of use
of airbags and the above warnings
and also be given this "Owner
Handbook".
Pretensioners, front airbags and front
side bags are deployed differently
according to the type of collision.
Failure to activate one or more of the
devices does not indicate a system
malfunction.
80) 81) 82) 83) 84) 85) 86) 87) 88) 89)
WARNING
80)There may be an anomaly in the
restraint systems if the warning light
does not light up when the key is turn
to MAR or remains on while driving (on
some versions with a message on the
display). In this case, the airbags or the
pretensioners may not be activated in the
case of an accident or (in a lesser number
of cases) they may be activated incorrectly.
Contact a Fiat Dealership immediately to
have the system checked.
81)Always drive with your hands on the
rim of the steering wheel so that the airbag
can inflate freely if required. Do not drive
bent over the steering wheel, but rather sit
upright with your back firmly resting against
the seat back.82)In some versions, in the event of a LED
failure (located on the dashboard
panel), thewarning light on the
instrument panel turns on and the
passenger side airbags are deactivated.
83)On cars with side bags, do not cover
the front seat backrests with extra covers.
84)Do not travel carrying objects in your
lap, in front of your chest or between your
lips (pipe, pencils, etc.): they could cause
severe injury if the airbag is deployed.
85)If the ignition device is at MAR, even if
the engine is switched off, airbags may
be deployed when the vehicle is stationary
and hit by another vehicle. Therefore,
even if the car is stationary, when an active
front passenger airbag is fitted, DO NOT
install rear facing child restraint systems on
the front passenger seat. Deployment of
the airbag following an impact could cause
fatal injuries to the child. Therefore, always
deactivate the passenger side airbag
when a rearward facing child restraint
system is installed on the front passenger
seat. The front passenger seat must also
be positioned back as far as possible in
order to prevent the child restraint system
from coming into contact with the
dashboard. Immediately reactivate the
passenger airbag as soon as the child
restraint system has been removed. Also
remember that, if the ignition device is
set to STOP, none of the safety devices
(airbags or pretensioners) will be deployed
in the event of collision. Non-deployment
in such cases does not indicate a system
malfunction.
89
Page 98 of 196
“COMFORT-MATIC”
TRANSMISSION
The vehicle is equipped with an
electronically controlled manual
gearbox known as COMFORT-MATIC
that has two operating modes:
MANUALandAUTO.
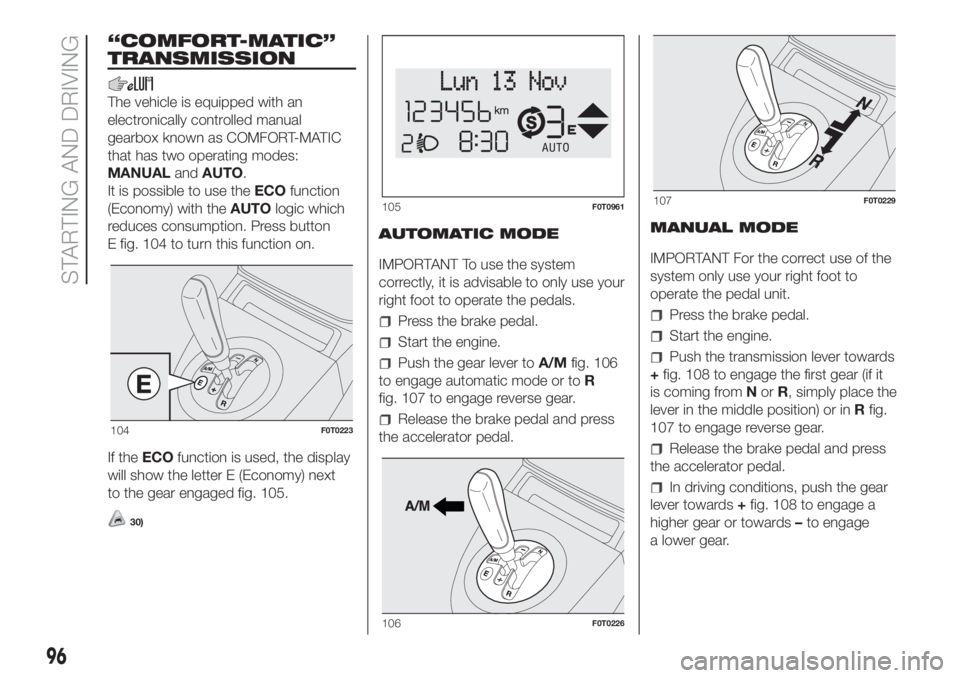
It is possible to use theECOfunction
(Economy) with theAUTOlogic which
reduces consumption. Press button
E fig. 104 to turn this function on.
If theECOfunction is used, the display
will show the letter E (Economy) next
to the gear engaged fig. 105.
30)
AUTOMATIC MODE
IMPORTANT To use the system
correctly, it is advisable to only use your
right foot to operate the pedals.
Press the brake pedal.
Start the engine.
Push the gear lever toA/Mfig. 106
to engage automatic mode or toR
fig. 107 to engage reverse gear.
Release the brake pedal and press
the accelerator pedal.MANUAL MODE
IMPORTANT For the correct use of the
system only use your right foot to
operate the pedal unit.
Press the brake pedal.
Start the engine.
Push the transmission lever towards
+fig. 108 to engage the first gear (if it
is coming fromNorR, simply place the
lever in the middle position) or inRfig.
107 to engage reverse gear.
Release the brake pedal and press
the accelerator pedal.
In driving conditions, push the gear
lever towards+fig. 108 to engage a
higher gear or towards–to engage
a lower gear.
104F0T0223
105F0T0961
106F0T0226
107F0T0229
96
STARTING AND DRIVING
Page 103 of 196
Versions with Comfort-matic
transmission
With the vehicle stationary and the
brake pedal pressed, the engine stops
if the gear lever is in position other
thanR. In the event of stops uphill,
engine switching off is disabled to make
the "Hill Holder" function available
(works only with the engine running).
The warning light on the instrument
panel switches on to signal that the
engine has stopped.
Restarting the engine
Versions with manual transmission
Depress the clutch pedal to restart
the engine.
Versions with Comfort-matic
transmission
Releasing the brake pedal the engine
restarts automatically; the icon switches
off on the display. If the engine is
restarted with the “Hill Holder” function
off, move the lever towards (+), (-)or
Rand the engine restarts.MANUAL ACTIVATION
AND DEACTIVATION
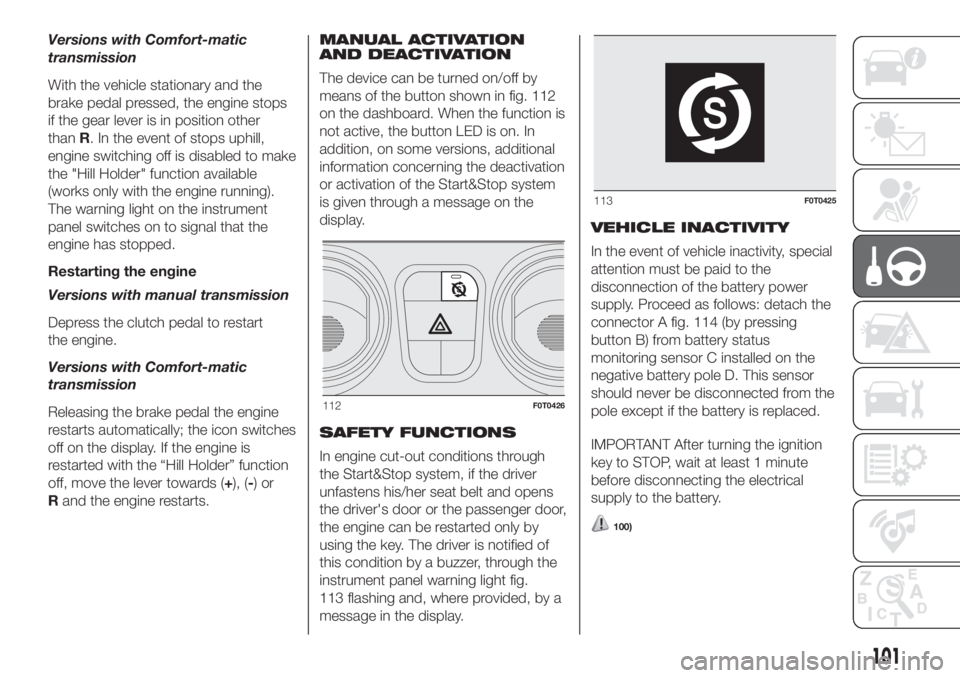
The device can be turned on/off by
means of the button shown in fig. 112
on the dashboard. When the function is
not active, the button LED is on. In
addition, on some versions, additional
information concerning the deactivation
or activation of the Start&Stop system
is given through a message on the
display.
SAFETY FUNCTIONS
In engine cut-out conditions through
the Start&Stop system, if the driver
unfastens his/her seat belt and opens
the driver's door or the passenger door,
the engine can be restarted only by
using the key. The driver is notified of
this condition by a buzzer, through the
instrument panel warning light fig.
113 flashing and, where provided, by a
message in the display.VEHICLE INACTIVITY
In the event of vehicle inactivity, special
attention must be paid to the
disconnection of the battery power
supply. Proceed as follows: detach the
connector A fig. 114 (by pressing
button B) from battery status
monitoring sensor C installed on the
negative battery pole D. This sensor
should never be disconnected from the
pole except if the battery is replaced.
IMPORTANT After turning the ignition
key to STOP, wait at least 1 minute
before disconnecting the electrical
supply to the battery.
100)
112F0T0426
113F0T0425
101
Page 130 of 196
FUEL CUT-OFF
SYSTEM
128)
This intervenes in the case of an impact
causing:
the interruption of the fuel supply
with the engine consequently cutting
out;
the automatic unlocking of the
doors;
turning on the lights inside the car.
When the system has been triggered,
the message “Fuel cut off, see
handbook” is displayed on some
versions.
IMPORTANT Check carefully for fuel
leaks, for instance in the engine
compartment, under the vehicle or near
the tank area.
After a crash, turn the ignition key to
STOP to avoid draining the battery.
The following procedure should be
carried out to restore the correct
operation of the vehicle:
turn the ignition key to MAR;
activate the right direction indicator;
deactivate the right direction
indicator;
activate the left direction indicator;
deactivate the left direction indicator;
activate the right direction indicator;
deactivate the right direction
indicator;
activate the left direction indicator;
deactivate the left direction indicator;
turn the ignition key to STOP.
Natural Power versions
In the event of an impact to the car, the
petrol and injection supply is cut off
immediately, causing the engine to cut
out and, as a result, the safety solenoid
valves to close.
WARNING
128)If, after an impact, you smell fuel or
notice leaks from the fuel system, do
not reactivate the system to avoid the risk
of fire.
TOWING THE
VEHICLE
The tow ring provided with the vehicle
is located in the tool box located behind
the left seat backrest (Cargo versions)
or in the boot (Combi versions).
ATTACHING THE TOW
HOOK
Proceed as follows:
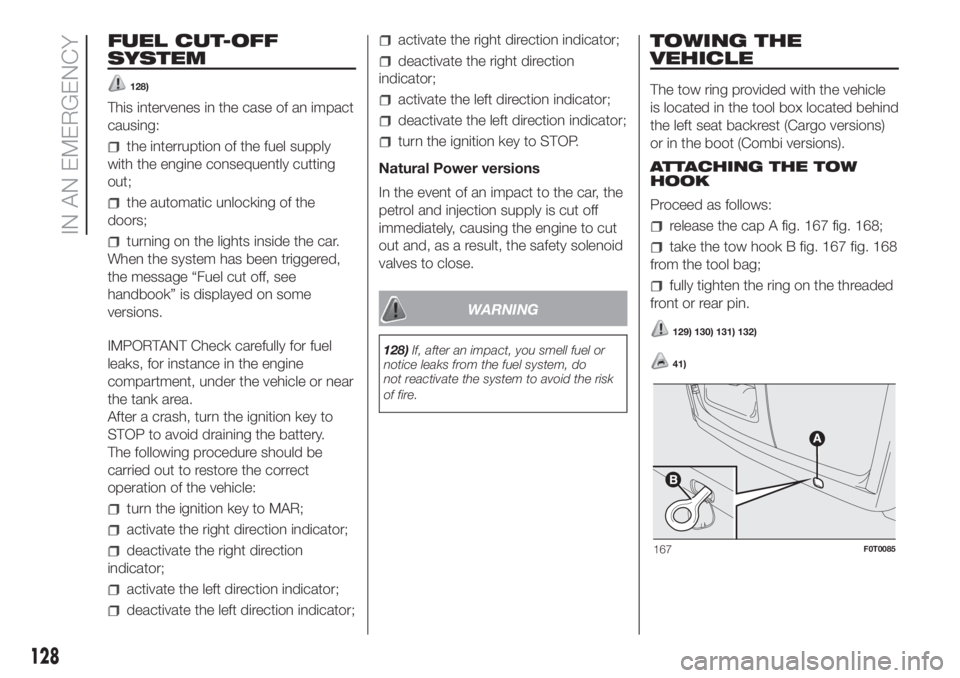
release the cap A fig. 167 fig. 168;
take the tow hook B fig. 167 fig. 168
from the tool bag;
fully tighten the ring on the threaded
front or rear pin.
129) 130) 131) 132)
41)
167F0T0085
128
IN AN EMERGENCY
Page 173 of 196
RADIO
(for versions/markets, where provided)
The radio has been designed according
to the specifications of the passenger
compartment, with a personalised
design matching the style of the
dashboard perfectly.
TIPS
Road safety
Please, learn how to use all different
radio functions (e.g. save stations)
before beginning to drive.
Reception conditions
Reception conditions change
constantly while driving. Reception may
be interfered with by the presence of
mountains, buildings or bridges,
especially when you are far away from
the broadcaster.
IMPORTANT The volume may be
increased when receiving traffic
information and news.
153)
Care and maintenance
Clean the cover with a soft anti-static
cloth only. Cleaning and polishing
products may damage the surface.ANTITHEFT PROTECTION
The radio is equipped with an anti-theft
protection system based on the
exchange of information between the
radio and the electronic control unit
(Body Computer) present on the
vehicle.
This system guarantees maximum
safety and prevents the secret code
from being entered each time the radio
power supply is disconnected.
If the check has a positive outcome, the
radio will start to function, whereas if
the comparison codes are not the
same or if the electronic control unit
(Body Computer) is replaced, the
device will ask the user to enter the
secret code according to the procedure
described in the paragraph below.
Entering the secret code
When the radio is switched on, if the
secret code is requested, the display
will show the word "Code" for about 2
seconds followed by four dashes "- -
- -".
The code is made up of four digits from
1 to 6, each corresponding to one of
the dashes.
To enter the first digit, press the
corresponding button of the preset
stations (from 1 to 6). Enter the other
code digits in the same way.If the four digits are not entered within
20 seconds, the display will show
"Enter code----".Ifthis occurs, it is
not considered an incorrect code entry.
After entering the fourth digit (within
20 seconds), the radio will work.
If an incorrect code is entered, the radio
will emit a sound and the display
shows the text "Radio blocked/wait" to
notify the user of the need to enter
the correct code.
Each time the user enters an incorrect
code, the waiting time will gradually
increase (1 min, 2 min, 4 min, 8 min, 16
min, 30 min,1h, 2h, 4h, 8h, 16h, 24h)
up to a maximum of 24 hours. The
waiting time will be shown on the
display with the text "Radio blocked/
wait". After the text has disappeared it
is possible to start the code entering
procedure again.
Vehicle radio passport
This document certifies ownership of
the car radio. The car radio passport
shows the radio model, serial number
and secret code.
IMPORTANT Keep the radio passport in
a safe place so that you can give the
information to the relevant authorities if
the radio is stolen.
171
Page 179 of 196
GENERAL INFORMATION
The radio offers the following functions:
Radio section
PLL tuning with FM/AM/MW
frequency bands;
RDS (Radio Data System) with TA
(traffic alerts) function - TP (traffic
programmes) - EON (Enhanced Other
Network) - REG (regional programmes);
AF: search selection for alternative
frequencies in RDS mode;
automatic/manual tuning into
stations;
FM Multipath detector;
manual storing of 30 stations: 18 on
FM band (6 on FM1, 6 on FM2, 6 on
FMT), 12 on MW band;
automatic storing (AUTOSTORE
function) of 6 stations in the dedicated
FM band;
SPEED VOLUME function:
automatic volume adjustment
according to the vehicle speed;
automatic Stereo/Mono selection.
CD section
Direct selection of the disc;
Track selection (forward/back);
Fast advance (forward/back) through
tracks;
CD Display function: display of disc
name and time elapsed since the
start of the track
Playing of audio CDs, CD-Rs and
CD-RWs.
51)
MP3 CD section
MP3-Info function (ID3-TAG);
Folder selection (previous/next);
Track selection (forward/back);
Fast advance (forward/back) through
tracks;
MP3 Display function: display of
name of folder, ID3-TAG information,
time elapsed since the start of the
track, name of the file;
Reading of audio or data CD, CD-R
and CD-RW.
Audio section
Mute/Pause function;
Soft-Mute function;
Loudness function
7-band graphic equaliser
Separate bass/treble adjustment
Right/left channel balance.FUNCTIONS AND
ADJUSTMENTS
SWITCHING ON THE RADIO
The car radio comes on when the
ON/OFF button/knob is briefly pressed.
When the radio is turned on with the
key extracted from the ignition, it
switches off automatically after about
20 minutes.
SWITCHING OFF THE RADIO
Keep the ON/OFF button/knob
pressed.
SELECTING THE RADIO
FUNCTIONS
By pressing the FM AS button quickly
and repeatedly, the following audio
sources can be selected cyclically:
TUNER (“FM1”, “FM2”, “FMA”).
By pressing the AM button briefly and
repeatedly, the following audio sources
can be selected cyclically:
TUNER (“MW1”, “MW2”).
SELECTING THE CD/CD CHANGER
FUNCTION
By briefly pressing the CD button, the
CD/CD CHANGER audio source can
be selected (only with a CD loaded).
MUTE/PAUSE FUNCTION (zeroing
the volume)
Press the MUTE button briefly to
activate the Mute function.
177
Page 180 of 196
Press the Mute button again to
deactivate the MUTE function.
The Mute function will be overridden
when there is an incoming traffic alert (if
the TA function is on) or if an
emergency alarm is received. The
function will be reactivated when the
alert is over.
AUDIO SETTINGS
The functions that can be selected from
the audio menu change depending on
the context: AM/FM/CD/CD
CHANGER.
Press the AUDIO button briefly to
change the Audio functions. After the
AUDIO button is first pressed, the
display will show the bass level value
for the source activated at that time
(e.g. in FM mode the display will show
the wording "FM Bass +2").
Use the
buttons to scroll through
the menu functions. To change the
setting of the function selected use the
buttons.
The current status of the selected
function appears on the display.
The functions managed by the Menu
are:
BASS (adjustment of bass tones);
TREBLE (adjustment of high tones);
BALANCE (right/left balance
adjustment);
FADER (front/back balance
adjustment);
LOUDNESS (LOUDNESS function
on/off);
EQUALISER (activation and
selection of factory-set equaliser levels);
USER EQUALISER (customised
equaliser setting).
MENU
MENU button functions
Press the button MENU briefly to
activate the Menu function. The display
will show the first menu item that can
be adjusted (AF) ("AF Switching On" on
the display).
Use the
orbuttons to scroll
through the Menu functions. To change
the setting of the function selected
use the
orbuttons.
The current status of the selected
function appears on the display.
The functions managed by the Menu
are:
AF SWITCHING (alternative
frequency search) (ON/OFF);
TRAFFIC INFORMATION (ON/OFF);
REGIONAL MODE (ON/OFF);
MP3 DISPLAY (CD MP3 / CD
CHANGER data);
SPEED VOLUME (volume change
based on speed);
RADIO ON VOLUME (radio
maximum limit on/off);
AUX OFFSET (alignment of the
portable device volume to that of the
other sources) (for versions/markets,
where provided);
RADIO OFF (switching-off mode);
SYSTEM RESET reset of factory
settings.
Press the button MENU again to exit
the Menu function.
IMPORTANT The AF SWITCHING,
TRAFFIC INFORMATION and
REGIONAL MODE adjustments are only
possible in FM mode.
RADIO (Tuner)
When the radio is turned on, it will
activate the last source listened
to before it was switched off: Radio,
CD, CD MP3.
To select the Radio function when
another audio source is being listened
to, briefly press the FM, AS or AM
buttons, depending on the desired
band.
SELECTING A FREQUENCY BAND
With the Radio mode active, press
the FM, AS or AM button briefly and
repeatedly to select the desired
reception band.
178
MULTIMEDIA
Page 181 of 196
Each time the button is pressed the
following bands are selected cyclically:
Pressing the FM AS button: “FM1”,
“FM2” or “FMA”;
Pressing the AM button: “MW1”,
“MW2”.
Each band is highlighted by the name
in the display. The last station selected
on the respective frequency band will
be tuned into.
PRESET BUTTONS
The buttons numbered from 1 to 6 are
used to set the following preset
stations:
18 in the AM band; 6 in FM1, 6 in
FM2, 6 in FMT or "FMA" (on some
versions);
12 in the MW band.
To listen to a preset station, select the
desired frequency band and then briefly
press the corresponding preset button
(from 1 to 6).
By pressing the preset button for more
than 2 seconds, the tuned station will
be stored. The storing phase is
confirmed by an acoustic signal.
AUTOMATIC TUNING
Briefly press the
orbutton to start
the automatic tuning search for the
next station that can be received in the
selected direction.If the button
orpressed down
longer, the fast search starts. When the
button is released, the tuner will stop
on the next station that can be
received.
If the TA function (traffic news) is on, the
tuner searches only for stations that
broadcast traffic news.
MANUAL TUNING
This is used to manually search for
stations in the preselected band. Select
the desired frequency band and then
press the
orbutton briefly and
repeatedly to start to the search in the
desired direction. If the
orbutton
is pressed longer, the fast search will
start and then stop when the button is
released.
AUTOSTORE FUNCTION (automatic
station storage)
To activate the Autostore function, hold
the FM AS button pressed until a beep
is heard. With this function, the radio
automatically stores the 6 stations with
the strongest signal in decreasing
order on the FMA frequency band.
During the automatic storing process,
the text “Autostore” flashes on the
display.Press the FM AS button again to stop
the Autostore function: the radio will
again tune into the station listened
to before the activation of the function.
When the Autostore scan is concluded,
the radio will automatically tune into
the first preset station on the FMA band
(preset 1).
The stations that have a strong signal at
that moment are then automatically
stored in the preselected band in the
buttons numbered 1 to 6.
When the Autostore function is
activated within the MW band, the FMA
band is automatically selected and the
function is performed.
IMPORTANT Sometimes the Autostore
function is not able to find 6 stations
with a strong signal. In this case, the
strongest stations stored will be
duplicated in the free preset buttons.
IMPORTANT When the Autostore
function is activated, the stations that
were previously stored in the FMA band
are deleted.
179