odometer FIAT FREEMONT 2013 Owner handbook (in English)
[x] Cancel search | Manufacturer: FIAT, Model Year: 2013, Model line: FREEMONT, Model: FIAT FREEMONT 2013Pages: 352, PDF Size: 5.22 MB
Page 26 of 352
Tire Pressure
Vehicle Information
Warning Message Displays
Turn Menu OFF
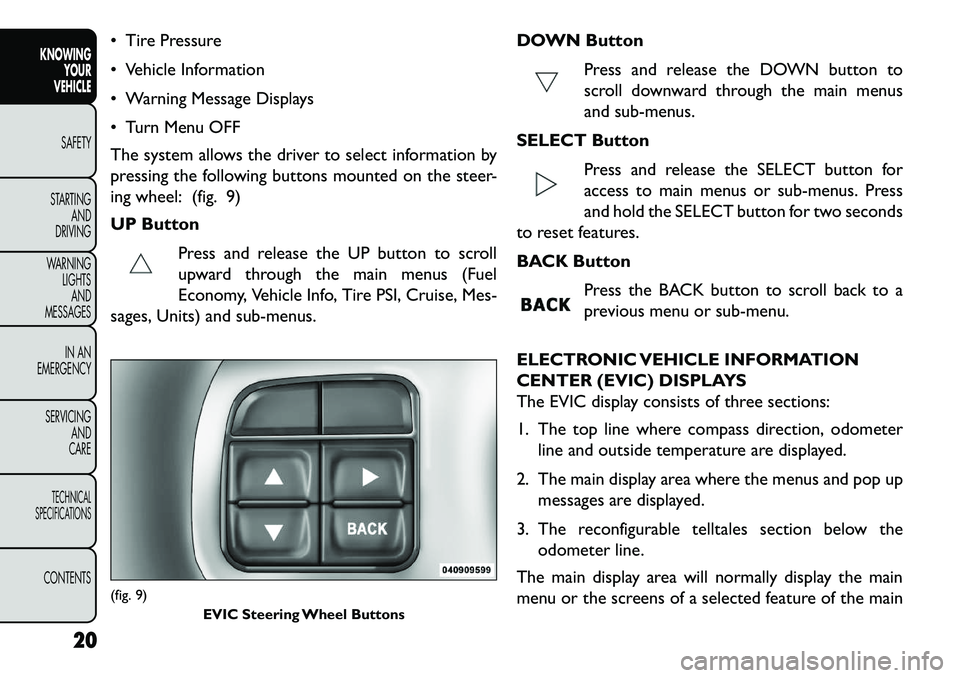
The system allows the driver to select information by
pressing the following buttons mounted on the steer-
ing wheel: (fig. 9)
UP ButtonPress and release the UP button to scroll
upward through the main menus (Fuel
Economy, Vehicle Info, Tire PSI, Cruise, Mes-
sages, Units) and sub-menus. DOWN Button
Press and release the DOWN button to
scroll downward through the main menus
and sub-menus.
SELECT Button Press and release the SELECT button for
access to main menus or sub-menus. Press
and hold the SELECT button for two seconds
to reset features.
BACK Button
Press the BACK button to scroll back to a
previous menu or sub-menu.
ELECTRONIC VEHICLE INFORMATION
CENTER (EVIC) DISPLAYS
The EVIC display consists of three sections:
1. The top line where compass direction, odometer line and outside temperature are displayed.
2. The main display area where the menus and pop up messages are displayed.
3. The reconfigurable telltales section below the odometer line.
The main display area will normally display the main
menu or the screens of a selected feature of the main(fig. 9) EVIC Steering Wheel Buttons
20
KNOWINGYOUR
VEHICLE
SAFETY
S
TARTING AND
DRIVING
WARNING LIGHTSAND
MESSAGES
IN AN
EMERGENCY
SERVICING AND
CARETECHNICAL
SPECIFICATIONSCONTENTS
Page 36 of 352
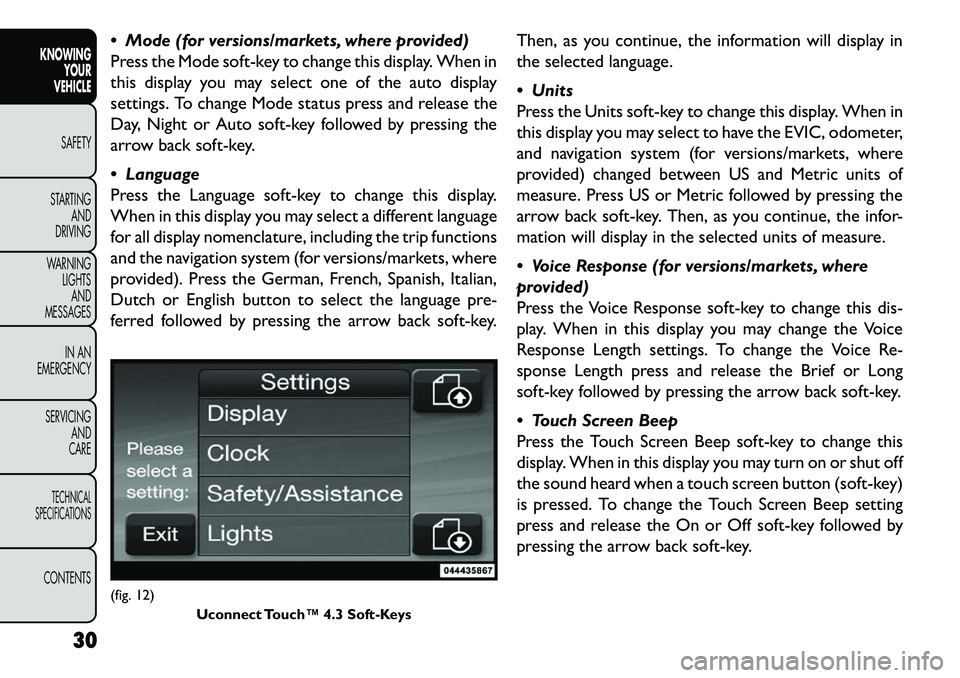
Mode (for versions/markets, where provided)
Press the Mode soft-key to change this display. When in
this display you may select one of the auto display
settings. To change Mode status press and release the
Day, Night or Auto soft-key followed by pressing the
arrow back soft-key.
Language
Press the Language soft-key to change this display.
When in this display you may select a different language
for all display nomenclature, including the trip functions
and the navigation system (for versions/markets, where
provided). Press the German, French, Spanish, Italian,
Dutch or English button to select the language pre-
ferred followed by pressing the arrow back soft-key.Then, as you continue, the information will display in
the selected language.
Units
Press the Units soft-key to change this display. When in
this display you may select to have the EVIC, odometer,
and navigation system (for versions/markets, where
provided) changed between US and Metric units of
measure. Press US or Metric followed by pressing the
arrow back soft-key. Then, as you continue, the infor-
mation will display in the selected units of measure.
Voice Response (for versions/markets, where
provided)
Press the Voice Response soft-key to change this dis-
play. When in this display you may change the Voice
Response Length settings. To change the Voice Re-
sponse Length press and release the Brief or Long
soft-key followed by pressing the arrow back soft-key.
Touch Screen Beep
Press the Touch Screen Beep soft-key to change this
display. When in this display you may turn on or shut off
the sound heard when a touch screen button (soft-key)
is pressed. To change the Touch Screen Beep setting
press and release the On or Off soft-key followed by
pressing the arrow back soft-key.(fig. 12)
Uconnect Touch™ 4.3 Soft-Keys
30
KNOWING YOUR
VEHICLE
SAFETY
S
TARTING AND
DRIVING
WARNING LIGHTSAND
MESSAGES
IN AN
EMERGENCY
SERVICING AND
CARETECHNICAL
SPECIFICATIONSCONTENTS
Page 43 of 352
selecting any point on the scale in between the + and –
soft-keys followed by pressing the arrow back soft-key.
Display Brightness with Headlights OFF (for
versions/markets, where provided)
When in this display you may select display brightness
with the headlights on and the headlights off. Adjust the
brightness with the + and – setting soft-keys or by
selecting any point on the scale in between the + and –
soft-keys followed by pressing the arrow back soft-key.
Set Language (for versions/markets, where pro-
vided)
When in this display you may select a different language
for all display nomenclature, including the trip functions
and the navigation system (for versions/markets, where
provided). Press the German, French, Spanish, Italian,
Dutch or English button to select the language pre-
ferred followed by pressing the arrow back soft-key.
Then, as you continue, the information will display in
the selected language.
Units (for versions/markets, where provided)
When in this display you may select to have the EVIC,
odometer, and navigation system (for versions/
markets, where provided) changed between US and
Metric units of measure. Press US or Metric followed
by pressing the arrow back soft-key. Then, as you
continue, the information will display in the selected
units of measure. Voice Response Length (for versions/markets,
where provided)
When in this display you may change the Voice Re-
sponse Length settings. To change the Voice Response
Length press and release the Brief or Detailed soft-key
followed by pressing the arrow back soft-key.
Touchscreen Beep
When in this display you may turn on or shut off the
sound heard when a touch screen button (soft-key) is
pressed. To change the Touch Screen Beep setting
press and release the On or Off soft-key followed by
pressing the arrow back soft-key.
Navigation Turn-By-Turn in Cluster (for
versions/markets, where provided)
When this feature is selected, the turn-by-turn direc-
tions will appear in the display as the vehicle ap-
proaches a designated turn within a programmed
route. To make your selection, press the Navigation
Turn-By-Turn in Cluster soft-key, select On or Off
followed by pressing the arrow back soft-key.
Clock
Sync Time with GPS (for versions/markets,
where provided)
When in this display you may automatically have the
radio set the time. To change the Sync Time setting
37
KNOWING
YOUR
VEHICLE
SAFETY
STARTING
AND
DRIVING
WARNING
LIGHTS
AND
MESSAGES
IN AN
EMERGENCY
SERVICING
AND
CARETECHNICAL
SPECIFICATIONSCONTENTS
Page 84 of 352
INTERIOR LIGHTS
The interior lights come on when a door is opened.
To protect the battery, the interior lights will turn off
automatically 10 minutes after the ignition switch is
moved to the LOCK position. This will occur if the
interior lights were switched on manually or are on
because a door is open. This includes the glove box
light, but not the trunk light. To restore interior light
operation, either turn the ignition switch ON or cycle
the light switch.
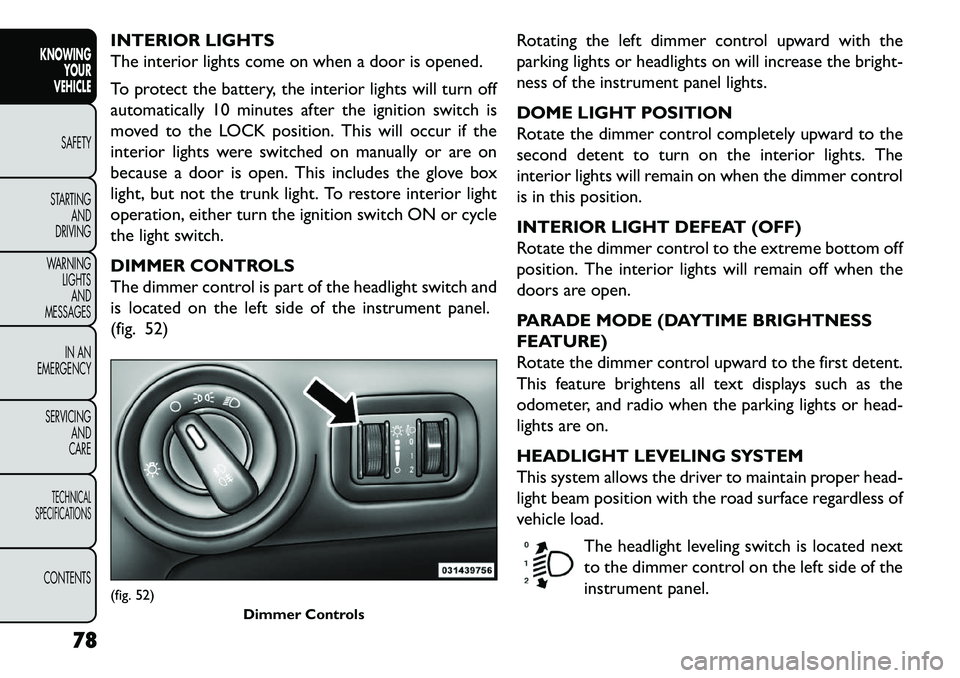
DIMMER CONTROLS
The dimmer control is part of the headlight switch and
is located on the left side of the instrument panel.
(fig. 52)Rotating the left dimmer control upward with the
parking lights or headlights on will increase the bright-
ness of the instrument panel lights.
DOME LIGHT POSITION
Rotate the dimmer control completely upward to the
second detent to turn on the interior lights. The
interior lights will remain on when the dimmer control
is in this position.
INTERIOR LIGHT DEFEAT (OFF)
Rotate the dimmer control to the extreme bottom off
position. The interior lights will remain off when the
doors are open.
PARADE MODE (DAYTIME BRIGHTNESS
FEATURE)
Rotate the dimmer control upward to the first detent.
This feature brightens all text displays such as the
odometer, and radio when the parking lights or head-
lights are on.
HEADLIGHT LEVELING SYSTEM
This system allows the driver to maintain proper head-
light beam position with the road surface regardless of
vehicle load.
The headlight leveling switch is located next
to the dimmer control on the left side of the
instrument panel.(fig. 52) Dimmer Controls
78
KNOWINGYOUR
VEHICLE
SAFETY
S
TARTING AND
DRIVING
WARNING LIGHTSAND
MESSAGES
IN AN
EMERGENCY
SERVICING AND
CARETECHNICAL
SPECIFICATIONSCONTENTS
Page 133 of 352
Prolonged driving with the MIL on
could cause further damage to the emis-
sion control system. It could also affect
fuel economy and drivability.The vehicle must be
serviced before any emissions tests can be per-
formed.
If the MIL is flashing while the engine is run-
ning, severe catalytic converter damage and
power loss will soon occur. Immediate service is
required.
LOOSE FUEL FILLER CAP MESSAGE (for
versions/markets, where provided)
If the vehicle diagnostic system determines that the
fuel filler cap is loose, improperly installed, or damaged,
a “Check Gascap” message will display in the Electronic
Vehicle Information Center (EVIC). If this occurs,
tighten the fuel filler cap properly and press the TRIP
ODOMETER button to turn off the message. If the
problem continues, the message will appear the next
time the vehicle is started.
A loose, improperly installed, or damaged fuel filler cap
may also turn on the MIL. POWER STEERING
The standard power steering system will give you good
vehicle response and increased ease of maneuverability
in tight spaces. The system will provide mechanical
steering capability if power assist is lost.
If for some reason the power assist is interrupted, it
will still be possible to steer your vehicle. Under these
conditions, you will observe a substantial increase in
steering effort, especially at very low vehicle speeds
and during parking maneuvers.
NOTE:
Increased noise levels at the end of the steering
wheel travel are considered normal and do not
indicate that there is a problem with the power
steering system.
Upon initial start-up in cold weather, the power steering pump may make noise for a short amount of
time. This is due to the cold, thick fluid in the
steering system. This noise should be considered
normal, and it does not in any way damage the
steering system.
127
KNOWING
YOUR
VEHICLE
SAFETY
STARTING
AND
DRIVING
WARNING
LIGHTS
AND
MESSAGES
IN AN
EMERGENCY
SERVICING
AND
CARETECHNICAL
SPECIFICATIONSCONTENTS
Page 171 of 352
LOOSE FUEL FILLER CAP MESSAGE (for
versions/markets, where provided)
If the vehicle diagnostic system determines that the
fuel filler cap is loose, improperly installed, or damaged,
a “Check Gascap” message will display in the Electronic
Vehicle Information Center (EVIC). If this occurs,
tighten the fuel filler cap properly and press the TRIP
ODOMETER button to turn off the message. If the
problem continues, the message will appear the next
time the vehicle is started.165
KNOWING
YOUR
VEHICLE
SAFETY
STARTING
AND
DRIVING
WARNING
LIGHTS
AND
MESSAGES
IN AN
EMERGENCY
SERVICING
AND
CARETECHNICAL
SPECIFICATIONSCONTENTS
Page 246 of 352
cycles, and the vehicle has been driven several kilome-
ters at speeds greater than 48 km/h, see your autho-
rized dealer as soon as possible to have the problem
diagnosed and corrected.
NOTE:
The “ESC Off Indicator Light” and the “ESC
Activation/Malfunction Indicator Light” come on mo-
mentarily each time the ignition switch is turned to
ON/RUN.
Each time the ignition is turned to ON/RUN, the ESC
system will be ON, even if it was turned off previously.
The ESC system will make buzzing or clicking sounds
when it is active. This is normal; the sounds will stop
when ESC becomes inactive following the maneuver
that caused the ESC activation.
4. Turn Signal Indicator LightThe left or right arrow will flash in unison
with the corresponding front and rear turn
signal lights when the turn signal switch is
operated. (Refer to “Lights” in “Knowing
Your Vehicle” for further information).
NOTE:
A chime will sound if the vehicle is driven more than
1.6 km with either turn signal on. Check for an inoperative outside light bulb if either
indicator flashes at a rapid rate.
5. High Beam Indicator
This light shows that the high beam headlights
are on. Pull the multifunction lever on the left
side of the steering column toward you to switch to
low beam. (Refer to “Lights” in “Knowing Your Vehicle”
for further information).
6. Front Fog Light Indicator (for versions/markets,
where provided) This indicator will illuminate when the front fog
lights are on. (Refer to “Lights” in “Knowing
Your Vehicle” for further information).
7. Odometer Display / Electronic Vehicle Informa-
tion Center (EVIC) Display
Odometer
The odometer display shows the total distance the
vehicle has been driven.
Electronic Vehicle Information Center (EVIC) Dis-
play
The Electronic Vehicle Information Center (EVIC) fea-
tures a driver-interactive display that is located in the
instrument cluster. For further information, refer to
“Electronic Vehicle Information Center (EVIC)” in
“Knowing Your Vehicle”.
240
KNOWING YOUR
VEHICLE
SAFETY
STARTING AND
DRIVING
WARNING LIGHTSAND
MESSA
GES
IN AN
EMERGENC
Y
SERVICING AND
CARETECHNICAL
SPECIFICATIONSCONTENTS
Page 329 of 352
(Continued)
Never use a tire with a smaller load index or
capacity, other than what was originally
equipped on your vehicle. Using a tire with a
smaller load index could result in tire overloading
and failure. You could lose control and have a
collision.
Failure to equip your vehicle with tires having
adequate speed capability can result in sudden
tire failure and loss of vehicle control.
Replacing original tires with tires of a
different size may result in false speed-
ometer and odometer readings. TIRE CHAINS
Use of Security Chain Company (SCC) Super Z6
SZ143 or Iceman Z6 IZ-643 cables or equivalent are
recommended on 225/65R17 tires.
NOTE:
These chains can be found referring to an authorized
FIAT Dealership.
Do not use tire chains on a compact spare tire.
To avoid damage to your vehicle or tires,
observe the following precautions:
Use chains on 225/65R17 tires only.
Because of restricted chain clearance between
tires and other suspension components, it is im-
portant that only chains in good condition are
used. Broken chains can cause serious damage.
Stop the vehicle immediately if noise occurs that
could indicate chain breakage. Remove the dam-
aged parts of the chain before further use.
Install chains on the front wheels as tightly as
possible and then retighten after driving about
0.8 km.
(Continued)
323
KNOWING
YOUR
VEHICLE
SAFETY
STARTING
AND
DRIVING
WARNING
LIGHTS
AND
MESSAGES
IN AN
EMERGENCY
SERVICING
AND
CARETECHNICAL
SPECIFICATIONSCONTENTS
Page 345 of 352
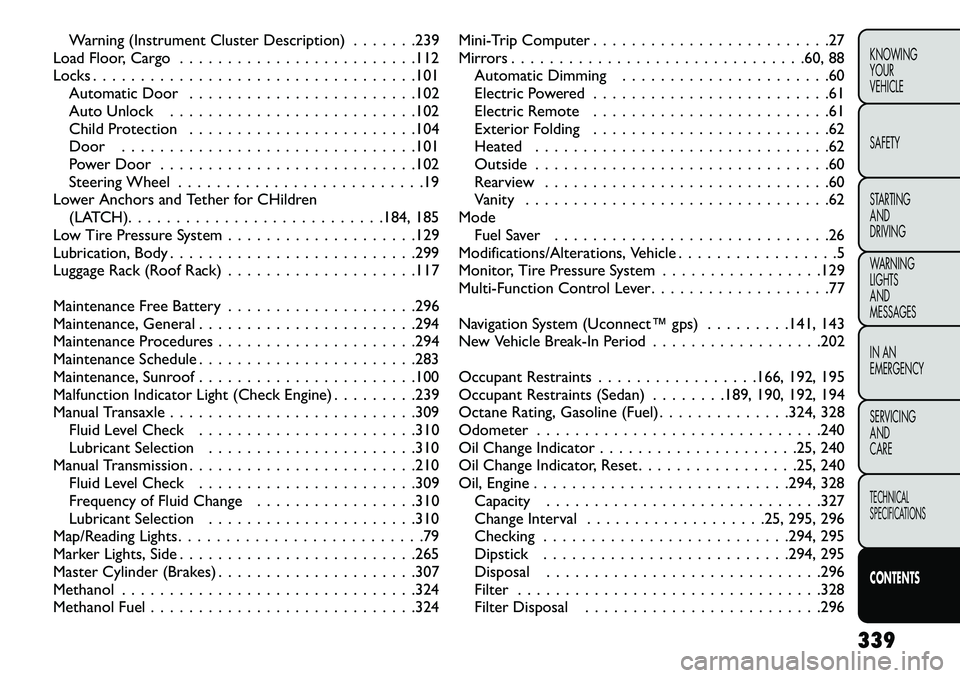
Warning (Instrument Cluster Description) . . . . . . .239
Load Floor, Cargo . . . . . . . . . . . . . . . . . . . . . . . . .112
Locks . . . . . . . . . . . . . . . . . . . . . . . . . . . . . . . . . .101 Automatic Door . . . . . . . . . . . . . . . . . . . . . . . .102
Auto Unlock . . . . . . . . . . . . . . . . . . . . . . . . . .102
Child Protection . . . . . . . . . . . . . . . . . . . . . . . .104
Door . . . . . . . . . . . . . . . . . . . . . . . . . . . . . . .101
Power Door . . . . . . . . . . . . . . . . . . . . . . . . . . .102
Steering Wheel . . . . . . . . . . . . . . . . . . . . . . . . . .19
Lower Anchors and Tether for CHildren
(LATCH). . . . . . . . . . . . . . . . . . . . . . . . . . .184, 185
Low Tire Pressure System . . . . . . . . . . . . . . . . . . . .129
Lubrication, Body . . . . . . . . . . . . . . . . . . . . . . . . . .299
Luggage Rack (Roof Rack) . . . . . . . . . . . . . . . . . . . .117
Maintenance Free Battery . . . . . . . . . . . . . . . . . . . .296
Maintenance, General . . . . . . . . . . . . . . . . . . . . . . .294
Maintenance Procedures . . . . . . . . . . . . . . . . . . . . .294
Maintenance Schedule . . . . . . . . . . . . . . . . . . . . . . .283
Maintenance, Sunroof . . . . . . . . . . . . . . . . . . . . . . .100
Malfunction Indicator Light (Check Engine) . . . . . . . . .239
Manual Transaxle . . . . . . . . . . . . . . . . . . . . . . . . . .309 Fluid Level Check . . . . . . . . . . . . . . . . . . . . . . .310
Lubricant Selection . . . . . . . . . . . . . . . . . . . . . .310
Manual Transmission . . . . . . . . . . . . . . . . . . . . . . . .210 Fluid Level Check . . . . . . . . . . . . . . . . . . . . . . .309
Frequency of Fluid Change . . . . . . . . . . . . . . . . .310
Lubricant Selection . . . . . . . . . . . . . . . . . . . . . .310
Map/Reading Lights. . . . . . . . . . . . . . . . . . . . . . . . . .79
Marker Lights, Side . . . . . . . . . . . . . . . . . . . . . . . . .265
Master Cylinder (Brakes) . . . . . . . . . . . . . . . . . . . . .307
Methanol . . . . . . . . . . . . . . . . . . . . . . . . . . . . . . .324
Methanol Fuel . . . . . . . . . . . . . . . . . . . . . . . . . . . .324 Mini-Trip Computer . . . . . . . . . . . . . . . . . . . . . . . . .27
Mirrors . . . . . . . . . . . . . . . . . . . . . . . . . . . . . . .60, 88
Automatic Dimming . . . . . . . . . . . . . . . . . . . . . .60
Electric Powered . . . . . . . . . . . . . . . . . . . . . . . . .61
Electric Remote . . . . . . . . . . . . . . . . . . . . . . . . .61
Exterior Folding . . . . . . . . . . . . . . . . . . . . . . . . .62
Heated . . . . . . . . . . . . . . . . . . . . . . . . . . . . . . .62
Outside . . . . . . . . . . . . . . . . . . . . . . . . . . . . . . .60
Rearview . . . . . . . . . . . . . . . . . . . . . . . . . . . . . .60
Vanity . . . . . . . . . . . . . . . . . . . . . . . . . . . . . . . .62
Mode Fuel Saver . . . . . . . . . . . . . . . . . . . . . . . . . . . . .26
Modifications/Alterations, Vehicle . . . . . . . . . . . . . . . . .5
Monitor, Tire Pressure System . . . . . . . . . . . . . . . . .129
Multi-Function Control Lever. . . . . . . . . . . . . . . . . . .77
Navigation System (Uconnect™ gps) . . . . . . . . .141, 143
New Vehicle Break-In Period . . . . . . . . . . . . . . . . . .202
Occupant Restraints . . . . . . . . . . . . . . . . .166, 192, 195
Occupant Restraints (Sedan) . . . . . . . .189, 190, 192, 194
Octane Rating, Gasoline (Fuel). . . . . . . . . . . . . .324, 328
Odometer . . . . . . . . . . . . . . . . . . . . . . . . . . . . . .240
Oil Change Indicator . . . . . . . . . . . . . . . . . . . . .25, 240
Oil Change Indicator, Reset . . . . . . . . . . . . . . . . .25, 240
Oil, Engine . . . . . . . . . . . . . . . . . . . . . . . . . . .294, 328 Capacity . . . . . . . . . . . . . . . . . . . . . . . . . . . . .327
Change Interval . . . . . . . . . . . . . . . . . . .25, 295, 296
Checking . . . . . . . . . . . . . . . . . . . . . . . . . .294, 295
Dipstick . . . . . . . . . . . . . . . . . . . . . . . . . .294, 295
Disposal . . . . . . . . . . . . . . . . . . . . . . . . . . . . .296
Filter . . . . . . . . . . . . . . . . . . . . . . . . . . . . . . . .328
Filter Disposal . . . . . . . . . . . . . . . . . . . . . . . . .296
339
KNOWING
YOUR
VEHICLE
SAFETY
STARTING
AND
DRIVING
WARNING
LIGHTS
AND
MESSAGES
IN AN
EMERGENCY
SERVICING
AND
CARETECHNICAL
SPECIFICATIONSCONTENTS
Page 349 of 352
Trailer and Tongue Weight . . . . . . . . . . . . . . . . .229
Wiring . . . . . . . . . . . . . . . . . . . . . . . . . . . . . .231
Trailer Towing Guide . . . . . . . . . . . . . . . . . . . . . . .228
Trailer Weight . . . . . . . . . . . . . . . . . . . . . . . . . . . .228
Transaxle Manual . . . . . . . . . . . . . . . . . . . . . . . . . . . . . .309
Transmission Automatic . . . . . . . . . . . . . . . . . . . . . . . . .211, 308
Filter . . . . . . . . . . . . . . . . . . . . . . . . . . . . . . . .309
Fluid . . . . . . . . . . . . . . . . . . . . . . . . . . . . .309, 310
Manual . . . . . . . . . . . . . . . . . . . . . . . . . . . . . .210
Transmitter Battery Service (Remote Keyless Entry) . . .13
Transmitter Programming (Remote Keyless Entry) . . . . .12
Transmitter, Remote Keyless Entry (RKE) . . . . . . . . . .12
Transporting Pets . . . . . . . . . . . . . . . . . . . . . . . . . .197
Tread Wear Indicators. . . . . . . . . . . . . . . . . . . . . . .321
Trip Odometer . . . . . . . . . . . . . . . . . . . . . . . . . . .240
Turn Signals . . . . . . . . . . . . . . . . . . . . . . . .77, 240, 268
UCI Connector . . . . . . . . . . . . . . . . . . . . . . . . . . .162
Underhood Fuses . . . . . . . . . . . . . . . . . . . . . . . . . .272
Universal Consumer Interface (UCI) Connector . . . . .162
Unleaded Gasoline . . . . . . . . . . . . . . . . . . . . . . . . .324
Untwisting Procedure, Seat Belt . . . . . . . . . . . . . . . .170
Upholstery Care . . . . . . . . . . . . . . . . . . . . . . . . . .312
Vanity Mirrors . . . . . . . . . . . . . . . . . . . . . . . . . . . . .62
Vehicle Identification Number (VIN) . . . . . . . . . . . . .316
Vehicle Modifications/Alterations . . . . . . . . . . . . . . . . .5
Vehicle Storage . . . . . . . . . . . . . . . . . . . . . . . . .73, 314
Vehicle Theft Alarm (Security Alarm) . . . . . . . . . . . . .15
Viscosity, Engine Oil . . . . . . . . . . . . . . . . . . . . .295, 296 Warning Flasher, Hazard . . . . . . . . . . . . . . . . . . . . . .89
Warning Lights (Instrument Cluster Description) . . . . .239
Washer
Adding Fluid . . . . . . . . . . . . . . . . . . . . . . . . . . .301
Washers, Headlight . . . . . . . . . . . . . . . . . . . . . . . . .82
Washers, Windshield . . . . . . . . . . . . . . . . . .80, 81, 301
Water Driving Through . . . . . . . . . . . . . . . . . . . . . . . .224
Wheel and Wheel Trim . . . . . . . . . . . . . . . . . . . . . .312
Wheel and Wheel Trim Care . . . . . . . . . . . . . . . . . .312
Wind Buffeting . . . . . . . . . . . . . . . . . . . . . . . .100, 110
Window Fogging . . . . . . . . . . . . . . . . . . . . . . . . . . .73
Windows . . . . . . . . . . . . . . . . . . . . . . . . . . . . . . .108 Power . . . . . . . . . . . . . . . . . . . . . . . . . . . . . . .108
Windshield Defroster . . . . . . . . . . . . . . . . . . . . . . .200
Windshield Washers . . . . . . . . . . . . . . . . . . . . . .80, 81 Fluid . . . . . . . . . . . . . . . . . . . . . . . . . . . . . . . .301
Windshield Wiper Blades . . . . . . . . . . . . . . . . . . . .300
Windshield Wipers . . . . . . . . . . . . . . . . . . . . . . . . .80
Wiper Blade Replacement . . . . . . . . . . . . . . . . . . . .300
Wiper, Delay . . . . . . . . . . . . . . . . . . . . . . . . . . . . . .80
Wiper, Rear . . . . . . . . . . . . . . . . . . . . . . . . . . . . . .83
Wipers, Intermittent . . . . . . . . . . . . . . . . . . . . . . . .80
Wrecker Towing . . . . . . . . . . . . . . . . . . . . . . . . . .280
343
KNOWING
YOUR
VEHICLE
SAFETY
STARTING
AND
DRIVING
WARNING
LIGHTS
AND
MESSAGES
IN AN
EMERGENCY
SERVICING
AND
CARETECHNICAL
SPECIFICATIONSCONTENTS