maintenance reset FIAT IDEA 2007 1.G Owner's Manual
[x] Cancel search | Manufacturer: FIAT, Model Year: 2007, Model line: IDEA, Model: FIAT IDEA 2007 1.GPages: 314, PDF Size: 4.78 MB
Page 103 of 314
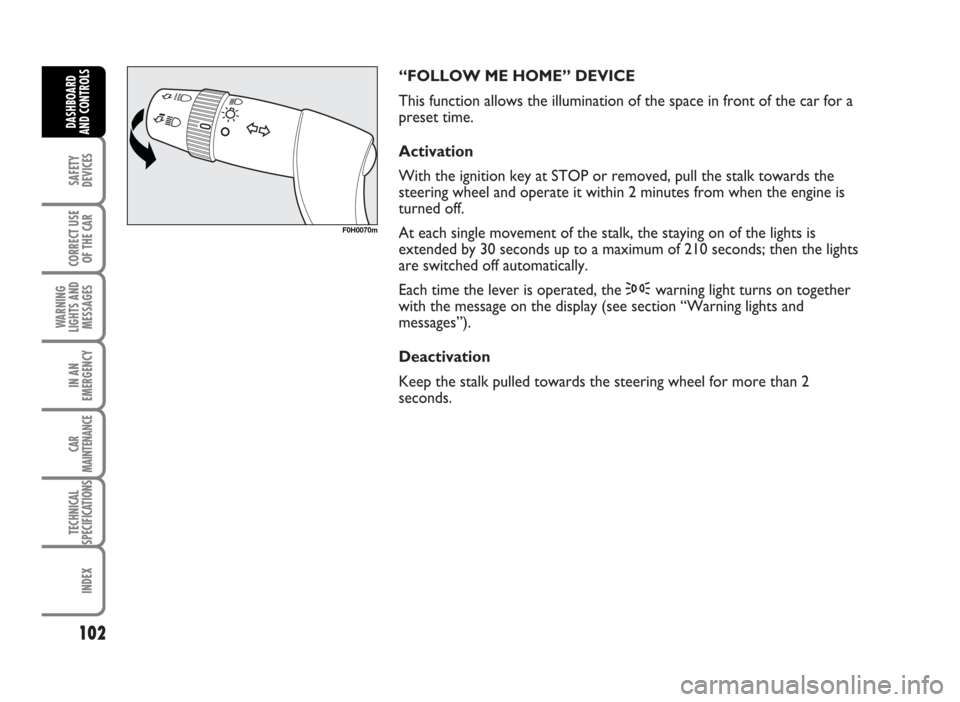
“FOLLOW ME HOME” DEVICE
This function allows the illumination of the space in front of the car for a
preset time.
Activation
With the ignition key at STOP or removed, pull the stalk towards the
steering wheel and operate it within 2 minutes from when the engine is
turned off.
At each single movement of the stalk, the staying on of the lights is
extended by 30 seconds up to a maximum of 210 seconds; then the lights
are switched off automatically.
Each time the lever is operated, the 3warning light turns on together
with the message on the display (see section “Warning lights and
messages”).
Deactivation
Keep the stalk pulled towards the steering wheel for more than 2
seconds.
102
SAFETY
DEVICES
CORRECT USE
OF THE CAR
WARNING
LIGHTS AND
MESSAGES
IN AN
EMERGENCY
CAR
MAINTENANCE
TECHNICAL
SPECIFICATIONS
INDEX
DASHBOARD
AND CONTROLS
F0H0070m
Page 104 of 314
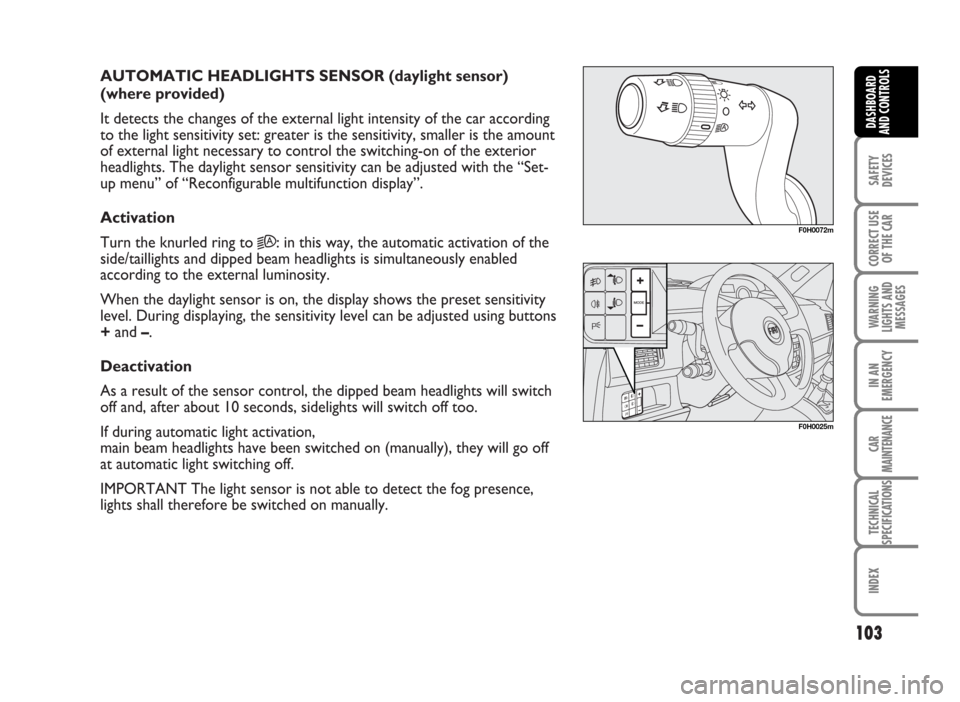
AUTOMATIC HEADLIGHTS SENSOR (daylight sensor)
(where provided)
It detects the changes of the external light intensity of the car according
to the light sensitivity set: greater is the sensitivity, smaller is the amount
of external light necessary to control the switching-on of the exterior
headlights. The daylight sensor sensitivity can be adjusted with the “Set-
up menu” of “Reconfigurable multifunction display”.
Activation
Turn the knurled ring to
2A: in this way, the automatic activation of the
side/taillights and dipped beam headlights is simultaneously enabled
according to the external luminosity.
When the daylight sensor is on, the display shows the preset sensitivity
level. During displaying, the sensitivity level can be adjusted using buttons
+and –.
Deactivation
As a result of the sensor control, the dipped beam headlights will switch
off and, after about 10 seconds, sidelights will switch off too.
If during automatic light activation,
main beam headlights have been switched on (manually), they will go off
at automatic light switching off.
IMPORTANT The light sensor is not able to detect the fog presence,
lights shall therefore be switched on manually.
103
SAFETY
DEVICES
CORRECT USE
OF THE CAR
WARNING
LIGHTS AND
MESSAGES
IN AN
EMERGENCY
CAR
MAINTENANCE
TECHNICAL
SPECIFICATIONS
INDEX
DASHBOARD
AND CONTROLS
F0H0072m
F0H0025m
Page 110 of 314
TO INCREASE THE MEMORISED SPEED
The speed memorised can be increased in two ways:
❒pressing the accelerator and then memorising the
new speed reached;
or
❒moving the stalk upwards (+).
Each operation of the stalk will correspond to a slight
increase in speed (about 1 km/h), while keeping the
stalk upwards continuously will correspond to a
continuous speed increase.
109
SAFETY
DEVICES
CORRECT USE
OF THE CAR
WARNING
LIGHTS AND
MESSAGES
IN AN
EMERGENCY
CAR
MAINTENANCE
TECHNICAL
SPECIFICATIONS
INDEX
DASHBOARD
AND CONTROLS
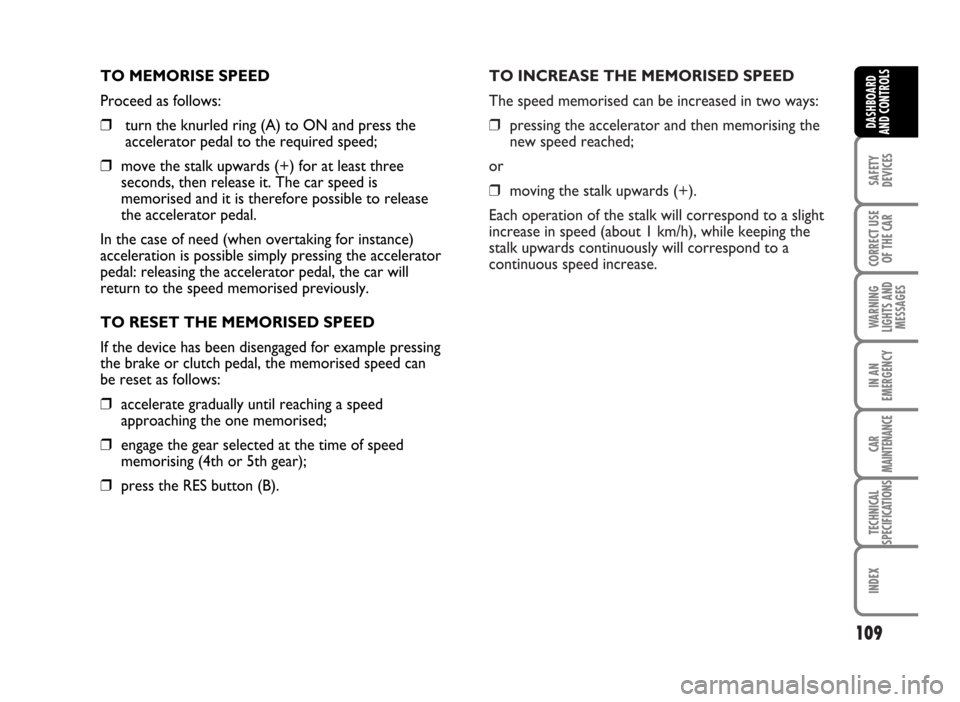
TO MEMORISE SPEED
Proceed as follows:
❒turn the knurled ring (A) to ON and press the
accelerator pedal to the required speed;
❒move the stalk upwards (+) for at least three
seconds, then release it. The car speed is
memorised and it is therefore possible to release
the accelerator pedal.
In the case of need (when overtaking for instance)
acceleration is possible simply pressing the accelerator
pedal: releasing the accelerator pedal, the car will
return to the speed memorised previously.
TO RESET THE MEMORISED SPEED
If the device has been disengaged for example pressing
the brake or clutch pedal, the memorised speed can
be reset as follows:
❒accelerate gradually until reaching a speed
approaching the one memorised;
❒engage the gear selected at the time of speed
memorising (4th or 5th gear);
❒press the RES button (B).
Page 117 of 314
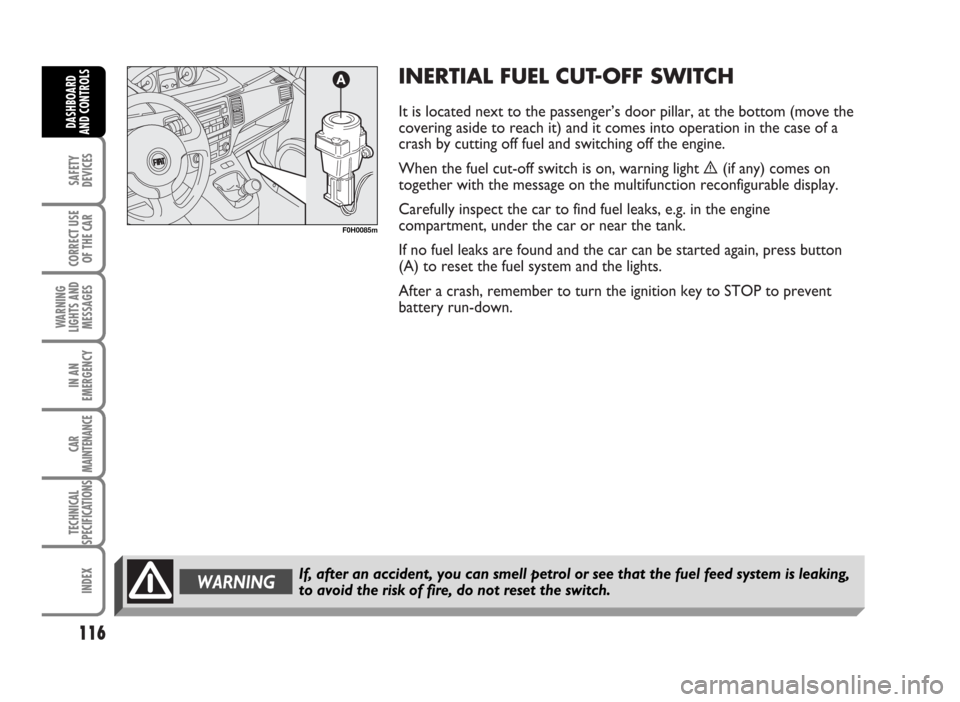
INERTIAL FUEL CUT-OFF SWITCH
It is located next to the passenger’s door pillar, at the bottom (move the
covering aside to reach it) and it comes into operation in the case of a
crash by cutting off fuel and switching off the engine.
When the fuel cut-off switch is on, warning light è(if any) comes on
together with the message on the multifunction reconfigurable display.
Carefully inspect the car to find fuel leaks, e.g. in the engine
compartment, under the car or near the tank.
If no fuel leaks are found and the car can be started again, press button
(A) to reset the fuel system and the lights.
After a crash, remember to turn the ignition key to STOP to prevent
battery run-down.
116
SAFETY
DEVICES
CORRECT USE
OF THE CAR
WARNING
LIGHTS AND
MESSAGES
IN AN
EMERGENCY
CAR
MAINTENANCE
TECHNICAL
SPECIFICATIONS
INDEX
DASHBOARD
AND CONTROLS
WARNINGIf, after an accident, you can smell petrol or see that the fuel feed system is leaking,
to avoid the risk of fire, do not reset the switch.
F0H0085m
Page 142 of 314
141
SAFETY
DEVICES
CORRECT USE
OF THE CAR
WARNING
LIGHTS AND
MESSAGES
IN AN
EMERGENCY
CAR
MAINTENANCE
TECHNICAL
SPECIFICATIONS
INDEX
DASHBOARD
AND CONTROLS
F0H0120m
SOUND SYSTEM (where fitted)
For the operation of the radio with CD or CD MP3, read the
instructions for use given in the attached Supplement.
PRESET SYSTEM (where fitted)
The system consists of:
❒radio power cables
❒front and rear loudspeaker power cables
❒aerial power cable
❒2 tweeters on front cross members (power 30W max each);
❒2 mid-woofers on front doors (diameter 165 mm, power 30W max
each);
❒2 full-range on rear doors (diameter 165 mm, power 30W max each).
❒1 radio interference suppressor, attached to the Owner Handbook.
Suppressor installation with the sound system will guarantee proper
AM reception. To install the radio interference suppressor see the
attached instructions (or contact Fiat Dealership).
Sound system installation
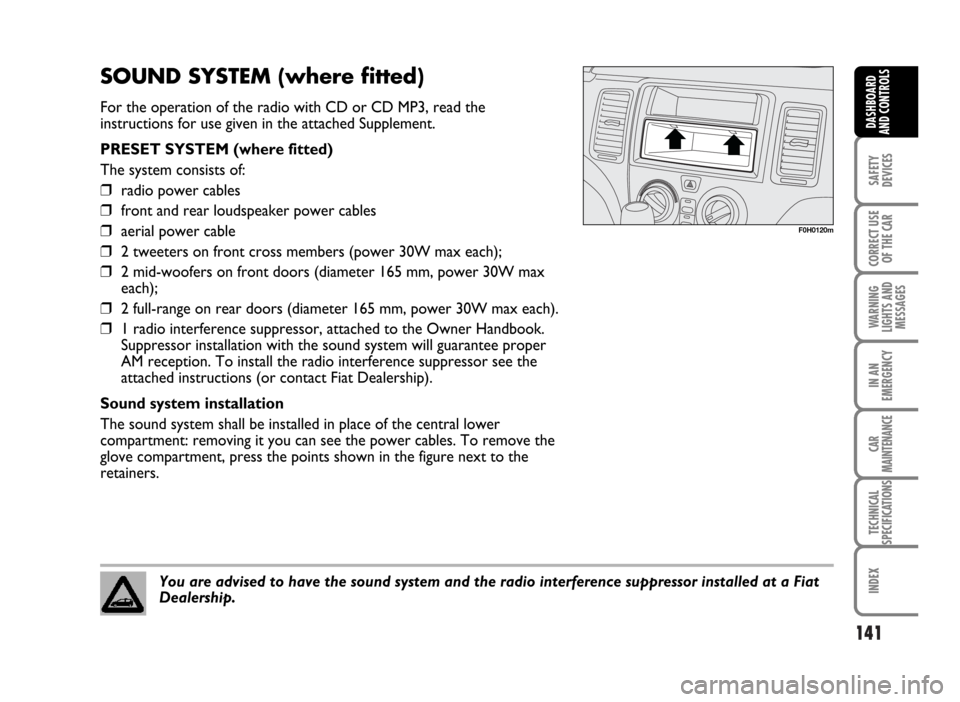
The sound system shall be installed in place of the central lower
compartment: removing it you can see the power cables. To remove the
glove compartment, press the points shown in the figure next to the
retainers.
You are advised to have the sound system and the radio interference suppressor installed at a Fiat
Dealership.
Page 148 of 314
FAILURE WARNINGS
See the “Warning lights and messages” chapter.
OPERATION WITH TRAILER
The system is preset for deactivating automatically
when the trailer electric cable plug is fitted into the car
tow hook socket.
Sensors are reactivated when removing the trailer
cable plug.GENERAL WARNINGS
❒When parking, take the utmost care to obstacles
set above or under the sensors.
❒Objects set close to car rear part, under certain
circumstances are not detected and could
therefore cause damages to the car.
❒Indications sent by the sensor can be altered by
dirt, snow or ice deposited on the sensors or by
ultrasound systems (e.g.: truck pneumatic brakes or
pneumatic hammers) set nearby the car.
147
SAFETY
DEVICES
CORRECT USE
OF THE CAR
WARNING
LIGHTS AND
MESSAGES
IN AN
EMERGENCY
CAR
MAINTENANCE
TECHNICAL
SPECIFICATIONS
INDEX
DASHBOARD
AND CONTROLS
For proper operation, the parking sensors set on the bumpers shall be clean from mud, dirt, snow or
ice. When cleaning the sensors, take the utmost care to prevent their damaging; do not use therefore
dry or rough clothes. Sensors shall be washed with clean water and car detergent, if required. In wash-
ing stations, clean sensors quickly keeping the vapour jet/high pressure washing nozzles at 10 cm at least from
the sensors.
WARNINGParking manoeuvres however are always under the driver’s responsibility that shall
always check the absence of people, animals or objects in the manoeuvre space.
This system is just a help for the driver but he shall never reduce important during
dangerous manoeuvres even if performed at low speed.
Page 152 of 314
151
CORRECT USE
OF THE CAR
WARNING
LIGHTS AND
MESSAGES
IN AN
EMERGENCY
CAR
MAINTENANCE
TECHNICAL
SPECIFICATIONS
INDEX
DASHBOARD
AND CONTROLS
SAFETY
DEVICES
SEAT BELTS............................................................................ 152
PRETENSIONERS ................................................................. 156
CARRYING CHILDREN SAFELY ..................................... 159
PRESETTING FOR MOUNTING THE
“TYPE ISOFIX” CHILD RESTRAINT SYSTEM .............. 166
FRONT AND SIDE AIR BAGS .......................................... 169
SIDE AIR BAGS (SIDE BAG -
FRONT WINDOW BAG).................................................. 173
S S
A A
F F
E E
T T
Y Y
D D
E E
V V
I I
C C
E E
S S
Page 154 of 314
S.B.R. system
The car is fitted with the S.B.R. system (Seat Belt
Reminder), consisting of a buzzer which, together with
the flashing of warning light
The buzzer can be deactivated (until the the next
engine stop) as follows:
❒fasten the driver’s seat belt.
❒turn the ignition key to MAR
❒wait for over 20 seconds and then release at least
one of the seat belts.
For permanent deactivation, contact Fiat Dealership.
153
CORRECT USE
OF THE CAR
WARNING
LIGHTS AND
MESSAGES
IN AN
EMERGENCY
CAR
MAINTENANCE
TECHNICAL
SPECIFICATIONS
INDEX
DASHBOARD
AND CONTROLS
SAFETY
DEVICES
Remember that in the event of a violent collision, back seat passengers not
wearing seat belts also represent a serious danger for the front seat passengers.WARNING
On versions fitted with reconfigurable multifunction
display (Comfort) it is possible to reset the S.B.R.
system only through the set-up menu (see “Warning
lights and messages” section at paragraph “Unfastened
seat belts”).
For the other versions system can be reset only by
Fiat Dealership.
Page 155 of 314
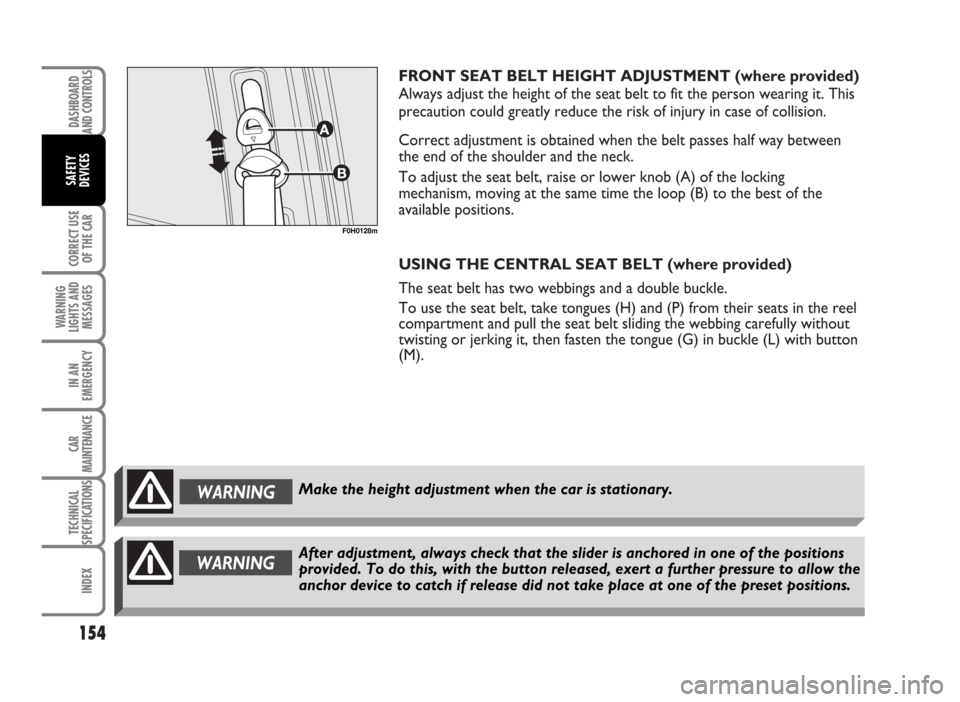
FRONT SEAT BELT HEIGHT ADJUSTMENT (where provided)
Always adjust the height of the seat belt to fit the person wearing it. This
precaution could greatly reduce the risk of injury in case of collision.
Correct adjustment is obtained when the belt passes half way between
the end of the shoulder and the neck.
To adjust the seat belt, raise or lower knob (A) of the locking
mechanism, moving at the same time the loop (B) to the best of the
available positions.
USING THE CENTRAL SEAT BELT (where provided)
The seat belt has two webbings and a double buckle.
To use the seat belt, take tongues (H) and (P) from their seats in the reel
compartment and pull the seat belt sliding the webbing carefully without
twisting or jerking it, then fasten the tongue (G) in buckle (L) with button
(M).
154
CORRECT USE
OF THE CAR
WARNING
LIGHTS AND
MESSAGES
IN AN
EMERGENCY
CAR
MAINTENANCE
TECHNICAL
SPECIFICATIONS
INDEX
DASHBOARD
AND CONTROLS
SAFETY
DEVICES
F0H0128m
WARNING
WARNINGAfter adjustment, always check that the slider is anchored in one of the positions
provided. To do this, with the button released, exert a further pressure to allow the
anchor device to catch if release did not take place at one of the preset positions. Make the height adjustment when the car is stationary.
Page 167 of 314
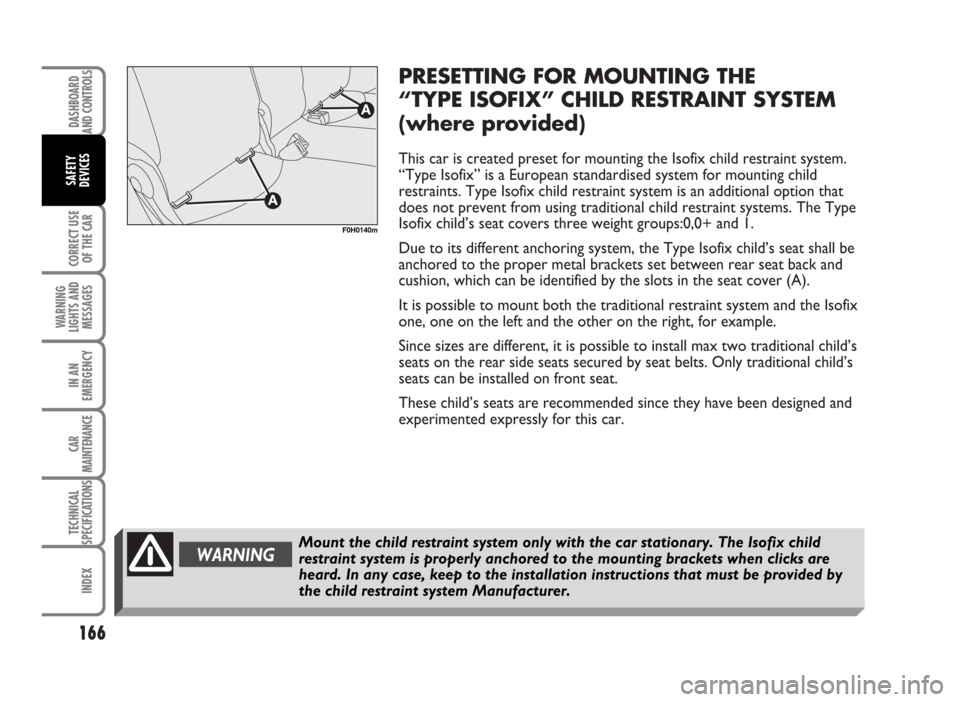
PRESETTING FOR MOUNTING THE
“TYPE ISOFIX” CHILD RESTRAINT SYSTEM
(where provided)
This car is created preset for mounting the Isofix child restraint system.
“Type Isofix” is a European standardised system for mounting child
restraints. Type Isofix child restraint system is an additional option that
does not prevent from using traditional child restraint systems. The Type
Isofix child’s seat covers three weight groups:0,0+ and 1.
Due to its different anchoring system, the Type Isofix child’s seat shall be
anchored to the proper metal brackets set between rear seat back and
cushion, which can be identified by the slots in the seat cover (A).
It is possible to mount both the traditional restraint system and the Isofix
one, one on the left and the other on the right, for example.
Since sizes are different, it is possible to install max two traditional child’s
seats on the rear side seats secured by seat belts. Only traditional child’s
seats can be installed on front seat.
These child’s seats are recommended since they have been designed and
experimented expressly for this car.
166
CORRECT USE
OF THE CAR
WARNING
LIGHTS AND
MESSAGES
IN AN
EMERGENCY
CAR
MAINTENANCE
TECHNICAL
SPECIFICATIONS
INDEX
DASHBOARD
AND CONTROLS
SAFETY
DEVICES
F0H0140m
WARNINGMount the child restraint system only with the car stationary. The Isofix child
restraint system is properly anchored to the mounting brackets when clicks are
heard. In any case, keep to the installation instructions that must be provided by
the child restraint system Manufacturer.