engine FIAT IDEA 2009 1.G User Guide
[x] Cancel search | Manufacturer: FIAT, Model Year: 2009, Model line: IDEA, Model: FIAT IDEA 2009 1.GPages: 210, PDF Size: 3.62 MB
Page 32 of 210
31
SAFETY
STARTING
AND DRIVING
WARNING
LIGHTS AND
MESSAGES
IN AN
EMERGENCY
MAINTENANCE
AND CARE
TECHNICAL
SPECIFICATIONS
ALPHABETICAL
INDEX
DASHBOARD
AND CONTROLS
Adjust the button volume
(Button Vol.)
This function is used to set the volume of
the roger-beep accompanying the activa-
tion of buttons MODE, +e –through 8
levels.
To set the desired volume, proceed as fol-
lows:
– briefly press button MODE: the previ-
ously set volume “level” starts flashing on
the display;
– press button +or –to set;
– briefly press button MODEto go back
to the menu screen or press the button
for a prolonged time to go back to the
standard screen without storing the set-
tings.
S.B.R. buzzer reactivation (Belt
Buzzer) (where provided)
This function can be only displayed after a
Fiat Dealership has deactivated the S.B.R.
system (see paragraph “S.B.R. system” in
section “Safety devices”).The indications will appear more fre-
quently where there are 200 km left. For
1.3 Multijet versions, refer to the “Service
Schedule” in the “Maintenance and care”
chapter for replacing the air cleaner, the
engine oil and the engine oil filter. The in-
dication will appear in kilometres or miles
according to the settings. When the next
scheduled service operation is approach-
ing, the message “Service” will appear on
the display followed by the number of kilo-
metres or miles left when the key is
turned to MAR. The “Service Schedule”
information is provided with kilometres
(km)/miles (mi) or days (dd), according to
the deadline which appears first. Go to a
Fiat Dealership where the “Scheduled Ser-
vice” operations will be performed and the
message will be reset. Scheduled Servicing (Service)
This function may be used to display in-
formation connected to proper car ser-
vicing in terms of kilometres or days.
This information can be consulted as fol-
lows:
–briefly press button MODE: service in
km or mi, according to previous setting,
will be displayed (see paragraph “Units”);
– press button +or –to set deadline in
days;
– briefly press button MODEto go back
to the menu screen or hold the button
pressed to go back to the standard screen.
Note The “Service Schedule” requires the
car to be services every 20,000 km (or
equivalent distance in miles) or once a
year. This message will appear automati-
cally with key at MARafter 2,000 km (or
equivalent distance in miles) or 30 before
the deadline and will appear every 200 km
(or equivalent distance in miles) or 3 days.
Page 35 of 210
34
SAFETY
STARTING
AND DRIVING
WARNING
LIGHTS AND
MESSAGES
IN AN
EMERGENCY
MAINTENANCE
AND CARE
TECHNICAL
SPECIFICATIONS
ALPHABETICAL
INDEX
DASHBOARD
AND CONTROLS
New mission
The new mission begins after:– “manu-
al” resetting by the user, by pressing the
relevant button;
– “automatic” resetting, when the “Trip
distance” reaches 3999.9 km or 9999.9 km
(according to the type of display) or when
the “Travel time” reaches 99.59 (99 hours
and 59 minutes);
– after disconnecting/reconnecting the
battery.
IMPORTANT “General Trip” resets will
reset “Trip B” at the same time, while re-
setting “Trip B” will only reset the val-
ues of the trip B function. Average speed
This shows the car average speed as a
function of the overall time elapsed since
the start of the new mission.Journey time
This value shows the time elapsed since
the start of the new mission.
IMPORTANT If information is not avail-
able, the message “----” will appear instead
of the Trip Computer values. Displaying
of the values will be resumed when nor-
mal operation is restored without reset-
ting the values displayed before the prob-
lem nor starting a new mission.
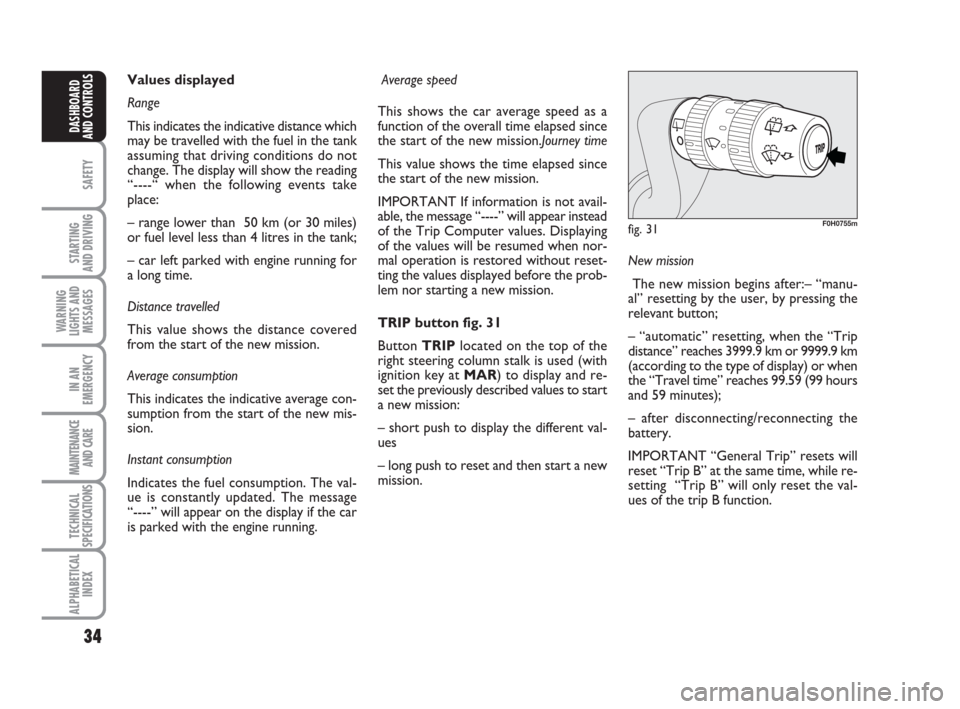
TRIP button fig. 31
Button TRIPlocated on the top of the
right steering column stalk is used (with
ignition key at MAR) to display and re-
set the previously described values to start
a new mission:
– short push to display the different val-
ues
– long push to reset and then start a new
mission. Values displayed
Range
This indicates the indicative distance which
may be travelled with the fuel in the tank
assuming that driving conditions do not
change. The display will show the reading
“----“ when the following events take
place:
– range lower than 50 km (or 30 miles)
or fuel level less than 4 litres in the tank;
– car left parked with engine running for
a long time.
Distance travelled
This value shows the distance covered
from the start of the new mission.
Average consumption
This indicates the indicative average con-
sumption from the start of the new mis-
sion.
Instant consumption
Indicates the fuel consumption. The val-
ue is constantly updated. The message
“----” will appear on the display if the car
is parked with the engine running.
fig. 31F0H0755m
Page 37 of 210
36
SAFETY
STARTING
AND DRIVING
WARNING
LIGHTS AND
MESSAGES
IN AN
EMERGENCY
MAINTENANCE
AND CARE
TECHNICAL
SPECIFICATIONS
ALPHABETICAL
INDEX
DASHBOARD
AND CONTROLS
Fig. 32F0H0737m
ADJUSTING THE
STEERING WHEEL
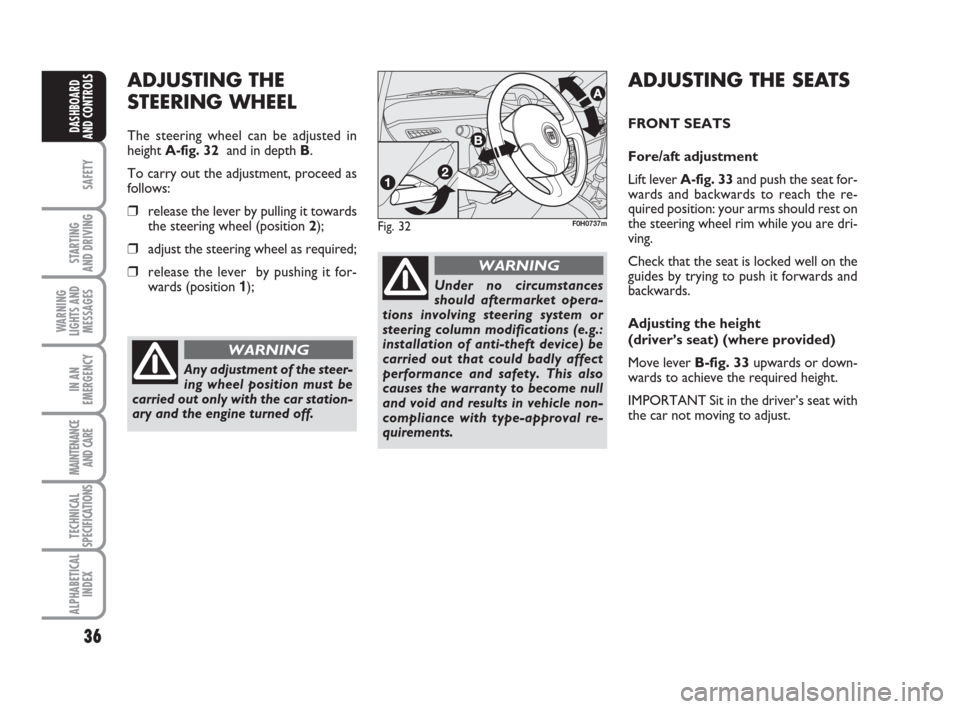
The steering wheel can be adjusted in
height A-fig. 32and in depth B.
To carry out the adjustment, proceed as
follows:
❒release the lever by pulling it towards
the steering wheel (position 2);
❒adjust the steering wheel as required;
❒release the lever by pushing it for-
wards (position 1);
Any adjustment of the steer-
ing wheel position must be
carried out only with the car station-
ary and the engine turned off.
WARNING
Under no circumstances
should aftermarket opera-
tions involving steering system or
steering column modifications (e.g.:
installation of anti-theft device) be
carried out that could badly affect
performance and safety. This also
causes the warranty to become null
and void and results in vehicle non-
compliance with type-approval re-
quirements.
WARNING
ADJUSTING THE SEATS
FRONT SEATS
Fore/aft adjustment
Lift lever A-fig. 33and push the seat for-
wards and backwards to reach the re-
quired position: your arms should rest on
the steering wheel rim while you are dri-
ving.
Check that the seat is locked well on the
guides by trying to push it forwards and
backwards.
Adjusting the height
(driver’s seat) (where provided)
Move lever
B-fig. 33upwards or down-
wards to achieve the required height.
IMPORTANT Sit in the driver’s seat with
the car not moving to adjust.
Page 57 of 210
56
SAFETY
STARTING
AND DRIVING
WARNING
LIGHTS AND
MESSAGES
IN AN
EMERGENCY
MAINTENANCE
AND CARE
TECHNICAL
SPECIFICATIONS
ALPHABETICAL
INDEX
DASHBOARD
AND CONTROLS
Air recirculation
on/off button (C)
Air recirculation works
according to the follow-
ing operating logics:
❒forced switching on (inside air recir-
culation always on), indicated by the
turning off of the button led C-fig. 62
and symbol íon the display;
❒function off (air recirculation always
off and introduction of external air),
indicated by the fact that the LED on
the button will go off and symbol
ê
will appear on the display.
These operating conditions are obtained
by pressing Cin sequence.
For safety reasons, the system will auto-
matically turn the recycling function off to
allow the introduction of fresh air after a
certain time.IMPORTANT The air recirculation func-
tion makes it possible to reach the re-
quired heating or cooling conditions faster.
It is however inadvisable to use it on
rainy/cold days as it would considerably
increase the possibility of the windows
misting inside, especially if the climate con-
trol compressor is off.
Recirculation is forced off (i.e. air is in-
troduced from the outside) when the the
outside temperature is cold to prevent
misting up.
Climate control
compressor on/off
button (B)
Press button
√when
the LED on the button
is on, to turn the climate
control compressor off. The LED will go
out. Press the button when the LED is off
to restore automatically system control
and use of the compressor. The LED will
light up on the button in this case.
The system will switch recirculation off
when the compressor is switched off to
prevent misting up. Although the system
is capable of maintaining the requiredtemperature, the word FULLwill disap-
pear from the display. If on the other
hand the system cannot maintain the
required temperature, the digits will
blink and the word AUTOwill disap-
pear.
IMPORTANT With the compressor off,
it is not possible to introduced air cool-
er than ambient temperature into the
passenger compartment. Furthermore,
in certain conditions, the windows could
mist up rapidly because the air is not
dehumidified.
The switching off of the climate control
compressor remains in storage even
when the engine has been stopped. To
restore automatic compressor control,
press √again (in this case, the system
will only work as a heater) or press
AUTO.
When the compressor is off, if the
external temperature is hotter than the
set temperature and the system cannot
satisfy the request, the digits of the set
temperature will blink for a few seconds
and the message AUTOwill go out.
With climate control compressor off,
the fan speed can be set to zero manual-
ly (no bar shown).
With the compressor on and the engine
started, the fan speed may be reduced to
the minimum setting (only one bar
shown).
It is advisable not to use the
air recirculation function
when the outside temperature is low
to prevent the windows from rapidly
misting up.
WARNING
Page 58 of 210
57
SAFETY
STARTING
AND DRIVING
WARNING
LIGHTS AND
MESSAGES
IN AN
EMERGENCY
MAINTENANCE
AND CARE
TECHNICAL
SPECIFICATIONS
ALPHABETICAL
INDEX
DASHBOARD
AND CONTROLS
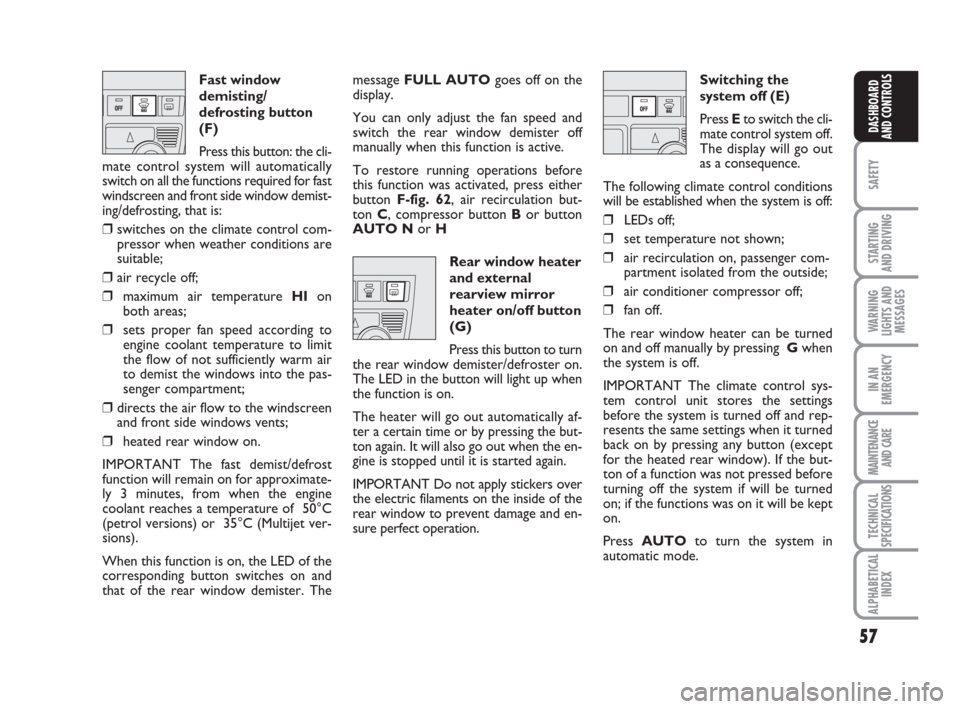
Fast window
demisting/
defrosting button
(F)
Press this button: the cli-
mate control system will automatically
switch on all the functions required for fast
windscreen and front side window demist-
ing/defrosting, that is:
❒switches on the climate control com-
pressor when weather conditions are
suitable;
❒air recycle off;
❒maximum air temperature HIon
both areas;
❒sets proper fan speed according to
engine coolant temperature to limit
the flow of not sufficiently warm air
to demist the windows into the pas-
senger compartment;
❒directs the air flow to the windscreen
and front side windows vents;
❒heated rear window on.
IMPORTANT The fast demist/defrost
function will remain on for approximate-
ly 3 minutes, from when the engine
coolant reaches a temperature of 50°C
(petrol versions) or 35°C (Multijet ver-
sions).
When this function is on, the LED of the
corresponding button switches on and
that of the rear window demister. Themessage FULL AUTOgoes off on the
display.
You can only adjust the fan speed and
switch the rear window demister off
manually when this function is active.
To restore running operations before
this function was activated, press either
button F-fig. 62, air recirculation but-
ton C, compressor button Bor button
AUTO Nor H
Rear window heater
and external
rearview mirror
heater on/off button
(G)
Press this button to turn
the rear window demister/defroster on.
The LED in the button will light up when
the function is on.
The heater will go out automatically af-
ter a certain time or by pressing the but-
ton again. It will also go out when the en-
gine is stopped until it is started again.
IMPORTANT Do not apply stickers over
the electric filaments on the inside of the
rear window to prevent damage and en-
sure perfect operation.Switching the
system off (E)
Press Eto switch the cli-
mate control system off.
The display will go out
as a consequence.
The following climate control conditions
will be established when the system is off:
❒LEDs off;
❒set temperature not shown;
❒air recirculation on, passenger com-
partment isolated from the outside;
❒air conditioner compressor off;
❒fan off.
The rear window heater can be turned
on and off manually by pressing Gwhen
the system is off.
IMPORTANT The climate control sys-
tem control unit stores the settings
before the system is turned off and rep-
resents the same settings when it turned
back on by pressing any button (except
for the heated rear window). If the but-
ton of a function was not pressed before
turning off the system if will be turned
on; if the functions was on it will be kept
on.
Press AUTOto turn the system in
automatic mode.
Page 65 of 210
64
SAFETY
STARTING
AND DRIVING
WARNING
LIGHTS AND
MESSAGES
IN AN
EMERGENCY
MAINTENANCE
AND CARE
TECHNICAL
SPECIFICATIONS
ALPHABETICAL
INDEX
DASHBOARD
AND CONTROLS
REDUCING THE MEMORIZED
SPEED
The stored speed can be increased in two
ways:
❒by turning the device off and then
storing a new speed;
or
❒ moving the stalk downwards (–) until
reaching the new speed which will be
memorised automatically.
Each movement of the lever will corre-
spond to a slight reduction in speed (about
1 km/h), while keeping the lever held
downwards will correspond to a continu-
ous speed reduction.
DISENGAGING THE DEVICE
Turn ring A-fig. 75to OFFor the igni-
tion key to STOP. If the device has been
disengaged, for example by pressing the
brake or clutch pedal.
If the device is faulty, turn
ring A to OFF, check the fuse
and contact a Fiat Dealership.
WARNING
COURTESY LIGHTS
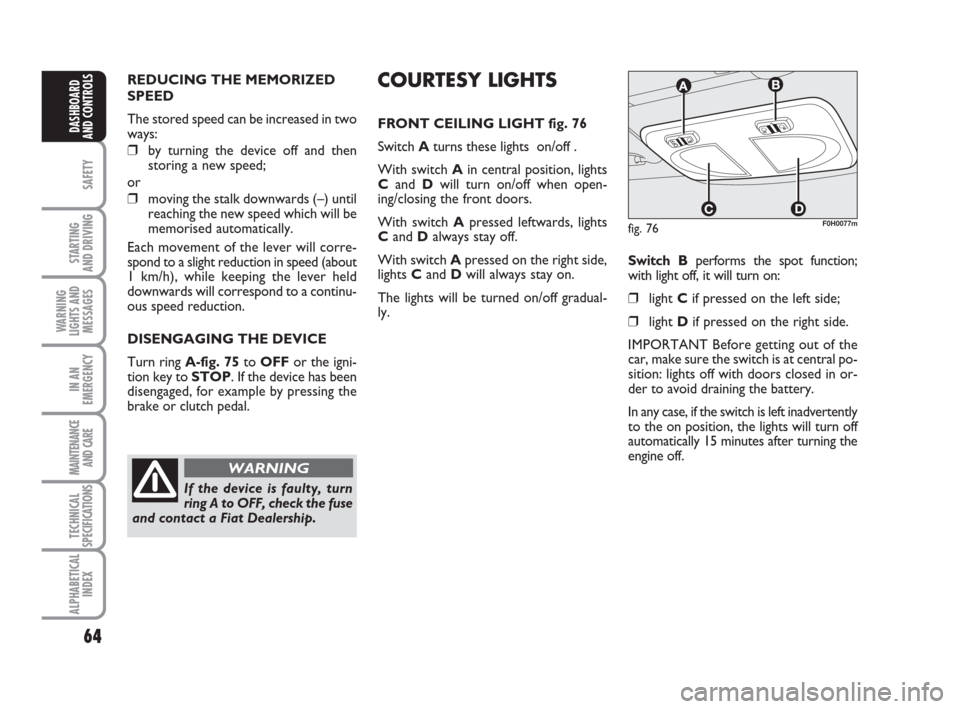
FRONT CEILING LIGHT fig. 76
Switch Aturns these lights on/off .
With switch Ain central position, lights
Cand Dwill turn on/off when open-
ing/closing the front doors.
With switch Apressed leftwards, lights
Cand Dalways stay off.
With switch Apressed on the right side,
lights C andD will always stay on.
The lights will be turned on/off gradual-
ly.Switch Bperforms the spot function;
with light off, it will turn on:
❒ light Cif pressed on the left side;
❒light Dif pressed on the right side.
IMPORTANT Before getting out of the
car, make sure the switch is at central po-
sition: lights off with doors closed in or-
der to avoid draining the battery.
In any case, if the switch is left inadvertently
to the on position, the lights will turn off
automatically 15 minutes after turning the
engine off.
fig. 76F0H0077m
Page 68 of 210
67
SAFETY
STARTING
AND DRIVING
WARNING
LIGHTS AND
MESSAGES
IN AN
EMERGENCY
MAINTENANCE
AND CARE
TECHNICAL
SPECIFICATIONS
ALPHABETICAL
INDEX
DASHBOARD
AND CONTROLS
FUEL CUT OFF SWITCH
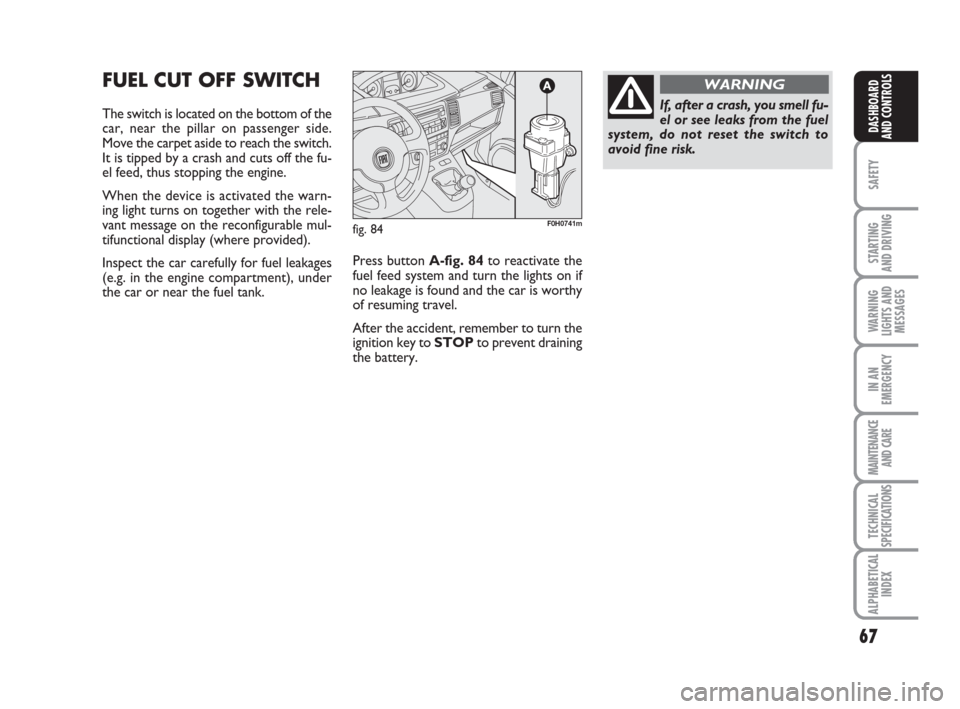
The switch is located on the bottom of the
car, near the pillar on passenger side.
Move the carpet aside to reach the switch.
It is tipped by a crash and cuts off the fu-
el feed, thus stopping the engine.
When the device is activated the warn-
ing light turns on together with the rele-
vant message on the reconfigurable mul-
tifunctional display (where provided).
Inspect the car carefully for fuel leakages
(e.g. in the engine compartment), under
the car or near the fuel tank. Press button A-fig. 84to reactivate the
fuel feed system and turn the lights on if
no leakage is found and the car is worthy
of resuming travel.
After the accident, remember to turn the
ignition key to STOPto prevent draining
the battery.
fig. 84F0H0741m
If, after a crash, you smell fu-
el or see leaks from the fuel
system, do not reset the switch to
avoid fine risk.
WARNING
Page 81 of 210
80
SAFETY
STARTING
AND DRIVING
WARNING
LIGHTS AND
MESSAGES
IN AN
EMERGENCY
MAINTENANCE
AND CARE
TECHNICAL
SPECIFICATIONS
ALPHABETICAL
INDEX
DASHBOARD
AND CONTROLS
BONNET
OPENING THE BONNET
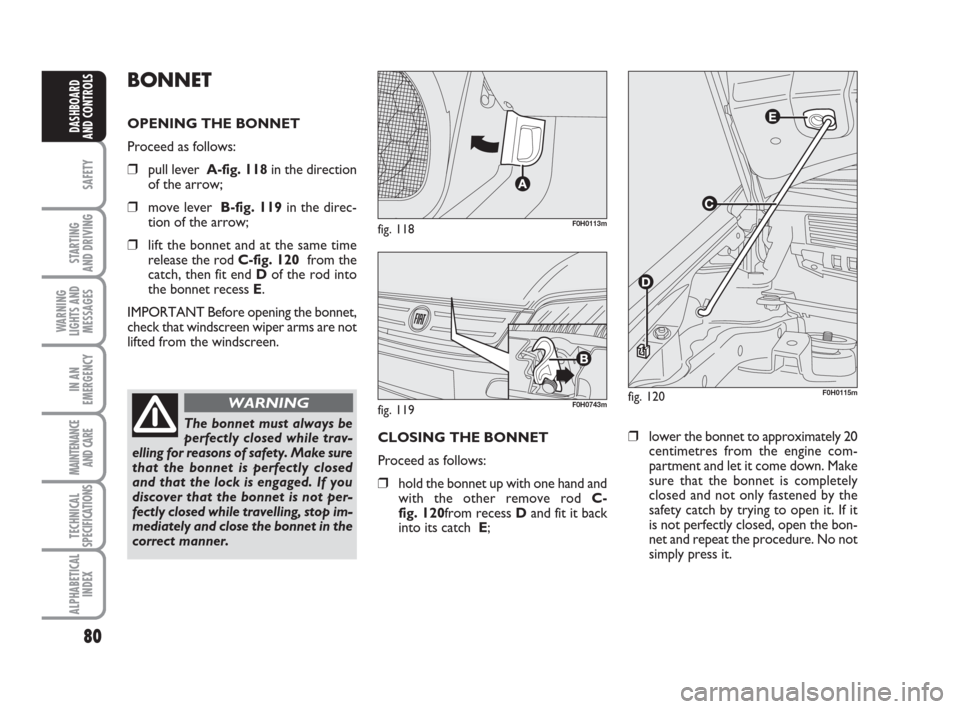
Proceed as follows:
❒pull lever A-fig. 118in the direction
of the arrow;
❒move lever B-fig. 119 in the direc-
tion of the arrow;
❒lift the bonnet and at the same time
release the rod C-fig. 120from the
catch, then fit end Dof the rod into
the bonnet recess E.
IMPORTANT Before opening the bonnet,
check that windscreen wiper arms are not
lifted from the windscreen.
The bonnet must always be
perfectly closed while trav-
elling for reasons of safety. Make sure
that the bonnet is perfectly closed
and that the lock is engaged. If you
discover that the bonnet is not per-
fectly closed while travelling, stop im-
mediately and close the bonnet in the
correct manner.
WARNING
fig. 118F0H0113m
fig. 119F0H0743mfig. 120F0H0115m
CLOSING THE BONNET
Proceed as follows:
❒hold the bonnet up with one hand and
with the other remove rod C-
fig. 120from recess Dand fit it back
into its catch E;❒lower the bonnet to approximately 20
centimetres from the engine com-
partment and let it come down. Make
sure that the bonnet is completely
closed and not only fastened by the
safety catch by trying to open it. If it
is not perfectly closed, open the bon-
net and repeat the procedure. No not
simply press it.
Page 85 of 210
84
SAFETY
STARTING
AND DRIVING
WARNING
LIGHTS AND
MESSAGES
IN AN
EMERGENCY
MAINTENANCE
AND CARE
TECHNICAL
SPECIFICATIONS
ALPHABETICAL
INDEX
DASHBOARD
AND CONTROLS
If warning light xonly lights
up on the instrument panel
(with a message on the reconfigurable
multifunctional display, where pro-
vided), stop the car immediately and
go to the nearest Fiat Dealership.
Leakage of hydraulic fluid from the
braking system will compromise func-
tionality of the braking system, either
of the conventional type or with ABS.
WARNINGEOBD SYSTEM
The EOBD system (European On Board
Diagnosis) allows continuous diagnosis of
the components of the car correlated with
emissions. It also alerts the driver, by turn-
ing on the warning light
Uon the in-
strument panel (together with relevant
message on the multifunctional display,
where provided) (see section “Warning
lights and messages”), when these condi-
tions are no longer in peak conditions.
The objective is:
❒to keep the system efficiency under
control;
❒warn when a fault causes emissions
levels to increase;
❒warn of the need to replace deterio-
rated components.
The system also has a diagnostic connec-
tor that can be interfaced with appropri-
ate tools, which makes it possible to read
the error codes stored in the control unit
together with a series of specific parame-
ters for engine operation and diagnosis.
This check can also be carried out by the
traffic police.
IMPORTANT After eliminating the in-
convenience, to check the system com-
pletely, Fiat Dealerships are obliged to run
a bench test and, if necessary, road tests
which may also call for a long journey. Go to a Fiat Dealership as
soon as possible if warning
light
Ueither does not light
up when the key is turned to
MAR to if while travelling the warning
lights comes on either steady or blink-
ing (along with a message on the mul-
tifunctional display, where provided).
The operation of warning light
Umay
be checked by the traffic police using
specific devices. Follow the laws in
force in the country where you are dri-
ving.
GSI SYSTEM
(for versions with
mechanical gearbox
only)
(where provided)
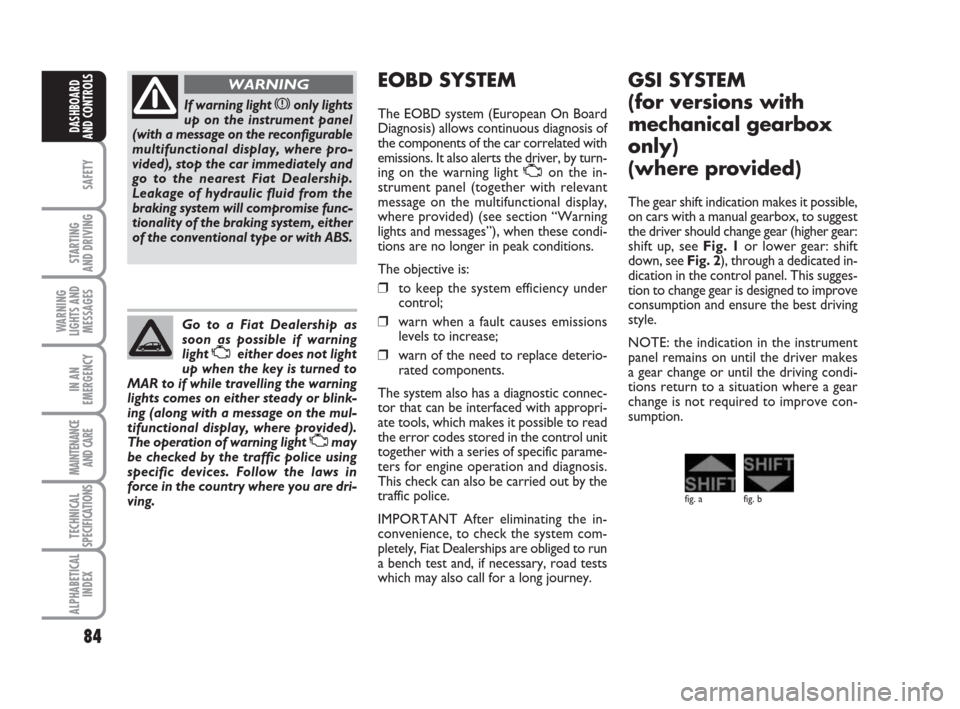
The gear shift indication makes it possible,
on cars with a manual gearbox, to suggest
the driver should change gear (higher gear:
shift up, see Fig. 1or lower gear: shift
down, see Fig. 2), through a dedicated in-
dication in the control panel. This sugges-
tion to change gear is designed to improve
consumption and ensure the best driving
style.
NOTE: the indication in the instrument
panel remains on until the driver makes
a gear change or until the driving condi-
tions return to a situation where a gear
change is not required to improve con-
sumption.
fig. a fig. b
Page 87 of 210
86
SAFETY
STARTING
AND DRIVING
WARNING
LIGHTS AND
MESSAGES
IN AN
EMERGENCY
MAINTENANCE
AND CARE
TECHNICAL
SPECIFICATIONS
ALPHABETICAL
INDEX
DASHBOARD
AND CONTROLS
ACCESSORIES
PURCHASED BY THE
OWNER
If after buying the car, you decide to install
electrical accessories that require a per-
manent electric supply (alarm, satellite an-
titheft system, etc.) or accessories that in
any case burden the electric supply, con-
tact Fiat Dealership, whose qualified per-
sonnel, besides suggesting the most suit-
able devices belonging to Lineaccessori Fi-
at, will also evaluate the overall electric
consumption, checking whether the car’s
electric system is able to withstand the
load required, or whether it needs to be
integrated with a more powerful battery.
INSTALLING
ELECTRICAL/ELECTRONIC
DEVICES
Electrical and electronic devices installed
after buying the car by after-market ser-
vice must carry the following label:
Fiat Auto S.p.A. authorises the installation
of transceiving devices provided that they
are installed by a specialised centre ac-
cording to rules of good engineering prac-
tice in compliance with the manufacturer’s
indications.IMPORTANT Traffic police may not allow
the car on the road in the event of as-
sembly of devices which imply modifica-
tions to the features of the car. This may
also cause lapse of warranty in relation to
faults caused by the change or either di-
rectly or indirectly related to it.
Fiat Auto S.p.A. shall not be liable for dam-
age caused by the installation of acces-
sories either not supplied or recom-
mended by Fiat Auto S.p.A. and/or not in-
stalled in compliance with the provided in-
structions.
RADIO TRANSMITTERS AND
CELLULAR PHONES
Radio transceiver equipment (e.g.: e-tacs
mobile phones, HAM radio systems and
the like) shall not be used inside the car
unless a separate aerial is mounted on the
roof.
IMPORTANT The use of similar devices
inside the passenger compartment (with-
out separated aerial) produces radio-fre-
quency electromagnetic fields which, am-
plified by the resonance effects inside the
passenger compartment, may cause elec-
trical systems equipping the car to mal-
function. This could compromise safety in
addition to constituting a potential hazard
for the passengers.
In addition, transmission and reception of
these devices may be affected by the
shielding effect of the car body.As concerns EC-approved mobile phones
(GSM, GPRS, UMTS), strictly comply with
the instructions for use provided by the
mobile phone’s manufacturer.
Be very careful when fitting
non-standard additional
spoilers, light alloy wheels or wheel
caps: they could reduce brake venti-
lation and consequently brake effi-
ciency in the case of repeated, violent
braking or on long downhill roads.
Make sure that nothing obstructs the
pedal stroke (mats, etc.)
WARNING