ignition FIAT PALIO 2003 178 / 1.G India Version Owner's Guide
[x] Cancel search | Manufacturer: FIAT, Model Year: 2003, Model line: PALIO, Model: FIAT PALIO 2003 178 / 1.GPages: 156, PDF Size: 6.27 MB
Page 98 of 156
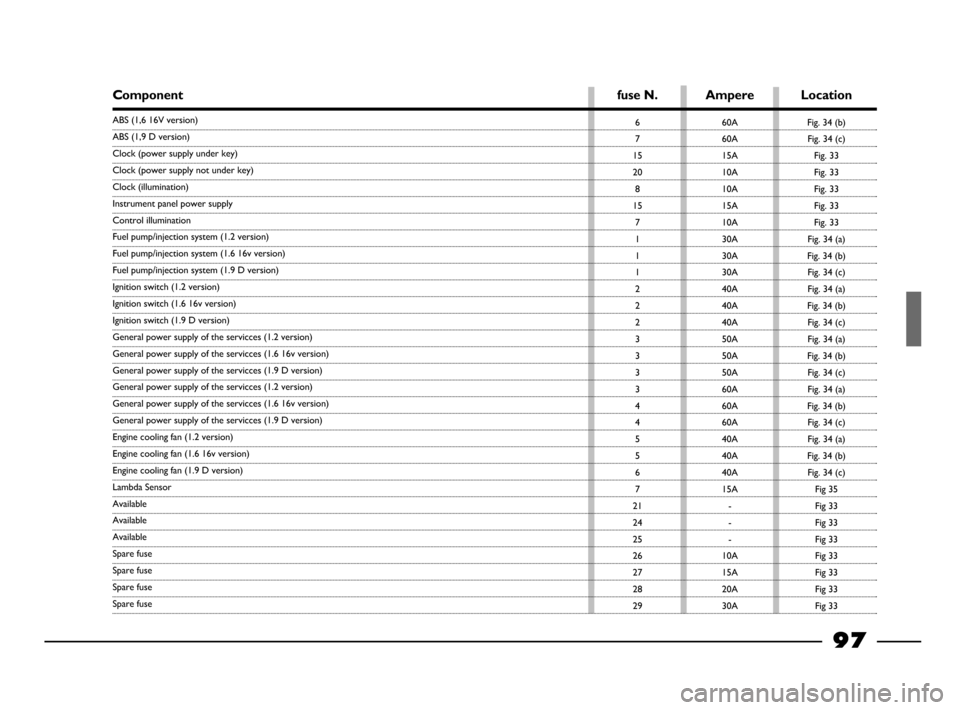
6
7
15
20
8
15
7
1
1
1
2
2
2
3
3
3
3
4
4
5
5
6
7
21
24
25
26
27
28
2960A
60A
15A
10A
10A
15A
10A
30A
30A
30A
40A
40A
40A
50A
50A
50A
60A
60A
60A
40A
40A
40A
15A
-
-
-
10A
15A
20A
30A
Componentfuse N. Ampere Location
Fig. 34 (b)
Fig. 34 (c)
Fig. 33
Fig. 33
Fig. 33
Fig. 33
Fig. 33
Fig. 34 (a)
Fig. 34 (b)
Fig. 34 (c)
Fig. 34 (a)
Fig. 34 (b)
Fig. 34 (c)
Fig. 34 (a)
Fig. 34 (b)
Fig. 34 (c)
Fig. 34 (a)
Fig. 34 (b)
Fig. 34 (c)
Fig. 34 (a)
Fig. 34 (b)
Fig. 34 (c)
Fig 35
Fig 33
Fig 33
Fig 33
Fig 33
Fig 33
Fig 33
Fig 33
97
C
ABS (1,6 16V version)
ABS (1,9 D version)
Clock (power supply under key)
Clock (power supply not under key)
Clock (illumination)
Instrument panel power supply
Control illumination
Fuel pump/injection system (1.2 version)
Fuel pump/injection system (1.6 16v version)
Fuel pump/injection system (1.9 D version)
Ignition switch (1.2 version)
Ignition switch (1.6 16v version)
Ignition switch (1.9 D version)
General power supply of the servicces (1.2 version)
General power supply of the servicces (1.6 16v version)
General power supply of the servicces (1.9 D version)
General power supply of the servicces (1.2 version)
General power supply of the servicces (1.6 16v version)
General power supply of the servicces (1.9 D version)
Engine cooling fan (1.2 version)
Engine cooling fan (1.6 16v version)
Engine cooling fan (1.9 D version)
Lambda Sensor
Available
Available
Available
Spare fuse
Spare fuse
Spare fuse
Spare fuse
80-103 03/03/2003 06:49 PM Page 97
Page 99 of 156
98
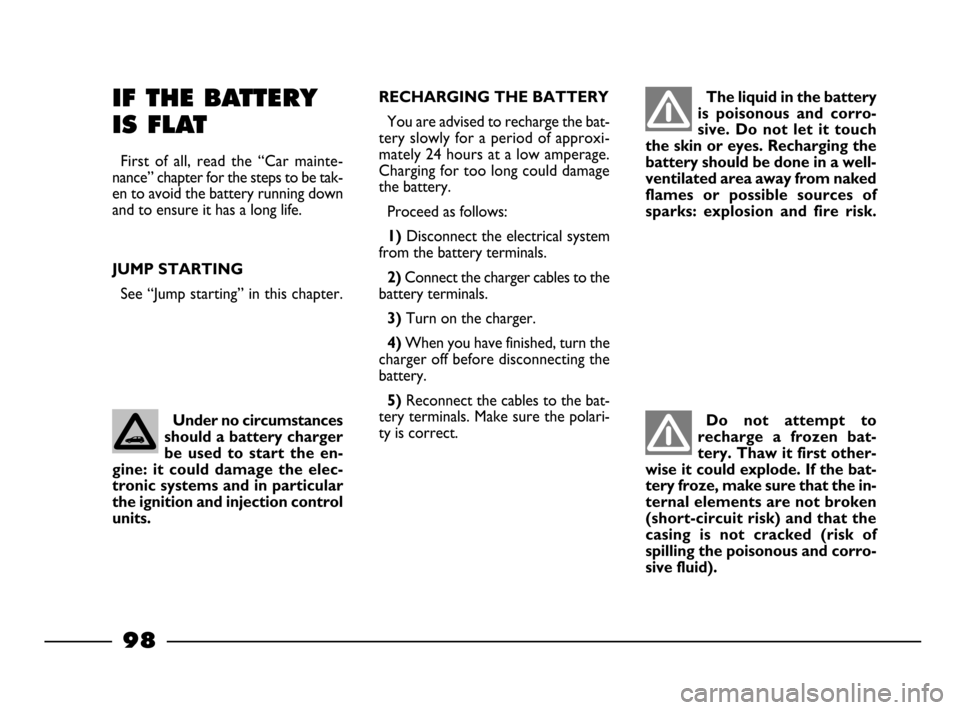
IF THE BATTERY
IS FLAT
First of all, read the “Car mainte-
nance” chapter for the steps to be tak-
en to avoid the battery running down
and to ensure it has a long life.
JUMP STARTING
See “Jump starting” in this chapter.
RECHARGING THE BATTERY
You are advised to recharge the bat-
tery slowly for a period of approxi-
mately 24 hours at a low amperage.
Charging for too long could damage
the battery.
Proceed as follows:
1) Disconnect the electrical system
from the battery terminals.
2)Connect the charger cables to the
battery terminals.
3)Turn on the charger.
4)When you have finished, turn the
charger off before disconnecting the
battery.
5)Reconnect the cables to the bat-
tery terminals. Make sure the polari-
ty is correct.
Under no circumstances
should a battery charger
be used to start the en-
gine: it could damage the elec-
tronic systems and in particular
the ignition and injection control
units. The liquid in the battery
is poisonous and corro-
sive. Do not let it touch
the skin or eyes. Recharging the
battery should be done in a well-
ventilated area away from naked
flames or possible sources of
sparks: explosion and fire risk.Do not attempt to
recharge a frozen bat-
tery. Thaw it first other-
wise it could explode. If the bat-
tery froze, make sure that the in-
ternal elements are not broken
(short-circuit risk) and that the
casing is not cracked (risk of
spilling the poisonous and corro-
sive fluid).
80-103 03/03/2003 06:49 PM Page 98
Page 102 of 156
101
Do not tow the car by
using flexible elements
(metallic cables, ropes or
strings); only the use of a rigid
bar, with the ends supplied with
adequate joints, is allowed. Make
sure to fix the joint to the car in
order not to damage the near el-
ements.
Before starting to tow, turn the
ignition key to MAR and then to
STOP. Do not remove the key. If
the key is removed, the steering
lock engages automatically which
prevents the wheels being turned.
While the car is being towed
with the engine off, remember
that the brake pedal and steering
will require more effort as you no
longer have the benefit of the
brake booster and the power
steering.
The towing vehicle must be dri-
ven as evenly and softly as possi-
ble to prevent counterblows.IF THE CAR
NEEDS TO BE
TOWED
The tow hitch is supplied as standard
with the car. It is in the tool kit at-
tached to the spare wheel.
To fasten the tow hitch:
1)Take the tow ring.
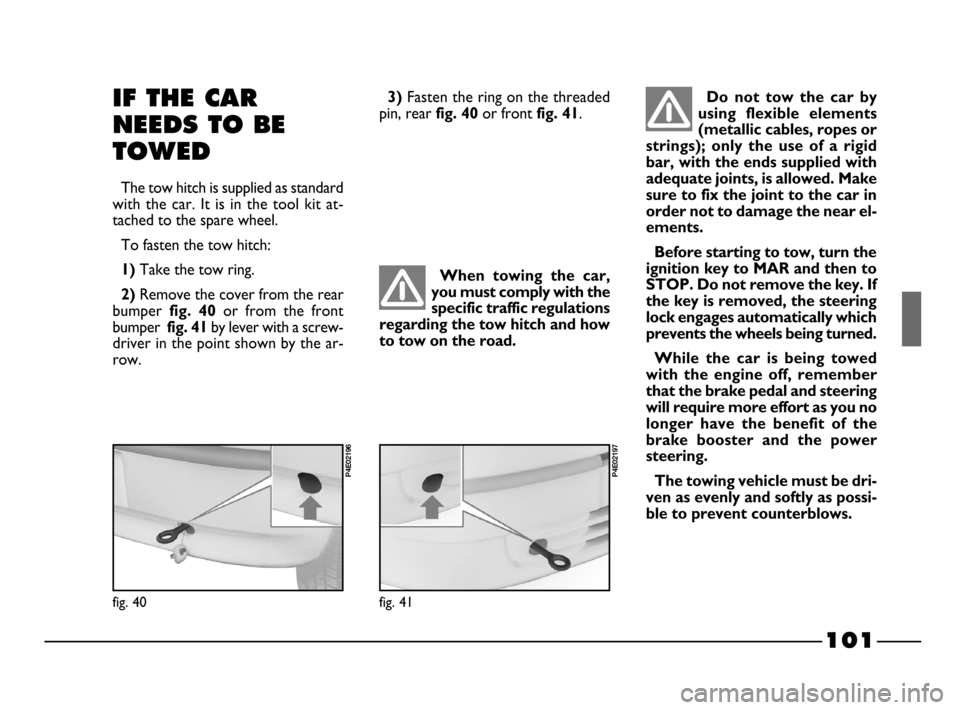
2) Remove the cover from the rear
bumper
fig. 40or from the front
bumper
fig. 41by lever with a screw-
driver in the point shown by the ar-
row.
fig. 40
P4E02196
fig. 41
P4E02197
When towing the car,
you must comply with the
specific traffic regulations
regarding the tow hitch and how
to tow on the road.
3)Fasten the ring on the threaded
pin, rear
fig. 40or front fig. 41.
80-103 03/03/2003 06:49 PM Page 101
Page 103 of 156
102
IF ANYONE IS INJURED
– Never leave the injured person
alone. The obligation to provide as-
sistance exists even for those not di-
rectly involved in the accident.
– Do not congregate around the in-
jured person.
– Reassure the injured person that
help is on its way and will arrive soon.
Stay close by to calm him/her down in
case of panic.
– Unfasten or cut seat belts holding
injured parties.
– Do not give an injured person any-
thing to drink.
– Do not move an injured person un-
less the following situation arise.
– Pull out the injured person from
the car only if there is a risk of it catch-
ing fire, sinking in water or is likely to
fall over a cliff or etc. Do not pull
his/her arms or legs, do not bend the
head and, as far as possible, keep the
body horizontal.
IF AN ACCIDENT
OCCURS
– It is important to keep calm.
– If you are not directly involved in
the accident, stop at least ten metres
away from the accident.
– If you are on a motorway, stop
without obstructing the emergency
lane with your car.
– Turn off the engine and turn on the
hazard lights.
– At night, illuminate the scene of the
accident with your headlights.
– Act carefully, you must not risk be-
ing run over.
– If the doors are blocked, do not at-
tempt to smash the windscreen to get
out of the car. It is made of layered
glass and is very hard. Side and rear
windows are much more easily bro-
ken.
– Mark the accident by putting the
red triangle at the regulatory distance
from the car where it can be clearly
seen. – Call for rescue making the infor-
mation you give as accurate as you
can. On the motorway use the special
column-mounted emergency phones.
– In pile-ups on the motorway, par-
ticularly when the visibility is bad,
there is a high risk of other vehicles
running into those already stopped.
Get out of the car immediately and
take refuge behind the guard-rail.
– Remove the ignition keys from the
vehicles involved.
– If you can smell petrol or other
chemicals, do not smoke and make
sure all cigarettes are extinguished.
– Use a fire extinguisher, blanket
sand or earth to put out fires, how-
ever small they may be. Never use wa-
ter
80-103 03/03/2003 06:49 PM Page 102
Page 121 of 156
IMPORTANT If the sound system
or car alarm systems are not installed
correctly, they can interfere with the
working of the electronic control
units.
Modifications or repairs
to the electrical system
carried out incorrectly
and without bearing the features
of the system in mind can cause
malfunctions with the risk of fire.
120
ELECTRONIC
CONTROL UNITS
When the car is being used normal-
ly, special measures are not necessary.
The following instructions must be
followed very carefully however, if you
work on the electrical system or
where emergency starting is neces-
sary:
– Never disconnect the battery from
the electrical system while the engine
is running.
– Disconnect the battery from the
electrical system if you are recharg-
ing it. Modern battery chargers can
discharge voltage up to 20 V.
– Never perform emergency star-
tups with a battery charger. Always
use an auxiliary battery (see “Startup
with auxiliary battery” in “In an emer-
gency” chapter).– Be particularly careful when con-
necting the battery to the electrical
system. Make sure that the polarity is
correct and the connection is efficient.
After reconnecting the battery, the in-
jection/ignition control unit will need
to readapt its internal parameters.
Therefore, the car’s performance may
change slightly during the first few kilo-
meters.
– Do not connect or disconnect the
terminals of the electronic units while
the ignition key is at
MAR.
– Do not check polarity through
sparking.
– Disconnect the electronic units if
you are electrically welding the car
body. Remove the units if tempera-
tures exceed 80°C (special operations
on the bodywork etc.).
104-127 03/03/2003 06:53 PM Page 120
Page 122 of 156
121
SPARK PLUGS
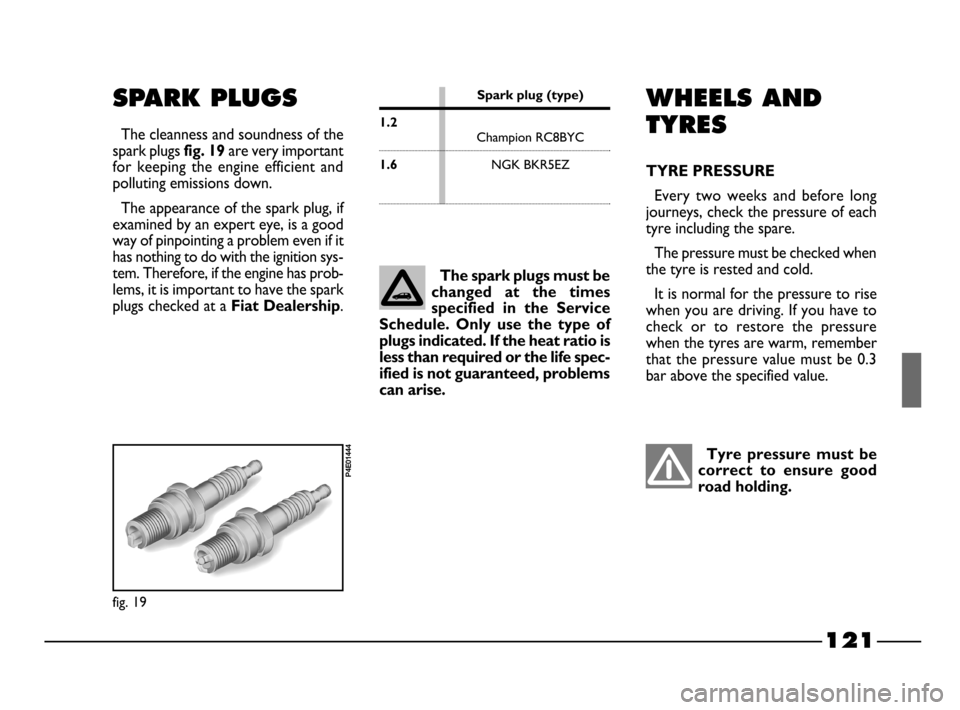
The cleanness and soundness of the
spark plugs
fig. 19 are very important
for keeping the engine efficient and
polluting emissions down.
The appearance of the spark plug, if
examined by an expert eye, is a good
way of pinpointing a problem even if it
has nothing to do with the ignition sys-
tem. Therefore, if the engine has prob-
lems, it is important to have the spark
plugs checked at a
Fiat Dealership.
The spark plugs must be
changed at the times
specified in the Service
Schedule. Only use the type of
plugs indicated. If the heat ratio is
less than required or the life spec-
ified is not guaranteed, problems
can arise.
Spark plug (type)
1.2
Champion RC7BMCChampion RC8BYC
1.6NGK BKR5EZ
Champion RC10YCC
Bosch FR8DE
fig. 19
P4E01444
WHEELS AND
TYRES
TYRE PRESSURE
Every two weeks and before long
journeys, check the pressure of each
tyre including the spare.
The pressure must be checked when
the tyre is rested and cold.
It is normal for the pressure to rise
when you are driving. If you have to
check or to restore the pressure
when the tyres are warm, remember
that the pressure value must be 0.3
bar above the specified value.
Tyre pressure must be
correct to ensure good
road holding.
104-127 03/03/2003 06:53 PM Page 121
Page 128 of 156
127
Detergents pollute wa-
ter. The car must there-
fore be washed in an area
equipped for the collection and
purification of the liquids used
while washing.
IMPORTANT
The engine com-
partment should be washed while the
engine is cold and with the ignition key
at
STOP. After washing make sure
that the various protections (e.g. rub-
ber boots and various guards) have
not been removed or damaged.
IMPORTANTTo prevent damage
to the electric heater element, wipe the
inside of the heated rear window gen-
tly in the same direction as the ele-
ments.
Engine compartment
At the end of each winter season,
carefully clean the engine compart-
ment. Have this done at a garage.
INTERIORS
Periodically check that water has not
collected under the mats (from dip-
ping shoes, umbrellas etc.) which could
cause the steel to rust
CLEANING SEATS AND
FABRIC COMPONENTS
– Remove dust with a soft brush or
vacuum cleaner.
– Brush the seats with a damp
sponge with water and a neutral soap.
Never use flammable
products (petroleum
ether or petrol) to clean
the inside of the car. Electro-
static charges generated by rub-
bing while cleaning could cause
fires.
Do not keep aerosol
cans in the car. There is
the risk they might ex-
plode. Aerosol cans must never
be exposed to a temperature
above 50°C; when the weather
starts to get hot the temperature
inside the car might go well be-
yond that figure.
PLASTIC PARTS INSIDE THE
CAR
Use special products designed not to
alter the appearance of the compo-
nents.
IMPORTANTDo not use alcohol
or petrol to clean the glass of the in-
strument panel.
104-127 03/03/2003 06:53 PM Page 127
Page 133 of 156
132
FUEL SUPPLY/ IGNITION
Integrated multipoint electronic in-
jection and ignition system: only one
electronic control unit controls both
functions. It processes both the time
the injection lasts (for petrol meter-
ing) and the ignition advance angle.
Type: Multipoint.
Air cleaner: dry, with paper filtering
element.
Fuel pump: by immersion, in the tank.
Injection pressure 3 barMixture metered by electronic pro-
cessing of the data picked up by the
engine speed sensor and absolute
pressure sensor in the intake manifold.
Petrol metering system : a “Closed
Loop” (information on the combus-
tion trend transmitted by the sensor
Lambda).
Ignition order: 1-3-4-2.
Spark plugs:
Modifications or repairs
to the fuel feed system
that are not carried out
properly or do not take the sys-
tem’s technical specifications in-
to account can cause malfunc-
tions leading to the risk of fire.
LUBRICATION
Forced-feed with gear pump with
pressure relief valve incorporated.
Oil purification through full-flow car-
tridge filter.
COOLING
Cooling system with radiator, cen-
trifugal pump and expansion tank.
Thermostat on the secondary circuit
for recirculating the water from the
engine to the radiator. “By-pass con-
trolled” thermostat.
Electrical fan for cooling the radiator
with connection/disconnection, con-
trolled by a thermostatic switch lo-
cated on the radiator.
Spark plug (type)
1.2
Champion RC7BMCChampion RC8BYC
1.6NGK BKR5EZ
Champion RC10YCC
Bosch FR8DE
Other equivalent Spark plug for 1.6 engine
is Champion RC10YCC.
128-143 03/03/2003 07:39 PM Page 132
Page 146 of 156
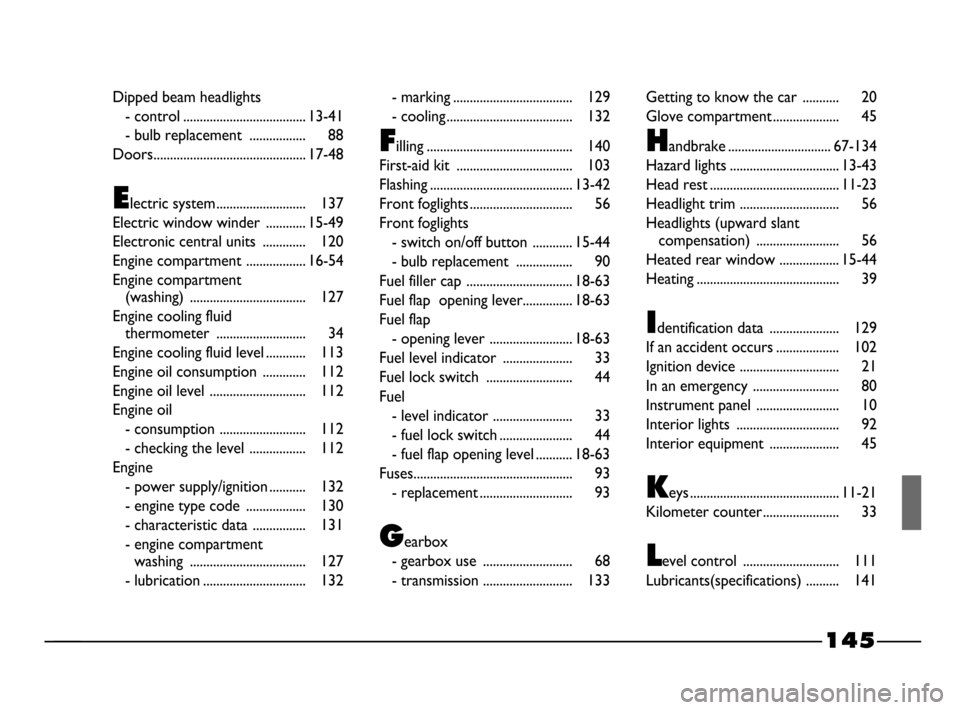
145
Dipped beam headlights
- control ..................................... 13-41
- bulb replacement ................. 88
Doors.............................................. 17-48
Electric system ........................... 137
Electric window winder ............ 15-49
Electronic central units ............. 120
Engine compartment .................. 16-54
Engine compartment
(washing) ................................... 127
Engine cooling fluid
thermometer ........................... 34
Engine cooling fluid level ............ 113
Engine oil consumption ............. 112
Engine oil level ............................. 112
Engine oil
- consumption .......................... 112
- checking the level ................. 112
Engine
- power supply/ignition ........... 132
- engine type code .................. 130
- characteristic data ................ 131
- engine compartment
washing ................................... 127
- lubrication ............................... 132- marking .................................... 129
- cooling ...................................... 132
Filling ............................................ 140
First-aid kit ................................... 103
Flashing ........................................... 13-42
Front foglights ............................... 56
Front foglights
- switch on/off button ............ 15-44
- bulb replacement ................. 90
Fuel filler cap ................................ 18-63
Fuel flap opening lever............... 18-63
Fuel flap
- opening lever ......................... 18-63
Fuel level indicator ..................... 33
Fuel lock switch .......................... 44
Fuel
- level indicator ........................ 33
- fuel lock switch ...................... 44
- fuel flap opening level ........... 18-63
Fuses................................................ 93
- replacement ............................ 93
Gearbox
- gearbox use ........................... 68
- transmission ........................... 133Getting to know the car ........... 20
Glove compartment .................... 45
Handbrake ............................... 67-134
Hazard lights ................................. 13-43
Head rest ....................................... 11-23
Headlight trim .............................. 56
Headlights (upward slant
compensation) ......................... 56
Heated rear window .................. 15-44
Heating ........................................... 39
Identification data ..................... 129
If an accident occurs ................... 102
Ignition device .............................. 21
In an emergency .......................... 80
Instrument panel ......................... 10
Interior lights ............................... 92
Interior equipment ..................... 45
Keys ............................................. 11-21
Kilometer counter ....................... 33
Level control ............................. 111
Lubricants(specifications) .......... 141
144-152 03/03/2003 07:30 PM Page 145
Page 148 of 156
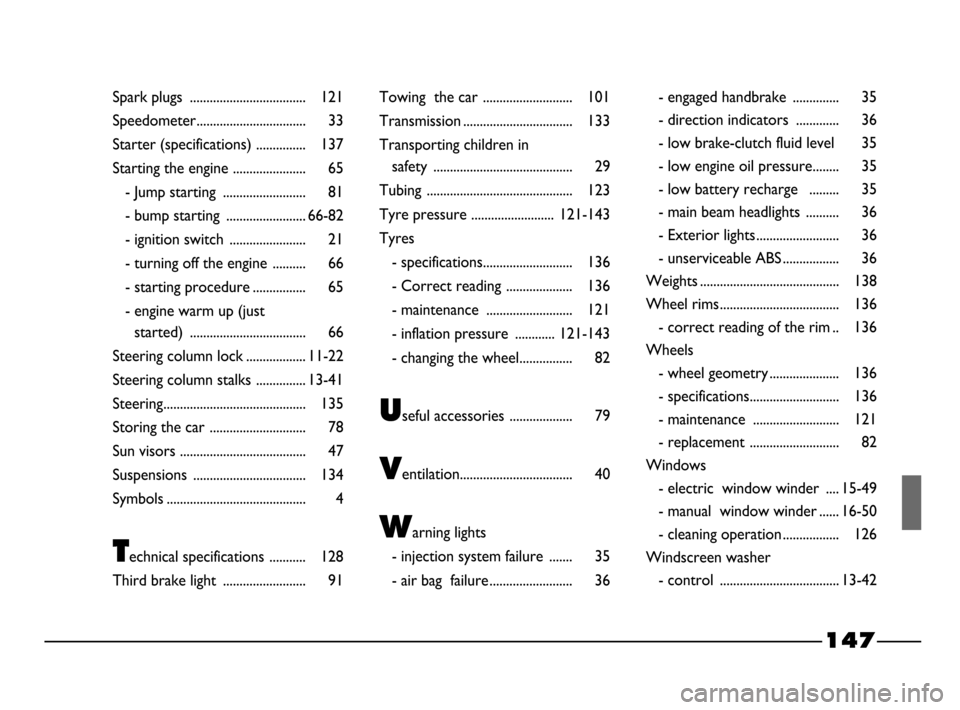
147
Spark plugs ................................... 121
Speedometer................................. 33
Starter (specifications) ............... 137
Starting the engine ...................... 65
- Jump starting ......................... 81
- bump starting ........................ 66-82
- ignition switch ....................... 21
- turning off the engine .......... 66
- starting procedure ................ 65
- engine warm up (just
started) ................................... 66
Steering column lock .................. 11-22
Steering column stalks ............... 13-41
Steering........................................... 135
Storing the car ............................. 78
Sun visors ...................................... 47
Suspensions .................................. 134
Symbols .......................................... 4
Technical specifications ........... 128
Third brake light ......................... 91Towing the car ........................... 101
Transmission ................................. 133
Transporting children in
safety .......................................... 29
Tubing ............................................ 123
Tyre pressure ......................... 121-143
Tyres
- specifications........................... 136
- Correct reading .................... 136
- maintenance .......................... 121
- inflation pressure ............ 121-143
- changing the wheel................ 82
Useful accessories ................... 79
Ventilation.................................. 40
Warning lights
- injection system failure ....... 35
- air bag failure ......................... 36- engaged handbrake .............. 35
- direction indicators ............. 36
- low brake-clutch fluid level 35
- low engine oil pressure........ 35
- low battery recharge ......... 35
- main beam headlights .......... 36
- Exterior lights ......................... 36
- unserviceable ABS ................. 36
Weights .......................................... 138
Wheel rims.................................... 136
- correct reading of the rim .. 136
Wheels
- wheel geometry ..................... 136
- specifications........................... 136
- maintenance .......................... 121
- replacement ........................... 82
Windows
- electric window winder .... 15-49
- manual window winder ...... 16-50
- cleaning operation ................. 126
Windscreen washer
- control .................................... 13-42
144-152 03/03/2003 07:30 PM Page 147