Panel FIAT PUNTO 1994 176 / 1.G Owner's Manual
[x] Cancel search | Manufacturer: FIAT, Model Year: 1994, Model line: PUNTO, Model: FIAT PUNTO 1994 176 / 1.GPages: 225, PDF Size: 18.54 MB
Page 203 of 225
11 *2 Bodywork and fittings
on vehicles with wax-based underbody protective coating, or the coating will be removed. Such vehicles should be inspected annually, preferably just prior lo Winter, when the underbody should be washed down, and any damage to the wax coating repaired. Ideally, a completely fresh coat should be applied. It would also be worth considering the use of such wax-based protection for injection into door panels, sills, box sections, etc, as an additional safeguard against rust damage, where such protection Is not provided by the vehicle manufacturer. After washing paintwork, wipe off with a chamois feather to give an unspotted clear finish. A coat of clear protective wax polish wilt give added protection against chemical pollutants in the air. If the paintwork sheen has duiled or oxidised, use a cleaner/polisher combination to restore the brilliance of the shine. This requires a little effort, but such dulling Is usually caused because regular washing has been neglected. Care needs to be taken with metallic paintwork, as special non-abrasive cleaner/polisher is required to avoid damage to the finish, Always check that the door and ventilator opening drain holes and pipes are completely clear, so that water can be drained out. Brightwork should be treated In the same way as paintwork. Windscreens and windows can be kept clear of the smeary film which often appears, by the use of proprietary glass cleaner. Nover use any form of wax or other body or chromium polish on glass.
Maintenance -upholstery and carpets
Mats and carpets should be brushed or vacuum-cleaned regularly, to keep them free of grit. If they are badly stained, remove them from the vehicle for scrubbing or sponging, and make quite sure they are dry before refitting. Seats and interior trim panels can be kept clean by wiping with a damp cloth. If they do become stained (which can be more apparent on light-coloured upholstery), use a little liquid detergent and a soft nail brush lo scour the grime out of the grain of the material. Do not forget to keep the headlining clean in the same way as the upholstery. When using liquid cleaners inside the vehicle, do not over-wet the surfaces being cleaned. Excessive damp could get Into the seams and padded interior, causing stains, offensive odours or even rot.
If the Inside of the vehicle gets wet accidentally, tt Is worthwhile taking some trouble to dry ft out property, particularly where carpets an involved. Do not leave oil or electric heaters inside the vehicle for this purpose.
4 Minor body damage -repair
Repairs of minor scratches In bodywork If the scratch Is very superficial, and does not penetrate to the metal of the bodywork, repair is very simple. Lightly rub the area of the scratch with a paintwork renovator, or a very fine cutting paste, to remove loose paint from the scratch, and to clear the surrounding bodywork of wax polish, Rinse the area with clean water. Apply touch-up paint to ihe scratch using a fine paint brush; continue to apply fine layers of paint until the surface of the paint In the scratch Is level with the surrounding paintwork. Allow Ihe new paint at least two weeks to harden, then blend it Into the surrounding paintwork by rubbing the scratch area with a paintwork renovator or a very fine cutting paste. Finally, apply wax polish. Where the scratch has penetrated right through to the metal of the bodywork, causing the metal to rust, a different repair technique Is required. Remove any loose rust from the bottom of the scratch with a penknife, then apply rust-inhibiting paint to prevent the formation of rust in the future. Using a rubber or nylon applicator, fill the scratch with bodystopper paste. If required, this paste can be mixed with cellulose thinners to provide a very thin paste which is ideal for filling narrow scratches. Before the stopper-paste in Ihe scratch hardens, wrap a piece of smooth cotton rag around the top of a finger. Dip the finger in cellulose thinners, and quickly sweep it across the surface of the stopper-paste in the scratch: this will ensure that the surface of the stopper-paste is slightly hollowed. The scratch can now be painted over as described earlier In this Section.
Repairs of dents in bodywork When deop denting of the vehicle's bodywork has taken place, the first task is to put) the dent out. until the affected bodywork almost attains rts onginal shape. There is little polnl in trying to restore Ihe original shape completely, as the metal in the damaged area will have stretched on impact, and cannot be reshaped fully to its original contour. It Is better to bring the level of the dent up to a point which is about 3 mm below the level of the surrounding bodywork. In cases where Ihe dent is very shallow anyway, It is not worth trying to pull it out at all. If the underside of the dent is accessible, it can be hammered out gently from behind, using a mallet with a wooden or plastic head, Whilst doing this, hold a suitable block of wood firmly against (he outside of Ihe panel, to absorb the impact from the hammer blows and thus prevent a large area of the bodywork from being 'belled-out".
Should the dent be In a section of (I* bodywork which has a double skin, or seme other factor making It Inaccessible from behind, a different technique is called for. Dull several small holes through the metal inside Ihe area - particularly in the deeper section. Then screw long self-tapping screws Into the holes, just sufficiently for them to gain a good purchase in the metal. Now the dent can be pulled out by pulling on the protruding heads of the screws with a pair of pliers. The next stage of the repair Is the removal of the paint from the damaged area, and from an inch or so of the surrounding 'sound' bodywork. This is accomplished most easily by using a wire brush or abrasive pad on a posver drill, although it can be done just as effectively by hand, using sheets of abrasive paper. To complete the preparation for filling, score the surface of the bare metal wflhi screwdriver or the tang of 8 file, or alternatively, drill small holes In the affected area. This will provide a really good 'key' for the filler paste. To complete the repair, see the Section on filling and respraying.
Repairs of rust holes or gashes in bodywork Remove all paint from the affected area, and from an inch or so of the surrounding 'sound' bodywork, using an abrasive pad
or a
wire brush on a power drill. If these are not available, a few sheets of abrasive paper wil do the job most effectively. With the paint removed, you will be able to judge the severity of the corrosion, and therefore decide whether to renew the whole panel (if this is possible) or to repair the affected area. New body panels are not as expansive as most people think, and it is often quicker and more satisfactory to fit a new panel than to attempt to repair large areas of corrosion. Remove all fittings from Ihe affected area, except those which will act as a guide to ttie original shape of the damaged bodywork (eg headlight shells etc). Then, using tin snips
or a
hacksaw blade, remove all loose metal snd any other metal badly affected by corrosion. Hammer the edges of the hole inwards, in order to create a slight depression for the filer paste. Wire-brush the affected area to remove tha powdery rust from the surface of the remaining metal. Paint Ihe affected area with rust-inhibiting paint, if the beck of the rusted area is accessible, treat this also. Before filling can take place, ft will be necessary to block the hole in some
way.
TNs can be achieved by the use of aluminium cr plastic mesh, or aluminium tape. Aluminium or plastic mesh, or glass-fibre matting, is probably the best material to use for a large hole. Cut a piece to tha approximate size and shape of tho hole to b« filled, then position it In the hole so that its edges are below the level of the surrounding bodywork. It can be retained in position by
Page 204 of 225
Bodywork and fittings
11
*3
several blobs of filler paste around its periphery. Aluminium tape should be used for small or very narrow holes. Pull a piece off the roll, trim it to the approximate size and shape required, then pull off the backing paper (if used) and stick the tape over the hole; it can be overlapped if the thickness of one piece is Insufficient. Burnish down the edges of the tape with the handle of a screwdriver or similar, to ensure that the tape is securely attached to the metal underneath.
Bodywork repairs -filling and respraying Before using this Section, see the Sections on dent, deep scratch, rust holes and gash repairs. Many types of bodyfiller are available, but generally speaking, those proprietary kits which contain a tin of filler paste and a tube of resin hardener are best for this type of repair. A wide, flexible plastic or nylon applicator will be found invaluable for imparting a smooth and well-contoured finish to the surface of the filler. Mix up a little filler on a clean piece of card or board • measure the hardener carefully (follow the maker's instructions on the pack), otherwise the filler will set too rapidly or too slowly. U3ing the applicator, apply the filler paste to the prepared area; draw the applicator across the surface of the filler to achieve the correct contour and to level the surface. As soon as a contour that approximates to the correct one is achieved, stop working the paste - if you carry on too long, the paste will become sticky and begin lo 'pick-up' on the applicator. Continue to add thin layers of filler paste at 20-minute Intervals, until the level of the filler is just proud of the surrounding bodywork. Once the filler has hardened, the excess can be removed using a metal plane or file. From then on, progressively-finer grades of abrasive paper should be used, starting with a 40-grade production paper, and finishing with a 400-grade wet-and-dry paper. Always wrap the abrasive paper around a flat rubber, cork, or wooden block • otherwise the surface of the filler will not be completely flat. During the smoothing of the filler surface, the wet-and-dry paper should be periodically rinsed in water. This will ensure that a very smooth finish is imparled to the filler at the final stage. At this stage, the dent should be surrounded by a ring of bare metal, which in turn should be encircled by the finely feathered' edge of the good paintwork. Rinse the repair area with clean water, until all of the dust produced by the rubbing-down operation has gone. Spray the whole area with a light coat of primer - this will show up any imperfections In the surface of the filler. Repair these imperfections with fresh filler paste or bodystopper, and once more smooth the surface with abrasive paper. Repeat this
spray-and-repair procedure until you are satisfied that the surface of the filler, and the feathered edge of the paintwork, are perfect. Clean the repair area with clean water, and allow to dry fully.
flflfl^gl tf txxfystopper is used, it can WiMiiBi be mixed with cellulose Hi NT thinners to form a really thin 1 1 paste which is Ideal for filling small holes.
The repair area Is now ready for final spraying. Paint spraying must be carried out in a warm, dry, windless and dust-free atmosphere. This condition can be created artificially if you have access to a large indoor working area, but If you are forced to work in the open, you will have to pick your day very carefully. If you are working indoors, dousing the floor In the work area with water will help to settle the dust which would otherwise be in the atmosphere. If the repair area is confined to one body panel, mask off the surrounding panels; this will help to minimise the effects of a slight mis-match in paint colours. Bodywork fittings (eg chrome strips, door handles etc) will also need to be masked off. Use genuine masking tape, and several thicknesses of newspaper, for the masking operations. Before commencing to spray, agitate the aerosol can thoroughly, then spray a test area (an old tin. or similar) until the technique is mastered. Cover the repair area with a thick coat of primer; the thickness should be built up using several thin layers of paint, rather than one thick one. Using 400-grade wet-and-dry paper, rub down the surface of the pnmer until it is really smooth. While doing this, the work area should be thoroughly doused with water, and the wet-and-dry paper periodically rinsed in water. Allow to dry before spraying on more paint. Spray on the top coat, again building up the thickness by using several thin layers of paint. Start spraying at one edge of the repair area, and then, using a side-to-side motion, work until the whole repair area and about 2 inches of the surrounding original paintwork is covered. Remove all masking material 10 to 15 minutes after spraying on the final coat of paint. Allow the new paint at least two weeks to harden, then, using a paintwork renovator, or a very fine cutting paste, blend the edges of the paint into the existing paintwork. Finally, apply wax polish.
Plastic components With the use of more and more plastic body components by the vehicle manufacturers (eg bumpers, spoilers, and in some cases major body panels), rectification of more serious damage to such items has become a matter of either entrusting repair work to a specialist in this field, or renewing complete components. Repair of such damage by the
DIY owner is not really feasible, owing to the cost of the equipment and materials required for effecting such repairs. The basic technique involves making a groove along the line of the crack in the plastic, using a rotary burr In a power drill. The damaged part is then welded back together, using a hot-air gun to heat up and fuse a plastic filler rod Into the groove. Any excess plastic is then removed, and the area rubbed down to a smooth finish. It is important that a filler rod of the correct plastic is used, as body components can be made of a variety of different types (eg polycarbonate, ABS, polypropylene). Damage of a less senous nature (abrasions, minor cracks etc) can be repaired by the DIY owner using a two-part epoxy filler repair material. Once mixed in equal proportions, this is used in similar fashion to the bodywork filler used on metal panels. The filler is usually cured in twenty to thirty minutes, ready for sanding and painting. If the owner is renewing a complete component himself, or If he has repaired it with epoxy filler, he will be left with the problem of finding a suitable paint for finishing which is compatible with the type of plastic used. At one time, the use of a universal paint was not possible, owing to the complex range of plastics encountered In body component applications. Standard paints, generally speaking, will not bond to plastic or rubber satisfactorily. However, it is now possible to obtain a plastic body parts finishing kit which consists of a pre-pnmer treatment, a primer and coloured top coat. Full Instructions are normally supplied with a kit, but basically, the method of use is to first apply the pre-pnmer to the component concerned, and allow It to dry for up to 30 minutes. Then the primer is applied, and left to dry for about an hour before finally applying the special-coloured top coat. The result is a correctly-coloured component, where the paint will flex with the plastic or rubber, a property that standard paint does not normally possess.
5 Major body damage -repair
Where serious damage has occurred, or large areas need renewal due to neglect, it means that complete new panels will need welding-in, and this is best left to professionals. If the damage is due to Impact, it will also be necessary to check completely the alignment of the bodyshell, and this can only be carried out accurately by a Fiat dealer using special jigs. If the alignment of the bodyshell is not corrected, the car's handling may be seriously affected. In addition, excessive stress may be Imposed on the steering, suspension, tyres or transmission, causing abnormal wear or even complete failure.
Page 206 of 225
Bodywork and fittings
11
*5
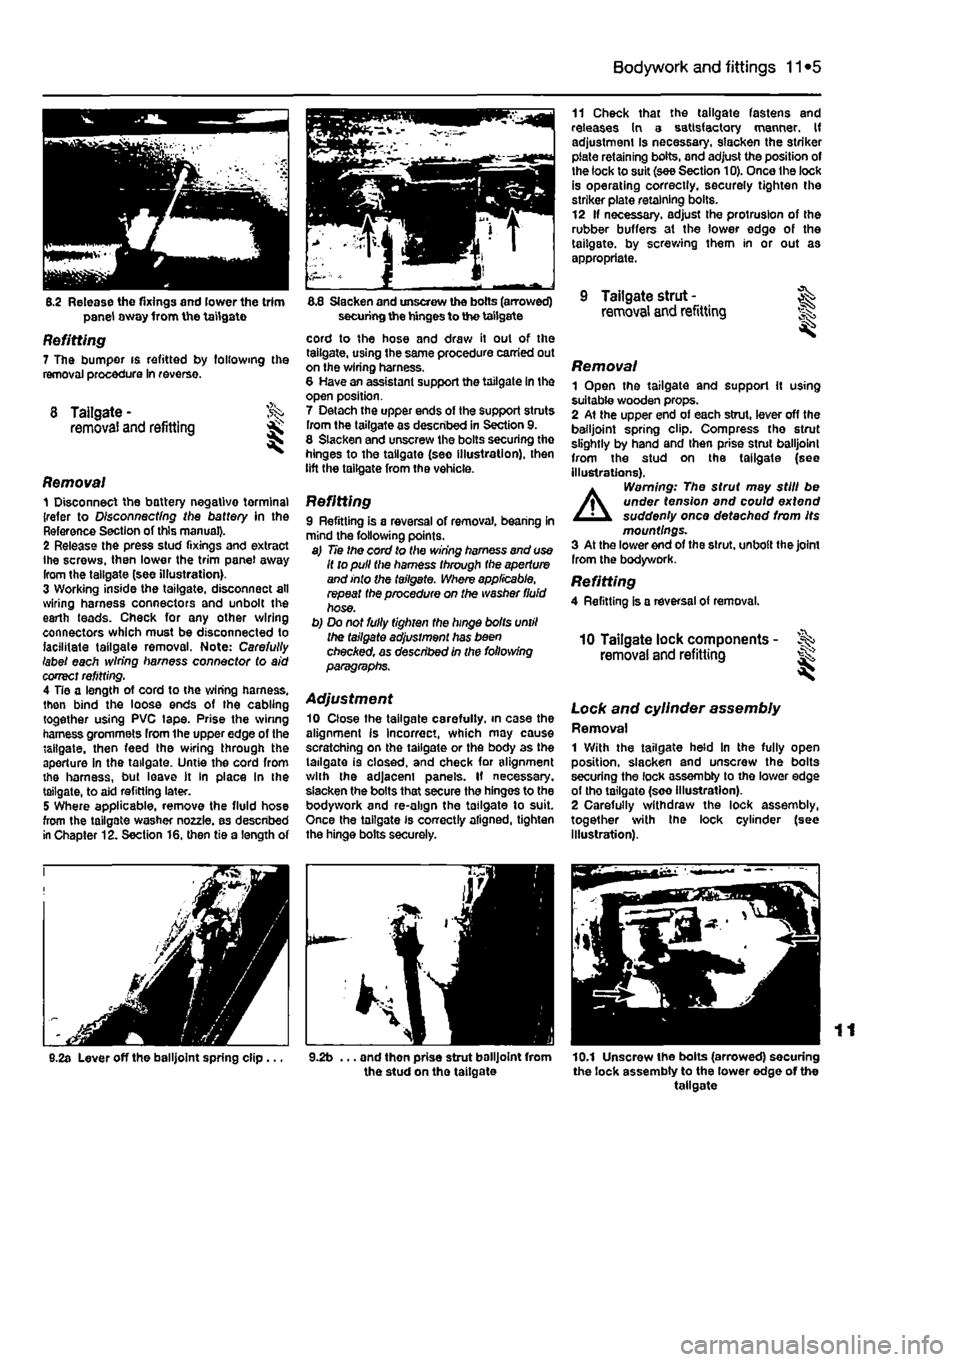
8.2 Release the fixings and lower the trim panel away from the tailgate
Refitting 7 The pumper is refitted by following the removal procedure In reverse.
8 Tailgate- ^ removal and refitting
Removal 1 Disconnect the battery negative tormina) {refer to D/sconnecf/ng the battery In the Reference Section of this manual}. 2 Release the press stud fixings and extract ihe screws, then lower the trim panel away from the tailgate (see illustration). 3 Working inside the tailgate, disconnect all wiring harness connectors and unbolt the earth leads. Check for any other wiring connectors which must be disconnected to facilitate tailgate removal. Note: Carefully label each wiring harness connector (o aid correct refitting. 4 Tie a length of cord to the wiring harness, then bind the loose ends of the cabling together using PVC tape. Prise the winng harness grommets from the upper edge of the tailgate, then feed the wiring through the aperture in the tailgate. Untie the cord from the harness, but leave it In place In the tailgate, to aid refitting later. 5 Where applicable, remove the fluid hose from the tailgate washer nozzle, as described in Chapter 12. Section 16. then tie a length of
8.2a Lever off the balljoint spring clip...
8.8 Slacken and unscrew the bolts (arrowed) securing the hinges to the tailgate
cord to the hose and draw it out of the tailgate, using the same procedure carried out on the wiring harness. 8 Have an assistant support the tailgate in the open position. 7 Detach the upper ends of the support stmts from the tailgate as described in Section 9. 8 Slacken and unscrew the bolts securing tho hinges to the tailgate (seo illustration), then lift the tailgate from the vehicle.
Refitting 9 Refitting is a reversal of removal, bearing in mind the following points. a) Tie the cord to the wiring harness and use It to pull the harness through the aperture and into the tailgate. Where applicable, repeat the procedure on the washer fluid hose. b) Do not fully tighten the hinge bolts until the tailgate adjustment has been checAed, as described in the following paragraphs.
Adjustment 10 Close the tailgate carefully, in case the alignment is Incorrect, which may cause scratching on the tailgate or the body as the tailgate is closed, and check for alignment with the adjacent panels. If necessary, slacken the bolts that secure the hinges to the bodywork and re-align the tailgate to suit. Once the tailgate is correctly aligned, tighten the hinge bolts securely.
9.2b ... and then prise strut balljoint from the stud on tho taitgate
11 Check that the tailgate fastens and releases In a satisfactory manner. If adjustment Is necessary, slacken the striker plate retaining bolts, and adjust the position of the lock to suit (see Section 10). Once the lock is operating correctly, securely tighten the striker plate retaining bolts. 12 If necessary, adjust the protrusion of the rubber buffers at the lower edge of the tailgate, by screwing them in or out as appropriate.
9 Tailgate strut - ^ removal and refitting
Removal 1 Open the tailgate and support it using suitable wooden props. 2 At the upper end of each strut, lever off the balljoint spring clip. Compress tho strut slightly by hand and then prise strut balljoint from the stud on the tailgate (see illustrations),
A
Warning: The strut may still be under tension and could extend suddenly once detached from Its mountings. 3 At the lower end of the strut, unbolt the joint Irom the bodywork. Refitting 4 Refitting is a reversal of removal.
10 Tailgate lock components -removal and refitting ^
Lock and cylinder assembly Removal 1 With the tailgate held In the fully open position, slacken and unscrew the bolts securing the lock assembly to tho lower edge of tho tailgate (soo illustration). 2 Carefully withdraw the lock assembly, together with tne lock cylinder (see Illustration).
10.1 Unscrew the bolts (arrowed) securing the lock assembly to the lower edge of the tailgate
Page 208 of 225
Bodywork and fittings
11
*7
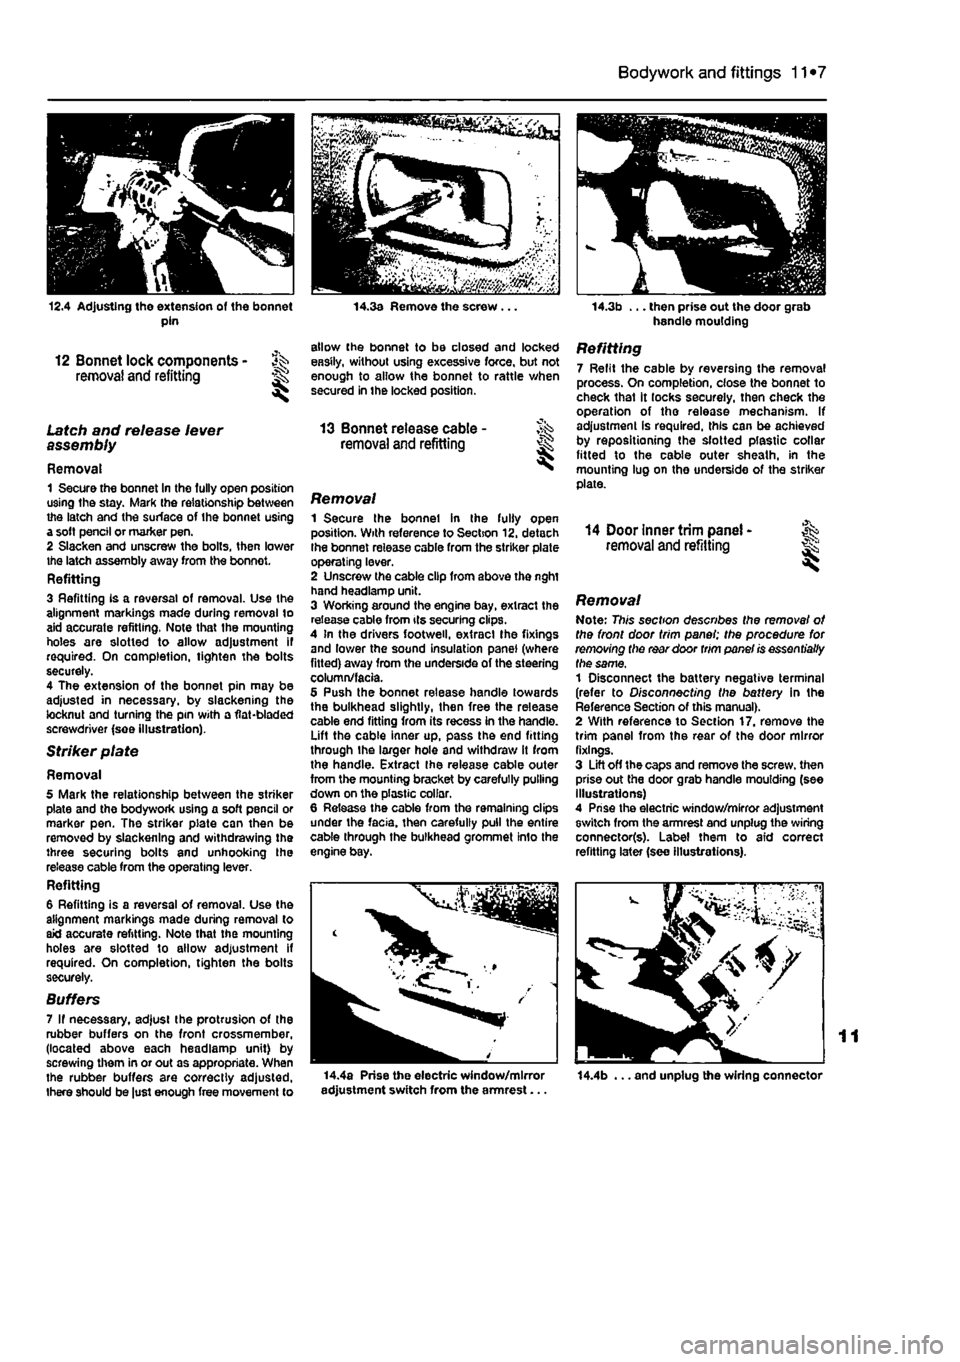
12.4 Adjusting the extension of the bonnet pin
12 Bonnet lock components - ^ removal and refitting H
Latch and release lever assembly
Removal 1 Secure the bonnet In the fully open position using the stay. Mark the relationship between the latch and the surface of the bonnet using a soft pencil or marker pen. 2 Slacken and unscrew the bolts, then lower the latch assembly away from the bonnot. Refitting 3 Refitting is a reversal of removal. Use the alignment markings made during removal to aid accurate refitting. Note that the mounting holes are slotted to allow adjustment if required. On completion, tighten the bolts securely. 4 The extension of the bonnet pin may be adjusted in necessary, by slackening the locknut and turning the pin with a flat-bladed screwdriver (see illustration).
Striker plate
Removal 5 Mark the relationship between the striker plate and the bodywork using a soft pencil or marker pen. The striker plate can then be removed by slackening and withdrawing the three securing bolts and unhooking the release cable from the operating lever. Refitting 6 Refitting is a reversal of removal. Use the alignment markings made during removal to aid accurate refitting. Note that the mounting holes are slotted to allow adjustment if required. On completion, tighten the bolts securely.
Suffers 7 If necessary, adjust the protrusion of the rubber buffers on the front crossmember, (located above each headlamp unit) by screwing them in or out as appropriate. When the rubber buffers are correctly adjusted, there should be just enough free movement to
14.3a Remove the screw .
allow the bonnet to be closed and locked easily, without using excessive force, but not enough to allow the bonnet to rattle when secured in the locked position.
13 Bonnet release cable -removal and refitting I
Removal 1 Secure the bonnet in the fully open position. With reference to Section 12, detach Ihe bonnet release cable from the striker plate operating lever. 2 Unscrew the cable clip from above the nght hand headlamp unit. 3 Working around the engine bay, extract the release cable from its securing clips. 4 In the drivers footweil, extracl Ihe fixings and lower the sound insulation panel (where fitted) away from the underside of the steering column/facia. 5 Push the bonnet release handle towards the bulkhead slightly, then free the release cable end fitting from its recess in the handle. Lift the cable inner up, pass the end fitting through the larger hole and withdraw it from the handle. Extract the release cable outer from the mounting bracket by carefully pulling down on the plastic collar. 6 Release the cable from the remaining clips under the facia, then carefully pull the entire cable through the bulkhead grommet Info the engine bay.
14.3b ... then prise out the door grab handle moulding
Refitting 7 Refit the cable by reversing the removal process. On completion, close the bonnet to check that it locks securely, then check the operation of tho release mechanism. If adjustment is required, this can be achieved by repositioning the slotted plastic collar fitted to the cable outer sheath, in the mounting lug on the underside of the striker plate.
14 Door inner trim panel -removal and refitting I
Removal Note: This section describes the removal of the front door trim panel; the procedure for removing the rear door trim panel is essentially the same, 1 Disconnect the battery negative terminal (refer to Disconnecting the battery in the Reference Section of this manual). 2 With reference to Section 17. remove the trim panel from the rear of the door mirror fixings. 3 Lift off the caps and remove the screw, then prise out the door grab handle moulding (see Illustrations) 4 Prise the electric window/mirror adjustment switch from the armrest and unplug the wiring connector(s). Label them to aid correct refitting later (see illustrations).
14.4a Prise the electric window/mirror adjustment switch from the armrest... 14.4b ... and unplug the wiring connector
Page 209 of 225
11
*8 Bodywork and fittings
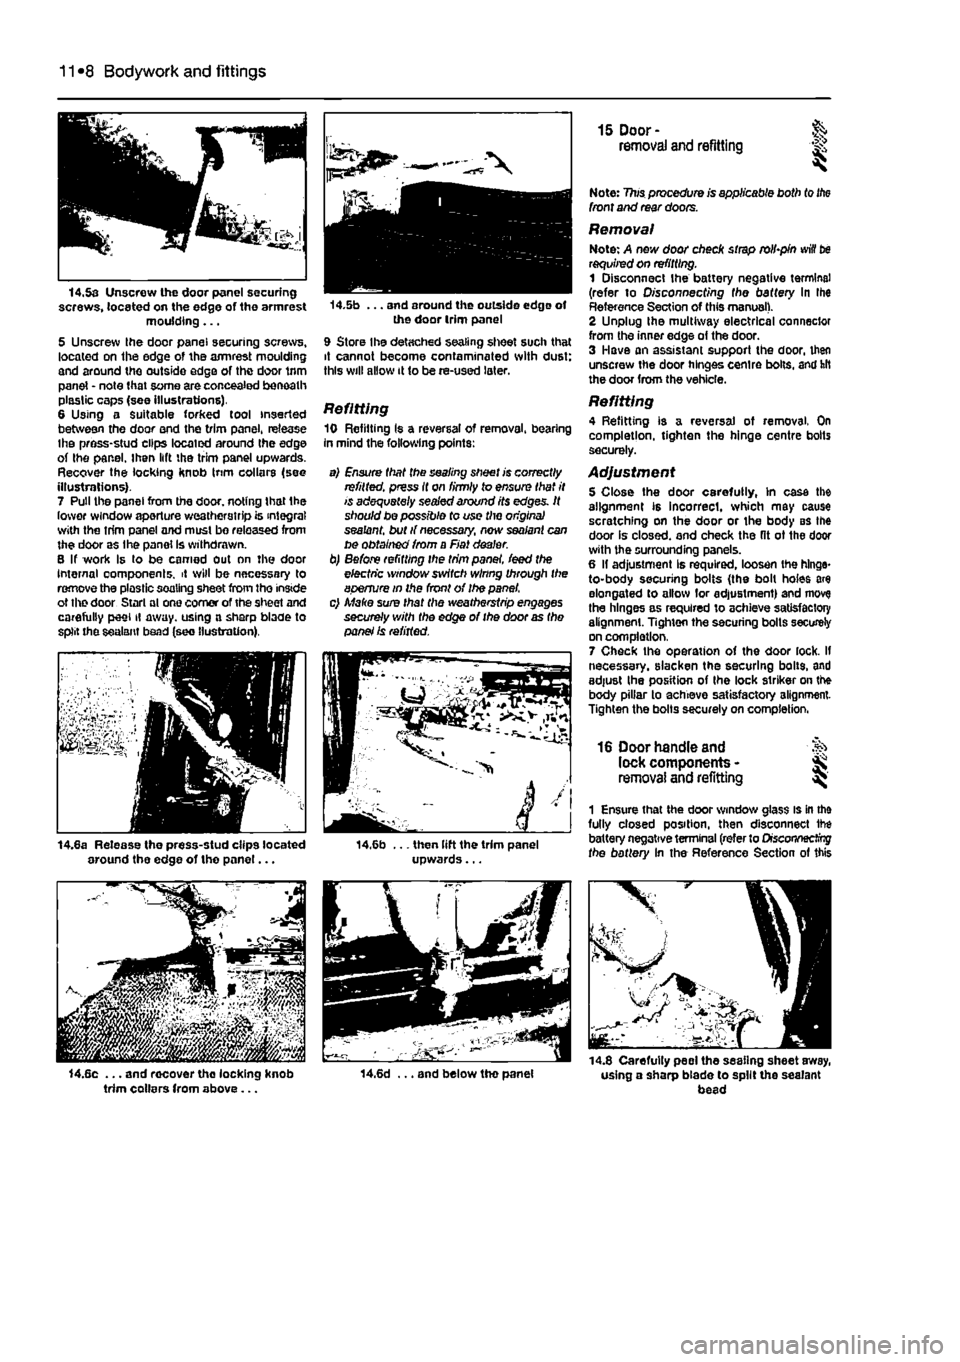
14.5a Unscrew the door panel securing screws, located on the edge of the armrest moulding... 5 Unscrew Ihe door panel securing screws, located on Ihe edge of the armrest moulding and around the outside edge of the door trim panel - note that some are concealed beneath plastic caps (see illustrations). 6 Using a Suitable forked tool inserted between the door end the trim panel, release Ihe press-stud clips located around Ihe edge of Ihe panel. Ihen lift the trim panel upwards. Recover the locking knob Inm collars (see illustrations). 7 Pull the panel from the door, noting that Ihe lower window aperture weatherstrip is integral with the trim panel and must bo released from the door as the panel Is withdrawn. B If work Is lo be earned out nn the door Internal oomponenls. it will be necessary to remove the plastic soaling sheet from tho inside ot the door Starl ol one comer of the sheet and carefully peel il away, using a sharp blade to split the sealant bead (see (lustration).
j
14.8a Release the press-stud clips located around the edge of tho panel...
trim collars from above...
14.5b ... and around the outside edge of the door trim panel
9 Store Ihe detached sealing sheet such that it cannot become contaminated with dust: this will allow it to be re-used later.
Refitting 10 Refilling Is a reversal of removal, bearing in mind the following points:
a) Ensure that the sealing sheet is correctly refitted, press it on firmly to ensure that it is adequately sealed around its edges. It should be possible fo use the origins} sealant, but if necessary, new sealant can be obtained from a Fiat dealer. b) Before refitting the trim panel, feed the electric window switch wlnng through the aperture in the front of Ihe panel. c) Make sure that the weatherstrip engages securely with the edge of the door as the panel Is refitted.
i4,6b ... then lift the trim panel upwards...
14.6d ... and below tho panel
15 Door- & removal and refitting is
Note: 7?ws procedure is applicable both to
the
front and rear doors.
Removal Note: A new door check strap rolbpin
win
be requited on refitting. 1 Disconnect the battery negative terminal (refer to O/sconoecf/ng fhe battery In Ihe Reference Section of this manual). 2 Unplug Ihe multiway electrical connector from the inner edge of the door. 3 Have an assistant support the door, then unscrew the door hinges centre bolts, and hit the door from the vehicle.
Refitting 4 Refitting is a reversal of removal. On completion, tighten the hinge centre bolts securely.
Adjustment 5 Close the door carefully, In case the alignment is incorrect, which may cause scratching on the door or the body BS the door is closed, and check the fit ot the door with the surrounding panels. 6 II adjustment Is required, loosen the hinge-to-body securing bolts (the bolt holes are elongated to allow lor adjustment) and move the hinges as required to achieve satisfactory alignment. Tighten the securing bolls securely on completion. 7 Check the operation of the door lock. If necessary, slacken the securing bolts, and adjust Ihe position of Ihe lock striker on the body pillar to achieve satisfactory alignment-Tighten the bolts securely on completion,
16 Door handle and lock components -removal and refitting ^
1 Ensure that the door window glass is in the fully closed position, then disconnect ihe battery negative terminal (refer to Drscoryiecfrrg fhe battery In the Reference Section of this
•
m-i -14.8 Carefully peel the sealing sheet away, using a sharp blade to spilt the sealant bead
Page 211 of 225
11
*10 Bodywork and fittings
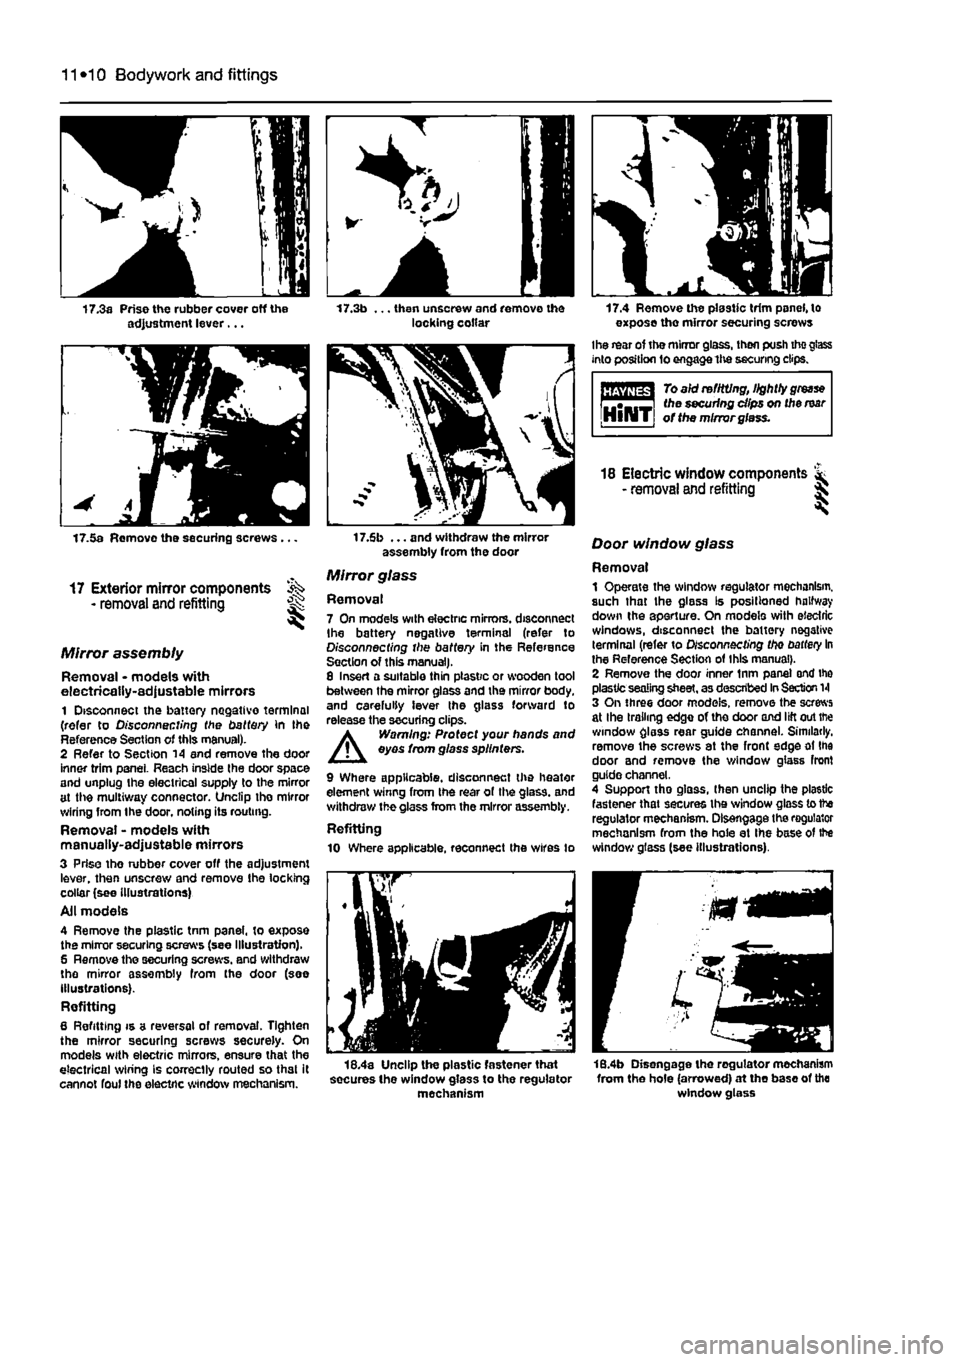
17.3a Prise the rubber cover off the adjustment lever... 17.3b ... then unscrew and remove the locking collar 17.4 Remove the plastic trim panel, to expose the mirror securing screws
Ihe rear of the mirror glass, then push tho glass into position fo engage the securing clips.
To aid re fitting, lightly
grease
^•-.—i the securing dips on the mar IjlllliTj of the mirror glass.
17.5a Remove the securing screws .
17 Exterior mirror components - removal and refitting
Mirror assembly
Removal • models with electrically-adjustable mirrors 1 Disconnect the battery negative terminal (refer to Disconnecting the battery in the Reference Section of this manual). 2 Refer to Section 14 and remove the door inner trim panel. Reach inside the door space and unplug the electrical supply to the mirror at the multiway connector. Unclip tho mirror wiring from Ihe door, noting its routing. Removal - models with manually-adjustable mirrors 3 Prise tho nibber cover off the adjustment lever, then unscrew and remove the locking collar (see Illustrations) Ail models 4 Remove the plastic tnm panel, to expose the mirror securing screws (see Illustration). 6 Remove the securing screws, and withdraw the mirror assembly from the door (see illustrations). Refitting 6 Refitting is a reversal of removal. Tighten the mirror securing screws securely. On models with electric mirrors, ensure that the electrical wiring is correctly routed so that it cannot foul the electric window mechanism.
17.6b ... and withdraw the mirror assembly from the door
Mirror glass
Removal 7 On models with electric mirrors, disconnect Ihe battery negative terminal (refer to Disconnecting the battery in the Reference Section of this manual). 8 Insert a suitable thin plastic or wooden tool between the mirror glass and the mirror body, and carefully lever the glass forward to release the securing clips. A Warning: Protect your hands and eyes from glass sp//nfers.
9 Where applicable, disconnect the heater element winng from the rear of the glass, and withdraw the glass from the mirror assembly. Refitting 10 Where applicable, reconnect the wires to
18 Electric window components & - removal and refitting 5
Door window glass
Removal 1 Operate the window regulator mechanism, such that the glass Is positioned halfway down the aperture. On modelo with electric windows, disconnect the battery negative terminal (refer to Disconnecting tho
battery
In the Reference Section of this manual). 2 Remove the door inner inm pane) ond ihe plastic sealing sheet, as described
In
Section
1
3 On three door models, remove the screws at Ihe trailing edge of the door and lift out the window glass rear guide channel. Similarly, remove the screws at the front edge at the door and remove the window glass front guide channel. 4 Support tho glass, (hen unclip the plastic fastener that secures the window glass to the regulator mechanism. Disengage the regulator mechanism from the hole at Ihe base of the window glass (see illustrations).
18.4a Unclip the plastic fastener that socures the window glass to the regulator mechanism
18.4b Disengage the regulator mechanism from the hole (arrowed) at the base of the window glass
Page 212 of 225
Bodywork and fittings
11
*11
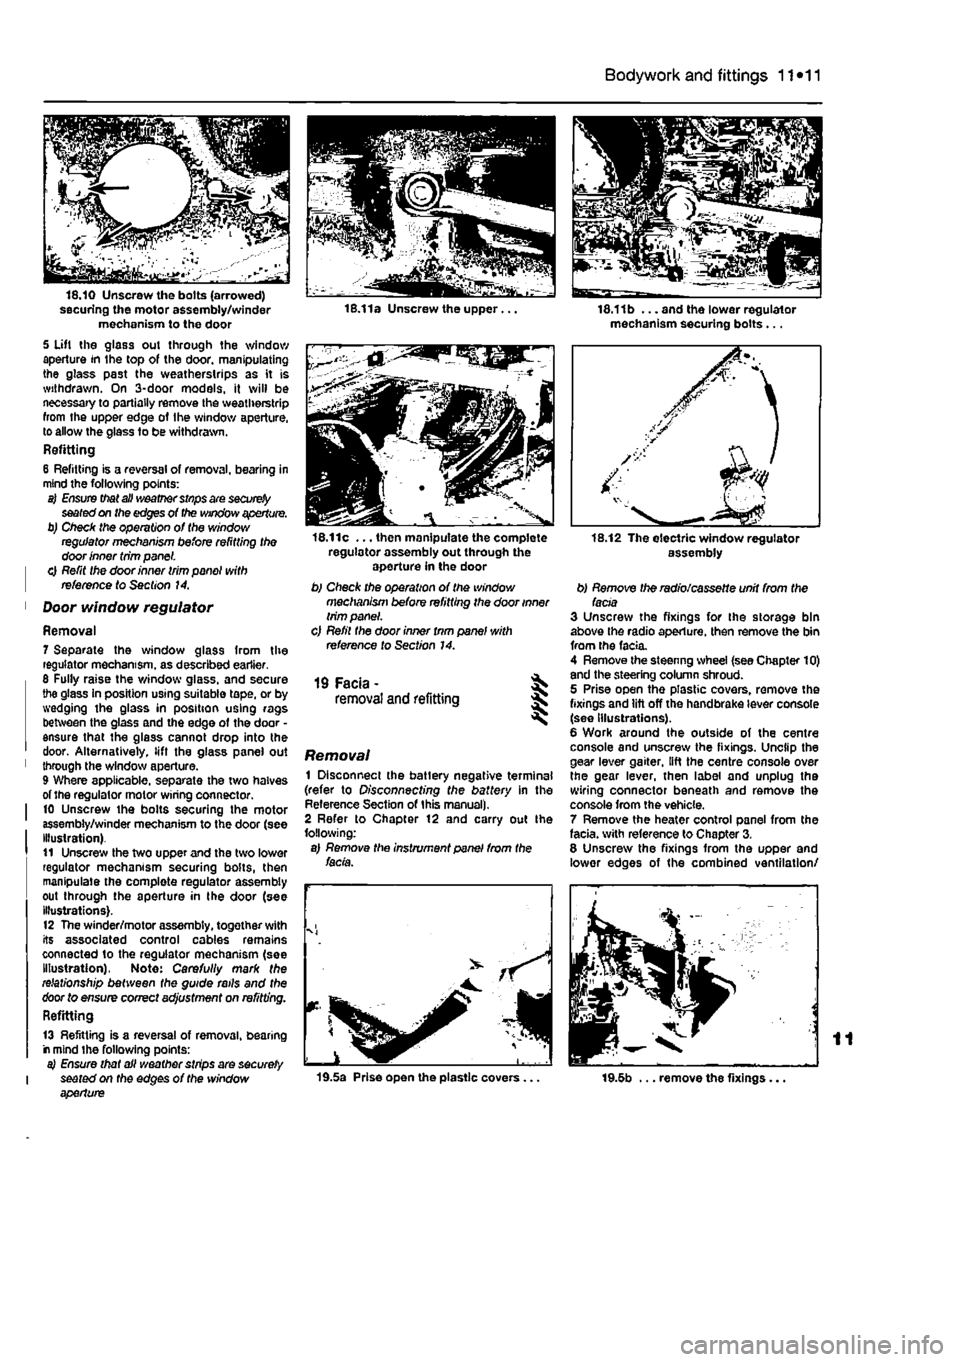
securing the motor assembly/winder mechanism to the door 5 Uft the glass out through the window aperture in the top of the door, manipulating the glass past the weatherstrips as it is withdrawn. On 3-door models, it will be necessary to partially remove the weatherstrip from the upper edge of Ihe window aperture, to allow the glass to be withdrawn. Refitting 6 Refitting is a reversal of removal, bearing in mind the following points: a) Ensure that all weather stnps are
securely
seated on the edges of the window aperture. b) Check the operation of the window regulator mechanism before refitting the door inner trim panel. | 0 Refit the door inner trim panel with | reference to Section 14.
1 Door window regulator
Removal 7 Separate the window glass from the regulator mechanism, as described earlier. 6 Fully raise the window glass, and secure the glass In position using suitable tape, or by wedging the glass in position using rags between the glass and the edge of the door • ensure that the glass cannot drop into the door. Alternatively, lift the glass panel out 1 through the window aperture. 9 Where applicable, separate the two halves of the regulator motor wiring connector. I 10 Unscrew the bolts securing the motor assembly/winder mechanism to the door (see Illustration). t1 Unscrew the two upper and the two lower regulator mechanism securing bolts, then manipulate the complete regulator assembly out through the aperture in the door (see illustrations). 12 The winder/motor assembly, together with its associated control cables remains connected to the regulator mechanism (see Illustration), Note: Carefully mark the relationship between the guide rails and the door to ensure correct adjustment on refitting. Refitting
13 Refitting is a reversal of removal, bearing r mind the following points: a) Ensure that all weather strips are securely I seated on the edges of the window aperture
16.11c ... then manipulate the complete regulator assembly out through the aperture in the door b) Check the operation of the window mechanism before refitting the door inner trim panel. c) Refil the door inner tnm panel with reference to Section 14.
19 Facia - ^ removal and refitting 5
Removal 1 Disconnect the batlery negative terminal (refer to Disconnecting the battery in the Reference Section of this manual). 2 Refer to Chapter 12 and carry out Ihe following: a) Remove the instrument panel from the facia.
19.5a Prise open the plastic covers...
18.11b ... and the lower regulator mechanism securing bolts...
assembly
b) Remove the radio/cassette unit from the facia 3 Unscrew the fixings for the storage bin above the radio aperture, then remove the bin from the facia. 4 Remove the steenng wheel (see Chapter 10) and the steering column shroud. 5 Prise open the plastic covers, remove the fixings and lift off the handbrake lever console (see Illustrations). 6 Work around the outside of the centre console and unscrew the fixings. Unclip the gear lever gaiter, lift the centre console over the gear lever, then label and unplug the wiring connector beneath and remove the console from the vehicle. 7 Remove the heater control panel from the facia, with reference to Chapter 3. 8 Unscrew the fixings from the upper and lower edges of the combined ventilation/
19.5b ... remove the fixings...
Page 213 of 225
11 *12 Bodywork and fittings
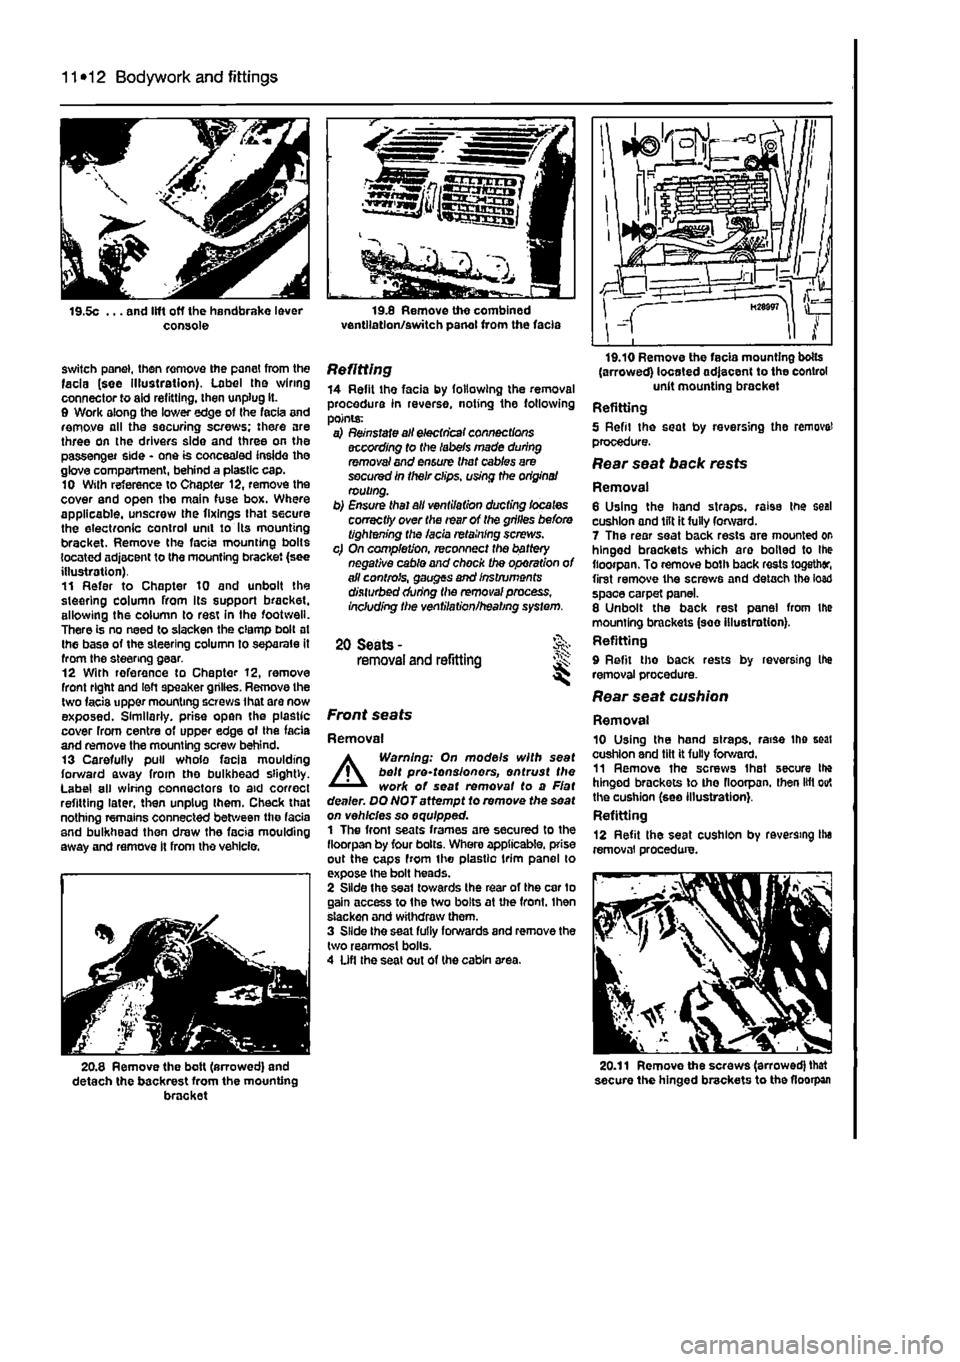
switch panel, then remove the panel from the facia (see illustration). Label tho wiring connector to aid refitting, then unplug It. 0 Work along the lower edge of Ihe facia and remove all the securing screws; there are three on the drivers side and three on the passenger side - one is concealed inside the glove compartment, behind a plastic cap. 10 Wilh reference to Chapter 12, remove the cover and open the main fuse box. Where applicable, unscrew the fixings that secure the electronic control unit to Its mounting bracket. Remove the facia mounting bolts located adjacent to the mounting bracket (see illustration). 11 Refer to Chapter 10 and unbolt the steering column from Its support bracket, allowing the column to rest in the footwell. There is no need to slacken the clamp bolt at Ihe base of the steering column to separate it from the steering gear. 12 With reference to Chapter 12, remove front right and left speaker grilles. Remove the two facis upper mounting screws ihat are now exposed. Similarly, prise open the plastic cover from centre of upper edge of the fada and remove the mounting screw behind. 13 Carefully pull whole facia moulding forward away from tho bulkhead slightly. Label all wiring connectors to aid correct refitting later, then unplug Ihem. Check that nothing remains connected between the facia and bulkhead then draw the facia moulding away and remove It from the vehicle.
20.8 Remove the bolt (arrowed) and detach the backrest from the mounting bracket
Refitting 14 Refit the facia by following the removal procedure in reverse, noting the following points: a) Reinstate all electrical connections according to (he labels made during removal and ensure that cables are secured in their clips, using the origins/ routing. b) Ensure thai all ventilation ducting locates correctly over the rear of the grilles before tightening the facia retaining screws. c) On completion, reconnect the battery negative cable and chock the operation of all controls, gauges and Instruments disturbed during the removal process, Including the ventilation/heating system.
20 Seats -removal and refitting JS:
Front seats
Removal
A
Warning: On models with seat belt pre-tonsionors, entrust the work of seat removal to a Flat dealer. DQNOTattempt to remove the seat on vehicles so equipped. 1 The front seats frames are secured to the fioorpan by four bolts. Whero applicable, prise out the caps from the plastic trim panel lo expose the bolt heads. 2 Slide the seat towards the rear of the car to gain access to the two bolts at the front, Ihen slacken and withdraw them. 3 Slide Ihe seat fully forwards and remove the two rearmost bolls. 4 Ufl the seat out of the cabin area.
(arrowed) located adjacent to the control unit mounting bracket Refitting 5 Refil the seat by reversing the remove! procedure. Rear seat back rests
Removal 6 Using the hand straps, raise the seal cushion and lilt it fully forward. 7 The rear seat back rests are mounted or hinged brackets which aro boiled to Ihe fioorpan. To remove both back rests together, first remove the screws and detach the load space carpet panel. 8 Unbolt the back rest panel from the mounting brackets (see illustration). Refitting 9 Refit tho back rests by reversing Ihe removal procedure. Rear seat cushion
Removal 10 Using the hand straps, raise the seat cushion and tilt it fully forward. 11 Remove ihe screws Ihat secure Ihe hinged brackets to tho fioorpan. then lift out the cushion (see illustration}. Refitting 12 Refit the seat cushion by reversing Ihe removal procedure.
20.11 Remove the screws (arrowed) that secure the hinged brackets to the fioorpan
Page 214 of 225
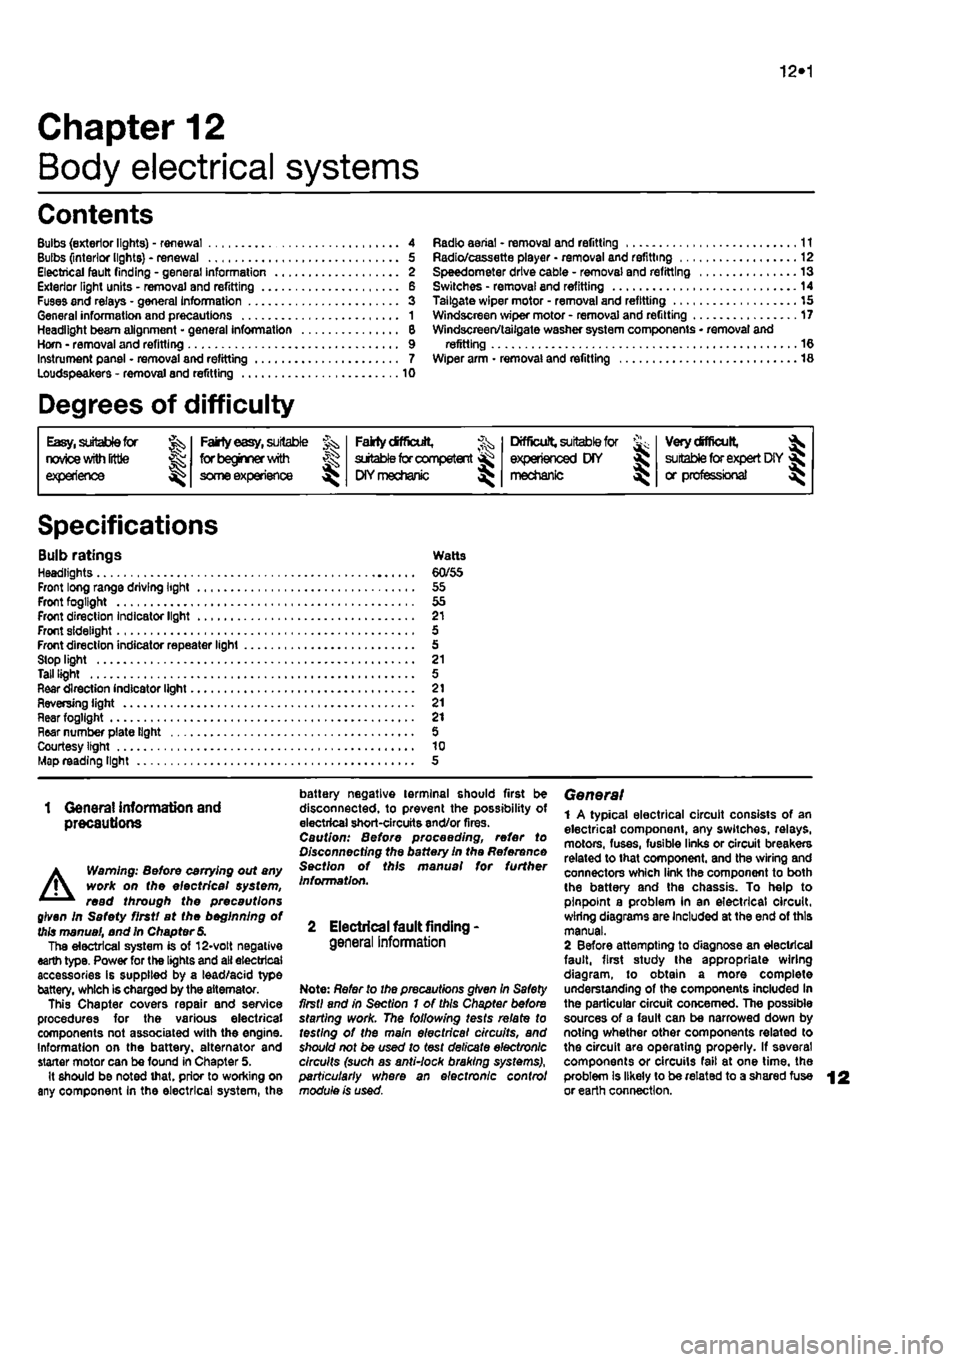
10*1
Chapter 12
Body electrical systems
Contents
Bulbs (exterior lights) - renewal 4 Bulbs (interior lights) - renewal 5 Electrical fault finding - general information 2 Exterior light units - removal and refitting 6 Fuses and relays - general Information 3 General information and precautions 1 Headlight beam alignment • general Information 6 Horn • removal and refitting 9 Instrument panel - removal and refitting 7 Loudspeakers - removal and refitting 10
Degrees of difficulty
Radio aerial - removal and refitting 11 Radio/cassette player • removal and refitting 12 Speedometer drive cable - removal and refitting 13 Switches - removal end refitting 14 Tailgate wiper motor - removal and refitting 15 Windscreen wiper motor - removal and refitting 17 Windscreen/tailgate washer system components • removal and refitting 16 Wiper arm • removal and refitting 18
Easy,
statable for ^
novice with liffle
|| experience ^
Fairly
easy,
suitable for beginner with ^ some experience ^
Fabtycffficiit,
suitable
for competent ^
DIY
mechanic ^
Difficult, suitable for
^ experienced DIY JR mechanic
Very difficult,
A,
suitable
for
expert DIY
Sj or professional ^
Specifications
Bulb ratings Watts Headlights 60/55 Front long range driving light 55 Front fogllght 55 Front direction Indicator light 21 Front sidelight 5 Front direction indicator repeater light 5 Stop light 21 Tall light 5 Rear direction indicator light 21 Reversing light 21 near fogllght 21 Hear number plate light 5 Courtesy light 10 Map reading light 5
1 Genera! information and precautions
A
Warning: fie/Ore carrying out any work on the electrical system, read through the precautions given in Safety first! at the beginning of this manual, and in Chapter 8. The electrical system is of 12-volt negative earth type. Power for the lights and all electrical accessories is supplied by a lead/acid type battery, which is charged by the alternator. This Chapter covers repair and service procedures for the various electrical components not associated with the engine. Information on the battery, alternator and starter motor can be found in Chapter 5. It should be noted that, prior to working on any component In the electrical system, the
battery negative terminal should first be disconnected, to prevent the possibility of electrical short-circuits and/or fires. Caution: Before proceeding, refer to Disconnecting the battery In the Reference Section of this manual for further information.
2 Electrical fault finding-general information
Note: Refer to the precautions given In Safety first! and in Section 1 of this Chapter before starting work. The following tests relate to testing ot the main electrical circuits, and should not be used to test delicate electronic circuits (such as antHock braking systems), particularly where an electronic con fro/ module is used.
General 1 A typical electrical circuit consists of an electrical component, any switches, relays, motors, fuses, fusible links or circuit breakers related to that component, and the wiring and connectors which link the component to both the battery and the chassis. To help to pinpoint a problem in an electrical circuit, wiring diagrams are Included at the end of this manual. 2 Before attempting to diagnose an electrical fault, first study the appropriate wiring diagram, to obtain a more complete understanding of the components included In the particular circuit concerned. The possible sources of a fault can be narrowed down by noting whether other components related to the circuit are operating properly. If several components or circuits fait at one time, the problem Is likely to be related to a shared fuse or earth connection.
Page 216 of 225
Body electrical systems 12*3
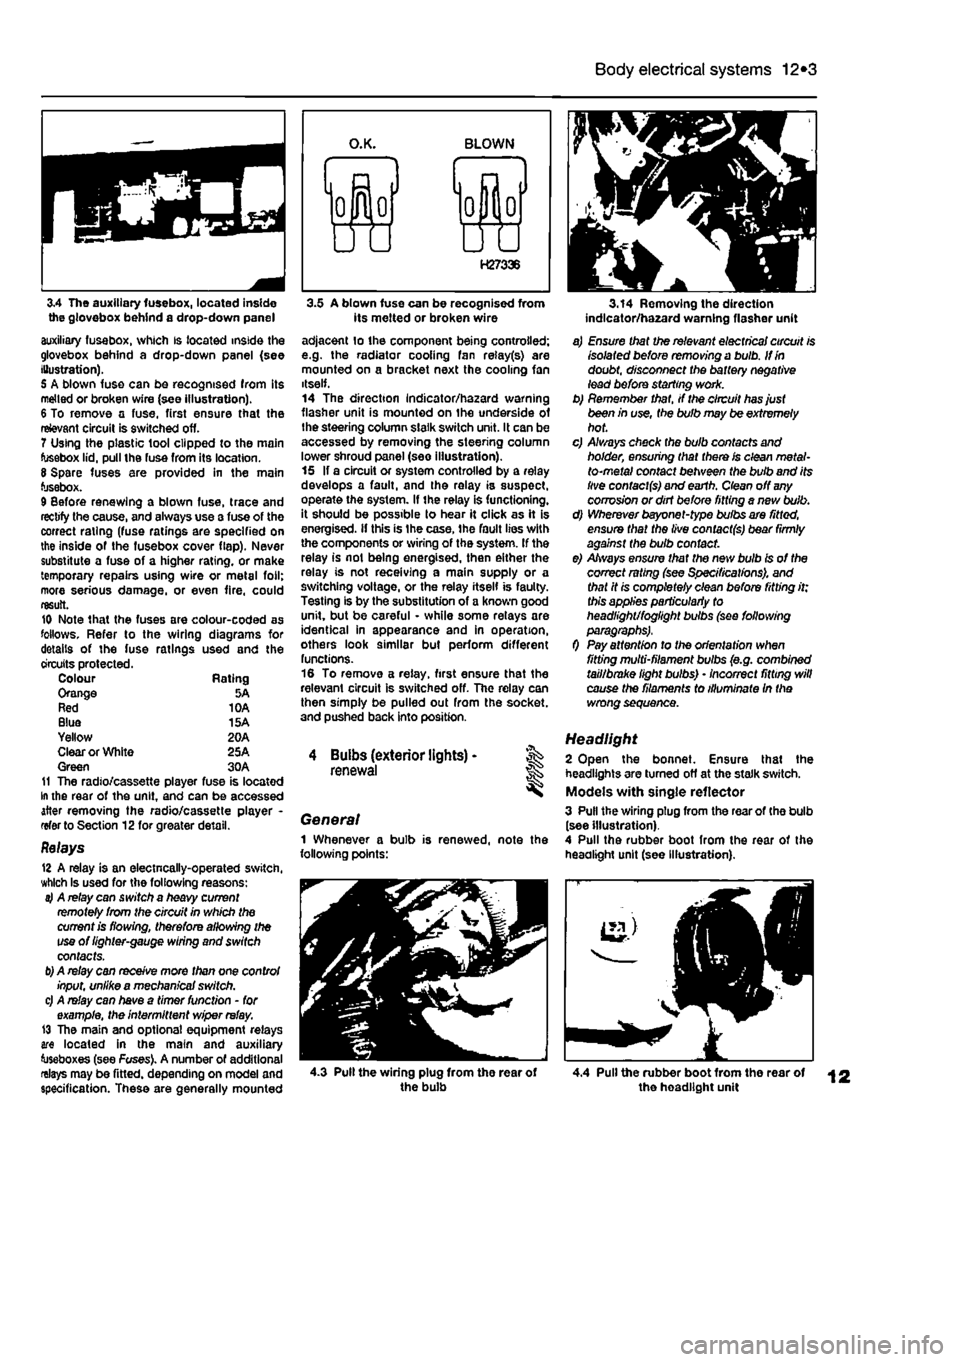
3.4 The auxiliary fusebox, located inside the glovebox behind a drop-down panel auxiliary fusebox, which is located inside the glovebox behind a drop-down panel (see Illustration). 5 A blown fuse can be recognised from its melted or broken wire (see illustration). 6 To remove a fuse, first ensure that the relevant circuit is switched off. 7 Using the plastic tool clipped to the main fusebox lid, pull the fuse from its location. 8 Spare fuses are provided in the main fusebox. 9 Before renewing a blown fuse, trace and rectify the cause, and always use a fuse of the correct rating (fuse ratings are specified on the inside of the fusebox cover flap). Never substitute a fuse of a higher rating, or make temporary repairs using wire or metal foil; more serious damage, or even fire, could result. 10 Note that the fuses are colour-coded as follows. Refer to the wiring diagrams for details of the fuse ratings used and the circuits protected. Colour Rating Orange 5A Red 10A Blue 15A Yellow 20A Clear or White 25A Green 30A 11 The radio/cassette player fuse is located In the rear of the unit, and can be accessed after removing the radio/cassette player -refer to Section 12for greater detail.
Relays 12 A relay is an electncally-operated switch, which Is used for the following reasons: 4 A relay can switch a heavy current remotely from the circuit in which the current is flowing, therefore allowing the use of lighter-gauge wiring and switch contacts.
b)
A relay can receive more than one control input, unlike a mechanical switch. c) A relay can have a timer function - for example, the intermittent wiper relay. 13 The main and optional equipment relays are located in the main and auxiliary toseboxes (see Fuses). A number of additional relays may be fitted, depending on model and specification. These are generally mounted
3.5 A blown fuse can be recognised from its melted or broken wire adjacent lo the component being controlled; e.g. the radiator cooling fan relay(s) are mounted on a bracket next the cooling fan itself. 14 The direction Indicator/hazard warning flasher unit is mounted on the underside of the steering column slalk switch unit. It can be accessed by removing the steering column lower shroud panel (see illustration). 15 If a circuit or system controlled by a relay develops a fault, and the relay is suspect, operate the system. If the relay is functioning, it should be possible to hear it click as it is energised, if this is Ihe case, the fault lies with the components or wiring of the system. If the relay is not being energised, then either the relay is not receiving a main supply or a switching voltage, or the relay itself is faulty. Testing is by the substitution of a known good unit, but be careful - while some relays are identical in appearance and in operation, others look similar but perform different functions. 16 To remove a relay, first ensure that the relevant circuit is switched off. The relay can then simply be pulled out from the socket, and pushed back into position.
4 Buibs (exterior lights) -renewal
General 1 Whenever a bulb is renewed, note the following points:
3.14 Removing the direction indlcator/ha2ard warning flasher unit
a) Ensure that the relevant electrical circuit is isolated before removing a bulb. If in doubt, disconnect the battery negative lead before starting work. b) Remember that, if the circuit has just been in use, the bulb may be extremely hot. c) A/ways check the bulb contacts and holder, ensuring that there is clean metal-to-metal contact between the bulb and its live contacts) and earth. Clean off
any
corrosion or dirt before fitting a nevt bulb. d) Wherever bayonet-type bulbs are fitted, ensure that the live contacts) bear firmly against the bulb contact. e) Always ensure that the new bulb is of the correct rating (see Specifications), and that it is completely clean before fitting it; this applies particularly to headlight/foglight bulbs (see following
0 Pay attention to the orientation when fitting multi-filament bulbs (e.g. combined tail/brake light bulbs) • incorrect fitting will cause the filaments to illuminate In the wrong sequence.
Headlight 2 Open the bonnet. Ensure that the headlights are turned off at the stalk switch. Models with single reflector 3 Pull the wiring plug from the rear of the bulb (see illustration). 4 Pull the rubber boot from the rear of the headlight unit (see Illustration).
4.3 Pull the wiring plug from the rear of the bulb 4.4 Pull the rubber boot from the rear of the headlight unit