automatic FIAT PUNTO 1994 176 / 1.G Owner's Manual
[x] Cancel search | Manufacturer: FIAT, Model Year: 1994, Model line: PUNTO, Model: FIAT PUNTO 1994 176 / 1.GPages: 225, PDF Size: 18.54 MB
Page 98 of 225
2D*10 Engine removal and overhaul procedures
05 Remove the brush holder assembly from the automatic transmission as described in Chapter 7B, Section 4. The brushes bear on the slip rings at the rear of the electro-magnetic clutch housing and they may be damaged when the transmission is removed. 86 Unscrew and remove the transmission-to-engine bolts then carefully draw the transmission away from the engine, resting It securely on wooden blocks. Collect the locating dowels If they are loose enough to be extracted, 87 If the oil pump driveshaft remains engaged with the crankshaft, remove it and reert Into the transmission to protect It from damage.
Connection 86 If the engine and transmission have not been separated, go to paragraph 104. Manual transmission models 89 Smear a little high-melting-point grease
on
the splines of the transmission input shaft. Do not use an excessive amount as there Is the risk of contaminating the clutch friction plate. 90 Carefully offer up the transmission to the engine cylinder block, guiding the input shaft through the clutch friction plate. 91 Refit the transmission-to-engine bolts and
the
single nut. hand^jghtenlng 1hem to secure the transmission in position. Note: Do not hghten them to force the engine and transmission together. Ensure that the beilhousing and cylinder block mating faces will butt together evenly without obstruction, before finally tightening the bolts and nut securely. Automatic transmission models 92 Check that the oil pump driveshaft is correctly engaged with the oil pump in the transmission. 93 Carefully offer up the transmission to Ihe rear of the engine and insert the oil pump driveshaft In the centre of the electro-magnetic clutch housing. Locate the transmission on the locating dowels then Insert the bolts and tighten them securely. 94 Refit the brush holder assembly to the automatic transmission with reference to Chapter 7B, Section 4. Petrol engines 96 Refit the transmission lower cover and tighten the bolts. 96 Locate the support bracket on the lower cover, then insert the bolts hand-tight. Also Insert the bolts securing the bracket lo the rear of Ihe cylinder block. With all the bolts Inserted, tighten them securely. 97 Refit the earth leads and tighten the bolts. Diesel engines 98 Refit the rpm sensor and tighten the bolts. 99 Insert the Intermediate shaft through the bracket then locate the dust boot on it and insert the Inner end in the transmission.
100 Refit and tighten the bolts securing the Intermediate shaft to the bracket on the rear of the cylinder block. 101 Refit the transmission lower cover and tighten the bolts. Ail models 102 Refit the starter motor (see Chapter 5A). 103 Refit the wiring harness to the components on the engine/transmission assembly making sure it is routed correctly.
Refitting 104 Locate the engine/transmission assembly beneath the engine compartment and attach the hoist to the lifting eyes. 105 Carefully lift the assembly up into the engine compartment taking care not to damage the surrounding components. 106 Reconnect the left-hand engine/trans-mission mounting to the body and tighten the bolts. 107 Reconnect Ihe right-hand engine mounting to the body and tighten the bolts. 108 Working beneath the vehicle, refit the rear engine mounting and tighten the bolts. 109 Disconnect the hoist from the engine and transmission lifting eyes and remove the hoist from under the vehicle. 110 The remainder of the refitting procedure is the direct reverse of the removal procedure, noting the following points:
a) Ensure that alf sections of the wiring harness follow their original routing; use new cable-ties to secure the harness In position, keeping it away from sources
of
heat and abrasion. b) On vehicles with manual transmission check and if necessary adjust the gearchenge cable and rod with reference to Chapter 7A. c) On vehicles with automatic transmission use new ro//p/ns fo secure the driveshafts to the transmission output stubs. Also check and if necessary adjust the kickdown end selector cables with reference to Chapter 78. d) Ensure that afi hoses are correctly routed and are secured with the correct hose clips, where applicable. If the hose clips cannot be used again; proprietary worm drive clips should be fitted
In
their place. e) Refill the cooling system as described in Chapter 1A or 18. f) Refill the engine with appropriate grades and quantities of oil (Chapter
1A
or 1B). g) Refit and adjust the auxiliary drivebelt(s) wfth reference fo Chapter 1A or 1B. h) Check and If necessary adjust the accelerator cable with reference to Chapter
AA,
48 or
AC.
i) When the engine is started for the first time, check for
air,
coolant, lubricant and fuel leaks from manifolds, hoses etc. If
the
engine has been overhauled, read
the
notes In Section 13 before attempting to starlit.
5 Engine overhaul • dismantling sequence
1 It is much easier to dismantle and work on the engine if it is mounted on a portable engine stand. These stands can often be hired from a tool hire shop. Before the engine is mounted on a stand, the flywheel should be removed, so that the stand bolts can be tightened Into the end of the cylinder block/crankcase. 2 If a stand Is not available, it Is possible to dismantle the engine with it blocked up on a sturdy workbench, or on the floor, Be very careful not to tip or drop the engine when working without a stand. 3 If you intend to obtain a reconditioned engine, all anclllarles must be removed first, to be transferred to the replacement engine (just as they will If you are doing a complete engine overhaul yourself). These components Include the following:
Petroi engines a) Power steering pump if removed with the engine (Chapter
10).
b) Alternator fmcluding mounting brackets) and starter motor (Chapter
SA).
c) The Ignition system and HT components including ail sensors, HT leads and
spark
plugs (Chapters 1A and
SB).
d) The fuel injection system components (Chapters A A and
AB).
e) All electrical switches, actuators and sensors, and the engine wiring harness (Chapters 4A, AB, SB). f) Inlet and exhaust manifolds (Chapters 4A, AB end
AD).
g) Engine oil dipstick and tube. h) Engine mountings (Chapter
2A).
i) Flywheef/driveptate (Chapter
2A).
j) Clutch components (Chapter
6)
- manual transmission. k) Electro-magnetic clutch components (Chapter 7B) - automatic transmission. I) Cooling system components (Chapter
3).
Diesei engines a) Power steering pump //removed with the engine (Chapter
10).
b) Alternator (Including mounting brackets) and starter motor (Chapter 5A). c) The glow plugfpre-heatlng system components (Chapter
SC).
d) Ait fuel system components, including the fuel injection pump, all sensors and actuators (Chapter
AC).
e) The vacuum pump. f) Ail electrical switches, actuators and sensors, and the engine wiring harness (Chapter 4C and 5C). g) Inlet and exhaust manifolds and, where applicable, the turbocharger (Chapter
AC
and 4D). h) The engine oil level dipstick and its tube. i) Engine mountings (Chapter
2C).
Page 137 of 225
Fuel system - diesel models 4C*3
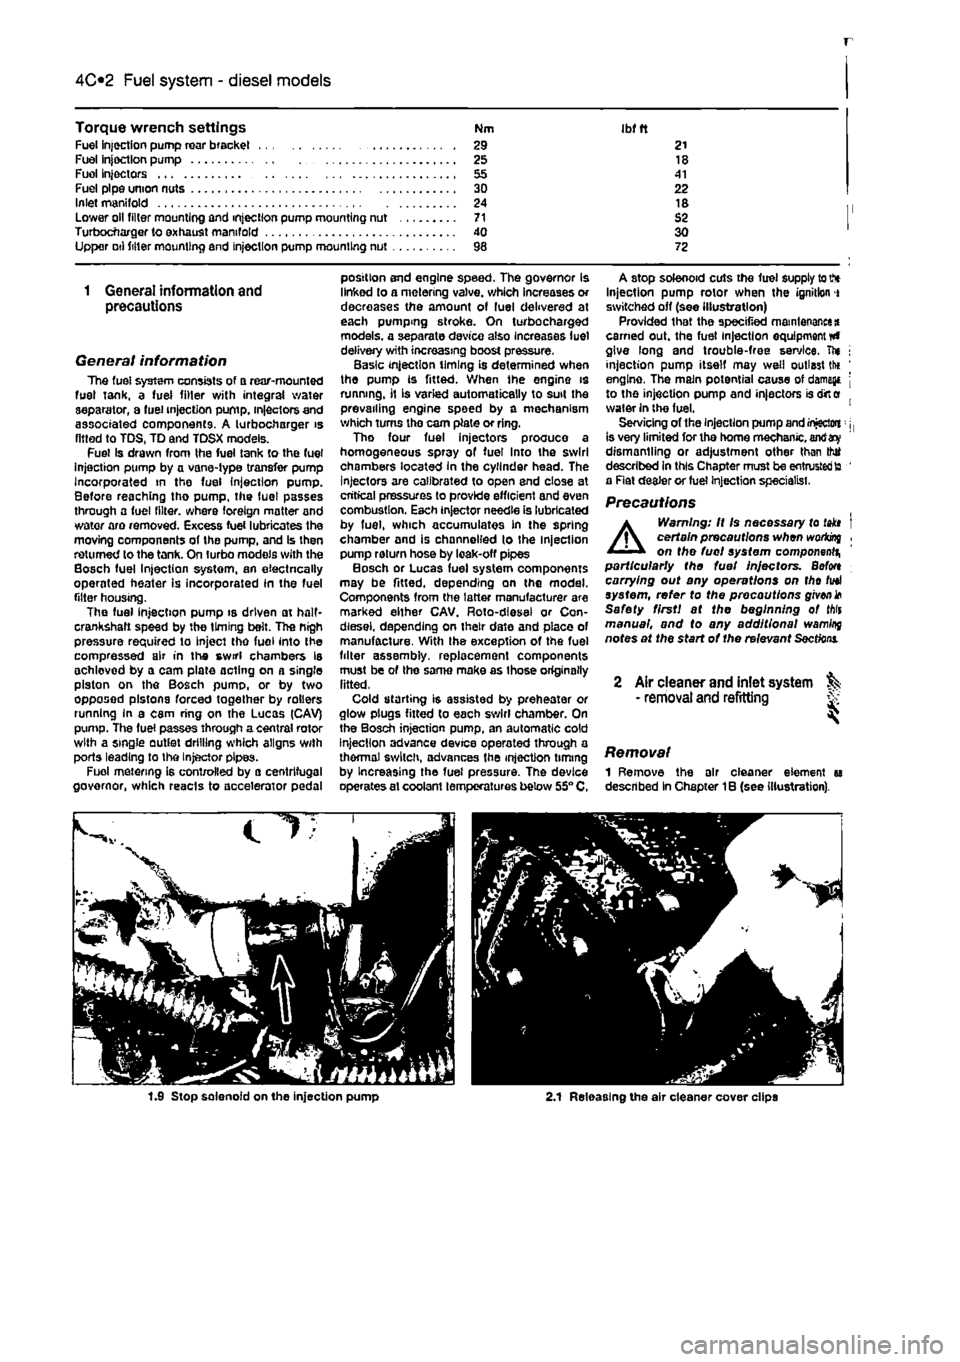
Torque wrench settings Nm Ibfft Fuel injection pump roar bracket .. . 29 21 Fuel Injection pump .... 25 18 Fuel Injectors 41 Fuel pipe union nuts .... 30 22 Inlet manifold .... 24 18 Lower oil tiller mounting and injection pump mounting nut ..... .... 71 S2 Turbocnarger to exhaust manifold .... <10 30 Upper Dtl filter mounting end injection pump mounting nut 98 72
1 General information and precautions
General information The fuel system consists of a rear-mounted fust tank, a fuel filter with integral water separator, a fuel injection pump, in|eciors and associated components. A turbocharger is fitted to TDS, TD and TDSX models. Fuel Is drawn from the fuel tank to the fuel Injection pump by a vane-type transfer pump Incorporated in the fuel injection pump. Before reaching tho pump, the fuel passes through a fuel filter, where foreign matter and water aro removed. Excess fuel lubricates the moving components of the pump, and Is then returned to the tank. On turbo models with the Bosch fuel Injection systom, an eiectncally operated heater is incorporated In the fuel filter housing. The fuel injection pump is driven at half-crankshaft speed by the timing belt. The nigh pressure required to inject tho fuel into the compressed air in the swirl chambers Is achlovod by a cam plate acting on a single piston on the Bosch pumo, or by two opposed pistons forced together by rollers running in a cam ring on the Lucas (CAV) pump. Tlie fuel passes through acentral rotor with a single outlet drilling which aligns With ports leading to the Injector pipes. Fuel metering is controlled by a centrifugal governor, which reacts to accelerator pedal
position end engine speed. The governor is linked lo a metering valve, which increases or decreases the amount of fuel delivered at each pumping stroke. On turbocharged models, a separate device also Increases luel delivery with increasing boost pressure. Basic injection timing is determined when the pump is fitted. When the engine is running, it Is varied automatically to suit the prevailing engine speed by a mechanism which turns the cam plate or ring, Tho four fuel injectors proouco a homogeneous spray of fuel Into the swirl chambers located In the cylinder head. The Injectors are calibrated to open end close at critical pressures lo provide efficient and even combustion. Each injector needle is lubricated by fuel, which accumulates In the spring chamber and is channelled to the injection pump return hose by loak-off pipes Bosch or Lucas fuel system components mBy be fitted, depending on the model. Components from the latter manufacturer are marked either CAV. Roto-dlesel or Con-diesel. depending on their date and place of manufacture. With the exception of the fuel filter assembly, replacement components must be of tho same make as those originally fitted. Cold starting is assisted by preheater or glow plugs fitted to each swirl chamber. On the Bosch injection pump, an automatic cold Injection advance device operated through a thermal switch, advances the injection timing by Increasing the fuel pressure. The device operates at coolant temperatures below 55° C,
A stop solenoid cuts the fuel supply to V* Injection pump rotor when the ignition i switched off (see illustration) Provided that the specified maintenance* earned out. the fuel injection equipment #» give long and trouble-free service, ft* j injection pump itself may well outlast tlx ' engine, The main potential cause of damage j to the injection pump and injectors is dirt e water in the fuel. 1 Servicing of the injection pump and injectwi: j, is very limited for tho home mechanic, antf dismantling or adjustment other than thtf described In this Chapter must be entrusted to ' a Rat dealer or fuel Injection specialist.
Precautions
A
Warning: It Is necessary to takt I certain precautions when woriong , on the fuel system component^ particularly the fuel Injectors. Befon carrying out any operations on tho fuel system, refer to the precautions given* Safety first! at the beginning of Mis manual, and to any additional wamlrq notes at the start of the relevant
Sections.
2 Air cleaner and inlet system ^ • removal and refitting S
Removal 1 Remove the air cleaner element u described In Chapter 1B (see illustration).
1.9 Stop solenoid on the injection pump 2.1 Releasing the air cleaner cover clips
Page 153 of 225
5B*1
Chapters PartB:
Ignition system - petrol models
Contents
General information 1 Ignition system - testing 2 Ignriton HT coil - removal, testing and refitting 3 Ignition timing - checking and adjustment 4 Igrrtion system - check See Chapter 1A Spark plugs - renewal See Chapter 1A
Degrees of difficulty
Easy,
suitable for Falrty easy, sulabte Fafety difficult, suitable for competent Difficult, suitable for Very difficult, ^ novice with littie
1
for beginner with Fafety difficult, suitable for competent experienced DIY suitable for expert DIY or professional ^ expenence 1 some experience DIY mechanic mechanic *
suitable for expert DIY or professional ^
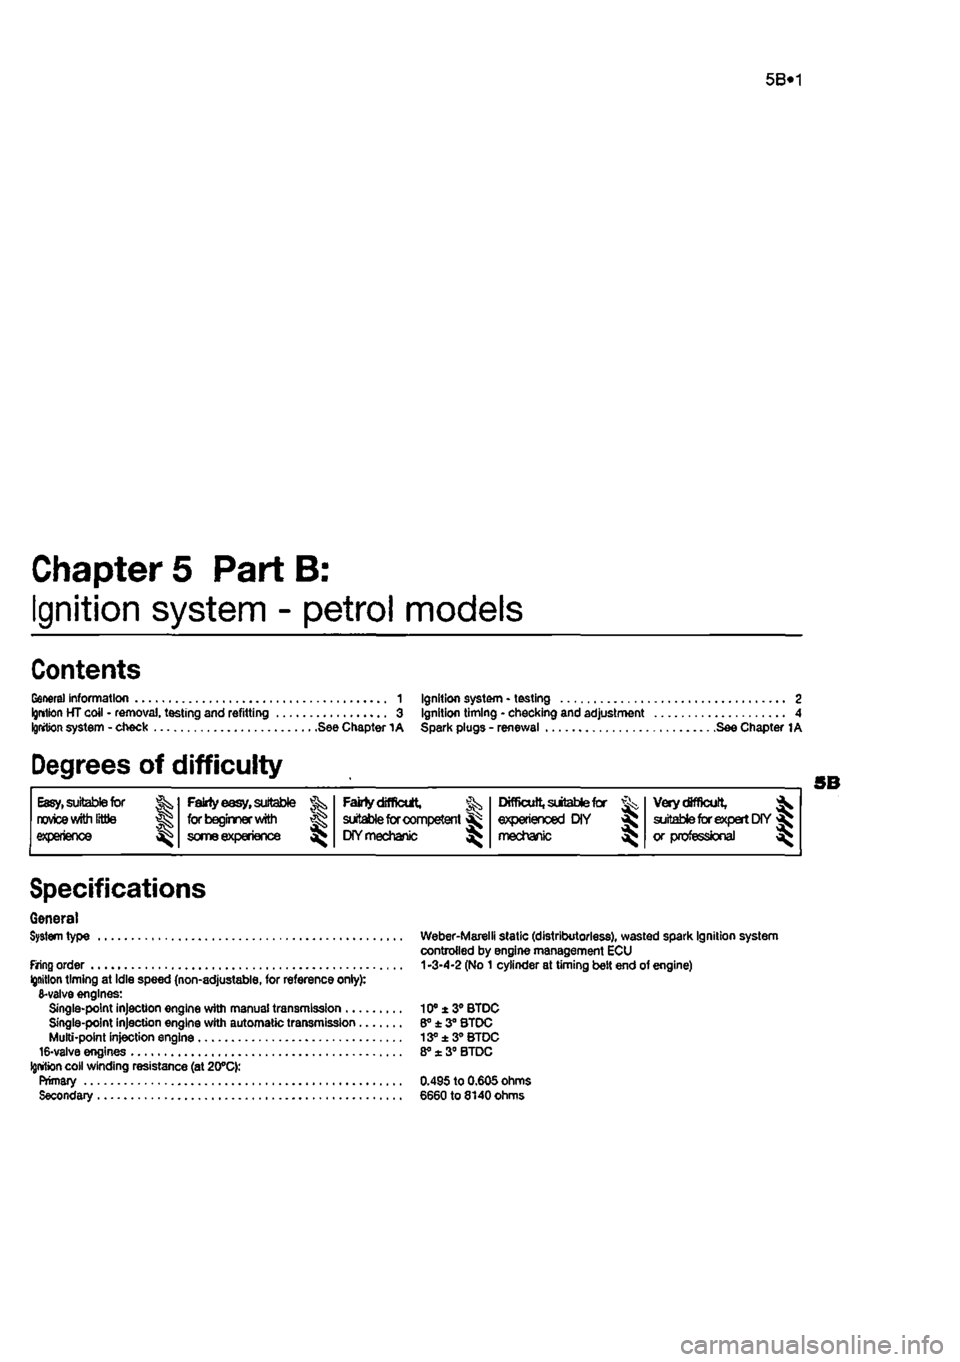
Specifications
General System type
firing order Ignition timing at Idle speed (non-adjustable, for reference onlyy. 6-valve engines: Single-point injection engine with manual transmission .... Single-point injection engine with automatic transmission.. Multi-point injection engine 16-valve engines
Ignition
coil winding resistance (at 20°C): Primary Secondary
Weber-Marelli static (distributorless), wasted spark Ignition system controlled by engine management ECU
1
-3-4-2 (No 1 cylinder at timing belt end of engine)
10® ± 3° BTDC 6° ± 3° STDC 13° ±3° BTDC 8° x 3° BTDC
0.495 to 0.605 ohms 6660 to 8140 Ohms
Page 166 of 225
7B«1
Chapter 7 Part B:
Automatic transmission
Contents
Accelerator pedal micro-switch(es) - checking and adjustment II Automatic transmission filter and fluid change See Chapter 1A Automatic transmission fluid level check See Weekly checks Automatic transmission • overhaul 12 Automatic transmission • removal and refining 2 Bectro-magnetic clutch - removal, inspection and refitting 3 BectrO'fnagnetic clutch brushes- removal, inspection and refitting . 4
Electronic control unit - removal and refitting 5 Gear selector cable - adjustment 6 Gear selector cable - removal and refitting 9 General information 1 Kickdown cable - adjustment 7 Kickdown cable - removal and refitting 6 Transmission oil pump - removal and refitting 10
Degrees of difficulty
Easy,
suitable for novice
with
ittle experience ^
Party
easy,
suitable for beginner
with
^r someexperienoe ^
Faiily
difficult,
^ suitable
for
competent
DIY mechanic
^
Difficult, suitable
for fe, experienced DIY >8J mechanic
Verydfficult, ^
suitable
for
expert DIY
or professional ^
Specifications
General Type Ratios (at transmission): Lowest Highest Final drive
Torque wrench settings Esnh cable Control unit Sectro-magnetic clutch to flywheel Transmission-to-engine bolt/nut ..
ECVT (Electronic Continuously Variable Transmission)
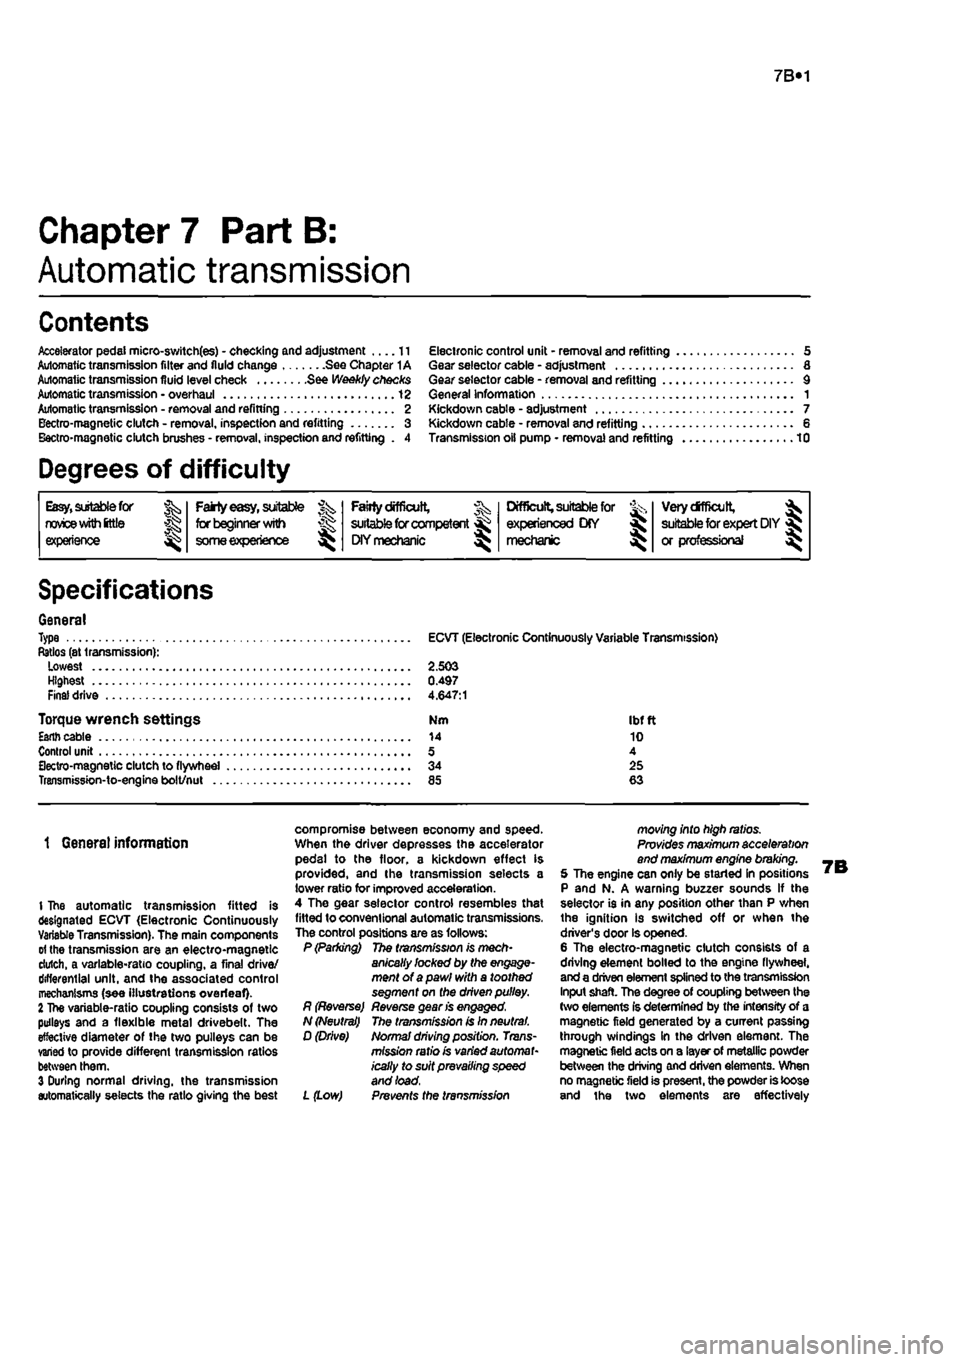
2.503 0.497 4.647:1
Nm Ibftt 14 10 5 4 34 25 85 63
1 Genera) information
I The automatic transmission fitted is designated ECVT (Electronic Continuously Variable Transmission). The main components
01
the transmission are an electro-magnetic dutch, a variable-ratio coupling, a final drive/ differential unit, and the associated control mechanisms (see illustrations overleaf) 2 The variable-ratio coupling consists of two pulleys and a flexible metal drivebelt. The effective diameter of the two pulleys can be varied to provide different transmission ratios between them. 3 During normal driving, the transmission automatically selects the ratio giving the best
compromise between economy and speed. When the driver depresses the accelerator pedal to the floor, a kickdown effect is provided, and the transmission selects a lower ratio for improved acceleration. 4 The gear selector control resembles that fitted to conventional automatic transmissions. The control positions are as follows: P (Parking) The transmission is mech-anically locked by the engage-ment of a pawl with a toothed segment on the driven pulley. R (Reverse) Reverse gean's engaged, N (Neutral) The transmission is In neutral. D (Drive) Normal driving position. Trans-mission ratio is varied automat-ically to suit prevailing speed and load.
L (Low) Prevents the transmission
moving into high ratios. Provides maximum acceleration end maximum engine braking. 5 The engine can only be started In positions P and N. A warning buzzer sounds If the selector is in any position other than P when the ignition is switched off or when the driver's door is opened. 6 The electro-magnetic clutch consists of a driving element boiled to the engine flywheel, and a driven element spiined to the transmission Input shaft. The degree of coupling between the (wo elements Is determined by the intensity of a magnetic field generated by a current passing through windings in the driven element. The magnetic field acts on a layer of metallic powder between the driving and driven elements. When no magnetic field is present, the powder is loose and the two elements are effectively
Page 167 of 225
7B*2 Automatic transmission
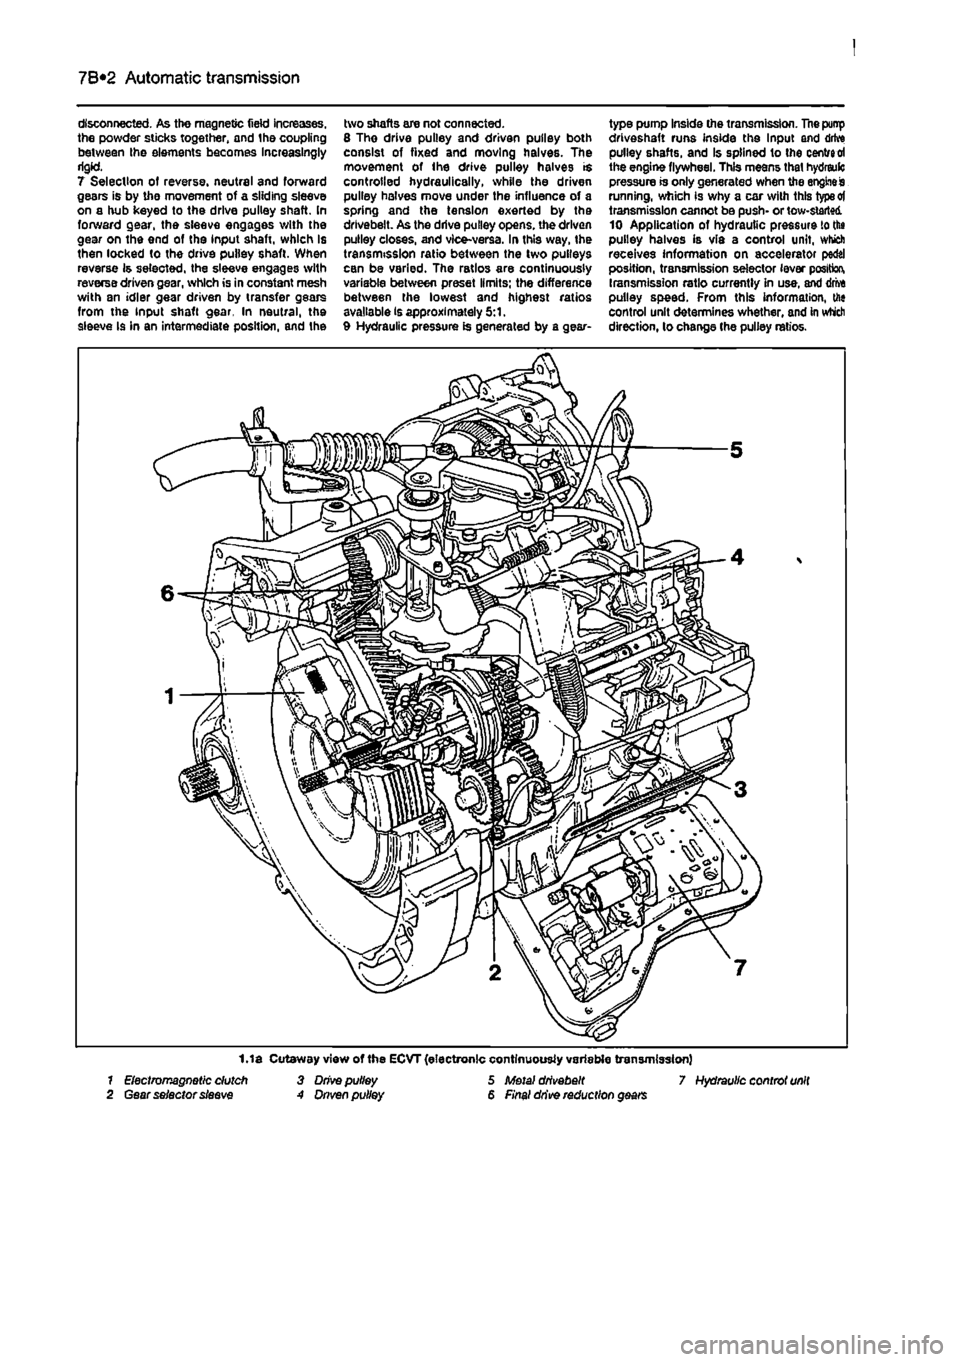
disconnected. As the magnetic field increases, the powder sticks together, and the coupling between Ihe elements becomes Increasingly rigid. 7 Selection of reverse, neutral and forward gears is by the movement of a sliding sleeve on a hub keyed to the drive pulley shaft. In forward gear, the sleeve engages with the gear on the end of the input shaft, which is then locked to the drive pulley shaft. When reverse is selected, the sleeve engages with reverse driven gear, which is in constant mesh with an idler gear driven by transfer gears from the input shaft gear. In neutral, the sleeve Is in an intermediate position, and the
two shafts are not connected. 8 Tho drive pulley and driven pulley both consist of fixed and moving halves. The movement of ihe drive pulley halves is controlled hydraulically, while the driven pulley halves move under the influence of a spring and the tension exerted by the drivebeit. As the drive pulley opens, the driven pulley closes, and vice-versa. In this way, the transmission ratio between the two pulleys can be varied. The ratios are continuously variable between preset limits; the difference between the lowest and highest ratios available is approximately 5:1. 9 Hydraulic pressure is generated by a gear-
type pump Inside the transmission. The punp driveshaft runs inside the Input and drive pulley shafts, and Is splined to the centred the engine flywheel. This means that hydreulc pressure is only generated when the engine is running, which is why a car with this type ot transmission cannot be push- or tow-started 10 Application of hydrautic pressure to the pulley halves is via a control unit, which receives information on accelerator pedal position, transmission selector lever position, transmission ratio currently in use, and drive pulley speed. From this information, the control unit determines whether, and in which direction, lo change the pulley ratios.
1.1 a Cutaway view of the ECVT (electronic continuously variable transmission) 7 Electromagnetic dutch 3 Drive pulley 5 Metal drivebeit 7 Hydraulic controt unit 2 Gear selector sleeve A Dnven pulley 6 Final drive reduction gears
Page 168 of 225
Automatic transmission 7B*3
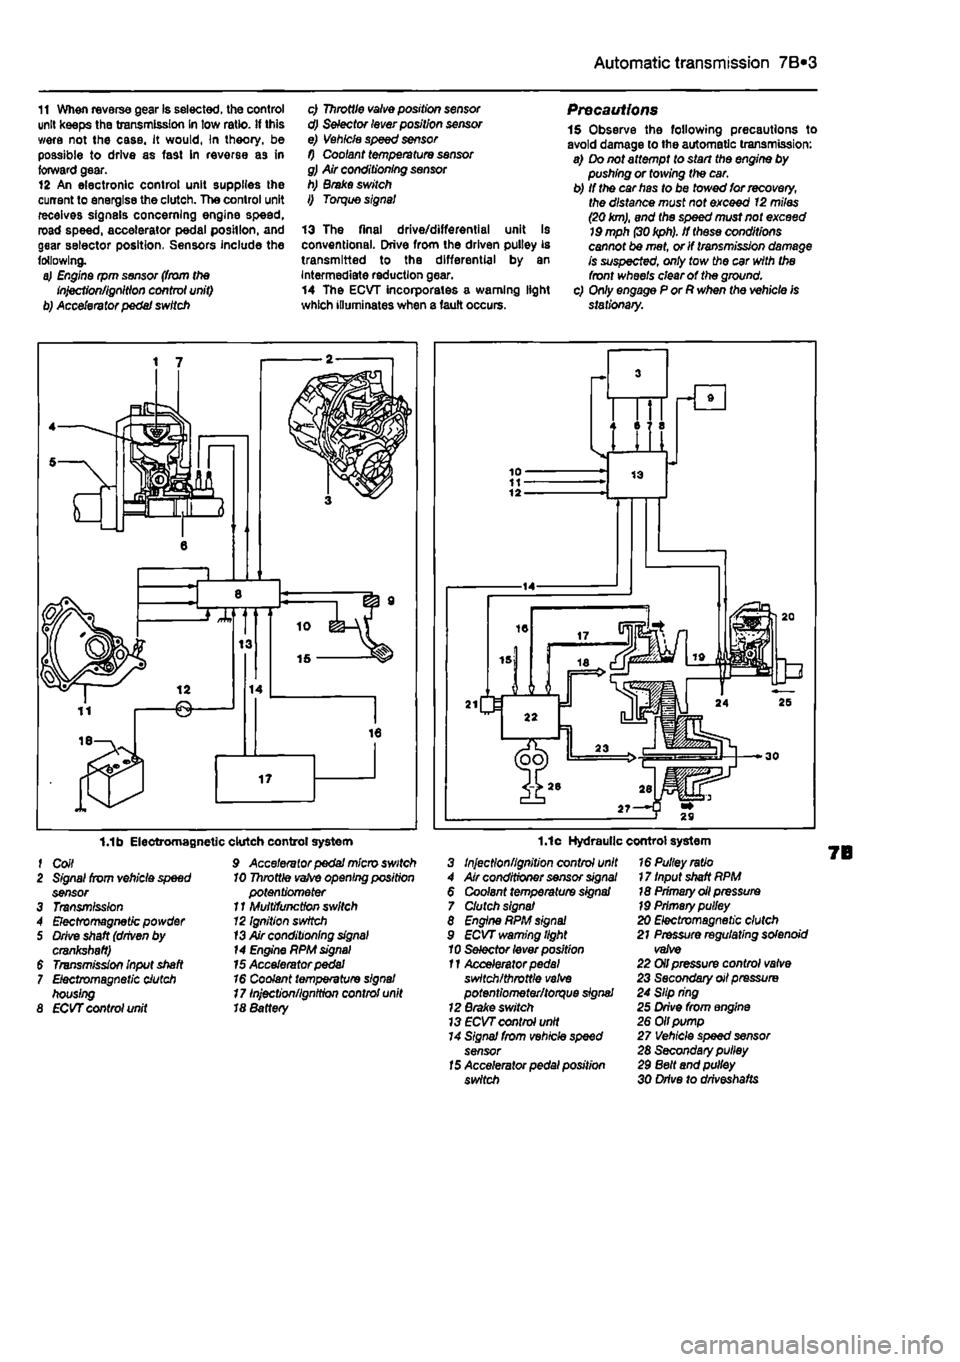
11 When reverse gear Is selected, the control unit keeps the transmission In tow ratio, if this were not the case, it would, In theory, be possible to drive as fast In reverse as in forward gear. 12 An electronic control unit supplies the current to energise the clutch. The control unit receives signals concerning engine speed, road speed, accelerator pedal position, and gear selector position, Sensors include the following. a) Engine rpm sensor (from the Injection/ignition control unit) b) Accelerator pedal switch
c) Throttle valve position sensor d) Selector lever position sensor e) Vehicle speed sensor f) Coolant temperature sensor g) Air conditioning sensor h) Brake switch I) Torque signal
13 The final drive/differential unit Is conventional. Drive from the driven pulley is transmitted to the differential by an Intermediate reduction gear. 14 The ECVT incorporates a warning light which illuminates when a fault occurs.
Precautions 1$ Observe the following precautions to avoid damage to the automatic transmission: a) Do not attempt to start the engine by pushing or towing the car. b) If the car has to be towed for recovery, the distance must not exceed 12 miles (20
km),
and the speed must not exceed
19
mph
(30 kph).
If these conditions cannot be met, or If transmission damage is suspected, only tow the car with the front wheels clear of the ground. c) Only engage P or R when the vehicle is stationary.
1.1b Electromagnetic f Coil 2 Signal from vehicle speed sensor 3 Transmission 4 Electromagnetic powder 5 Drive shaft (driven by crankshaft) $ Transmission input shaft 7 Electromagnetic clutch housing 8 ECVT control unit
clutch control system 9 Accelerator pedal micro switch 10 Throttle
vafve
opening position potentiometer 11 Multifunction switch 12 Ignition switch
13
Air conditioning
signal
14 Engine PPM
signal
15 Accelerator pedal 16 Coolant temperature signal 17 Injection/ignition control unit 18 8attery
1.1c Hydraulic control system 3 Injection/ignition control unit 4 Air conditioner sensor
signal
6 Coolant temperature signal 7 Clutch signal 8 Engine RPM
signal
9 ECVT warning light 10 Selector lever position 11 Accelerator
pedal
switch/throttle
valve
potentiometer/torque signal 12 Brake switch 13
ECVT
control unit 14 Signal from vehicle speed sensor
15
Accelerator pedal position switch
16 Pulley ratio 17 Input shaft RPM 18 Primary oil pressure
19
Primary pulley 20 Electromagnetic clutch 21 Pressure regulating solenoid valve 22 Oil pressure control valve 23 Secondary oil pressure 24 Slip ring 25 Drive from engine 26 Oil pump 27 Vehicle speed sensor 28 Secondary pulley 29 Belt and pulley 30 Drive to drlveshafts
Page 169 of 225
7B*4 Automatic transmission
2 Automatic transmission - ^ removal and refitting St
Removal 1 Select a solid, level surface to park the vehicle upon. Give yourself enough space to move around it easily. Apply the handbrake then jack up the front of the vehicle and support on axle stands (see Jacking and vehicle support). Remove both front wheels, 2 Remove the battery and mounting tray as described In Chapter 5A. 3 Remove the air cleaner and air inlet duct as described In Chapter 4A. 4 Disconnect the kickdown cable at the sector on the throttle housing and detach It from the mounting on the camshaft cover. Also release the cable from the support on the left-hand end of the cylinder head. 5 Disconnect the wiring connectors on the transmission. 6 Disconnect the fluid inlet and outlet Unas from the heat exchanger on top of the transmission. 7 Pull the fluid level dipstick from Its tube on the front of the transmission and tape over the top of the tube to prevent dirt entry. 8 Unscrew and remove the retaining pin and disconnect the speed selector cable from the top of the transmission. 9 Unscrew the upper bolt securing the starter motor to the transmission. 10 Unscrew the upper bolts securing the transmission to the engine. 11 Support the weight of the engine using a hoist attached to the engine lifting eyes, or alternatively UBO a trolley jack and block of wood beneath the engine, 12 Remove the screws and remove the front wheel arch liner from under the left-hand wheel arch. 13 Unscrew the nut securing the earth cablo to the transmission. 14 Using a punch drive out the roll pins securing both driveshafts to the final drive output shafts. 15 Unscrew and remove the bolts securing the left-hand swivel hub assembly to the front suspension strut, then separate the components and support the swivel hub on an axle stand. 16 Move the swivel hub assembly outwards and slide the inner end of the driveshaft from the splines on the transmission output shaft. Support the shaft away from the transmission to prevent damage to the gaiters. 17 Unscrew the lambdafoxygen sensor from the exhaust downpipe and position it In a safe place to prevent damage. 18 Unscrew ihe nuts securing the downpipe to Ihe exhaust manifold, then lower It and suppon on an axle stand. Recover the gasket. 19 Unscrew the knurled nut and disconnect the speedometer cable from the top of the final drive housing.
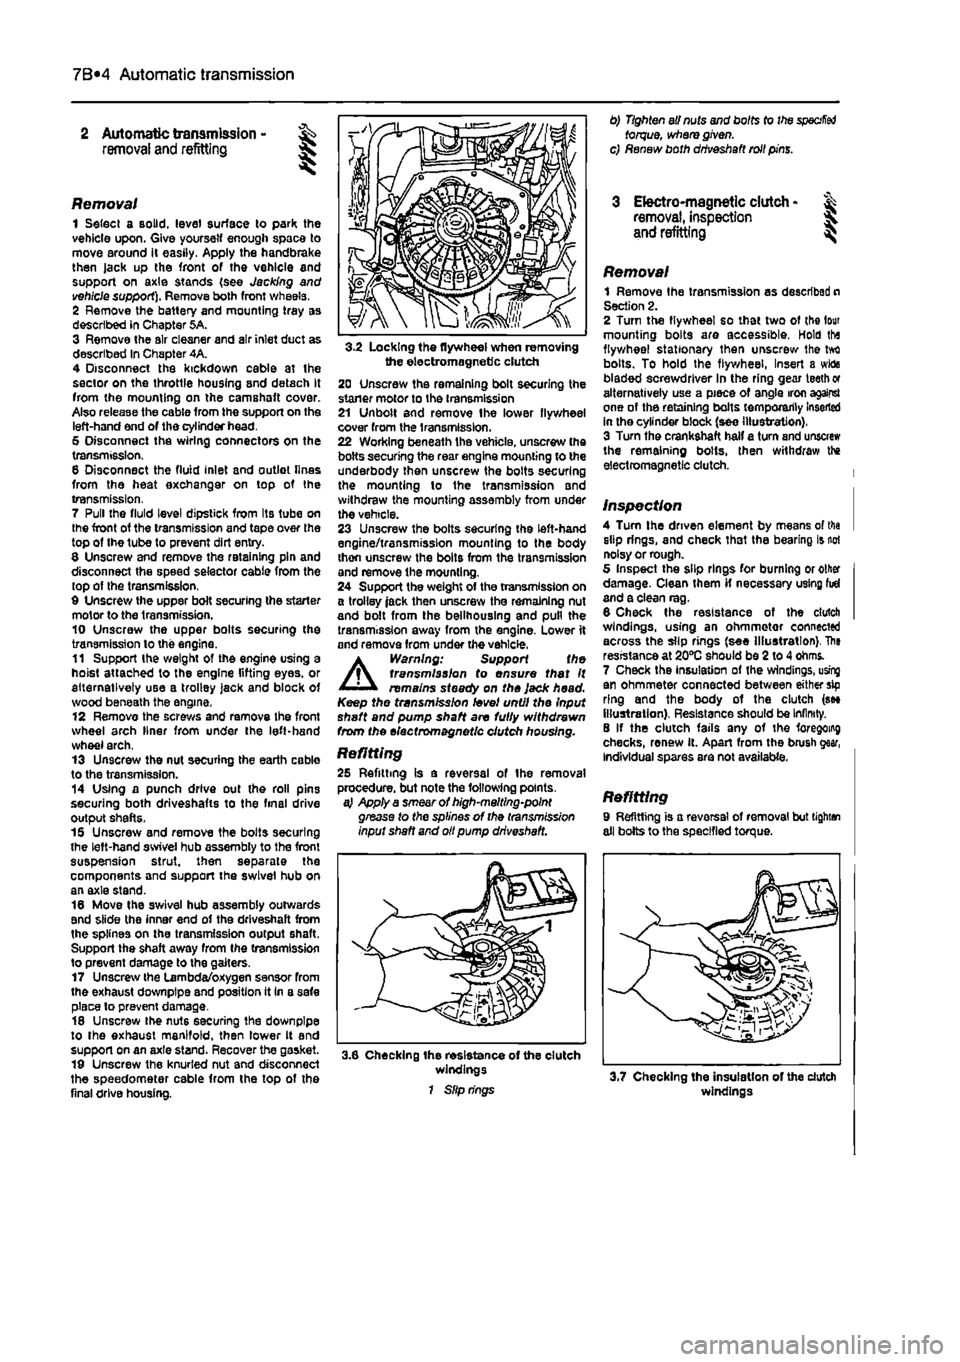
3-2 Locking the flywheel when removing the electromagnetic clutch 20 Unscrew the remaining bolt securing the staner motor to the transmission 21 Unbolt and remove Ihe lower flywheel cover from the transmission. 22 Working beneath the vehicle, unscrew the bolts securing the rear engine mounting to the underbody then unscrew the bolts securing the mounting lo the transmission and withdraw the mounting assembly from under the vehicle. 23 Unscrew the bolts securing the left-hand engine/transmission mounting to the body thon unscrew the bolts from the transmission and remove the mounting. 24 Support the weight of the transmission on a trolley jack then unscrew the remaining nut and bolt from the bellhouslng and pull the transmission away from the engine. Lower it and remove from under the vehicle.
A
Warning: Support the transmission to ensure that It remains steady on the Jack head. Keep the transmission level until the Input shaft and pump shaft are fully withdrawn from the electromagnetic clutch housing.
Refitting 25 Refitting is a reversal of the removal procedure, but note the following points. a} Apply a smear of high-melting-point grease to the splines of the transmission input shaft and oil pump driveshaft.
3.6 Checking the resistance of the clutch windings 1 Slip rings
0) Tighten all nuts and bolts to the
specified
torque, where given, c) Renew both driveshaft roll pins.
3 Electro-magnetic clutch • & removal, inspection 5. and refitting ^
Removal 1 Remove Ihe transmission as described n Section 2. 2 Turn the flywheel so that two of the lour mounting bolts are accessible, Hold tha flywheel stationary then unscrew Ihe tvrt bolts. To hold the flywheel, Insert a wida bladed screwdriver In the ring gear teeth or alternatively use a piece of angle iron against one of the retaining bolts temporarily Inserted in the cylinder block (see illustration). 3 Turn the crankshaft half a turn and unscrew the remaining bolts, then withdraw the electromagnetic clutch.
Inspection 4 Turn the driven element by means of tha slip rings, and check that the bearing is not noisy or rough. 5 Inspect the slip rings for burning or other damage. Clean them if necessary using fid and a clean rag. 6 Check the resistance of the clutch windings, using an ohmmetor connected across the slip rings (see Illustration). The resistance at 20*0 should be 2 to 4 ohms. 7 Check the Insulation of the windings, using an ohmmeter connected between either sip ring and the body of the clutch (see illustration). Resistance should be Infinity. 8 If the clutch fails any of the foregoing checks, renew it. Apart from the brush gear, Individual spares are not available.
Refitting 9 Refitting is a reversal of removal but tighten all bolts to the specified torque.
windings
Page 170 of 225
Automatic transmission 7B«5
4 Electro-magnetic dutch brushes - removal, inspection and refitting
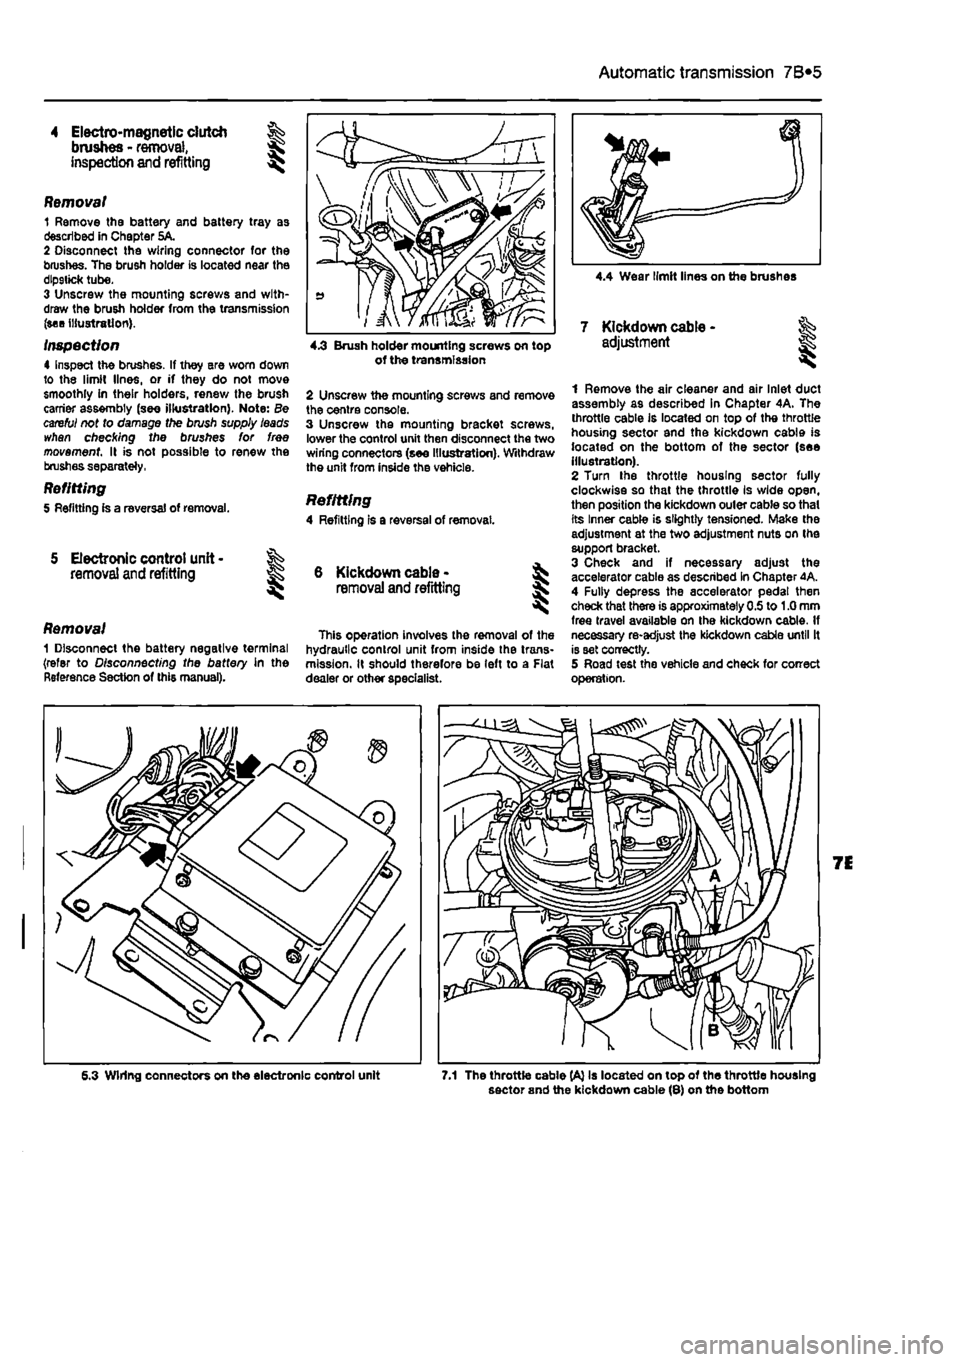
Removal 1 Remove the battery and battery tray as described in Chapter 5A. 2 Disconnect the wiring connector for the brushes. The brush holder is located near the dlp9tick tube. 3 Unscrew the mounting screws and with-draw the brush holder from the transmission (see illustration).
inspection 4 Inspect the brushes. If they ere worn down to the limit lines, or if they do not move smoothly in their holders, renew the brush carrier assembly (see illustration}. Note: Be careful not to damage the brush supply leads whan checking the brushes for free movement II is not possible to renew the brushes separately,
Refitting 5 Refitting is a reversal of removal.
5 Electronic control unit • removal and refitting
Removal 1 Disconnect the battery negative terminal (refer to Disconnecting the battery in the Reference Section of this manual).
4.3 Brush holder mounting screws on top of tho transmission
2 Unscrew the mounting screws and remove the centre console. 3 Unscrew the mounting bracket screws, lower the control unit then disconnect the two wiring connectors (see Illustration). Withdraw the unit from inside the vehicle.
Refitting 4 Refitting Is a reversal of removal.
6 Kickdown cable -removal
and
refitting I
This operation involves the removal of the hydraulic control unit from inside the trans-mission. It should therefore be left to a Flat dealer or other specialist.
1 Remove the air cleaner and air Inlet duct assembly as described in Chapter 4A. The throttle cable is located on top of the throttle housing sector and the kickdown cable is located on the bottom of the sector (see Illustration). 2 Turn the throttle housing sector fully clockwise so that the throttle Is wide open, then position the kickdown outer cable so thai its Inner cable is slightly tensioned. Make the adjustment at the two adjustment nuts on the support bracket. 3 Check and if necessary adjust the accelerator cable as described In Chapter 4A. 4 Fully depress the accelerator pedal then check that there is approximately 0.5 to 1.0 mm free travel available on the kickdown cable. If necessary re-adjust the kickdown cable until It is set correctly. 5 Road test the vehicle and check for correct operation.
6.3 Wiring connectors on tho electronic control unit 7.1 The throttle cable (A} Is located on top of the throttle housing sector and the kickdown cable (8) on the bottom
Page 171 of 225
7B*6 Automatic transmission
Gear selector cable -adjustment
1 Remove the battery and tray as described In Chapter 5A for access to the transmission. 2 Disconnect the selector cable from the lever on Ihe transmission. 3 Move the selector fever inside the vehicle to the N (Neutral) position, then move the lever on the transmission to Its central (Neutral) position. Locate the cable end over the lever. If the cable end fitting does not line up exactly with the hole In Ihe lever, loosen the adjustment nut and reposition the end fitting. 4 With the adjustment correct reconnect tha cable to the lever, then move the selector lever to the P (Park) position. Check that the lever on the transmission has also moved to the P position. 6 Refit the battery and tray as described in Chapter 5A. 6 Road test the vehicle, and check for correct operation in all selector lever positions.
9 Gear selector cable -removal and refitting at
7 Inside the vehicle disconnect the selector cable from the bottom of the selector lever (hen remove it from the support bracket, a Withdraw the cable into the engine compartment, and remove it.
Refitting 9 Refitting is a reversal of removal, but adjust the cable as described in Section 8. 10 Check that It is only possible to start the engine in positions P and N. Reposition the selector lever switch If necessary. 11 Road test the vehicle, and check for correct operation In ell selector lever positions.
10 Transmission oil pump - & mnvtiifll rAtiMlitA removal a/id refitting
Removal 1 Using an Allen key. unscrew the screw and remove the selector lever knob from the lever. 2 Remove the oddment tray and the ashtray. 3 Remove the screws and withdraw the centre console and selector mechanism cover. 4 Unscrew the mounting screws, slightly lift the centre console, then disconnect the wiring and remove the console, 5 Remove the battery and tray as described in Chapter 5A for access to the transmission, 6 Disconnect the selector cable from the lever on the transmission.
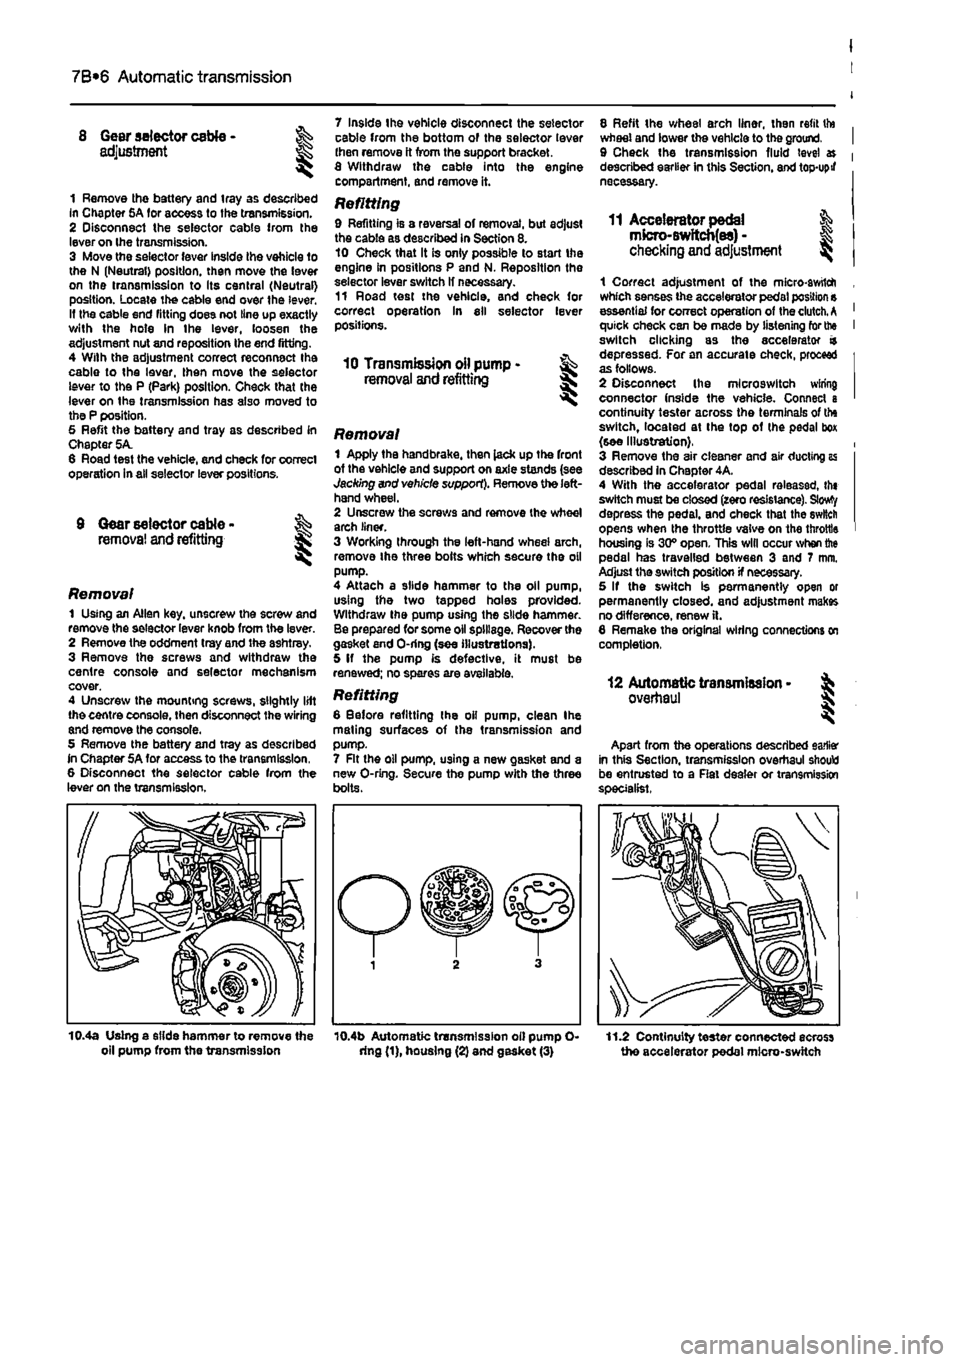
Removal 1 Apply the handbrake, then lack up the front of the vehicle and support on axle stands (see Jacking and vehicle support). Remove the left-hand wheel. 2 Unscrew the screws and remove the wheel arch liner. 3 Working through the left-hand wheel arch, remove Ihe three bolts which secure the oil pump. 4 Attach a slide hammer to the oil pump, using the two tapped holes provided. Withdraw the pump using the slide hammer. Be prepared for some oil spillage. Recover the gasket end O-ring (see illustrations). 5 If the pump is defective, it must be renewed; no spares are available.
Refitting 6 Before refitting Ihe oil pump, clean Ihe mating surfaces of the transmission and pump. 7 Rt the oil pump, U9ing a new gasket and a new O-ring. Secure the pump with the three bolts.
8 Refit the wheel arch liner, then refit tto wheel and lower the vehicle to the ground. 9 Check the transmission fluid level » described earlier in this Section, and top-upif necessary.
11 Accelerator pedal & mfcro-Bwftcb(es) -checking
and
adjustment ^
1 Correct adjustment of the micro-awtlch which senses the accelerator pedal position s essential for correct operation of the clutch.
A
quick check can be made by listening for the switch clicking as the accelerator a depressed. For an accurate check, proceed as follows. 2 Disconnect Ihe mlcroswitch wiring connector (nside the vehicle. Connect a continuity tester across the terminals of the switch, located at the top of (he pedal box (see Illustration}. 3 Remove the air cleaner and air ducting as described in Chapter 4A. 4 With the accelerator pedal releassd, th« switch must be closed (zero resistance). Slowty depress the pedal, and check that the switch opens when the throttle valve on the throttle housing is 30° open. This will occur when the pedal has travelled between 3 and 7 mm. Adjust the switch position if necessary. 5 If the switch is permanently open or permanently closed, and adjustment makes no difference, renew ft. 6 Remake the original wiring connections on completion,
12 Automatic transmission -overhaul
Apart from the operations described earlier in this Section, transmission overhaul should be entrusted to a Rat dealer or transmission specialist.
10.4a Using a slide hammer to remove the oil pump from the transmission 10.4b Automatic transmission oil pump O-dng (1), housing (2) and gasket (3) 11.2 Continuity tester connected ecross the accelerator pedal micro-switch
Page 178 of 225
9*2 Braking system
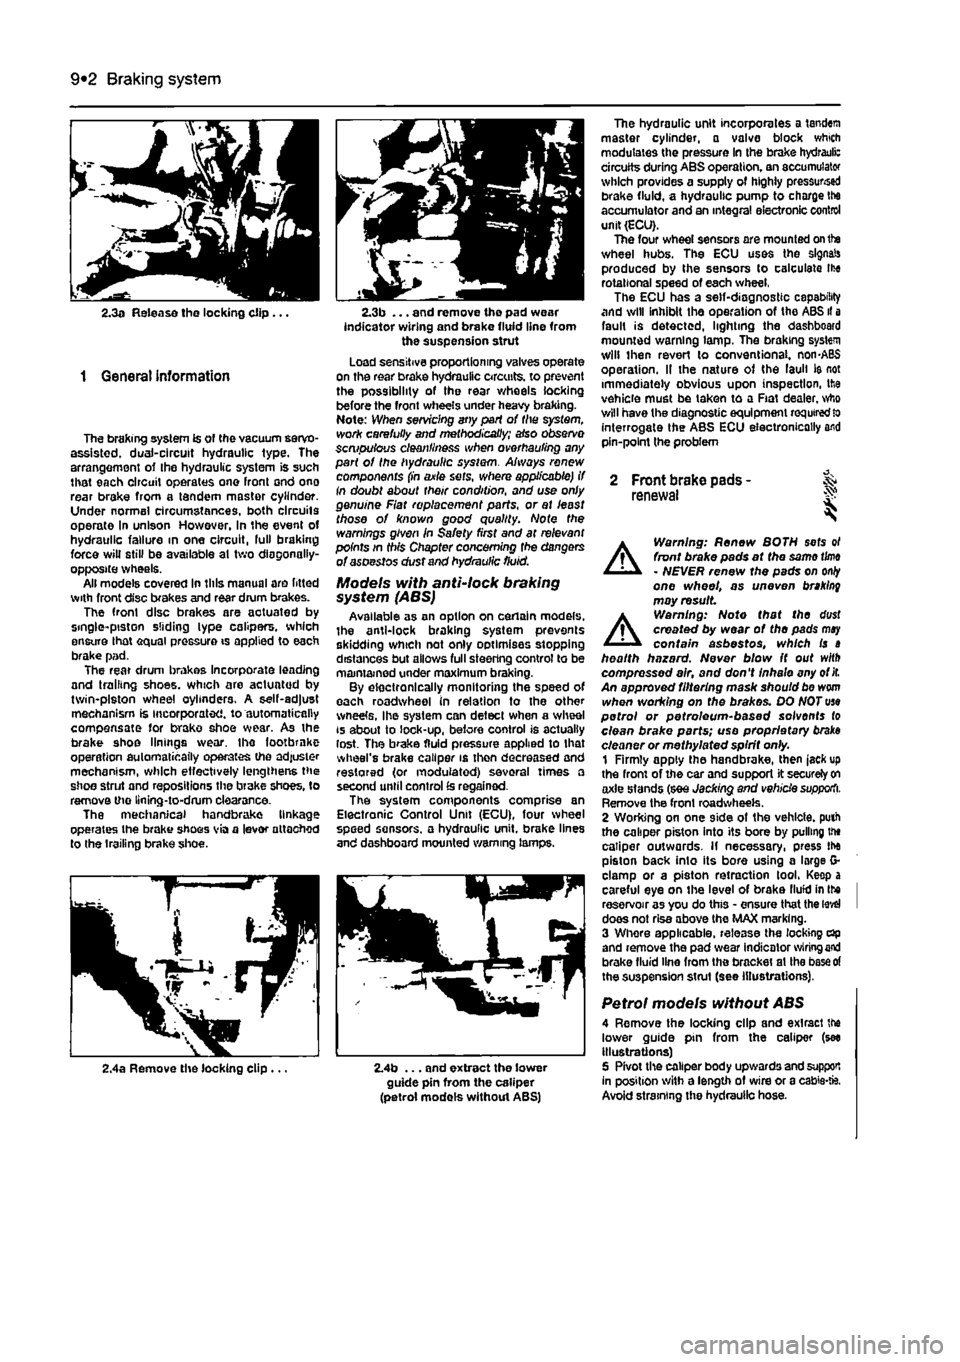
2.3a Release tho locking clip ...
1 General information
The braking system is of the vacuum servo-assisted. dual-circuit hydraulic type. The arrangement of Ihe hydraulic system is such that each circuit operates one front ond ono rear brake from a tandem master cylinder. Under normal circumstances, both circuits operate In unison However, in the event of hydraulic failure in one circuit, lull braking force will still be available at two diagonally-opposite wheels. All models covered in this manual are fitted with front disc brakes and rear drum brakes. The front disc brakes are aotuated by single-piston sliding lype calipers, which ensure lhat equal pressure is applied to each brake pad. The rear drum brakes incorporate leading and trailing shoes, which are actuated by twin-piston wheel cylinders. A self-adjust mechanism is incorporated, to automatically compensate for brako shoe wear. As the brake shoe linings wear, the footbrnke operation automatically operates the adjuster mechanism, which effectively lengthens the shoe strut and repositions the brake shoes, to remove the llning-to-drum clearance. The mechanical handbrake linkage operates the brake shoos via a lever attached to the trailing brake shoe.
2.3b ... and remove the pad wear indicator wiring and brake fluid line from the suspension strut Load sensitive proportioning valves operate on the rear brake hydraulic circuits, to prevent the possibility of the rear wheels locking before the front wheels under heavy braking. Note: When servicing any part of the system, work carefully and methodically; also observe scmpulous cleanliness when overhauling any part of the hydraulic sysiem. Always renew components (in axle sets, where applicable) if In doubt about their condition, and use only genuine Fiat replacement parts, or at least those of known good quality. Note the warnings given in Safety first and at relevant points in this Chapter concerning fhe dangers of asoestos dust and hydraulic fluid.
Models with anti-lock braking system (ABS) Available as an option on certain models, the anti-lock braking system prevents skidding which not only optimises stopping distances but allows full steering control to be maintained under maximum braking. By electronically monitoring the speed of each roadwheel in relation to the other wneete, Ihe system can detect when a wheel is about to lock-up, before control is actually lost. The brake fluid pressure applied to that wheel's brake caliper is then decreased and restored (or modulated) several times a second until control
£s
regained. The system components comprise an Electronic Control Unit (ECU), four wheel speed sensors, a hydraulic unit, brake lines and dashboard mounted warning lamps.
The hydraulic unit incorporates a tandem master cylinder, a valve block which modulates the pressure in the brake hydrauli: circuits during ABS operation, an accumulator which provides a supply of highly pressursed brake fluid, a hydraulic pump to charge Ihe accumulator and an integral electronic control unit (ECU). The four wheel sensors are mounted on the wheel hubs. The ECU uses the signals produced by the sensors to calculate Ihe rotational speed of each wheel, The ECU has a self-diagnostic capability and will inhibit the operation of the ABS il a fault is detected, lighting the dashboard mounted warning lamp. The braking system will then revert lo conventional. non-ABS operation. II the nature of the laull ie not immediately obvious upon inspection, the vehicle must be taken to a Fiat dealer, who will have the diagnostic equipment
required
lo interrogate the ABS ECU electronically and pin-point the problem
2 Front brake pads - & renewal S
A
Warning: Renew BOTH sets ol front brake pads at the same
time
- NEVER renew the pads on
only
one wheel, as uneven braking may result
A
Warning: Note that the dust created by wear of the pads
may
contain asbestos, which is a health hazard. Never blow It out with compressed air, and don't inhale any of
it.
An approved filtering mask should be worn when working on the brakes. DO NOT use petrol or petroleum-based solvents to clean brake parts; use proprietary braks cleaner or methylated spirit only. 1 Firmly apply the handbrake, then jack up the front of the car and support it securely
on
axle stands (see Jacking and vehicle supporti. Remove the front roadwheeis. 2 Wording on one side of the vehicle, puth the caliper piston into its bore by pulling the caliper outwards. If necessary, press the piston back into its bore using a large G-clamp or a piston retraction tool. Keep a careful eye on the level of brake llufd in Ihe I reservoir as you do this - ensure that the
level
I does not rise above the MAX marking. 3 Whore applicable, release the locking dp and remove the pad wear indicator
wiring end
brake fluid line from the bracket at Ihe
base of
the suspension strut (see illustrations).
Petrol models without ABS 4 Remove the locking clip and exlracl the lower guide pin from the caliper (see illustrations) 5 Pivot the caliper body upwards and support In position with a length of wire or a cabie-fc. Avoid straining the hydraulic hose.
2,4a Remove the locking clip ... 2.4b ... and extract the lower guide pin from the caliper (petrol models without ABS)