Power FIAT PUNTO 1997 176 / 1.G User Guide
[x] Cancel search | Manufacturer: FIAT, Model Year: 1997, Model line: PUNTO, Model: FIAT PUNTO 1997 176 / 1.GPages: 225, PDF Size: 18.54 MB
Page 28 of 225
Every 10 000 miles - petrol models ia.q
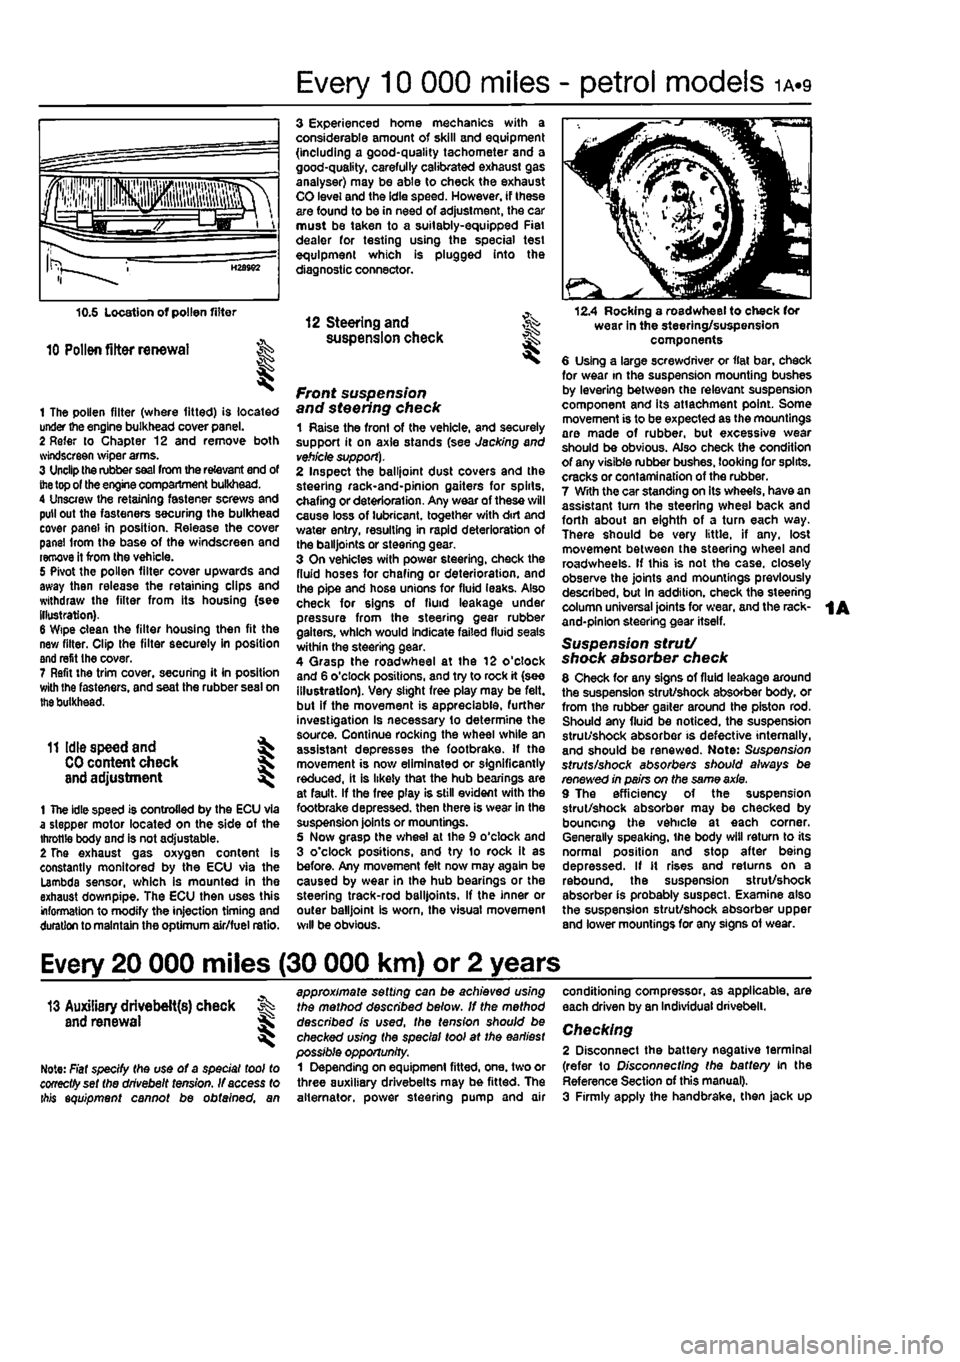
10 Pollen filter renewal
1 The pollen filter (where fitted) is located under the engine bulkhead cover panel. 2 Refer to Chapter 12 and remove both svindscreen wiper arms. 3 Unclip the rubber
seal
from the relevant end of
the
top of the engine compartment bulkhead. 4 Unscrew the retaining fastener screws and pull out the fasteners securing the bulkhead cover panel in position. Release the cover panel Irom the base of the windscreen and remove it from the vehicle. 5 Pivot the pollen filter cover upwards and away then release the retaining clips and withdraw the filter from its housing (see illustration). 6 Wipe clean the filter housing then fit the new filter. Clip the filter securely in position and refit the cover. 7 Refit the trim cover, securing it in position with Ihe fasteners, and seat the rubber seal on
the
bulkhead.
11 Idle speed and ^
CO
content check J and adjustment ^
1 The idle speed is controlled by the ECU via a stepper motor located on the side of the throttle body and is not adjustable. 2 The exhaust gas oxygen content is constantly monitored by the ECU via the Lambda sensor, which is mounted in the exhaust down pipe. The ECU then uses this information to modify the injection timing and duration to maintain the optimum air/fuel ratio.
3 Experienced home mechanics with a considerable amount of skill and equipment (including a good-quality tachometer and a good-quality, carefully calibrated exhaust gas analyser) may be able to check the exhaust CO level and the idle speed. However, if these are found to be in need of adjustment, the car must be taken to a suitably-equipped Fiat dealer for testing using the special test equipment which is plugged into the diagnostic connector.
12 Steering and ^ suspension check
front suspension and steering check 1 Raise the front of the vehicle, and securely support it on axle stands (see Jacking and
vehicle support).
2 Inspect the balljoint dust covers and the steehng rack-and-pinion gaiters for spirts, chafing or deterioration. Any wear of these will cause loss of lubricant, together with dirt and water entry, resulting in rapid deterioration of the balljoints or steering gear. 3 On vehicles with power steering, check the fluid hoses for chafing or deterioration, and the pipe and hose unions for fluid leaks. Also check for signs of fluid leakage under pressure from the steering gear rubber gaiters, which would indicate failed fluid seals within the steering gear. 4 Qrasp the roadwheel at the 12 o'clock and 6 o'clock positions, and try to rock it (see illustration). Very slight free play may be felt, but if the movement is appreciable, further investigation Is necessary to determine the source. Continue rocking the wheel while an assistant depresses the footbrake. If the movement is now eliminated or significantly reduced, it is likely that the hub bearings are at fault. If the free play is still evident with the footbrake depressed, then there is wear in the suspension joints or mountings. 5 Now grasp the wheel at the 9 o'clock and 3 o'clock positions, and try to rock it as before. Any movement felt now may again be caused by wear in the hub bearings or the steering track-rod balljoints. If the inner or outer balljoint is worn, the visual movement will be obvious.
12.4 Rocking a roadwheel to check for wear in the steering/suspension components 6 Using a large screwdriver or flat bar, check for wear in the suspension mounting bushes by levering between the relevant suspension component and its attachment point. Some movement is to be expected as the mountings are made of rubber, but excessive wear should be obvious. Also check the condition of any visible rubber bushes, looking for splits, cracks or contamination of the rubber. 7 With the car standing on its wheels, have an assistant tum the steering wheel back and forth about sn eighth of a turn each way. There should be very little, if any. lost movement between the steering wheel and roadwheels. If this is not the case, closely observe the joints and mountings previously described, but in addition, check the steering column universal joints for wear, and the rack-and-pinion steering gear itself.
Suspension strut/ shock absorber check 8 Check for any signs of fluid leakage around the suspension strut/shock absorber body, or from the rubber gaiter around the piston rod. Should any fluid be noticed, the suspension strut/shock absorber is defective internally, and should be renewed. Note: Suspension struts/shock absorbers should always be renewed in pairs on the same axle. 9 The efficiency of the suspension strut/shock absorber may be checked by bouncing the vehicle at each corner. Generally speaking, ihe body will return to its normal position and stop after being depressed. If it rises and returns on a rebound, the suspension strut/shock absorber is probably suspect. Examine also the suspension strut/shock absorber upper and lower mountings for any signs of wear.
Every 20 000 miles (30 000 km) or 2 years
13 Auxiliary drivebelt{s) check % and renewal ^
Note: Fiat specify the use of a special tool to cooectfyset the drivebelt tension. If access to ibis equipment cannot be obtained, an
approximate setting can be achieved using the method described below. If the method described is used, the tension should be checked using the special tool at the earliest possible opportunity. 1 Depending on equipment fitted, one. two or three auxiliary drivebelts may be fitted. The alternator, power steering pump and air
conditioning compressor, as applicable, are each driven by an Individual drivebelt.
Checking 2 Disconnect the battery negative terminal (refer to Disconnecting the battery in the Reference Section of this manual). 3 Firmly apply the handbrake, then jack up
Page 29 of 225
ia.io Every 20 000 miles - petrol models
the front of the car and support It securely on axle stands (see Jacking and vehicle support}. 4 Remove the nght-hand front wheel. 5 Remove the inner cover from under the right-hand wheeiarch for access to the right-hand side of the engine. 0 Using a socket on the crankshaft sprocket boll, rotate the crankshaft so that the full length of the auxiliary drlvebelt(s) can be examined. Look for cracks, splitting and fraying on the surface of the belt: check also for signs of glazing (shiny patches) and separation of the belt plies. If damage or wear Is visible, the relevant belt should be renewed. 7 If the condition of the belt Is satisfactory, check Ihe drivebeit tension as described below.
Renewal
Alternator drivebeit Note: On certain models with power steering but without air conditioning, it will be necessary to remove the power steering pump drivebeit ffrst, as described below. 8 Where fitted, undo the bolts and remove the belt guard from the alternator. 9 Loosen the pivot and adjustment bolts then swivel the alternator towards the engine and slip off the drivebeit. 10 Unbolt and remove the crankshaft sensor from Ihe front of the engine (refer to Chapter 4A. Section 5, if necessary). 11 Remove the drivebeit from the engine. 12 When renewing a drivebeit. ensure that the correct type is used. Fit the belt around the two pulleys then swivel the alternator outwaids to take up any slack in the betL Adjust the tension correctly as described below. Power steering pump drivebeit 13 Slacken the bolts securing the power steering pump to the mounting bracket. 14 Slacken the adjusting bolt locknut and turn the adjusting boit until all the tension is removed from the drivebeit. 15 Undo the bolts and remove the pultey guard from the power steering pump then slip the drivebeit off (he pulleys. 18 Ensuring that the correct type of drivebeit is used, fit the belt around the pulleys and turn the adjusting bolt to just take up the slack in the belt. Adjust the tension correctly as described below. Air conditioning compressor drivebeit 17 Remove the alternator and power steering pump dnvebelts as described previously. 18 Slacken the bolts securing the compressor to the mounting bracket. 19 Slacken the adjusting bolt locknut and turn the adjusting bolt until alt the tension is removed from the drivebeit, then slip the belt off the pulleys. 20 Ensuring lhat the correct type of drivebeit is used, fit the belt around the pulleys and turn the adjusting bolt to just take up the slack In the belt. Adjust the tension correctly as described below.
15.7 Checking a valve clearance with a feeler blade
Tensioning 21 Correct tensioning of the belt will ensure that it has a long life. A belt which Is too slack will slip and perhaps squeal. Beware, however, of overtightening, as this can cause wear in the alternator, power steering pump or air conditioning compressor bearings. Note: Fiat recommend use of their special tensioning tool however the fallowing procedure will set the tension correctly. 22 The belt(s) should be tensioned so that, under firm thumb pressure, there is approximately 5.0 mm of free movement at the mid-point between the pulleys. To adjust the alternator drivebeit, slightly tighten the adjustment bolt then swivel the alternator outwards until tne beft tension Is correct. Fully tighten the adjustment bolt followed by the pivot bolt then refit the rpm sensor. 23 On models with power steering and/or air conditioning, fit the relevant drivebeit over the pulleys then turn the adjusting bolt until the tension is correct. Secure the adjusting bolt by tightening Ihe locknut, then tighten the remaining mounting bolts. Refit any remaining dnvebelts and all the components removed. 24 Refit the inner cover and wheel, lower the vehicle to the ground, then reconnect the battery negative terminal,
14 Clutch adjustment check
Refer to Chapter 8. Section 2.
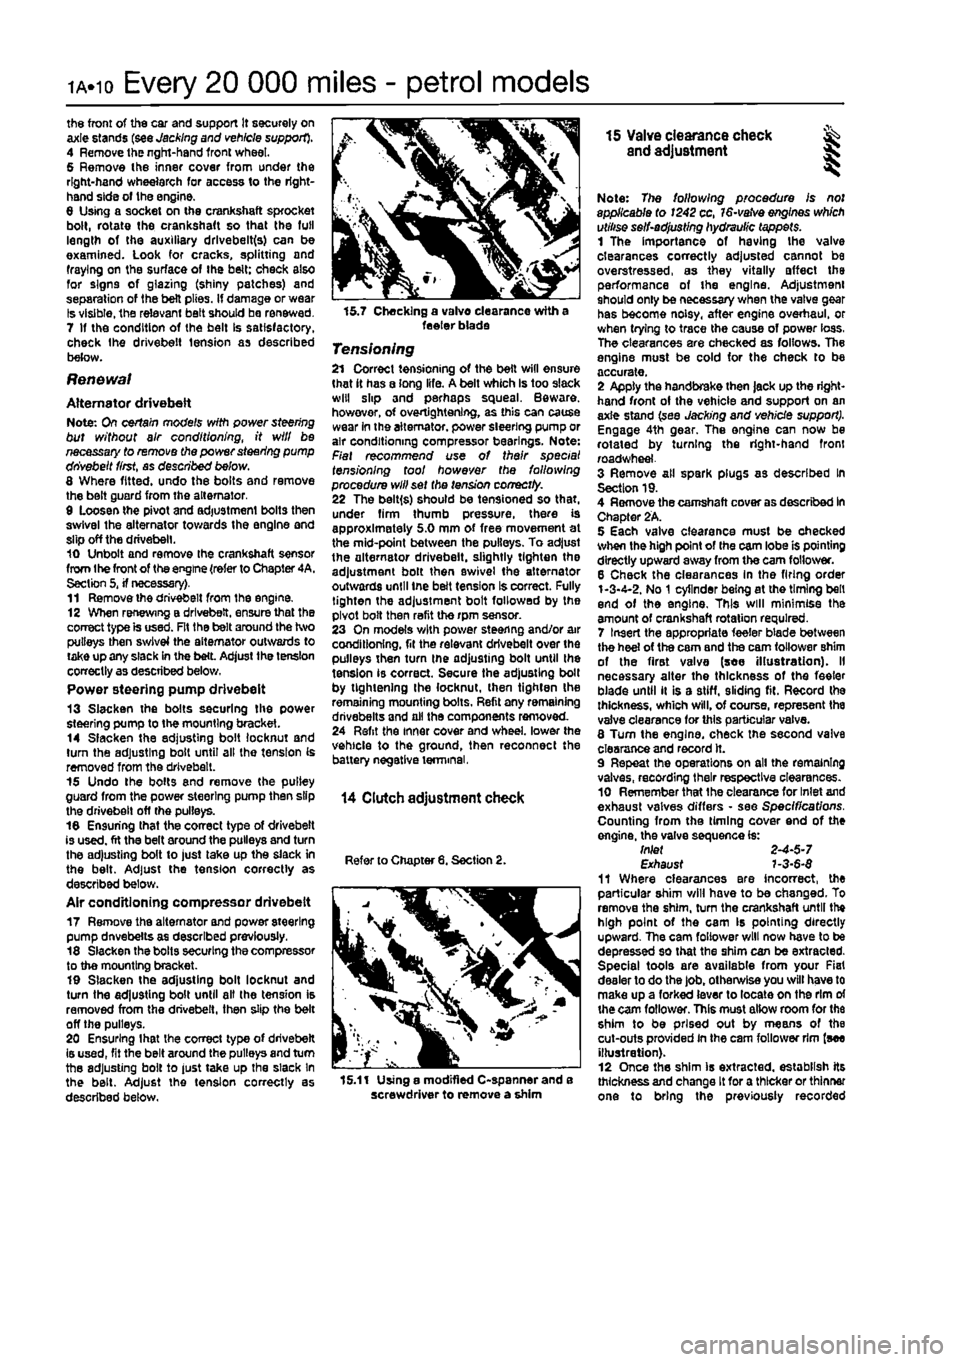
15.11 Using a modified C-spanner and e screwdriver to remove a shim
15 Valve clearance check ^ and adjustment S
Note: The following procedure Is not applicable to 1242 cc,
16-vatve
engines which utilise self-adjusting hydraulic tappets. 1 The importance of having the valve clearances correctly adjusted cannot be overstressed, as they vitally affect the performance of the engine. Adjustment should only be necessary when the valve gear has become noisy, after engine overhaul, or when trying to trace the cause of power loss. The clearances are checked as follows. The engine must be cold for the check to be accurate. 2 Apply the handbrake then jack up the right* hand front of the vehicle and support on an axle stand (see Jacking and vehicle support). Engage 4th gear. The engine can now be rotated by turning the right-hand front road wheel. 3 Remove all spark plugs as described In Section 19. 4 Remove the camshaft cover as described In Chapter 2A. 5 Each valve clearance must be checked when the high point of the cam lobe is pointing directly upward away from the cam follower. 6 Check the clearances In the firing order 1-3-4-2. No
1
cylinder being at the timing bell end of the engine. This will minimise the amount of crankshaft rotation required. 7 Insert the appropriate feeler blade between the heel of the cam and the cam follower shim of the first valve (see illustration). II necessary alter the thickness of the feeler blade until it is a stiff, sliding fit. Record the thickness, which will, of course, represent the valve clearance for this particular valve. 8 Tum the engine, check the second valve clearance and record it. 9 Repeat the operations on all the remaining valves, recording their respective clearances. 10 Remember that the clearance for Inlet and exhaust valves differs • see Specifications. Counting from the timing cover end of the engine, the valve sequence is: tnlet 2-4-5-7 Exhaust 7-3-6-$ 11 Where clearances are incorrect, the particular shim will have to be changed. To remove the shim, turn the crankshaft until the high point of the cam Is pointing directly upward. The cam follower will now have to be depressed so that the shim can be extracted. Special tools are available from your Fiat dealer to do the job, otherwise you will have to make up a forked (ever to locate on the rim of the cam follower. This must allow room for the shim to be prised out by means of the cut-outs provided in the cam follower rim {see illustration). 12 Once the shim is extracted, establish its thickness and change It for a thicker or thinner one to bring the previously recorded
Page 38 of 225
1B.2
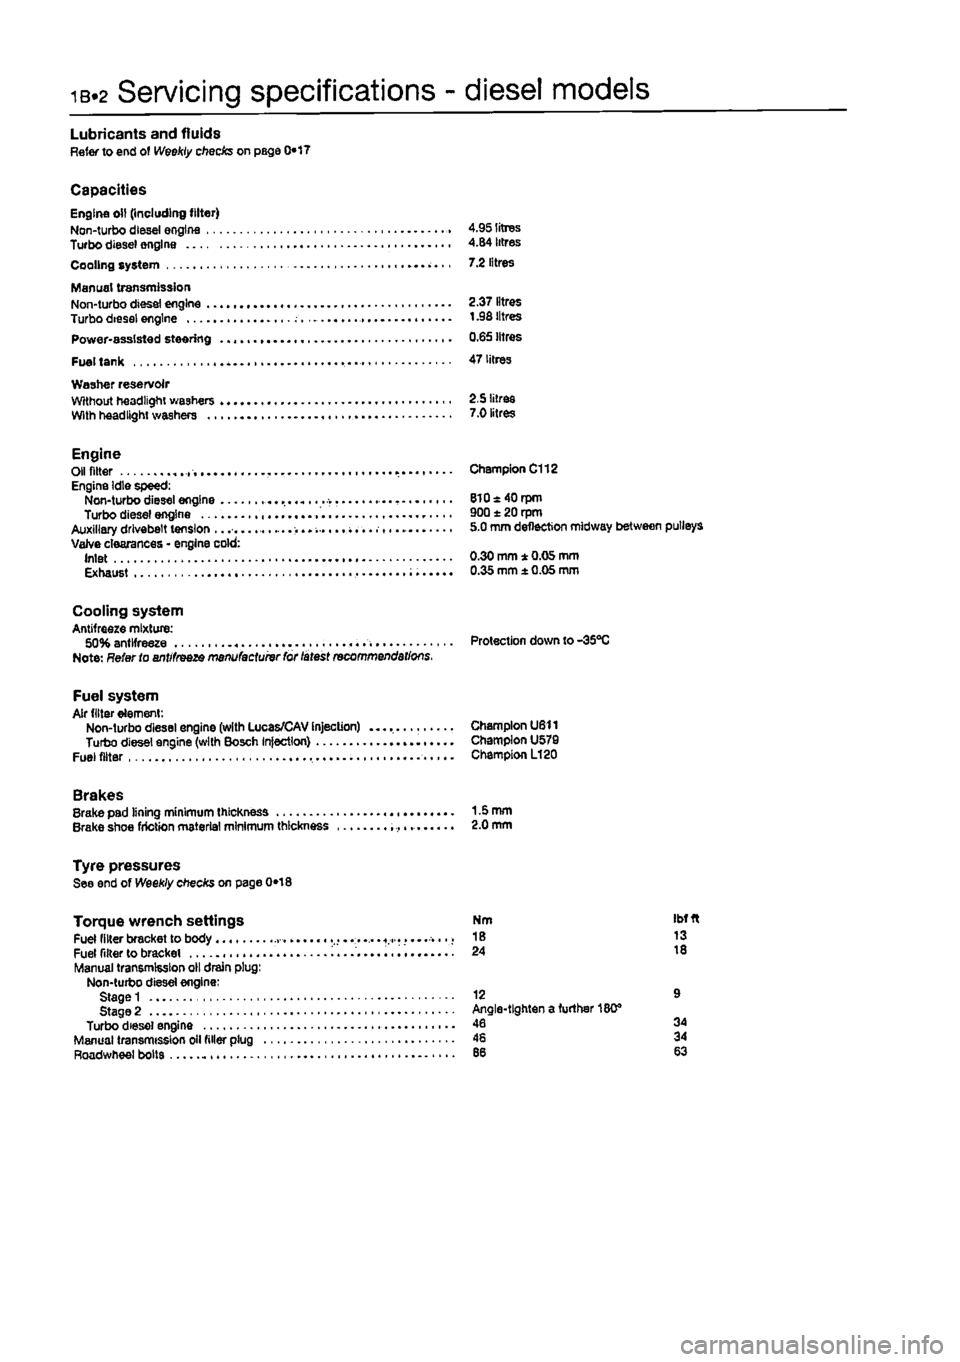
Servicing specifications - diesel models
Lubricants and fluids Refer to end of Weekly checks on page 0*17
Capacities Engine oil (including filter) Non-turbo diesei engine 4.95 litres Turbo diesel engine 4.84 litres Cooling system 7.2 litres
Manual transmission Non-turbo diesel engine 2.37 litres Turbo diesei engine t .98 litres Power-assisted steering 0.65 litres
Fuel tank 47 litres Washer reservoir Without headlight washers 2.5 litres With headlight washers 7.0 litres
Engine Oil fitter Engine Idle speed: Non-turbo diesel engine Turbo diesel engine Auxiliary drivebelt tension ...... Valve clearances • engine cold: Inlet Exhaust
Champion C112
8l0«40rpm 900 ± 20 rpm 5.0 mm deflection midway between pulleys
0.30 mm * 0.05 mm 0.35 mm ± 0.05 mm
Cooling system Antifreeze mixture: 50% antifreeze Protection down to-35°C Note: Refer to antifreeze manufactuivr for latest recommendations.
Fuel system Air filter element: Non-turbo diesel engine (with Lucas/CAV Injection) Champion U611 Turbo diesel engine (with Bosch Injection) Champion U579 Fuel filter Champion L120
Brakes Brake pad lining minimum thickness 1-5 mm Brake shoe friction material minimum thickness 2.0 mm
Tyre pressures See end of Weekly checks on page 0*18
Torque wrench settings Fuel filter bracket to body ..... « Fuel filter to bracket i........ Manual transmission oil drain plug: Non-turbo diesel engine: Stage 1 Stage 2 Turbo diesel engine Manual transmission oil filler plug Roadwheel bolts
Nm Ibfft 18 13 24 18
12 9 Angle-tighten a further 180® 46 34 46 34
Page 40 of 225
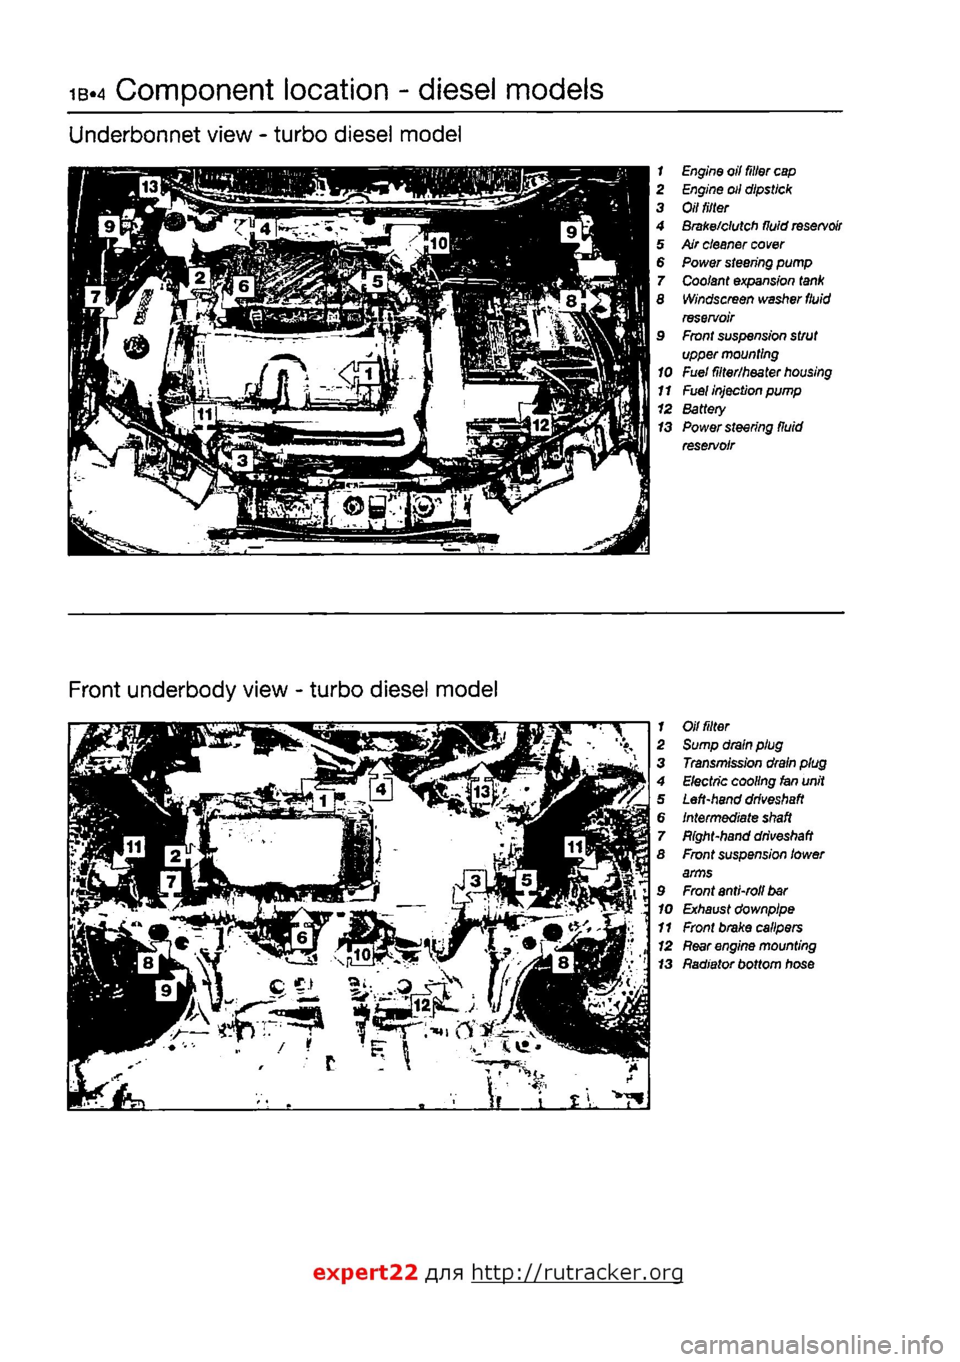
ib-4 Component location - diesel models
Underbonnet view - turbo diesel model
1 Engine oil filter
cap
2 Engine oil dipstick 3 Oil
tilter
4 Brake/clutch fluid
reservoir
5 Air cleaner
cover
6 Power steering pump 7 Coolant expansion
tank
8 Windscreen washer
fluid
reservoir 9 Front suspension strut upper mounting 10 Fuel filter/heater
housing
11
Fuel
injection pump 12 Battery 13 Power steering fluid reservoir
Front underbody view - turbo diesel model
1 Oil
fitter
2 Sump drain plug 3 Transmission drain plug 4 Electric cooling fan unit 5 Left-hand
driveshaft
6 Intermediate
shaft
7 Bight-hand
driveshaft
8 Front suspension lower arms 9 Front anti-roll
bar
10 Exhaust downpipe 11 Front brake calipers 12
Rear
engine mounting 13 Radiator bottom hose
expert22 fl/ia http://rutracker.org
Page 43 of 225
Maintenance procedures - diesel models ib.?
Every 10 000 miles (15 000 km) or 12 months
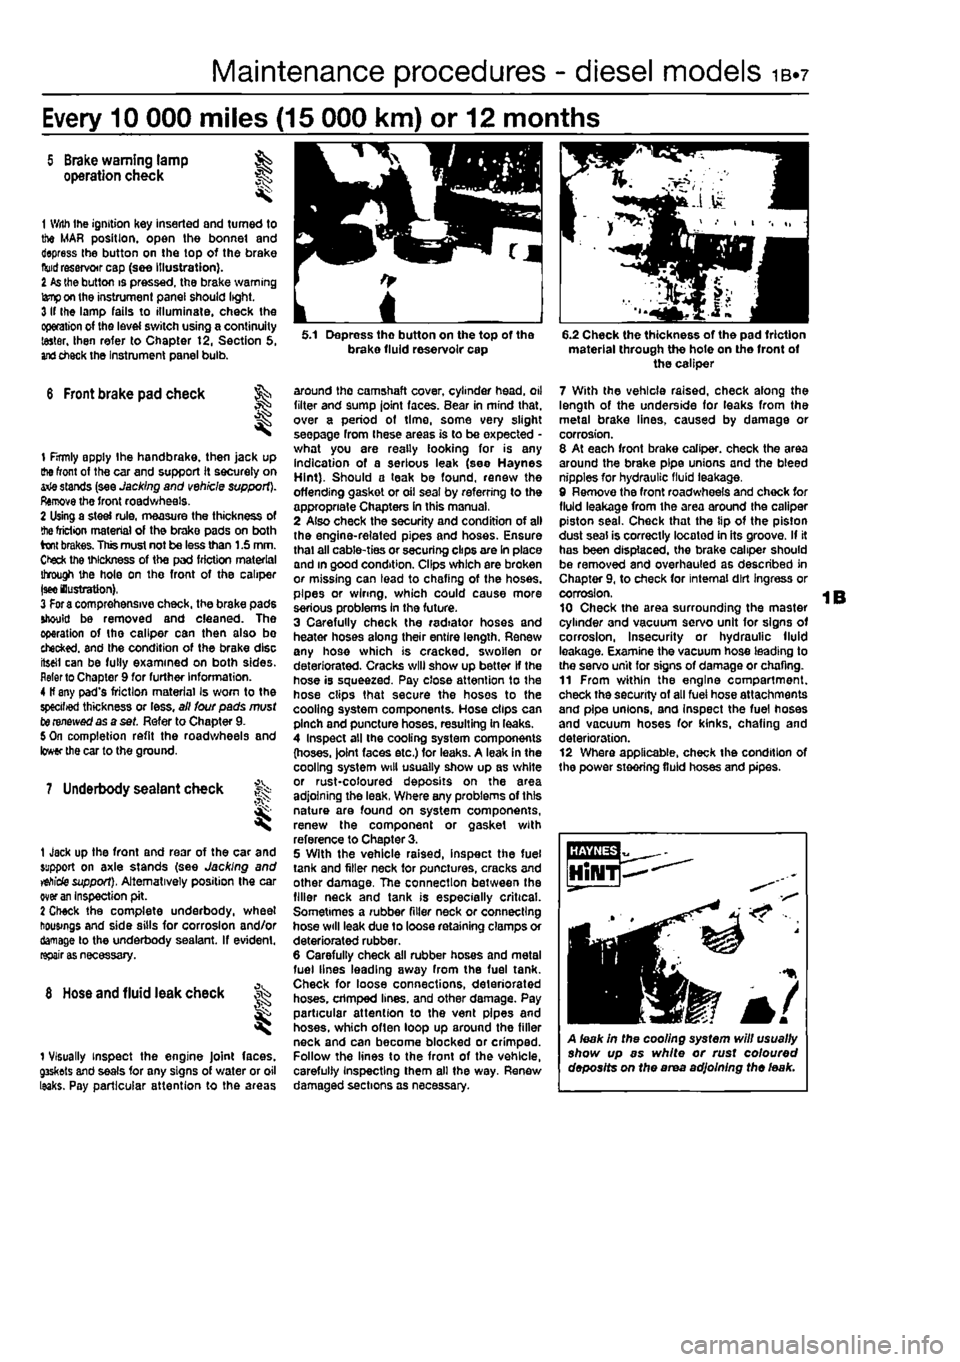
5 Brake warning lamp operation check 1
1 With Ihe ignition Key inserted and turned to the MAR position, open the bonnet and depress the button on the top of the brake
fluid
reservoir cap (see illustration). I
As
the button is pressed, the brake warning
lamp
on the instrument panel should light. 3 If Ihe lamp fails to illuminate, check the operation of the level switch using a continuity taster, then refer to Chapter t2, Section 5,
and
check the Instrument panel bulb.
6 Front brake pad check ^
I
1 firmly apply Ihe handbrake, then jack up the front of the car and support it securely on arie stands (see Jacking and vehicle support). Remove the front roadwheels. 2 Using a steel rule, measure the thickness of
the
friction material of the brake pads on both brakes. This must not be less than 1.5 mm. Ctefc the thickness of the pad friction material through the hole on the front of the caliper
|see
lustration), 3
For a
comprehensive check, the brake pads should be removed and cleaned. The operation of the caliper can then also bo checked, and the condition of the brake disc iteeil can be fully examined on both sides. Refer to Chapter 9 for further Information. 4 If any pad's friction material Is worn to the specified thickness or less, all lour pads must to renewed as a set. Refer to Chapter 9. 5 On completion refit the roadwheels and lower the car to the ground.
7 Underbody sealant check f^
1 Jack up the front and rear of the car and support on axle stands (see Jacking and
vehicle
support). Alternatively position the car over
an
Inspection pit. 2 Check the complete underbody, wheel housings and side sills for corrosion and/or damage to the underbody sealant. If evident,
rapairi
8
Hose
and fluid leak check
1 Visually inspect the engine Joint faces. g3skets and seals for any signs of water or oil leaks. Pay particular attention to the areas
5.1 Depress tho button on the top of the brake fluid reservoir cap
around the camshaft cover, cylinder head, oil filter and sump joint faces. Bear in mind that, over a period of time, some very slight seepage from these areas is to be expected -what you are really looking for is any indication of a serious leak (see Haynes Hint). Should a teak be found, renew the offending gasket or oil seal by referring to the appropriate Chapters In this manual, 2 Also check the security and condition of all the engine-related pipes and hoses. Ensure thai all cable-ties or securing clips are In place and in good condition. Clips which are broken or missing can lead to chafing of the hoses, pipes or wiring, which could cause more serious problems In the future. 3 Carefully check the radiator hoses and heater hoses along their entire length. Renew any hose which is cracked, swollen or deteriorated. Cracks will show up better If the hose is squeezed. Pay close attention to the hose clips that secure the hoses to the cooling system components. Hose clips can pinch and puncture hoses, resulting in leaks. 4 Inspect all the cooling system components (hoses. )olnt faces etc.) for leaks. A leak in the cooling system will usually show up as white or rust-coloured deposits on the area adjoining the leak, Where any problems of this nature are found on system components, renew the component or gasket with reference to Chapter 3. 5 With the vehicle raised, inspect the fuel tank and filler neck for punctures, cracks and other damage, The connection between the filler neck and tank is especially critical. Sometimes a rubber filler neck or connecting hose will leak due to loose retaining clamps or deteriorated rubber. 6 Carefully check all rubber hoses and metal fuel lines leading away from the fuel tank. Check for loose connections, deteriorated hoses, crimped lines, and other damage. Pay particular attention to the vent pipes and hoses, which often loop up around the filler neck and can become blocked or crimped. Follow the lines to the front of the vehicle, carefully Inspecting them all the way. Renew damaged sections as necessary.
6.2 Check the thickness of the pad friction material through the hote on the front of the caliper
7 With the vehicle raised, check along the length of the underside for leaks from the metal brake lines, caused by damage or corrosion. 8 At each front brake caliper, check the area around the brake pipe unions and the bleed nipples for hydraulic fluid leakage, 9 Remove the front roadwheels and chock for fluid leakage from the area around the caliper piston seal. Check that the tip of the piston dust seal is correctly located in its groove. If it has been displaced, the brake caliper should be removed and overhauled as described in Chapter 9, to check for internal dirt Ingress or corrosion. 10 Check the area surrounding the master cylinder and vacuum servo unit for signs of corrosion, Insecurity or hydraulic fluid leakage. Examine the vacuum hose leading to the servo unit for signs of damage or chafing. 11 From within the engine compartment, check the security of all fuel hose attachments and pipe unions, and Inspect the fuel hoses and vacuum hoses for kinks, chafing and deterioration. 12 Where applicable, check the condition of the power steering fluid hoses and pipes.
A leak in the cooling system will usually show up as white or rust coloured deposits on the area adjoining the leak.
Page 45 of 225
Every 10 000 miles - diesel models ib«9
4 Completely unscrew the filter and pour the remaining contents into the container. Ensure (hat the rubber sealing ring comes away with
me
fitter and unscrew the drain screw from the
bottom
of tho filter (see illustrations). 5 Wipe clean the contact surfaces then smear
a
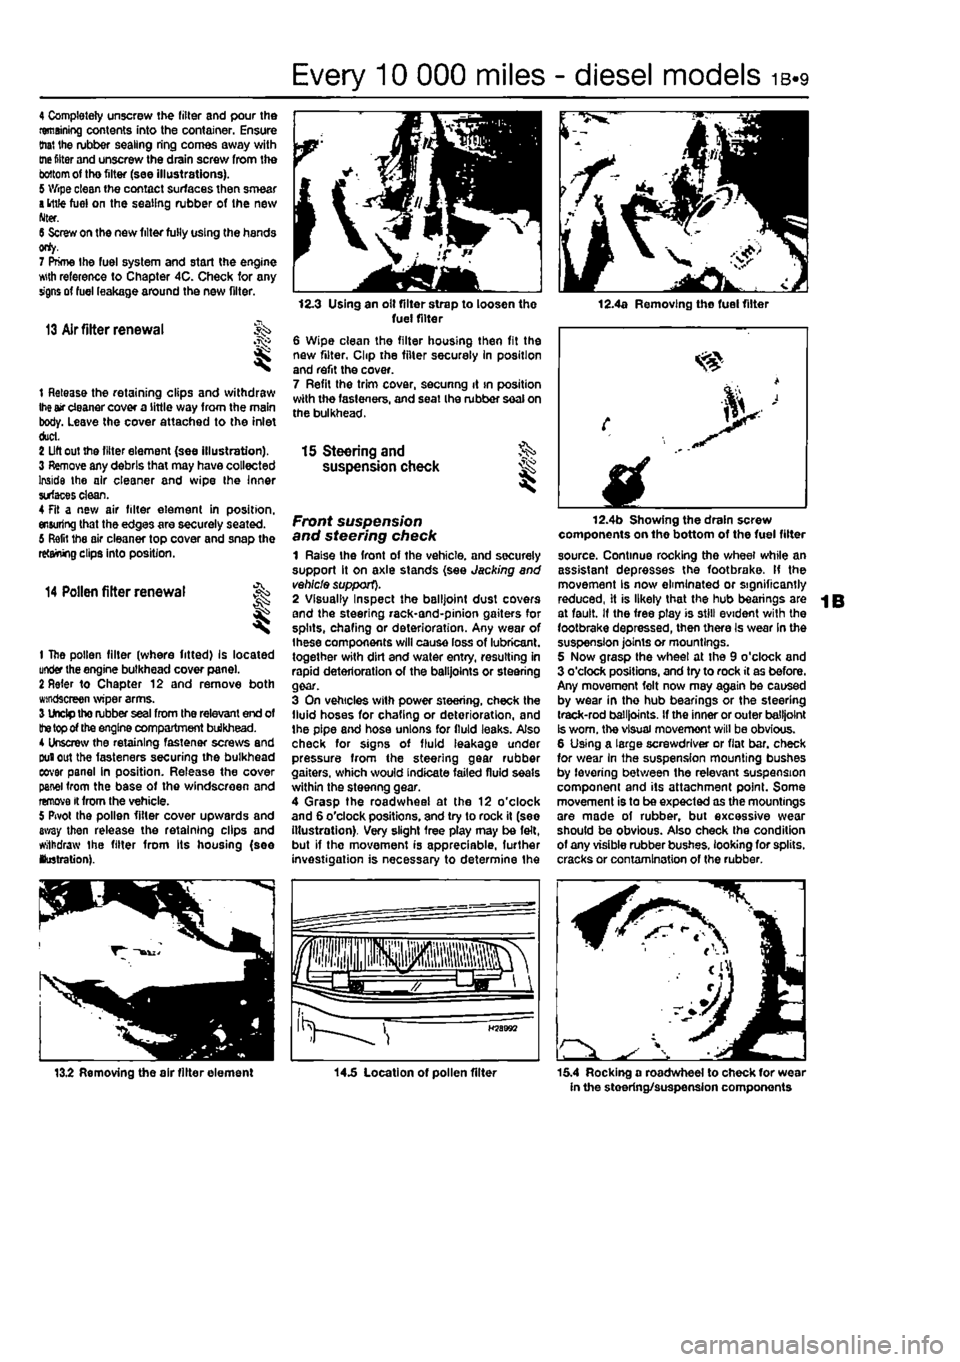
ittfe fuel on the sealing rubber of the new Nter. 6 Screw on the new filter fully using the hands orty. 7 Prime the fuel system and start the engine wth reference to Chapter 4C. Check for any signs of fuel leakage around the new filter.
13 Air fitter renewal
t Release the retaining clips and withdraw
Ihe
air cleaner cover a little way from the main body. Leave the cover attached to the inlet duct. 2 Lift out the filter element (see illustration). 3 Remove any debris that may have collected Inside the air cleaner and wipe the Inner surfaces clean. 4 Fit a new air filter element in position, ensuring that the edges are securely seated. 6 Refit the air cleaner top cover and snap the retaining clips into position.
14 Pollen filter renewal
t
1 The pollen filter (where fitted) Is located under the engine bulkhead cover pane). 2 Refer to Chapter 12 and remove both windscreen wiper arms. 3 Undp tho rubber seal from the relevant end of
the top
of the engine compartment bulkhead. 4 Unscrew the retaining fastener screws and Duiout the fasteners securing the bulkhead eovar panel in position. Release the cover panel from the base of the windscreen and remove it from the vehicle. 5 Pivot the pollen filter cover upwards and away then release the retaining clips and withdraw the filter from Its housing (see lustration).
12.3 Using an olt filter strap to loosen the fuel filter 6 Wipe clean the filter housing then fit the new filter, Clip the filter securely In position and refit the cover. 7 Refit the trim cover, secunng it >n position with the fasteners, and seat Ihe rubber seal on the bulkhead.
12.4a Removing the fuel filter
15 Steering and §S> suspension check ^
Front suspension and steering check 1 Raise the front of the vehicle, and securely support it on axle stands (see Jacking and vehicle support). 2 Visually Inspect the balljoint dust covers and the steering rack-and-pinion gaiters for splits, chafing or deterioration. Any wear of Ihese components will cause loss of lubricant, together with dirt and water entry, resulting in rapid deterioration of the balljoints or steering gear. 3 On vehicles with power steering, check the fluid hoses for chafing or deterioration, and the pipe and hose unions for fluid leaks. Also check for signs of fluid leakage under pressure from the steering gear rubber gaiters, which would indicate failed fluid seals within the steenng gear. 4 Grasp the roadwheel at the 12 o'clock and 6 o'clock positions, and try to rock it (see illustration). Very slight free play may be felt, but if the movement is appreciable, further investigation is necessary to determine the
fplllll iHpjiiisisps fa^aJw a LJgr >
H58B92
12.4b Showing the drain screw components on the bottom of the fuel filter source. Continue rocking the wheel while an assistant depresses the footbrake. If the movement Is now eliminated or significantly reduced, it is likely that the hub bearings are at fault. If the free ptay is still evident with the footbrake depressed, then there Is wear In the suspension joints or mountings. 5 Now grasp the wheel at the 9 o'clock and 3 o'clock positions, and try to rock it as before. Any movement felt now may again be caused by wear in the hub bearings or the steering track-rod balljoints. If the inner or outer balljoint Is worn, the visual movemont will be obvious. 6 Using a large screwdriver or flat bar. check for wear in the suspension mounting bushes by levering between the relevant suspension component and its attachment point. Some movement is to be expected as the mountings are made of rubber, but excessive wear should be obvious. Also check the condition of any visible rubber bushes, looking for splits, cracks or contamination of the rubber.
13.2 Removing the air filter element 14.5 Location of pollen filter 15.4 Rocking a roadwheel to check for wear in the steering/suspension components
Page 46 of 225
ib-io Every 10 000 miles - diesel models
7 With the car standing on Its wheels, have an assistant turn the steering wheel back and forth about an eighth of a turn each way. There should be very hide. If any, lost movement between the steering wheel and roadwheels. If this is not the case, closely observe the joints and mountings previously described, but in addition, check the steering column universal joints for wear, and the rack-and-plnion steering gear itself.
Suspension strut/ shock absorber check 8 Check for any signs of fluid leakage around the suspension strut/shock absorber body, or from the rubber gaiter around the piston rod, Should any fluid be noticed, the suspension strut/shock absorber is defective Internally, and should be renewed. Note: Suspension struts/shock absorbers should always be renewed in pairs on the same axle.
9 The efficiency of the suspension strut/shock] absorber may be checked by bouncing 0*1 vehicle at each comer. Generally speaking. th»| body will return to its normal position and 8top| after being depressed. If It rises and returns cn| a rebound, the suspension strut/shocH absorber is probably suspect. Examine also* the suspension strut/shock absorber uppeij and lower mountings for any signs of wear.
Every 20 000 miles (30 000 km) or 2 years
18 Auxiliary drivebeltfs) % check and renewal
Note: Fiat specify the use of a spec/a/ toot to correctly set the drivebelt fens/on. if access to this equipment cannot be obtained, an approximate setting can be achieved using the method described beiow. If the method described Is used, the tension should be checked using the spec/a/ too! at the earliest possible opportunity. 1 Depending on equipment fitted, one, two or three auxiliary drivebeits may be fitted. The alternator, power steering pump and air conditioning compressor, as applicable, are each driven by an individual drivebelt. Checking 2 Disconnect the battery negative terminal (refer to Disconnecting the battery In the Reference Section of this manual). 3 Firmly apply the handbrake, then Jack up the Iront of the car and support it securely on exie stands (see Jacking and vehicle support). 4 Remove the right-hand wheel. 5 Remove the Inner cover(s) from under the right-hand wheelarch for access to the right-hand side of the engine. 6 Using a socket on the crankshaft sprocket bolt, rotate the crankshaft so that the full length of the auxiliary drivebelt(s) can be examined. Look for cracks, splitting and fraying on the surface of the belt: check also for signs of glazing (shiny patches) and
16.10a Loosening the alternator drivebelt adjustment bolt
separation of the belt plies. If damage or wear Is visible, the bell should be renewed, 7 If the condition of the belt Is satisfactory, check tho drivebelt tension as described below.
Renewal
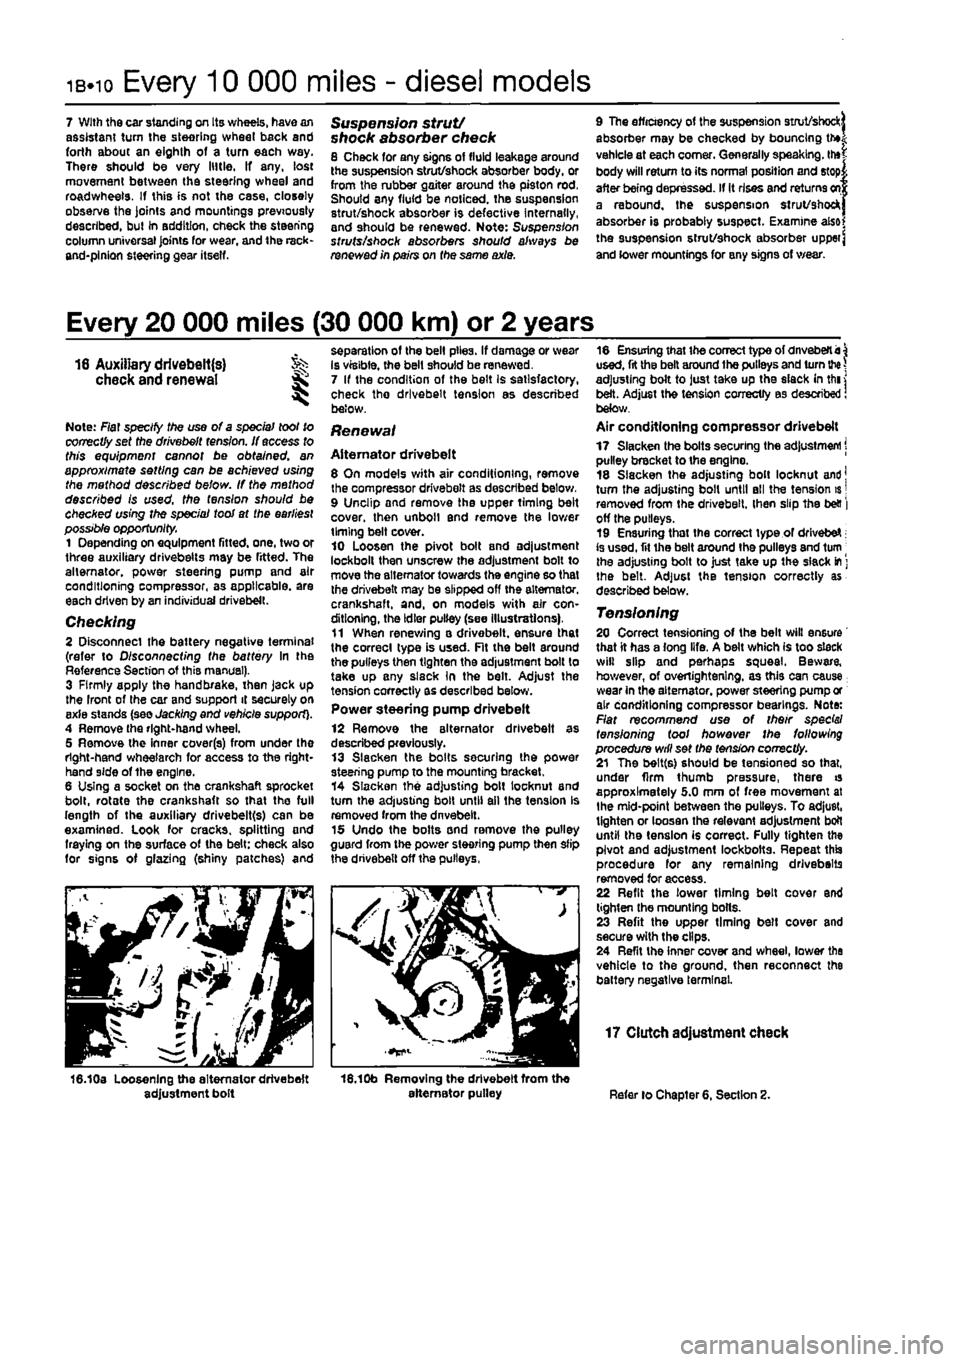
Alternator drivebelt 8 On models with air conditioning, remove the compressor drivebelt as described below, 9 Unclip and remove the upper timing belt cover, then unbolt end remove the lower timing belt cover. 10 Loosen the pivot bolt and adjustment lockbolt then unscrew the adjustment bolt to move the alternator towards the engine so that the drivebelt may be slipped off the alternator, crankshaft, and, on models with air con-ditioning, the Idler pulley (see Illustrations), 11 When renewing a drivebelt. ensure that the correct type is used. Fit the belt around the pulleys then tighten the adjustment bolt to take up any slsck In the belt. Adjust the tension correctly as described below. Power steering pump drivebelt
12 Remove the alternator drivebelt as described previously. 13 Slacken the bolts securing the power steering pump to the mounting bracket. 14 Slacken the adjusting bolt locknut and turn the adjusting bolt until ail the tension Is removed from the dnvebelt. 15 Undo the bolts and remove the pulley guard from the power steering pump then slip the drivebelt off the pulleys,
16.10b Removing the drivebelt from the alternator pulley
18 Ensuring that the correct type of dnveberti^ used, fit the belt around the pulleys and turn
the
adjusting bolt to just take up the slack in thi j belt. Adjust the tension correctly as described! below. Air conditioning compressor drivebelt 17 Slacken the bolts securing the adjustment j pulley bracket to the engine. 18 Slacken the adjusting bolt locknut and] turn the adjusting bolt until ell the tension is | removed from the drivebelt. then slip the be& | off the pulleys. 19 Ensuring that the correct type of drivebeX; is used, fit ihe belt around the pulleys and turn | the adjusting bolt to just take up the slack
m
] the belt. Adjust the tension correctly as described below.
Tensioning 20 Correct tensioning of the belt will ensure that it has a long life. A belt which is too slack will slip and perhaps squeal. Beware, however, of overiightenlng. as this can cause wear in the alternator, power steering pump or air conditioning compressor bearings. Note: Flat recommend use of their spec's/ tensioning tool however the following procedure will set the tension correctly. 21 The belt(s) should be tensioned so that, under firm thumb pressure, there is approximately 5.0 mm of free movement at the mid-point between the pulleys. To adjust, tighten or loosen the relevant adjustment bolt until the tension is correct. Fully tighten the pivot and adjustment lockbotts. Repeat this procedure for any remaining drivebeits removed for access. 22 Refit the lower timing belt cover end tighten the mounting bolts. 23 Refit the upper timing belt cover and secure with the clips. 24 Refit the inner cover and wheel, lower the vehicle to the ground, then reconnect the battery negative terminal.
17 Clutch adjustment check
Refer lo Chapter 6, Section 2.
Page 47 of 225
Every 20 000 miles - diesel models ib.h
18
Valve clearance check and
adjustment
1 The Importance of having the valve clearances correctly adjusted cannot be Distressed, as they vitally affect the performance of the engine. Adjustment should only be necessary when the valve gear nas become noisy, after engine overhaul, or when trying to trace the cause of power loss. The clearances are checked as follows. The engine must be cold for the check to be ttcurate. 2 Apply the handbrake then jack up the right-hand front of the vehicle and support on an axle stand (see Jacking and vehicle support). Engage 4th gear. The engine can now be rotated by turning the right-hand front roadwfteei. 3 Remove ail four glove plugs as described In Chapter 5C. 4 Remove the air cleaner cover and air duct
then
remove the camshaft cover as described
in
Chapter 2C. 6 Each valve clearance must be checked wnen the high point of the cam is pointing directly upward away from the cam follower. 6 Check the clearances in the firing order 1-3-4-2, No 1 cylinder being at the timing belt end of the engine. This will minimise the amount of crankshaft rotation required. 7 Insert the appropriate feeler blade between
the heel
of the cam and the cam follower shim of the First valve (see Illustration). If necessary alter the thickness of the feeler blade until it is a stiff, sliding fit. Record the thickness, which will, of course, represent the
vafve
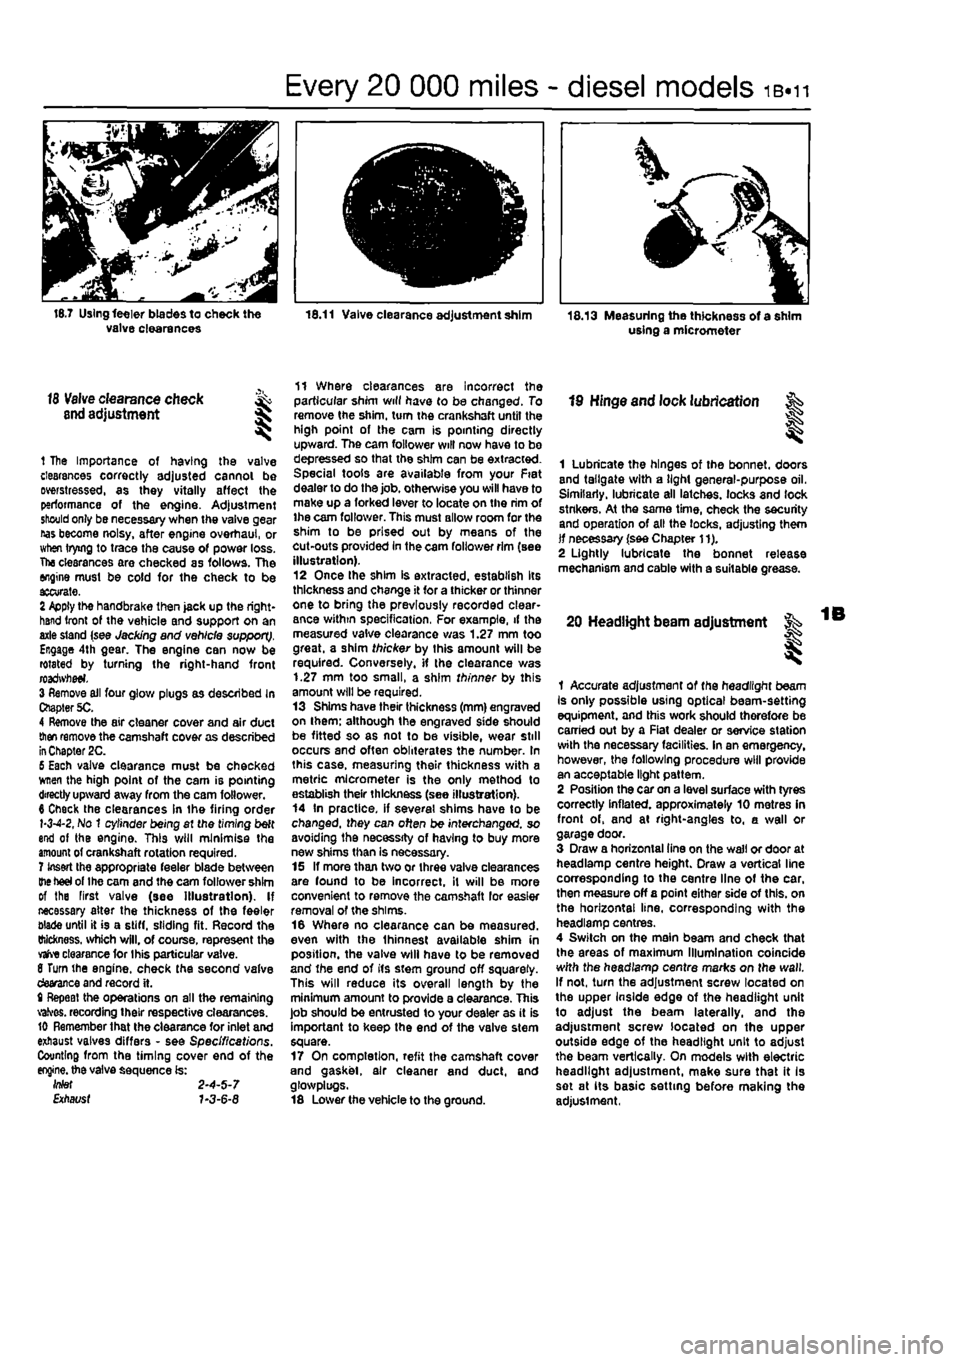
clearance tor Ihis particular valve. 8 Turn the engine, check the second valve devance and record it. t Repeat the operations on all the remaining valves. recording their respective clearances. 10 Remember that the clearance for inlet and exhaust valves differs - see Specifications. Counting from the timing cover end of the
engine,
the valve sequence is: Wef 2-4-5-7 Etfiat/sf 7-3-6-8
11 Where clearances are incorrect the particular shim will have to be changed. To remove the shim, turn the crankshaft until the high point of the cam is pointing directly upward. The cam follower will now have to bo depressed so that the shim can be extracted. Special tools are available from your Fiat dealer to do the job. otherwise you will have to make up a forked lever to locate on the rim of ihe cam follower. This must allow room for the shim to be prised out by means of the cut-outs provided in the cam follower rim (see illustration). 12 Once Ihe shim is extracted, establish Its thickness and change it for a thicker or thinner one to bring the previously recorded clear-ance within specification, For example, if the measured valve clearance was 1.27 mm too great, a shim thicker by this amount will be required. Conversely, if the clearance was 1.27 mm too small, a shim thinner by this amount will be required. 13 Shims have their thickness (mm) engraved on ihem; although the engraved side should be fitted so as not to be visible, wear still occurs and often obliterates the number. In this case, measuring their thickness with a metric micrometer is the only method to establish their thickness (see illustration). 14 In practice, if several shims have to be changed, they can often be interchanged, so avoiding the necessity of having to buy more new shims than is necessary. 15 If more than two or three valve clearances are found to be incorrect, it will be more convenient to remove the camshaft lor easier removal of the shims. 16 Where no clearance can be measured, even with the Ihinnest available shim in position, the valve will have to be removed and the end of its stem ground off squarely. This will reduce its overall length by the minimum amount to provide a clearance. This job should be entrusted to your dealer as it is important to keep the end of the valve stem square. 17 On completion, refit the camshaft cover and gasket, air cleaner and duct, and glosvplugs. 18 Lower the vehicle to the ground.
19 Hinge and lock lubrication
I
1 Lubricate the hinges of the bonnet, doors and tailgate with a light general-purpose oil. Similarly, lubricate all latches, locks and lock stnkers. At the same time, check the security and operation of all the locks, adjusting them if necessary (see Chapter 11). 2 Lightly lubricate the bonnet release mechanism and cable with a suitable grease.
20 Headlight beam adjustment
I
1 Accurate adjustment of the headlight beam Is only possible using optical beam-setting equipment, and this work should therefore be carried out by a Fiat dealer or service station with the necessary facilities. In an emergency, however, the following procedure will provide an acceptable light pattern. 2 Position the car on a level surface with tyres correctly inflated, approximately 10 metres in front of, and at right-angles to, a wall or garage door. 3 Draw a horizontal tine on the wall or door at headlamp centre height. Draw a vertical line corresponding to the centre line of the car. then measure off a point either side of this, on the horizontal line, corresponding with the headlamp centres. 4 Switch on the main beam and check that the areas of maximum Illumination coincide with the headlamp centre marks on the wall. If not, turn the adjustment screw located on the upper Inside edge of the headlight unit to adjust the beam laterally, and the adjustment screw located on the upper outside edge of the headlight unit to adjust the beam vertically. On models with electric headlight adjustment, make sure that it Is set at its basic setting before making the adjustment,
Page 80 of 225
2C*2 Diesel engine in-car repair procedures
Refitting 6 Locate a new gasket on the cylinder head and make sure tt Is correctly seated. 7 Lower the cover onto the gasket making sure the gasket Is not displaced, 8 Insert the mounting bolts and tighten them securely In a progressive sequence. Position Ihe support brackets as noted during removal. 9 Clip ihe coolant hoses in position then refil the air ducting.
7 Camshaft oil seal -renewal
8 Crankshaft oil seals -renswal I
9 Cylinder head -
removal
and refitting
1 Remove the timing belt and camshaft sprocket as descnbed in Sections 4 and 5. 2 Using a suitable hooked instrument, remove tho oil seal from the cylinder head taking care nol to damage the surface of the camshafl. Alternatively drill a small hole In tho oil seal and Insert a self-topping screw - the seal can then be removed by pulling on the screw with a pair of pliers. 3 Clean the seating In the cylinder head and tho end of the camshaft To prevent damage to the new oil seal as It is being fitted, wrap some adhesive tape around the end ol the camshaft and lightJy oil it. 4 Dip tho new ail s«al In oil then locate it over Ihe camshaft making sure that the sealing lips are facing inwards. 5 Using a suitable tubular drift, drive the oil seal squarely into the cylinder h*ad. Remove the adhesive tap© 6 Refit the camshaft sprocket and timing belt with reference to Sections 6 and 4.
Front (right-hand side) oil seal t The front oil seal is located in the oil pump casing on the front of the crankshaft. Remove the timing belt as described in Section 4 and the crankshaft sprocket as described in Section 5, 2 Using a suitable hooked instrument, remove the oil seal from the oil pump casing taking care not to damage the surface of the crankshaft. Alternatively drill a small hole In the oil soal and insert a self-tapping screw - the seal can then be removed by pulling on the screw with a pair of pliers. 3 Clean the seating in the oH pump and the surface of the crankshaft. To prevent damage to the new off seal as It Is being fitted, wrap some adhesive tape around the end of tha crankshaft and lightly oil it. 4 Oip the new oii seal In oil then otter it up to the oil pump casing making sure that the sealing Hps are facing inwards,
8.Ba Rear oil soal and housing
5 Using a suitable tubular drift, driva the oil sea! squarely into the casing. Remove the adhesive tape. 6 Refit the crankshaft sprocket and timing belt with reference to Sections 5 and 4.
Rear (left-hand side) oil seal Note: The following paragraphs describe renewal of the rear oil seal leaving the housing In position. The alternative mathod is to remove the housing and renew the oil seel on the bench, however there is then the possibility of damaging the sump gasket. Refer to Chapter 2D for details of removing the mar oil sea! housing. 7 Ramove the flywheel as described in Section 10. 8 Using a suitable hooked Instrument. remove 1he oil seat from the roar oil seal housing taking care not to damage Ihe surface of Ihe crankshaft. Alternatively dnll a small hole In the o» seal and insert a self-tapping screw - the seal can ihan be removed by pulling on the screw with a pair of pliers (see Illustrations), 9 Clean the seating in the housing and the surface of the crankshaft. Check the crankshaft for burrs which may damage the oil seal tip of tno new saal, and It necessary use a Una file to removothem. 10 Dip the new soal in clean engine oil and carefully tocato it over tho crankshafl rear Range making sure that
H
the correct way round. 11 Progressively tap the oH seal into the housing keepfng it square to prevent distortion. A block of wood is useful for this purpose. 12 Refit the flywheel with reference to Section 10.
I
5.8b Using a self-tapping screw and pliers to remove the rear oil seal
Removal Note: The cylinder head bolts are of special splined design and a Fiat tool should be obtained to unscrew them. A Torn key will
not
fit however In practise It was found that a close-fitting Allen key could bo used as an alternative. 1 Disconnect the battery negative terminal (refer to Disconnecting the battery in the Reference Section of this manual), 2 Remove tha battery as described In Chapter 5A. 3 Refer to Chapter IB and carry out the following: o) Drain the engine oil, b) Drain the cooling system. 4 Remove the timing belt as described in Section 4. 5 Unbolt and remova the relay guard and bracket from the left-hand side of the engine. 6 Unbolt and remove the battery mounting tray and disconnect the wiring and lines from the modulator valva and relays. 7 Remove the air eleanar assembly and air duct with reference lo Chapter 4C. 8 Loosen the clip and disconnect the vacuum hosa from the vacuum pump on the left-hand end of the cylinder head. 9 Loosen Ihe clips and disconnect the radiator top hose from the cylinder head outlet. Also disconnect the heater inlet hose from the thermostat housing, 10 Loosen the clips and disconnect the expansion tank and heater outlet hoses. 11 Identify all wiring connectors then disconnect them from the cylinder head, 12 Unscrew the expansion tank mounting screws, then disconnect tha expansion tank hoses at their connections to the engine. Remove the expansion tank from tha engine compartment. 13 Release tha clip and disconnect ihe crankcase breather from the left-hand rear of the cylinder head. 14 Unbolt the power steering pump uppar cover bracket then unscrew the pivot ana adjustment bolts while leaving ihe tMd lioses still attached. Release the drivebelt (if still In place) then tie the pump to the bulkhead. 15 Loosen tha clips and disconnect Ihe short coolant hose from the cylinder head outlet to the coolant pump (soe illustration). 18 At the rear of the engine, unbolt and disconnect the oil delivery pipe from the turbocharger (where applicable) and crankcase (see Illustrations). 17 Disconnect the return hose from tha thermostat housing to the coolant pump (see Illustration), 18 Unbolt the metal coolant return pipe and pull it out from the coolant pump inlet elbow (see Illustrations).
expert22 flna http://rutracker.org
Page 91 of 225
2D*10 Engine removal and overhaul procedures
1 General information
Included In (his Part of Chapter 2 are details of removing the engine/transmission from the car and general overhaul procedures for tho cylinder head, cylinder block/crankca9e and all other engine internal components. The information given ranges from advice concerning preparation for an overhaul and the purchase of replacement parts, to detailed step-by-step procedures covering removal, inspection, renovation and refitting of engine Internal components. After Section 5, all instructions are based on the assumption that the engine has been removed from the car. For Information concerning in-car engine repair, as well as the removal and refitting of those external components necessary for full overhaul, refer to Part A, 8 or C of this Chapter (as applicable) and to Section 5. Ignore any preliminary dismantling operations described in Part A. B or C that are no longer relevant onca the engine has been removed from ihe car.
2 Engine overhaul -general information
1 It Is not always easy to determine when, or if, an engine should be completely overhauled, as a number of lectors must be considered. 2 High mileage Is not necessarily an Indication that an overhaul Is needed, while low mileage does not preclude the need for an overhaul. Frequency of servicing Is probably the most important consideration. An engine which has had regular and frequent oil and filter changes, as well as other required maintenance, should give many thousands of miles of reliable service. Conversely, a neglected engine may require an overhaul very early In its life. 3 Excessive oil consumption Is an Indication that piston rings, vaivo seals and/or valve guides are in need of attention. Make sure that oil leaks are not responsible before deciding that the rings and/or guides are worn Perform a compression test, as described In Parts A or B (petrol engines) or C (diesel engines) of this Chapter, to determine the likely cause of the problem. 4 Check the oil pressure with a gauge fitted In place of the oil pressure switch. If it Is extremely low. the main and big-end bearings, and/or the oil pump, are probably worn out. 5 Loss of power, rough running, knocking or metallic engine noises, excessive valve gear noise, and high fuel consumption may also point to Ihe need for an overhaul, especially if
they are all present at the same time. If a complete service does not remedy the situation, major mechanical work is the only solution. 6 An engine overhaul involves restoring ell Internal parts to the specification of a new engine. During an overhaul, the cylinders are rebored (where applicable), the pistons and the piston rings are renewed. New main and big-end bearings are generally fitted; If necessary, the crankshaft may be reground. to restore the journals. 7 The valves are also servrced as well, since they are usually In less-than-perfect condition at this point. While the engine is being overhauled, other components, such as the starter and alternator, can be overhauled as well. The end result should be an as-new engine that will give many trouble-free miles. Note: Critical cooling system components such as the hoses, thermostat and coolant pump should be renewed when an engine is overhauled. The radiator should be checked carefully, to ensure that it is not clogged or leaking. A/so. it Is a good Idea to renew the ofI pump whenever the engine i$ overhauled.
8 Before beginning the engine overhaul, read through tho entire procedure, to familiarise yourself with the scope and requirements of the job. Overhauling an engine is not difficult If you follow carefully all of the instructions, have the necessary tools and equipment, and pay close attention to all specifications. It can, however, be time-consuming. Plan on the car being off the road for a minimum of two weeks, especially If pans must be taken to an engineering wo'kd for repair or reconditioning.
9 Check on the availability of parts and make sure that any necessary special tools and equipment are obtained in advance. Most work can be done with typical hand lools, although a number of precision measuring tools are required (or Inspecting parts to determine if they must be renewed. Often the engineering works will handle the inspection of parts and offer advice concerning reconditioning and renewal, Note: Always wait unt'l the engine has been completely dismantled, and until all components (especially the cylinder block/crankcase and the crankshaft) have been inspected, before deciding what service and repair operations must be performed by an engineering works. The condition of these components will be the major factor to consider when determining whether to overhaul the original engine, or to buy a reconditioned unit. Do not. fh ere tore, purchase parts or have overhaul work done on other components until they have been thoroughly Inspected. As a general rule, time is the primary cost of an overhaul, so it does not pay to fit worn or sub-standard parts.
10 As a final note, to ensure maximum life and minimum trouble from a reconditioned engine, everything must be assembled wilh care, in a spotlessly-clean environment.
3 Engine and transmission removal -methods
and
precautions
1 If you have decided that the engine must be removed for overhaul or major repair work, several preliminary steps should be taken. 2 Locating a suitable place to work is extremely important. Adequate work space, along with storage space for the car, will be needed. If a workshop or garage Is not available, at the very least, a flat, level, clean work surface Is required. 3 Cleaning the engine compartment and engine/transmission before beginning the removal procedure wilt help keep tools clean and organised. 4 An engine hoist or A-frame will also be necessary. Make sure the equipment is rated In excess of the combined weight of the engine and transmission, Safety Ib of primary Importance, considering the potential hazards involved in lifting the engine/transmission out of the car. 5 If this is Ihe first time you have removed
an
engine, an assistant Bhould Ideally be available. Advice and aid from someone more experienced would also be helpful. There are many instances when one person cannot simultaneously perform all of the operations required when lifting the engine out of Ihe vehicle. 6 Plan the operation ahead of time. Before starting work, arrange for the hire of or obtain all of the tools and equipment you will need. Some of the equipment necessary to perform engine/transmission removal and Installation safely and wilh relative ease On addition to an engine hoist) Is as follows: a heavy duly trolley jack, complete sets of spanners and sockets as described in the reference section of this manual, wooden blocks, and plenty of rags and cleaning solvent for mopping up spitted oil, coolant and fuel. If the hoist must be hired, make sure that you arrange for it In advance, and perform all of the operations possible without it beforehand. This will save you money and time.
7 Plan for the car to be out of use for quite a while. An engineering works will be required to perform some of the work which the do-it-yourselfer cannot accomplish without special equipment. These places often have a busy schedule, so it would be a good idea to consul! them before removing the engine, in order to accurately estimate the amount of time required to rebuild or repair components that may need work, 9 Always be extremely careful when removing and refitting the engine/transmission. Serious injury can result from careless actions. Plan ahead and take your time, and a job of this nature, although major, can be accomplished successfully.