blade FIAT PUNTO 1998 176 / 1.G Owner's Manual
[x] Cancel search | Manufacturer: FIAT, Model Year: 1998, Model line: PUNTO, Model: FIAT PUNTO 1998 176 / 1.GPages: 225, PDF Size: 18.54 MB
Page 169 of 225
7B*4 Automatic transmission
2 Automatic transmission - ^ removal and refitting St
Removal 1 Select a solid, level surface to park the vehicle upon. Give yourself enough space to move around it easily. Apply the handbrake then jack up the front of the vehicle and support on axle stands (see Jacking and vehicle support). Remove both front wheels, 2 Remove the battery and mounting tray as described In Chapter 5A. 3 Remove the air cleaner and air inlet duct as described In Chapter 4A. 4 Disconnect the kickdown cable at the sector on the throttle housing and detach It from the mounting on the camshaft cover. Also release the cable from the support on the left-hand end of the cylinder head. 5 Disconnect the wiring connectors on the transmission. 6 Disconnect the fluid inlet and outlet Unas from the heat exchanger on top of the transmission. 7 Pull the fluid level dipstick from Its tube on the front of the transmission and tape over the top of the tube to prevent dirt entry. 8 Unscrew and remove the retaining pin and disconnect the speed selector cable from the top of the transmission. 9 Unscrew the upper bolt securing the starter motor to the transmission. 10 Unscrew the upper bolts securing the transmission to the engine. 11 Support the weight of the engine using a hoist attached to the engine lifting eyes, or alternatively UBO a trolley jack and block of wood beneath the engine, 12 Remove the screws and remove the front wheel arch liner from under the left-hand wheel arch. 13 Unscrew the nut securing the earth cablo to the transmission. 14 Using a punch drive out the roll pins securing both driveshafts to the final drive output shafts. 15 Unscrew and remove the bolts securing the left-hand swivel hub assembly to the front suspension strut, then separate the components and support the swivel hub on an axle stand. 16 Move the swivel hub assembly outwards and slide the inner end of the driveshaft from the splines on the transmission output shaft. Support the shaft away from the transmission to prevent damage to the gaiters. 17 Unscrew the lambdafoxygen sensor from the exhaust downpipe and position it In a safe place to prevent damage. 18 Unscrew ihe nuts securing the downpipe to Ihe exhaust manifold, then lower It and suppon on an axle stand. Recover the gasket. 19 Unscrew the knurled nut and disconnect the speedometer cable from the top of the final drive housing.
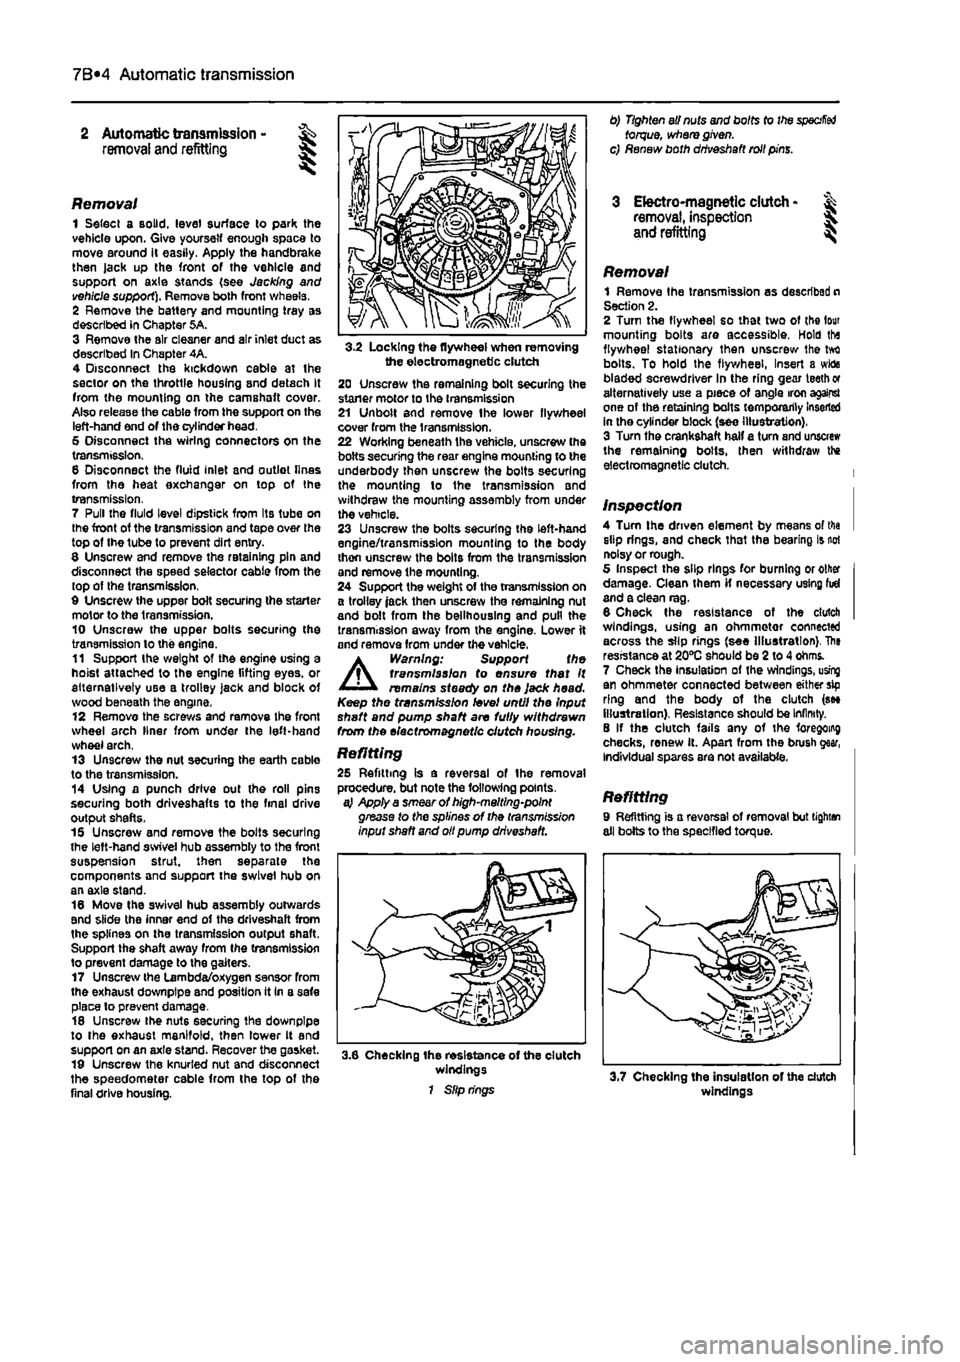
3-2 Locking the flywheel when removing the electromagnetic clutch 20 Unscrew the remaining bolt securing the staner motor to the transmission 21 Unbolt and remove Ihe lower flywheel cover from the transmission. 22 Working beneath the vehicle, unscrew the bolts securing the rear engine mounting to the underbody then unscrew the bolts securing the mounting lo the transmission and withdraw the mounting assembly from under the vehicle. 23 Unscrew the bolts securing the left-hand engine/transmission mounting to the body thon unscrew the bolts from the transmission and remove the mounting. 24 Support the weight of the transmission on a trolley jack then unscrew the remaining nut and bolt from the bellhouslng and pull the transmission away from the engine. Lower it and remove from under the vehicle.
A
Warning: Support the transmission to ensure that It remains steady on the Jack head. Keep the transmission level until the Input shaft and pump shaft are fully withdrawn from the electromagnetic clutch housing.
Refitting 25 Refitting is a reversal of the removal procedure, but note the following points. a} Apply a smear of high-melting-point grease to the splines of the transmission input shaft and oil pump driveshaft.
3.6 Checking the resistance of the clutch windings 1 Slip rings
0) Tighten all nuts and bolts to the
specified
torque, where given, c) Renew both driveshaft roll pins.
3 Electro-magnetic clutch • & removal, inspection 5. and refitting ^
Removal 1 Remove Ihe transmission as described n Section 2. 2 Turn the flywheel so that two of the lour mounting bolts are accessible, Hold tha flywheel stationary then unscrew Ihe tvrt bolts. To hold the flywheel, Insert a wida bladed screwdriver In the ring gear teeth or alternatively use a piece of angle iron against one of the retaining bolts temporarily Inserted in the cylinder block (see illustration). 3 Turn the crankshaft half a turn and unscrew the remaining bolts, then withdraw the electromagnetic clutch.
Inspection 4 Turn the driven element by means of tha slip rings, and check that the bearing is not noisy or rough. 5 Inspect the slip rings for burning or other damage. Clean them if necessary using fid and a clean rag. 6 Check the resistance of the clutch windings, using an ohmmetor connected across the slip rings (see Illustration). The resistance at 20*0 should be 2 to 4 ohms. 7 Check the Insulation of the windings, using an ohmmeter connected between either sip ring and the body of the clutch (see illustration). Resistance should be Infinity. 8 If the clutch fails any of the foregoing checks, renew it. Apart from the brush gear, Individual spares are not available.
Refitting 9 Refitting is a reversal of removal but tighten all bolts to the specified torque.
windings
Page 181 of 225
Braking system 9®5
2 Rotate the brake disc by hand and examine the whole of the surface area swept by the brake pads, on both sides ot the disc. Note: /( will bo necessary to remove the front brake pads to allow an adequate inspection of the disc's rear surface; refer to Section 2 tor details. 3 Typically, the disc surface will have a polished appearance and should be free from heavy scoring. Smooth rippling is produced by normal operation and does not indicate excessive wear. Deep scoring and cracks, however, are indications of more serious damage in need of correction. 4 If deep scoring Is discovered, it may be possible to have the disc reground to restore the surface, depending on the extent of the damage. To determine whether this is a feasible course of action, it will be necessary to measure the thickness of the disc, as described later. 5 Check the whole surface of the disc for cracks, particularly around the roadwheel bolt holes. A cracked disc mutt be renewed. 6 A ridge of rust and brake dust at the inner and outer edges of the disc, beyond the pad contact area is normal - this can be scraped tway quite easily. 7 Raised ridges caused by the brake pads eroding the disc material, however, are an indication of excessive wear. If close examination reveals such ridges, the oiicknoss of the disc must be measured, to usess whether it is still fit for use. 8 To measure the thickness of the disc, take readings at several points on the surface using a micrometer. In the area swept by the brake pads (see Illustration). Include any points where the disc has been scored: align me Jaws of the micrometer with the deepest ares of scoring, to get a true indication of the extent of the wear. Compare these ineasurements with the limits listed in the Specifications. If the disc has worn below its minimum thickness, at any point, it must be renewed. 9 If the discs are suspected of causing brake luddor, check the disc runout, using one of
me
following methods: Runout measurement -
DTI
gauge method 10 Refit the four roadwheel bolts, together
w.1h
one M14 plain washer per stud • this will ensure adequate disc to hub contact. Tighten te studs to 5 Nm (4 Ibf ft). 11 Clamp the DTI gauge to a stand and attach the stand, preferably via a magnetic oase. to the strut mounting bracket. Align the jauge so that its pointer rests upon the area of the dtsc swept by the brake pads, on an arc i mm from the outer edge of tho disc (soe illustration). 12 Zero the gauge and slowly rotate the disc trough one revolution, observing tho pointer rcovement. Note the maximum deflection recorded and compare the figure with that >«ted In Specifications.
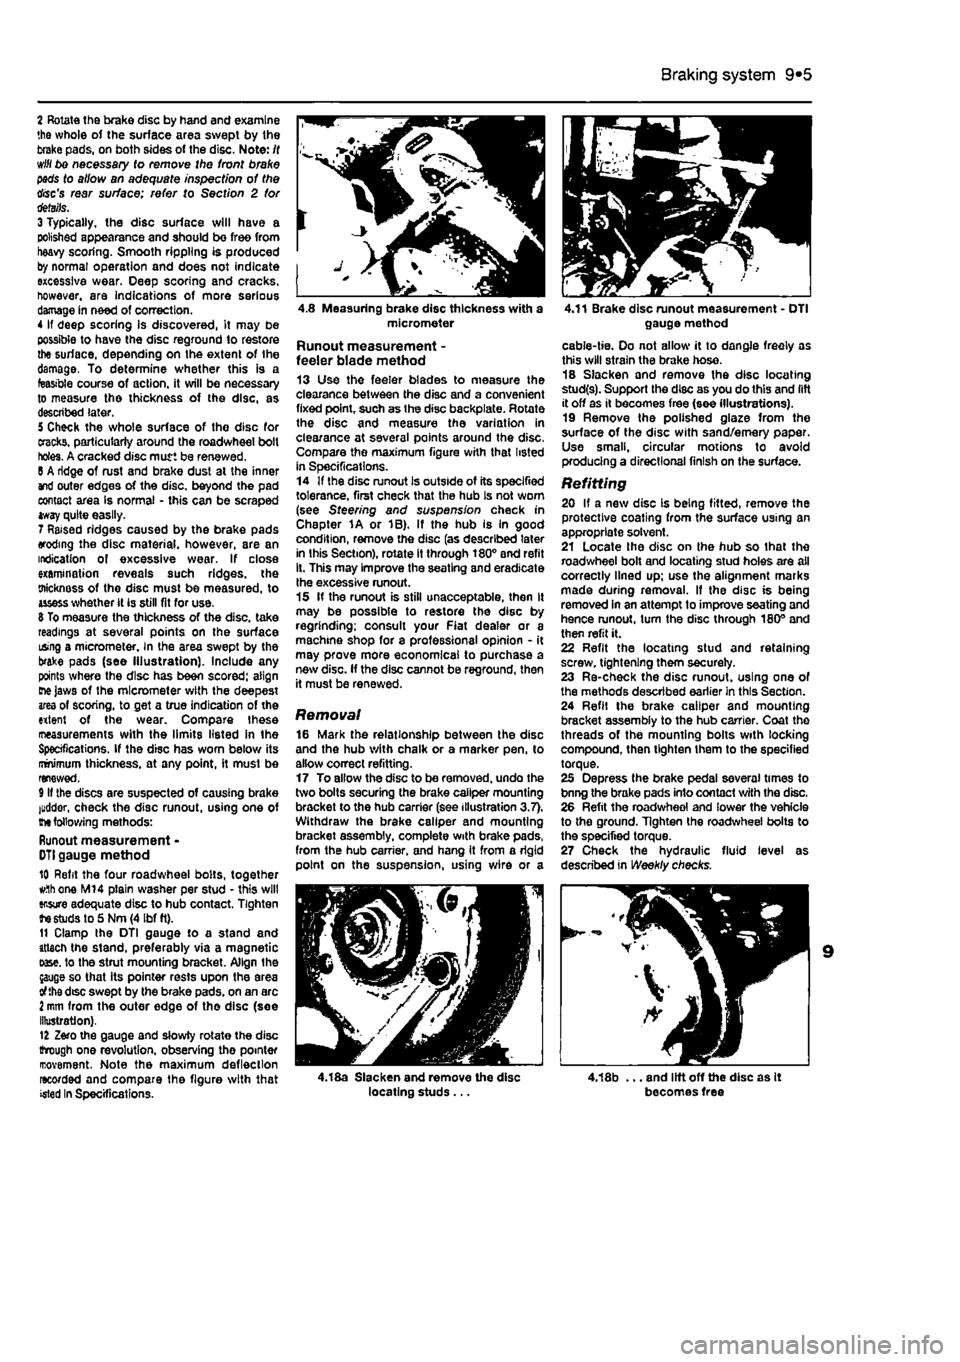
4.8 Measuring brake disc thickness with a micrometer
Runout measurement -feeler blade method 13 Use the feeler blades to measure the clearance between the disc and a convenient fixed point, such as the disc backplate. Rotate the disc and measure the variation in clearance at several points around the disc, Compare the maximum figure with that listed in Specifications. 14 If the disc runout Is outside of its specified tolerance, first check that the hub Is not worn (see Steering and suspension check in Chapter 1A or 1B). If the hub is In good condition, remove the disc (as described later in this Section), rotate it through 180° and refit it. This may improve the seating and eradicate Ihe excessive runout. 15 If the runout is still unacceptable, then It may be possible to restore the disc by regrinding; consult your Fiat dealer or a machine shop for a professional opinion - it may prove more economical to purchase a new disc. If the disc cannot be reground, then it must be renewed.
Removal 16 Mark the relationship between the disc and the hub with chalk or a marker pen, to allow correct refitting. 17 To allow the disc to be removed, undo the two bolts securing (he brake caliper mounting bracket to the hub carrier (see illustration 3.7). Withdraw the brake caliper and mounting bracket assembly, complete with brake pads, from the hub carrier, and hang it from a rigid point on the suspension, using v/lre or a
4.18a Slacken and remove the disc locating studs ...
4.11 Brake disc runout measurement - DTI gauge method
cable-tie. Oo not allow it to dangle freely as this will strain the brake hose. 18 Slacken and remove the disc locating stud(s). Support the disc as you do this and lift it off as it becomes free (see illustrations). 19 Remove the polished glaze from the surface of the disc with sand/emery paper. Use small, circular motions to avoid producing a directional finish on the surface.
Refitting 20 If a new disc Is being fitted, remove the protective coating from the surface U9ing an appropriate solvent. 21 Locate Ihe disc on ihe hub so that the roadwheel bolt and locating stud holes are all correctly lined up; use the alignment marks made during removal. If the disc is being removed in an attempt to improve seating and hence runout, turn the disc through 180° and then refit it. 22 Refit the locating stud and retaining screw, tightening them securely. 23 Re-check the disc runout, using one of the methods described earlier in this Section. 24 Refil the brake caliper and mounting bracket assembly to the hub carrier. Coat the threads of the mounting bolts with locking compound, then tighten them to the specified torque. 25 Depress the brake pedal several times to bnng the brake pads into contact with the disc. 26 Refit the roadwheel and lower the vehicle to the ground. Tighten the roadwheel bolts to the specified torque. 27 Check the hydraulic fluid level as described in Weekly checks.
4,18b ... and lift off the disc as It becomes free
Page 196 of 225
Suspension and steering 10*8
9.1 Prise the horn centre pad from the steering wheel hub unbolt the lower end of the damper from the trailing arm. 9 Lower the trailing arm gradually using a trolley jack, until the coil spring Is released from its lower seat on the trailing arm and its upper seat on the subframe. Make a note of the orientation of the coll spring, to aid correct refitting later. Refitting 10 Refitting is a reversal of removal, lighten the damper lower retaining bolt to the specified torque. Trailing arm Note: The rear stub axles are integral with the trailing arm assemblies and cannot be renewed separately. Removal 11 With reference to Chapter 9. carry out the following: a) Remove the brake drum, shoes and adjuster assembly. b) Unbolt the brake hose union from the
rear
of the wheel cylinder. c) Unbolt the brake pipe mounting bracket from the trailing arm. 12 Refer to Section 7 and remove The rear hub and beanng assembly. 13 With reference to the relevant sub-Section, unbolt the lower end of Ihe damper from the trailing arm. 14 Raise the trailing arm using a trolley jack so that the coll spring Is compressed, then slacken and withdraw the trailing arm front mounting bolL 15 With reference to the previous sub-Section, gradually lower the trailing arm using a trolley lack and remove the coll spring. 16 Allow Ihe trailing arm to hang down, then pull the leading edge of the arm down from its mounting bracket. Refitting 17 Refitting Is a reversal of removal. Tighten all suspension fixings to the specified torque settings, but delay this operation until the full weight vehicle is resting on the roadwheeis -this prevents the damper and trailing arm bushes from being strained. 18 On completion, bleed the brake hydraulic system and adjust the operation of the handbrake, with reference to Chapter 9.
9.2 Unplug the wiring from the centre pad at the connector(s)
9 Steering wheel - % removal and refitting ^
Note: This procedure does not apply to vehicles fitted with an airbag A Warning: For safety reasons, owners are strongly advisod to entrust to an authorised Fiat dealer any work which involves disturbing the airbeg system components. The airbag inflation devices contain explosive material and legislation exists to control their handling and storage. In addition, specialised test equipment Is needed to check thet the alrbag system Is fully operational following reassembly.
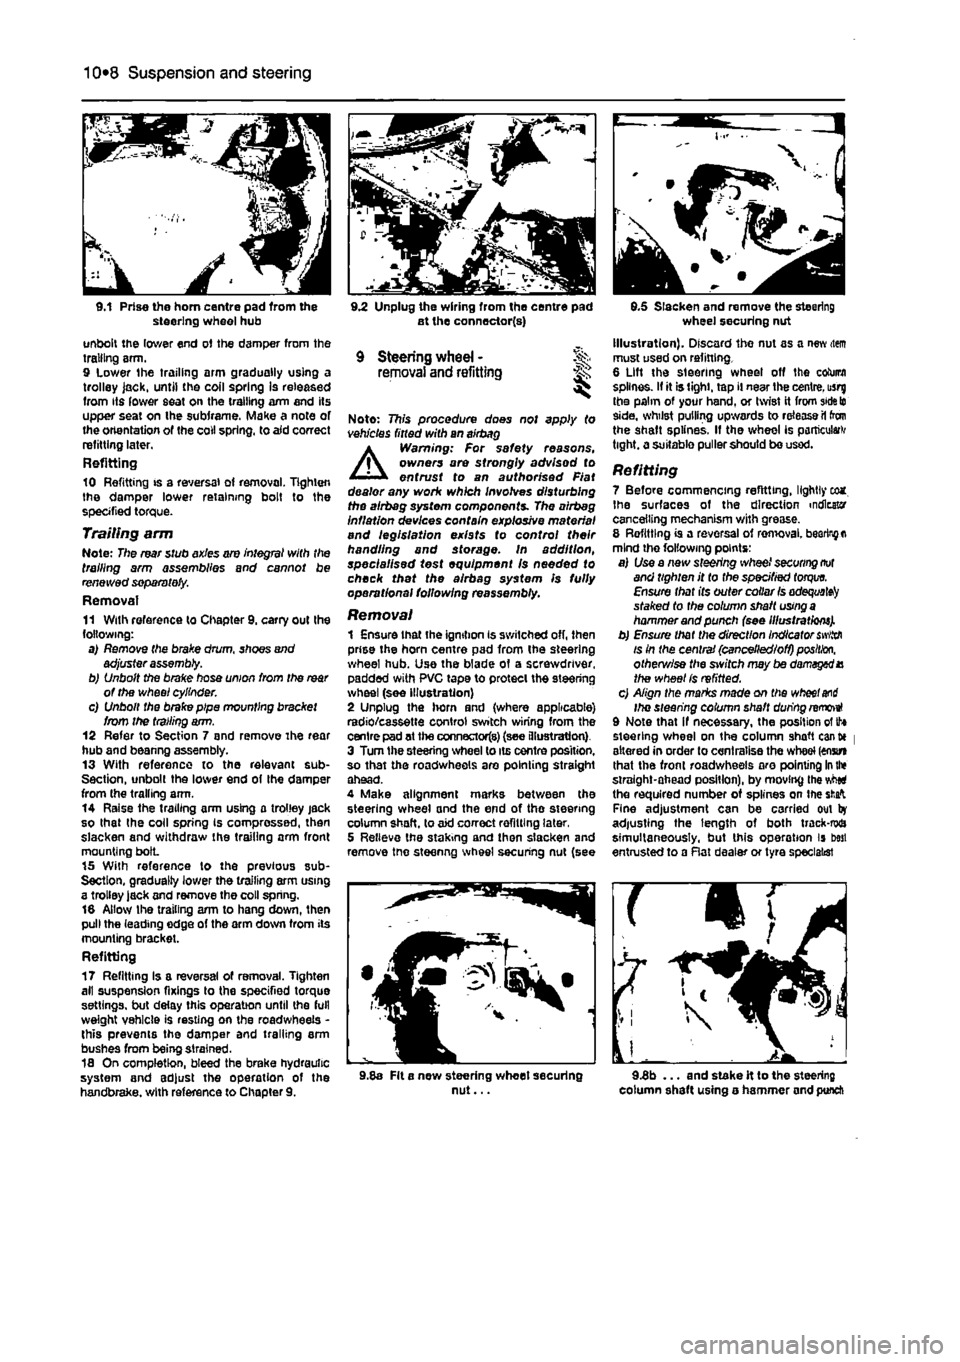
Removal 1 Ensure that the ignition is switched off, then prise the horn centre pad from the steering wheel hub. Use the blade of a screwdriver, padded with PVC tape to protect the steering wheel (see illustration) 2 Unplug the horn and (where applicable) radio/cassette control switch wiring from the centre pad at the connectors) (see illustration) 3 Turn the steering wheel to its centre position, so that the roadwheeis are pointing straight ahead. 4 Make alignment marks between the steering wheel and the end of the steering column shaft, to aid correct refitting later, 5 Relieve the staking and then slacken and remove tne steenng wheel securing nut (see
9.5 Slacken and remove the steering wheel securing nut Illustration). Discard the nut as a new item must used on refitting. 6 Lift the steering wheel off the column splines. If it is tight, tap il near the centre, usrg the palm of your hand, or twist it from
side to
side, whilst pulling upwards to release il ton the shaft splines. If the wheel is particular tight, a suitable puller should be used.
Refitting 7 Before commencing refitting, lightly eca. Ihe surfaces of the direction indicator cancelling mechanism with grease. 8 Refitting is a reversal of ren>oval.
bearing a
mind the following points: a) Use a new steering wheel
securing not
and tighten it to the specified
torque.
Ensure that its outer collar
Is adequate^
staked to the column shaft
using a
hammer and punch (see Illustrations). b) Ensure that the direction Indicator
swiith
is in the central (cancelled/off)
position,
otherv/ise the sivitch may be damaged X the wheel Is refitted. c) Align the marks made on the
wheel and
Ihe steering column shaft during removeI 9 Note that if necessary, the position of tf* steering wheel on the column shaft cant* | altered in order to centralise the wheel (enstn that the front roadwheeis aro pointing
In the
straight-ahead position), by moving the vMti the required number of splines on the
sfcafc
Fine adjustment can be carried out by adjusting the length of both track-rwa simultaneously, but this operation is best entrusted to a Rat dealer or tyre specialist
9.8a Fit a new steering wheet securing nut... 9.3b ... and stake it to the steering column shaft using o hammer and punch
Page 197 of 225
Suspension and steering 10*9
10.3 Unplug the multi-way wiring connector from the rear of tho lock assembly
10 Ignition switch/ steering column lock • ^ removal and refitting ^
Caul/on: The Ignition switch/steering column lock has on integral and-tho ft mechanism. Any attempt to rofafe tho lock shaft using tools (lo without using the correct key) results in the steering column tebg locked and Irreparable damage to the lock mechanism. This renders the vehicle
unusable
until tho lock assembly Is renewed.
Removal 1 Disconnect the battery negative terminal (refer to Disconnecting the battery In the Reference Section of this manual}. 2 Remove the lower section of the steering column shroud.
11.3a Unscrew the fixings using an Allen key...
f
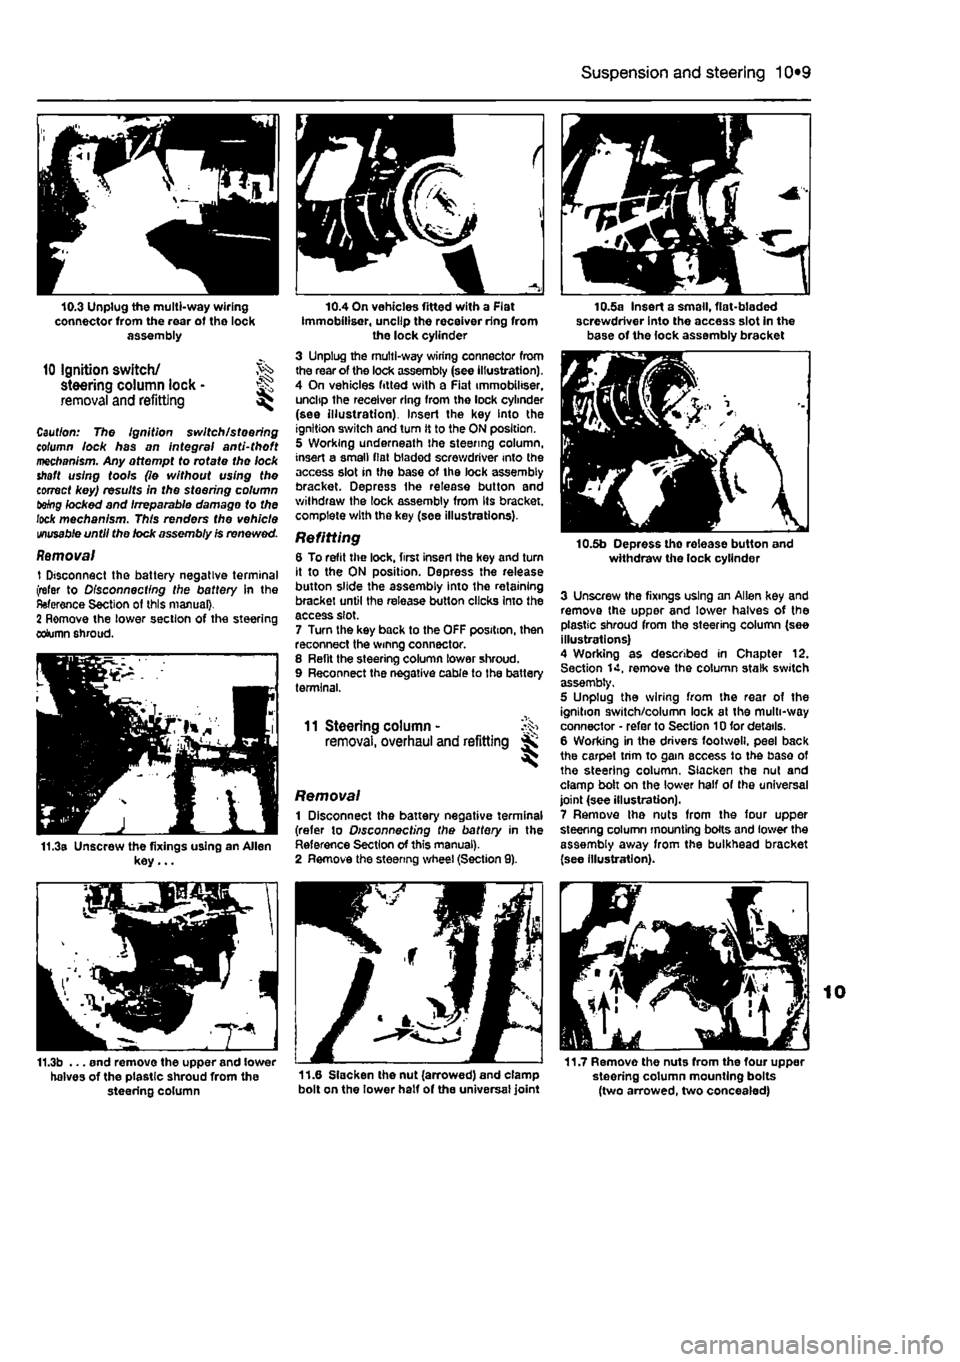
10.4 On vehicles fitted with a Flat Immobiliser, uncllp the receiver ring from the lock cylinder 3 Unplug the multi-way wiring connector from the rear of the lock assembly (see illustration). 4 On vehicles fitted with a Fiat immobiliser. uncltp the receiver ring from the lock cylinder (see illustration). Insert the key Into the ignition switch and turn it to the ON position. 5 Working underneath the steering column, insert a small fiat bladed screwdriver into the access slot in the base of the lock assembly bracket. Depress Ihe release button and withdraw the lock assembly from Its bracket, complete with the key (see illustrations).
Refitting 6 To refit the lock, first inserl the hey and turn it to the ON position. Depress the release button slide the assembly into the retaining bracket until the release button clicks Into the access slot. 7 Turn the key back to the OFF position, then reconnect the wmng connector. 8 Relit the steering column lower shroud. 9 Reconnect the negative cable to the battery terminal.
11 Steering column - ^ removal, overhaul and refitting jK
Removal 1 Disconnect the battery negative terminal (refer to Disconnecting the battery in the Reference Section of this manual). 2 Remove the steenng wheel (Section 9).
10.5a Insert a small, flat-bladed screwdriver into the access slot in the base of the lock assembly bracket
10.5b Depress tho release button and withdraw the lock cylinder
3 Unscrew the fixings using an Allen key and remove the upper and lower halves of the plastic shroud from the steering column (see illustrations) 4 Working as described in Chapter 12. Section 14. remove the column stalk switch assembly, 5 Unplug the wiring from the rear of the ignition switch/column lock at the multi-way connector • refer to Section 10 for details. 6 Working in the drivers footweli. peel back the carpet trim to gam access to the base of the steering column. Slacken the nut and clamp bolt on the lower half of the universal joint (see illustration). 7 Remove Ihe nuts from the four upper steenng column mounting bolts and lower the assembly away from the bulkhead bracket (see illustration).
11.7 Remove the nuts from the four upper steering column mounting bolts (two arrowed, two concealed)
11.3b ... end remove the upper and lower halves of the plastic shroud from the 11-6 Slacken the nut (arrowed) and clamp steering column bolt on the lower half of the universal joint
Page 203 of 225
11 *2 Bodywork and fittings
on vehicles with wax-based underbody protective coating, or the coating will be removed. Such vehicles should be inspected annually, preferably just prior lo Winter, when the underbody should be washed down, and any damage to the wax coating repaired. Ideally, a completely fresh coat should be applied. It would also be worth considering the use of such wax-based protection for injection into door panels, sills, box sections, etc, as an additional safeguard against rust damage, where such protection Is not provided by the vehicle manufacturer. After washing paintwork, wipe off with a chamois feather to give an unspotted clear finish. A coat of clear protective wax polish wilt give added protection against chemical pollutants in the air. If the paintwork sheen has duiled or oxidised, use a cleaner/polisher combination to restore the brilliance of the shine. This requires a little effort, but such dulling Is usually caused because regular washing has been neglected. Care needs to be taken with metallic paintwork, as special non-abrasive cleaner/polisher is required to avoid damage to the finish, Always check that the door and ventilator opening drain holes and pipes are completely clear, so that water can be drained out. Brightwork should be treated In the same way as paintwork. Windscreens and windows can be kept clear of the smeary film which often appears, by the use of proprietary glass cleaner. Nover use any form of wax or other body or chromium polish on glass.
Maintenance -upholstery and carpets
Mats and carpets should be brushed or vacuum-cleaned regularly, to keep them free of grit. If they are badly stained, remove them from the vehicle for scrubbing or sponging, and make quite sure they are dry before refitting. Seats and interior trim panels can be kept clean by wiping with a damp cloth. If they do become stained (which can be more apparent on light-coloured upholstery), use a little liquid detergent and a soft nail brush lo scour the grime out of the grain of the material. Do not forget to keep the headlining clean in the same way as the upholstery. When using liquid cleaners inside the vehicle, do not over-wet the surfaces being cleaned. Excessive damp could get Into the seams and padded interior, causing stains, offensive odours or even rot.
If the Inside of the vehicle gets wet accidentally, tt Is worthwhile taking some trouble to dry ft out property, particularly where carpets an involved. Do not leave oil or electric heaters inside the vehicle for this purpose.
4 Minor body damage -repair
Repairs of minor scratches In bodywork If the scratch Is very superficial, and does not penetrate to the metal of the bodywork, repair is very simple. Lightly rub the area of the scratch with a paintwork renovator, or a very fine cutting paste, to remove loose paint from the scratch, and to clear the surrounding bodywork of wax polish, Rinse the area with clean water. Apply touch-up paint to ihe scratch using a fine paint brush; continue to apply fine layers of paint until the surface of the paint In the scratch Is level with the surrounding paintwork. Allow Ihe new paint at least two weeks to harden, then blend it Into the surrounding paintwork by rubbing the scratch area with a paintwork renovator or a very fine cutting paste. Finally, apply wax polish. Where the scratch has penetrated right through to the metal of the bodywork, causing the metal to rust, a different repair technique Is required. Remove any loose rust from the bottom of the scratch with a penknife, then apply rust-inhibiting paint to prevent the formation of rust in the future. Using a rubber or nylon applicator, fill the scratch with bodystopper paste. If required, this paste can be mixed with cellulose thinners to provide a very thin paste which is ideal for filling narrow scratches. Before the stopper-paste in Ihe scratch hardens, wrap a piece of smooth cotton rag around the top of a finger. Dip the finger in cellulose thinners, and quickly sweep it across the surface of the stopper-paste in the scratch: this will ensure that the surface of the stopper-paste is slightly hollowed. The scratch can now be painted over as described earlier In this Section.
Repairs of dents in bodywork When deop denting of the vehicle's bodywork has taken place, the first task is to put) the dent out. until the affected bodywork almost attains rts onginal shape. There is little polnl in trying to restore Ihe original shape completely, as the metal in the damaged area will have stretched on impact, and cannot be reshaped fully to its original contour. It Is better to bring the level of the dent up to a point which is about 3 mm below the level of the surrounding bodywork. In cases where Ihe dent is very shallow anyway, It is not worth trying to pull it out at all. If the underside of the dent is accessible, it can be hammered out gently from behind, using a mallet with a wooden or plastic head, Whilst doing this, hold a suitable block of wood firmly against (he outside of Ihe panel, to absorb the impact from the hammer blows and thus prevent a large area of the bodywork from being 'belled-out".
Should the dent be In a section of (I* bodywork which has a double skin, or seme other factor making It Inaccessible from behind, a different technique is called for. Dull several small holes through the metal inside Ihe area - particularly in the deeper section. Then screw long self-tapping screws Into the holes, just sufficiently for them to gain a good purchase in the metal. Now the dent can be pulled out by pulling on the protruding heads of the screws with a pair of pliers. The next stage of the repair Is the removal of the paint from the damaged area, and from an inch or so of the surrounding 'sound' bodywork. This is accomplished most easily by using a wire brush or abrasive pad on a posver drill, although it can be done just as effectively by hand, using sheets of abrasive paper. To complete the preparation for filling, score the surface of the bare metal wflhi screwdriver or the tang of 8 file, or alternatively, drill small holes In the affected area. This will provide a really good 'key' for the filler paste. To complete the repair, see the Section on filling and respraying.
Repairs of rust holes or gashes in bodywork Remove all paint from the affected area, and from an inch or so of the surrounding 'sound' bodywork, using an abrasive pad
or a
wire brush on a power drill. If these are not available, a few sheets of abrasive paper wil do the job most effectively. With the paint removed, you will be able to judge the severity of the corrosion, and therefore decide whether to renew the whole panel (if this is possible) or to repair the affected area. New body panels are not as expansive as most people think, and it is often quicker and more satisfactory to fit a new panel than to attempt to repair large areas of corrosion. Remove all fittings from Ihe affected area, except those which will act as a guide to ttie original shape of the damaged bodywork (eg headlight shells etc). Then, using tin snips
or a
hacksaw blade, remove all loose metal snd any other metal badly affected by corrosion. Hammer the edges of the hole inwards, in order to create a slight depression for the filer paste. Wire-brush the affected area to remove tha powdery rust from the surface of the remaining metal. Paint Ihe affected area with rust-inhibiting paint, if the beck of the rusted area is accessible, treat this also. Before filling can take place, ft will be necessary to block the hole in some
way.
TNs can be achieved by the use of aluminium cr plastic mesh, or aluminium tape. Aluminium or plastic mesh, or glass-fibre matting, is probably the best material to use for a large hole. Cut a piece to tha approximate size and shape of tho hole to b« filled, then position it In the hole so that its edges are below the level of the surrounding bodywork. It can be retained in position by
Page 208 of 225
Bodywork and fittings
11
*7
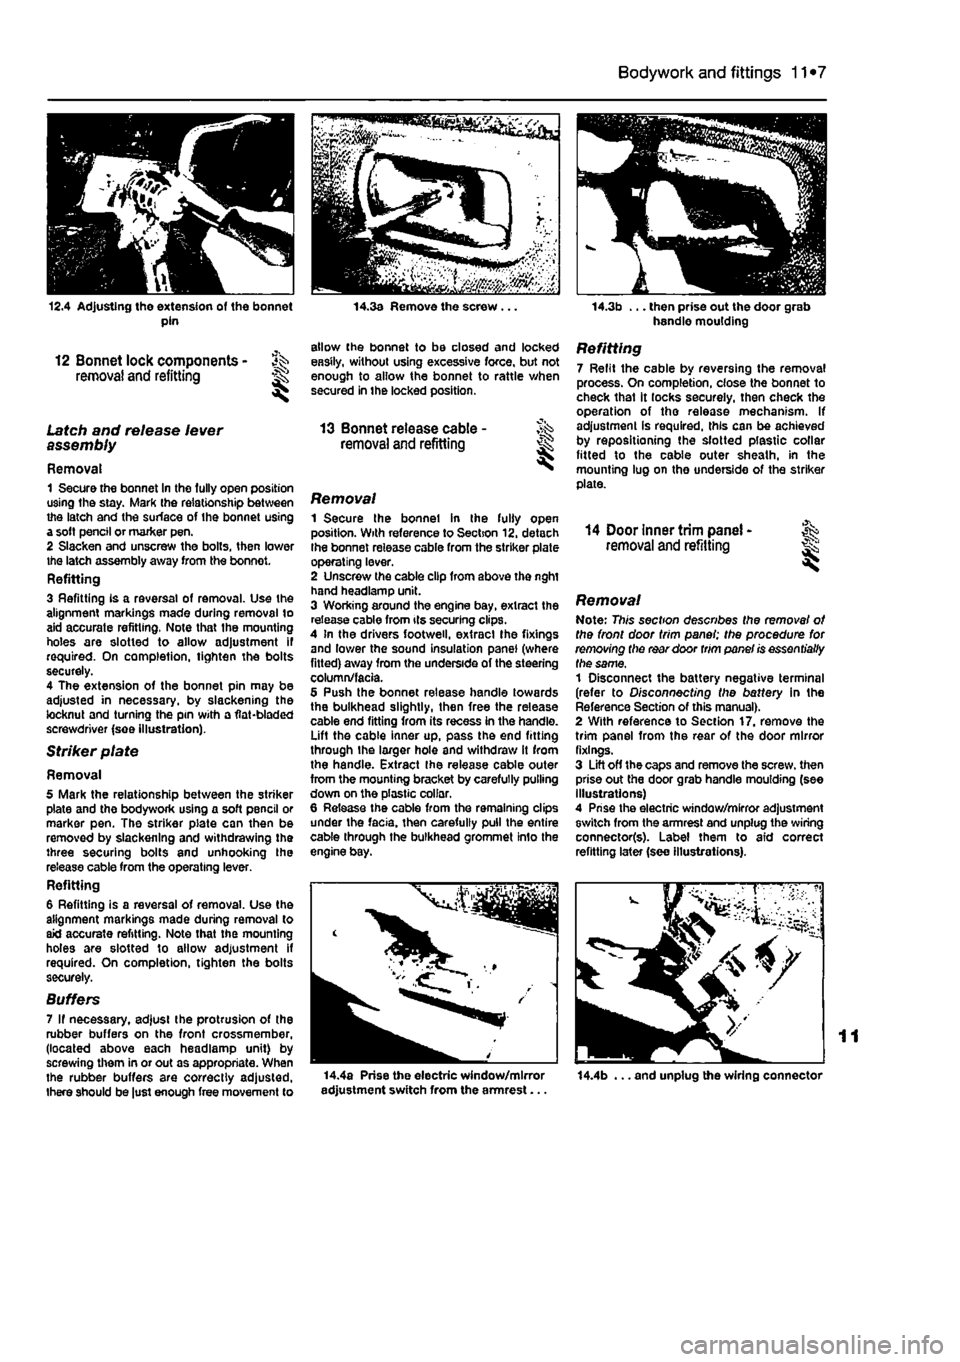
12.4 Adjusting the extension of the bonnet pin
12 Bonnet lock components - ^ removal and refitting H
Latch and release lever assembly
Removal 1 Secure the bonnet In the fully open position using the stay. Mark the relationship between the latch and the surface of the bonnet using a soft pencil or marker pen. 2 Slacken and unscrew the bolts, then lower the latch assembly away from the bonnot. Refitting 3 Refitting is a reversal of removal. Use the alignment markings made during removal to aid accurate refitting. Note that the mounting holes are slotted to allow adjustment if required. On completion, tighten the bolts securely. 4 The extension of the bonnet pin may be adjusted in necessary, by slackening the locknut and turning the pin with a flat-bladed screwdriver (see illustration).
Striker plate
Removal 5 Mark the relationship between the striker plate and the bodywork using a soft pencil or marker pen. The striker plate can then be removed by slackening and withdrawing the three securing bolts and unhooking the release cable from the operating lever. Refitting 6 Refitting is a reversal of removal. Use the alignment markings made during removal to aid accurate refitting. Note that the mounting holes are slotted to allow adjustment if required. On completion, tighten the bolts securely.
Suffers 7 If necessary, adjust the protrusion of the rubber buffers on the front crossmember, (located above each headlamp unit) by screwing them in or out as appropriate. When the rubber buffers are correctly adjusted, there should be just enough free movement to
14.3a Remove the screw .
allow the bonnet to be closed and locked easily, without using excessive force, but not enough to allow the bonnet to rattle when secured in the locked position.
13 Bonnet release cable -removal and refitting I
Removal 1 Secure the bonnet in the fully open position. With reference to Section 12, detach Ihe bonnet release cable from the striker plate operating lever. 2 Unscrew the cable clip from above the nght hand headlamp unit. 3 Working around the engine bay, extract the release cable from its securing clips. 4 In the drivers footweil, extracl Ihe fixings and lower the sound insulation panel (where fitted) away from the underside of the steering column/facia. 5 Push the bonnet release handle towards the bulkhead slightly, then free the release cable end fitting from its recess in the handle. Lift the cable inner up, pass the end fitting through the larger hole and withdraw it from the handle. Extract the release cable outer from the mounting bracket by carefully pulling down on the plastic collar. 6 Release the cable from the remaining clips under the facia, then carefully pull the entire cable through the bulkhead grommet Info the engine bay.
14.3b ... then prise out the door grab handle moulding
Refitting 7 Refit the cable by reversing the removal process. On completion, close the bonnet to check that it locks securely, then check the operation of tho release mechanism. If adjustment is required, this can be achieved by repositioning the slotted plastic collar fitted to the cable outer sheath, in the mounting lug on the underside of the striker plate.
14 Door inner trim panel -removal and refitting I
Removal Note: This section describes the removal of the front door trim panel; the procedure for removing the rear door trim panel is essentially the same, 1 Disconnect the battery negative terminal (refer to Disconnecting the battery in the Reference Section of this manual). 2 With reference to Section 17. remove the trim panel from the rear of the door mirror fixings. 3 Lift off the caps and remove the screw, then prise out the door grab handle moulding (see Illustrations) 4 Prise the electric window/mirror adjustment switch from the armrest and unplug the wiring connector(s). Label them to aid correct refitting later (see illustrations).
14.4a Prise the electric window/mirror adjustment switch from the armrest... 14.4b ... and unplug the wiring connector
Page 209 of 225
11
*8 Bodywork and fittings
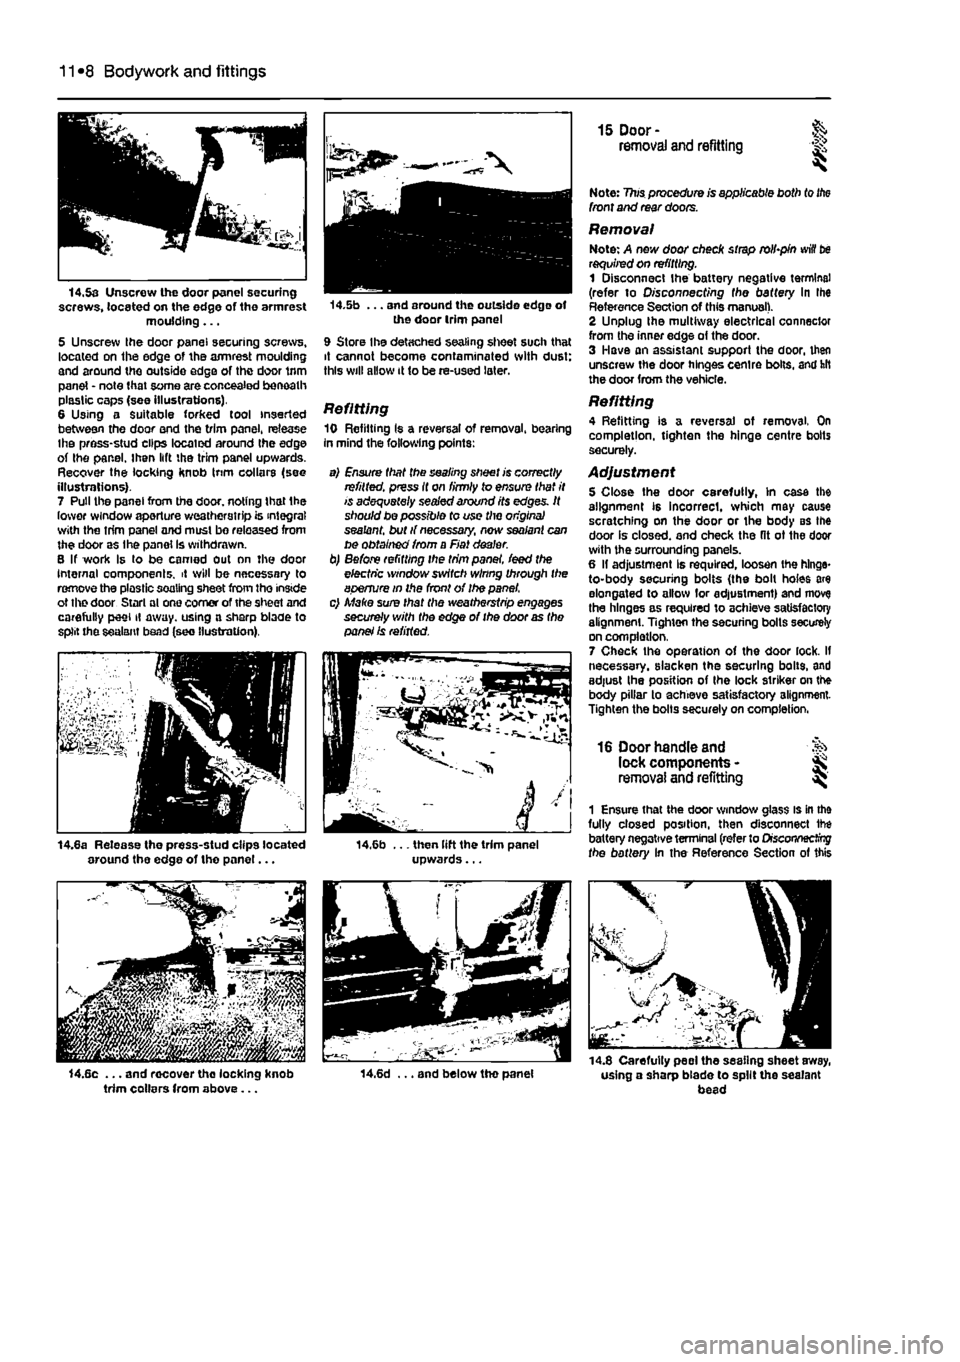
14.5a Unscrew the door panel securing screws, located on the edge of the armrest moulding... 5 Unscrew Ihe door panel securing screws, located on Ihe edge of the armrest moulding and around the outside edge of the door trim panel - note that some are concealed beneath plastic caps (see illustrations). 6 Using a Suitable forked tool inserted between the door end the trim panel, release Ihe press-stud clips located around Ihe edge of Ihe panel. Ihen lift the trim panel upwards. Recover the locking knob Inm collars (see illustrations). 7 Pull the panel from the door, noting that Ihe lower window aperture weatherstrip is integral with the trim panel and must bo released from the door as the panel Is withdrawn. B If work Is lo be earned out nn the door Internal oomponenls. it will be necessary to remove the plastic soaling sheet from tho inside ot the door Starl ol one comer of the sheet and carefully peel il away, using a sharp blade to split the sealant bead (see (lustration).
j
14.8a Release the press-stud clips located around the edge of tho panel...
trim collars from above...
14.5b ... and around the outside edge of the door trim panel
9 Store Ihe detached sealing sheet such that it cannot become contaminated with dust: this will allow it to be re-used later.
Refitting 10 Refilling Is a reversal of removal, bearing in mind the following points:
a) Ensure that the sealing sheet is correctly refitted, press it on firmly to ensure that it is adequately sealed around its edges. It should be possible fo use the origins} sealant, but if necessary, new sealant can be obtained from a Fiat dealer. b) Before refitting the trim panel, feed the electric window switch wlnng through the aperture in the front of Ihe panel. c) Make sure that the weatherstrip engages securely with the edge of the door as the panel Is refitted.
i4,6b ... then lift the trim panel upwards...
14.6d ... and below tho panel
15 Door- & removal and refitting is
Note: 7?ws procedure is applicable both to
the
front and rear doors.
Removal Note: A new door check strap rolbpin
win
be requited on refitting. 1 Disconnect the battery negative terminal (refer to O/sconoecf/ng fhe battery In Ihe Reference Section of this manual). 2 Unplug Ihe multiway electrical connector from the inner edge of the door. 3 Have an assistant support the door, then unscrew the door hinges centre bolts, and hit the door from the vehicle.
Refitting 4 Refitting is a reversal of removal. On completion, tighten the hinge centre bolts securely.
Adjustment 5 Close the door carefully, In case the alignment is incorrect, which may cause scratching on the door or the body BS the door is closed, and check the fit ot the door with the surrounding panels. 6 II adjustment Is required, loosen the hinge-to-body securing bolts (the bolt holes are elongated to allow lor adjustment) and move the hinges as required to achieve satisfactory alignment. Tighten the securing bolls securely on completion. 7 Check the operation of the door lock. If necessary, slacken the securing bolts, and adjust Ihe position of Ihe lock striker on the body pillar to achieve satisfactory alignment-Tighten the bolts securely on completion,
16 Door handle and lock components -removal and refitting ^
1 Ensure that the door window glass is in the fully closed position, then disconnect ihe battery negative terminal (refer to Drscoryiecfrrg fhe battery In the Reference Section of this
•
m-i -14.8 Carefully peel the sealing sheet away, using a sharp blade to spilt the sealant bead
Page 223 of 225
12*10 Body electrical systems
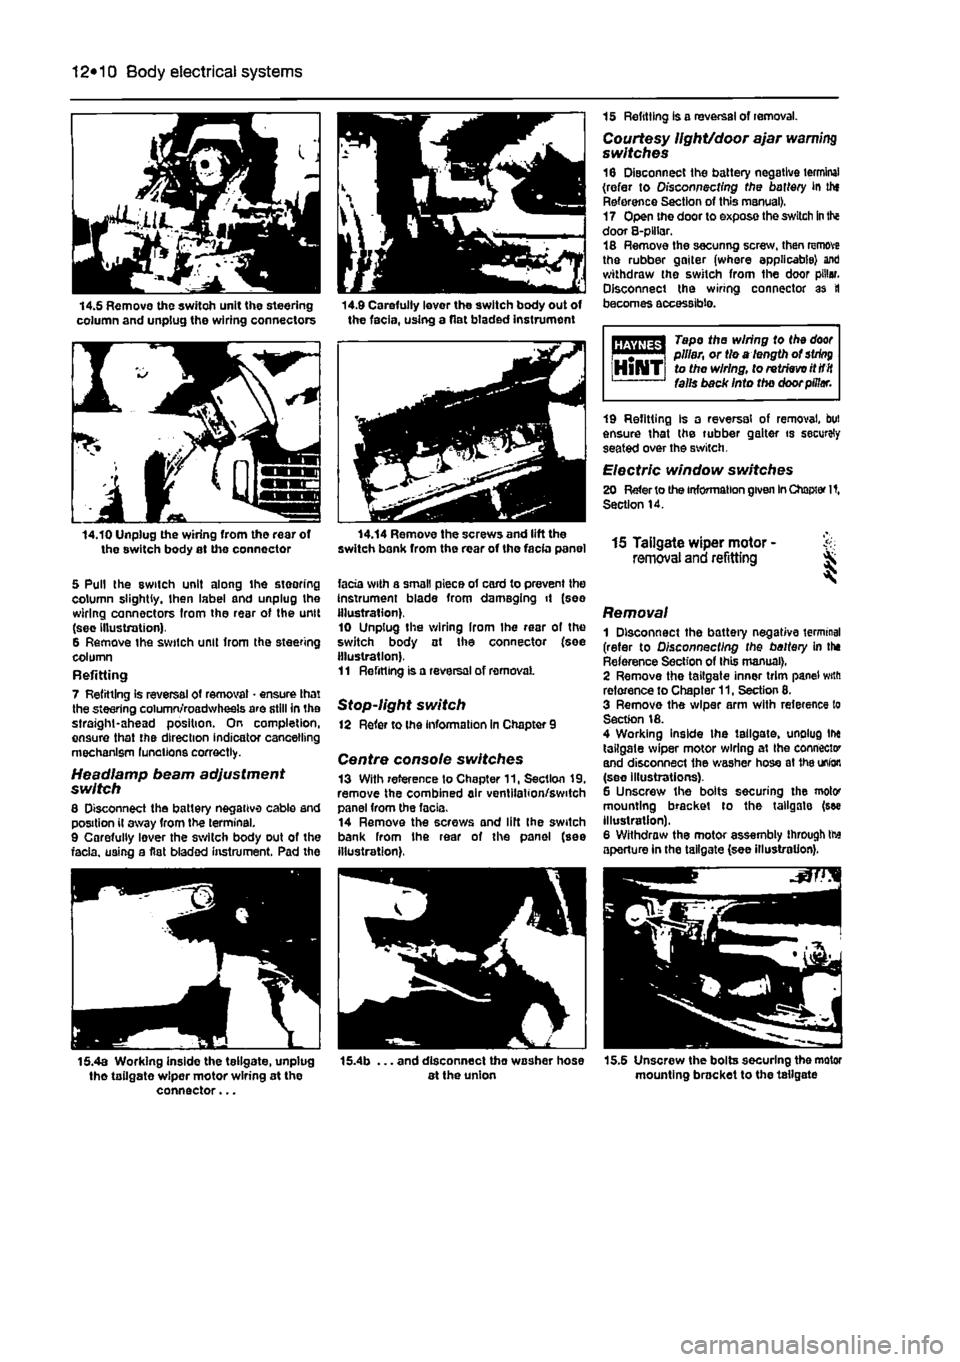
14.5 Remove the switch unit the steering column and unplug the wiring connectors 14.9 Carefully lever the switch body out of the facia, using a flat btaded instrument
14.10 Unplug the wiring from tho rear of the switch body at the connector
5 Pull the switch unit along ihe steering column slightly, then label and unplug the wiring connectors from the rear of the unit (sec Illustration). 6 Remove the switch unit from the steering column Refitting 7 Refitting is reversal of removal • ensure that the steering column/roadwheels are still in the straight-ahead position. On completion, ensure that the direction indicator cancelling mechanism lunations correctly.
Headlamp beam adjustment switch 8 Disconnect the battery negative cable and position il away from the terminal. 9 Carefully lever the switch body out of the facia, using a flat bladed instrument. Pad the
15 Refitting is a reversal of removal. Courtesy light/door ajar warning switches 16 Disconnect the battery negative terminal (refer to Disconnecting the battery in thf Reference Section of this manual). 17 Open the door to expose the switch
in
the door 8-plHar. 18 Remove the secunng screw, then remove the rubber gaiter (where applicable) ant) withdraw the switch from the door pillar. Disconnect the wiring connector as tl becomes accessible.
Tape the wiring to the
door
i m | pillar, or tie a length of
string
HlNTi to the wiring, to retrieve itttit falls back Into the door pillar.
14.14 Remove the screws and lift the switch bank from the rear of the facia panel
facia with a small piece of card to prevent the Instrument blade from damaging it (see illustration). 10 Unplug the wiring Irom Ihe rear of the switch body at Ihe connector (see illustration). 11 Refitting is a reversal of removal
Stop-light switch 12 Refer to the information in Chapter 9
Centre console switches 13 With reference to Chapter 11, Section 19, remove the combined air ventilation/switch panel from the facia. 14 Remove the screws and lift Ihe switch bank from Ihe rear of the panel (see illustration),
19 Refitting Is a reversal of removal, but ensure that the rubber gaiter is securely seated over the switch.
Electric window switches 20 Refer to the information given
In
Chapter It, Section 14.
15 Tailgate wiper motor - & removal and refitting ^
Removal 1 Disconnect the battery negative terminal (refer to Disconnecting the battery in the Reference Section of this manual), 2 Remove the tailgate inner trim panel with reference to Chapter 11, Section 8. 3 Remove the wiper arm with reference to Section 18. 4 Working inside the tailgate, unplug tlx tailgate wiper motor wiring at Ihe connector and disconnect the washer hose at
1he
union (see illustrations). 6 Unscrew the bolts securing the motor mounting bracket to the tailgate (see illustration). 6 Withdraw the motor assembly through tte aperture in the tailgate (see illustration).
15.4a Working inside the tellgate, unplug tho tailgate wiper motor wiring at the connector...
. and disconnect tho washer hose at the union 15.5 Unscrew the bolts securing the motor mounting bracket to the tailgate
Page 225 of 225
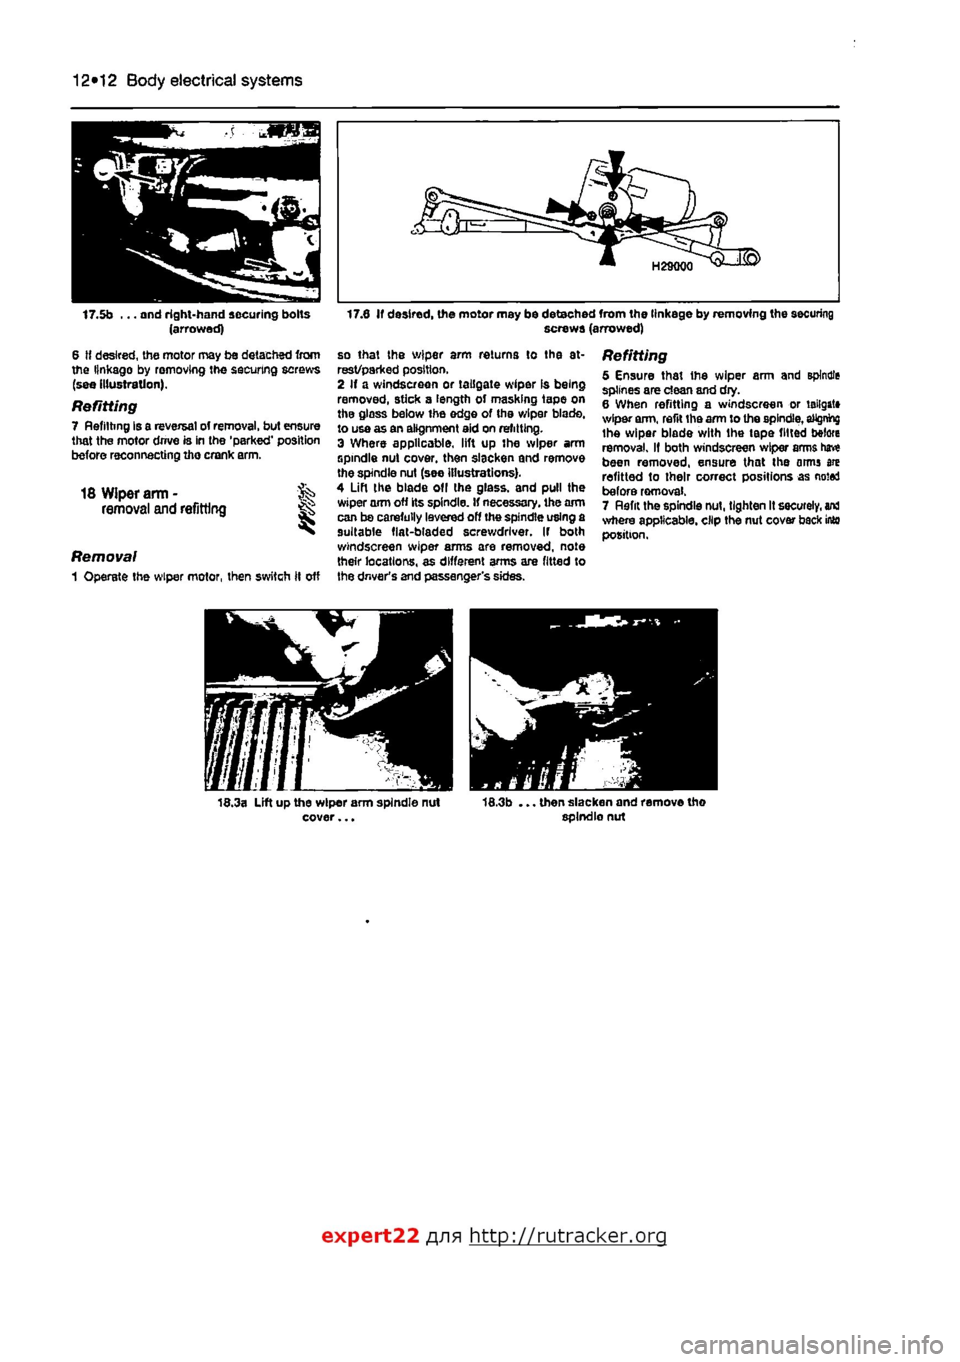
12*12 Body electrical systems
17.0 If desired, the motor may be detached from the linkage by removing the securing screws (arrowed) 17.5b ... and right-hand securing bolts (arrowed)
6 If desired, the motor may be detached from the linkage by removing the securing screws (see illustration).
Refitting 7 Refitting Is a reversal of removal, but ensure that the motor drrve is in the 'parked' position before reconnecting ihe crank arm.
18 Wiper arm - fe removal and refitting
Removal 1 Operate the wiper motor, then switch ft off
so that the wiper arm returns to tha at-rest/parked position, 2 If a windscreen or tailgate wiper Is being removed, stick a length of masking tape on tha glass below ihe edge of tha wiper blade, to use as an alignment aid on refitting. 3 Where applicable, lift up the wiper arm spindle nut cover, then slacken and remove the spindle nut (see illustrations). 4 Lift the blade of
I
the glass, and pull the wiper arm off its spindle. If necessary, the aim can be carefully lavered off the spindle using a suitable fiat-bladed screwdriver. If both windscreen wiper arms are removed, note their locations, as different arms are fitted to the driver's and passenger's sides.
Refitting 5 Ensure that the wiper arm and spindle splines are dean and dry. 6 When refitting a windscreen or tailgate wiper arm, refit tha arm to the spindle,
aMgnhg
the wiper blade with the tape fitted before removal. If both windscreen wiper arms have been removed, ensure that the arms are refitted to their correct positions as noted before removal. 7 Rflfit the spindle nut, tighten It securely,
ana
where applicable, clip the nut cover back into position.
expert22 fl/in http://rutracker.org