Automatic lights FIAT PUNTO EVO 2010 1.G Owners Manual
[x] Cancel search | Manufacturer: FIAT, Model Year: 2010, Model line: PUNTO EVO, Model: FIAT PUNTO EVO 2010 1.GPages: 270, PDF Size: 8.34 MB
Page 19 of 270
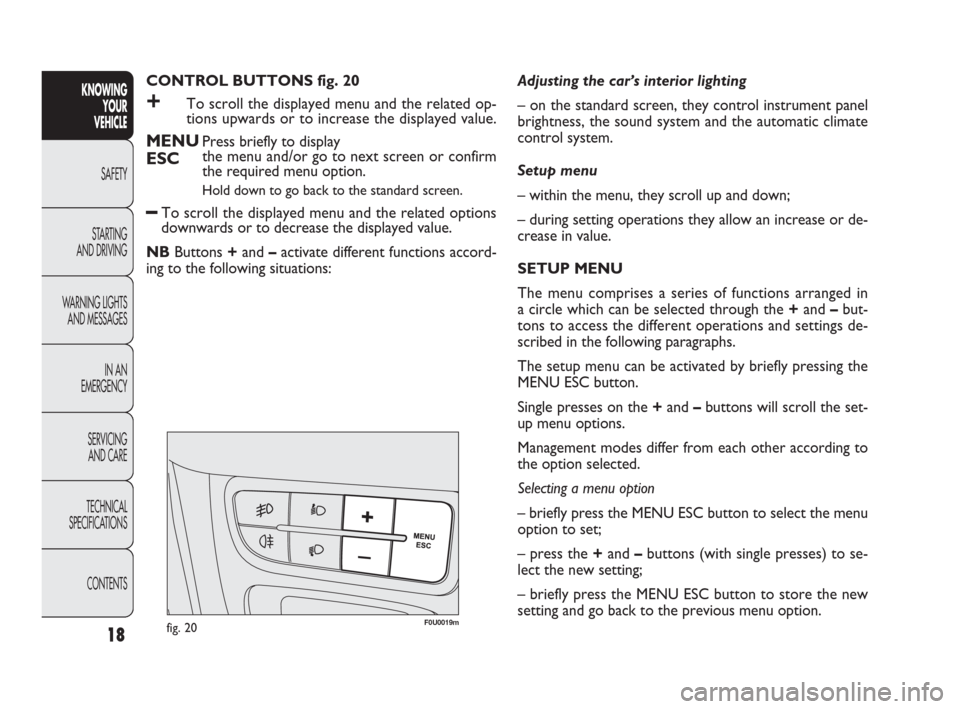
CONTROL BUTTONS fig. 20
+To scroll the displayed menu and the related op-
tions upwards or to increase the displayed value.
MENUPress briefly to display
ESCthe menu and/or go to next screen or confirm
the required menu option.
Hold down to go back to the standard screen.
–To scroll the displayed menu and the related options
downwards or to decrease the displayed value.
NBButtons +and –activate different functions accord-
ing to the following situations:Adjusting the car’s interior lighting
– on the standard screen, they control instrument panel
brightness, the sound system and the automatic climate
control system.
Setup menu
– within the menu, they scroll up and down;
– during setting operations they allow an increase or de-
crease in value.
SETUP MENU
The menu comprises a series of functions arranged in
a circle which can be selected through the +and –but-
tons to access the different operations and settings de-
scribed in the following paragraphs.
The setup menu can be activated by briefly pressing the
MENU ESC button.
Single presses on the +and –buttons will scroll the set-
up menu options.
Management modes differ from each other according to
the option selected.
Selecting a menu option
– briefly press the MENU ESC button to select the menu
option to set;
– press the +and –buttons (with single presses) to se-
lect the new setting;
– briefly press the MENU ESC button to store the new
setting and go back to the previous menu option.
CONTENTS TECHNICAL
SPECIFICATIONSSERVICING
AND CAREIN AN
EMERGENCY WARNING LIGHTS
AND MESSAGESSTARTING
AND DRIVINGSAFETY
KNOWING
YOUR
VEHICLE
18
F0U0019mfig. 20
001-036 PUNTO FL EN 4ed 18-01-2010 12:21 Pagina 18
Page 26 of 270
25
KNOWING
YOUR
VEHICLE
SAFETY
STARTING
AND DRIVING
WARNING LIGHTS
AND MESSAGES
IN AN
EMERGENCY
SERVICING
AND CARE
TECHNICAL
SPECIFICATIONS
CONTENTS
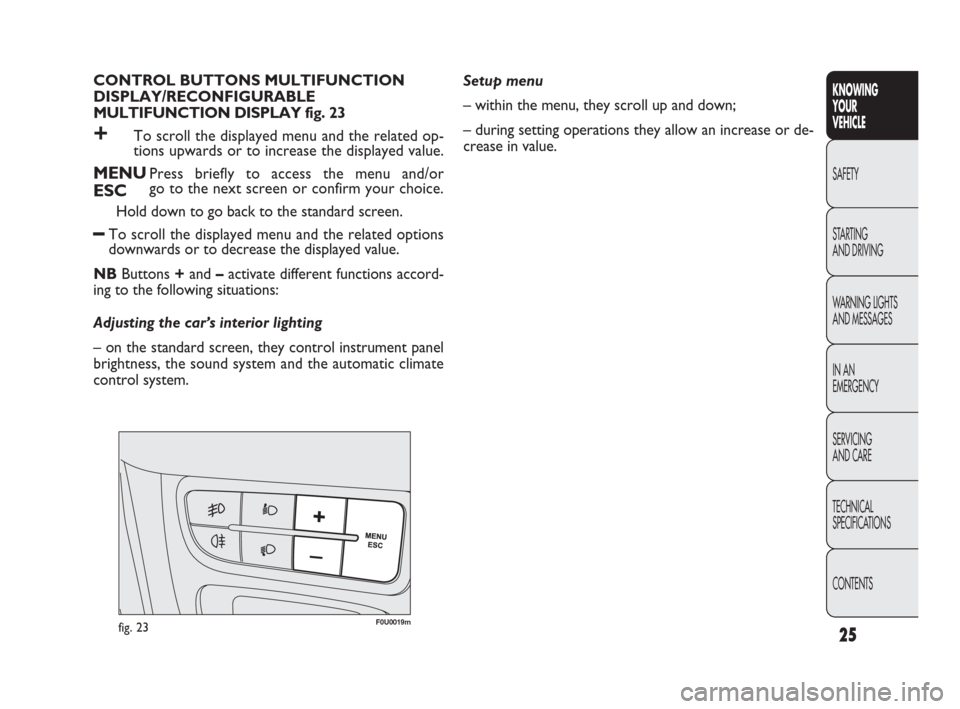
CONTROL BUTTONS MULTIFUNCTION
DISPLAY/RECONFIGURABLE
MULTIFUNCTION DISPLAY fig. 23
+To scroll the displayed menu and the related op-
tions upwards or to increase the displayed value.
MENUPress briefly to access the menu and/or
ESCgo to the next screen or confirm your choice.
Hold down to go back to the standard screen.
–To scroll the displayed menu and the related options
downwards or to decrease the displayed value.
NBButtons +and –activate different functions accord-
ing to the following situations:
Adjusting the car’s interior lighting
– on the standard screen, they control instrument panel
brightness, the sound system and the automatic climate
control system.Setup menu
– within the menu, they scroll up and down;
– during setting operations they allow an increase or de-
crease in value.
F0U0019mfig. 23
001-036 PUNTO FL EN 4ed 18-01-2010 12:21 Pagina 25
Page 33 of 270
32
KNOWING
YOUR
VEHICLE
SAFETY
STARTING
AND DRIVING
WARNING LIGHTS
AND MESSAGES
IN AN
EMERGENCY
SERVICING
AND CARE
TECHNICAL
SPECIFICATIONS
CONTENTS
AUTOCLOSE
(Automatic central locking with car moving)
When activated (On), this function automatically locks the
doors when the car speed exceeds 20 km/h.
To activate (On) or deactivate (Off) this function, proceed
as follows:
– press the MENU ESC button briefly: the display will show
a submenu;
– briefly press MENU ESC: On or Off will flash on the dis-
play (depending on previous setting);
– press +or –to make your choice;
– briefly press the MENU ESC button to go back to the
submenu screen or hold the button down to go back to
the main menu screen without saving;
– hold down MENU ESC again to go back to the standard
screen or main menu, depending on which point in the
menu you have reached. – briefly press the MENU ESC button to go back to the
menu screen or hold the button down to go back to the
standard screen without saving.
When the key is turned to MAR and the initial check stage
is over, the display will show the information selected via
the “First page” menu function.
SEE RADIO
(Relaying audio information)
With this function the display shows information relevant
to the sound system.
– Radio: selected radio station frequency or RDS message,
automatic tuning activation or AutoSTore;
– CD, MP3: track number;
– CD Changer: CD number and track number;
To show the sound system information in the display (On)
or clear it (Off), proceed as follows:
– briefly press MENU ESC: On or Off will flash on the dis-
play (depending on previous setting);
– press +or –to make your choice;
– briefly press the MENU ESC button to go back to the
menu screen or hold the button down to go back to the
standard screen without saving.
001-036 PUNTO FL EN 4ed 18-01-2010 12:22 Pagina 32
Page 36 of 270
35
KNOWING
YOUR
VEHICLE
SAFETY
STARTING
AND DRIVING
WARNING LIGHTS
AND MESSAGES
IN AN
EMERGENCY
SERVICING
AND CARE
TECHNICAL
SPECIFICATIONS
CONTENTS
BUTTON VOLUME
(Adjusting the button volume)
This function may be used to adjust (over 8 levels) the vol-
ume of the noise made when the MENU ESC, +e –but-
tons are pressed.
To set the desired volume, proceed as follows:
– briefly press MENU ESC: the previously set volume lev-
el will flash on the display;
– press +or –to set the value;
– briefly press the MENU ESC button to go back to the
menu screen or hold the button down to go back to the
standard screen without saving.
SEAT BELT BUZZ
(SBR buzzer reactivation
(for versions/markets where provided)
This function can be displayed only after a Fiat Dealer-
ship has deactivated the SBR system (see “SBR system”
in the “Safety” section).SERVICE
(Scheduled servicing)
Through this function it is possible to display information
related to regular scheduling intervals.
This information can be consulted as follows:
– briefly press MENU ESC: service intervals in km or mi,
depending on the previous setting, will be displayed (see
“Measurement units”);
– press the MENU ESC button briefly to return to the
menu screen or hold the button down to return to the
standard screen.
NBThe “Scheduled Servicing Plan” requires the vehicle
to be serviced every 30,000 km (or 18,000 mi). This indi-
cation will appear automatically, with the key at MAR, start-
ing from 2,000 km (or 1,240 mi) and will be displayed every
200 km (or 124 mi). Below 200 km the signals become
more frequent. The indication will appear in kilometres or
miles depending on the unit of measurement settings.
When the next scheduled service is approaching, the mes-
sage “Service” will appear on the display, followed by the
number of kilometres or miles left, when the key is turned
to MAR. Go to a Fiat Dealership, where the “Scheduled
Servicing Plan” operations will be performed and the mes-
sage will be reset.
001-036 PUNTO FL EN 4ed 18-01-2010 12:22 Pagina 35
Page 39 of 270
38
F0U0022mfig. 28
New journey
The new journey begins after:
– “manual” resetting by the user, by pressing the relevant
button;
– “automatic” resetting, when the distance travelled reach-
es 99,999.9 km or when the journey time reaches 99.59
(99 hours and 59 minutes);
– disconnection and subsequent reconnection of the bat-
tery.
IMPORTANT The reset operation when “Trip A” details
are being displayed resets only the information associat-
ed with this function.
IMPORTANT The reset operation when “Trip B” details
are being displayed resets only the information associat-
ed with this function.
Start trip procedure
With the ignition key in the MAR position, reset by press-
ing the TRIP button and keeping it pressed for more than
2 seconds.
Trip Exit
To quit the Trip function: keep MENU ESC pressed for
over 2 seconds. Journey time
This value shows the time elapsed since the start of the
new journey.
IMPORTANT If information is not available, the message
“----” will appear instead of the Trip Computer values.
Counting of the different values will resume regularly when
normal operation is restored. This will not reset any of the
values displayed before the failure nor start a new jour-
ney.
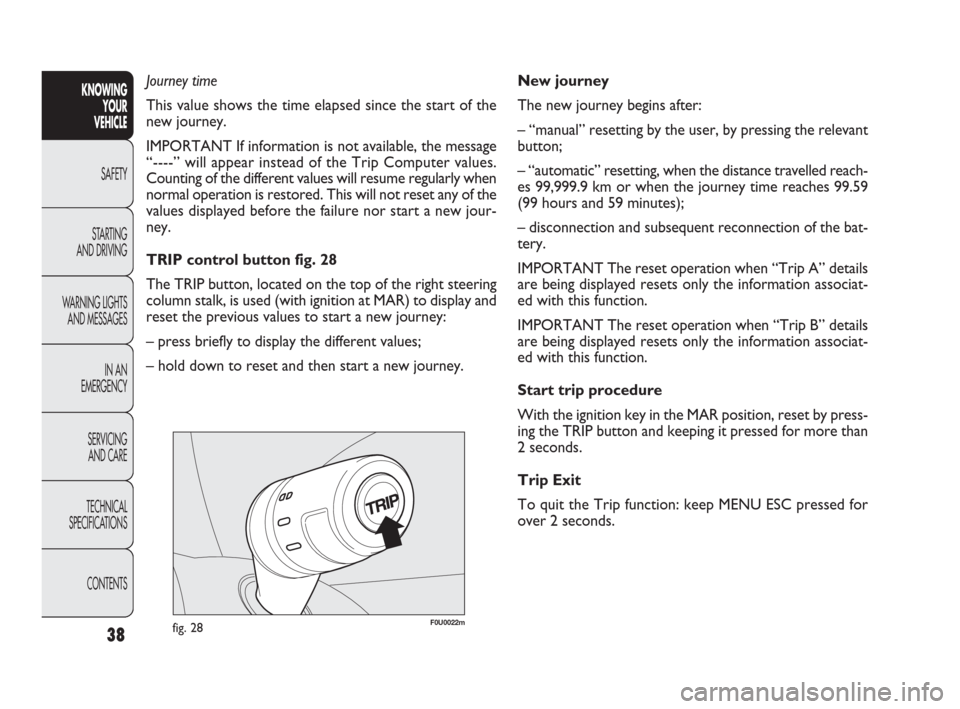
TRIP control button fig. 28
The TRIP button, located on the top of the right steering
column stalk, is used (with ignition at MAR) to display and
reset the previous values to start a new journey:
– press briefly to display the different values;
– hold down to reset and then start a new journey.KNOWING
YOUR
VEHICLE
SAFETY
STARTING
AND DRIVING
WARNING LIGHTS
AND MESSAGES
IN AN
EMERGENCY
SERVICING
AND CARE
TECHNICAL
SPECIFICATIONS
CONTENTS
037-081 PUNTO FL EN 4ed 18-01-2010 12:23 Pagina 38
Page 43 of 270
Head restraints must be adjusted so that
the head, rather than the neck, rests on
them. Only then can they protect your head cor-
rectly.
WARNING
To make the best use of the head restraint protection, ad-
just the backrest to keep a straight back, with the head
as close as possible to its restraint. HEAD RESTRAINTS
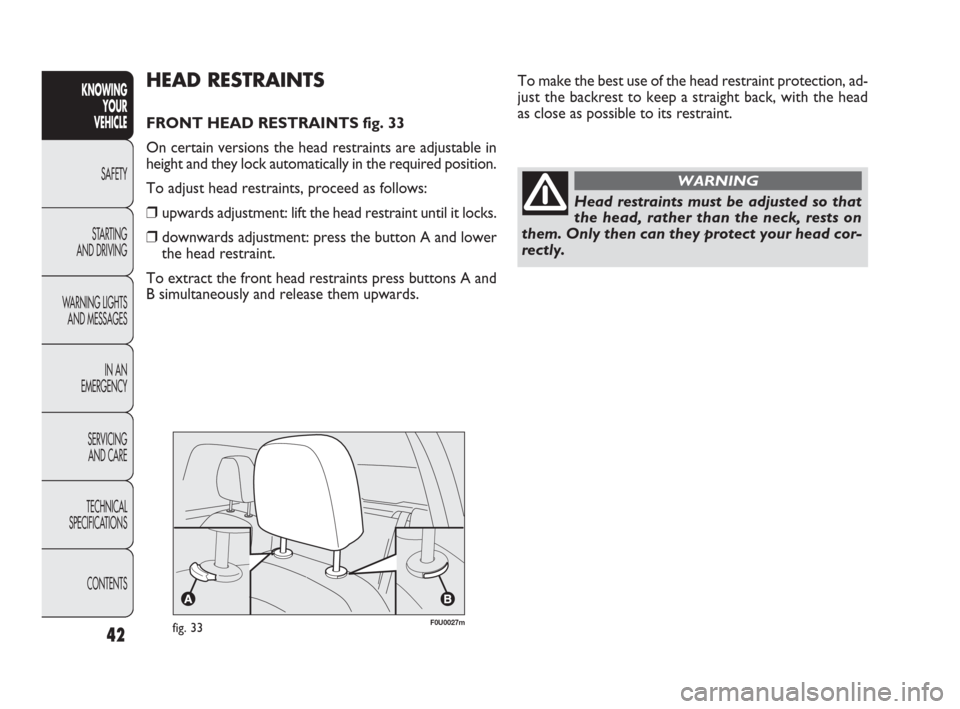
FRONT HEAD RESTRAINTS fig. 33
On certain versions the head restraints are adjustable in
height and they lock automatically in the required position.
To adjust head restraints, proceed as follows:
❒upwards adjustment: lift the head restraint until it locks.
❒downwards adjustment: press the button A and lower
the head restraint.
To extract the front head restraints press buttons A and
B simultaneously and release them upwards.
fig. 33F0U0027m
42
KNOWING
YOUR
VEHICLE
SAFETY
STARTING
AND DRIVING
WARNING LIGHTS
AND MESSAGES
IN AN
EMERGENCY
SERVICING
AND CARE
TECHNICAL
SPECIFICATIONS
CONTENTS
037-081 PUNTO FL EN 4ed 18-01-2010 12:23 Pagina 42
Page 52 of 270
❒turn knob C to -or to position ®if the windows
do not demist;
❒turn knob B to 2nd speed.
HEATED REAR
WINDSCREEN AND WING MIRRORS
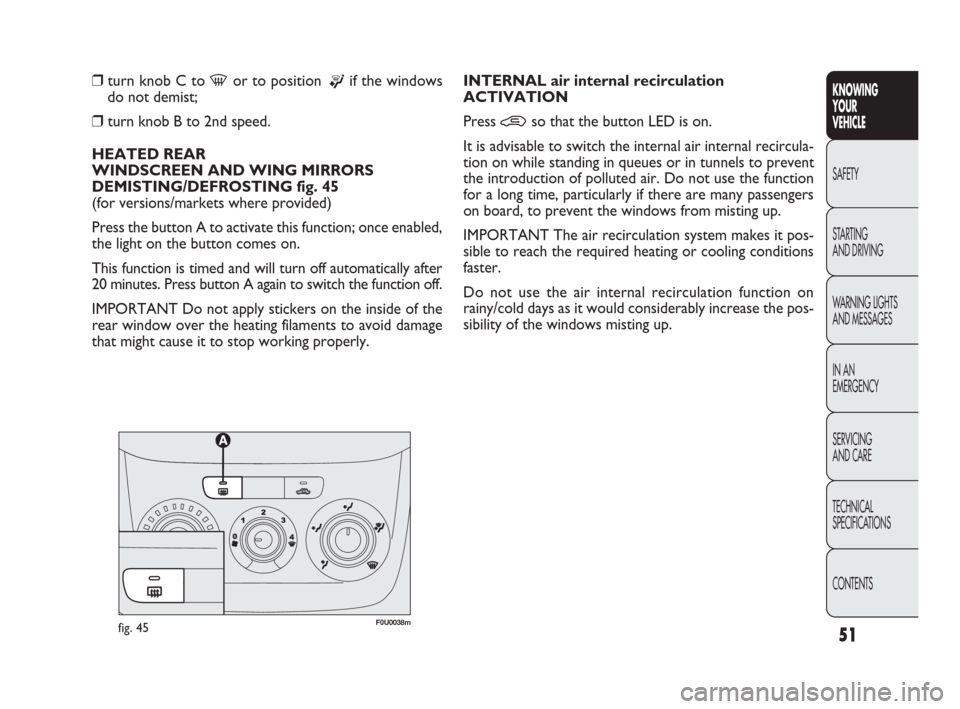
DEMISTING/DEFROSTING fig. 45
(for versions/markets where provided)
Press the button A to activate this function; once enabled,
the light on the button comes on.
This function is timed and will turn off automatically after
20 minutes. Press button A again to switch the function off.
IMPORTANT Do not apply stickers on the inside of the
rear window over the heating filaments to avoid damage
that might cause it to stop working properly.INTERNAL air internal recirculation
ACTIVATION
Press
•so that the button LED is on.
It is advisable to switch the internal air internal recircula-
tion on while standing in queues or in tunnels to prevent
the introduction of polluted air. Do not use the function
for a long time, particularly if there are many passengers
on board, to prevent the windows from misting up.
IMPORTANT The air recirculation system makes it pos-
sible to reach the required heating or cooling conditions
faster.
Do not use the air internal recirculation function on
rainy/cold days as it would considerably increase the pos-
sibility of the windows misting up.
fig. 45F0U0038m
51
KNOWING
YOUR
VEHICLE
SAFETY
STARTING
AND DRIVING
WARNING LIGHTS
AND MESSAGES
IN AN
EMERGENCY
SERVICING
AND CARE
TECHNICAL
SPECIFICATIONS
CONTENTS
037-081 PUNTO FL EN 4ed 18-01-2010 12:23 Pagina 51
Page 56 of 270
The system uses R134a refrigerant fluid
which does not harm the environment in
the event of accidental leakage. Never use
R12 fluid which is not compatible with the system
components.
HEATED REAR
WINDSCREEN AND WING MIRRORS
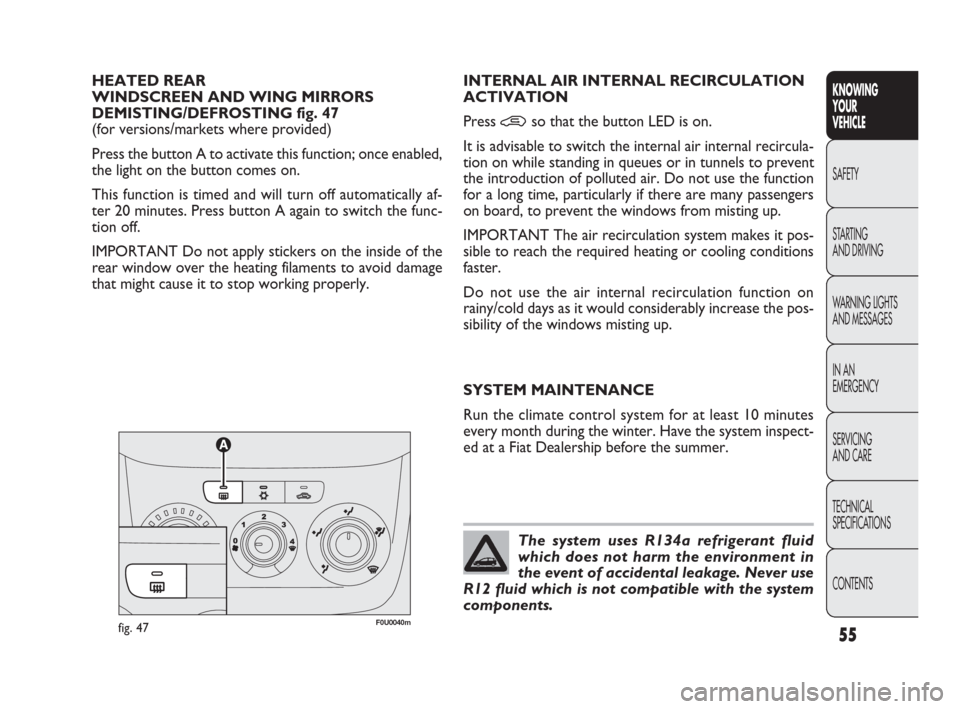
DEMISTING/DEFROSTING fig. 47
(for versions/markets where provided)
Press the button A to activate this function; once enabled,
the light on the button comes on.
This function is timed and will turn off automatically af-
ter 20 minutes. Press button A again to switch the func-
tion off.
IMPORTANT Do not apply stickers on the inside of the
rear window over the heating filaments to avoid damage
that might cause it to stop working properly.INTERNAL AIR INTERNAL RECIRCULATION
ACTIVATION
Press
•so that the button LED is on.
It is advisable to switch the internal air internal recircula-
tion on while standing in queues or in tunnels to prevent
the introduction of polluted air. Do not use the function
for a long time, particularly if there are many passengers
on board, to prevent the windows from misting up.
IMPORTANT The air recirculation system makes it pos-
sible to reach the required heating or cooling conditions
faster.
Do not use the air internal recirculation function on
rainy/cold days as it would considerably increase the pos-
sibility of the windows misting up.
SYSTEM MAINTENANCE
Run the climate control system for at least 10 minutes
every month during the winter. Have the system inspect-
ed at a Fiat Dealership before the summer.
fig. 47F0U0040m
55
KNOWING
YOUR
VEHICLE
SAFETY
STARTING
AND DRIVING
WARNING LIGHTS
AND MESSAGES
IN AN
EMERGENCY
SERVICING
AND CARE
TECHNICAL
SPECIFICATIONS
CONTENTS
037-081 PUNTO FL EN 4ed 18-01-2010 12:23 Pagina 55
Page 57 of 270
56
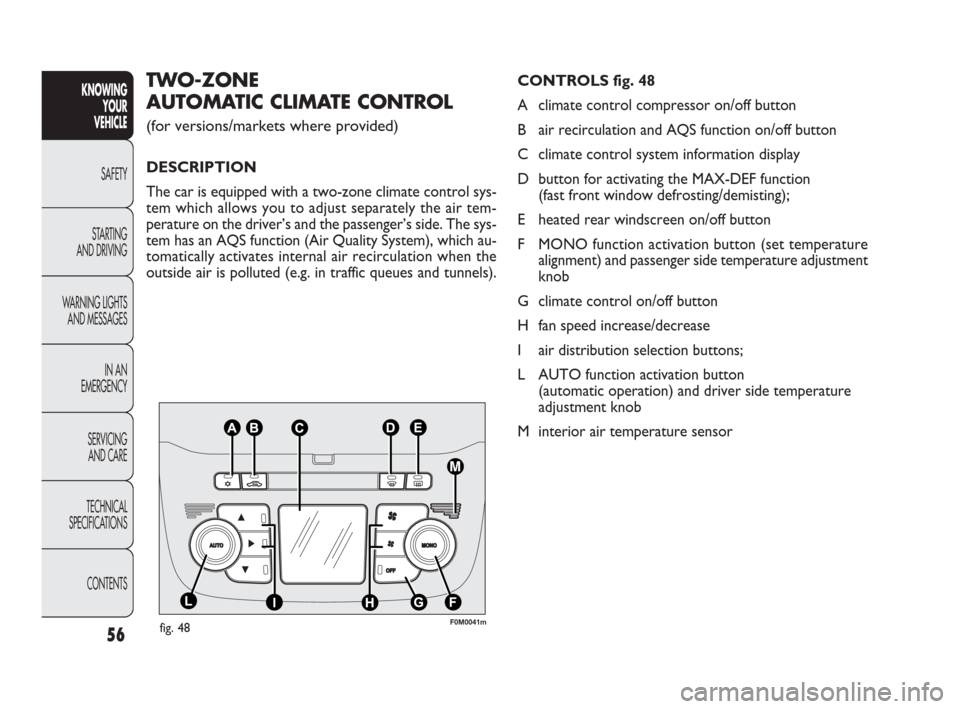
CONTROLS fig. 48
A climate control compressor on/off button
B air recirculation and AQS function on/off button
C climate control system information display
D button for activating the MAX-DEF function
(fast front window defrosting/demisting);
E heated rear windscreen on/off button
F MONO function activation button (set temperature
alignment) and passenger side temperature adjustment
knob
G climate control on/off button
H fan speed increase/decrease
I air distribution selection buttons;
L AUTO function activation button
(automatic operation) and driver side temperature
adjustment knob
M interior air temperature sensorTWO-ZONE
AUTOMATIC CLIMATE CONTROL
(for versions/markets where provided)
DESCRIPTION
The car is equipped with a two-zone climate control sys-
tem which allows you to adjust separately the air tem-
perature on the driver’s and the passenger’s side. The sys-
tem has an AQS function (Air Quality System), which au-
tomatically activates internal air recirculation when the
outside air is polluted (e.g. in traffic queues and tunnels).
fig. 48F0M0041m
KNOWING
YOUR
VEHICLE
SAFETY
STARTING
AND DRIVING
WARNING LIGHTS
AND MESSAGES
IN AN
EMERGENCY
SERVICING
AND CARE
TECHNICAL
SPECIFICATIONS
CONTENTS
037-081 PUNTO FL EN 4ed 18-01-2010 12:23 Pagina 56
Page 58 of 270
57
SWITCHING ON THE CLIMATE CONTROL
SYSTEM
The system can be activated by pressing any of the but-
tons; it is, however, advisable to set the desired temper-
atures on the display, then press the AUTO button.
The climate control system allows you to customise the
temperatures (driver side and passenger side) with a max-
imum difference of 7°C.
The climate control system compressor works only with
the engine running and with an outside temperature of
above 4°C.
AUTOMATIC FUNCTION OF THE CLIMATE
CONTROL SYSTEM (AUTO function)
Press the AUTO button; the system will automatically ad-
just:
❒the amount of air introduced into the passenger com-
partment;
❒the distribution of air inside the passenger compartment;
cancelling any previous manual settings.
During climate control system automatic operation, the
words FULL AUTO appear on the display.
During automatic operation it is still possible to adjust the
set temperature and carry out the following operations
manually:
❒adjust fan speed;
❒select air distribution;
❒switch air recirculation and AQS function on/off;
❒switch on the climate control system compressor.REGULATING THE FAN SPEED
Press button
pto increase/decrease the fan speed.
The 12 possible speeds are indicated by bars lighting up on
the display:
❒max fan speed = all bars lit;
❒min. fan speed = one bar lit.
The fan can be disabled (no bars lit) only if the climate con-
trol compressor has been switched off by pressing but-
ton
❄.
To restore automatic fan speed control after a manual ad-
justment, press AUTO.
RAPID FRONT WINDOWS DEMISTING/
DEFROSTING (MAX-DEF function)
Press button
-to automatically activate the timed op-
eration of all the functions required to rapidly
demist/defrost the windscreen and front side windows.
KNOWING
YOUR
VEHICLE
SAFETY
STARTING
AND DRIVING
WARNING LIGHTS
AND MESSAGES
IN AN
EMERGENCY
SERVICING
AND CARE
TECHNICAL
SPECIFICATIONS
CONTENTS
It is advisable not to use the air recircula-
tion function when the outside tempera-
ture is low to prevent the windows from rapidly
misting up.
WARNING
037-081 PUNTO FL EN 4ed 18-01-2010 12:23 Pagina 57