diagram FIAT QUBO 2015 1.G Owners Manual
[x] Cancel search | Manufacturer: FIAT, Model Year: 2015, Model line: QUBO, Model: FIAT QUBO 2015 1.GPages: 231, PDF Size: 5.01 MB
Page 48 of 231
Activation
Turn the ring to
to operate the rear window
wiper as follows:
❒intermittent operation if the windscreen wiper is
off;
❒in synchronous mode (at half the speed of the
windscreen wiper) when the windscreen wiper
is on;
❒in continuous mode with reverse gear engaged and
the control active.
With the windscreen wiper on and reverse gear
engaged, rear window wiping will be continuous.
Pushing the stalk towards the dashboard (temporary
position) the rear window washer jet will activate.
Keeping the stalk pushed for more than half a second
also the rear window wiper will activate. Releasing
the stalk will activate the smart washing function, as
described for the windscreen wiper.
Deactivation
The function stops when the stalk is released.
Do not use the rear window wiper to
removelayersofsnoworice.In
such conditions, the wiper may be
subjected to excessive stress and the motor
protection, which prevents operation for a few
seconds, may intervene. Contact the Fiat
Dealership if operation is not restored.
CEILING LIGHTSFRONT CEILING LIGHT WITH MOVABLE
LENS
The light comes on automatically when a front door
or sliding side door is opened and goes out when
it is closed.
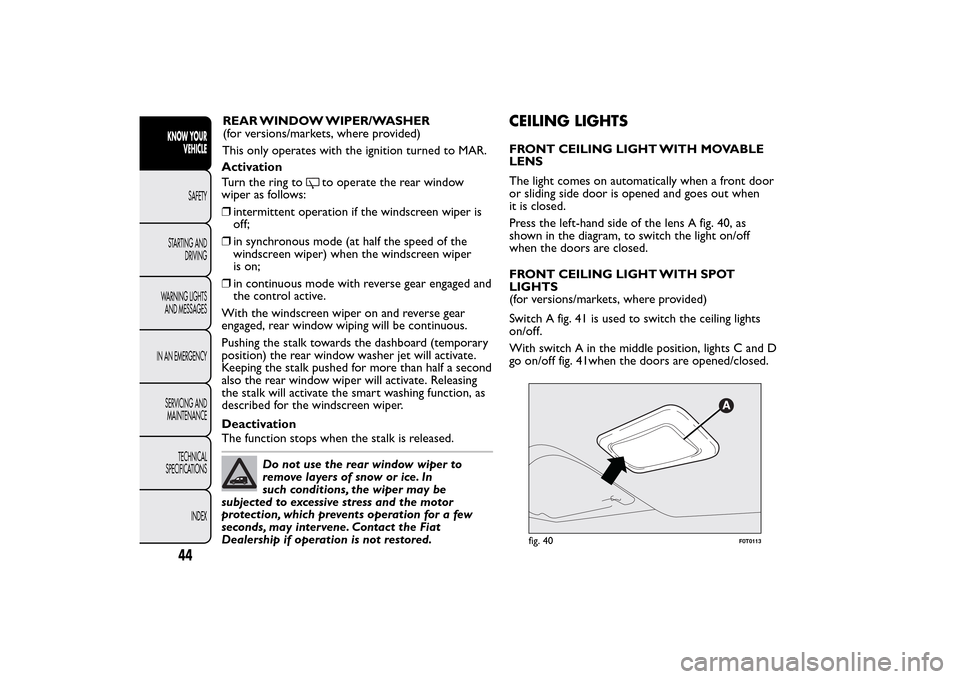
Press the left-hand side of the lens A fig. 40, as
shown in the diagram, to switch the light on/off
when the doors are closed.
FRONT CEILING LIGHT WITH SPOT
LIGHTS
(for versions/markets, where provided)
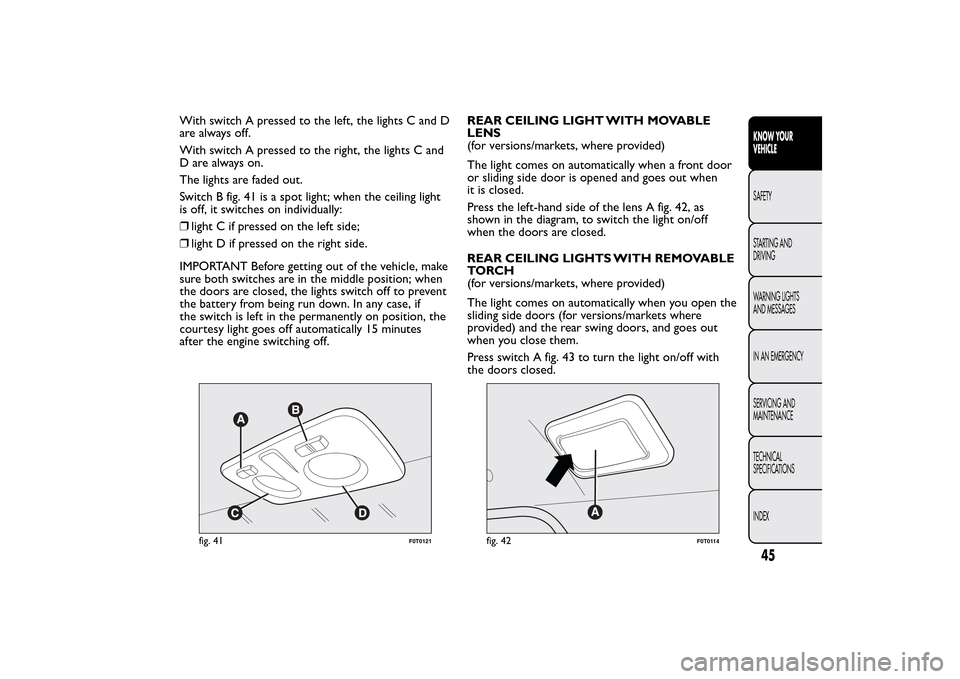
Switch A fig. 41 is used to switch the ceiling lights
on/off.
With switch A in the middle position, lights C and D
go on/off fig. 41when the doors are opened/closed.
fig. 40
F0T0113
44KNOW YOUR
VEHICLE
SAFETY
STARTING AND
DRIVING
WARNING LIGHTS
AND MESSAGES
IN AN EMERGENCY
SERVICING AND
MAINTENANCE
TECHNICAL
SPECIFICATIONS
INDEX
REAR WINDOW WIPER/WASHER
(for versions/markets, where provided)
This only operates with the ignition turned to MAR.
Page 49 of 231
With switch A pressed to the left, the lights C and D
arealwaysoff.
With switch A pressed to the right, the lights C and
D are always on.
The lights are faded out.
Switch B fig. 41 is a spot light; when the ceiling light
is off, it switches on individually:
❒light C if pressed on the left side;
❒light D if pressed on the right side.
IMPORTANT Before getting out of the vehicle, make
sure both switches are in the middle position; when
the doors are closed, the lights switch off to prevent
the battery from being run down. In any case, if
the switch is left in the permanently on position, the
courtesy light goes off automatically 15 minutes
after the engine switching off.REAR CEILING LIGHT WITH MOVABLE
LENS
(for versions/markets, where provided)
The light comes on automatically when a front door
or sliding side door is opened and goes out when
it is closed.
Press the left-hand side of the lens A fig. 42, as
shown in the diagram, to switch the light on/off
when the doors are closed.
REAR CEILING LIGHTS WITH REMOVABLE
TO RC H
(for versions/markets, where provided)
The light comes on automatically when you open the
sliding side doors (for versions/markets where
provided) and the rear swing doors, and goes out
when you close them.
Press switch A fig. 43 to turn the light on/off with
the doors closed.
fig. 41
F0T0121
fig. 42
F0T0114
45KNOW YOUR
VEHICLESAFETY
STARTING AND
DRIVING
WARNING LIGHTS
AND MESSAGES
IN AN EMERGENCY
SERVICING AND
MAINTENANCE
TECHNICAL
SPECIFICATIONS
INDEX
Page 62 of 231
DOUBLE REAR SWING DOORS
(for versions/markets, where provided)
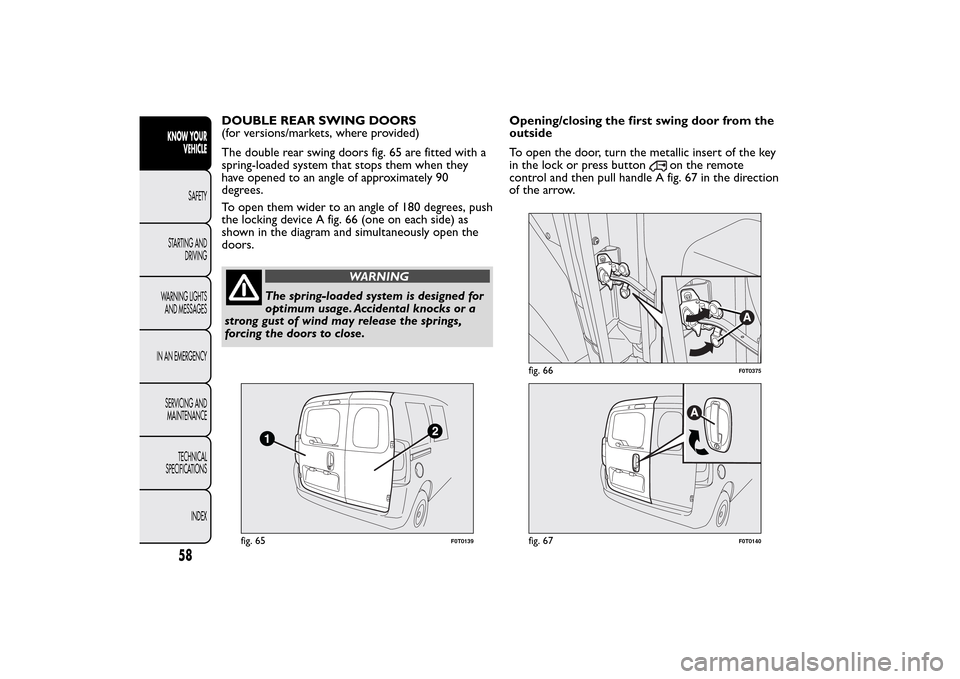
The double rear swing doors fig. 65 are fitted with a
spring-loaded system that stops them when they
have opened to an angle of approximately 90
degrees.
To open them wider to an angle of 180 degrees, push
the locking device A fig. 66 (one on each side) as
shown in the diagram and simultaneously open the
doors.
WARNING
The spring-loaded system is designed for
optimum usage. Accidental knocks or a
strong gust of wind may release the springs,
forcing the doors to close.Opening/closing the first swing door from the
outside
To open the door, turn the metallic insert of the key
in the lock or press button
on the remote
control and then pull handle A fig. 67 in the direction
of the arrow.
fig. 65
F0T0139
fig. 66
F0T0375
fig. 67
F0T0140
58KNOW YOUR
VEHICLE
SAFETY
STARTING AND
DRIVING
WARNING LIGHTS
AND MESSAGES
IN AN EMERGENCY
SERVICING AND
MAINTENANCE
TECHNICAL
SPECIFICATIONS
INDEX
Page 90 of 231
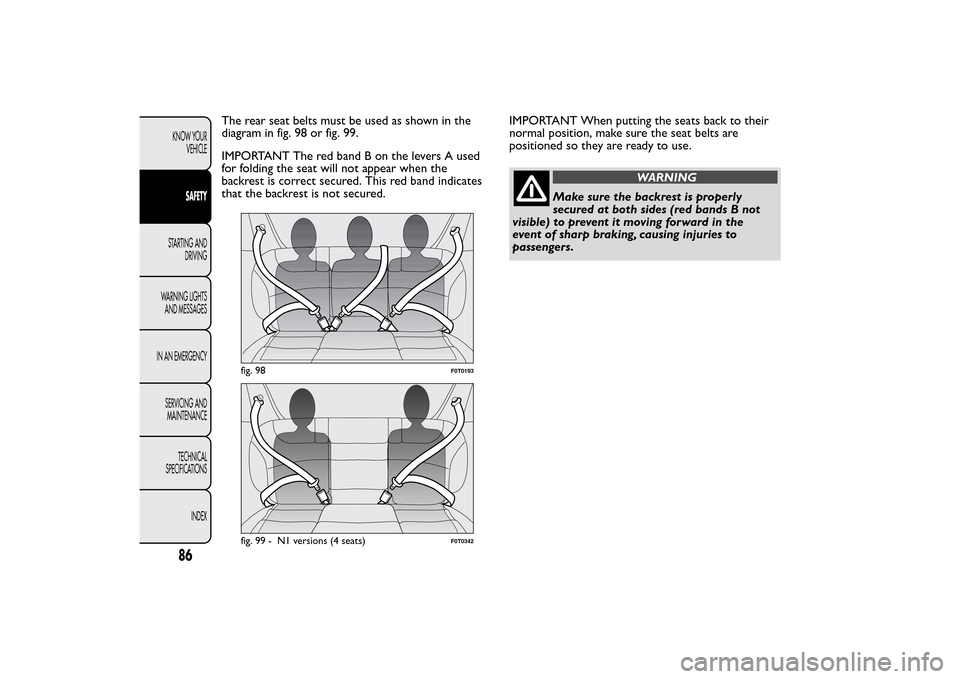
The rear seat belts must be used as shown in the
diagram in fig. 98 or fig. 99.
IMPORTANT The red band B on the levers A used
for folding the seat will not appear when the
backrest is correct secured. This red band indicates
that the backrest is not secured.IMPORTANT When putting the seats back to their
normal position, make sure the seat belts are
positioned so they are ready to use.
WARNING
Make sure the backrest is properly
secured at both sides (red bands B not
visible) to prevent it moving forward in the
event of sharp braking, causing injuries to
passengers.
fig. 98
F0T0193
fig. 99 - N1 versions (4 seats)
F0T0342
86KNOW YOUR
VEHICLE
SAFETY
STARTING AND
DRIVING
WARNING LIGHTS
AND MESSAGES
IN AN EMERGENCY
SERVICING AND
MAINTENANCE
TECHNICAL
SPECIFICATIONS
INDEX
Page 96 of 231
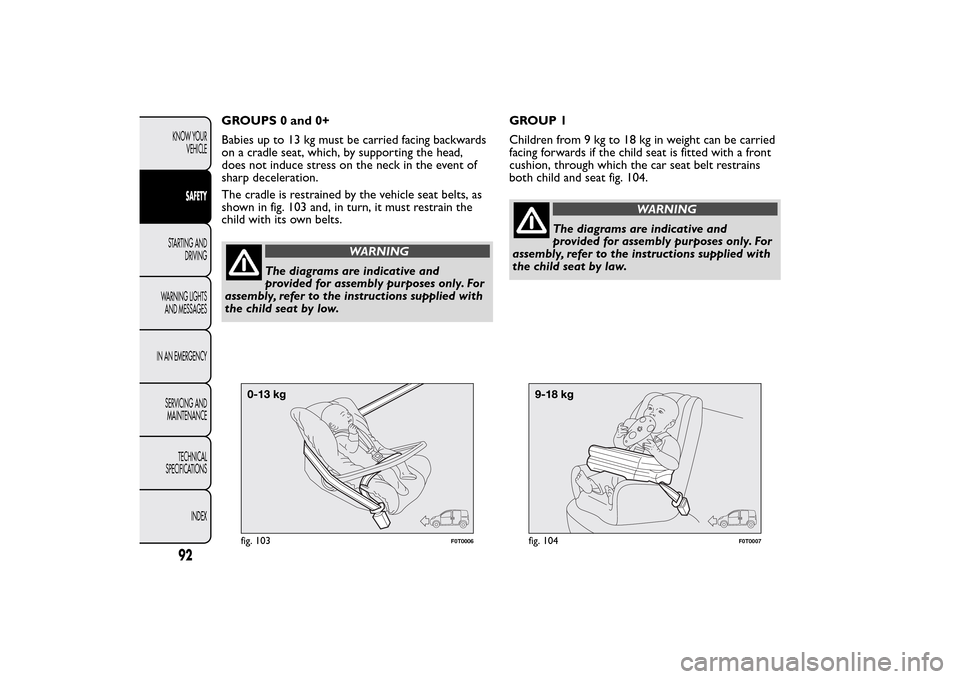
GROUPS 0 and 0+
Babies up to 13 kg must be carried facing backwards
on a cradle seat, which, by supporting the head,
does not induce stress on the neck in the event of
sharp deceleration.
The cradle is restrained by the vehicle seat belts, as
shown in fig. 103 and, in turn, it must restrain the
child with its own belts.
WARNING
The diagrams are indicative and
provided for assembly purposes only. For
assembly, refer to the instructions supplied with
the child seat by low.GROUP 1
Children from 9 kg to 18 kg in weight can be carried
facing forwards if the child seat is fitted with a front
cushion, through which the car seat belt restrains
both child and seat fig. 104.
WARNING
The diagrams are indicative and
provided for assembly purposes only. For
assembly, refer to the instructions supplied with
the child seat by law.
fig. 103
F0T0006
fig. 104
F0T0007
92KNOW YOUR
VEHICLE
SAFETY
STARTING AND
DRIVING
WARNING LIGHTS
AND MESSAGES
IN AN EMERGENCY
SERVICING AND
MAINTENANCE
TECHNICAL
SPECIFICATIONS
INDEX
Page 97 of 231
WARNING
Some child restraint systems for weight
groups 0 and 1 have a rear attachment
to the car seat belts and their own seat belts for
securing the child. Due to their weight , they
may be dangerous if incorrectly mounted (e.g. if
fastened to the vehicle seat belts placing a
cushion in between). Follow the assembly
instructions carefully.
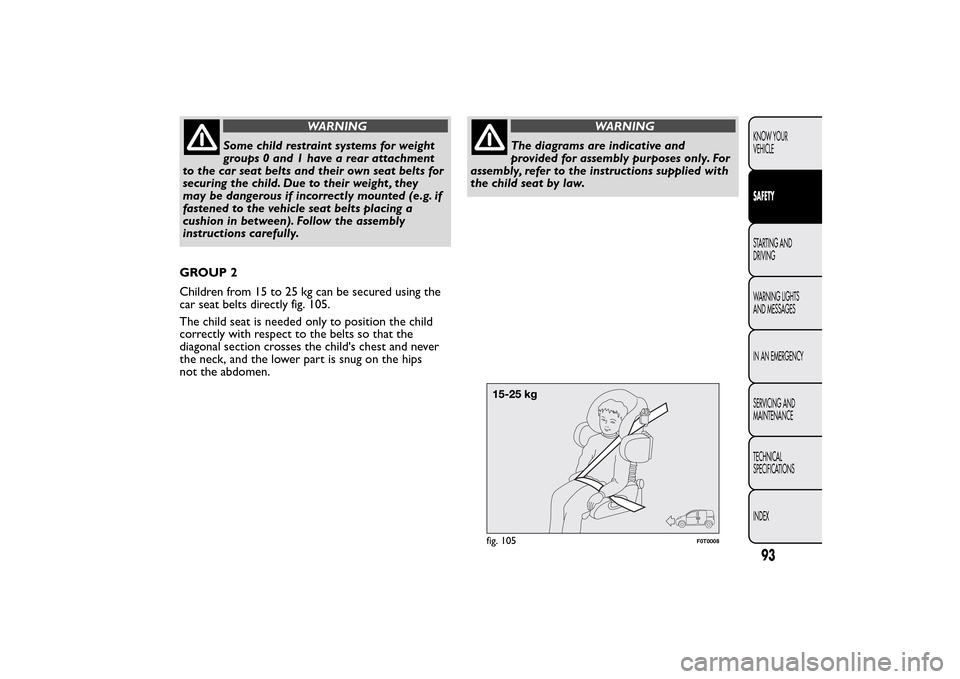
GROUP 2
Children from 15 to 25 kg can be secured using the
car seat belts directly fig. 105.
The child seat is needed only to position the child
correctly with respect to the belts so that the
diagonal section crosses the child's chest and never
the neck, and the lower part is snug on the hips
not the abdomen.
WARNING
The diagrams are indicative and
provided for assembly purposes only. For
assembly, refer to the instructions supplied with
the child seat by law.
fig. 105
F0T0008
93KNOW YOUR
VEHICLESAFETYSTARTING AND
DRIVING
WARNING LIGHTS
AND MESSAGES
IN AN EMERGENCY
SERVICING AND
MAINTENANCE
TECHNICAL
SPECIFICATIONS
INDEX
Page 98 of 231
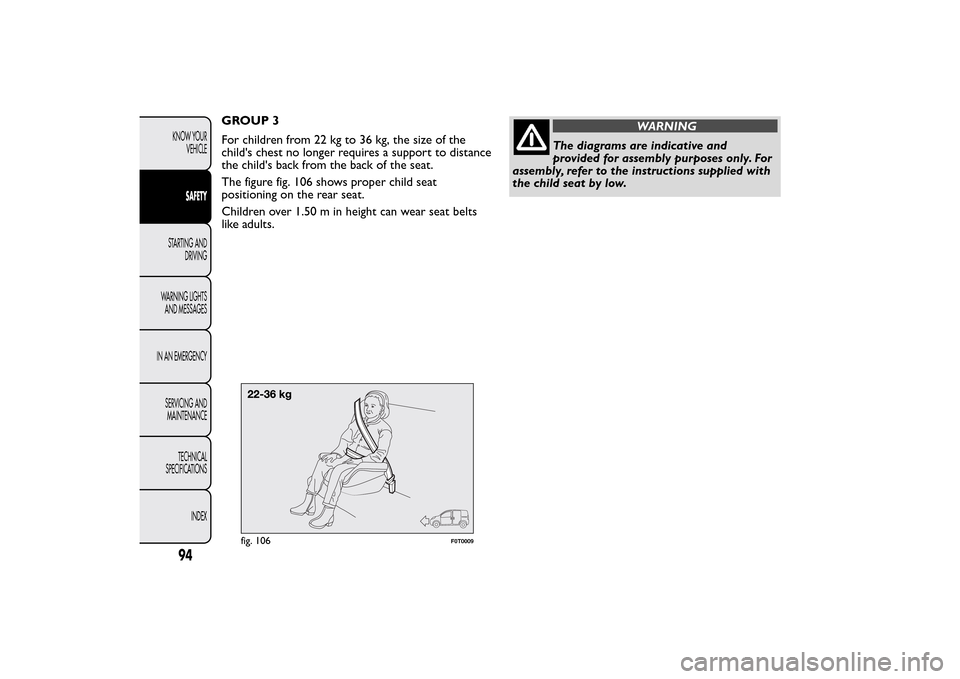
GROUP 3
For children from 22 kg to 36 kg, the size of the
child's chest no longer requires a support to distance
the child's back from the back of the seat.
The figure fig. 106 shows proper child seat
positioning on the rear seat.
Children over 1.50 m in height can wear seat belts
like adults.
WARNING
The diagrams are indicative and
provided for assembly purposes only. For
assembly, refer to the instructions supplied with
the child seat by low.
fig. 106
F0T0009
94KNOW YOUR
VEHICLE
SAFETY
STARTING AND
DRIVING
WARNING LIGHTS
AND MESSAGES
IN AN EMERGENCY
SERVICING AND
MAINTENANCE
TECHNICAL
SPECIFICATIONS
INDEX
Page 116 of 231
IMPORTANT When using snow tyres with a
maximum speed index below the one that can be
reached by the vehicle (increased by 5%), place
a notice in the passenger compartment, plainly in
view, which states the maximum speed allowed
by the snow tyres (as per EC Directive).
All four tyres should be the same (brand and profile)
to ensure greater safety when driving and braking
as well as making the car more responsive.
Remember that you should not change the rotation
direction of the tyres.
WARNING
You must not exceed 160 km/h on snow
tyres with a “Q” mark; in any case, make
sure you stick to the rules of the highway code.
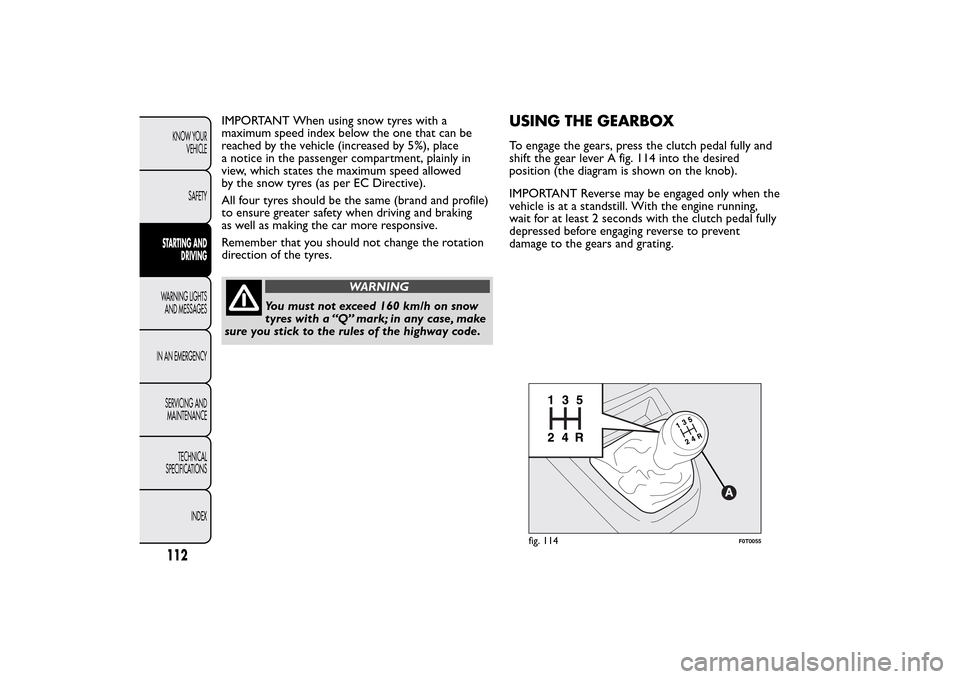
USING THE GEARBOXTo engage the gears, press the clutch pedal fully and
shift the gear lever A fig. 114 into the desired
position (the diagram is shown on the knob).
IMPORTANT Reverse may be engaged only when the
vehicle is at a standstill. With the engine running,
wait for at least 2 seconds with the clutch pedal fully
depressed before engaging reverse to prevent
damage to the gears and grating.
fig. 114
F0T0055
112KNOW YOUR
VEHICLE
SAFETYSTARTING AND
DRIVINGWARNING LIGHTS
AND MESSAGES
IN AN EMERGENCY
SERVICING AND
MAINTENANCE
TECHNICAL
SPECIFICATIONS
INDEX