deactivate FIAT STILO 2006 1.G Owners Manual
[x] Cancel search | Manufacturer: FIAT, Model Year: 2006, Model line: STILO, Model: FIAT STILO 2006 1.GPages: 274, PDF Size: 4.76 MB
Page 10 of 274
9
SAFETY
DEVICES
CORRECT USE
OF THE CAR
WARNING
LIGHTS AND
MESSAGES
IN AN
EMERGENCY
CAR
MAINTENANCE
TECHNICAL
SPECIFICATIONS
INDEX
DASHBOARD
AND CONTROLS
OPERATION
Each time the car is started turning the ig-
nition key to MAR, the Fiat CODE sys-
tem control unit sends a recognition code
to the engine control unit to deactivate
the inhibitor.
The code is sent only if the Fiat CODE
system control unit has recognised the
code transmitted from the key.
Each time the ignition key is turned to
STOP, the Fiat CODE system deactivates
the functions of the engine electronic con-
trol unit.
If the code has not been recognised cor-
rectly, the instrument panel warning light
Ywill turn on.
In this case, the key should be moved to
the STOPposition and then back to
MAR; if the lock continues, possibly try
again with the other key provided with the
car. If it is still not possible to start the car
contact a Fiat Dealership.IMPORTANT Every key has its own code,
which must be memorised by the system
control unit. To memorise new keys, up
to a maximum of eight, apply solely to Fi-
at Dealership taking with you the CODE
card and the keys, a personal identity doc-
ument and the car’s ownership docu-
ments. The codes of the keys not provid-
ed during the new memorising procedure
are erased from the memory. This is to
ensure that any lost or stolen keys can no
longer be used to start the car.
The electronic components in-
side the key may be damaged
if the key is submitted to sharp
knocks.
Warning light Ycoming
on when driving
❒If the warning light Yturns on, this
means that the system is running a self-
test (for example for a voltage drop).
❒If the warning light Ycontinues to stay
on, contact a Fiat Dealership.
Page 11 of 274
10
SAFETY
DEVICES
CORRECT USE
OF THE CAR
WARNING
LIGHTS AND
MESSAGES
IN AN
EMERGENCY
CAR
MAINTENANCE
TECHNICAL
SPECIFICATIONS
INDEX
DASHBOARD
AND CONTROLS
THE KEYS
CODE CARD
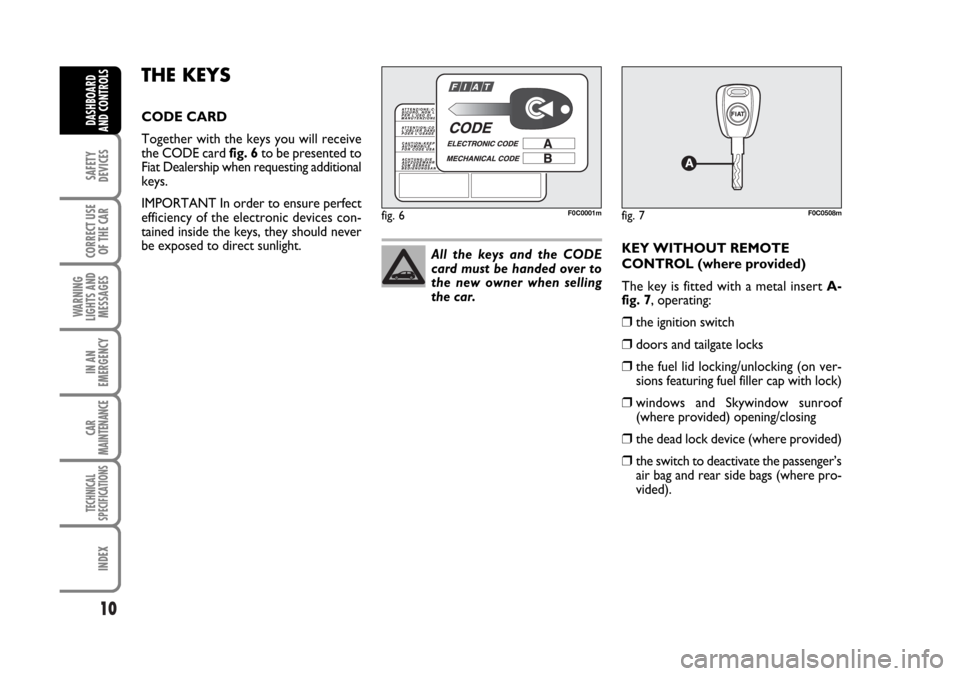
Together with the keys you will receive
the CODE card fig. 6to be presented to
Fiat Dealership when requesting additional
keys.
IMPORTANT In order to ensure perfect
efficiency of the electronic devices con-
tained inside the keys, they should never
be exposed to direct sunlight.
KEY WITHOUT REMOTE
CONTROL (where provided)
The key is fitted with a metal insert A-
fig. 7, operating:
❒the ignition switch
❒doors and tailgate locks
❒the fuel lid locking/unlocking (on ver-
sions featuring fuel filler cap with lock)
❒windows and Skywindow sunroof
(where provided) opening/closing
❒the dead lock device (where provided)
❒the switch to deactivate the passenger’s
air bag and rear side bags (where pro-
vided). All the keys and the CODE
card must be handed over to
the new owner when selling
the car.
fig. 6F0C0001mfig. 7F0C0508m
Page 12 of 274
11
SAFETY
DEVICES
CORRECT USE
OF THE CAR
WARNING
LIGHTS AND
MESSAGES
IN AN
EMERGENCY
CAR
MAINTENANCE
TECHNICAL
SPECIFICATIONS
INDEX
DASHBOARD
AND CONTROLS
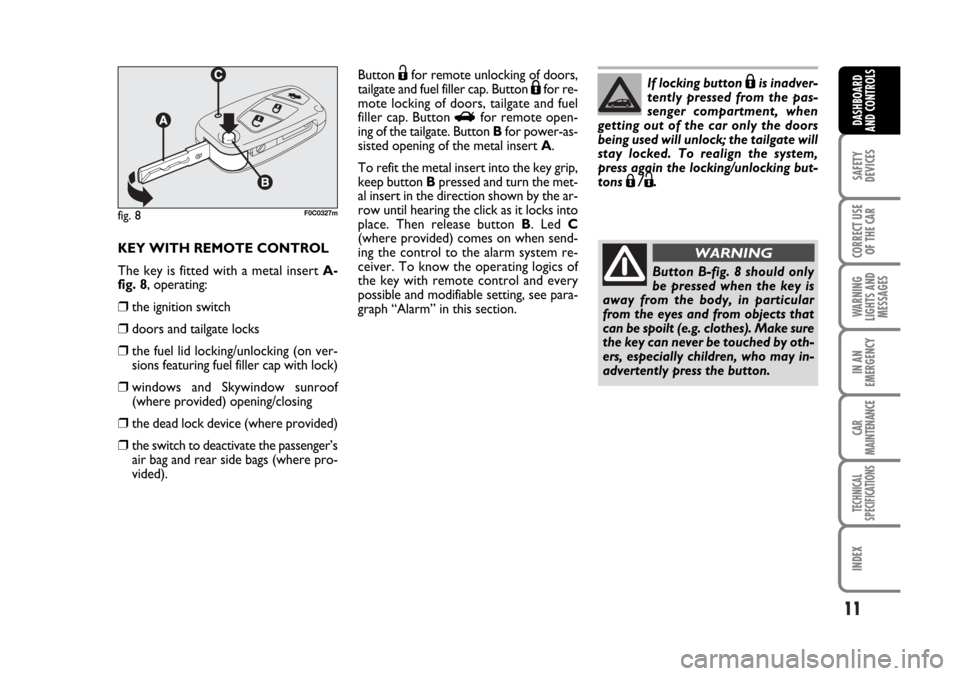
KEY WITH REMOTE CONTROL
The key is fitted with a metal insert A-
fig. 8, operating:
❒the ignition switch
❒doors and tailgate locks
❒the fuel lid locking/unlocking (on ver-
sions featuring fuel filler cap with lock)
❒windows and Skywindow sunroof
(where provided) opening/closing
❒the dead lock device (where provided)
❒the switch to deactivate the passenger’s
air bag and rear side bags (where pro-
vided).
fig. 8F0C0327m
Button Ëfor remote unlocking of doors,
tailgate and fuel filler cap. Button Áfor re-
mote locking of doors, tailgate and fuel
filler cap. Button
Rfor remote open-
ing of the tailgate. Button Bfor power-as-
sisted opening of the metal insert A.
To refit the metal insert into the key grip,
keep button Bpressed and turn the met-
al insert in the direction shown by the ar-
row until hearing the click as it locks into
place. Then release button B. Led C
(where provided) comes on when send-
ing the control to the alarm system re-
ceiver. To know the operating logics of
the key with remote control and every
possible and modifiable setting, see para-
graph “Alarm” in this section.If locking button
Áis inadver-
tently pressed from the pas-
senger compartment, when
getting out of the car only the doors
being used will unlock; the tailgate will
stay locked. To realign the system,
press again the locking/unlocking but-
tons
Á/Ë.
Button B-fig. 8 should only
be pressed when the key is
away from the body, in particular
from the eyes and from objects that
can be spoilt (e.g. clothes). Make sure
the key can never be touched by oth-
ers, especially children, who may in-
advertently press the button.
WARNING
Page 16 of 274
15
SAFETY
DEVICES
CORRECT USE
OF THE CAR
WARNING
LIGHTS AND
MESSAGES
IN AN
EMERGENCY
CAR
MAINTENANCE
TECHNICAL
SPECIFICATIONS
INDEX
DASHBOARD
AND CONTROLS
Device activation
The device is automatically activated on
every door in the following cases:
❒turning twice the key without remote
control (where provided) in closing di-
rection;
❒pressing twice button Áof the key with
remote control.
Device activation is signalled by three
flashings of the direction indicators and
flashing of the led on the driver door pan-
el (see the table on next page).
If one of the doors is not perfectly closed,
the dead lock device will not activate, thus
preventing that a person getting into the
car from the open door remains blocked
inside the passenger’s compartment when
she/he closes the door.Device deactivation
The device is deactivated automatically on
every door in the following cases:
❒when unlocking the doors;
❒when unlocking only the driver’s door;
❒when turning the ignition key to MAR.
Once the dead lock device
has been actuated, doors
cannot be opened from inside the car
in any way whatsoever. For this rea-
son, make sure there are no persons
left inside the car.
WARNING
If the battery of the key with
remote control is down, the
dead lock device can only be activat-
ed through the metal insert of the key
in the revolving plugs of the doors as
described previously: in this case the
dead lock device is active only on the
rear doors.
WARNING
Page 19 of 274
18
SAFETY
DEVICES
CORRECT USE
OF THE CAR
WARNING
LIGHTS AND
MESSAGES
IN AN
EMERGENCY
CAR
MAINTENANCE
TECHNICAL
SPECIFICATIONS
INDEX
DASHBOARD
AND CONTROLS
If the doors, bonnet and boot are shut
correctly and the control signal is repeat-
ed, the system self-diagnostics has de-
tected a system operating fault. It is there-
fore necessary to contact Fiat Dealership.
IMPORTANT When operating the cen-
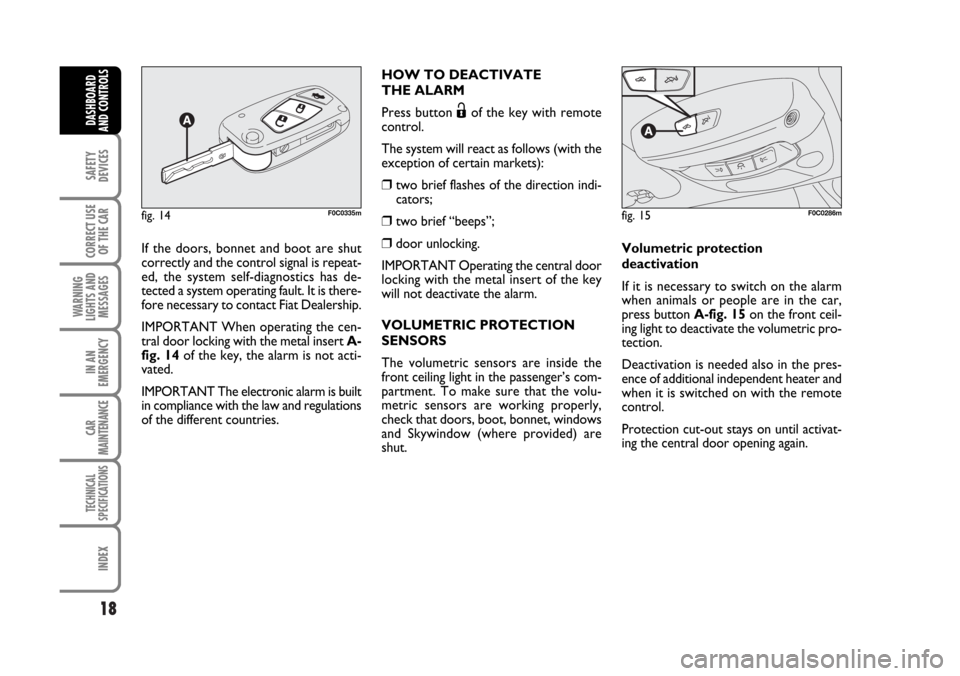
tral door locking with the metal insert A-
fig. 14of the key, the alarm is not acti-
vated.
IMPORTANT The electronic alarm is built
in compliance with the law and regulations
of the different countries.HOW TO DEACTIVATE
THE ALARM
Press button
Ëof the key with remote
control.
The system will react as follows (with the
exception of certain markets):
❒ two brief flashes of the direction indi-
cators;
❒ two brief “beeps”;
❒door unlocking.
IMPORTANT Operating the central door
locking with the metal insert of the key
will not deactivate the alarm.
VOLUMETRIC PROTECTION
SENSORS
The volumetric sensors are inside the
front ceiling light in the passenger’s com-
partment. To make sure that the volu-
metric sensors are working properly,
check that doors, boot, bonnet, windows
and Skywindow (where provided) are
shut.Volumetric protection
deactivation
If it is necessary to switch on the alarm
when animals or people are in the car,
press button A-fig. 15 on the front ceil-
ing light to deactivate the volumetric pro-
tection.
Deactivation is needed also in the pres-
ence of additional independent heater and
when it is switched on with the remote
control.
Protection cut-out stays on until activat-
ing the central door opening again.
fig. 14F0C0335mfig. 15F0C0286m
Page 20 of 274
19
SAFETY
DEVICES
CORRECT USE
OF THE CAR
WARNING
LIGHTS AND
MESSAGES
IN AN
EMERGENCY
CAR
MAINTENANCE
TECHNICAL
SPECIFICATIONS
INDEX
DASHBOARD
AND CONTROLS
ANTI-RAISING SENSOR
The anti-raising sensor detects any ab-
normal car raising/sloping, even partial
(e.g.: attempt to remove a wheel).
This sensor can detect the smallest car
sideslip angle changes, both longitudinally
and transversally.
Sideslip angle changes lower than 0.5°/min.
(e.g.: slow tyre flattening) are not consid-
ered.
Anti-raising protection
deactivation
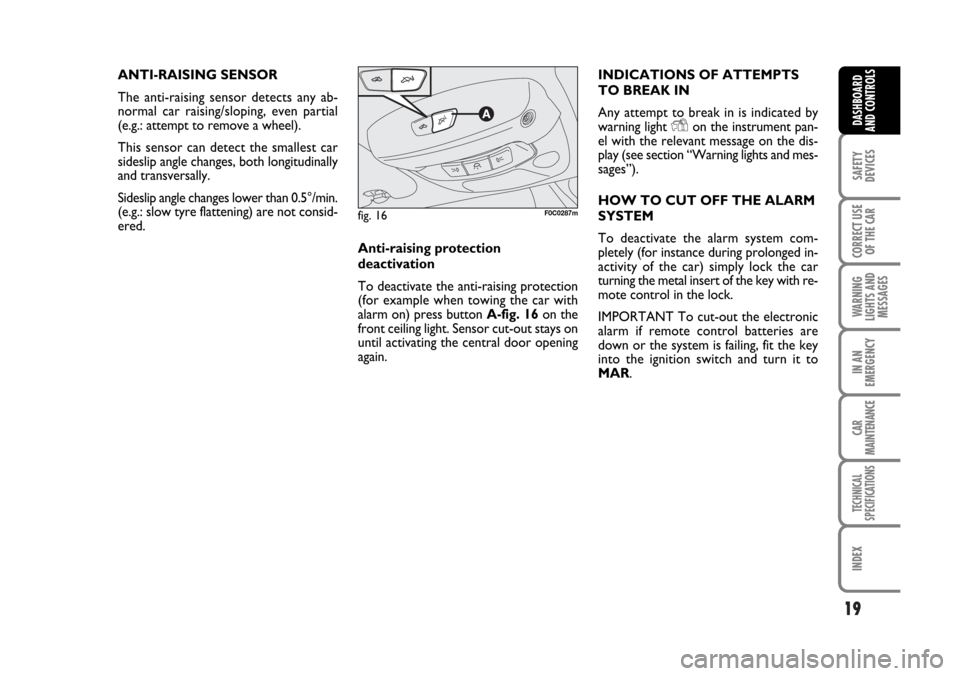
To deactivate the anti-raising protection
(for example when towing the car with
alarm on) press button A-fig. 16 on the
front ceiling light. Sensor cut-out stays on
until activating the central door opening
again.INDICATIONS OF ATTEMPTS
TO BREAK IN
Any attempt to break in is indicated by
warning light
Yon the instrument pan-
el with the relevant message on the dis-
play (see section “Warning lights and mes-
sages”).
HOW TO CUT OFF THE ALARM
SYSTEM
To deactivate the alarm system com-
pletely (for instance during prolonged in-
activity of the car) simply lock the car
turning the metal insert of the key with re-
mote control in the lock.
IMPORTANT To cut-out the electronic
alarm if remote control batteries are
down or the system is failing, fit the key
into the ignition switch and turn it to
MAR.
fig. 16F0C0287m
Page 29 of 274

28
SAFETY
DEVICES
CORRECT USE
OF THE CAR
WARNING
LIGHTS AND
MESSAGES
IN AN
EMERGENCY
CAR
MAINTENANCE
TECHNICAL
SPECIFICATIONS
INDEX
DASHBOARD
AND CONTROLS
Trip B On/Off (TripB data)
Through this option it is possible to acti-
vate (On) or deactivate (Off) the Trip B
(partial trip) (for further information see
“Trip computer”).
For activation / deactivation, proceed as
follows:
– briefly press button MODE: (On) or
(Off) will flash on the display (according to
previous setting);
– press button
Õor Ôfor setting;
– briefly press button MODEto go back
to the menu screen or press the button
for long to go back to the standard screen
without storing settings.Setting the clock (Set time)
This function enables to set the clock
through two submenus: “Time” and
“Mode”.
To set the clock proceed as follows:
– briefly press button MODE, the display
will show the two submenus “Time” and
“Mode”;
– press button
Õor Ôto scroll the two
submenus;
– select the required submenu and then
press briefly MODE;
– if selecting “Time”: briefly press button
MODE, “hours” will flash on the display;
– press button
Õor Ôfor setting;
– press button MODE, “minutes” will
flash on the display;
– press button
Õor Ôfor setting.– if selecting “Mode”: briefly press but-
ton MODE, “12h” or “24h” will flash on
the display;
– press button
Õor Ôto select “24h” or
“12h”.
After setting, briefly press button MODE
to go back to the submenu screen or
press the button for long to go back to the
main menu screen without storing set-
tings.
– press again button MODEfor long to
go back to the standard screen or to the
main menu according to the current menu
level.
Page 30 of 274

29
SAFETY
DEVICES
CORRECT USE
OF THE CAR
WARNING
LIGHTS AND
MESSAGES
IN AN
EMERGENCY
CAR
MAINTENANCE
TECHNICAL
SPECIFICATIONS
INDEX
DASHBOARD
AND CONTROLS
Setting the date (Set date)
This function enables to update the date
(day – month – year).
To correct the date proceed as follows:
– briefly press button MODE: “year” will
flash on the display;
– press button
Õor Ôfor setting;
– briefly press button MODE: “month”
will flash on the display;
– press button
Õor Ôfor setting;
– briefly press button MODE: “day” will
flash on the display;
– press button
Õor Ôfor setting.
NoteEvery press on button
Õor Ôin-
creases/decreases by 1 unit. Keeping the
button pressed obtains automatic fast in-
crease or decrease. When you are near
the required setting complete adjustment
by single presses.
– briefly press button MODEto go back
to the menu screen or press the button
for long to go back to the standard screen
without storing settings.Audio info repetition (See radio)
With this function the display repeats in-
formation relevant to the sound system.
– Radio: selected radio station frequency
or RDS message;
– Audio CD/MP3 CD: CD and/or track
number;
To activate (On) or to deactivate (Off)
sound system info displaying proceed as
follows:
– briefly press button MODE: (On) or
(Off) will flash on the display (according to
previous setting);
– press button
Õor Ôfor setting;
– briefly press button MODEto go back
to the menu screen or press the button
for long to go back to the standard screen
without storing settings.Door opening mode (Key)
This function enables to select the re-
quired door opening mode:
– briefly press button MODE, the display
will show the wording “Key”;
– press button
Õor Ôto select option
“Open doors” or “Open all”;
– briefly press button MODEto go back
to the menu screen or press the button
for long to go back to the standard screen
without storing settings.
– “Open doors”: press button
Ëto open
the doors (excluding the tailgate);
– “Open all”: press button
Ëto open the
doors and the tailgate.
Page 31 of 274

30
SAFETY
DEVICES
CORRECT USE
OF THE CAR
WARNING
LIGHTS AND
MESSAGES
IN AN
EMERGENCY
CAR
MAINTENANCE
TECHNICAL
SPECIFICATIONS
INDEX
DASHBOARD
AND CONTROLS
Automatic central door locking
when travelling (Autoclose)
When activated (On), this function locks
automatically the doors when the car
speed exceeds 20 km/h.
To activate (On) or to deactivate (Off) this
function proceed as follows:
– briefly press button MODE, the display
will show the wording “Travelling”. Word-
ings On or Off will flash (according to pre-
vious setting);
– press button
Õor Ôfor setting;
– briefly press button MODEto go back
to the menu screen or press the button
for long to go back to the standard screen
without storing settings.Setting units (Units)
With this function it is possible to set the
units through three submenus: “Dis-
tances”, “Consumption” and “Tempera-
ture”.
To set the required unit proceed as fol-
lows:
– briefly press button MODE, the display
will show the three submenus;
– press button
Õor Ôto scroll the three
submenus;
– select the required submenu and then
press briefly button MODE;
– if selecting “Distances”: pressing button
MODEbriefly, the display will show “km”
or “mi” (according to previous setting);
– press button
Õor Ôfor setting;
– if selecting “Consumption”: pressing but-
ton MODEbriefly, the display will show
“km/l ”, “l/100km” or “mpg” (according to
previous setting);If set unit is “km”, the display will show fu-
el consumption in km/l or l/100km.
If set unit is “mi” the display will show fu-
el consumption in “mpg”.
– press button
Õor Ôfor setting;
– if selecting “Temperature”: pressing but-
ton MODEbriefly, the display will show
“°C” or “°F” (according to previous set-
ting);
– press button
Õor Ôto select the re-
quired level;
Page 33 of 274

32
SAFETY
DEVICES
CORRECT USE
OF THE CAR
WARNING
LIGHTS AND
MESSAGES
IN AN
EMERGENCY
CAR
MAINTENANCE
TECHNICAL
SPECIFICATIONS
INDEX
DASHBOARD
AND CONTROLS
Adjusting the button volume
(Button vol.)
With this function the volume of the
roger-beep accompanying the activation
of buttons MODE,
Õand Ôcan be ad-
justed according to 8 levels.
To set the required the volume proceed
as follows:
– briefly press button MODE: the previ-
ously set volume “level” will flash on the
display;
– press button
Õor Ôfor setting;
– briefly press button MODEto go back
to the menu screen or press the button
for long to go back to the standard screen
without storing settings.S.B.R. buzzer reactivation
(Belt buzzer)
This function can be only displayed after
Fiat Dealership has deactivated the S.B.R.
system (see paragraph “S.B.R. system” in
section “Safety devices”).Scheduled Servicing (Service)
Through this function it is possible to dis-
play information connected to proper car
servicing.
To display scheduled servicing info pro-
ceed as follows:
– briefly press button MODE: service in
km or mi, according to previous setting,
will be displayed (see paragraph “Distance
unit”);
– press button
Õor Ôto select display-
ing in days;
– briefly press button MODEto go back
to the menu screen or press the button
for long to go back to the standard screen
without storing settings.