check FIAT TIPO 4DOORS 2016 1.G Owners Manual
[x] Cancel search | Manufacturer: FIAT, Model Year: 2016, Model line: TIPO 4DOORS, Model: FIAT TIPO 4DOORS 2016 1.GPages: 204, PDF Size: 4.94 MB
Page 2 of 204

We really know your car because we invented, designed and built it: we really know every single detail.
At Fiat Service authorised workshopsyou can find technicians directly trained by us,
offering quality and professionalism for all service operations.
Fiat workshops are always close to you for the regular servicing operations, season checks
and practical recommendations by our experts.
With Original Parts distributed by MOPAR
®, you maintain the reliability, comfort
and performance features that you bought your new car for over time.
Always ask for Genuine Parts for the components used on our cars; we recommend them because
they come from our steady commitment in research and development of highly innovative technologies.
For all these reasons: rely on Genuine Parts, because they are the only ones designed
by FCA for your car.
SAFETY:
BRAKING SYSTEMENVIRONMENT: PARTICULATE FILTERS,
CLIMATE CONTROL MAINTENANCECOMFORT: SUSPENSION
AND WINDSCREEN WIPERS PERFORMANCE: SPARK PLUGS,
INJECTORS AND BATTERIESLINEACCESSORI
ROOF RACK BARS, WHEEL RIMS
WHY CHOOSING
GENUINE PARTS
This Owner Handbook is intended to show the vehicle's operating conditions.
For the enthusiast user who wants to have insights, curiosities and detailed information about the characteristics and functions
of the vehicle, Fiat gives the opportunity to consult a dedicated section which is available in electronic format.
ONLINE VEHICLE OWNER HANDBOOK
The following symbol is reported within the text of the Owner Handbook, next to the subjects for which details are provided.
Go to the www.mopar.eu/owner
website and access your personal area.
The “Maintenance and care” page includes all the information about your vehicle and the link to access eLUM, where you will find
all the details of the Owner Handbook.
Alternatively, to access this information, go to the Internet website at http://aftersales.fiat.com/elum/
.
The eLUMwebsite is free and will allow you, among many other things, to easily consult the on-board documents
of all the other vehicles of the Group.
Have a nice reading and happy motoring!
Cop TIPO LUM GB.qxp_500 UM ITA 02/12/15 09:34 Pagina 2
Page 4 of 204
READ THIS CAREFULLY
REFUELLINGPetrol engines: only refuel with unleaded petrol with octane rating (RON) not less than 95 in compliance with the European specification
EN228.
For further details on the use of the correct fuel see the "Refuelling the vehicle" paragraph in the "Starting and driving" chapter.
Diesel engines: refuel only with Diesel fuel motor vehicles conforming to the European specification EN590. The use of other products or
mixtures may damage the engine beyond repair and consequently invalidate the warranty, due to the damage caused.
For further details on the use of the correct fuel see the "Refuelling the vehicle" paragraph in the "Starting and driving" chapter.
STARTING THE ENGINE
Versions with manual gearbox (petrol engines):make sure that the handbrake is engaged; set the gear lever to neutral, fully depress the
clutch pedal without pressing the accelerator, then turn the ignition key to AVV and release the key as soon as the engine has started.
Versions with manual gearbox (Diesel engines): make sure that the handbrake is engaged; set the gear lever to neutral, fully depress the
clutch pedal without pressing the accelerator, then turn the ignition key to MAR and wait for the
warning light to switch off. Turn the
ignition key to AVV and release it as soon as the engine starts.
Versions with automatic transmission(where present): make sure that the handbrake is engaged and that the gear lever is in P (Parking) or
N (Neutral), depress the brake pedal, without pressing the accelerator pedal, then turn the ignition key to AVV or press the ignition device
button; release the key or the button as soon as the engine has started.
PARKING ON FLAMMABLE MATERIAL
The catalytic converter develops high temperatures during operation. Do not park the car on grass, dry leaves, pine needles or other flammable
material: fire hazard.
RESPECTING THE ENVIRONMENT
The vehicle is fitted with a system that carries out a continuous diagnosis of the emission-related components in order to help protect the
environment.
ELECTRICAL ACCESSORIES
If, after buying the vehicle, you decide to add electrical accessories (with the risk of gradually draining the battery), contact a Fiat Dealership.
They can calculate the overall electrical requirement and check that the vehicle's electric system can support the required load.
SCHEDULED SERVICING
Correct maintenance of the car is essential for ensuring that it maintains its performance and its safety features, its environmental friendliness
and low running costs for a long time to come.
SYMBOLS
Some car components have coloured labels whose symbols indicate precautions to be observed when using this component.
A plate summarising these symbols can also be found under the bonnet.
Page 12 of 204

IGNITION DEVICE
OPERATION
The key can be turned to three different
positions fig. 3:
STOP: engine off, key can be
removed, steering column locked (with
key removed). Some electrical devices
(e.g. central door locking system, etc.)
are still available;
MAR: driving position. All electrical
devices are available;
AVV: engine starting.
The ignition device is fitted with a safety
system that requires the ignition key to
be turned back to STOP if the engine
does not start, before the starting
operation can be repeated.
On versions with automatic
transmission (if present) the ignition keycan only be removed when the gear
lever is at P (Park).
2) 3)
STEERING LOCK
Activation
When the key is in the STOP position,
remove the key and turn the steering
wheel until it locks.
IMPORTANT If the ignition key has been
moved from the MAR to the STOP
position, the steering lock cannot
engage until the key is removed from
the ignition device.
Deactivation
Move the steering wheel slightly and
turn the key to MAR.
4) 5) 6) 7)
WARNING
2)If the ignition device has been tampered
with (e.g. an attempted theft), have it
checked by a Fiat Dealership before driving
again.
3)Always take the key with you when you
leave your vehicle to prevent someone
from accidentally operating the controls.
Remember to engage the parking brake.
Never leave children unattended in the
vehicle.4)It is absolutely forbidden to carry out any
after-market operation involving steering
system or steering column modifications
(e.g. installation of anti-theft device) that
could adversely affect performance,
invalidate the warranty, cause serious
safety problems and also result in the car
not meeting type-approval requirements.
5)Never extract the mechanical key while
the vehicle is moving. The steering wheel
will automatically lock as soon as it is
turned. This holds true for cars being
towed as well.
6)Before exiting the vehicle, ALWAYS
engage the parking brake, steer the
wheels, engage the first gear if uphill and
the reverse if downhill. On versions with
automatic transmission (where present),
bring the gear lever to P (Park) and turn the
ignition device to bring it to STOP. If the
vehicle is parked on a steep slope, chock
the wheels with wedges or stones. When
leaving the vehicle, always lock all the
doors by pressing the button on the key.
7)On versions with automatic transmission
(where present), it is advisable to put the
transmission in P, release the brake pedal
safely and then stop the engine to release
the key smoothly.304026J0001EM
10
KNOWING YOUR CAR
Page 15 of 204

WARNING
8)If the child lock was engaged and the
previously described locking procedure
carried out, operating the internal opening
handle will not open the door: in this case,
to open the door, the outside handle must
be used. The door central locking/
unlocking button is not disabled by the
engagement of the emergency lock.
9)NEVER leave children unattended inside
the car, let alone leave the car with the
doors unlocked in a place that children can
access easily. Children may seriously, or
even fatally, injure themselves. Also ensure
that children do not inadvertently operate
the parking brake, the brake pedal or the
automatic transmission lever (where
present).
10)Always use this device when carrying
children. After engaging the child lock on
both rear doors, check for effective
engagement by trying to open a door with
the internal handle.
IMPORTANT
2)Make sure to take the key with you once
a door or the tailgate is locked, to prevent
locking the same key inside the vehicle. If
the key has been locked in, it can only be
recovered using the second provided key.3)If the child lock was engaged and the
previously described locking procedure
carried out, operating the internal opening
handle will not open the door: in this case,
to open the door, the outside handle must
be used. The central locking/unlocking
button is not disabled by the engagement
of the emergency lock.
SEATS
FRONT SEATS WITH
MANUAL ADJUSTMENT
11)
4)
Longitudinal adjustment
Lift lever 1 fig. 7 and push the seat
forwards or backwards.
12)
IMPORTANT Carry out the adjustment
while sitting on the seat involved (driver
side or passenger side).
Height adjustment
(where provided)
Move lever 2 upwards or downwards to
achieve the required height.
704066J0001EM
13
Page 17 of 204
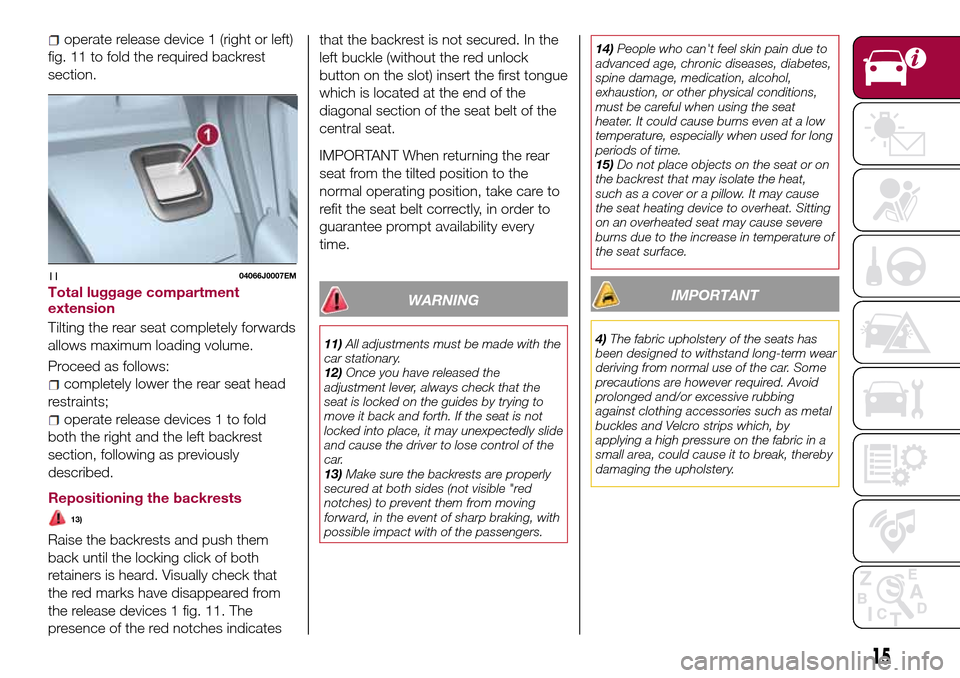
fig. 11 to fold the required backrest
section.
Total luggage compartment
extension
Tilting the rear seat completely forwards
allows maximum loading volume.
Proceed as follows:
completely lower the rear seat head
restraints;
operate release devices 1 to fold
both the right and the left backrest
section, following as previously
described.
Repositioning the backrests
13)
Raise the backrests and push them
back until the locking click of both
retainers is heard. Visually check that
the red marks have disappeared from
the release devices 1 fig. 11. The
presence of the red notches indicatesthat the backrest is not secured. In the
left buckle (without the red unlock
button on the slot) insert the first tongue
which is located at the end of the
diagonal section of the seat belt of the
central seat.
IMPORTANT When returning the rear
seat from the tilted position to the
normal operating position, take care to
refit the seat belt correctly, in order to
guarantee prompt availability every
time.
WARNING
11)All adjustments must be made with the
car stationary.
12)Once you have released the
adjustment lever, always check that the
seat is locked on the guides by trying to
move it back and forth. If the seat is not
locked into place, it may unexpectedly slide
and cause the driver to lose control of the
car.
13)Make sure the backrests are properly
secured at both sides (not visible "red
notches) to prevent them from moving
forward, in the event of sharp braking, with
possible impact with of the passengers.14)People who can't feel skin pain due to
advanced age, chronic diseases, diabetes,
spine damage, medication, alcohol,
exhaustion, or other physical conditions,
must be careful when using the seat
heater. It could cause burns even at a low
temperature, especially when used for long
periods of time.
15)Do not place objects on the seat or on
the backrest that may isolate the heat,
such as a cover or a pillow. It may cause
the seat heating device to overheat. Sitting
on an overheated seat may cause severe
burns due to the increase in temperature of
the seat surface.
IMPORTANT
4)The fabric upholstery of the seats has
been designed to withstand long-term wear
deriving from normal use of the car. Some
precautions are however required. Avoid
prolonged and/or excessive rubbing
against clothing accessories such as metal
buckles and Velcro strips which, by
applying a high pressure on the fabric in a
small area, could cause it to break, thereby
damaging the upholstery.
1104066J0007EM
15
operate release device 1 (right or left)
Page 24 of 204
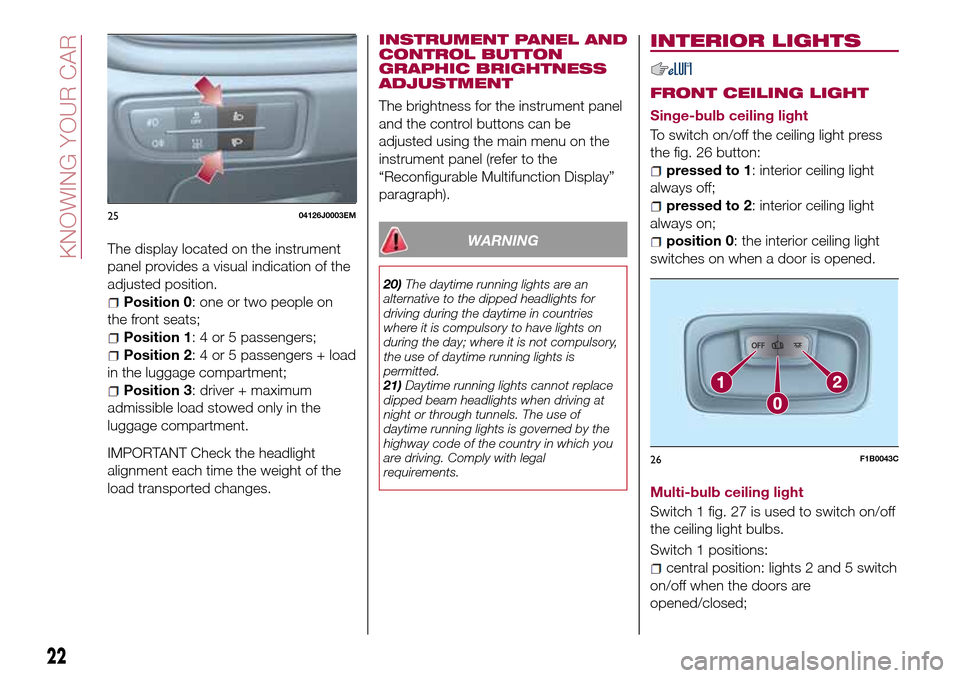
The display located on the instrument
panel provides a visual indication of the
adjusted position.
Position 0: one or two people on
the front seats;
Position 1: 4 or 5 passengers;
Position 2: 4 or 5 passengers + load
in the luggage compartment;
Position 3: driver + maximum
admissible load stowed only in the
luggage compartment.
IMPORTANT Check the headlight
alignment each time the weight of the
load transported changes.INSTRUMENT PANEL AND
CONTROL BUTTON
GRAPHIC BRIGHTNESS
ADJUSTMENT
The brightness for the instrument panel
and the control buttons can be
adjusted using the main menu on the
instrument panel (refer to the
“Reconfigurable Multifunction Display”
paragraph).
WARNING
20)The daytime running lights are an
alternative to the dipped headlights for
driving during the daytime in countries
where it is compulsory to have lights on
during the day; where it is not compulsory,
the use of daytime running lights is
permitted.
21)Daytime running lights cannot replace
dipped beam headlights when driving at
night or through tunnels. The use of
daytime running lights is governed by the
highway code of the country in which you
are driving. Comply with legal
requirements.
INTERIOR LIGHTS
FRONT CEILING LIGHT
Singe-bulb ceiling light
To switch on/off the ceiling light press
the fig. 26 button:
pressed to 1: interior ceiling light
always off;
pressed to 2: interior ceiling light
always on;
position 0: the interior ceiling light
switches on when a door is opened.
Multi-bulb ceiling light
Switch 1 fig. 27 is used to switch on/off
the ceiling light bulbs.
Switch 1 positions:
central position: lights 2 and 5 switch
on/off when the doors are
opened/closed;
2504126J0003EM
26F1B0043C
22
KNOWING YOUR CAR
Page 33 of 204

WARNING
23)Incorrect use of the electric windows
may be dangerous. Before and during
operation, always check that nobody is
exposed to the risk of being injured either
directly by the moving window or through
objects getting caught or hit by it. When
leaving the vehicle (equipped with
mechanical key with remote control),
always remove the key from the ignition
device to prevent accidental operation of
the electric windows from being a hazard
for those still on board.
BONNET
OPENING
Proceed as follows:
pull the lever 1 fig. 38, located in the
driver's side pedal area, in the direction
of the arrow;
adjust the lever 2 fig. 39 in the
direction indicated by the arrow;
raise the bonnet and, at the same
time, release the bonnet stay 3
fig. 40 from its locking device, then
insert the end of the stay in the housing
4 in the bonnet.
IMPORTANT Before raising the bonnet,
make sure that the arms of the wipers
are not raised from the windscreen and
that the wiper is not operational.
24) 25) 26)
CLOSING
27)
Proceed as follows:
hold the bonnet up with one hand
and with the other remove the stay 3
fig. 40 from the housing 4 and fit it back
in locking device;
lower the bonnet to approximately
40 centimetres from the engine
compartment and let it drop. Make sure
3704166J0004EM
3804196J0001EM
3904196J0002EM
4004196J0003EM
31
Page 34 of 204
that the bonnet is completely closed
and not only fastened by the locking
device by trying to open it. If it is not
perfectly closed, do not try to press the
bonnet lid down but open it and repeat
the procedure.
IMPORTANT Always check that the
bonnet is closed correctly to prevent it
from opening while the vehicle is
travelling.
WARNING
24)Perform these operations only when
the car is stationary.
25)The bonnet may drop suddenly if the
supporting rod is not positioned correctly.
26)Use both hands to lift the bonnet.
Before lifting, check that the windscreen
wiper arms are not raised from the
windscreen, that the vehicle is stationary
and that the parking brake is engaged.
27)For safety reasons, the bonnet must
always be properly closed while the car is
travelling. Therefore, make sure that the
bonnet is properly closed and that the lock
is engaged. If you discover that the bonnet
is not perfectly closed during travel, stop
immediately and close the bonnet in the
correct manner.
DUALDRIVE
ELECTRIC POWER
STEERING
This only operates with the key turned
to MAR and the engine started. The
electric steering allows the force
required at the steering wheel to be
adjusted to suit driving conditions.
IMPORTANT When turning the ignition
key quickly, full power steering
functionality can be achieved after a
few seconds.
IMPORTANT During parking
manoeuvres requiring a lot of steering,
the steering may become harder; this is
normal and is due to the intervention of
the system to protect the electric
steering motor from overheating. No
repair intervention is needed in this
case. When the car is used again, the
power steering will work normally again.
IMPORTANT The Dualdrive electric
power steering provides an electronic
damping effect when approaching the
end of travel. In some manoeuvring
conditions, the steering wheel may
perform an additional small rotation until
reaching its mechanical stop. This
behaviour is normal and is intended to
prevent excessive impacts with the
mechanical components located inside
the device.POWER STEERING
ACTIVATION/
DEACTIVATION
28) 29)
Activation/deactivation:
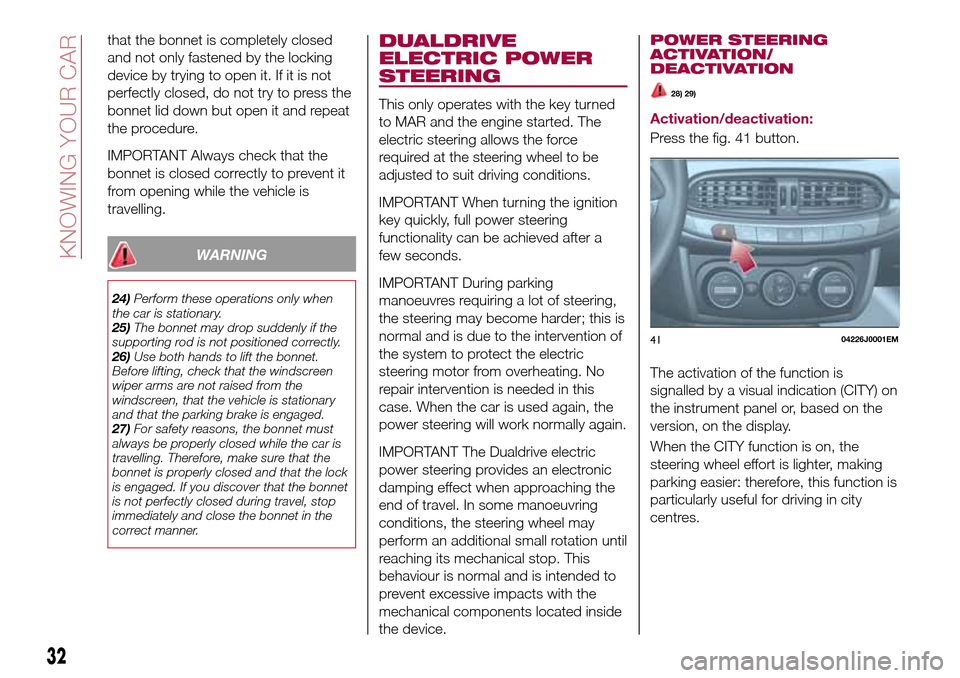
Press the fig. 41 button.
The activation of the function is
signalled by a visual indication (CITY) on
the instrument panel or, based on the
version, on the display.
When the CITY function is on, the
steering wheel effort is lighter, making
parking easier: therefore, this function is
particularly useful for driving in city
centres.
4104226J0001EM
32
KNOWING YOUR CAR
Page 44 of 204
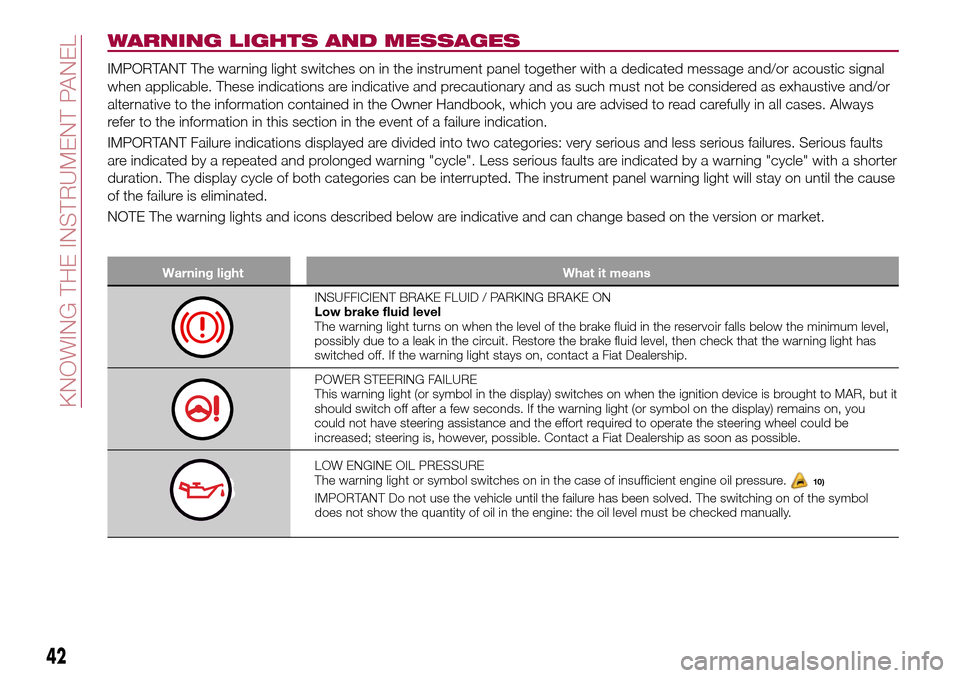
WARNING LIGHTS AND MESSAGES
IMPORTANT The warning light switches on in the instrument panel together with a dedicated message and/or acoustic signal
when applicable. These indications are indicative and precautionary and as such must not be considered as exhaustive and/or
alternative to the information contained in the Owner Handbook, which you are advised to read carefully in all cases. Always
refer to the information in this section in the event of a failure indication.
IMPORTANT Failure indications displayed are divided into two categories: very serious and less serious failures. Serious faults
are indicated by a repeated and prolonged warning "cycle". Less serious faults are indicated by a warning "cycle" with a shorter
duration. The display cycle of both categories can be interrupted. The instrument panel warning light will stay on until the cause
of the failure is eliminated.
NOTE The warning lights and icons described below are indicative and can change based on the version or market.
Warning light What it means
INSUFFICIENT BRAKE FLUID / PARKING BRAKE ON
Low brake fluid level
The warning light turns on when the level of the brake fluid in the reservoir falls below the minimum level,
possibly due to a leak in the circuit. Restore the brake fluid level, then check that the warning light has
switched off. If the warning light stays on, contact a Fiat Dealership.
POWER STEERING FAILURE
This warning light (or symbol in the display) switches on when the ignition device is brought to MAR, but it
should switch off after a few seconds. If the warning light (or symbol on the display) remains on, you
could not have steering assistance and the effort required to operate the steering wheel could be
increased; steering is, however, possible. Contact a Fiat Dealership as soon as possible.
LOW ENGINE OIL PRESSURE
The warning light or symbol switches on in the case of insufficient engine oil pressure.10)
IMPORTANT Do not use the vehicle until the failure has been solved. The switching on of the symbol
does not show the quantity of oil in the engine: the oil level must be checked manually.
42
KNOWING THE INSTRUMENT PANEL
Page 46 of 204

Warning light What it means
SEAT BELTS NOT FASTENED
The warning light switches on constantly if the vehicle is stationary and the driver side or passenger side
seat belt (for versions/markets, where provided), with the passenger seated, is not fastened. The warning
light flashes and a buzzer will sound if the vehicle is in motion and the driver side or passenger side seat
belt (for versions/markets, where provided), with the passenger seated, is not correctly fastened. In this
case, fasten the seat belt.
ENGINE COOLANT TEMPERATURE TOO HIGH
The warning light (or the icon on the display on some versions) switches on when the engine is
overheated.
In normal driving conditions: stop the car, switch off the engine and check that the coolant level in the
reservoir is not below the MIN mark. In this case, wait for the engine to cool down, then slowly and
carefully open the cap, top up with coolant and check that the level is between the MIN and MAX marks
on the reservoir itself. Also check visually for any fluid leaks. If, when restarting, the warning light switches
on (or the icon is displayed) again, contact a Fiat Dealership.
If the vehicle is used under demanding conditions(e.g. in high-performance driving): slow down
and, if the warning light stays on, stop the vehicle. Stop for two or three minutes with the engine running
and slightly accelerated to facilitate better coolant circulation, then turn the engine off. Check that the
coolant level is correct as described above.
IMPORTANT Over demanding routes, it is advisable to keep the engine running and slightly accelerated
for a few minutes before turning it off.
ALTERNATOR FAILURE
If this warning light or symbol switches on when the engine is running, this indicates a vehicle recharging
system failure. Contact a Fiat Dealership as soon as possible.
DOOR OPEN
The warning light turns on when one or more doors (or, for some versions also the bonnet and the engine
bonnet) are not perfectly closed (for versions/markets, where provided). An acoustic signal is activated
with the doors open and the car moving. Close the doors properly.
AIRBAG FAILURE
If the warning light switches on constantly, this indicates a failure in the airbag system.31) 32)
44
KNOWING THE INSTRUMENT PANEL