air condition FIAT TIPO 4DOORS 2018 Owner handbook (in English)
[x] Cancel search | Manufacturer: FIAT, Model Year: 2018, Model line: TIPO 4DOORS, Model: FIAT TIPO 4DOORS 2018Pages: 244, PDF Size: 5.77 MB
Page 28 of 244
IMPORTANT
5)Never use the windscreen wipers to
remove layers of snow or ice from the
windscreen. In such conditions, the
windscreen wiper may be subjected to
excessive stress and the motor cut-out
switch, which prevents operation for a few
seconds, may intervene. If operation is not
subsequently restored, even after restarting
the engine, contact a Fiat Dealership.
6)Do not operate the windscreen wiper
with the blades lifted from the windscreen.
7)Do not activate the rain sensor when
washing the car in an automatic car wash.
8)Make sure the device is switched off if
there is ice on the windscreen.
CLIMATE CONTROL
SYSTEM
1)
PASSENGER
COMPARTMENT AIR
DIFFUSERS
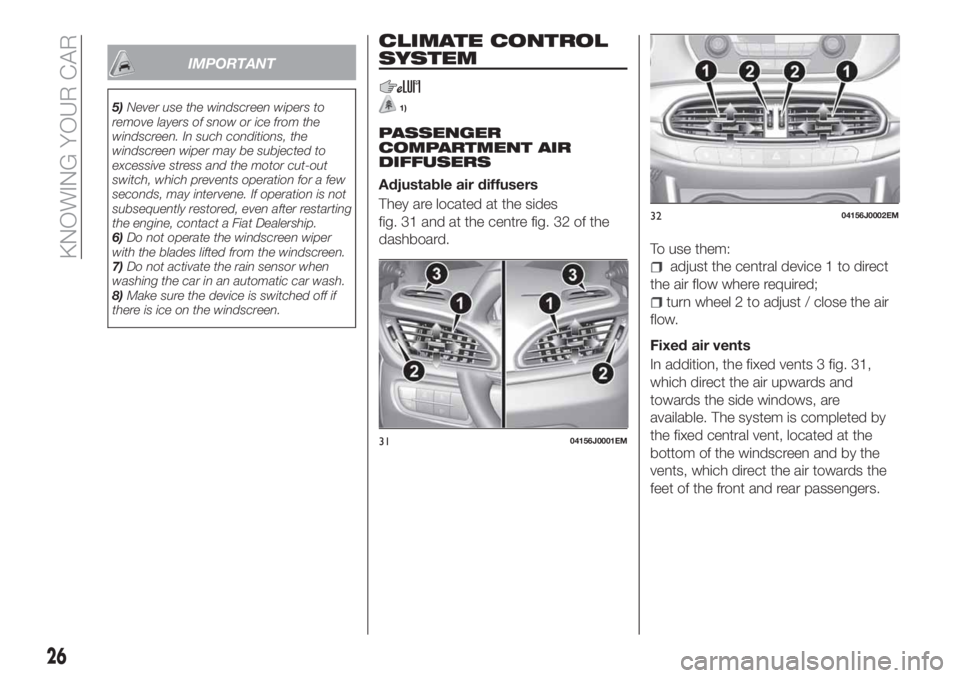
Adjustable air diffusers
They are located at the sides
fig. 31 and at the centre fig. 32 of the
dashboard.
To use them:
adjust the central device 1 to direct
the air flow where required;
turn wheel 2 to adjust / close the air
flow.
Fixed air vents
In addition, the fixed vents 3 fig. 31,
which direct the air upwards and
towards the side windows, are
available. The system is completed by
the fixed central vent, located at the
bottom of the windscreen and by the
vents, which direct the air towards the
feet of the front and rear passengers.
3104156J0001EM
3204156J0002EM
26
KNOWING YOUR CAR
Page 30 of 244
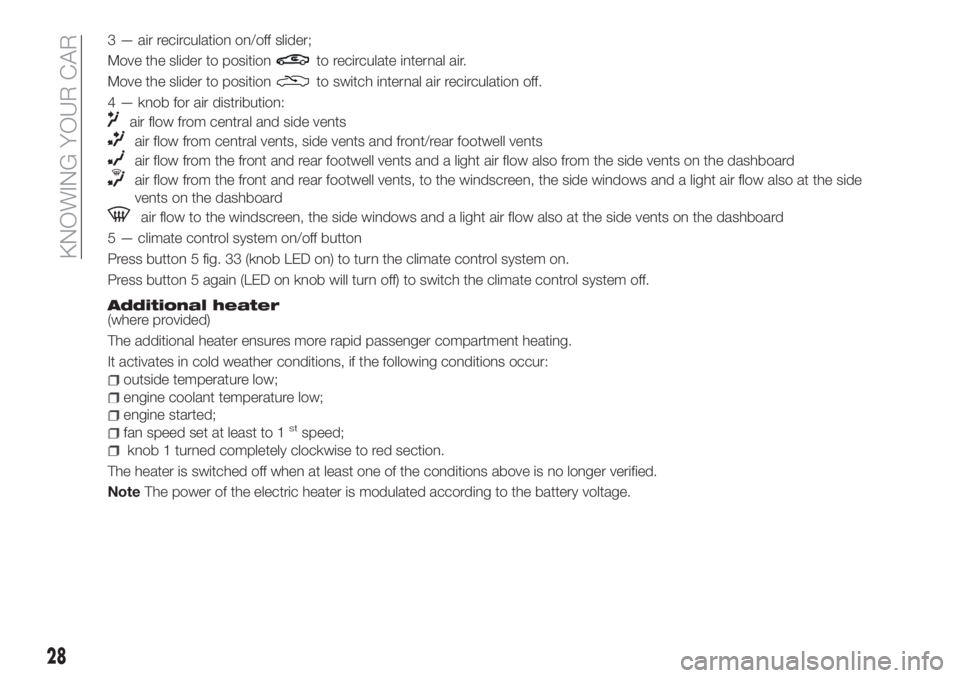
3 — air recirculation on/off slider;
Move the slider to position
to recirculate internal air.
Move the slider to position
to switch internal air recirculation off.
4 — knob for air distribution:
air flow from central and side vents
air flow from central vents, side vents and front/rear footwell vents
air flow from the front and rear footwell vents and a light air flow also from the side vents on the dashboard
air flow from the front and rear footwell vents, to the windscreen, the side windows and a light air flow also at the side
vents on the dashboard
air flow to the windscreen, the side windows and a light air flow also at the side vents on the dashboard
5 — climate control system on/off button
Press button 5 fig. 33 (knob LED on) to turn the climate control system on.
Press button 5 again (LED on knob will turn off) to switch the climate control system off.
Additional heater(where provided)
The additional heater ensures more rapid passenger compartment heating.
It activates in cold weather conditions, if the following conditions occur:
outside temperature low;
engine coolant temperature low;
engine started;
fan speed set at least to 1stspeed;
knob 1 turned completely clockwise to red section.
The heater is switched off when at least one of the conditions above is no longer verified.
NoteThe power of the electric heater is modulated according to the battery voltage.
28
KNOWING YOUR CAR
Page 32 of 244
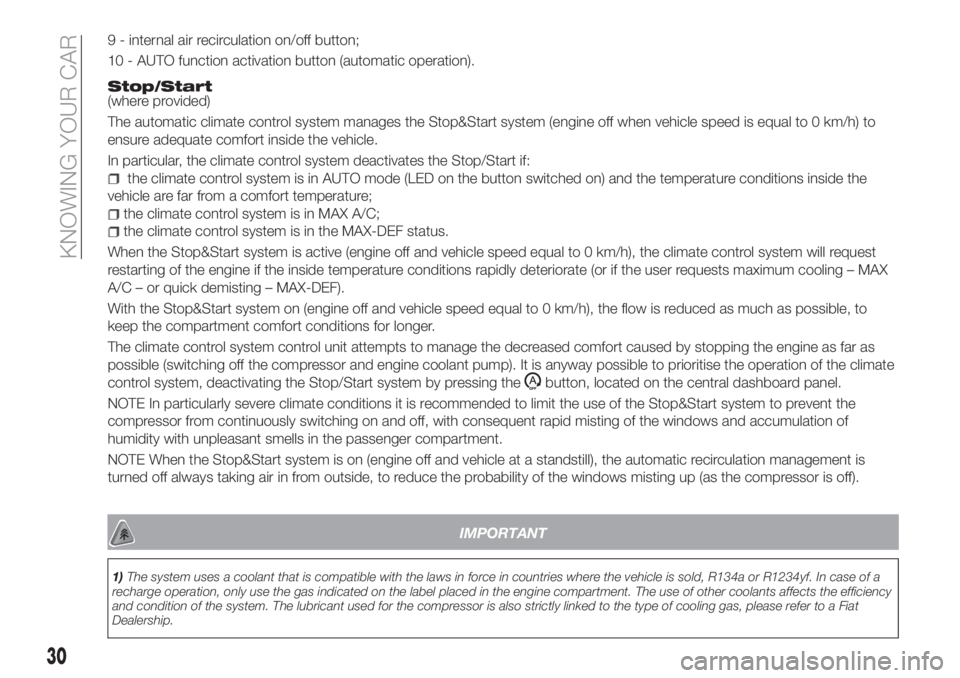
9 - internal air recirculation on/off button;
10 - AUTO function activation button (automatic operation).
Stop/Start(where provided)
The automatic climate control system manages the Stop&Start system (engine off when vehicle speed is equal to 0 km/h) to
ensure adequate comfort inside the vehicle.
In particular, the climate control system deactivates the Stop/Start if:
the climate control system is in AUTO mode (LED on the button switched on) and the temperature conditions inside the
vehicle are far from a comfort temperature;
the climate control system is in MAX A/C;
the climate control system is in the MAX-DEF status.
When the Stop&Start system is active (engine off and vehicle speed equal to 0 km/h), the climate control system will request
restarting of the engine if the inside temperature conditions rapidly deteriorate (or if the user requests maximum cooling – MAX
A/C – or quick demisting – MAX-DEF).
With the Stop&Start system on (engine off and vehicle speed equal to 0 km/h), the flow is reduced as much as possible, to
keep the compartment comfort conditions for longer.
The climate control system control unit attempts to manage the decreased comfort caused by stopping the engine as far as
possible (switching off the compressor and engine coolant pump). It is anyway possible to prioritise the operation of the climate
control system, deactivating the Stop/Start system by pressing the
button, located on the central dashboard panel.
NOTE In particularly severe climate conditions it is recommended to limit the use of the Stop&Start system to prevent the
compressor from continuously switching on and off, with consequent rapid misting of the windows and accumulation of
humidity with unpleasant smells in the passenger compartment.
NOTE When the Stop&Start system is on (engine off and vehicle at a standstill), the automatic recirculation management is
turned off always taking air in from outside, to reduce the probability of the windows misting up (as the compressor is off).
IMPORTANT
1)The system uses a coolant that is compatible with the laws in force in countries where the vehicle is sold, R134a or R1234yf. In case of a
recharge operation, only use the gas indicated on the label placed in the engine compartment. The use of other coolants affects the efficiency
and condition of the system. The lubricant used for the compressor is also strictly linked to the type of cooling gas, please refer to a Fiat
Dealership.
30
KNOWING YOUR CAR
Page 35 of 244
Make sure that the bonnet is
completely closed and not only
fastened by the locking device by trying
to open it. If it is not perfectly closed,
do not try to press the bonnet lid down
but open it and repeat the procedure.
IMPORTANT Always check that the
bonnet is closed correctly to prevent it
from opening while the vehicle is
travelling.
WARNING
24)Perform these operations only when
the car is stationary.
25)The bonnet may drop suddenly if the
supporting rod is not positioned correctly.
26)Use both hands to lift the bonnet.
Before lifting, check that the windscreen
wiper arms are not raised from the
windscreen, that the vehicle is stationary
and that the parking brake is engaged.
27)For safety reasons, the bonnet must
always be properly closed while the car is
travelling. Therefore, make sure that the
bonnet is properly closed and that the lock
is engaged. If you discover that the bonnet
is not perfectly closed during travel, stop
immediately and close the bonnet in the
correct manner.
DUALDRIVE
ELECTRIC POWER
STEERING
This only operates with the key turned
to MAR and the engine started. The
electric steering allows the force
required at the steering wheel to be
adjusted to suit driving conditions.
IMPORTANT When turning the ignition
key quickly, full power steering
functionality can be achieved after a
few seconds.
IMPORTANT During parking
manoeuvres requiring a lot of steering,
the steering may become harder; this is
normal and is due to the intervention of
the system to protect the electric
steering motor from overheating. No
repair intervention is needed in this
case. When the car is used again, the
power steering will work normally again.
IMPORTANT The Dualdrive electric
power steering provides an electronic
damping effect when approaching the
end of travel. In some manoeuvring
conditions, the steering wheel may
perform an additional small rotation until
reaching its mechanical stop. This
behaviour is normal and is intended to
prevent excessive impacts with the
mechanical components located inside
the device.POWER STEERING
ACTIVATION/
DEACTIVATION
28) 29)
Engagement/disengagement
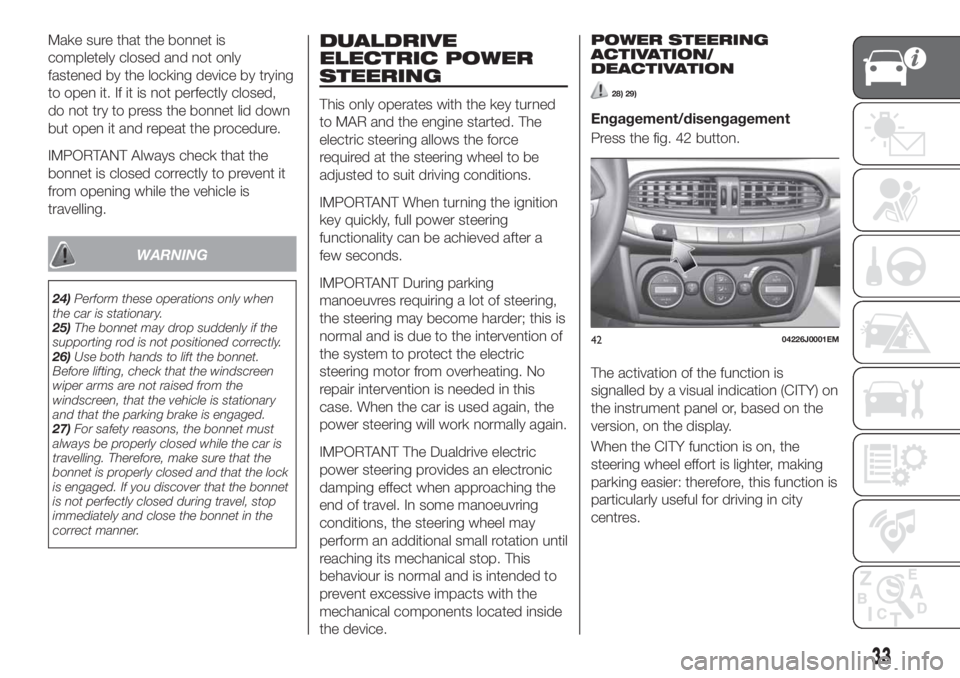
Press the fig. 42 button.
The activation of the function is
signalled by a visual indication (CITY) on
the instrument panel or, based on the
version, on the display.
When the CITY function is on, the
steering wheel effort is lighter, making
parking easier: therefore, this function is
particularly useful for driving in city
centres.
4204226J0001EM
33
Page 40 of 244
In addition, when starting at outside
temperatures below approximately
–10°C, the switching times from petrol
to LPG increase to allow the pressure
regulator/reduction unit to heat up.
To change fuel type, press the
fig. 51 button on the dashboard with
the car stationary and engine running,
or while driving.
14) 15)
LPG FUEL RESERVE
When the residual quantity of LPG
drops below 1/5 of the tank capacity:
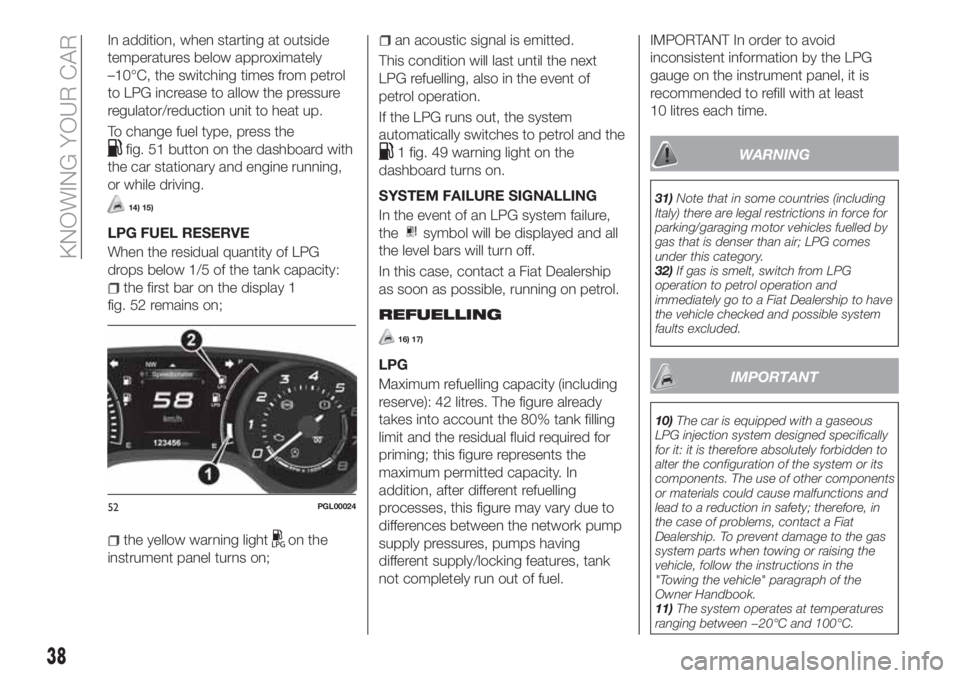
the first bar on the display 1
fig. 52 remains on;
the yellow warning lighton the
instrument panel turns on;
an acoustic signal is emitted.
This condition will last until the next
LPG refuelling, also in the event of
petrol operation.
If the LPG runs out, the system
automatically switches to petrol and the
1 fig. 49 warning light on the
dashboard turns on.
SYSTEM FAILURE SIGNALLING
In the event of an LPG system failure,
the
symbol will be displayed and all
the level bars will turn off.
In this case, contact a Fiat Dealership
as soon as possible, running on petrol.
REFUELLING
16) 17)
LPG
Maximum refuelling capacity (including
reserve): 42 litres. The figure already
takes into account the 80% tank filling
limit and the residual fluid required for
priming; this figure represents the
maximum permitted capacity. In
addition, after different refuelling
processes, this figure may vary due to
differences between the network pump
supply pressures, pumps having
different supply/locking features, tank
not completely run out of fuel.
IMPORTANT In order to avoid
inconsistent information by the LPG
gauge on the instrument panel, it is
recommended to refill with at least
10 litres each time.
WARNING
31)Note that in some countries (including
Italy) there are legal restrictions in force for
parking/garaging motor vehicles fuelled by
gas that is denser than air; LPG comes
under this category.
32)If gas is smelt, switch from LPG
operation to petrol operation and
immediately go to a Fiat Dealership to have
the vehicle checked and possible system
faults excluded.
IMPORTANT
10)The car is equipped with a gaseous
LPG injection system designed specifically
for it: it is therefore absolutely forbidden to
alter the configuration of the system or its
components. The use of other components
or materials could cause malfunctions and
lead to a reduction in safety; therefore, in
the case of problems, contact a Fiat
Dealership. To prevent damage to the gas
system parts when towing or raising the
vehicle, follow the instructions in the
"Towing the vehicle" paragraph of the
Owner Handbook.
11)The system operates at temperatures
ranging between −20°C and 100°C.
52PGL00024
38
KNOWING YOUR CAR
Page 76 of 244
It could be necessary to clean or
remove any obstructions in the area
shown in fig. 64.
If the message appears often, even in
the absence of atmospheric conditions
such as snow, rain, mud or other
obstructions, contact a Fiat Dealership
for a sensor alignment check.
In the absence of visible obstructions,
cleaning the radar surface, by manually
removing the decorative cover trim,
could be required. For this operation,
contact a Fiat Dealership.
IMPORTANT It is recommended that
you do not install devices, accessories
or aerodynamic attachments in front of
the sensor or darken it in any way, as
this can compromise the correct
functioning of the system. Any
modifications to the vehicle’s geometry
or its front area (including repairs not
done by the Fiat Dealership) can affect
the proper operation of the device.
Frontal collision alarm with active
braking
(where provided)
If this functions is enabled and the
system detects the risk of a collision, it
can activate the brakes to slow the car
down.This function applies an additional
braking pressure if the braking pressure
applied by the driver does not suffice to
prevent potential frontal impact.
The function is active with speed above
7 km/h.
Driving in special conditions
In certain driving conditions, such as,
for example:
driving close to a bend;
vehicles with small dimensions
and/or not aligned in the driving lane;
lane change by other vehicles;
vehicles travelling at right angles to
the vehicle.
The system’s intervention might be
unexpected or delayed. The driver must
therefore be very careful, keeping
control of the vehicle to drive in
complete safety.
IMPORTANT In particularly complex
traffic conditions, the driver can
deactivate the system through the
Menu.
Driving close to a bend
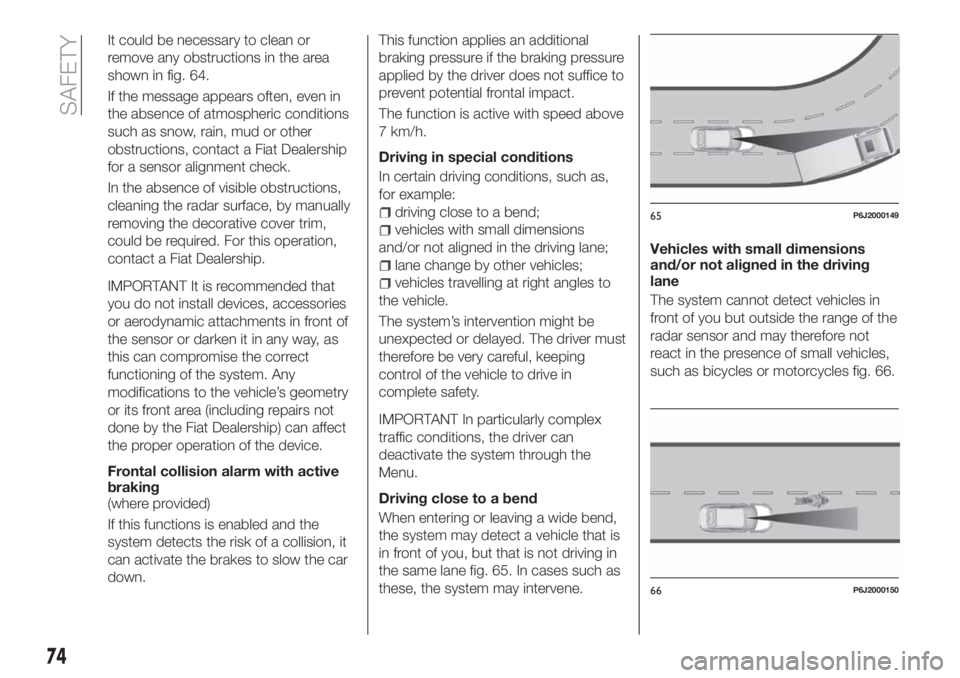
When entering or leaving a wide bend,
the system may detect a vehicle that is
in front of you, but that is not driving in
the same lane fig. 65. In cases such as
these, the system may intervene.Vehicles with small dimensions
and/or not aligned in the driving
lane
The system cannot detect vehicles in
front of you but outside the range of the
radar sensor and may therefore not
react in the presence of small vehicles,
such as bicycles or motorcycles fig. 66.
65P6J2000149
66P6J2000150
74
SAFETY
Page 78 of 244
This indication is displayed also when
turning the engine off and on again until
the RESET procedure is carried out.
Reset procedure
The iTPMS needs an initial
"self-learning" phase (with length
depending on the driving style and road
conditions: optimal conditions being
driving on a straight road at 80 km/h for
at least 20 minutes) which starts when
the RESET procedure is carried out.
The RESET procedure must be carried
out:
whenever the tyre pressure is
modified;
when even only one tyre is changed;
when tyres are rotated/inverted;
when the space-saver wheel is fitted.
Before carrying out the RESET
procedure, inflate the tyres to the rated
pressure values specified in the inflation
pressure table (see "Wheels" paragraph
in the "Technical specifications"
chapter).
If the RESET is not carried out, in all
above cases, the
warning light may
give false indications on one or more
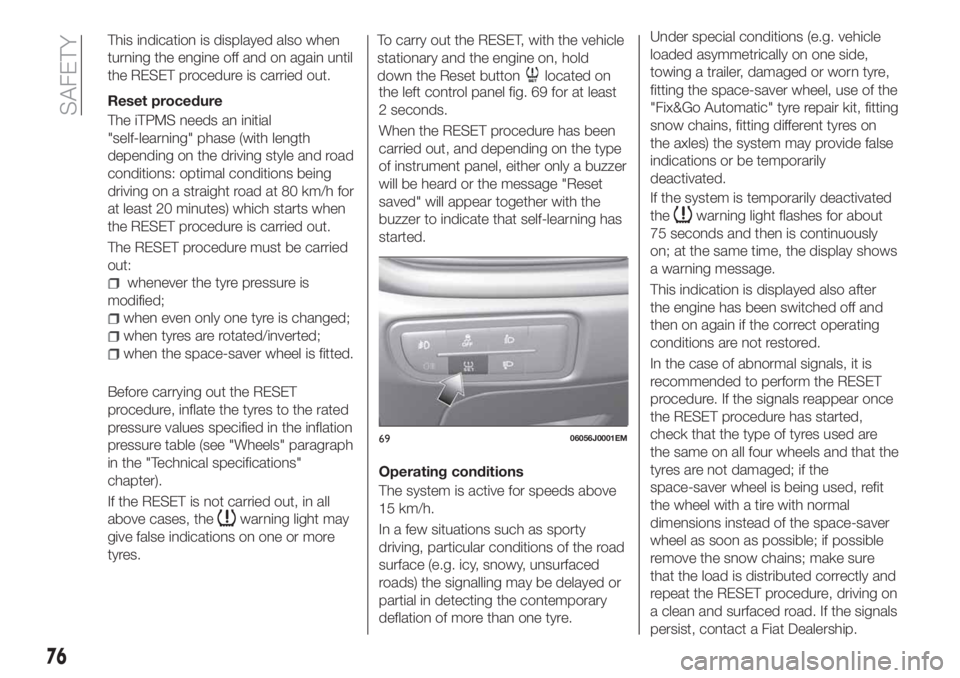
tyres.To carry out the RESET, with the vehicle
stationary and the engine on, hold
down the Reset button
located on
the left control panel fig. 69 for at least
2 seconds.
When the RESET procedure has been
carried out, and depending on the type
of instrument panel, either only a buzzer
will be heard or the message "Reset
saved" will appear together with the
buzzer to indicate that self-learning has
started.
Operating conditions
The system is active for speeds above
15 km/h.
In a few situations such as sporty
driving, particular conditions of the road
surface (e.g. icy, snowy, unsurfaced
roads) the signalling may be delayed or
partial in detecting the contemporary
deflation of more than one tyre.Under special conditions (e.g. vehicle
loaded asymmetrically on one side,
towing a trailer, damaged or worn tyre,
fitting the space-saver wheel, use of the
"Fix&Go Automatic" tyre repair kit, fitting
snow chains, fitting different tyres on
the axles) the system may provide false
indications or be temporarily
deactivated.
If the system is temporarily deactivated
the
warning light flashes for about
75 seconds and then is continuously
on; at the same time, the display shows
a warning message.
This indication is displayed also after
the engine has been switched off and
then on again if the correct operating
conditions are not restored.
In the case of abnormal signals, it is
recommended to perform the RESET
procedure. If the signals reappear once
the RESET procedure has started,
check that the type of tyres used are
the same on all four wheels and that the
tyres are not damaged; if the
space-saver wheel is being used, refit
the wheel with a tire with normal
dimensions instead of the space-saver
wheel as soon as possible; if possible
remove the snow chains; make sure
that the load is distributed correctly and
repeat the RESET procedure, driving on
a clean and surfaced road. If the signals
persist, contact a Fiat Dealership.
6906056J0001EM
76
SAFETY
Page 79 of 244
WARNING
60)The system is an aid for the driver, who
must always pay full attention while driving.
The responsibility always rests with the
driver, who must take into account the
traffic conditions in order to drive in
complete safety. The driver must always
maintain a safe distance from the vehicle in
front.
61)If the driver depresses the brake pedal
fully or carries out a fast steering during
system operation, the automatic braking
function may stop (e.g. to allow a possible
manoeuvre to avoid the obstacle).
62)The system intervenes on vehicles
travelling in the same lane. People, animals
and things (e.g. pushchairs) are not taken
into consideration.
63)If the car must be placed on a roller
bench for maintenance interventions or if it
is washed in an automatic roller washing
tunnel with an obstacle in the front part
(e.g. another car, a wall or another
obstacle), the system may detect its
presence and activate. In this case the
system must be deactivated through the
settings of the5”Uconnect™system.
64)If the iTMPS system signals a pressure
decrease on the tyres, it is recommended
to check the pressure on all four tyres.
65)The iTPMS does not relieve the driver
from the obligation to check the tyre
pressure every month; it is not even to be
considered a replacing system for
maintenance or a safety system.66)Tyre pressure must be checked with
tyres cold. Should it become necessary for
whatever reason to check pressure with
warm tyres, do not reduce pressure even
though it is higher than the prescribed
value, but repeat the check when tyres are
cold
67)The iTPMS cannot indicate sudden tyre
pressure drops (e.g. if a tyre bursts). In this
case, stop the vehicle, braking with caution
and avoiding abrupt steering.
68)The system only warns that the tyre
pressure is low: it is not able to inflate
them.
69)Insufficient tyre inflation increases fuel
consumption, reduces the tread duration
and may affect the capacity to drive safely.
IMPORTANT
26)The system may have limited or absent
operation due to weather conditions such
as: heavy rain, hail, thick fog, heavy snow.
27)The section of the bumper before the
sensor must not be covered with
adhesives, auxiliary headlights or any other
object.
28)System intervention might be
unexpected or delayed when other vehicles
transport loads projecting from the side,
above or from the rear, with respect to the
normal size of the vehicle.
29)Operation can be adversely affected by
any structural change made to the vehicle,
such as a modification to the front
geometry, tyre change, or a heavier load
than the standard load of the vehicle.30)Incorrect repairs made on the front part
of the vehicle (e.g. bumper, chassis) may
alter the position of the radar sensor, and
adversely affect its operation. Go to a Fiat
Dealership for any operation of this type.
31)Do not tamper nor operate on the radar
sensor. In the event of a sensor failure,
contact a Fiat Dealership.
32)When towing a trailer (with modules
installed after purchasing the vehicle), a
vehicle or during loading manoeuvres on a
vehicle transporter (or in vehicle for
transport), the system must be deactivated
via theUconnect™5” system.
33)Do not wash with high-pressure jets in
the bumper lower area: in particular do not
operate on the system's electrical
connector.
34)Be careful in the case of repairs and
new paintings in the area around the
sensor (panel covering the sensor on the
left side of the bumper). In the event of a
frontal impact the sensor may automatically
deactivate and display a warning to indicate
that the sensor needs to be repaired. Even
without a malfunction warning, deactivate
the system operation if you think that the
position of the radar sensor has changed
(e.g. due to low-speed frontal impact as
during parking manoeuvres). In these
cases, go to a Fiat Dealership to have the
radar sensor realigned or replaced.
77
Page 98 of 244
84)After installing a child restraint system,
do not move the seat: always remove the
child restraint system before making any
adjustment.
85)Always make sure that the diagonal
section of the seat belt does not pass
under the arms or behind the back of the
child. In the event of an accident the seat
belt will not be able to secure the child,
with the risk of injury, including fatal injury.
Therefore the child must always wear the
seat belt correctly.
86)Do not use the same lower anchorage
to install more than one child restraint
system.
87)If a Universal ISOFIX child restraint
system is not fixed to all three anchorages,
it will not be able to protect the child
correctly. In a crash, the child could be
seriously or fatally injured.
88)Fit the child restraint system when the
car is stationary. The child restraint system
is correctly fixed to the brackets when you
hear the click. Follow the instructions for
assembly, disassembly and positioning that
the Manufacturer must supply with the
child restraint system.SUPPLEMENTARY
RESTRAINT SYSTEM
(SRS) - AIRBAG
The vehicle is equipped with:
front driver airbag;
passenger front airbag (where
provided);
driver and passenger front side bags
(if present) for pelvis, chest and
shoulder protection (Side bags);
side bags (if present) for head
protection of front seat passengers and
rear side seat passengers (window
bag).
The location of the airbags on the
vehicle is marked by the word "AIR
BAG" in the middle of the steering
wheel, on the dashboard, on the side
trim or on a label placed next to the
airbag deployment area.
FRONT AIRBAGS
The front driver and passenger airbags
(where present) protect the front seat
occupants in the event of head-on
crashes of medium-high severity, by
placing the cushion between the
occupant and the steering wheel or
dashboard.The non-activation of airbags in other
types of collisions (side impacts, rear
shunts, roll-overs, etc...) (if present)
therefore does not indicate a system
malfunction.
Driver and passenger front airbags
(where present) are not a replacement
of but complementary to the seat belts,
which should always be worn, as
specified by law in Europe and most
non-European countries.
In the event of impact, those not
wearing a seat belt are projected
forwards and may come into contact
with the bag which is still inflating. The
protection offered by the bag is
compromised in these circumstances.
Front airbags may not activate in the
following situations:
frontal impacts against highly
deformable objects not involving the
front surface of the vehicle (e.g. wing
collision against guard rail, etc.);
vehicle wedging under other
vehicles or protective barriers (e.g.
trucks or guard rails).
Failure to activate in the conditions
described above is due to the fact that
they may not provide any additional
protection compared with seat belts, so
their activation would be inappropriate.
In these cases, non-deployment does
not indicate a system malfunction.
96
SAFETY
Page 100 of 244
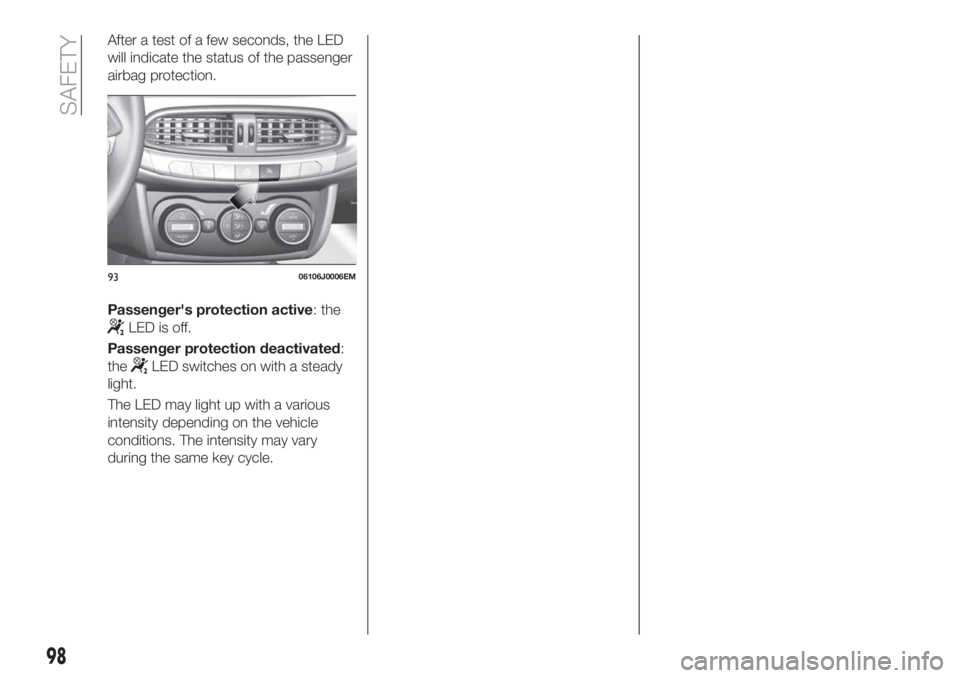
After a test of a few seconds, the LED
will indicate the status of the passenger
airbag protection.
Passenger's protection active: the
LED is off.
Passenger protection deactivated:
the
LED switches on with a steady
light.
The LED may light up with a various
intensity depending on the vehicle
conditions. The intensity may vary
during the same key cycle.
9306106J0006EM
98
SAFETY