change wheel FIAT TIPO 5DOORS STATION WAGON 2018 Owner handbook (in English)
[x] Cancel search | Manufacturer: FIAT, Model Year: 2018, Model line: TIPO 5DOORS STATION WAGON, Model: FIAT TIPO 5DOORS STATION WAGON 2018Pages: 292, PDF Size: 7.74 MB
Page 157 of 292

CHANGING A WHEEL
JACK
Please note that:
the jack weight is 2.15 kg;
the jack cannot be repaired and in
the event of a fault it must be replaced
by another genuine one;
No tool other than its cranking device
may be fitted on the jack.
Servicing
Prevent any dirt from depositing on
the "worm screw";
Keep the "worm screw" lubricated;
Never modify the jack.
Conditions for non-use
Temperatures below −40°C;
On sandy or muddy ground;
On uneven ground;
On steep roads;
In extreme weather conditions:
thunderstorms, typhoons, hurricanes,
blizzards, storms, etc.
In direct contact with the engine or
for repairs under the vehicle;
On boats.
CHANGING PROCEDURE
147) 148) 149) 150) 151) 152)
64) 65)
Proceed as follows:
stop the car in a position that is not
dangerous for oncoming traffic where
you can change the wheel safely. The
ground must be flat and sufficiently
compact;
stop the engine, engage the hazard
warning lights and the parking brake;
engage first gear or reverse or, for
versions with automatic transmission
(where provided), move the lever to the
P (Parking) position;
wear the reflective safety jacket
before getting out of the car (anyway
comply with the laws in force in the
country you are driving in);
open the boot and if there is a cargo
box (for TIPO 5DOOR version only),
remove it as described in the “Cargo
box” paragraph in the “Getting to know
the car” chapter (for petrol and Diesel
versions only);
lift the mat and fix it by the tab to the
fastening device on the parcel shelf
fig. 170 (for TIPO 5DOOR version only);
using the tool 4 in the tool box, undo
the lock nut 1 fig. 171 (for TIPO 5DOOR
version) or fig. 172 (for TIPO STATION
WAGON version);
170P2000069-000-000
171P2000059-000-000
155
Page 160 of 292
NOTE The hub cap cannot be fitted to
the space-saver wheel (for TIPO
5DOOR version).
NOTE If replacing a wheel with alloy
rim, stove it temporarily into the spare
wheel compartment with the cosmetic
side facing upwards.
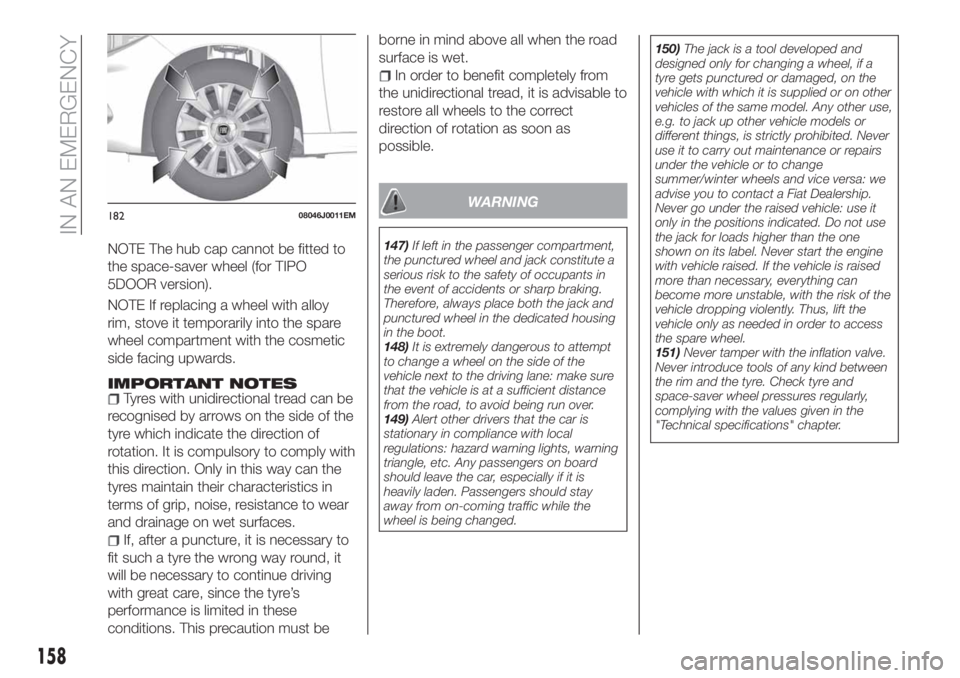
IMPORTANT NOTESTyres with unidirectional tread can be
recognised by arrows on the side of the
tyre which indicate the direction of
rotation. It is compulsory to comply with
this direction. Only in this way can the
tyres maintain their characteristics in
terms of grip, noise, resistance to wear
and drainage on wet surfaces.
If, after a puncture, it is necessary to
fit such a tyre the wrong way round, it
will be necessary to continue driving
with great care, since the tyre’s
performance is limited in these
conditions. This precaution must beborne in mind above all when the road
surface is wet.
In order to benefit completely from
the unidirectional tread, it is advisable to
restore all wheels to the correct
direction of rotation as soon as
possible.
WARNING
147)If left in the passenger compartment,
the punctured wheel and jack constitute a
serious risk to the safety of occupants in
the event of accidents or sharp braking.
Therefore, always place both the jack and
punctured wheel in the dedicated housing
in the boot.
148)It is extremely dangerous to attempt
to change a wheel on the side of the
vehicle next to the driving lane: make sure
that the vehicle is at a sufficient distance
from the road, to avoid being run over.
149)Alert other drivers that the car is
stationary in compliance with local
regulations: hazard warning lights, warning
triangle, etc. Any passengers on board
should leave the car, especially if it is
heavily laden. Passengers should stay
away from on-coming traffic while the
wheel is being changed.150)The jack is a tool developed and
designed only for changing a wheel, if a
tyre gets punctured or damaged, on the
vehicle with which it is supplied or on other
vehicles of the same model. Any other use,
e.g. to jack up other vehicle models or
different things, is strictly prohibited. Never
use it to carry out maintenance or repairs
under the vehicle or to change
summer/winter wheels and vice versa: we
advise you to contact a Fiat Dealership.
Never go under the raised vehicle: use it
only in the positions indicated. Do not use
the jack for loads higher than the one
shown on its label. Never start the engine
with vehicle raised. If the vehicle is raised
more than necessary, everything can
become more unstable, with the risk of the
vehicle dropping violently. Thus, lift the
vehicle only as needed in order to access
the spare wheel.
151)Never tamper with the inflation valve.
Never introduce tools of any kind between
the rim and the tyre. Check tyre and
space-saver wheel pressures regularly,
complying with the values given in the
"Technical specifications" chapter.
18208046J0011EM
158
IN AN EMERGENCY
Page 211 of 292
WHEELS
SNOW TYRES
187)
Use snow tyres of the same size as the
standard tyres provided with the car.
The Fiat Dealership will be happy to
provide advice concerning the most
suitable type of tyre for the customer's
requirements.
For the type of snow tyre to be used,
inflation pressures and the
specifications of the tyres, carefully
follow the instructions given in this
chapter.
The winter features of these tyres are
reduced considerably when the tread
depth is below 4 mm. Replace them in
this case.
Due to the specific characteristics of
snow tyres, in normal weather
conditions or on long motorway
journeys, the performance of these
tyres is lower than that of standard
tyres.
Their usage should therefore be
restricted in accordance with their
type-approval; always comply with
specific local regulations relating to the
use of snow tyres.All four tyres should be the same (brand
and track) to ensure greater safety
when driving and braking as well as a
good manoeuvrability. Remember that
you should not change the rotation
direction of the tyres.
209
Page 246 of 292
SWITCHING THE SYSTEM
ON/OFF
The system is switched on/off by
pressing the
button/knob.
Turn the button/knob clockwise to
increase the radio volume or
anticlockwise to decrease it. The
electronic volume adjustment control
rotates continuously (360°) in both
directions, without stop positions.
RADIO (TUNER) MODE
The system is equipped with the
following tuners: AM, FM and DAB (for
versions/markets, where provided).
Radio mode selection
Press the RADIO button on the front
panel to activate radio mode.
Selecting a frequency band
The different tuning modes can be
selected by pressing the RADIO button
on the front panel.
Indications on display
After the desired radio station is
selected on the display, the following
information is shown (INFO mode
activated):
In the upper part: the preset station, the
time and the other active radio settings
are highlighted.In the central part: the name of the
current station, the frequency and the
radio text information (if any) are
highlighted.
FM station list
Press the BROWSE ENTER
button/knob to display the complete list
of the FM stations that can be received.
AM/FM radio station storage
The preset stations are available in all
system modes and are selected by
touching one of the presetting buttons
1-2-3-4-5-6on the front panel. If you
are tuned to a radio station that you
wish to store, hold down the button on
the display which corresponds to the
desired preset until an acoustic
confirmation signal is emitted.
AM/FM radio station selection
To search for the desired radio station
press the
orbutton or use the
wheel of the steering wheel controls, or
turn the "BROWSE ENTER" knob.
Previous/next radio station search
Briefly press the
orbutton:
when the button is released the
previous or the next radio station is
displayed.Previous/next radio station fast
search
Hold down the
orbutton to
start the fast search: when the button is
released, the first tunable radio is
played.
MEDIA MODE
Interaction modes for AUX (where
provided), USB operation.
Audio source selection
To select the desired audio source
among those available: AUX (where
provided) or USB, press theMEDIA
media.
To select and playback music tracks on
the cell phone CD card (where the
phone allows) press the BROWSE
ENTER button, select Folders then
Card.
IMPORTANT Some multimedia players
may not be compatible with the
Uconnect™.
CHANGE TRACK (next/previous)
Briefly press the
button to play the
next track or briefly press the
button to return to the beginning
of the selected track or to the beginning
of the previous track if this has been
played for less than 3 seconds.
244
MULTIMEDIA
Page 248 of 292
Adjust the volume using the
button/knob on the front panel or
using the volume adjustment control on
the connected device.
For the "Audio source selection"
function, see the "Media mode"
chapter.
IMPORTANT NOTES
The functions of the device connected
with the AUX socket are directly
managed by the device itself: it is not
possible to change track/folder/playlist
or control playing start/end/pause with
the controls on the front panel or on the
steering wheel.
Do not leave the cable of your portable
player connected to the AUX socket
after disconnection, to avoid possible
hiss from the speakers.
IMPORTANT When connecting a device
to the AUX socket, make sure that it
does not obstruct the operation of the
handbrake lever.PHONE MODE
(where provided)
Phone mode activation
Press the PHONE button on the front
panel to activate the Phone mode.
The available commands can be used
to:
dial the wished phone number;
display and call the contacts in the
mobile phone phonebook;
display and call contacts from the
registers of previous calls;
pair up to 8 phones to make access
and connection easier and quicker;
transfer calls from the system to the
mobile phone and vice versa and
deactivate the microphone audio for
private conversations.
The mobile phone audio is transmitted
through the vehicle’s audio system; the
system automatically mutes the radio
when the Phone function is used.
Pairing a mobile phone
To pair the mobile phone, proceed as
follows:
activate theBluetooth®
function on
the mobile phone;
press thePHONEbutton on the
front panel;
if no phone is paired with the system
yet, the display shows a dedicated
screen;
select "Connect Phone" to start the
pairing procedure then search for the
Uconnect™device on the mobile
phone (if "No" is selected, the Phone
main screen is displayed);
when prompted by the mobile
phone, use the phone keypad to enter
the PIN code shown on the system
display or confirm on the mobile phone
the PIN displayed;
from the "Settings" menu you can
always pair a mobile phone by selecting
"Phone menu/Add phone", then
proceed as described above;
during the pairing stage a screen is
displayed showing the progress of the
operation.
NOTE After updating the telephone
software, for correct operation it is
advisable to remove the telephone from
the list of devices paired to the radio,
delete the previous system pairing from
the telephone's availableBluetooth®
device list and pair it again.
Making a phone call
The operations described below can
only be accessed if supported by the
mobile phone in use.
A call can be made by:
selecting "Contacts" (Phonebook
......);
selecting "Recent Calls list";
selecting "Dial Pad".
246
MULTIMEDIA
Page 256 of 292
This mode is activated by pairing a
Bluetooth®
device containing music
tracks with the system.
To pair a
Bluetooth®
audio device,
proceed as follows:
activate theBluetooth®
function on
the device;
press the MEDIA button on the front
panel;
if the "Media" source is active, press
the "Source" button;
select theBluetooth®
Media
source;
press the "Add Device" button;
search forUconnect™on the
Bluetooth®
audio device (during the
pairing stage a screen is displayed
showing the progress of the operation);
when requested by the audio device,
enter the PIN code shown on the
system display or confirm on the device
the PIN displayed;
if the pairing procedure is completed
successfully, a screen is displayed.
Answer "Yes" to the question to pair the
Bluetooth®
audio device as favourite
(the device will have priority over all
other devices to be paired
subsequently). If "No" is selected, the
priority is determined according to the
order of connection. The last device
connected will have the highest priority;
an audio device can also be paired
by pressing the PHONE button on the
front panel and by selecting "Settings"
or, from the "Settings" menu, selecting
"Phone/Bluetooth".
WARNING If the
Bluetooth®
connection between mobile phone and
system is lost, consult the mobile
phone handbook.
USB SOURCE
To activate the USB mode, insert the
corresponding USB device into the
USB port on the central console.
When a USB device is inserted with the
radio on, it starts to play the tracks on
the device if the “AutoPlay” is set to ON
in the “Audio” menu.
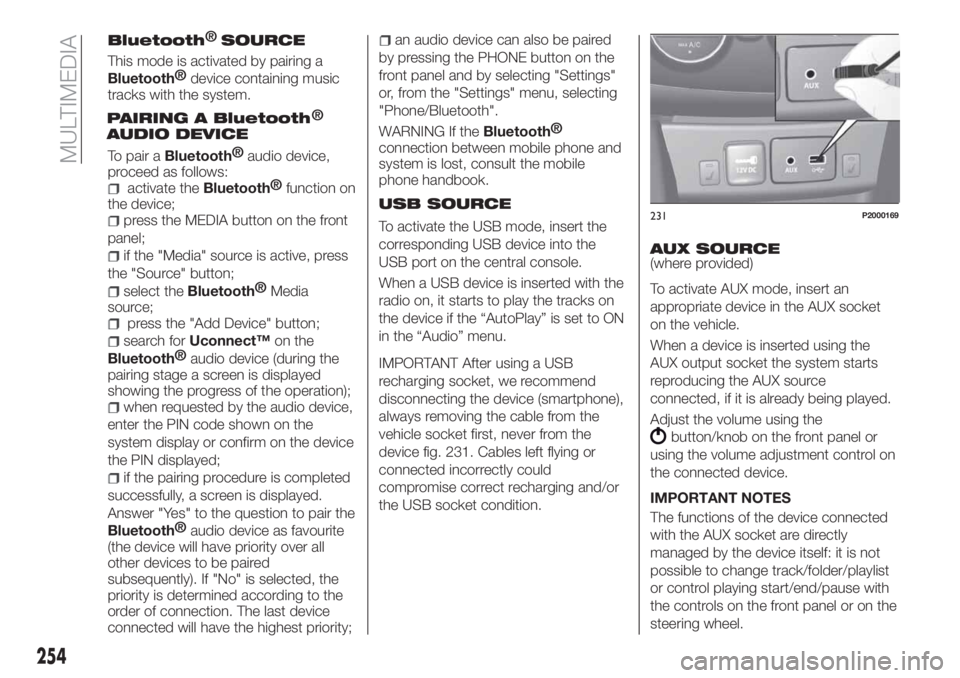
IMPORTANT After using a USB
recharging socket, we recommend
disconnecting the device (smartphone),
always removing the cable from the
vehicle socket first, never from the
device fig. 231. Cables left flying or
connected incorrectly could
compromise correct recharging and/or
the USB socket condition.AUX SOURCE
(where provided)
To activate AUX mode, insert an
appropriate device in the AUX socket
on the vehicle.
When a device is inserted using the
AUX output socket the system starts
reproducing the AUX source
connected, if it is already being played.
Adjust the volume using the
button/knob on the front panel or
using the volume adjustment control on
the connected device.
IMPORTANT NOTES
The functions of the device connected
with the AUX socket are directly
managed by the device itself: it is not
possible to change track/folder/playlist
or control playing start/end/pause with
the controls on the front panel or on the
steering wheel.
231P2000169
254
MULTIMEDIA
Bluetooth SOURCE
PAIRING A Bluetooth
AUDIO DEVICE®
®
Page 270 of 292
AUX SOURCE(where provided)
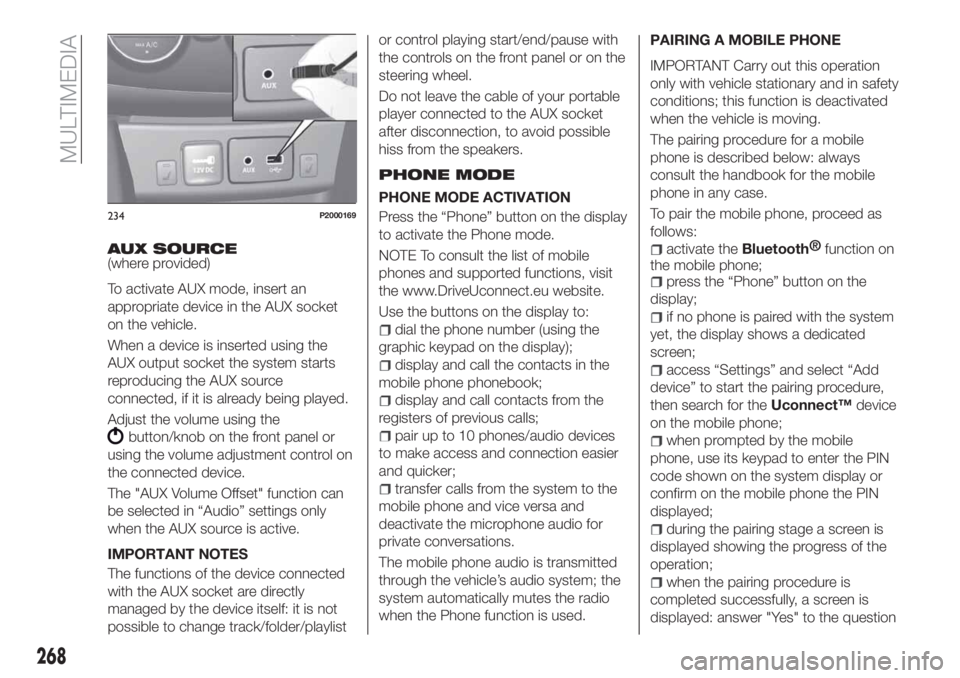
To activate AUX mode, insert an
appropriate device in the AUX socket
on the vehicle.
When a device is inserted using the
AUX output socket the system starts
reproducing the AUX source
connected, if it is already being played.
Adjust the volume using the
button/knob on the front panel or
using the volume adjustment control on
the connected device.
The "AUX Volume Offset" function can
be selected in “Audio” settings only
when the AUX source is active.
IMPORTANT NOTES
The functions of the device connected
with the AUX socket are directly
managed by the device itself: it is not
possible to change track/folder/playlistor control playing start/end/pause with
the controls on the front panel or on the
steering wheel.
Do not leave the cable of your portable
player connected to the AUX socket
after disconnection, to avoid possible
hiss from the speakers.
PHONE MODE
PHONE MODE ACTIVATION
Press the “Phone” button on the display
to activate the Phone mode.
NOTE To consult the list of mobile
phones and supported functions, visit
the www.DriveUconnect.eu website.
Use the buttons on the display to:
dial the phone number (using the
graphic keypad on the display);
display and call the contacts in the
mobile phone phonebook;
display and call contacts from the
registers of previous calls;
pair up to 10 phones/audio devices
to make access and connection easier
and quicker;
transfer calls from the system to the
mobile phone and vice versa and
deactivate the microphone audio for
private conversations.
The mobile phone audio is transmitted
through the vehicle’s audio system; the
system automatically mutes the radio
when the Phone function is used.PAIRING A MOBILE PHONE
IMPORTANT Carry out this operation
only with vehicle stationary and in safety
conditions; this function is deactivated
when the vehicle is moving.
The pairing procedure for a mobile
phone is described below: always
consult the handbook for the mobile
phone in any case.
To pair the mobile phone, proceed as
follows:
activate theBluetooth®
function on
the mobile phone;
press the “Phone” button on the
display;
if no phone is paired with the system
yet, the display shows a dedicated
screen;
access “Settings” and select “Add
device” to start the pairing procedure,
then search for theUconnect™device
on the mobile phone;
when prompted by the mobile
phone, use its keypad to enter the PIN
code shown on the system display or
confirm on the mobile phone the PIN
displayed;
during the pairing stage a screen is
displayed showing the progress of the
operation;
when the pairing procedure is
completed successfully, a screen is
displayed: answer "Yes" to the question
234P2000169
268
MULTIMEDIA
Page 273 of 292
Apple CarPlay and
Android Auto
(where provided)
The Apple CarPlay and Android Auto
applications allow you to use your
smartphone in the car safely and
intuitively. To enable them, just connect
a compatible smartphone via the USB
port and the phone's contents will be
automatically shown on the
Uconnect™system display.
To check the compatibility of your
smartphone, see the indications on the
websites:
https://www.android.com/intl/it_it/auto/
and http://www.apple.com/it/ios/
carplay/.
If the smartphone is connected
correctly to the car via the USB port,
the Apple CarPlay or Android Auto icon
will be displayed in place of the
button in the main menu.
Android Auto APP Setup
Before use, download the Android Auto
application to your smartphone from
Google Play Store.
The application is compatible with
Android 5.0 (Lollipop) and later
versions. To use Android Auto, the
smartphone must be connected to the
car with a USB cable.
On the first connection, you will have to
perform the setup procedure that
appears on the smartphone.You can only perform this procedure
with the vehicle stationary.
Once connected to the USB port, the
Android Auto application establishes a
parallel
Bluetooth®
connection.
Apple CarPlay App Setup
Apple CarPlay is compatible with the
iPhone 5 or more recent models, with
the iOS 7.1 operating system or later
versions. Before using Apple CarPlay,
enable Siri from "Settings"
General
Siri on the smartphone.
To use Apple CarPlay, the smartphone
must be connected to the car with a
USB cable.
NOTE Enabling CarPlay/Android Auto
or some functions could require
interaction on the smartphone. If
necessary, complete the step on your
device (smartphone).
Interaction
After the setup procedure, on
connecting your smartphone to the
car's USB port, the application will run
automatically on theUconnect™
system. You can interact with Apple
CarPlay and Android Auto using the
steering wheel button
(long press of
the button), using the BROWSE ENTER
button/knob (to select and confirm) or
using theUconnect™system
touchscreen.Navigation
With the Apple CarPlay and Android
Auto applications, the driver can
choose to use the navigation system on
their smartphone.
If the system “Nav” mode is already
active, or when a device is connected
to the car with a navigation session in
progress, theUconnect™display
shows a pop-up alert enabling the
driver to choose between system
navigation or navigation using the
smartphone.
The selection can be changed at any
time by accessing the chosen
navigation system and setting a new
destination.
Setting “AutoShow smartphone
display on connection"
Through theUconnect™system
settings, the user can decide to view
the smartphone screen on the
Uconnect™system display as soon as
the smartphone is connected via the
USB port.
When this function is set, each time a
connection is made via USB, the Apple
CarPlay or Android Auto apps will run
automatically on theUconnect™
system display.
The "AutoShow smartphone display on
connection" item can be found in the
"Display" submenu.
271
Page 289 of 292
Scheduled Servicing Plan.......173
Screen wiper/washer...........27
Smart washing function.......27
Seat belts..................84
Seats.....................16
Servicing procedures..........196
Side bag..................106
Side direction indicators (bulb
replacement)..............143
Sideboards (TIPO STATION
WAGON version)............39
Snow chains...............200
Speed Limiter...............118
SRS (supplementary restraint
system).................102
Starting the engine...........109
Steering lock................13Steering wheel...............21
Steering wheel controls.........263
Stop/Start system............116
TC (system)................75
Technical data..............205
Third brake light (bulb
replacement)..............147
Toolbox...................36
Towing the vehicle............169
Towing trailers..............133
Trip Computer...............55
TSC (system)................76
Tyres (inflation pressure)........212
Uconnect™ 5” LIVE —
Uconnect™ 5” Nav LIVE......248
Uconnect™ 7" HD LIVE -
Uconnect™ 7" HD Nav LIVE. . . .260Uconnect™ Radio............238
Use of the Owner Handbook.......3
Vehicle changes/alterations.......4
Version with LPG system........41
Warning lights and messages.....56
Weights..................218
Wheels...................209
Wheels and tyres.............200
Window bag...............106
Windows (cleaning)...........201
Windscreen wiper
replacing blades...........197
Windscreen/rear window wiper....27
Xenon gas discharge main
beam/dipped beam headlights
(bulb replacement)..........145