tow FORD C MAX 2008 1.G Owner's Manual
[x] Cancel search | Manufacturer: FORD, Model Year: 2008, Model line: C MAX, Model: FORD C MAX 2008 1.GPages: 278, PDF Size: 17.5 MB
Page 156 of 278
Downloaded from www.Manualslib.com manuals search engine MANUAL TRANSMISSION
WARNINGS
Engage reverse gear only whenthe vehicle is stationary.
Do not apply any undue lateralforce to the gear lever whenchanging from 5th to 4th gear as thiscould lead to the inadvertentselection of 2nd gear.
To avoid shifting noises whenengaging the reverse gear, waitapproximately three seconds withthe clutch depressed when thevehicle is stationary.
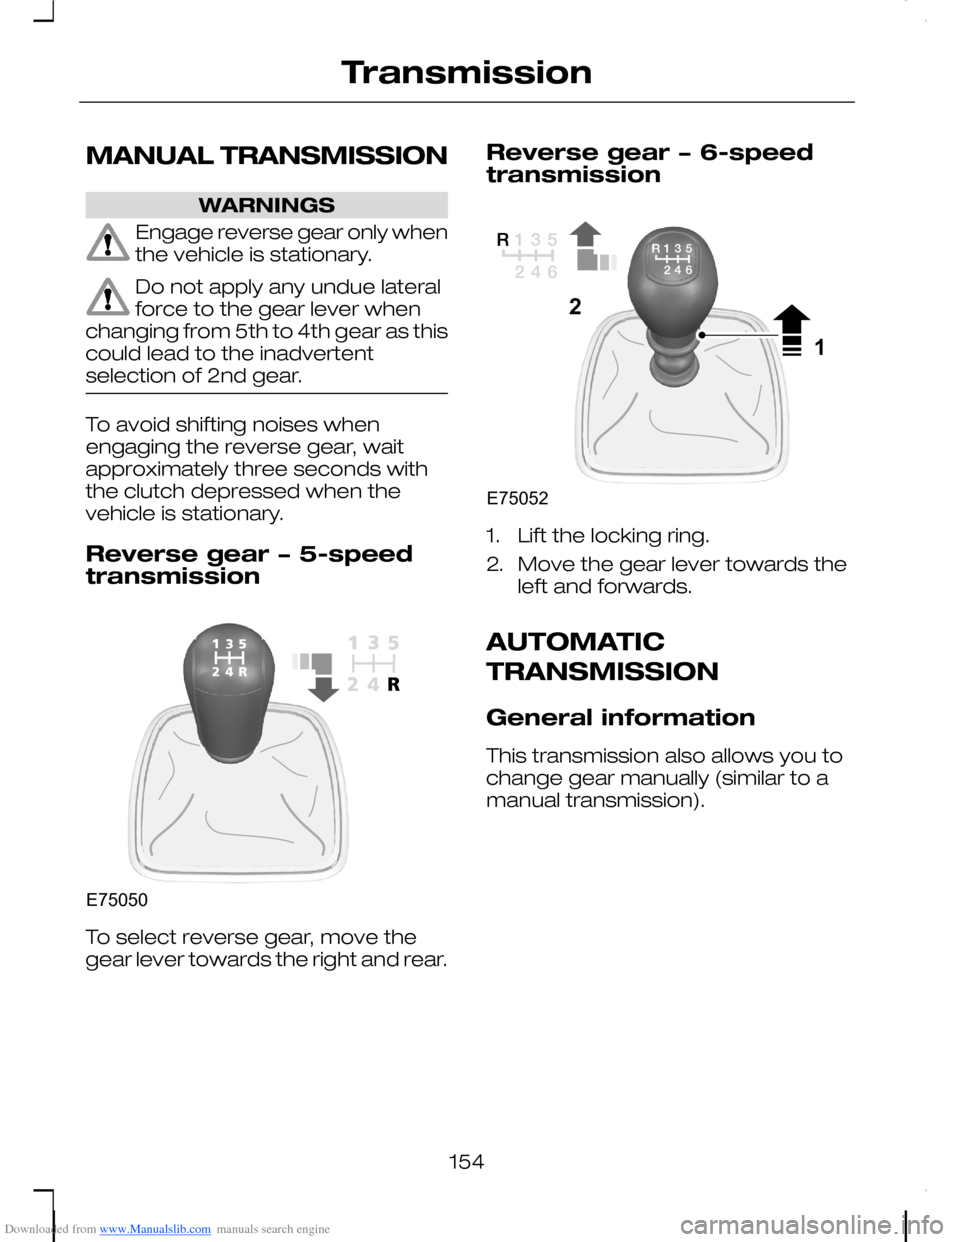
Reverse gear − 5-speedtransmission
To select reverse gear, move thegear lever towards the right and rear.
Reverse gear − 6-speedtransmission
1.Lift the locking ring.
2.Move the gear lever towards theleft and forwards.
AUTOMATIC
TRANSMISSION
General information
This transmission also allows you tochange gear manually (similar to amanual transmission).
154
TransmissionE75050 E7505221
Page 158 of 278
Downloaded from www.Manualslib.com manuals search engine Drive
Select drive to shift automaticallythrough the forward gears.
Manual shifting
Note:A shift will occur only whenthe vehicle speed and the enginespeed are appropriate.
Select manual shifting to shiftmanually through the forward gears.Push the selector lever forwards toshift down and pull it backwards toshift up.
WARNING
Do not hold the selector leverpermanently in – or +.
Gears can be skipped by moving theselector lever repeatedly at shortintervals.
Manual mode also provides akickdown function. See Kickdown.
The transmission will automaticallydownshift when the engine speed istoo low and upshift when to high.
Drive modes
The transmission will select theappropriate gear for optimumperformance based on ambienttemperature, road gradient, vehicleload and driver input.
Hints on driving with anautomatic transmission
Moving off
WARNING
It is not possible to tow-start orpush-start a vehicle fitted withan automatic transmission. SeeUsing booster cables (page 209).
1.Release the parking brake.
2.Release the brake pedal andpress the accelerator pedal.
Stopping
1.Release the accelerator pedal andpress the brake pedal.
2.Apply the parking brake.
Kickdown
Press the accelerator pedal fully withthe selector lever in the drive positionto select the next lowest gear foroptimum performance. Release theaccelerator pedal when you nolonger require kickdown.
Emergency park positionrelease lever
Use the lever to move the selectorlever from the park position in theevent of an electrical malfunction orif your vehicle has a flat battery.
156
Transmission
Page 161 of 278
Downloaded from www.Manualslib.com manuals search engine The ABS will not eliminate thedangers inherent when:
•you drive too close to the vehiclein front of you.
•the vehicle is aquaplaning.
•you take corners too fast.
•the road surface is poor.
PARKING BRAKE
All vehicles
WARNING
Vehicles with an automatictransmission should always beleft with the selector lever in positionP.
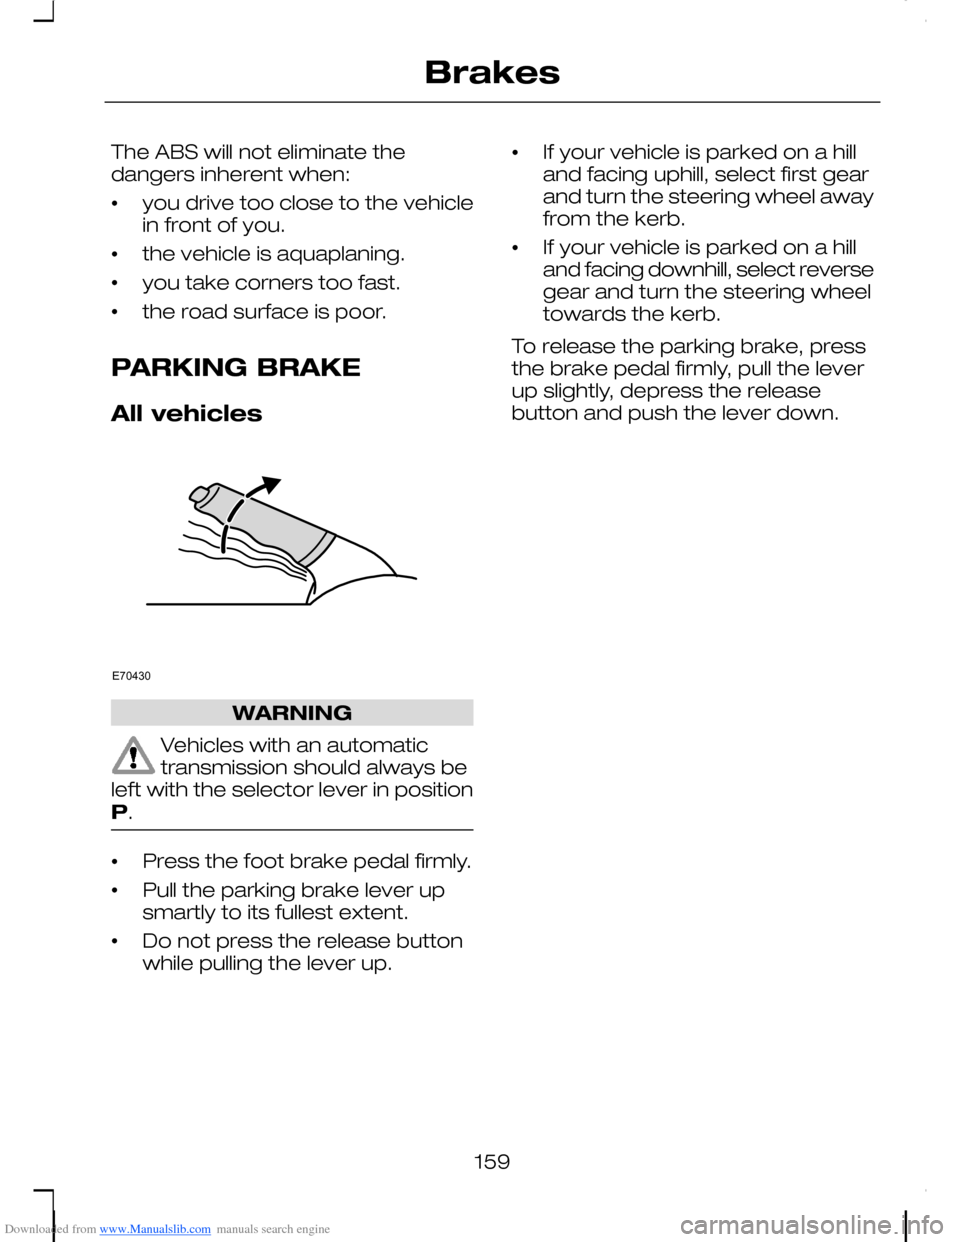
•Press the foot brake pedal firmly.
•Pull the parking brake lever upsmartly to its fullest extent.
•Do not press the release buttonwhile pulling the lever up.
•If your vehicle is parked on a hilland facing uphill, select first gearand turn the steering wheel awayfrom the kerb.
•If your vehicle is parked on a hilland facing downhill, select reversegear and turn the steering wheeltowards the kerb.
To release the parking brake, pressthe brake pedal firmly, pull the leverup slightly, depress the releasebutton and push the lever down.
159
BrakesE70430
Page 164 of 278
Downloaded from www.Manualslib.com manuals search engine PRINCIPLE OF
OPERATION
WARNING
The parking aid does not relieveyou of your responsibility todrive with due care and attention.
CAUTIONS
The sensors may not detectobjects in heavy rain or otherconditions that cause disruptivereflections.
The sensors may not detectobjects with surfaces that absorbultrasonic waves.
The sensors may not detectobjects that are close to thevehicle (approximately 30centimetres [11 inches] to the rearand above or below the sensors).
If you use a high pressure sprayto wash your vehicle, only spraythe sensors briefly from a distancenot less than 20 centimetres (8inches).
Note:The parking aid may emit falsetones if it detects a signal using thesame frequency as the sensors or ifthe vehicle is fully laden.
Note:The outer sensors may detectthe side walls of a garage. If thedistance between the outer sensorand the side wall remains constantfor three seconds, the tone willswitch off. As you continue, the innersensors will detect rearward objects.
USING THE PARKING AID
Note:Keep the sensors free fromdirt, ice and snow. Do not clean withsharp objects.
Switching the parking aidon and off
Note:The parking aid switches offautomatically when you start theengine or when you exceed 16 km/h(10 mph).
Note:Vehicles fitted with a trailertow module not approved by us maynot correctly detect obstacles.
Note:On vehicles fitted with a towball arm, the rear sensors aredeactivated automatically when anytrailer lamps (or lighting boards) areconnected to the 13-pin socket via atrailer tow module we haveapproved. On vehicles fitted with atrailer tow module not approved byus, you have to switch the parkingaid off using the switch.
Note:The front and rear sensors arealways activated or deactivatedtogether.
Note:On vehicles fitted withautomatic transmission, the parkingaid will not operate in position P.
The parking aid is per default off. Toswitch the parking aid on, press theswitch in the instrument panel orselect reverse gear.
The light in the switch illuminateswhen the parking aid is activated.
To turn it off, press the switch again.
162
Parking aid
Page 165 of 278
Downloaded from www.Manualslib.com manuals search engine Manoeuvring with theparking aid
CAUTIONS
The parking aid does not detectobstacles moving away from thevehicle. They will only be detectedshortly after they start to movetowards the vehicle again.
Take particular care whenreversing with a tow ball arm orrear fitted accessories e.g. a bicyclecarrier, as the rear parking aid will onlyindicate the distance from thebumper to the obstacle.
Note:If a high pitch warning tonesounds for three seconds and thelight in the switch is flashing, itindicates a malfunction. The systemwill be disabled. Have the systemchecked by properly trainedtechnicians.
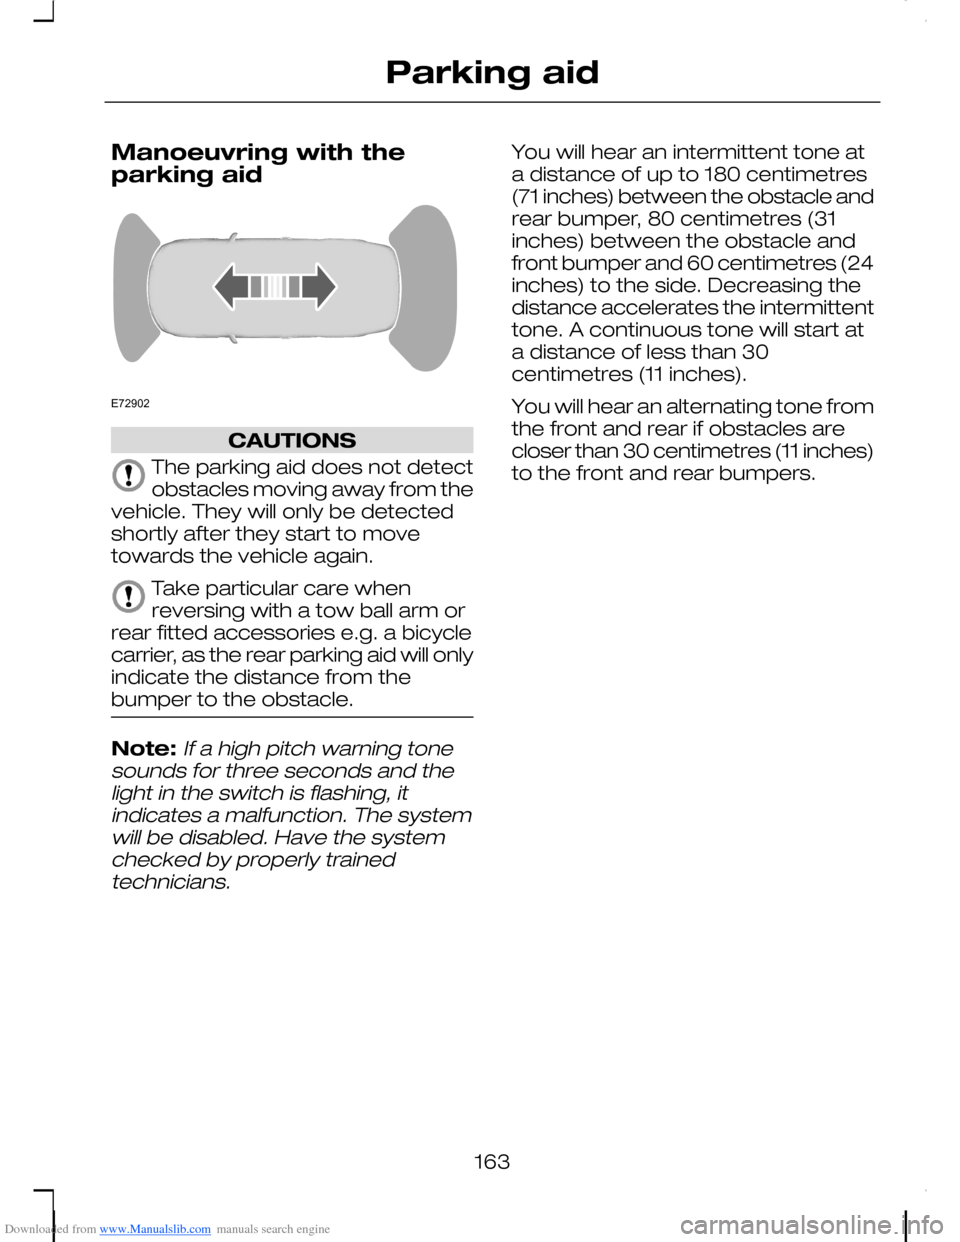
You will hear an intermittent tone ata distance of up to 180 centimetres(71 inches) between the obstacle andrear bumper, 80 centimetres (31inches) between the obstacle andfront bumper and 60 centimetres (24inches) to the side. Decreasing thedistance accelerates the intermittenttone. A continuous tone will start ata distance of less than 30centimetres (11 inches).
You will hear an alternating tone fromthe front and rear if obstacles arecloser than 30 centimetres (11 inches)to the front and rear bumpers.
163
Parking aidE72902
Page 171 of 278
Downloaded from www.Manualslib.com manuals search engine TOWING A TRAILER
WARNINGS
Do not exceed the maximumvehicle and trailer weight statedon the vehicle identification plate. SeeVehicle identification (page 226).
ST vehicles are not approvedfor trailer towing.
Note:Not all vehicles are suitable orapproved to have tow bars fitted.Check with your dealer first.
Place loads as low and central to theaxle(s) of the trailer as possible. If youare towing with an unladen vehicle,the load in the trailer should beplaced toward the nose, within themaximum nose load, as this gives thebest stability.
Note:The maximum trailer noseweight can be found on themanufacturers data plate on the towbar.
The stability of the vehicle to trailercombination is very much dependanton the quality of the trailer.
In high altitude regions, the stipulatedmaximum permitted gross trainweight must be reduced by 10% forevery 1 000 metres (3 281 feet).
Steep gradients
WARNING
The overrun brake on a trailer isnot controlled by ABS.
Change down a gear before youreach a steep downhill gradient.
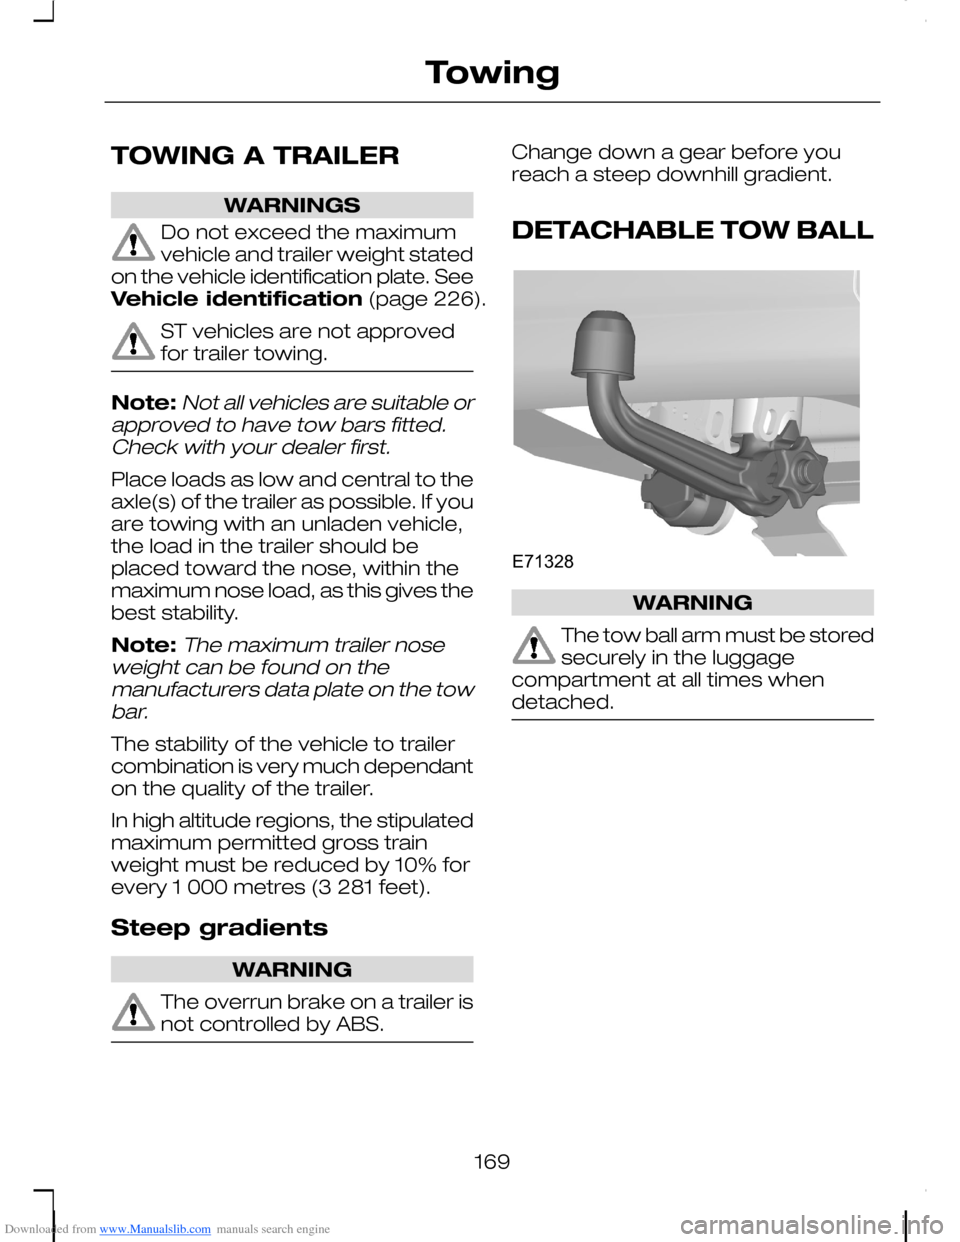
DETACHABLE TOW BALL
WARNING
The tow ball arm must be storedsecurely in the luggagecompartment at all times whendetached.
169
TowingE71328
Page 172 of 278
Downloaded from www.Manualslib.com manuals search engine Unlocking the tow ball armmechanism
WARNING
Do not use any tools formounting or dismounting thetow ball arm. Do not modify the trailercoupling. Do not disassemble orrepair the tow ball arm.
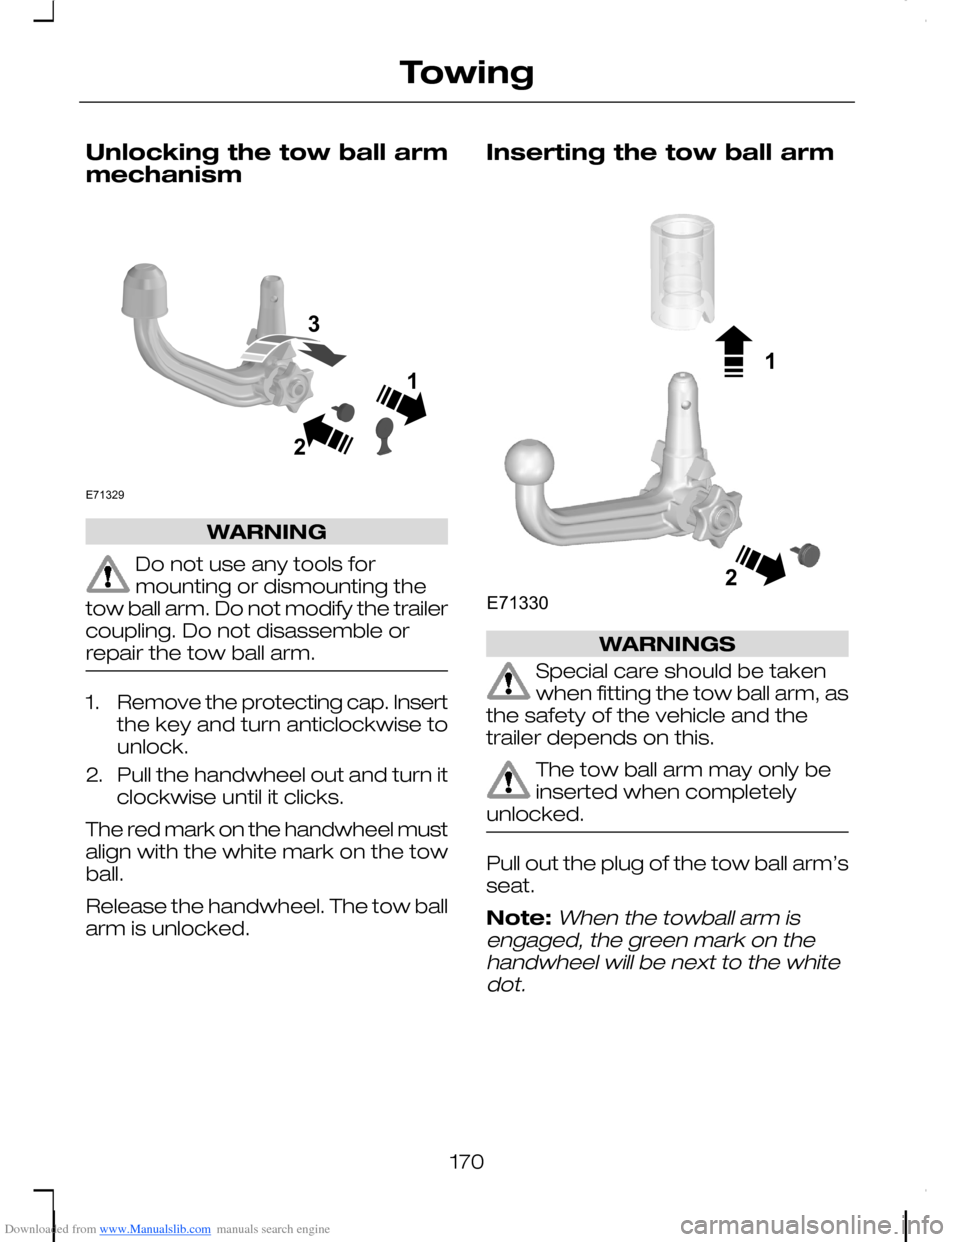
1.Remove the protecting cap. Insertthe key and turn anticlockwise tounlock.
2.Pull the handwheel out and turn itclockwise until it clicks.
The red mark on the handwheel mustalign with the white mark on the towball.
Release the handwheel. The tow ballarm is unlocked.
Inserting the tow ball arm
WARNINGS
Special care should be takenwhen fitting the tow ball arm, asthe safety of the vehicle and thetrailer depends on this.
The tow ball arm may only beinserted when completelyunlocked.
Pull out the plug of the tow ball arm’sseat.
Note:When the towball arm isengaged, the green mark on thehandwheel will be next to the whitedot.
170
TowingE71329213 12E71330
Page 173 of 278
Downloaded from www.Manualslib.com manuals search engine 1.Insert the tow ball arm verticallyand press it upwards until itengages. Do not hold your handnear the handwheel.
2.To lock: Turn the key clockwiseand remove the key.
Insert the end of the protection capinto the keyhole.
Driving with a trailer
WARNING
If any of the below conditionscannot be met, do not use thetow bar and have it inspected by anexpert.
Before starting your journey, ensurethe tow ball arm is properly locked.Check that:
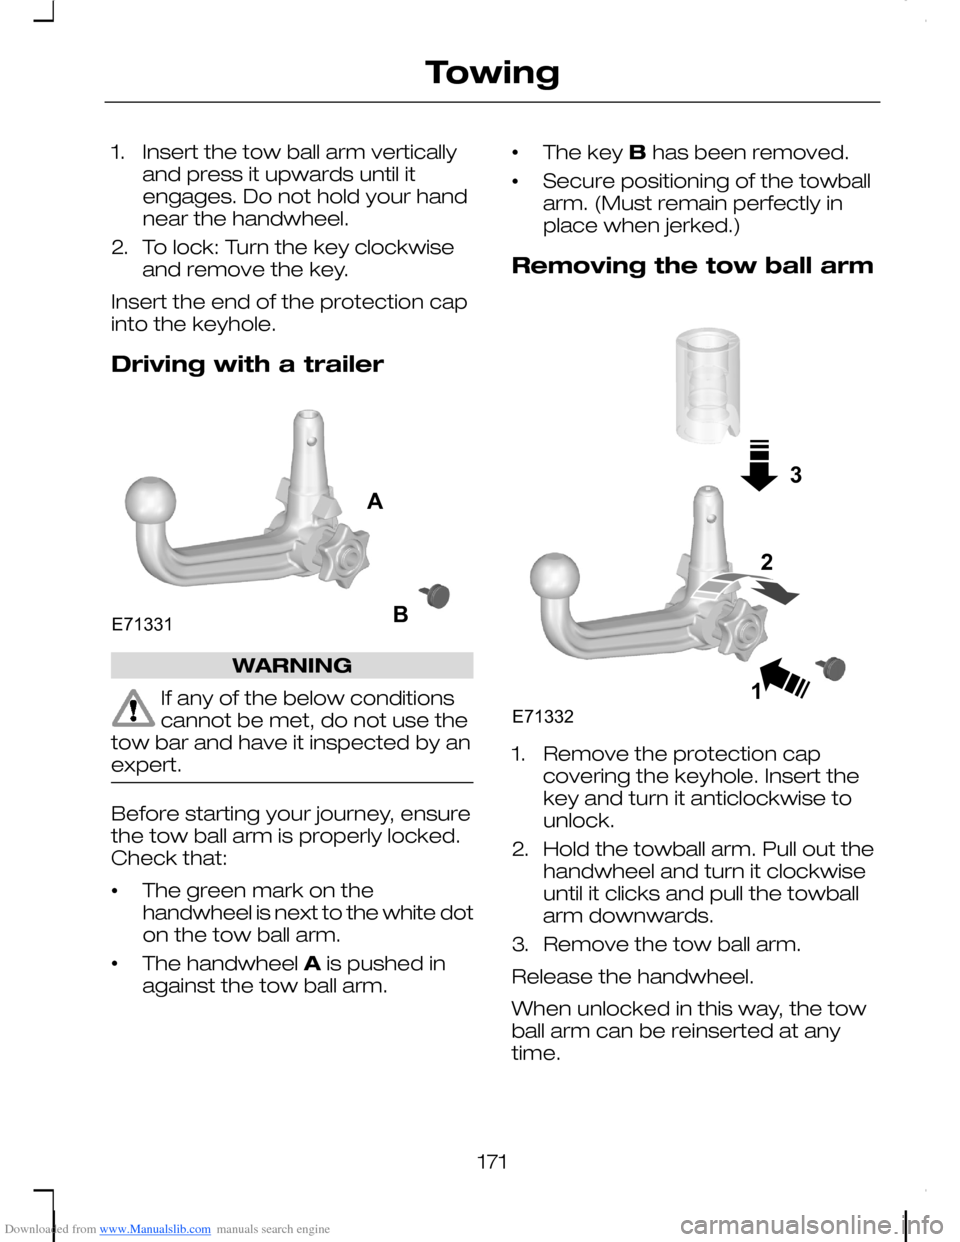
•The green mark on thehandwheel is next to the white doton the tow ball arm.
•The handwheel A is pushed inagainst the tow ball arm.
•The key B has been removed.
•Secure positioning of the towballarm. (Must remain perfectly inplace when jerked.)
Removing the tow ball arm
1.Remove the protection capcovering the keyhole. Insert thekey and turn it anticlockwise tounlock.
2.Hold the towball arm. Pull out thehandwheel and turn it clockwiseuntil it clicks and pull the towballarm downwards.
3.Remove the tow ball arm.
Release the handwheel.
When unlocked in this way, the towball arm can be reinserted at anytime.
171
TowingE71331AB 31E713322
Page 174 of 278
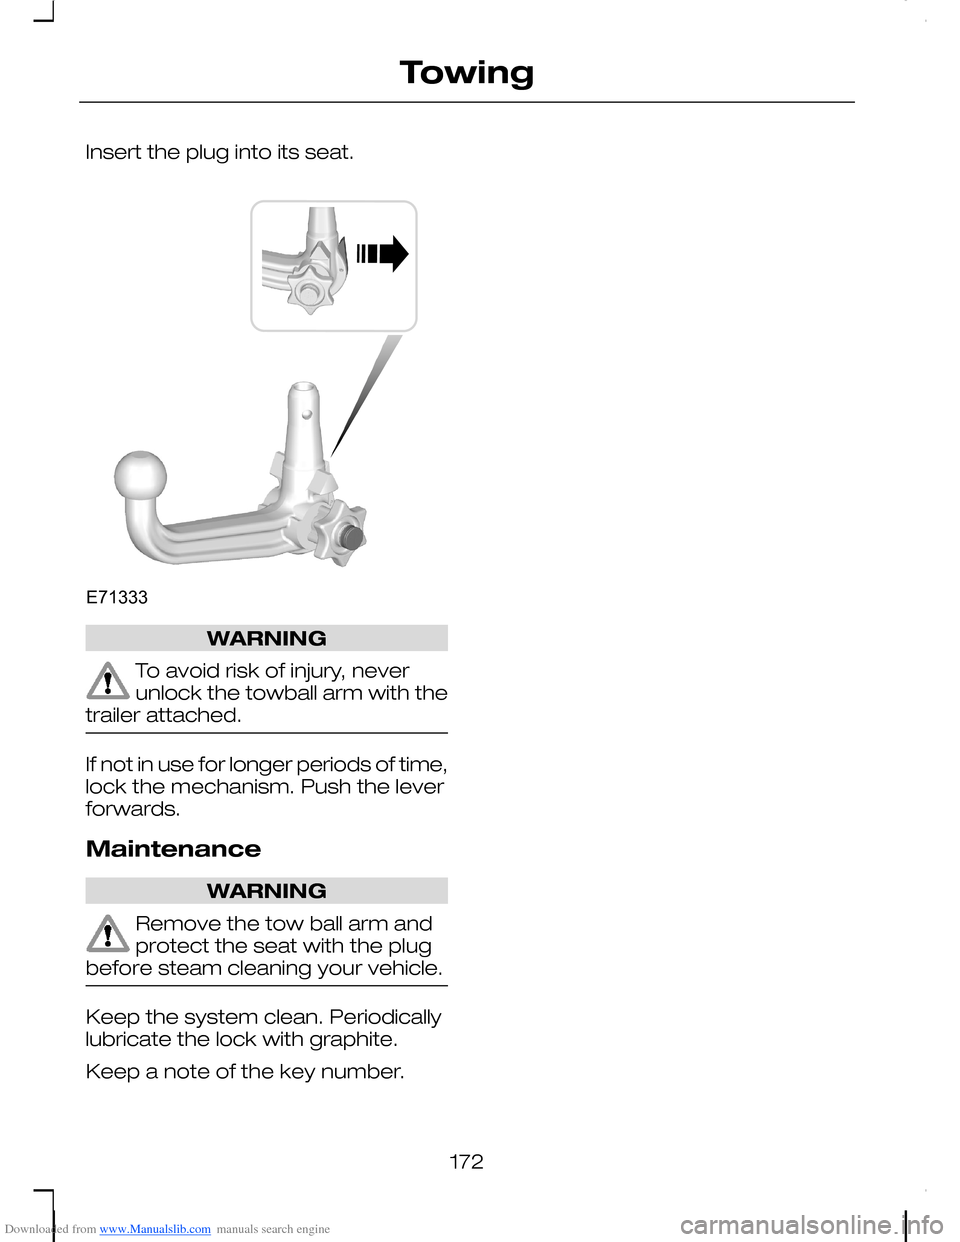
Downloaded from www.Manualslib.com manuals search engine Insert the plug into its seat.
WARNING
To avoid risk of injury, neverunlock the towball arm with thetrailer attached.
If not in use for longer periods of time,lock the mechanism. Push the leverforwards.
Maintenance
WARNING
Remove the tow ball arm andprotect the seat with the plugbefore steam cleaning your vehicle.
Keep the system clean. Periodicallylubricate the lock with graphite.
Keep a note of the key number.
172
TowingE71333
Page 175 of 278
Downloaded from www.Manualslib.com manuals search engine RUNNING-IN
Tyres
WARNING
New tyres need to be run-in forapproximately 500 kilometres(300 miles). During this time, you mayexperience different drivingcharacteristics.
Brakes and clutch
WARNING
Avoid heavy use of the brakesand clutch if possible for the first150 kilometres (100 miles) in townand for the first 1 500 kilometres (1000 miles) on motorways.
Engine
CAUTION
Avoid driving too fast during thefirst 1 500 kilometres (1 000miles). Vary your speed frequentlyand change up through the gearsearly. Do not labour the engine.
173
Driving hints