ECO mode FORD C MAX 2011 2.G User Guide
[x] Cancel search | Manufacturer: FORD, Model Year: 2011, Model line: C MAX, Model: FORD C MAX 2011 2.GPages: 296, PDF Size: 7.87 MB
Page 229 of 296
Downloaded from www.Manualslib.com manuals search engine ON/OFF CONTROL
Press the on/off control. This will also
operate the unit for up to one hour with the
ignition turned off.
The radio will switch off automatically
after one hour.
SOUND BUTTON
This will allow you to adjust the sound
settings (for example bass and treble).
1. Press the sound button.
2.
Use the up and down arrow buttons to
select the required setting.
3. Use the left and right arrow buttons to
make the necessary adjustment. The
display indicates the level selected.
4. Press the OK button to confirm the new settings.
WAVEBAND BUTTON
Press the RADIO button to select from the
wavebands available.
The selector can also be used to return to
radio reception when you have been
listening to another source.
Alternatively, press the left arrow button
to display the available wavebands. Scroll
to the required waveband and press OK.
STATION TUNING CONTROL
DAB service linking
Note: The DAB service linking is as per
default off.
Note: Service linking allows
cross-referencing to other corresponding
frequencies of the same station, for example
FM and other DAB ensembles. Note:
The system will automatically
change to another corresponding station if
the current one becomes unavailable, for
example when leaving the coverage area.
Switching DAB service linking on and off.
See General Information (page 83).
Seek tuning
Select a waveband and briefly press one
of the seek buttons. The unit will stop at
the first station it finds in the direction you
have chosen.
Manual tuning
Type 1
1. Press the MENU button.
2. Select RADIO mode and then MANUAL
TUNE.
3. Use the left and right arrow buttons to
tune down or up the waveband in small
increments or press and hold to
increment quickly, until you find a
station you want to listen to.
4. Press OK to continue listening to a station.
Type 2 and 3
1. Press function button 2.
2. Use the left and right arrow buttons to
tune down or up the waveband in small
increments or press and hold to
increment quickly, until you find a
station you want to listen to.
3. Press OK to continue listening to a station.
Scan tuning
Scan allows you to listen to a few seconds
of each station detected.
Type 1
1. Press the MENU button.
227
Audio unit operation
Page 234 of 296
Downloaded from www.Manualslib.com manuals search engine COMPACT DISC PLAYBACK
Note:
During playback, the display indicates
the disc, track and time that has elapsed
since the start of the track.
During radio reception, press the CD button
once to start CD playback.
Playback will start immediately after a disc
is loaded.
TRACK SELECTION
• Press the seek up button once to move
to the next track or press it repeatedly
to access later tracks.
• Press the seek down button once to
replay the current track. If pressed
within two seconds of the start of a
track, the previous track will be
selected.
• Press the seek down button repeatedly
to select previous tracks.
• Press the up or down arrow buttons,
and using the OK button, select the
required track.
Type 2 and 3
The desired track number may be entered
using the numeric keypad. Dial the required
track number until complete (for example
1 then 2 for track 12), or dial the number
and directly press OK.
FAST FORWARD/REVERSE
Press and hold the seek down or up
buttons to search backwards or forwards
within the tracks on the disc. SHUFFLE/RANDOM
Random track playback, also known as
shuffle, plays all tracks on the CD in
random order.
Type 1
1. Press the MENU button and select CD
MODE.
2. Select SHUFFLE, which then enables the function to be selected on or off.
When an MP3 CD is playing, options
include SHUFFLE for the whole CD, or to
play all the tracks in the folder in a random
order.
Type 2 and 3
Press function button 2.
Note: When an MP3 CD is playing, options
include SHUFFLE for the whole CD, or to
play all the tracks in the folder in a random
order. Repeat presses of function button 2
will toggle these options.
Use the seek up or down button to select
the next track to shuffle if required.
REPEAT COMPACT DISC
TRACKS
Type 1
1. Press the MENU button and select CD MODE.
2. Select REPEAT, which then enables the function to be selected on or off.
The track will replay once ended.
When an MP3 CD is playing, options
include REPEAT for the track, or to repeat
all the tracks in the folder.
Type 2 and 3
Press function button 1.
232
Compact disc player
Page 235 of 296
Downloaded from www.Manualslib.com manuals search engine When an MP3 CD is playing, options
include REPEAT for the track, or to repeat
all the tracks in the folder. Repeat presses
of function button 1 will toggle these
options.
COMPACT DISC TRACK
SCANNING
The SCAN function allows you to preview
each track for approximately 5 seconds.
Type 1
Various scan modes are possible,
according to the type of CD currently
playing.
1. Press the MENU button and select CD
MODE.
2. Select SCAN, which then enables the function to be selected on or off.
Note: When an MP3 CD is playing, options
include SCAN for the CD, or just the tracks
in the folder.
3. Press the OK button to stop the scan mode.
Type 2 and 3
1. Press function button 3.
Note: When an MP3 CD is playing, options
include SCAN for the CD, or just the tracks
in the folder. Repeat presses of function
button 3 will toggle these options.
2. Press function button 3 again to stop the scan mode.
MP3 FILE PLAYBACK
Note: Some copy protected audio files may
not be read by the CD player.
The CD player also supports MP3 and
WMA format audio files. When a CD containing audio is inserted
into the CD player the disc's directory
structure is read in. It may take a while
before playback starts and is dependant
on the quality of the disc.
MP3 tracks may be recorded on the CD in
several ways. They can all be placed in the
root directory like a conventional audio CD,
or they can be placed in folders that may
represent, for example, an album, an artist,
or a genre.
Playing a multi session disc
The normal playing sequence on CD's with
multiple folders is to play the tracks in the
first folder, then the tracks in any folders
nested inside the first folder, then move
onto the second folder, and so on. For
example, if folder 1 has folders 1a and 1b
within it, and folder 2 contains folder 2a,
the playing sequence will be folder 1, 1a, 1b,
2, 2a.
When the playback of a file is finished the
playback of the other files in the same
directory continues. Directory change takes
place automatically when all files in the
current directory have been played back.
MP3 DISPLAY OPTIONS
When an MP3 disc is playing, certain
information encoded in each track can be
displayed. Such information will normally
include:
•
The file name
• The folder name
• ID3 information which might be the
album or artist’ s name.
The unit will normally show the file name
that is playing. To select one of the other
items of information, press the INFO
button repeatedly until the required item
is shown in the display.
233
Compact disc player
Page 243 of 296
Downloaded from www.Manualslib.com manuals search engine PRINCIPLE OF OPERATION
CAUTION
Using the system with the engine off
will drain the battery.
Voice recognition enables operation of the
system without the need to divert your
attention from the road ahead in order to
change settings, or receive feedback from
the system.
Whenever you issue one of the defined
commands with the system active, the
voice recognition system converts your
command into a control signal for the
system. Your inputs take the form of
dialogues or commands. You are guided
through these dialogues by
announcements or questions.
Please familiarise yourself with the
functions of the system before using voice
recognition.
Supported commands
The voice control system allows you to
control the following vehicle functions:
•
Bluetooth phone
• radio
• CD Player
• external device (USB)
• external device (iPod)
• automatic climate control
System response
As you work through a voice session the
system will prompt you with a beep tone
each time the system is ready to proceed.
Do not try to give any commands until the
beep tone has been heard. The voice
control system will repeat each spoken
command back to you. If you are not sure how to continue say
"HELP" for assistance or "CANCEL" if you
do not wish to continue.
The "HELP" function provides only a
subset of the available voice commands.
Detailed explanations of all possible voice
commands can be found on the following
pages.
Voice commands
All voice commands should be given using
a natural speaking voice, as if speaking to
a passenger or on the phone. Your voice
level should be dependant on the
surrounding noise level inside or outside
the vehicle but do not shout.
USING VOICE CONTROL
System operation
The order and content of the voice controls
are given in the following lists. The tables
show the sequence of user voice
commands and system responses for each
available function.
<> indicates a number or stored name tag
to be inserted by the user.
Short cuts
There are a number of voice command
short cuts available, which allow you to
control some vehicle features without
having to follow the complete command
menu. These are:
•
phone: "MOBILE NAME", "DIAL
NUMBER", "DIAL NAME", and "REDIAL"
• automatic climate control:
"TEMPERATURE", "AUTO MODE",
"DEFROSTING/DEMISTING ON" and
"DEFROSTING/DEMISTING OFF"
• radio: "TUNE NAME"
• external device (USB): "TRACK"
• external device (iPod): "TRACK"
241
Voice control
Page 264 of 296
Downloaded from www.Manualslib.com manuals search engine GENERAL INFORMATION
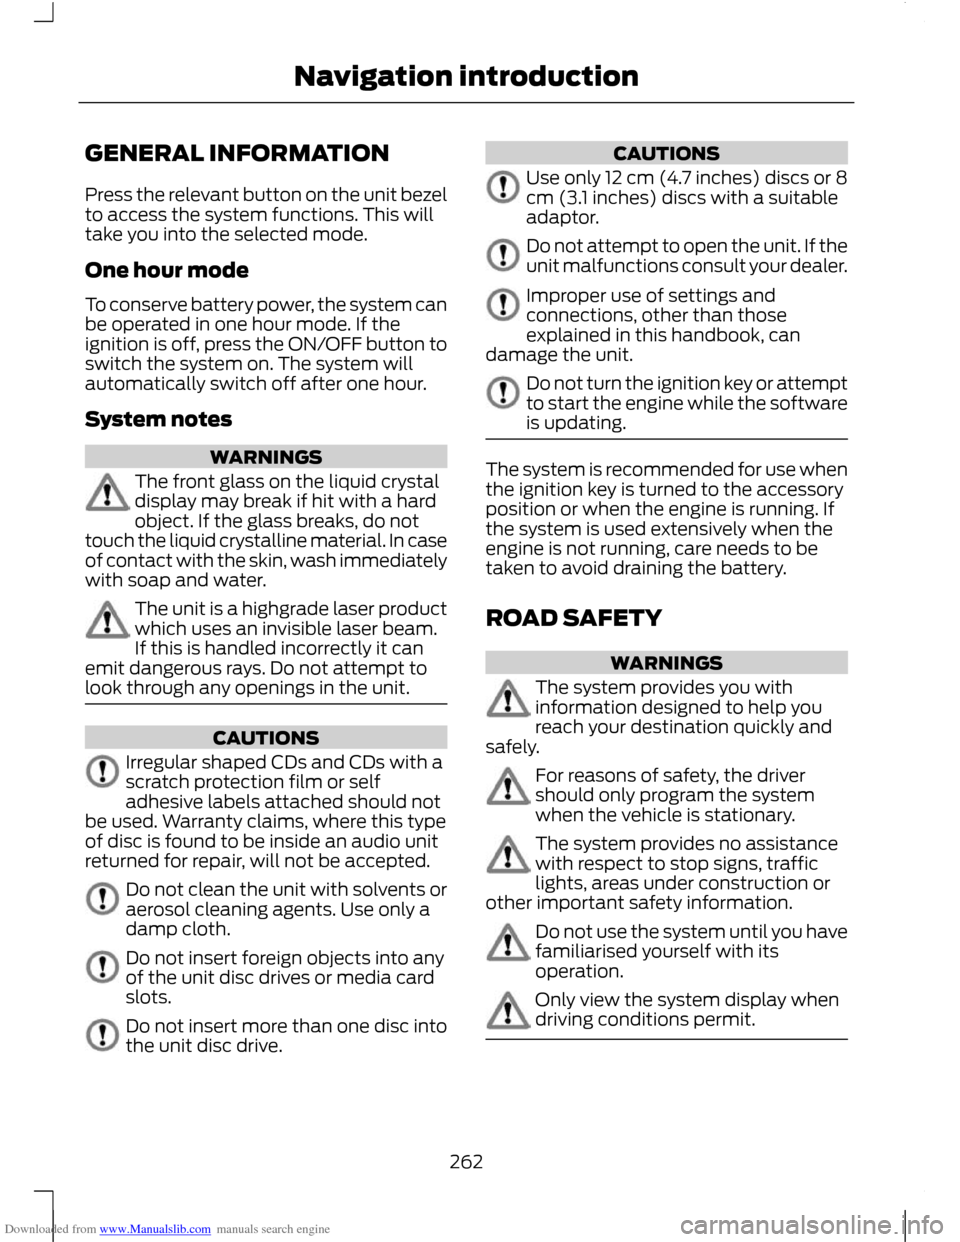
Press the relevant button on the unit bezel
to access the system functions. This will
take you into the selected mode.
One hour mode
To conserve battery power, the system can
be operated in one hour mode. If the
ignition is off, press the ON/OFF button to
switch the system on. The system will
automatically switch off after one hour.
System notes
WARNINGS
The front glass on the liquid crystal
display may break if hit with a hard
object. If the glass breaks, do not
touch the liquid crystalline material. In case
of contact with the skin, wash immediately
with soap and water. The unit is a highgrade laser product
which uses an invisible laser beam.
If this is handled incorrectly it can
emit dangerous rays. Do not attempt to
look through any openings in the unit. CAUTIONS
Irregular shaped CDs and CDs with a
scratch protection film or self
adhesive labels attached should not
be used. Warranty claims, where this type
of disc is found to be inside an audio unit
returned for repair, will not be accepted. Do not clean the unit with solvents or
aerosol cleaning agents. Use only a
damp cloth.
Do not insert foreign objects into any
of the unit disc drives or media card
slots.
Do not insert more than one disc into
the unit disc drive. CAUTIONS
Use only 12 cm (4.7 inches) discs or 8
cm (3.1 inches) discs with a suitable
adaptor.
Do not attempt to open the unit. If the
unit malfunctions consult your dealer.
Improper use of settings and
connections, other than those
explained in this handbook, can
damage the unit. Do not turn the ignition key or attempt
to start the engine while the software
is updating.
The system is recommended for use when
the ignition key is turned to the accessory
position or when the engine is running. If
the system is used extensively when the
engine is not running, care needs to be
taken to avoid draining the battery.
ROAD SAFETY
WARNINGS
The system provides you with
information designed to help you
reach your destination quickly and
safely. For reasons of safety, the driver
should only program the system
when the vehicle is stationary.
The system provides no assistance
with respect to stop signs, traffic
lights, areas under construction or
other important safety information. Do not use the system until you have
familiarised yourself with its
operation.
Only view the system display when
driving conditions permit.
262
Navigation introduction
Page 288 of 296
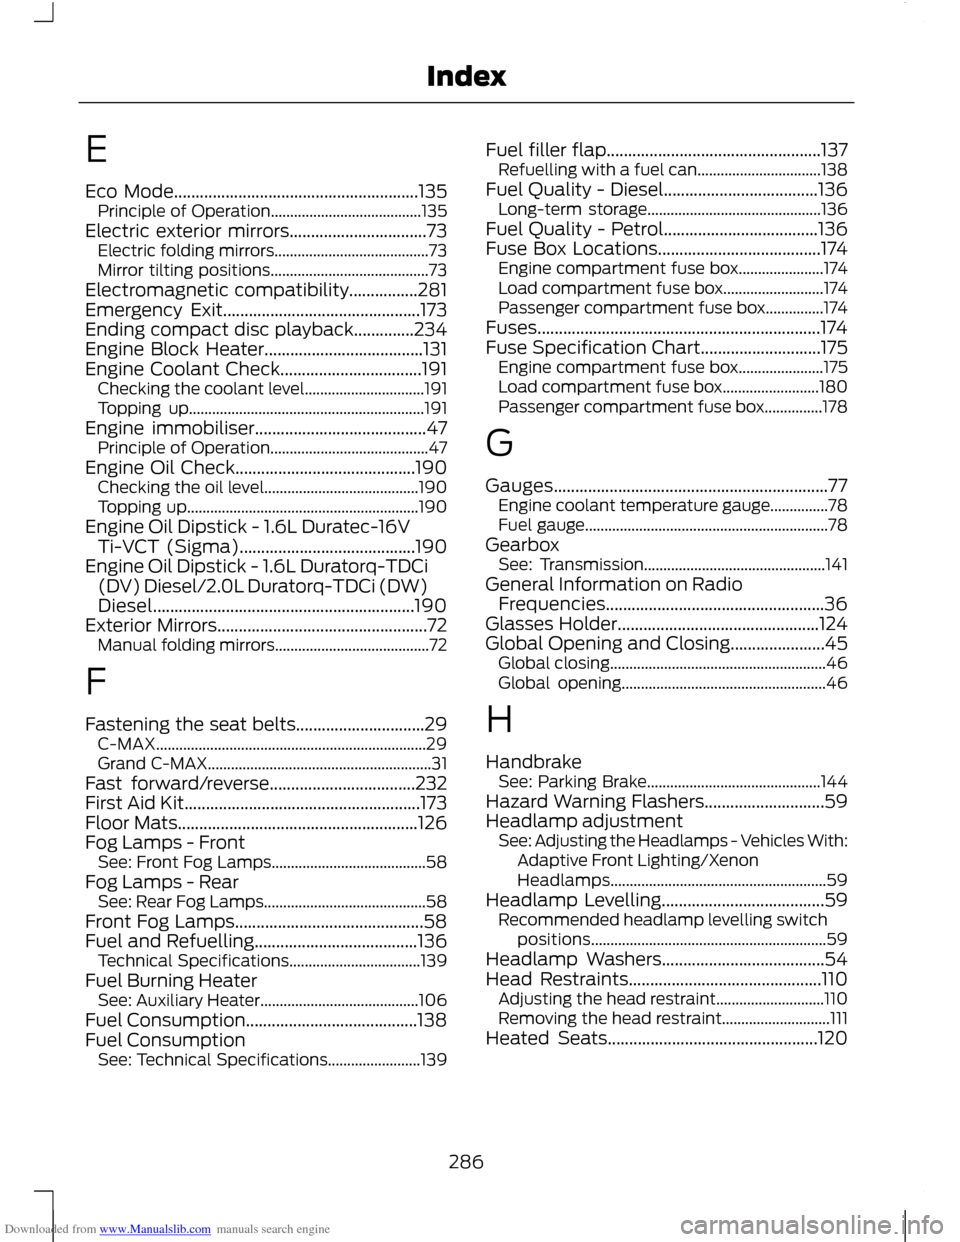
Downloaded from www.Manualslib.com manuals search engine E
Eco Mode.........................................................135
Principle of Operation....................................... 135
Electric exterior mirrors................................73 Electric folding mirrors........................................ 73
Mirror tilting positions......................................... 73
Electromagnetic compatibility................281
Emergency Exit..............................................173
Ending compact disc playback..............234
Engine Block Heater.....................................131
Engine Coolant Check.................................191 Checking the coolant level............................... 191
Topping up............................................................. 191
Engine immobiliser........................................47 Principle of Operation......................................... 47
Engine Oil Check..........................................190 Checking the oil level........................................ 190
Topping up............................................................ 190
Engine Oil Dipstick - 1.6L Duratec-16V Ti-VCT (Sigma).........................................190
Engine Oil Dipstick - 1.6L Duratorq-TDCi (DV) Diesel/2.0L Duratorq-TDCi (DW)
Diesel.............................................................190
Exterior Mirrors.................................................72 Manual folding mirrors........................................ 72
F
Fastening the seat belts..............................29 C-MAX...................................................................... 29
Grand C-MAX.......................................................... 31
Fast forward/reverse..................................232
First Aid Kit.......................................................173
Floor Mats........................................................126
Fog Lamps - Front See: Front Fog Lamps........................................ 58
Fog Lamps - Rear See: Rear Fog Lamps.......................................... 58
Front Fog Lamps............................................58
Fuel and Refuelling......................................136 Technical Specifications.................................. 139
Fuel Burning Heater See: Auxiliary Heater......................................... 106
Fuel Consumption........................................138
Fuel Consumption See: Technical Specifications........................ 139Fuel filler flap..................................................137
Refuelling with a fuel can................................ 138
Fuel Quality - Diesel....................................136 Long-term storage............................................. 136
Fuel Quality - Petrol....................................136
Fuse Box Locations......................................174 Engine compartment fuse box...................... 174
Load compartment fuse box.......................... 174
Passenger compartment fuse box...............174
Fuses..................................................................174
Fuse Specification Chart............................175 Engine compartment fuse box...................... 175
Load compartment fuse box......................... 180
Passenger compartment fuse box...............178
G
Gauges................................................................77 Engine coolant temperature gauge...............78
Fuel gauge............................................................... 78
Gearbox See: Transmission............................................... 141
General Information on Radio Frequencies...................................................36
Glasses Holder...............................................124
Global Opening and Closing......................45 Global closing........................................................ 46
Global opening..................................................... 46
H
Handbrake See: Parking Brake............................................. 144
Hazard Warning Flashers............................59
Headlamp adjustment See: Adjusting the Headlamps - Vehicles With:
Adaptive Front Lighting/Xenon
Headlamps........................................................ 59
Headlamp Levelling......................................59 Recommended headlamp levelling switch
positions............................................................. 59
Headlamp Washers......................................54
Head Restraints.............................................110 Adjusting the head restraint............................ 110
Removing the head restraint............................ 111
Heated Seats.................................................120
286
Index
Page 291 of 296
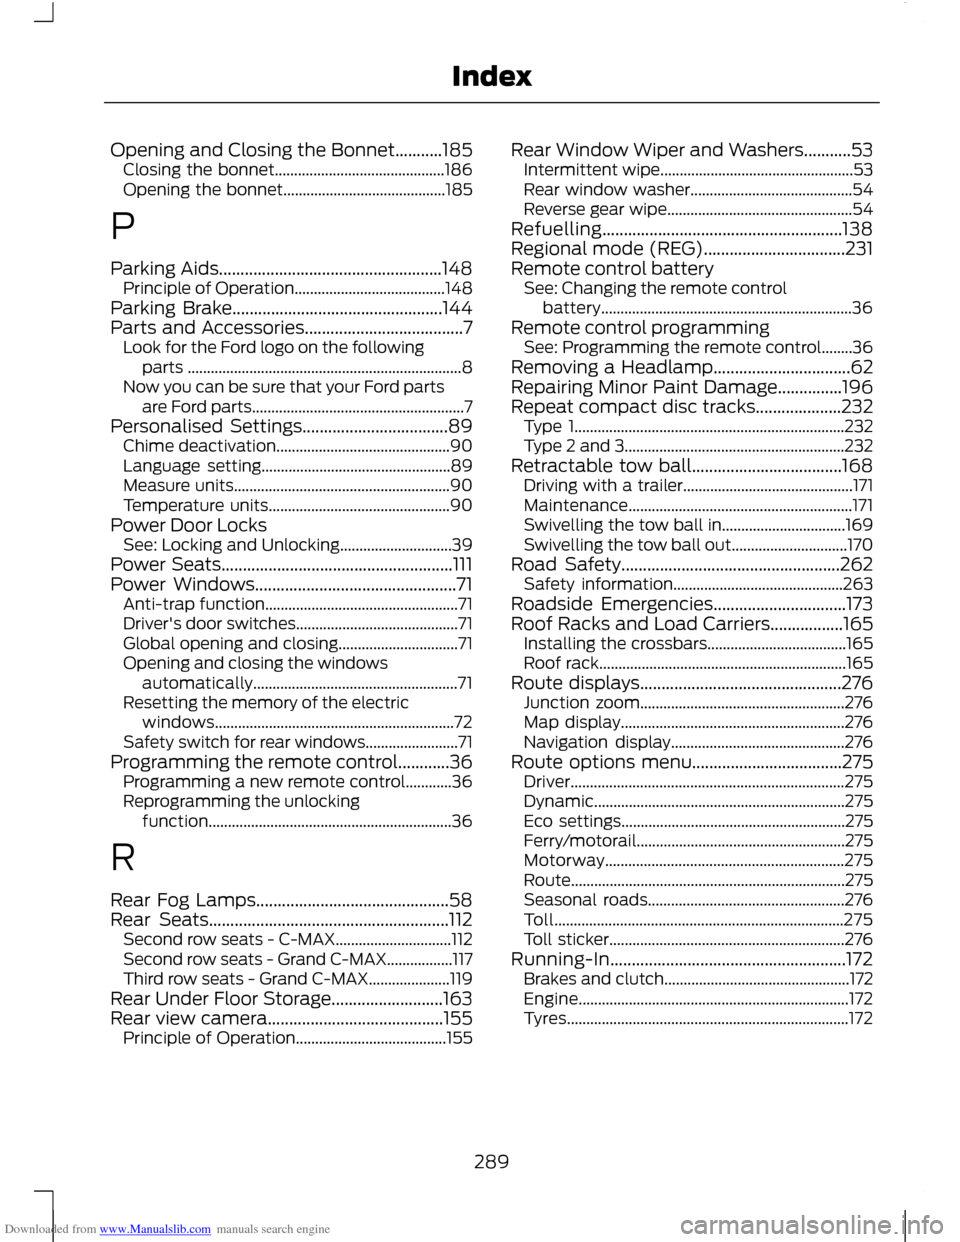
Downloaded from www.Manualslib.com manuals search engine Opening and Closing the Bonnet...........185
Closing the bonnet............................................ 186
Opening the bonnet.......................................... 185
P
Parking Aids....................................................148 Principle of Operation....................................... 148
Parking Brake.................................................144
Parts and Accessories.....................................7 Look for the Ford logo on the following
parts ....................................................................... 8
Now you can be sure that your Ford parts are Ford parts....................................................... 7
Personalised Settings..................................89 Chime deactivation............................................. 90
Language setting................................................. 89
Measure units........................................................ 90
Temperature units............................................... 90
Power Door Locks See: Locking and Unlocking............................. 39
Power Seats......................................................111
Power Windows...............................................71 Anti-trap function.................................................. 71
Driver's door switches.......................................... 71
Global opening and closing............................... 71
Opening and closing the windows automatically..................................................... 71
Resetting the memory of the electric windows.............................................................. 72
Safety switch for rear windows........................ 71
Programming the remote control............36 Programming a new remote control............36
Reprogramming the unlocking
function............................................................... 36
R
Rear Fog Lamps.............................................58
Rear Seats........................................................112 Second row seats - C-MAX.............................. 112
Second row seats - Grand C-MAX.................117
Third row seats - Grand C-MAX..................... 119
Rear Under Floor Storage..........................163
Rear view camera.........................................155 Principle of Operation....................................... 155Rear Window Wiper and Washers...........53
Intermittent wipe.................................................. 53
Rear window washer.......................................... 54
Reverse gear wipe................................................ 54
Refuelling........................................................138
Regional mode (REG).................................231
Remote control battery See: Changing the remote control
battery................................................................. 36
Remote control programming See: Programming the remote control........36
Removing a Headlamp................................62
Repairing Minor Paint Damage...............196
Repeat compact disc tracks....................232 Type 1...................................................................... 232
Type 2 and 3......................................................... 232
Retractable tow ball...................................168 Driving with a trailer............................................ 171
Maintenance.......................................................... 171
Swivelling the tow ball in................................ 169
Swivelling the tow ball out.............................. 170
Road Safety...................................................262 Safety information............................................ 263
Roadside Emergencies...............................173
Roof Racks and Load Carriers.................165 Installing the crossbars.................................... 165
Roof rack................................................................ 165
Route displays...............................................276 Junction zoom..................................................... 276
Map display.......................................................... 276
Navigation display............................................. 276
Route options menu...................................275 Driver....................................................................... 275
Dynamic................................................................. 275
Eco settings.......................................................... 275
Ferry/motorail...................................................... 275
Motorway.............................................................. 275
Route....................................................................... 275
Seasonal roads................................................... 276
Toll........................................................................\
... 275
Toll sticker............................................................. 276
Running-In.......................................................172 Brakes and clutch................................................ 172
Engine...................................................................... 172
Tyres........................................................................\
. 172
289
Index
Page 293 of 296
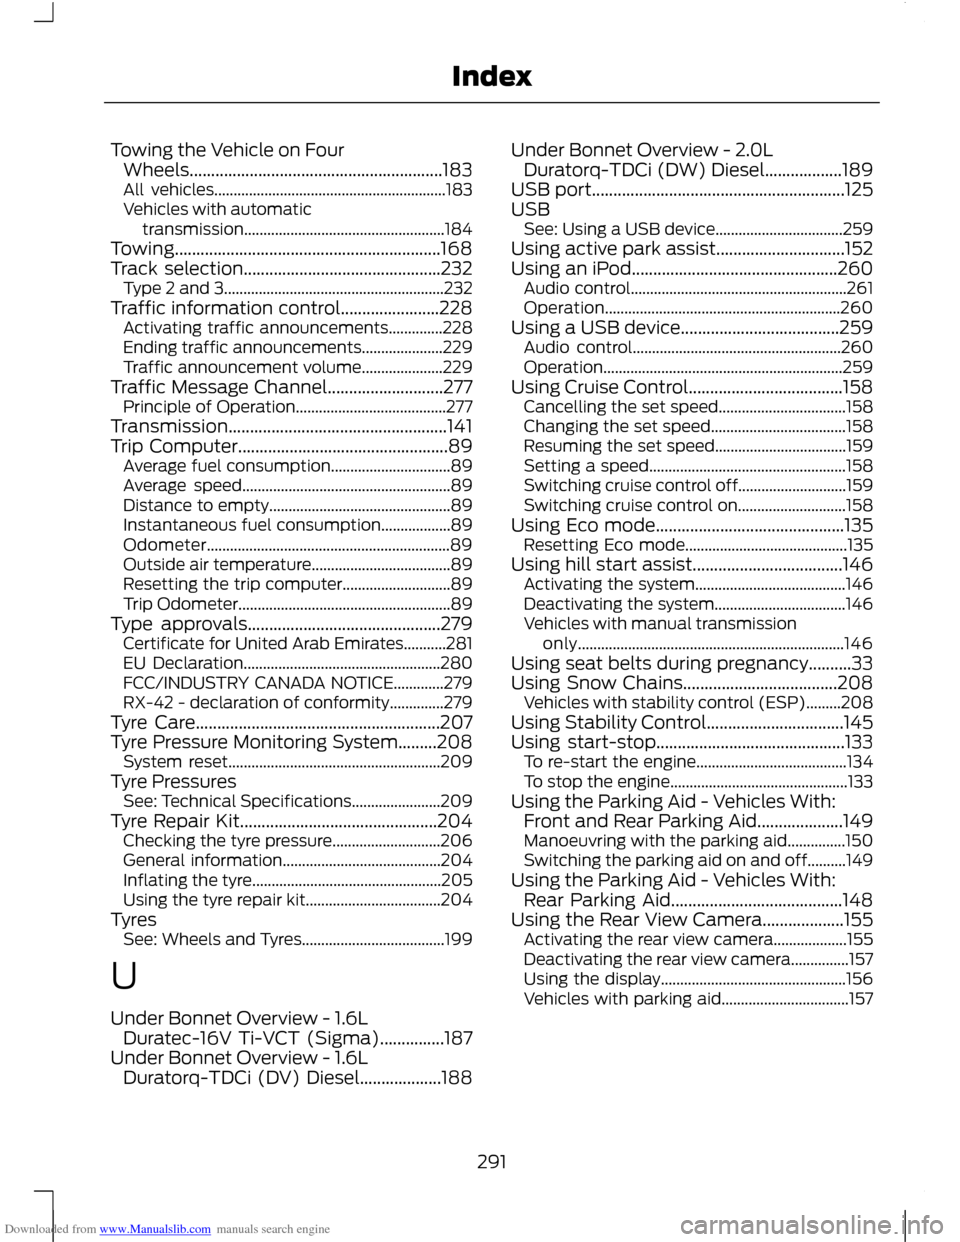
Downloaded from www.Manualslib.com manuals search engine Towing the Vehicle on Four
Wheels...........................................................183
All vehicles............................................................ 183
Vehicles with automatic transmission.................................................... 184
Towing..............................................................168
Track selection..............................................232 Type 2 and 3......................................................... 232
Traffic information control.......................228 Activating traffic announcements..............228
Ending traffic announcements..................... 229
Traffic announcement volume..................... 229
Traffic Message Channel...........................277 Principle of Operation....................................... 277
Transmission...................................................141
Trip Computer.................................................89 Average fuel consumption............................... 89
Average speed...................................................... 89
Distance to empty............................................... 89
Instantaneous fuel consumption.................. 89
Odometer............................................................... 89
Outside air temperature.................................... 89
Resetting the trip computer............................ 89
Trip Odometer....................................................... 89
Type approvals.............................................279 Certificate for United Arab Emirates...........281
EU Declaration................................................... 280
FCC/INDUSTRY CANADA NOTICE.............279
RX-42 - declaration of conformity..............279
Tyre Care.........................................................207
Tyre Pressure Monitoring System.........208 System reset....................................................... 209
Tyre Pressures See: Technical Specifications....................... 209
Tyre Repair Kit..............................................204 Checking the tyre pressure............................ 206
General information......................................... 204
Inflating the tyre................................................. 205
Using the tyre repair kit................................... 204
Tyres See: Wheels and Tyres..................................... 199
U
Under Bonnet Overview - 1.6L Duratec-16V Ti-VCT (Sigma)...............187
Under Bonnet Overview - 1.6L Duratorq-TDCi (DV) Diesel...................188 Under Bonnet Overview - 2.0L
Duratorq-TDCi (DW) Diesel..................189
USB port...........................................................125
USB See: Using a USB device................................. 259
Using active park assist..............................152
Using an iPod................................................260 Audio control........................................................ 261
Operation............................................................. 260
Using a USB device.....................................259 Audio control...................................................... 260
Operation.............................................................. 259
Using Cruise Control....................................158 Cancelling the set speed................................. 158
Changing the set speed................................... 158
Resuming the set speed.................................. 159
Setting a speed................................................... 158
Switching cruise control off............................ 159
Switching cruise control on............................ 158
Using Eco mode............................................135 Resetting Eco mode.......................................... 135
Using hill start assist...................................146 Activating the system....................................... 146
Deactivating the system.................................. 146
Vehicles with manual transmission only..................................................................... 146
Using seat belts during pregnancy..........33
Using Snow Chains....................................208 Vehicles with stability control (ESP).........208
Using Stability Control................................145
Using start-stop............................................133 To re-start the engine....................................... 134
To stop the engine.............................................. 133
Using the Parking Aid - Vehicles With: Front and Rear Parking Aid....................149
Manoeuvring with the parking aid...............150
Switching the parking aid on and off..........149
Using the Parking Aid - Vehicles With: Rear Parking Aid........................................148
Using the Rear View Camera...................155 Activating the rear view camera................... 155
Deactivating the rear view camera...............157
Using the display................................................ 156
Vehicles with parking aid................................. 157
291
Index