clock FORD C MAX 2013 User Guide
[x] Cancel search | Manufacturer: FORD, Model Year: 2013, Model line: C MAX, Model: FORD C MAX 2013Pages: 552, PDF Size: 8.55 MB
Page 305 of 552
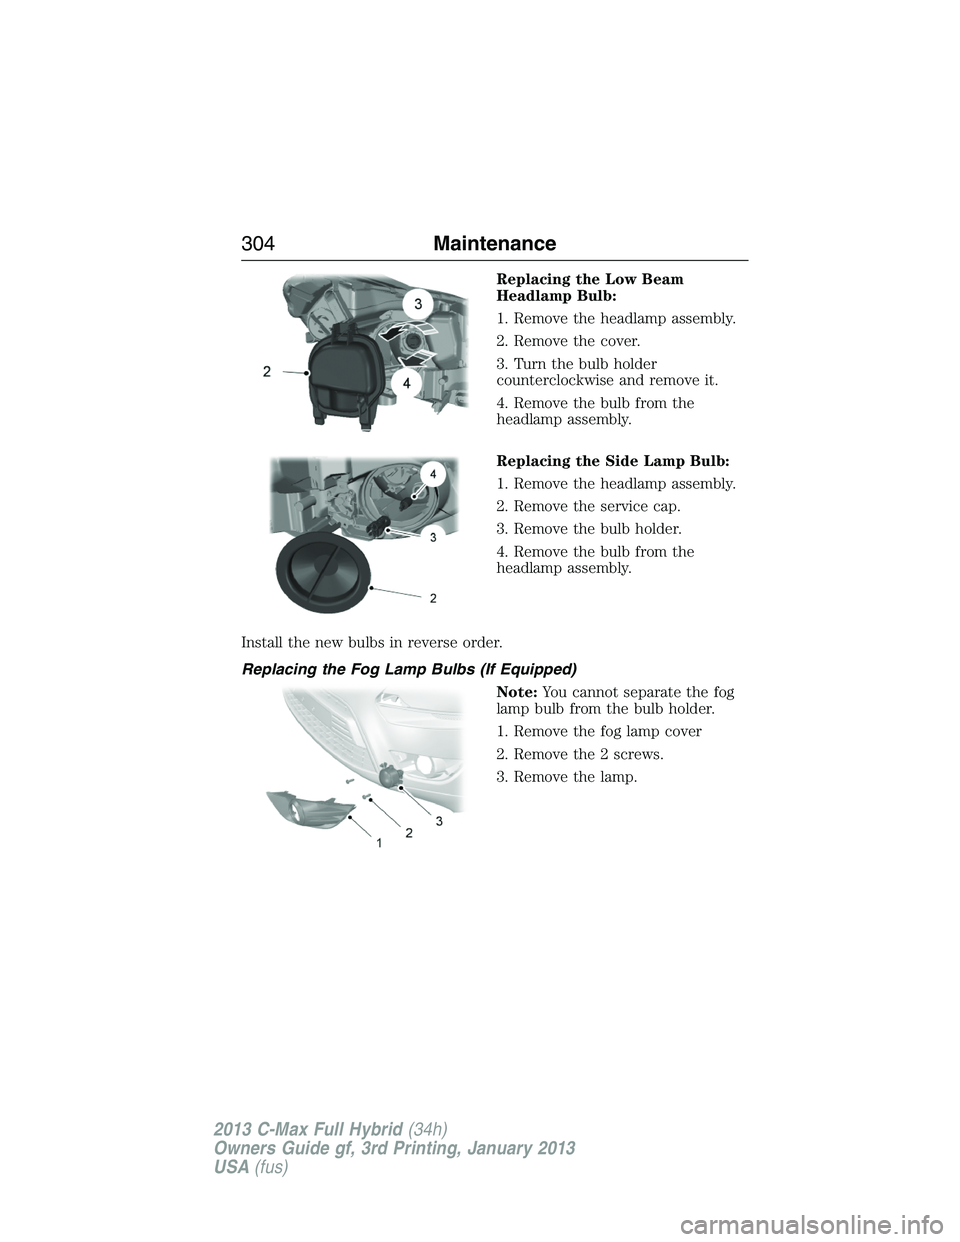
Replacing the Low Beam
Headlamp Bulb:
1. Remove the headlamp assembly.
2. Remove the cover.
3. Turn the bulb holder
counterclockwise and remove it.
4. Remove the bulb from the
headlamp assembly.
Replacing the Side Lamp Bulb:
1. Remove the headlamp assembly.
2. Remove the service cap.
3. Remove the bulb holder.
4. Remove the bulb from the
headlamp assembly.
Install the new bulbs in reverse order.
Replacing the Fog Lamp Bulbs (If Equipped)
Note:You cannot separate the fog
lamp bulb from the bulb holder.
1. Remove the fog lamp cover
2. Remove the 2 screws.
3. Remove the lamp.
304Maintenance
2013 C-Max Full Hybrid(34h)
Owners Guide gf, 3rd Printing, January 2013
USA(fus)
Page 306 of 552
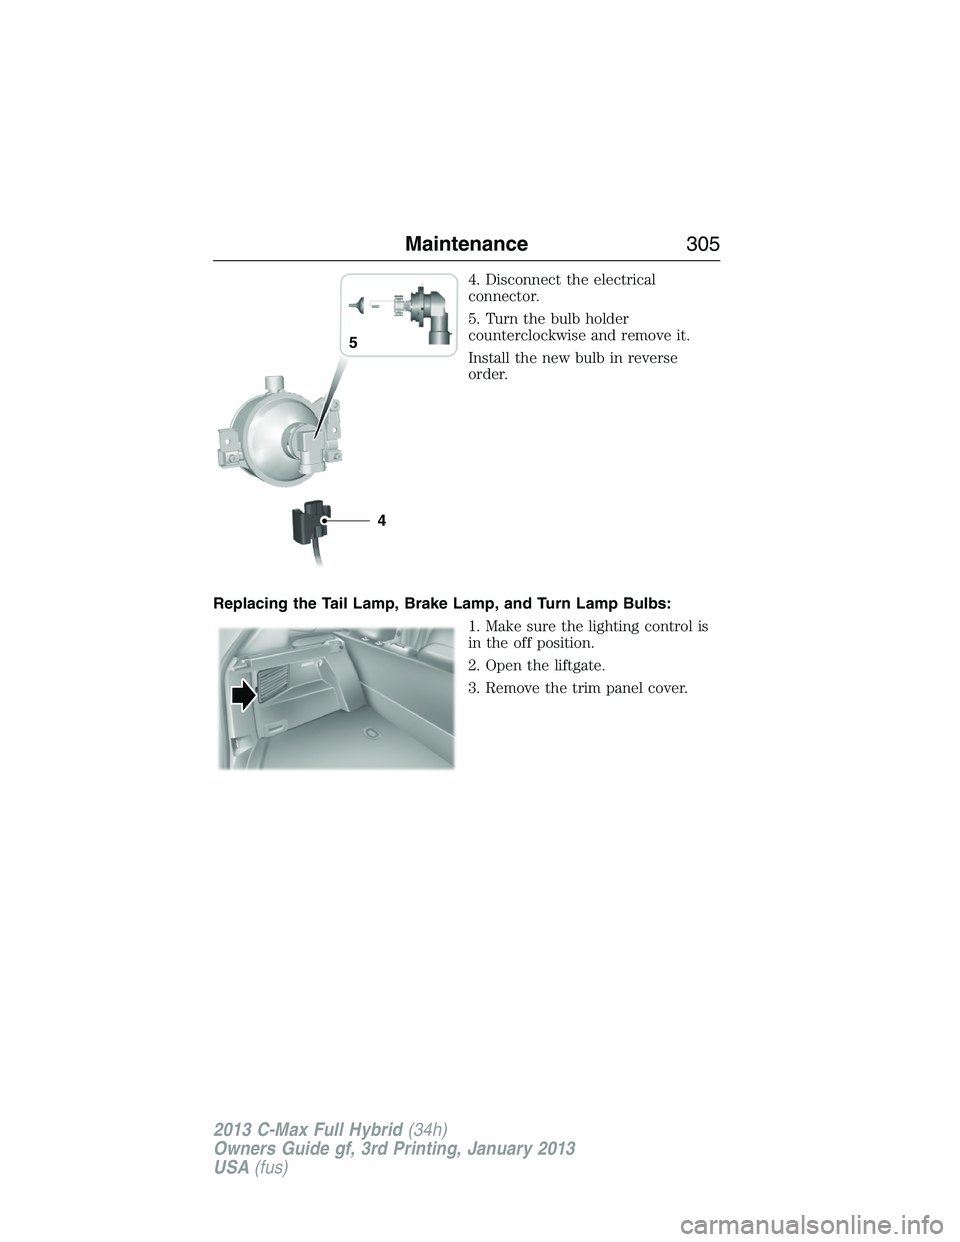
4. Disconnect the electrical
connector.
5. Turn the bulb holder
counterclockwise and remove it.
Install the new bulb in reverse
order.
Replacing the Tail Lamp, Brake Lamp, and Turn Lamp Bulbs:
1. Make sure the lighting control is
in the off position.
2. Open the liftgate.
3. Remove the trim panel cover.
4 5
Maintenance305
2013 C-Max Full Hybrid(34h)
Owners Guide gf, 3rd Printing, January 2013
USA(fus)
Page 307 of 552
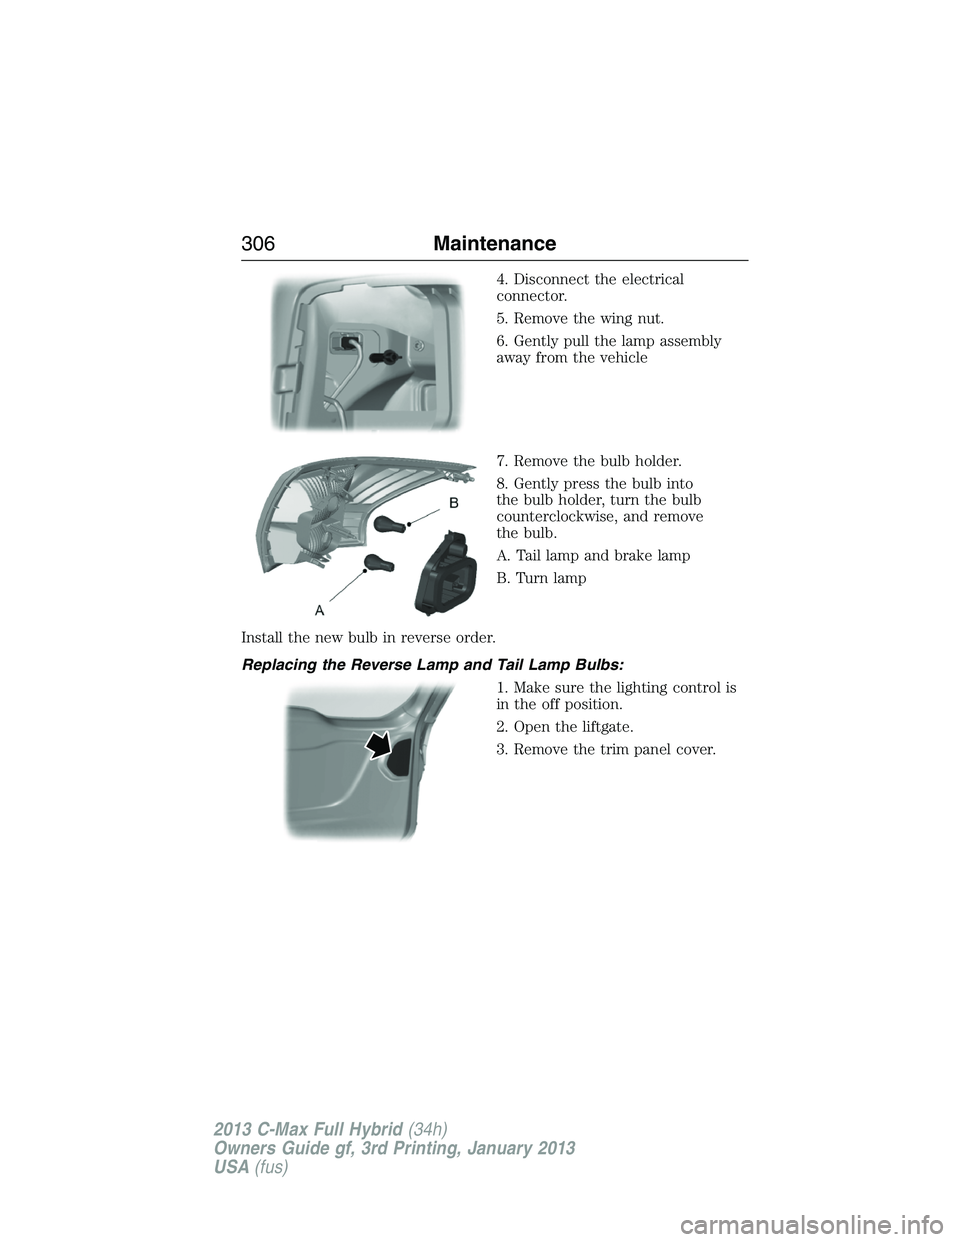
4. Disconnect the electrical
connector.
5. Remove the wing nut.
6. Gently pull the lamp assembly
away from the vehicle
7. Remove the bulb holder.
8. Gently press the bulb into
the bulb holder, turn the bulb
counterclockwise, and remove
the bulb.
A. Tail lamp and brake lamp
B. Turn lamp
Install the new bulb in reverse order.
Replacing the Reverse Lamp and Tail Lamp Bulbs:
1. Make sure the lighting control is
in the off position.
2. Open the liftgate.
3. Remove the trim panel cover.
306Maintenance
2013 C-Max Full Hybrid(34h)
Owners Guide gf, 3rd Printing, January 2013
USA(fus)
Page 308 of 552
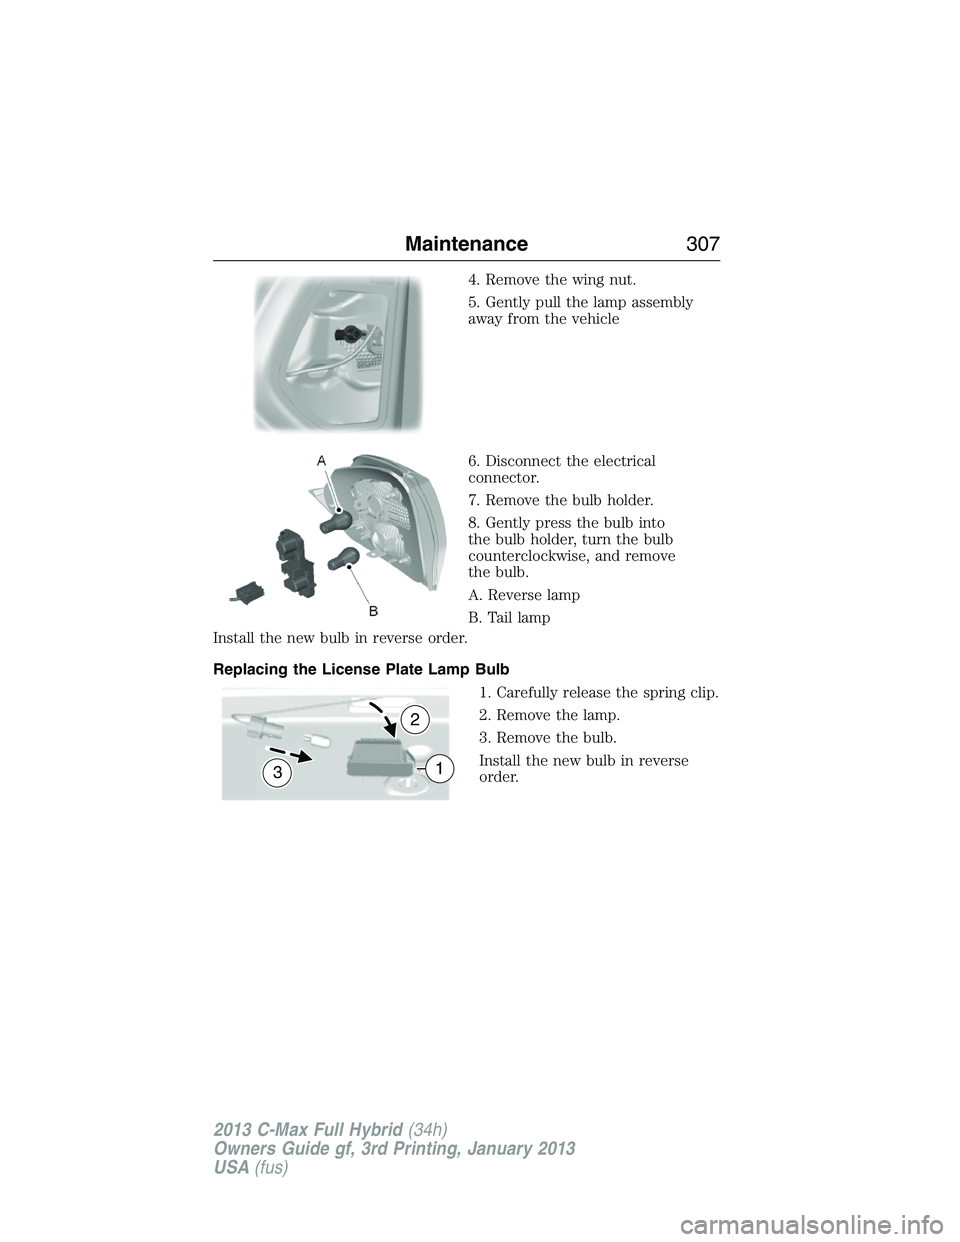
4. Remove the wing nut.
5. Gently pull the lamp assembly
away from the vehicle
6. Disconnect the electrical
connector.
7. Remove the bulb holder.
8. Gently press the bulb into
the bulb holder, turn the bulb
counterclockwise, and remove
the bulb.
A. Reverse lamp
B. Tail lamp
Install the new bulb in reverse order.
Replacing the License Plate Lamp Bulb
1. Carefully release the spring clip.
2. Remove the lamp.
3. Remove the bulb.
Install the new bulb in reverse
order.
3
2
1
Maintenance307
2013 C-Max Full Hybrid(34h)
Owners Guide gf, 3rd Printing, January 2013
USA(fus)
Page 344 of 552
What to Do When a Tire Is Punctured
A tire puncture within the tire’s tread area can be repaired in two stages
with the temporary mobility kit:
•In the first stage, the tire will be reinflated with a sealing compound
and air. After the tire has been reinflated, you will need to drive the
vehicle a short distance (about 4 miles [6 kilometers]) to distribute
the sealant in the tire.
•In the second stage, check the tire pressure and adjust, if necessary,
to the vehicle’s tire inflation pressure.
First Stage: Reinflating the Tire with Sealing Compound and Air
WARNING:Do not stand directly over the temporary mobility
kit while inflating the tire. If you notice any unusual bulges or
deformations in the tire’s sidewall during inflation, stop and call
roadside assistance.
WARNING:If the tire does not inflate to the recommended tire
pressure within 15 minutes, stop and call roadside assistance.
Preparation
Park the vehicle in a safe, level and secure area, away from moving
traffic. Turn the hazard lights on. Apply the parking brake and turn the
engine off. Inspect the flat tire for visible damage.
Sealant compound contains latex. To avoid any allergic reactions, use the
non-latex gloves located in the accessory box on the underside of the
temporary mobility kit housing.
Do not remove any foreign object that has pierced the tire. If a puncture
is located in the tire sidewall, stop and call roadside assistance.
1. Remove the valve cap from the tire valve.
2. Unwrap the clear tube from the compressor housing.
3. Remove the tube cap and fasten the metal connector of the tube to
the tire valve, turning clockwise. Make sure the connection is tightly
fastened.
Wheels and Tires343
2013 C-Max Full Hybrid(34h)
Owners Guide gf, 3rd Printing, January 2013
USA(fus)
Page 345 of 552
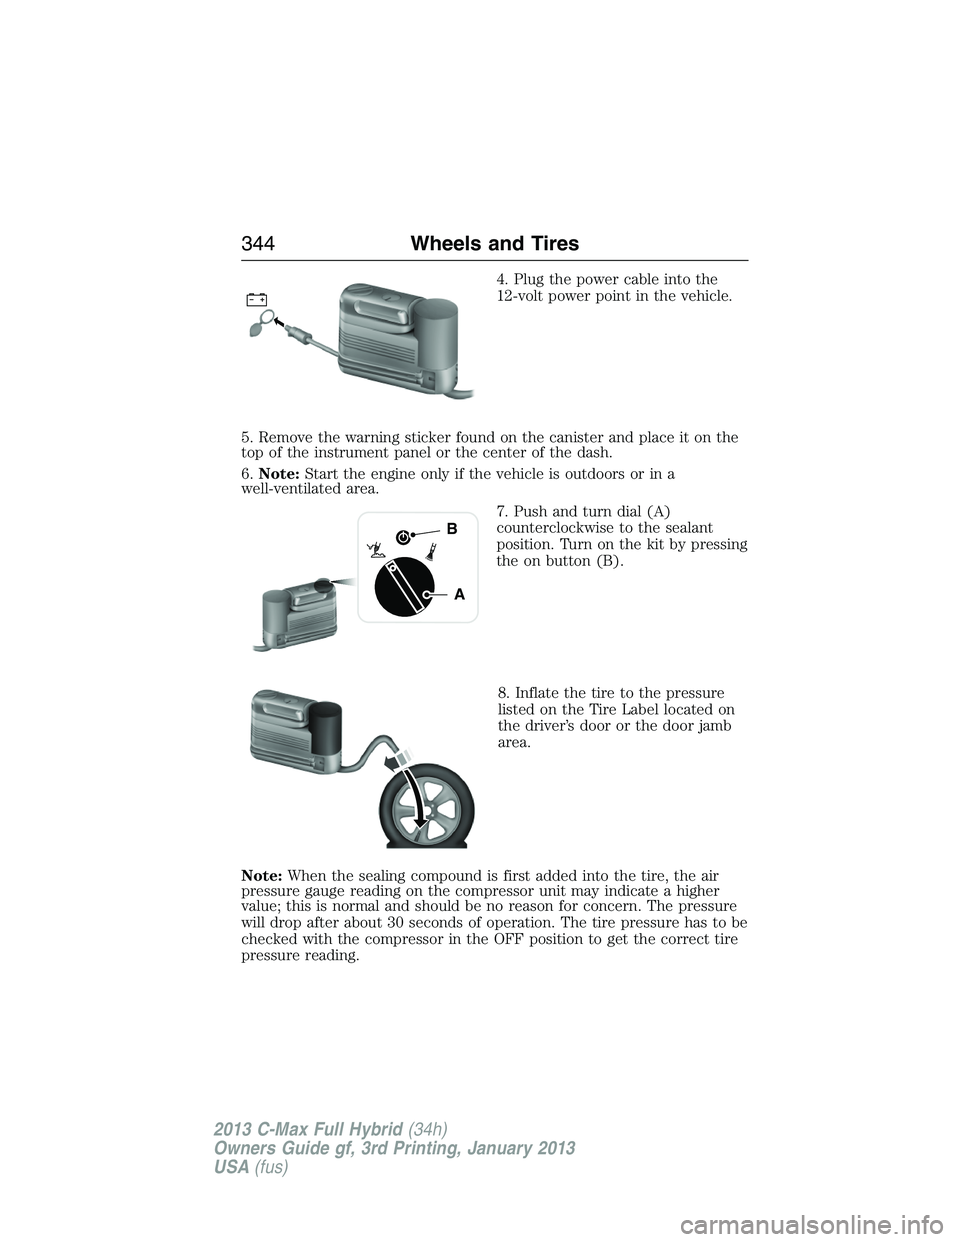
4. Plug the power cable into the
12-volt power point in the vehicle.
5. Remove the warning sticker found on the canister and place it on the
top of the instrument panel or the center of the dash.
6.Note:Start the engine only if the vehicle is outdoors or in a
well-ventilated area.
7. Push and turn dial (A)
counterclockwise to the sealant
position. Turn on the kit by pressing
the on button (B).
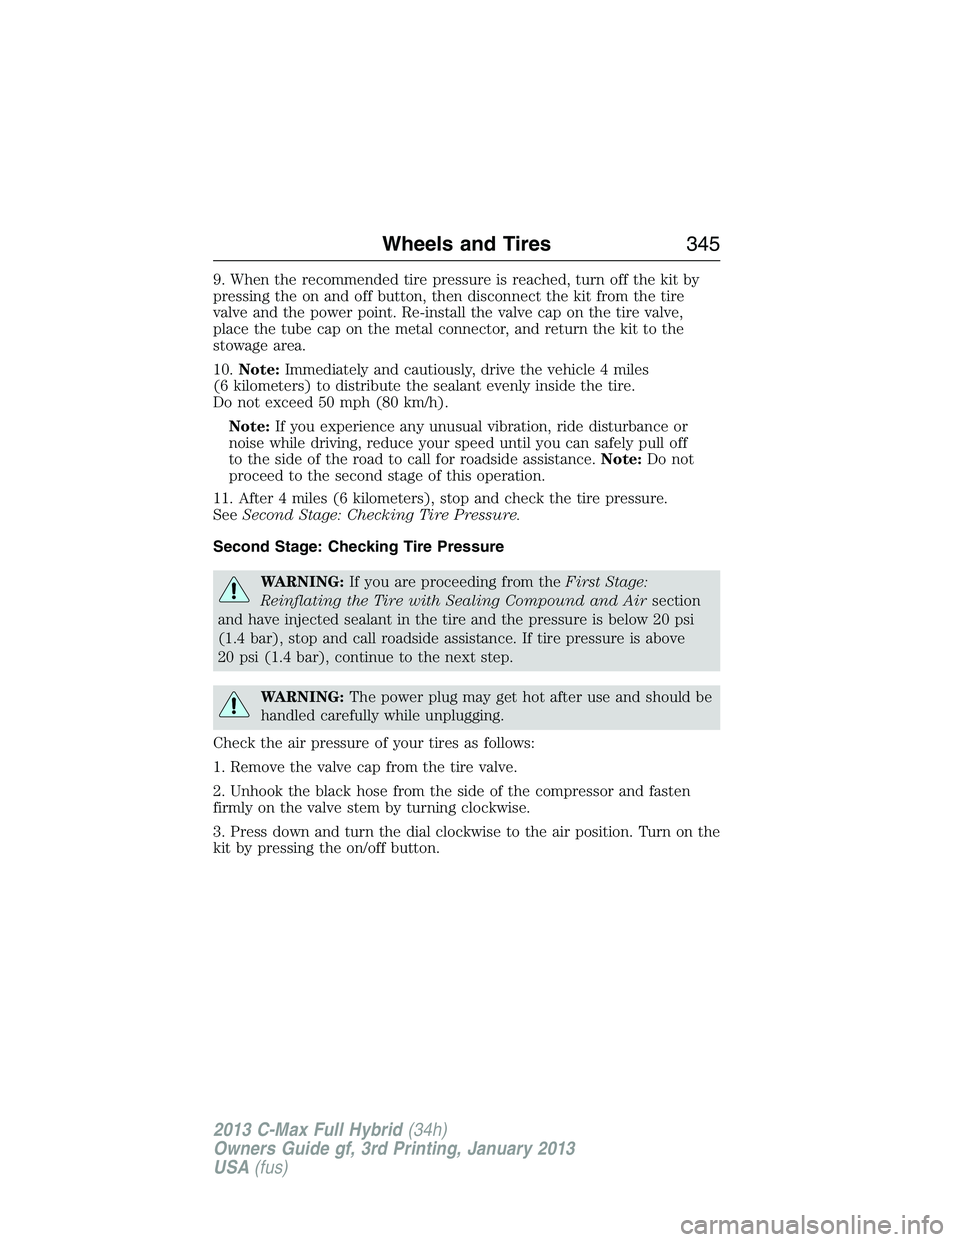
8. Inflate the tire to the pressure
listed on the Tire Label located on
the driver’s door or the door jamb
area.
Note:When the sealing compound is first added into the tire, the air
pressure gauge reading on the compressor unit may indicate a higher
value; this is normal and should be no reason for concern. The pressure
will drop after about 30 seconds of operation. The tire pressure has to be
checked with the compressor in the OFF position to get the correct tire
pressure reading.
A
B
344Wheels and Tires
2013 C-Max Full Hybrid(34h)
Owners Guide gf, 3rd Printing, January 2013
USA(fus)
Page 346 of 552
9. When the recommended tire pressure is reached, turn off the kit by
pressing the on and off button, then disconnect the kit from the tire
valve and the power point. Re-install the valve cap on the tire valve,
place the tube cap on the metal connector, and return the kit to the
stowage area.
10.Note:Immediately and cautiously, drive the vehicle 4 miles
(6 kilometers) to distribute the sealant evenly inside the tire.
Do not exceed 50 mph (80 km/h).
Note:If you experience any unusual vibration, ride disturbance or
noise while driving, reduce your speed until you can safely pull off
to the side of the road to call for roadside assistance.Note:Do not
proceed to the second stage of this operation.
11. After 4 miles (6 kilometers), stop and check the tire pressure.
SeeSecond Stage: Checking Tire Pressure.
Second Stage: Checking Tire Pressure
WARNING:If you are proceeding from theFirst Stage:
Reinflating the Tire with Sealing Compound and Airsection
and have injected sealant in the tire and the pressure is below 20 psi
(1.4 bar), stop and call roadside assistance. If tire pressure is above
20 psi (1.4 bar), continue to the next step.
WARNING:The power plug may get hot after use and should be
handled carefully while unplugging.
Check the air pressure of your tires as follows:
1. Remove the valve cap from the tire valve.
2. Unhook the black hose from the side of the compressor and fasten
firmly on the valve stem by turning clockwise.
3. Press down and turn the dial clockwise to the air position. Turn on the
kit by pressing the on/off button.
Wheels and Tires345
2013 C-Max Full Hybrid(34h)
Owners Guide gf, 3rd Printing, January 2013
USA(fus)
Page 432 of 552
SETTINGS
Press to select any of the following:
•Clock
•Display
•Sound
•Vehicle
•Settings
•Help
HOME
Press to access your home screen. Depending on your vehicle’s option
package and software, your screens may vary in appearance from the
descriptions in this section. Your features may also be limited depending
on your market. Check with your authorized dealer for availability.
INFORMATION
Press to select any of the following:
•SYNC® Services
•SIRIUS® Travel Link™
•Alerts
•Calendar
•SYNC Apps
If the icon is yellow, seeAlertsin theInformationsection of this
chapter.
ENTERTAINMENT
Press to select any of the following:
•AM
•FM
•SIRIUS
•CD
•USB
•BT Stereo
•SD Card
•A/V In
MyFord Touch® (If Equipped)431
2013 C-Max Full Hybrid(34h)
Owners Guide gf, 3rd Printing, January 2013
USA(fus)
Page 498 of 552
SETTINGS
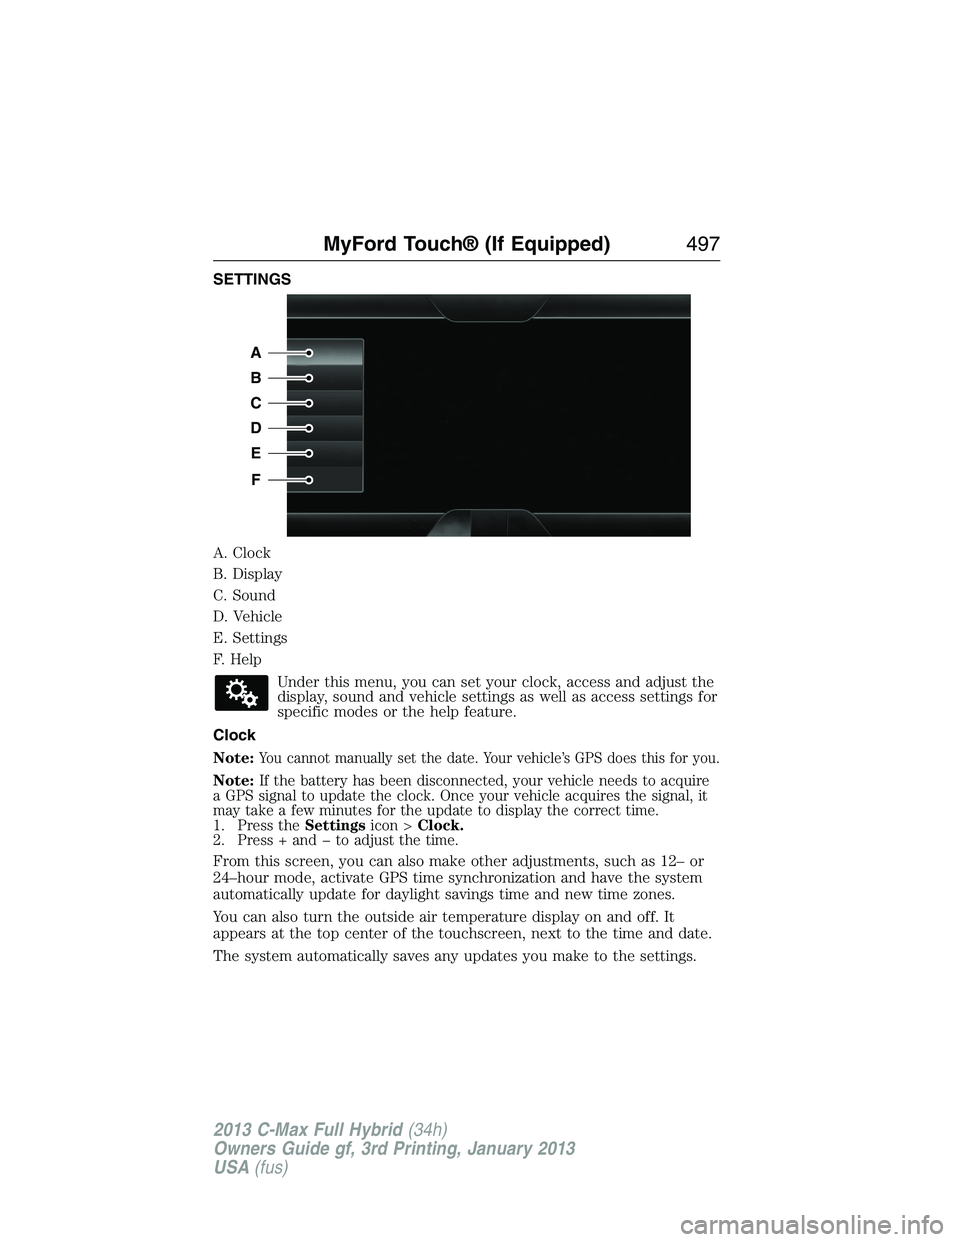
A. Clock
B. Display
C. Sound
D. Vehicle
E. Settings
F. Help
Under this menu, you can set your clock, access and adjust the
display, sound and vehicle settings as well as access settings for
specific modes or the help feature.
Clock
Note:
You cannot manually set the date. Your vehicle’s GPS does this for you.
Note:If the battery has been disconnected, your vehicle needs to acquire
a GPS signal to update the clock. Once your vehicle acquires the signal, it
may take a few minutes for the update to display the correct time.
1. Press theSettingsicon >Clock.
2. Press + and � to adjust the time.
From this screen, you can also make other adjustments, such as 12– or
24–hour mode, activate GPS time synchronization and have the system
automatically update for daylight savings time and new time zones.
You can also turn the outside air temperature display on and off. It
appears at the top center of the touchscreen, next to the time and date.
The system automatically saves any updates you make to the settings.
A
B
C
D
E
F
MyFord Touch® (If Equipped)497
2013 C-Max Full Hybrid(34h)
Owners Guide gf, 3rd Printing, January 2013
USA(fus)
Page 546 of 552
Brakes ........................................218
anti-lock ...................................218
anti-lock brake system (ABS)
warning light ...........................218
brake warning light ................218
fluid, checking and adding ....292
fluid, refill capacities ..............351
fluid, specifications .................351
lubricant specifications ..........351
parking ....................................220
shift interlock ..........................215
C
Capacities for refilling fluids ....351
Cargo area shade ......................240
CD ..............................138, 143–144
CD player ..........................136, 457
CD voice commands .................458
Cell phone use ............................16
Changing the air filter ..............297
Child safety restraints ..........28, 30
Child safety seats
attaching with tether straps ....30
automatic locking mode
(retractor) .................................36
LATCH .......................................28
Child safety seats - booster
seats .............................................23
Cleaning the touchscreen ........432
Cleaning your vehicle ...............310
engine compartment ..............312
instrument panel ....................314
interior .....................................313
plastic parts ............................311
washing ....................................310
waxing .....................................311
wheels ......................................316wiper blades ............................313
Climate voice commands .........510
Clock ..................................138, 497
Console ......................................173
overhead ..................................173
Coolant ......................................286
checking and adding ..............286
recovery reservoir ..................283
refill capacities ........................351
specifications ..........................351
Customer Assistance ................256
Ford Extended Service
Plan ..........................................359
Getting roadside assistance ...256
Getting the service
you need .................................263
Ordering additional owner’s
literature .................................269
Utilizing the
Mediation/Arbitration
Program ...................................267
D
Defrost .......................................151
rear window ............................155
Dipstick
automatic transmission
fluid ..........................................291
engine oil .........................283–284
Display settings .........................498
Doors
central unlocking ......................72
Driving under special
conditions ..................................216
through water .........................251
Dual automatic temperature
control (DATC) .........................151
Index545
2013 C-Max Full Hybrid(34h)
Owners Guide gf, 3rd Printing, January 2013
USA(fus)