horn FORD CROWN VICTORIA 1998 2.G Owners Manual
[x] Cancel search | Manufacturer: FORD, Model Year: 1998, Model line: CROWN VICTORIA, Model: FORD CROWN VICTORIA 1998 2.GPages: 160, PDF Size: 1.24 MB
Page 49 of 160

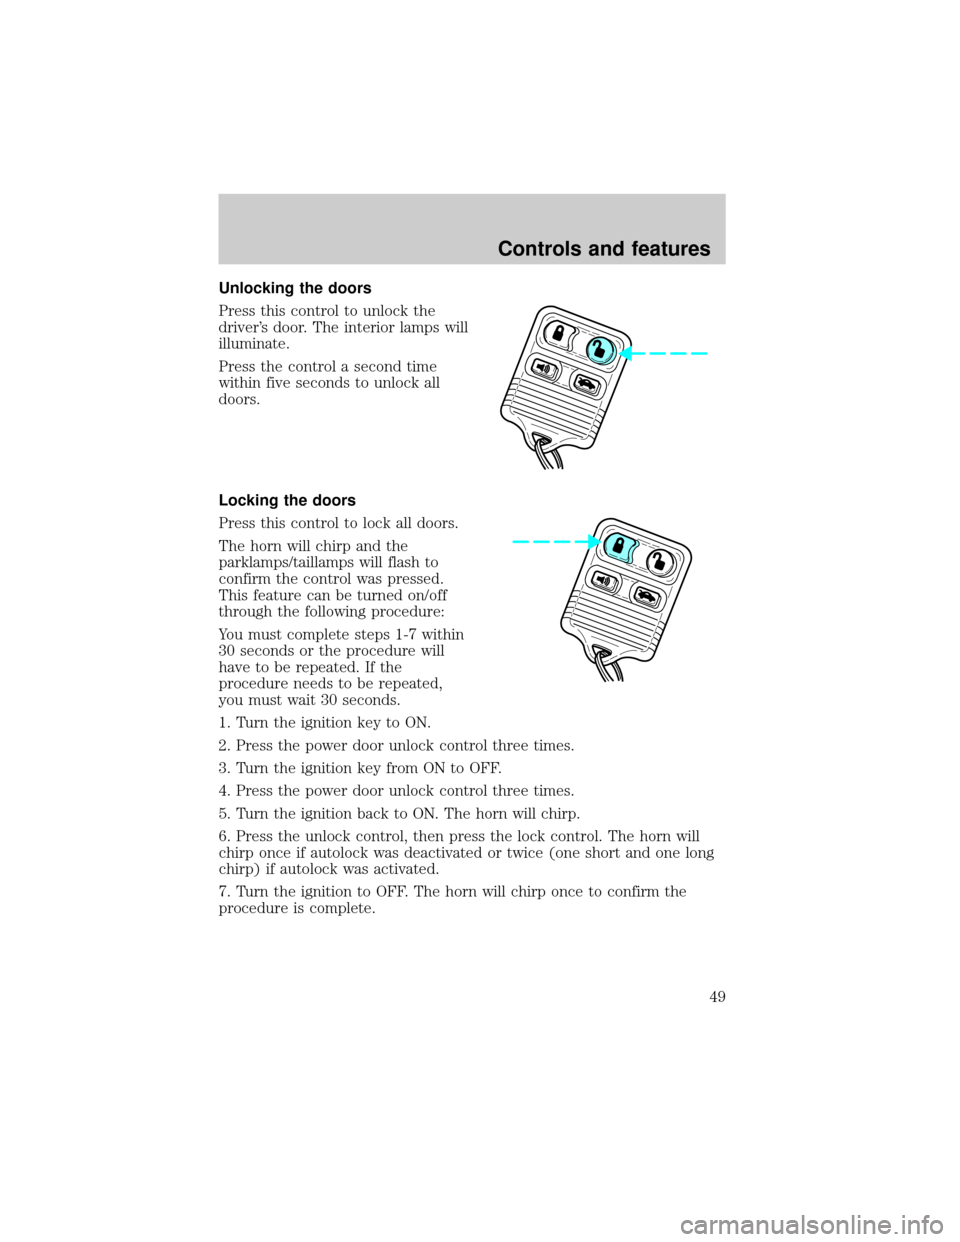
Unlocking the doors
Press this control to unlock the
driver's door. The interior lamps will
illuminate.
Press the control a second time
within five seconds to unlock all
doors.
Locking the doors
Press this control to lock all doors.
The horn will chirp and the
parklamps/taillamps will flash to
confirm the control was pressed.
This feature can be turned on/off
through the following procedure:
You must complete steps 1-7 within
30 seconds or the procedure will
have to be repeated. If the
procedure needs to be repeated,
you must wait 30 seconds.
1. Turn the ignition key to ON.
2. Press the power door unlock control three times.
3. Turn the ignition key from ON to OFF.
4. Press the power door unlock control three times.
5. Turn the ignition back to ON. The horn will chirp.
6. Press the unlock control, then press the lock control. The horn will
chirp once if autolock was deactivated or twice (one short and one long
chirp) if autolock was activated.
7. Turn the ignition to OFF. The horn will chirp once to confirm the
procedure is complete.
Controls and features
49
Page 50 of 160

Autolock
This feature automatically locks all doors when:
²all vehicle doors are closed
²the ignition is in the ON position
²you shift into or through R (Reverse)
²the brake pedal is released.
Relock
The autolock feature repeats when:
²any door is opened and closed
²the brake pedal is released.
Deactivating/activating the autolock feature
Before following the procedure, make sure that the ignition is OFF and
all vehicle doors are closed.
Automatic door locks can be turned on/off with the keyless entry keypad
through the following porcedure:
You must complete steps 1-5 within 30 seconds or the procedure will
have to be repeated. If the procedure needs to be repeated, you must
wait 30 seconds.
1. Enter the keyless entry keypad factory code.
2. Within 5 seconds, press and hold control 7/8.
3. Within 5 seconds (while holding down control 7/8), press and release
control 3/4.
4. Release control 7/8.
The door will lock/unlock to confirm the horn chirp feature has been
disabled. Once disabled, the feature can be enabled by repeating the
same sequence.
Controls and features
50
Page 55 of 160

3. Within five seconds of turning the ignition to OFF, insert the second
previously programmed SecuriLockykey into the ignition and turn the
ignition from OFF to RUN (maintain ignition in RUN for at least one
second but no more than 5 seconds).
4. Turn the ignition to OFF and remove the second SecuriLockykey
from the ignition.
5. Within 10 seconds of turning the ignition to OFF, insert the
unprogrammed SecuriLockykey (new key) into the ignition and turn
the ignition from OFF to RUN (maintain ignition in RUN for at least one
second). This step will program your new SecuriLockykey.
6. To program additional SecuriLockykey(s), repeat this procedure from
step 1.
If the programming procedure was successful, the new SecuriLocky
key(s) will start the vehicle's engine. The theft indicator (located on the
instrument panel) will light for three seconds and then go out.
If the programming procedure was not successful, the new SecuriLocky
key(s) will not operate the vehicle's engine. The theft indicator will flash
on and off. Wait at least one minute and then repeat the procedure from
step 1. If failure repeats, bring your vehicle to your dealership to have
the spare SecuriLockykey(s) programmed.
KEYLESS ENTRY SYSTEM
With the keyless entry keypad, you
can:
²lock or unlock the vehicle doors
without using the key
²open trunk
²disable/enable horn chirp
²disable/enable autolock
See alsoRemote entry systemin this chapter for more information.
Your vehicle has a factory-set 5±digit code that operates the keyless
entry system. You can also program your own 5±digit personal entry
code.
123
45678
90
Controls and features
55
Page 100 of 160

The high-current fuses are coded as follows.
Fuse/Relay
LocationFuse Amp
RatingDescription
1 20A* Electric Fuel Pump Relay
2 30A* Generator, Starter Relay, Fuses 15 and 18
3 25A* Radio, CD Changer, Subwoofer Amplifier
4 30A* Police Power Relay
5 15A* Horn Relay
6 20A* DRL Module
7 20A CB Power door Locks, Power Seats, Trunk Lid
Release
8 30A** Air Suspension System
9 50A** See Fuses 5 and 9
1
2
3
4
5
6
7
89
10
11
12
13
14
15
16
17RELAY
1
RELAY
2
RELAY
3
RELAY
4
Roadside emergencies
100
Page 101 of 160

Fuse/Relay
LocationFuse Amp
RatingDescription
10 50A** See Fuses 1, 2, 6, 7, 10, 11, 13 and Circuit
Breaker 14
11 40A** See Fuses 4, 8, 16 and Circuit Breaker 12
12 30A** PCM Power Relay, PCM, Natural Gas
Vehicle Module
13 50A** High Speed Cooling Fan Relay
14 40A** Rear Window Defrost Relay, Also see Fuse
17
15 50A** Anti-Lock Brake Module
16 50A** Police Option Fuse Holder
17 30A** Cooling Fan Relay
Relay 1 Ð Rear Defrost Relay
Relay 2 Ð Horn Relay
Relay 3 Ð Cooling Fan Relay
Relay 4 Ð Air Suspension Pump Relay, Police Power
Relay
* Mini Fuses ** Maxi Fuses
Relays
Relays are located in the power distribution box and should be replaced
by qualified technicians.
CHANGING THE TIRES
If you get a flat tire while driving, do not apply the brake heavily.
Instead, gradually decrease your speed. Hold the steering wheel firmly
and slowly move to a safe place on the side of the road.
Temporary spare tire information
Your vehicle may have a temporary or full-size spare tire. The temporary
spare tire for your vehicle is labeled as such. It is smaller than a regular
tire and is designed for emergency use only. Replace this tire with a
full-size tire as soon as possible.
Roadside emergencies
101