automatic transmission FORD CROWN VICTORIA 1999 2.G Owners Manual
[x] Cancel search | Manufacturer: FORD, Model Year: 1999, Model line: CROWN VICTORIA, Model: FORD CROWN VICTORIA 1999 2.GPages: 208, PDF Size: 1.49 MB
Page 67 of 208
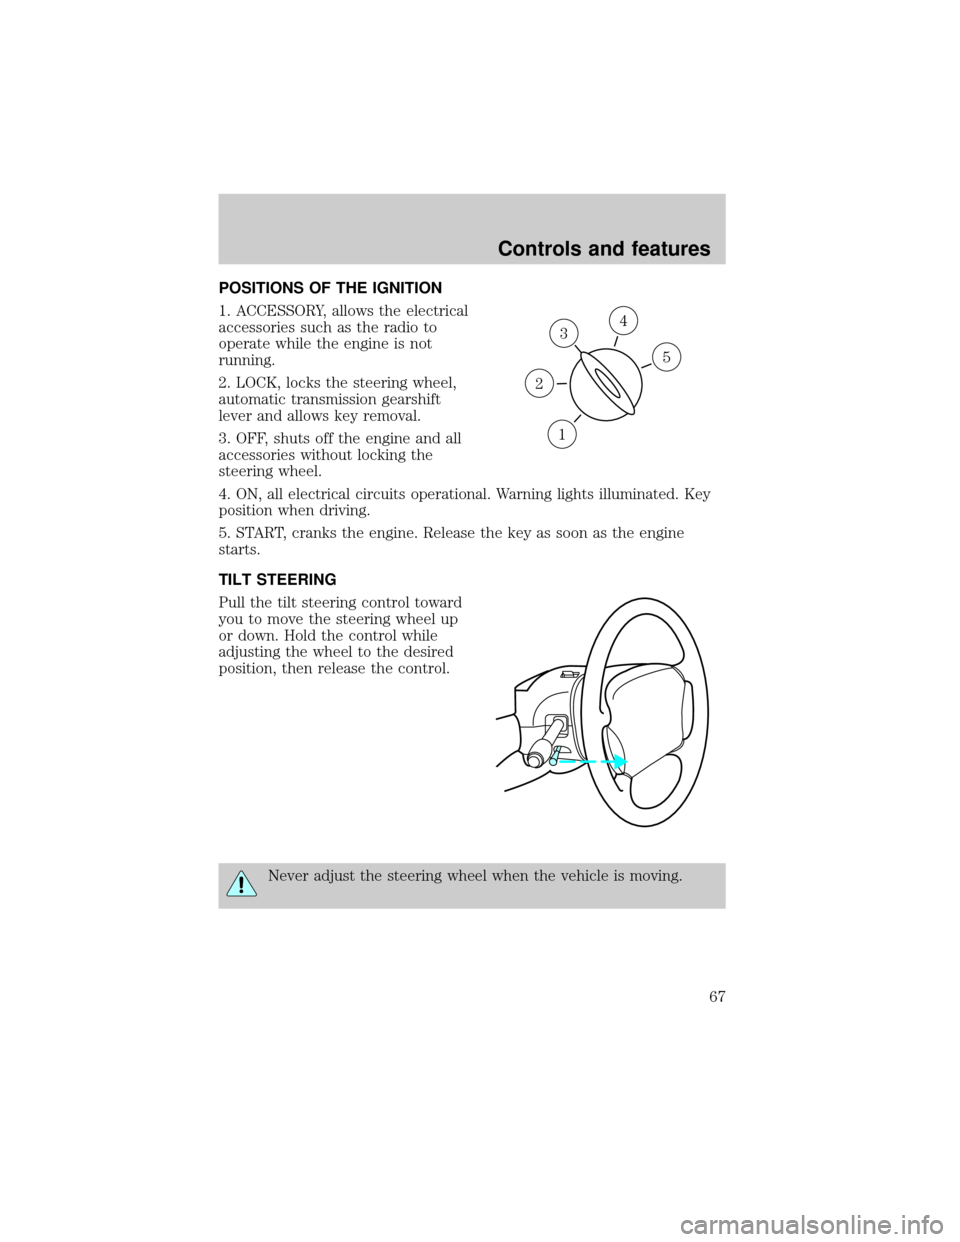
POSITIONS OF THE IGNITION
1. ACCESSORY, allows the electrical
accessories such as the radio to
operate while the engine is not
running.
2. LOCK, locks the steering wheel,
automatic transmission gearshift
lever and allows key removal.
3. OFF, shuts off the engine and all
accessories without locking the
steering wheel.
4. ON, all electrical circuits operational. Warning lights illuminated. Key
position when driving.
5. START, cranks the engine. Release the key as soon as the engine
starts.
TILT STEERING
Pull the tilt steering control toward
you to move the steering wheel up
or down. Hold the control while
adjusting the wheel to the desired
position, then release the control.
Never adjust the steering wheel when the vehicle is moving.
3
1
2
5
4
Controls and features
67
Page 68 of 208
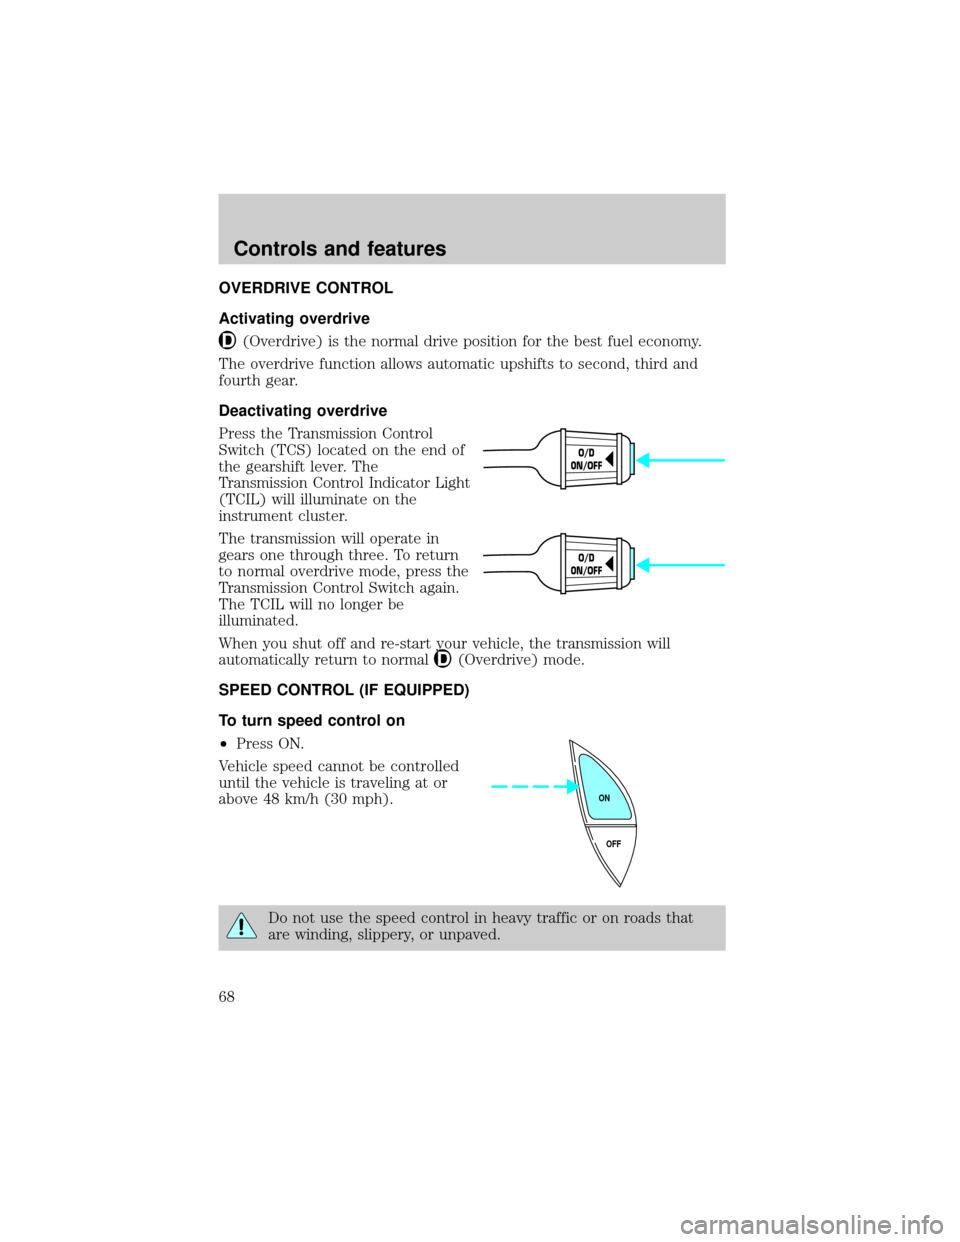
OVERDRIVE CONTROL
Activating overdrive
(Overdrive) is the normal drive position for the best fuel economy.
The overdrive function allows automatic upshifts to second, third and
fourth gear.
Deactivating overdrive
Press the Transmission Control
Switch (TCS) located on the end of
the gearshift lever. The
Transmission Control Indicator Light
(TCIL) will illuminate on the
instrument cluster.
The transmission will operate in
gears one through three. To return
to normal overdrive mode, press the
Transmission Control Switch again.
The TCIL will no longer be
illuminated.
When you shut off and re-start your vehicle, the transmission will
automatically return to normal
(Overdrive) mode.
SPEED CONTROL (IF EQUIPPED)
To turn speed control on
²Press ON.
Vehicle speed cannot be controlled
until the vehicle is traveling at or
above 48 km/h (30 mph).
Do not use the speed control in heavy traffic or on roads that
are winding, slippery, or unpaved.
O/D
ON/OFF
O/D
ON/OFF
OFF ON
Controls and features
68
Page 124 of 208
Driving with a 4±speed automatic transmission
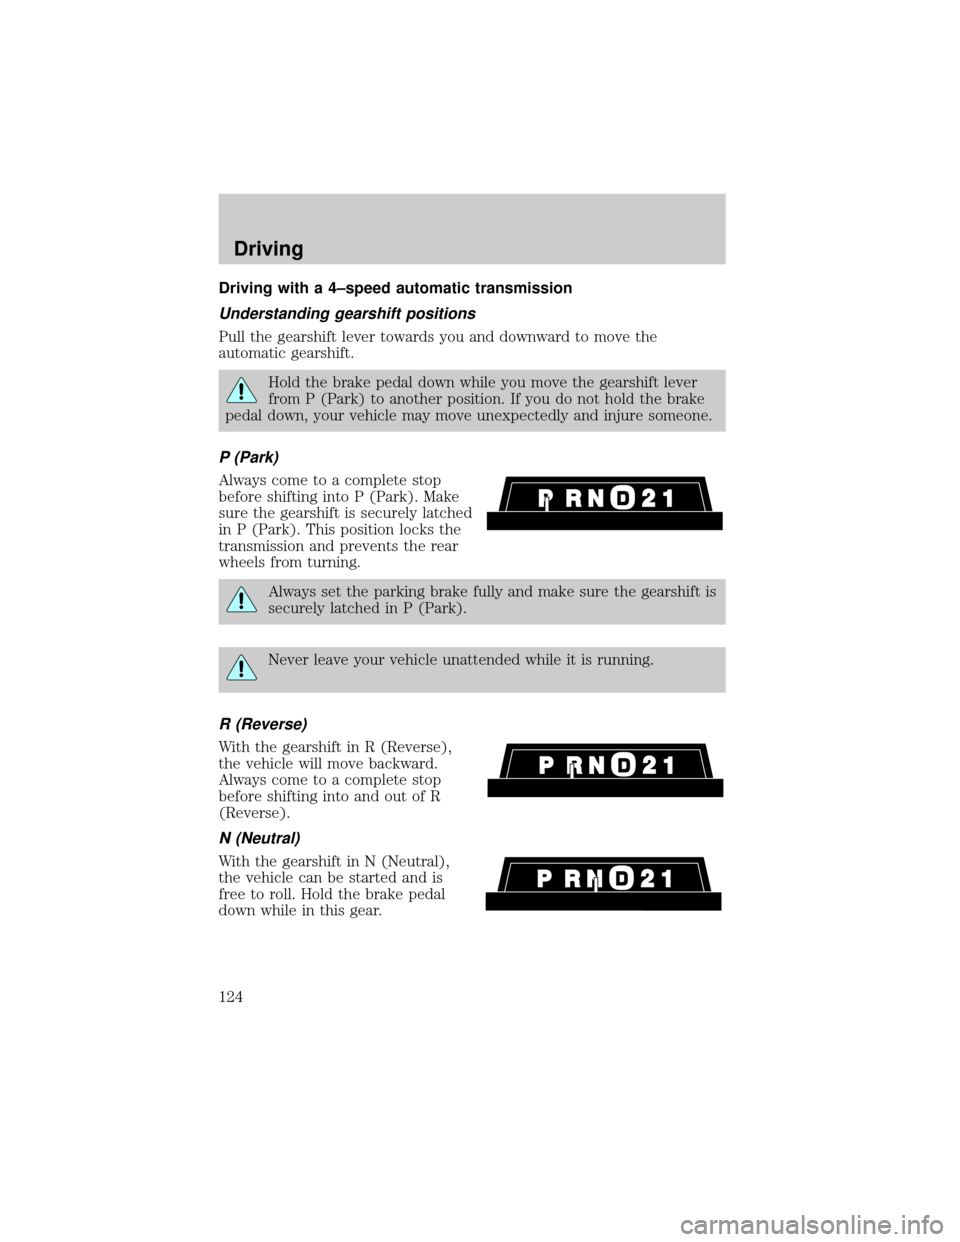
Understanding gearshift positions
Pull the gearshift lever towards you and downward to move the
automatic gearshift.
Hold the brake pedal down while you move the gearshift lever
from P (Park) to another position. If you do not hold the brake
pedal down, your vehicle may move unexpectedly and injure someone.
P (Park)
Always come to a complete stop
before shifting into P (Park). Make
sure the gearshift is securely latched
in P (Park). This position locks the
transmission and prevents the rear
wheels from turning.
Always set the parking brake fully and make sure the gearshift is
securely latched in P (Park).
Never leave your vehicle unattended while it is running.
R (Reverse)
With the gearshift in R (Reverse),
the vehicle will move backward.
Always come to a complete stop
before shifting into and out of R
(Reverse).
N (Neutral)
With the gearshift in N (Neutral),
the vehicle can be started and is
free to roll. Hold the brake pedal
down while in this gear.
Driving
124
Page 125 of 208
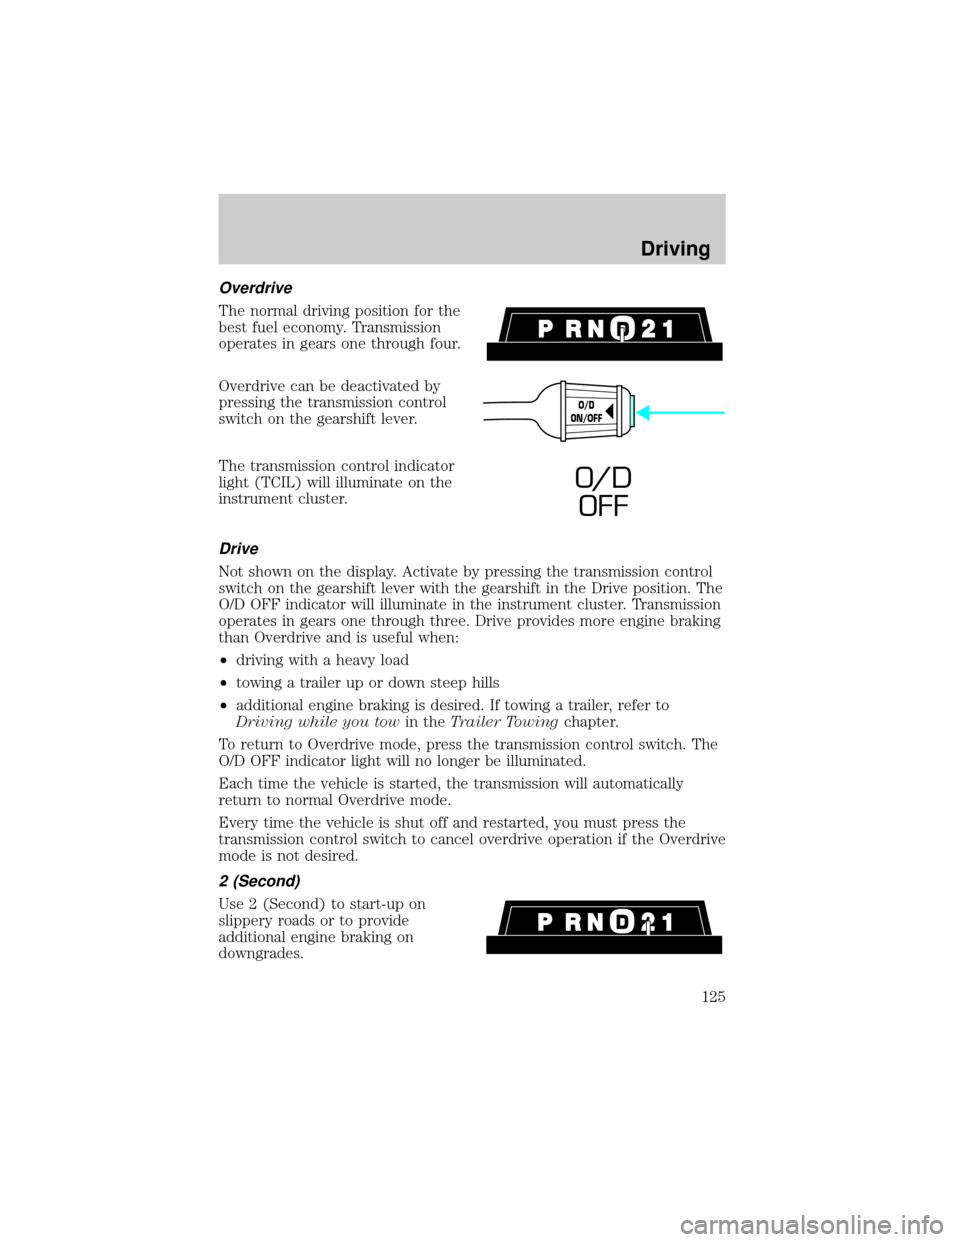
Overdrive
The normal driving position for the
best fuel economy. Transmission
operates in gears one through four.
Overdrive can be deactivated by
pressing the transmission control
switch on the gearshift lever.
The transmission control indicator
light (TCIL) will illuminate on the
instrument cluster.
Drive
Not shown on the display. Activate by pressing the transmission control
switch on the gearshift lever with the gearshift in the Drive position. The
O/D OFF indicator will illuminate in the instrument cluster. Transmission
operates in gears one through three. Drive provides more engine braking
than Overdrive and is useful when:
²driving with a heavy load
²towing a trailer up or down steep hills
²additional engine braking is desired. If towing a trailer, refer to
Driving while you towin theTrailer Towingchapter.
To return to Overdrive mode, press the transmission control switch. The
O/D OFF indicator light will no longer be illuminated.
Each time the vehicle is started, the transmission will automatically
return to normal Overdrive mode.
Every time the vehicle is shut off and restarted, you must press the
transmission control switch to cancel overdrive operation if the Overdrive
mode is not desired.
2 (Second)
Use 2 (Second) to start-up on
slippery roads or to provide
additional engine braking on
downgrades.
O/D
ON/OFF
O/ D
OFF
Driving
125
Page 129 of 208
If you use a rental trailer, follow the instructions that the rental agency
gives to you.
Do not attach safety chains to the bumper.
Trailer brakes
Electric brakes and manual, automatic or surge-type brakes are safe if
installed properly and adjusted to the manufacturer's specifications. The
trailer brakes must meet local and Federal regulations.
Do not connect a trailer's hydraulic brake system directly to your
vehicle's brake system. Your vehicle may not have enough
braking power and your chances of having a collision greatly increase.
The braking system of the tow vehicle is rated for operation at the
GVWR not GCWR.
Trailer lamps
Trailer lamps are required on most towed vehicles. Make sure your
trailer lamps conform to local and Federal regulations. See your dealer or
trailer rental agency for proper instructions and equipment for hooking
up trailer lamps.
Driving while you tow
Do not drive faster than 88 km/h (55 mph) when towing a trailer.
Speed control may shut off if you are towing on long, steep grades.
When towing a trailer:
²Use a lower gear when towing up or down steep hills. This will
eliminate excessive downshifting and upshifting for optimum fuel
economy and transmission cooling.
²Anticipate stops and brake gradually.
Exceeding the GCWR rating may cause internal transmission
damage and void your warranty coverage.
Servicing after towing
If you tow a trailer for long distances, your vehicle will require more
frequent service intervals. Refer to your Scheduled Maintenance guide
for more information.
Driving
129
Page 136 of 208
Fuse/Relay
LocationFuse Amp
RatingDescription
9 30A Blower Motor, A/C-Heater Mode Switch
10 10A Air Bag Module
11 5A Radio
12 18A CB Lighting Control Module, Flash-to-Pass,
Main Light Switch
13 15A Warning Lamps, Analog Cluster Gauges and
Indicators, Electronic Automatic
Transmission, Lighting Control Module
14 20A CB Window/Door Lock Control, Driver's Door
Module, One Touch Down
15 10A Anti-Lock Brakes, Instrument Cluster,
Transmission Control Switch
16 20A Cigar Lighter
17 10A Rear Defrost
18 10A Air Bag Module
Power distribution box
The power distribution box is located in the engine compartment. The
power distribution box contains high-current fuses that protect your
vehicle's main electrical systems from overloads.
Always disconnect the battery before servicing high current
fuses.
Always replace the cover to the Power Distribution Box before
reconnecting the battery or refilling fluid reservoirs.
If the battery has been disconnected and reconnected, refer to the
Batterysection of theMaintenance and Carechapter.
Roadside emergencies
136
Page 142 of 208
Removing the anti-theft lug nut
1. Insert the key over the locking lug nut. Make sure you hold the key
square to the lug nut. If you hold the key at an angle, you could damage
the key and the lug nut.
2. Place the lug nut wrench over the lug nut key and apply pressure on
the key with the wrench.
3. Turn the wrench in a counterclockwise direction to remove the lug
nut.
Reinstalling the anti-theft lug nut
1. Insert the key over the locking lug nut.
2. Place the lug nut wrench over the lug nut key and apply pressure on
the key with the wrench.
3. Install the lug nut.
JUMP STARTING YOUR VEHICLE
The gases around the battery can explode if exposed to flames,
sparks, or lit cigarettes. An explosion could result in injury or
vehicle damage.
Do not push start your vehicle. You could damage the catalytic
converter.
Batteries contain sulfuric acid which can burn skin, eyes, and
clothing, if contacted.
Do not attempt to push start your vehicle. Automatic
transmissions do not have push-start capability.
Preparing your vehicle
1.Use only a 12±volt supply to start your vehicle.
2. Do not disconnect the battery of the disabled vehicle as this could
damage the vehicle's electrical system.
Roadside emergencies
142
Page 150 of 208
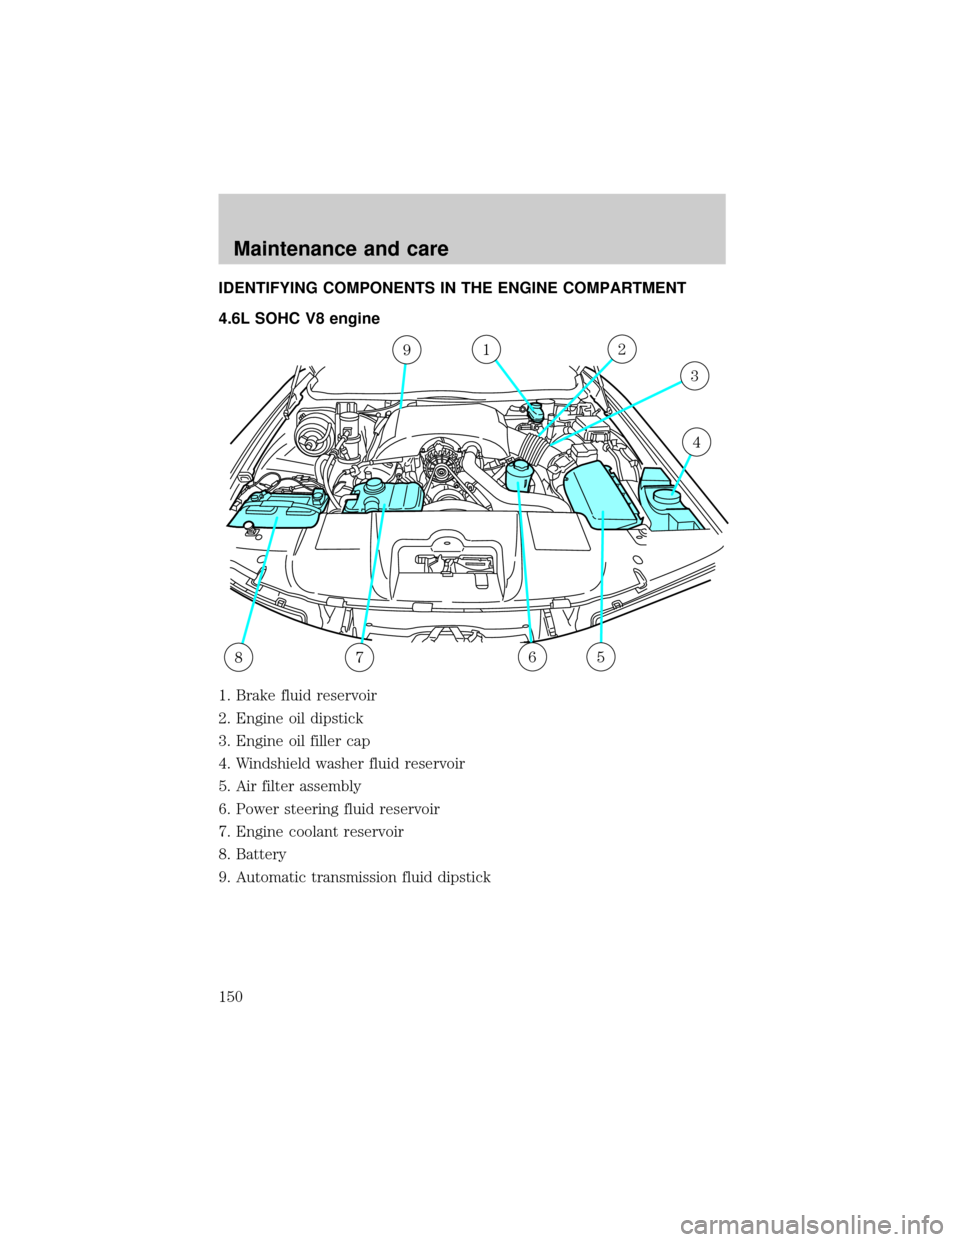
IDENTIFYING COMPONENTS IN THE ENGINE COMPARTMENT
4.6L SOHC V8 engine
1. Brake fluid reservoir
2. Engine oil dipstick
3. Engine oil filler cap
4. Windshield washer fluid reservoir
5. Air filter assembly
6. Power steering fluid reservoir
7. Engine coolant reservoir
8. Battery
9. Automatic transmission fluid dipstick
912
3
6578
4
Maintenance and care
150
Page 159 of 208
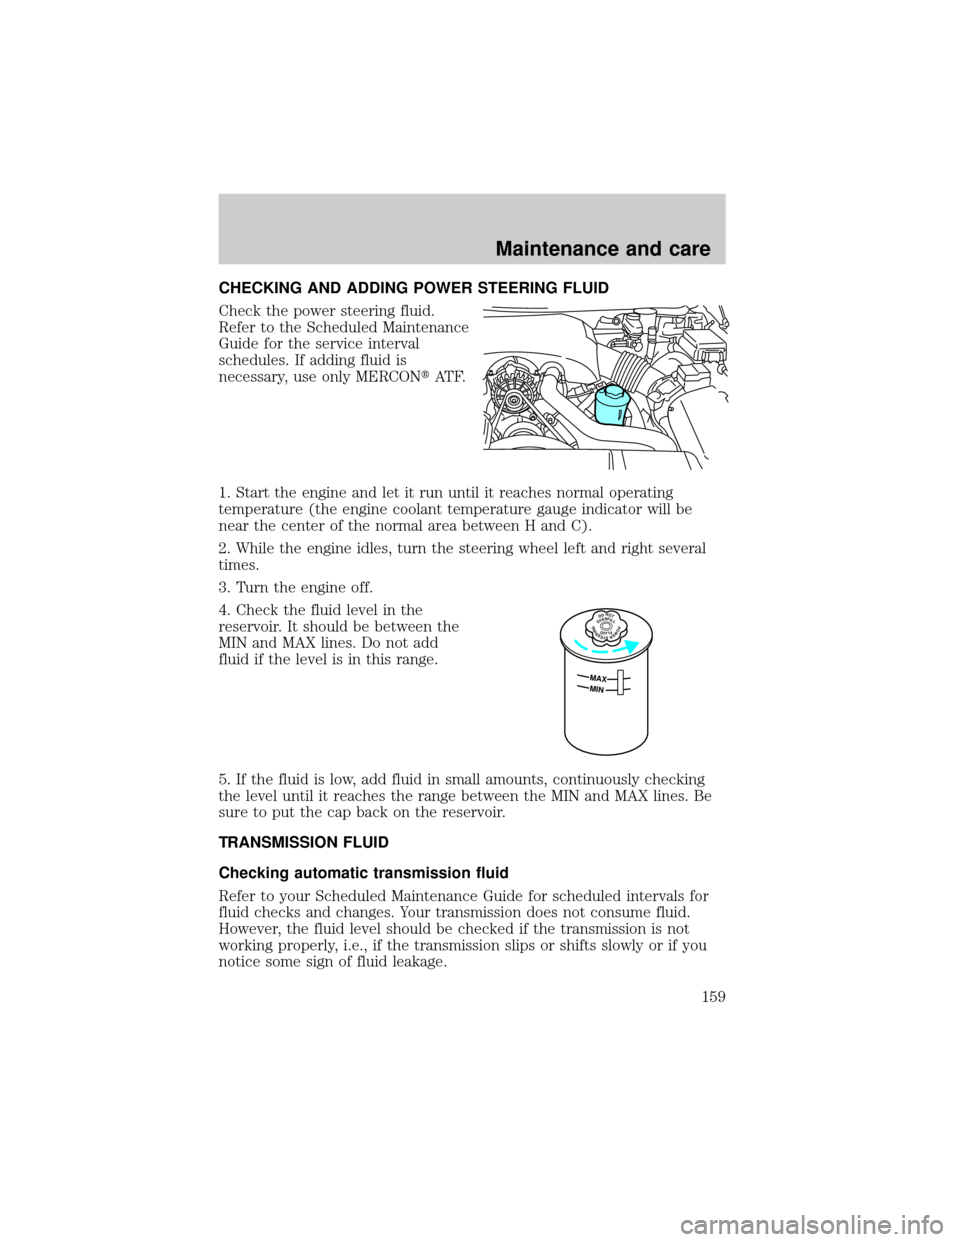
CHECKING AND ADDING POWER STEERING FLUID
Check the power steering fluid.
Refer to the Scheduled Maintenance
Guide for the service interval
schedules. If adding fluid is
necessary, use only MERCONtAT F.
1. Start the engine and let it run until it reaches normal operating
temperature (the engine coolant temperature gauge indicator will be
near the center of the normal area between H and C).
2. While the engine idles, turn the steering wheel left and right several
times.
3. Turn the engine off.
4. Check the fluid level in the
reservoir. It should be between the
MIN and MAX lines. Do not add
fluid if the level is in this range.
5. If the fluid is low, add fluid in small amounts, continuously checking
the level until it reaches the range between the MIN and MAX lines. Be
sure to put the cap back on the reservoir.
TRANSMISSION FLUID
Checking automatic transmission fluid
Refer to your Scheduled Maintenance Guide for scheduled intervals for
fluid checks and changes. Your transmission does not consume fluid.
However, the fluid level should be checked if the transmission is not
working properly, i.e., if the transmission slips or shifts slowly or if you
notice some sign of fluid leakage.
DONOTOVERFILLPOWERSTEERINGFLUID
MAX
MIN
Maintenance and care
159
Page 160 of 208
![FORD CROWN VICTORIA 1999 2.G Owners Manual Automatic transmission fluid expands when warmed. To obtain an
accurate fluid check, drive the vehicle until it is at normal operating
temperature (approximately 30 km [20 miles]). If your vehicle has FORD CROWN VICTORIA 1999 2.G Owners Manual Automatic transmission fluid expands when warmed. To obtain an
accurate fluid check, drive the vehicle until it is at normal operating
temperature (approximately 30 km [20 miles]). If your vehicle has](/img/11/4775/w960_4775-159.png)
Automatic transmission fluid expands when warmed. To obtain an
accurate fluid check, drive the vehicle until it is at normal operating
temperature (approximately 30 km [20 miles]). If your vehicle has been
operated for an extended period at high speeds, in city traffic during hot
weather or pulling a trailer, the vehicle should be turned off for about 30
minutes to allow fluid to cool before checking.
1. Drive the vehicle 30 km (20 miles) or until it reaches normal operating
temperature.
2. Park the vehicle on a level surface and engage the parking brake.
3. With the parking brake engaged and your foot on the brake pedal,
start the engine and move the gearshift lever through all of the gear
ranges. Allow sufficient time for each gear to engage.
4. Latch the gearshift lever in P (Park) and leave the engine running.
5. Remove the dipstick, wiping it clean with a clean, dry lint free rag.
6. Install the dipstick making sure it is fully seated in the filler tube.
7. Remove the dipstick and inspect the fluid level. The fluid should be in
the designated area for normal operating temperature (H) or ambient
temperature (C).
Low fluid level
Do not drive the vehicle if the fluid
level is at the bottom of the dipstick
and the ambient temperature is
above 10ÉC (50ÉF).
Correct fluid level
The transmission fluid should be checked at normal operating
temperature 66ÉC-77ÉC (150ÉF-170ÉF) on a level surface. The normal
operating temperature can be reached after approximately 30 km (20
miles) of driving.
You can check the fluid without driving if the ambient temperature is
above 10ÉC (50ÉF). However, if fluid is added at this time, an overfill
condition could result when the vehicle reaches normal operating
temperature.
The transmission fluid should be in
this range if at normal operating
temperature (66ÉC-77ÉC
[150ÉF-170ÉF]).
DON’T ADD
DON’T ADD
Maintenance and care
160