headlamp FORD CROWN VICTORIA 1999 2.G Owners Manual
[x] Cancel search | Manufacturer: FORD, Model Year: 1999, Model line: CROWN VICTORIA, Model: FORD CROWN VICTORIA 1999 2.GPages: 208, PDF Size: 1.49 MB
Page 4 of 208
R.DEF.
AUTO
LAMP0FFPANEL
DIM
PUSH INTERIOR
HI
LO
F
E
CHECK
ENGINEAIR
SUSPOD
OFF
BRAKE
TEMP VOLTS FUEL
MPH km/h10 203040506070
80
90
10 0
11 0
12 020 406080100
120
140
160
180
200H
C F H
L
< FUEL FILL DOORP R N D 2 1
OFFON
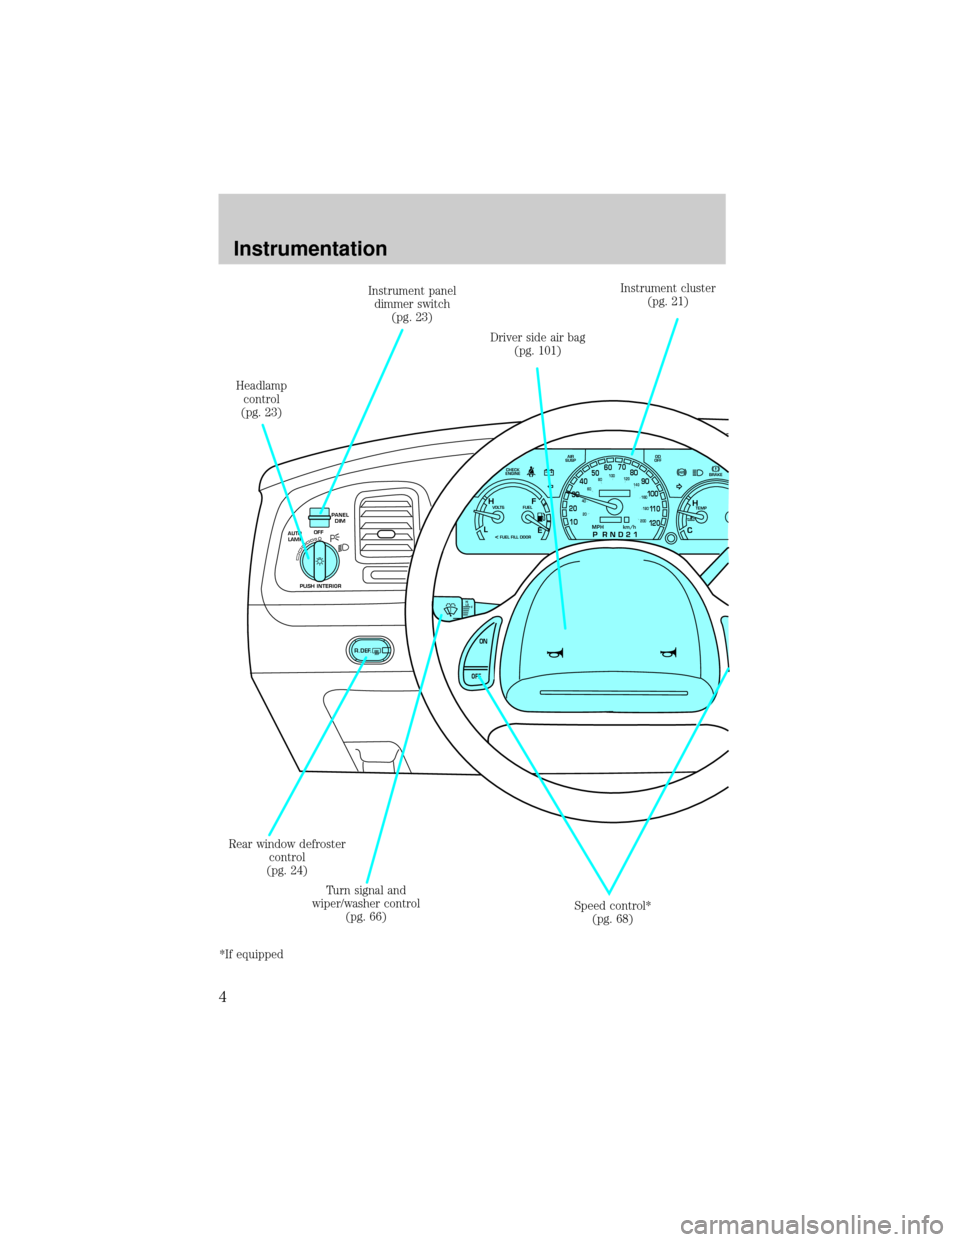
Driver side air bag
(pg. 101)Instrument cluster
(pg. 21)
Rear window defroster
control
(pg. 24)Instrument panel
dimmer switch
(pg. 23)
Headlamp
control
(pg. 23)
Speed control*
(pg. 68) Turn signal and
wiper/washer control
(pg. 66)
*If equipped
Instrumentation
4
Page 9 of 208
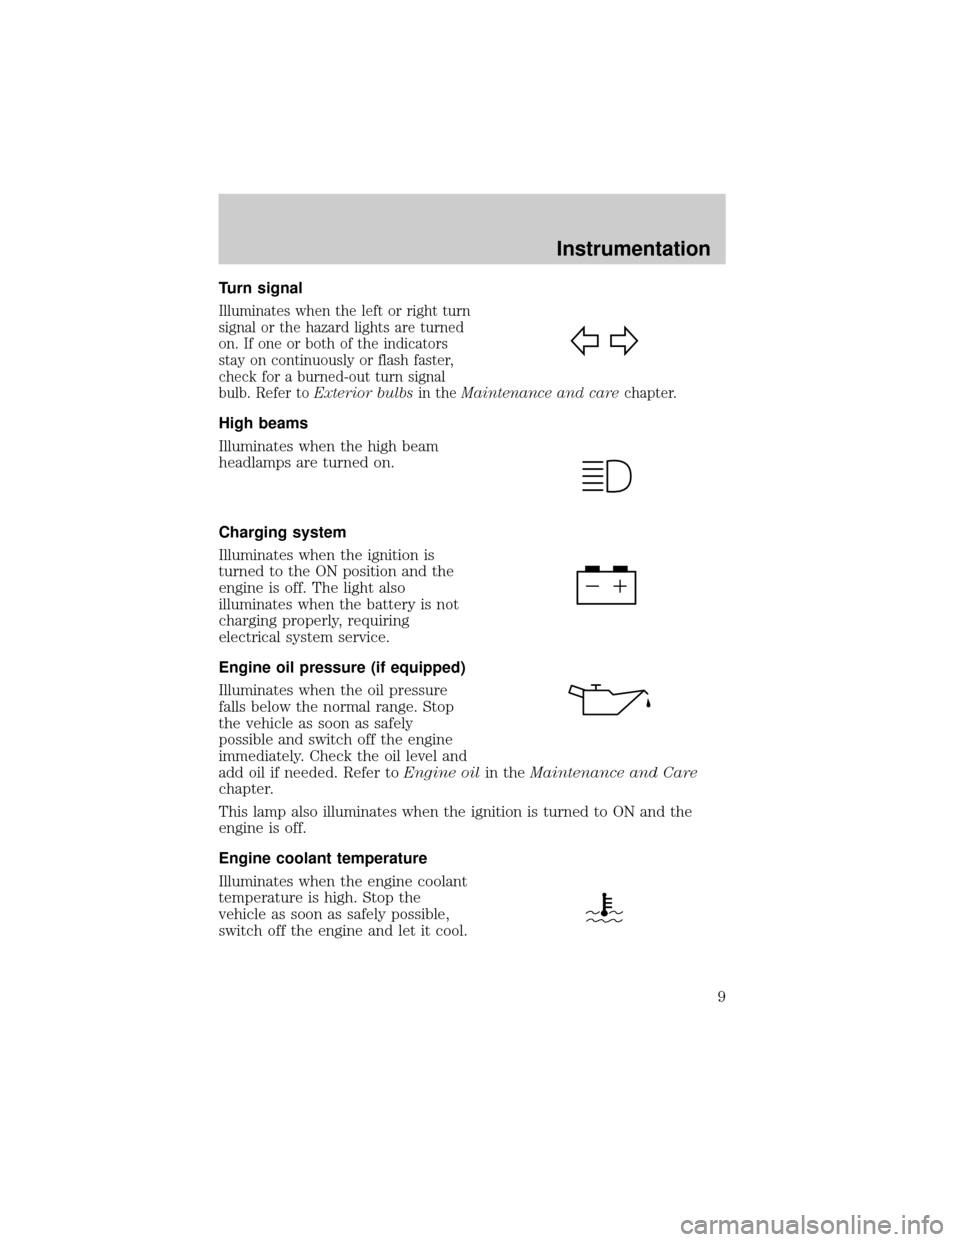
Turn signal
Illuminates when the left or right turn
signal or the hazard lights are turned
on. If one or both of the indicators
stay on continuously or flash faster,
check for a burned-out turn signal
bulb. Refer toExterior bulbsin theMaintenance and carechapter.
High beams
Illuminates when the high beam
headlamps are turned on.
Charging system
Illuminates when the ignition is
turned to the ON position and the
engine is off. The light also
illuminates when the battery is not
charging properly, requiring
electrical system service.
Engine oil pressure (if equipped)
Illuminates when the oil pressure
falls below the normal range. Stop
the vehicle as soon as safely
possible and switch off the engine
immediately. Check the oil level and
add oil if needed. Refer toEngine oilin theMaintenance and Care
chapter.
This lamp also illuminates when the ignition is turned to ON and the
engine is off.
Engine coolant temperature
Illuminates when the engine coolant
temperature is high. Stop the
vehicle as soon as safely possible,
switch off the engine and let it cool.
Instrumentation
9
Page 11 of 208
²the customer has disabled the system using the traction control
switch.
For more information, refer to theDrivingchapter.
Safety belt warning chime
Chimes to remind you to fasten your safety belts.
For information on the safety belt warning chime, refer to theSeating
and safety restraintschapter.
Supplemental restraint system (SRS) warning chime
For information on the SRS warning chime, refer to theSeating and
safety restraintschapter.
Key-in-ignition warning chime
Sounds when the key is left in the ignition in the OFF/LOCK or ACC
position and the driver's door is opened.
Headlamps on warning chime
Sounds when the headlamps or parking lamps are on, the ignition is off
(and the key is not in the ignition) and the driver's door is opened.
Turn signal chime
Sounds when the turn signal lever has been activated to signal a turn
and the vehicle is driven more than 0.8 km (1/2 mile).
GAUGES
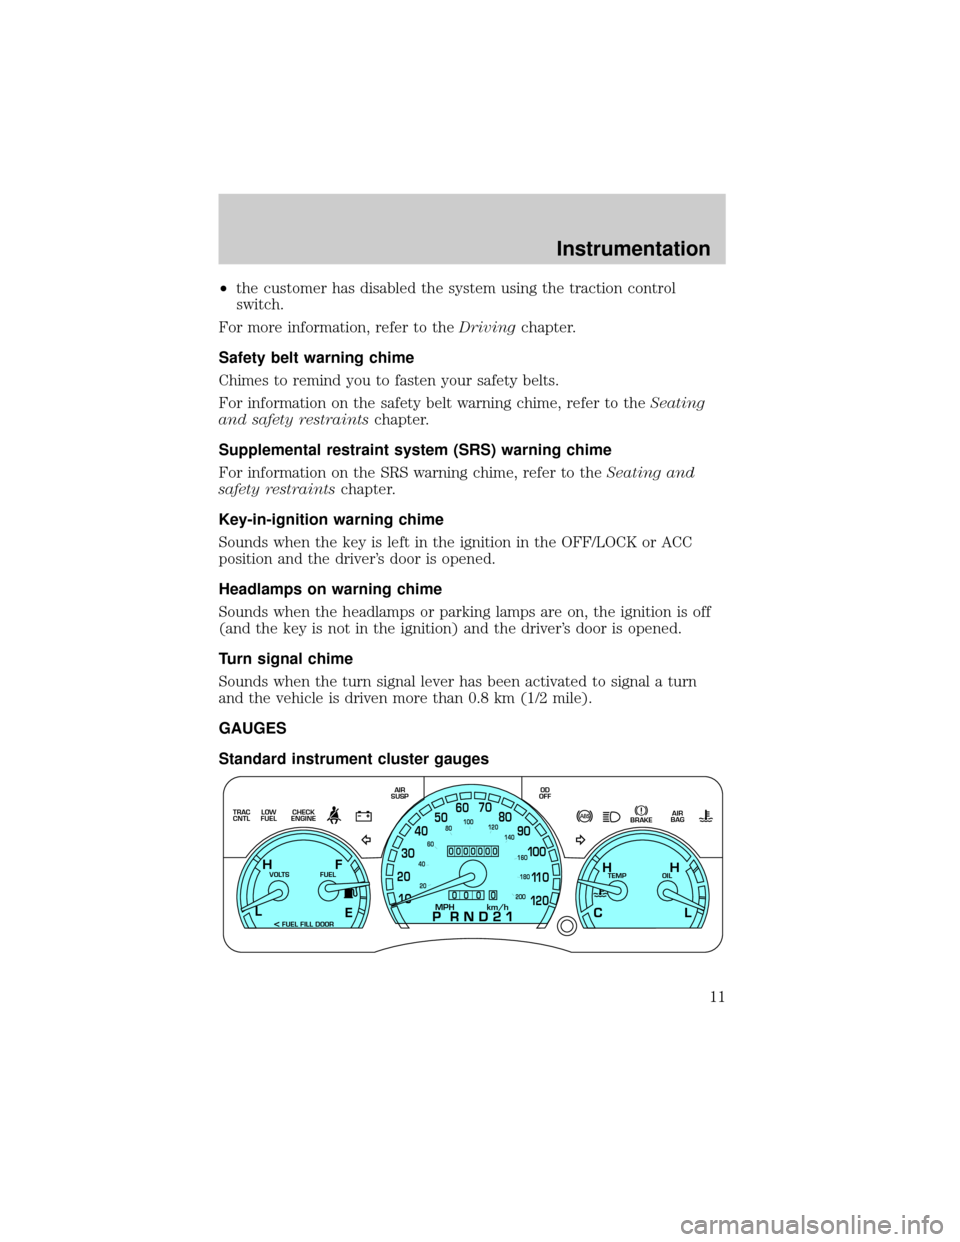
Standard instrument cluster gauges
E
LOW
FUEL TRAC
CNTLCHECK
ENGINEAIR
SUSPOD
OFF
BRAKEAIR
BAG
TEMP OIL VOLTS FUEL
MPH km/h10 203040506070
80
90
10 0
11 0
12 020 406080100
120
140
160
180
200
H H
L C F H
L
< FUEL FILL DOOR
0000000
0
0 0 0
Instrumentation
11
Page 23 of 208
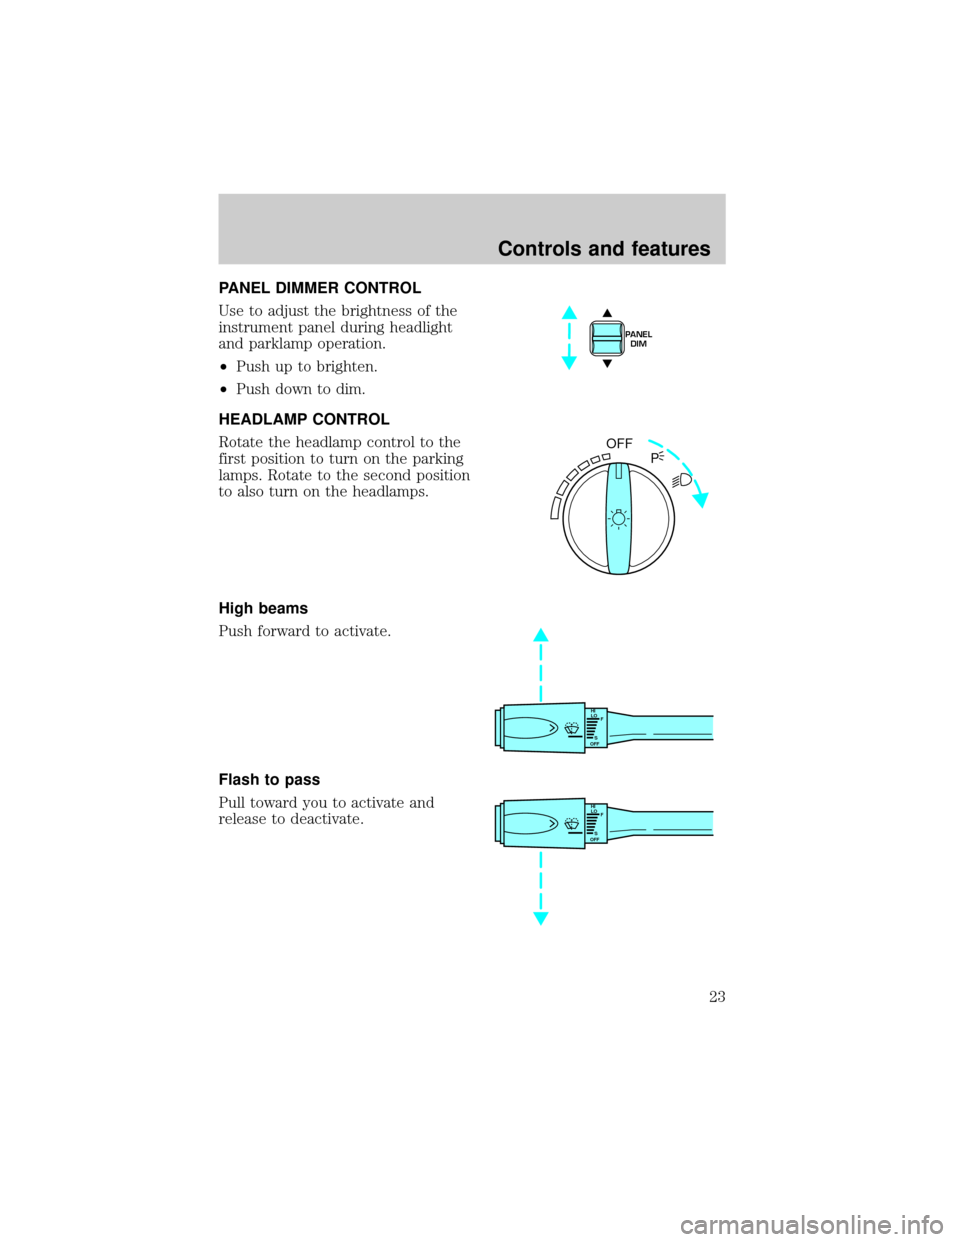
PANEL DIMMER CONTROL
Use to adjust the brightness of the
instrument panel during headlight
and parklamp operation.
²Push up to brighten.
²Push down to dim.
HEADLAMP CONTROL
Rotate the headlamp control to the
first position to turn on the parking
lamps. Rotate to the second position
to also turn on the headlamps.
High beams
Push forward to activate.
Flash to pass
Pull toward you to activate and
release to deactivate.
PANEL
DIM
OFF
P
HI
LO
F
S
OFF
HI
LO
F
S
OFF
Controls and features
23
Page 24 of 208
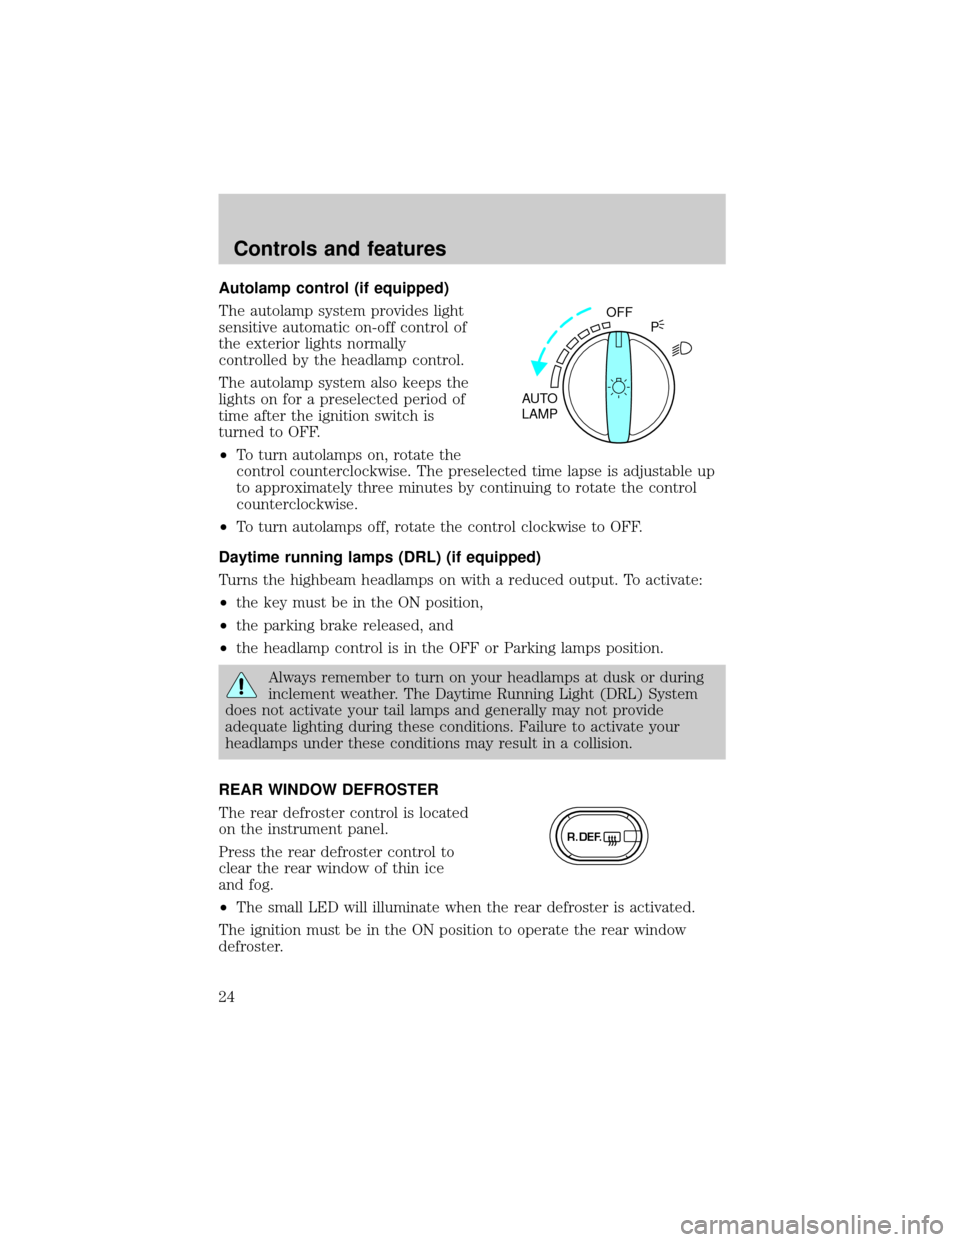
Autolamp control (if equipped)
The autolamp system provides light
sensitive automatic on-off control of
the exterior lights normally
controlled by the headlamp control.
The autolamp system also keeps the
lights on for a preselected period of
time after the ignition switch is
turned to OFF.
²To turn autolamps on, rotate the
control counterclockwise. The preselected time lapse is adjustable up
to approximately three minutes by continuing to rotate the control
counterclockwise.
²To turn autolamps off, rotate the control clockwise to OFF.
Daytime running lamps (DRL) (if equipped)
Turns the highbeam headlamps on with a reduced output. To activate:
²the key must be in the ON position,
²the parking brake released, and
²the headlamp control is in the OFF or Parking lamps position.
Always remember to turn on your headlamps at dusk or during
inclement weather. The Daytime Running Light (DRL) System
does not activate your tail lamps and generally may not provide
adequate lighting during these conditions. Failure to activate your
headlamps under these conditions may result in a collision.
REAR WINDOW DEFROSTER
The rear defroster control is located
on the instrument panel.
Press the rear defroster control to
clear the rear window of thin ice
and fog.
²The small LED will illuminate when the rear defroster is activated.
The ignition must be in the ON position to operate the rear window
defroster.
OFF
AUTO
LAMPP
R.DEF.
Controls and features
24
Page 51 of 208
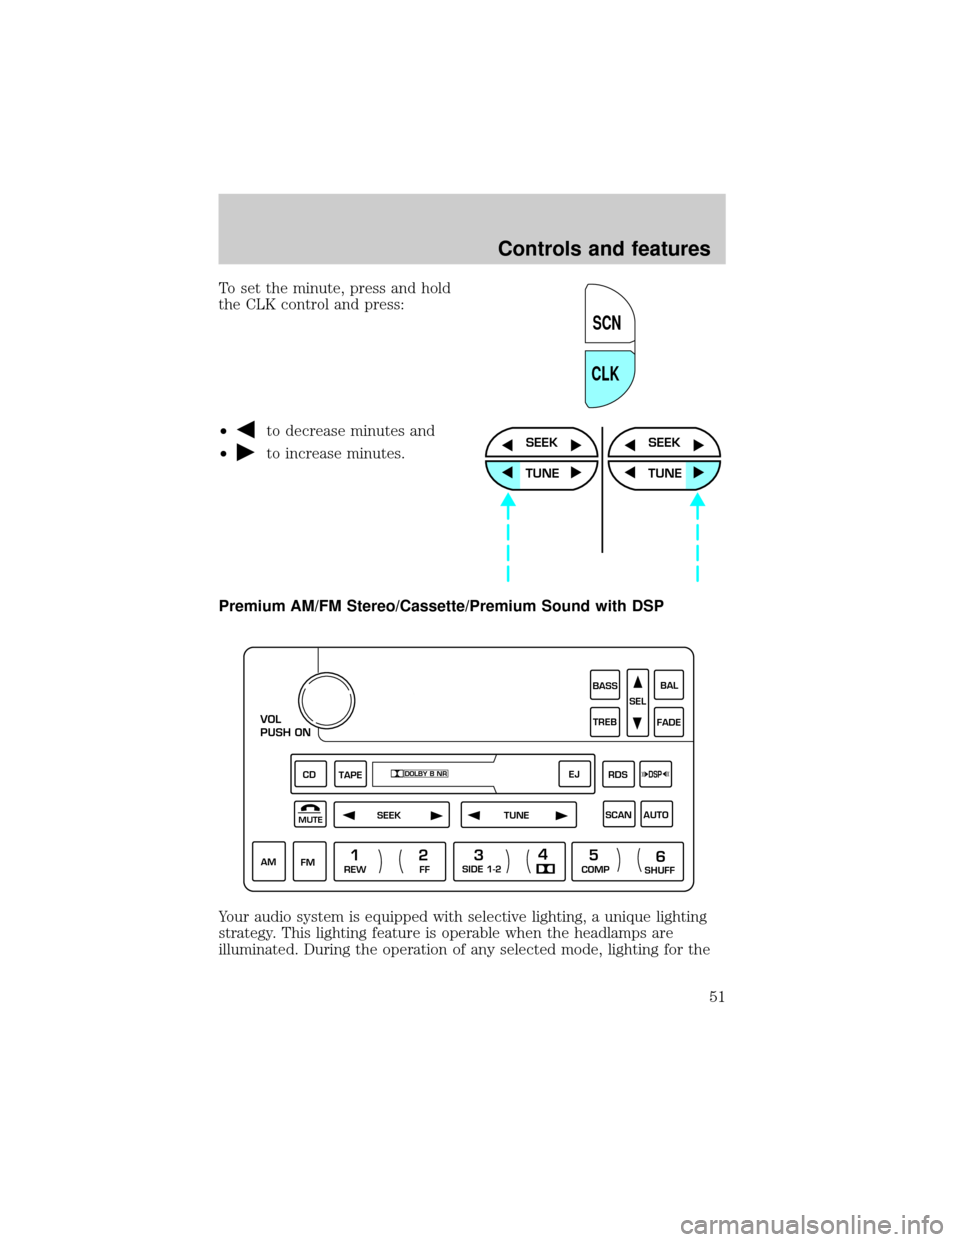
To set the minute, press and hold
the CLK control and press:
²
to decrease minutes and
²
to increase minutes.
Premium AM/FM Stereo/Cassette/Premium Sound with DSP
Your audio system is equipped with selective lighting, a unique lighting
strategy. This lighting feature is operable when the headlamps are
illuminated. During the operation of any selected mode, lighting for the
SCN
CLK
SEEK
TUNE
SEEK
TUNE
VOL
PUSH ON
TAPE
MUTESEEKTUNE
AM
FM
REW
FFSIDE 1-2
COMP
SHUFF
CDEJ
RDS
SCAN AUTO
1
234
5
6
BASS
TREBSELBAL
FADE
DSPDOLBY B NR
Controls and features
51
Page 113 of 208
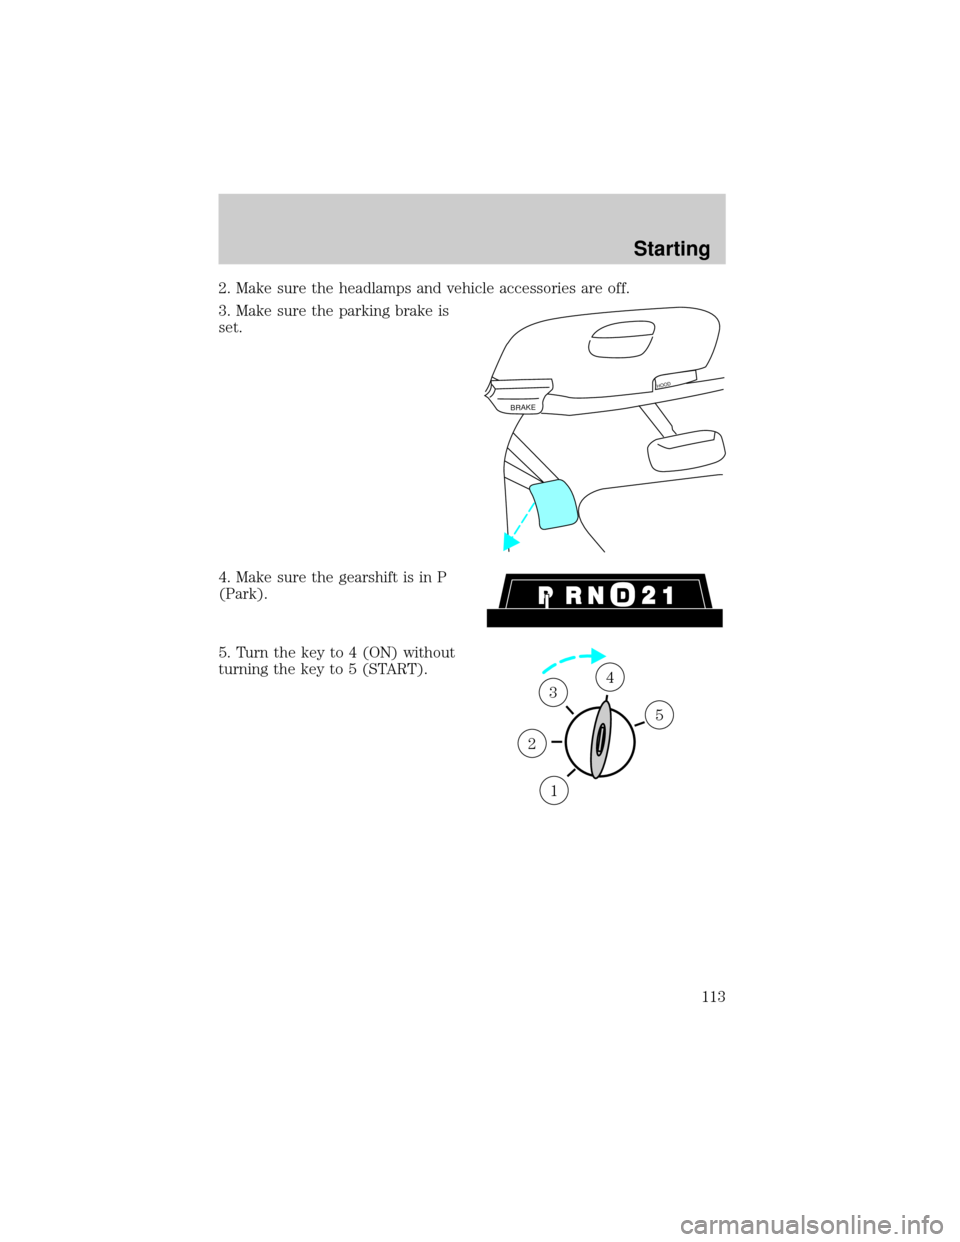
2. Make sure the headlamps and vehicle accessories are off.
3. Make sure the parking brake is
set.
4. Make sure the gearshift is in P
(Park).
5. Turn the key to 4 (ON) without
turning the key to 5 (START).
BRAKE
HOOD
1
2
34
5
Starting
113
Page 178 of 208

Readiness for Inspection/Maintenance (I/M) testing
In some localities, it may be a legal requirement to pass an I/M test of
the on-board diagnostics system. If your ªCheck Engine/Service Engine
Soonº light is on, refer to the description in theWarning Lights and
Chimessection of theInstrumentationchapter. Your vehicle may not
pass the I/M test with the ªCheck Engine/Service Engine Soonº light on.
If the vehicle's powertrain system or its battery has just been serviced,
the on-board diagnostics system is reset to a ªnot ready for I/M testº
condition. To ready the on-board diagnostics system for I/M testing, a
minimum of 30 minutes of city and highway driving is necessary as
described below:
²First, at least 10 minutes of driving on an expressway or highway.
²Next, at least 20 minutes driving in stop-and-go, city-type traffic with
at least four idle periods.
Allow the vehicle to sit for at least eight hours without starting the
engine. Then, start the engine and complete the above driving cycle. The
engine must warm up to its normal operating temperature. Once started,
do not turn off the engine until the above driving cycle is complete.
EXTERIOR BULBS
Replacing exterior bulbs
Check the operation of the following lamps frequently:
²Headlamps
²Tail lamps
²Brakelamps
²High-mount brakelamp
²Turn signals
²Backup lamps
²License plate lamp
Do not remove lamp bulbs unless they will be replaced immediately. If a
bulb is removed for an extended period of time, contaminants may enter
the lamp housings and affect performance.
Maintenance and care
178
Page 179 of 208
Replacing headlamp bulbs
Handle a halogen headlamp bulb carefully and keep out of
children's reach. Grasp the bulb only by its plastic base and do
not touch the glass. The oil from your hand could cause the bulb to
break the next time the headlamps are operated.
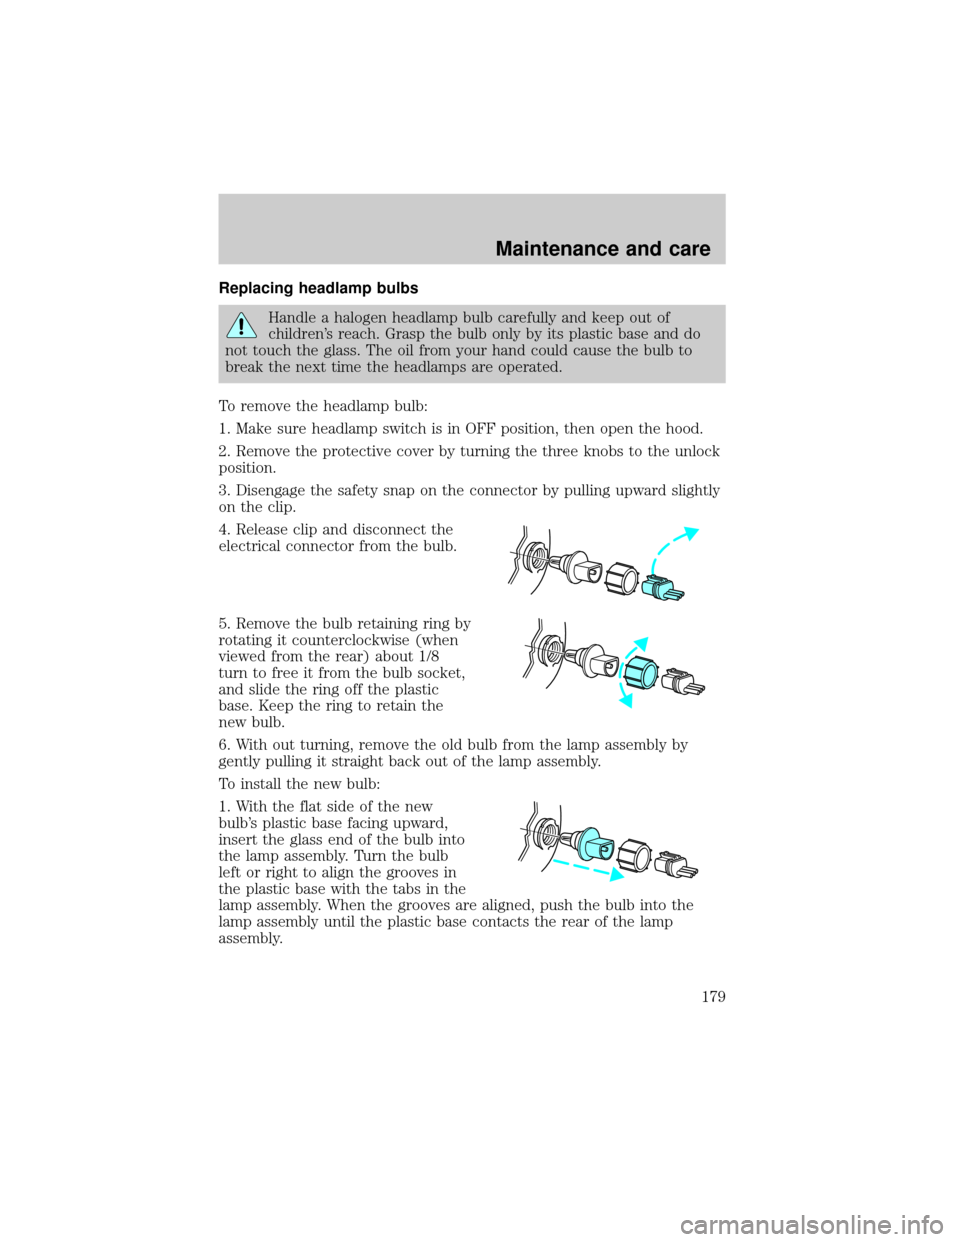
To remove the headlamp bulb:
1. Make sure headlamp switch is in OFF position, then open the hood.
2. Remove the protective cover by turning the three knobs to the unlock
position.
3. Disengage the safety snap on the connector by pulling upward slightly
on the clip.
4. Release clip and disconnect the
electrical connector from the bulb.
5. Remove the bulb retaining ring by
rotating it counterclockwise (when
viewed from the rear) about 1/8
turn to free it from the bulb socket,
and slide the ring off the plastic
base. Keep the ring to retain the
new bulb.
6. With out turning, remove the old bulb from the lamp assembly by
gently pulling it straight back out of the lamp assembly.
To install the new bulb:
1. With the flat side of the new
bulb's plastic base facing upward,
insert the glass end of the bulb into
the lamp assembly. Turn the bulb
left or right to align the grooves in
the plastic base with the tabs in the
lamp assembly. When the grooves are aligned, push the bulb into the
lamp assembly until the plastic base contacts the rear of the lamp
assembly.
Maintenance and care
179
Page 180 of 208
2. Install the bulb retaining ring over the plastic base until it contacts the
rear of the socket by rotating it clockwise until you feel a ªstop.º
3. Connect the electrical connector into the rear of the plastic base until
it snaps, locking it into position.
4. Install the protective cover over headlamps locking it in place with
three knobs.
5. Turn the headlamps on and make sure they work properly. If the
headlamp was correctly aligned before you changed the bulb, you should
not need to align it again.
Replacing front parking lamp/turn signal bulbs
1. Make sure headlamp switch is in OFF position, then open the hood.
2. Remove the protective cover by turning the three knobs to the unlock
position.
3. Disengage the safety snap on the connector by pulling upward slightly
on the clip.
4. Disconnect the electrical
connector from the bulb socket.
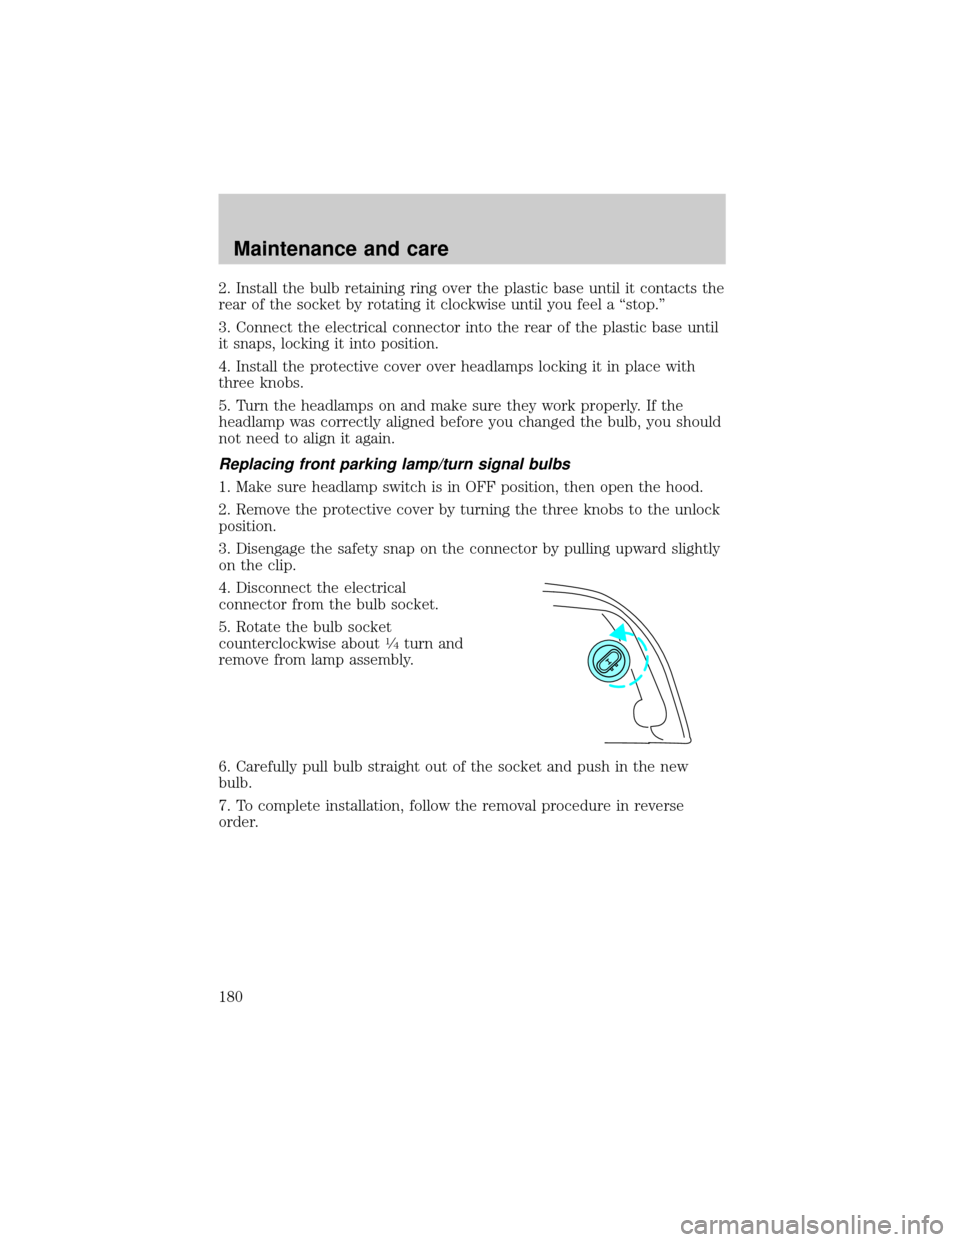
5. Rotate the bulb socket
counterclockwise about
1¤4turn and
remove from lamp assembly.
6. Carefully pull bulb straight out of the socket and push in the new
bulb.
7. To complete installation, follow the removal procedure in reverse
order.
Maintenance and care
180