instrument panel FORD CROWN VICTORIA 2001 2.G User Guide
[x] Cancel search | Manufacturer: FORD, Model Year: 2001, Model line: CROWN VICTORIA, Model: FORD CROWN VICTORIA 2001 2.GPages: 248, PDF Size: 1.87 MB
Page 141 of 248
The system operates by detecting and controlling wheel spin. The system
borrows many of the electronic and mechanical elements already present
in the anti-lock braking system (ABS).
Wheel-speed sensors allow excess rear wheel spin to be detected by the
Traction Controlyportion of the ABS computer. Any excessive wheel
spin is controlled by automatically applying and releasing the rear brakes
in conjunction with engine torque reductions. Engine torque reduction is
realized via the fully electronic spark and fuel injection systems. This
process is very sensitive to driving conditions and very fast acting. The
rear wheels ªsearchº for optimum traction several times a second and
adjustments are made accordingly.
The Traction Controlysystem will allow your vehicle to make better use
of available traction on slippery surfaces. The system is a driver aid
which makes your vehicle easier to handle primarily on snow and ice
covered roads.
During Traction Controlyoperation you may hear an electric motor type
of sound coming from the engine compartment and the engine will not
ªrev-upº when you push further on the accelerator. This is normal
system behavior.
If you should become stuck in snow
or ice or on a very slippery road
surface, try switching the Traction
Controlysystem off. This may allow
excess wheel spin to ªdigº the
vehicle out and enable a successful
ªrockingº maneuver.
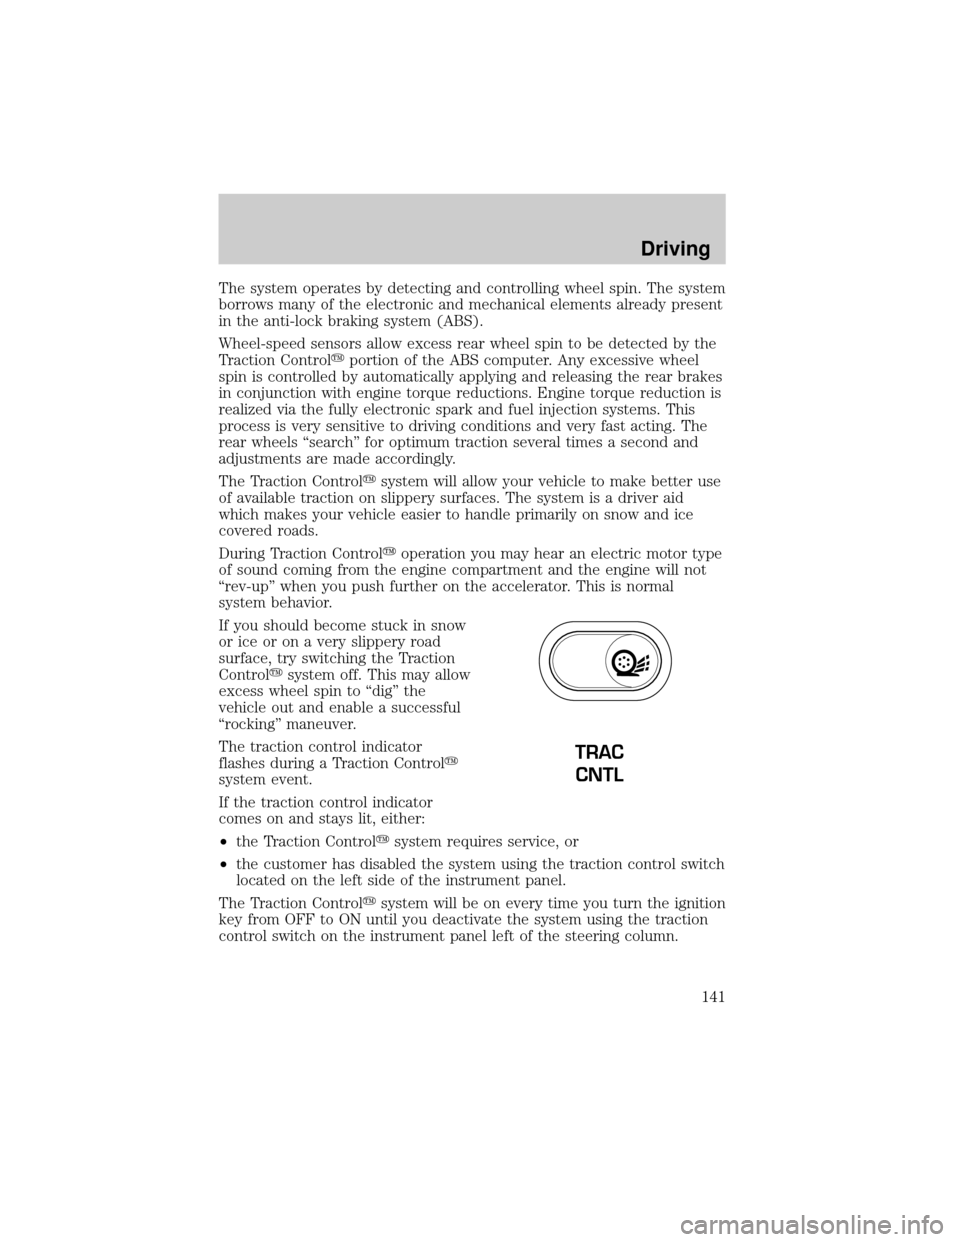
The traction control indicator
flashes during a Traction Controly
system event.
If the traction control indicator
comes on and stays lit, either:
²the Traction Controlysystem requires service, or
²the customer has disabled the system using the traction control switch
located on the left side of the instrument panel.
The Traction Controlysystem will be on every time you turn the ignition
key from OFF to ON until you deactivate the system using the traction
control switch on the instrument panel left of the steering column.
TRAC
CNTL
Driving
141
Page 157 of 248
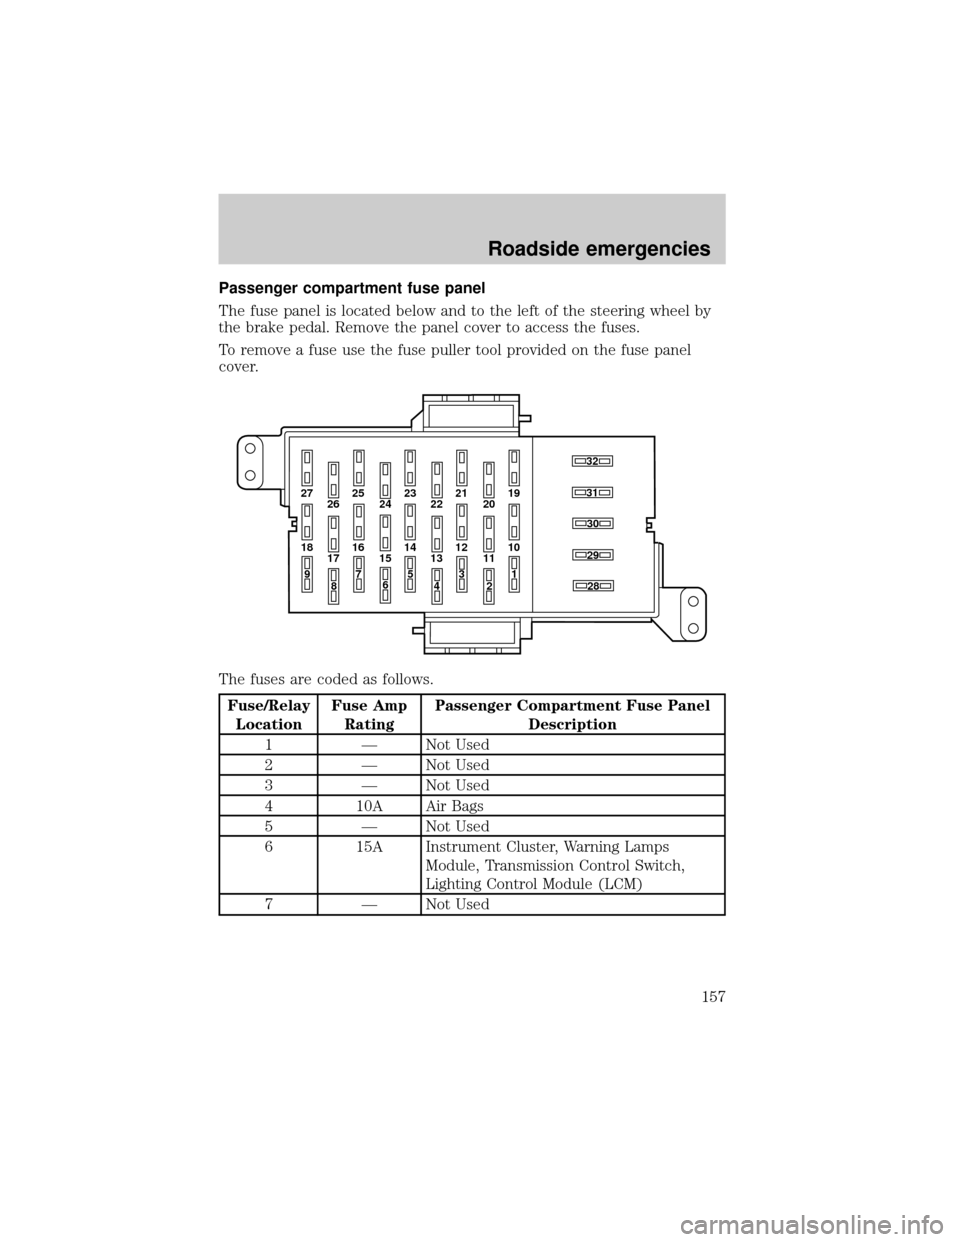
Passenger compartment fuse panel
The fuse panel is located below and to the left of the steering wheel by
the brake pedal. Remove the panel cover to access the fuses.
To remove a fuse use the fuse puller tool provided on the fuse panel
cover.
The fuses are coded as follows.
Fuse/Relay
LocationFuse Amp
RatingPassenger Compartment Fuse Panel
Description
1 Ð Not Used
2 Ð Not Used
3 Ð Not Used
4 10A Air Bags
5 Ð Not Used
6 15A Instrument Cluster, Warning Lamps
Module, Transmission Control Switch,
Lighting Control Module (LCM)
7 Ð Not Used
27 25
26 2423 21
2219
20
18 16
17 1514 12
131030
32
31
28
29
11
97
8653
41
2
Roadside emergencies
157
Page 158 of 248
Fuse/Relay
LocationFuse Amp
RatingPassenger Compartment Fuse Panel
Description
8 25A Power Train Control Module (PCM)
Power Relay, Coil-on -Plugs, Radio Noise
Capacitator, Passive Anti-theft System
(PATS)
9 Ð Not Used
10 10A Rear Window Defrost
11 Ð Not Used
12 Ð Not Used
13 5A Radio
14 10A Traction Control Switch, Anti-lock Brakes
(ABS), Instrument Cluster
15 15A Speed Control Servo, Main Light Switch
Illumination, Lighting Control Module
(LCM), Clock, Police Power Relay
16 15A Reversing lamps, Turn Signals, Shift Lock,
DRL Module, EVO Steering, Electronic
Day/Night Mirror
17 30A Wiper Motor, Wiper Control Module
18 30A Heater Blower Motor
19 20A Auxiliary Power Point
20 Ð Not Used
21 15A Multifunction Switch, Lighting Control
Module (LCM), PATS Indicator, Parking
Lamps, Instrument Panel Light
22 15A Speed Control Servo, Hazard Lights
23 15A Power Windows/Door Locks, PATS,
Exterior Rear View Mirrors, EATC
Module, Instrument Cluster, Clock,
Lighting Control Module (LCM), Interior
Lamps
24 10A Left Hand Low Beam
Roadside emergencies
158
Page 173 of 248
Working with the engine off
1. Set the parking brake and ensure the gearshift is securely latched in P
(Park).
2. Turn off the engine and remove the key.
3. Block the wheels to prevent the vehicle from moving unexpectedly.
Working with the engine on
1. Set the parking brake and ensure the gearshift is securely latched in P
(Park).
2. Block the wheels to prevent the vehicle from moving unexpectedly.
NOTE:Do not start your engine with the air cleaner removed and do
not remove it while the engine is running.
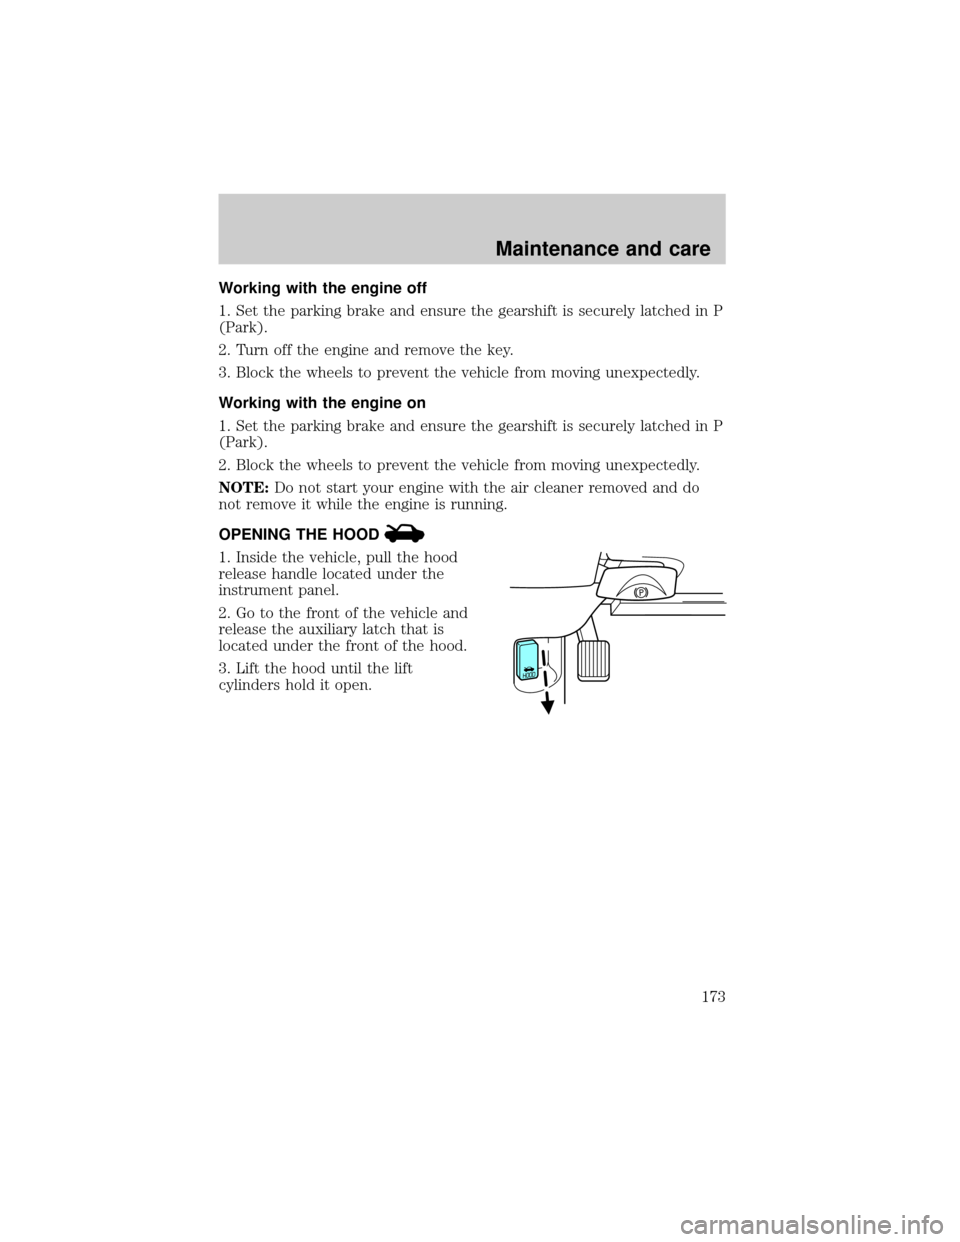
OPENING THE HOOD
1. Inside the vehicle, pull the hood
release handle located under the
instrument panel.
2. Go to the front of the vehicle and
release the auxiliary latch that is
located under the front of the hood.
3. Lift the hood until the lift
cylinders hold it open.
Maintenance and care
173
Page 214 of 248
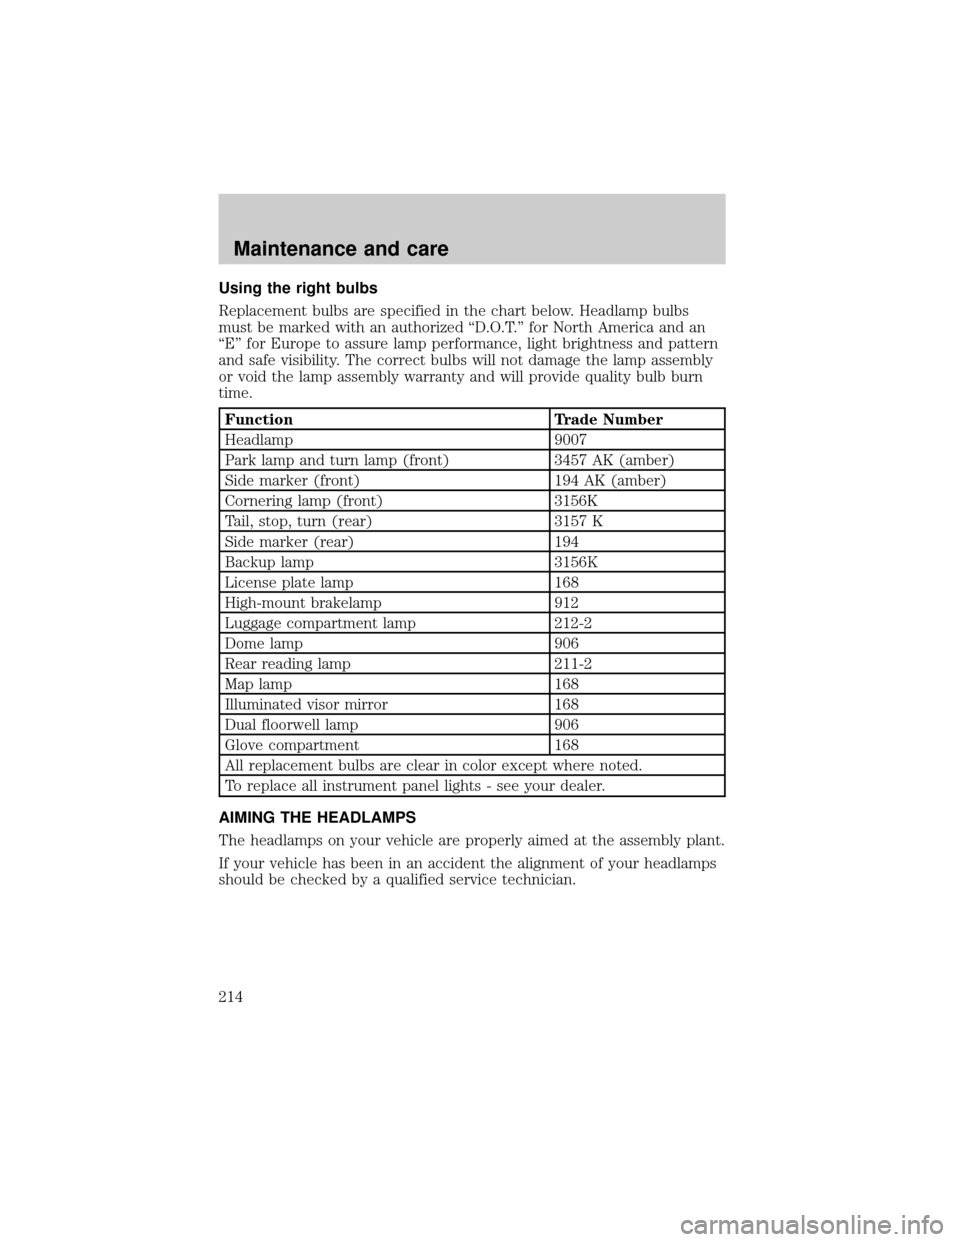
Using the right bulbs
Replacement bulbs are specified in the chart below. Headlamp bulbs
must be marked with an authorized ªD.O.T.º for North America and an
ªEº for Europe to assure lamp performance, light brightness and pattern
and safe visibility. The correct bulbs will not damage the lamp assembly
or void the lamp assembly warranty and will provide quality bulb burn
time.
Function Trade Number
Headlamp 9007
Park lamp and turn lamp (front) 3457 AK (amber)
Side marker (front) 194 AK (amber)
Cornering lamp (front) 3156K
Tail, stop, turn (rear) 3157 K
Side marker (rear) 194
Backup lamp 3156K
License plate lamp 168
High-mount brakelamp 912
Luggage compartment lamp 212-2
Dome lamp 906
Rear reading lamp 211-2
Map lamp 168
Illuminated visor mirror 168
Dual floorwell lamp 906
Glove compartment 168
All replacement bulbs are clear in color except where noted.
To replace all instrument panel lights - see your dealer.
AIMING THE HEADLAMPS
The headlamps on your vehicle are properly aimed at the assembly plant.
If your vehicle has been in an accident the alignment of your headlamps
should be checked by a qualified service technician.
Maintenance and care
214
Page 218 of 248
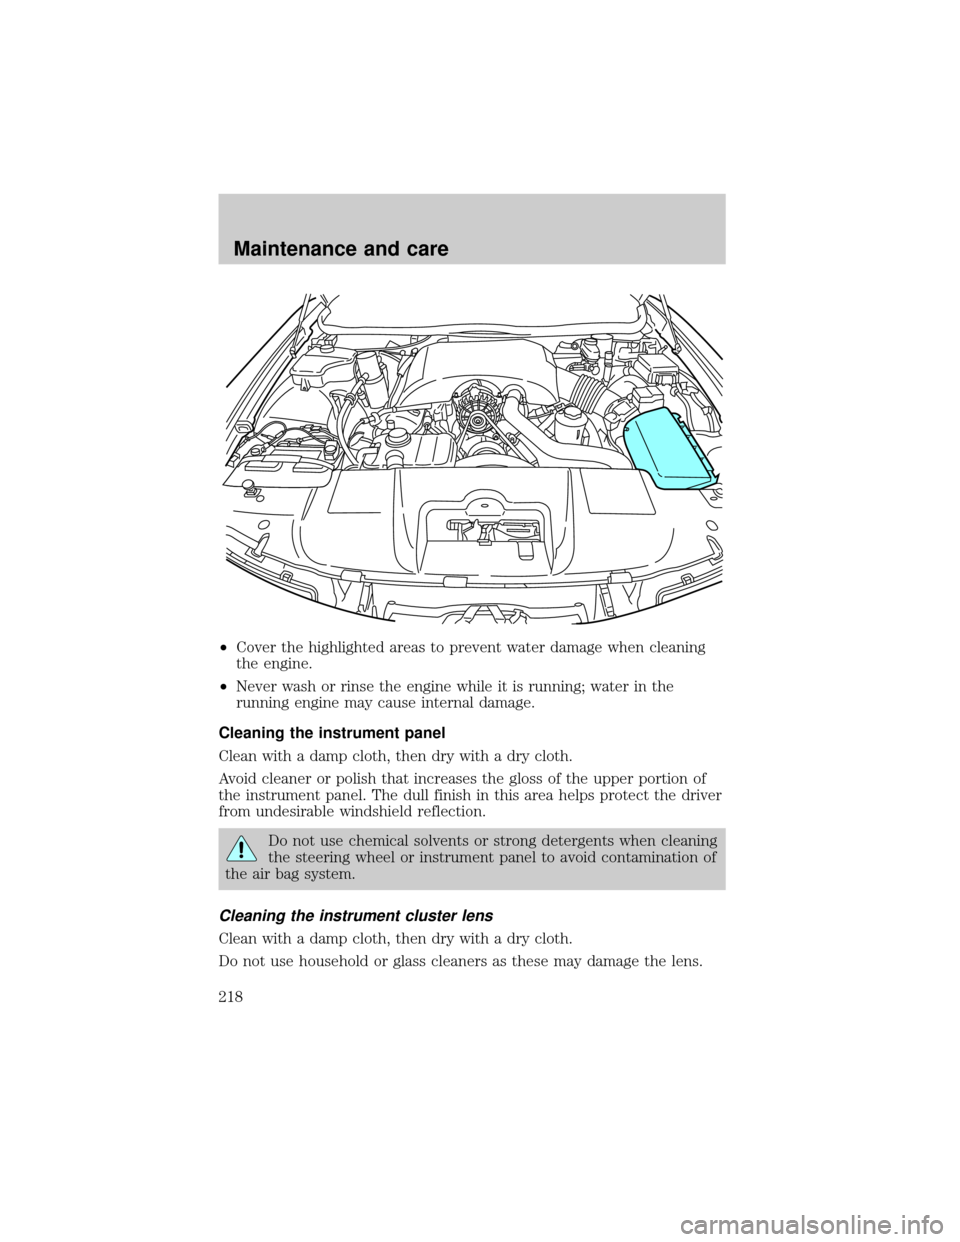
²Cover the highlighted areas to prevent water damage when cleaning
the engine.
²Never wash or rinse the engine while it is running; water in the
running engine may cause internal damage.
Cleaning the instrument panel
Clean with a damp cloth, then dry with a dry cloth.
Avoid cleaner or polish that increases the gloss of the upper portion of
the instrument panel. The dull finish in this area helps protect the driver
from undesirable windshield reflection.
Do not use chemical solvents or strong detergents when cleaning
the steering wheel or instrument panel to avoid contamination of
the air bag system.
Cleaning the instrument cluster lens
Clean with a damp cloth, then dry with a dry cloth.
Do not use household or glass cleaners as these may damage the lens.
Maintenance and care
218
Page 227 of 248
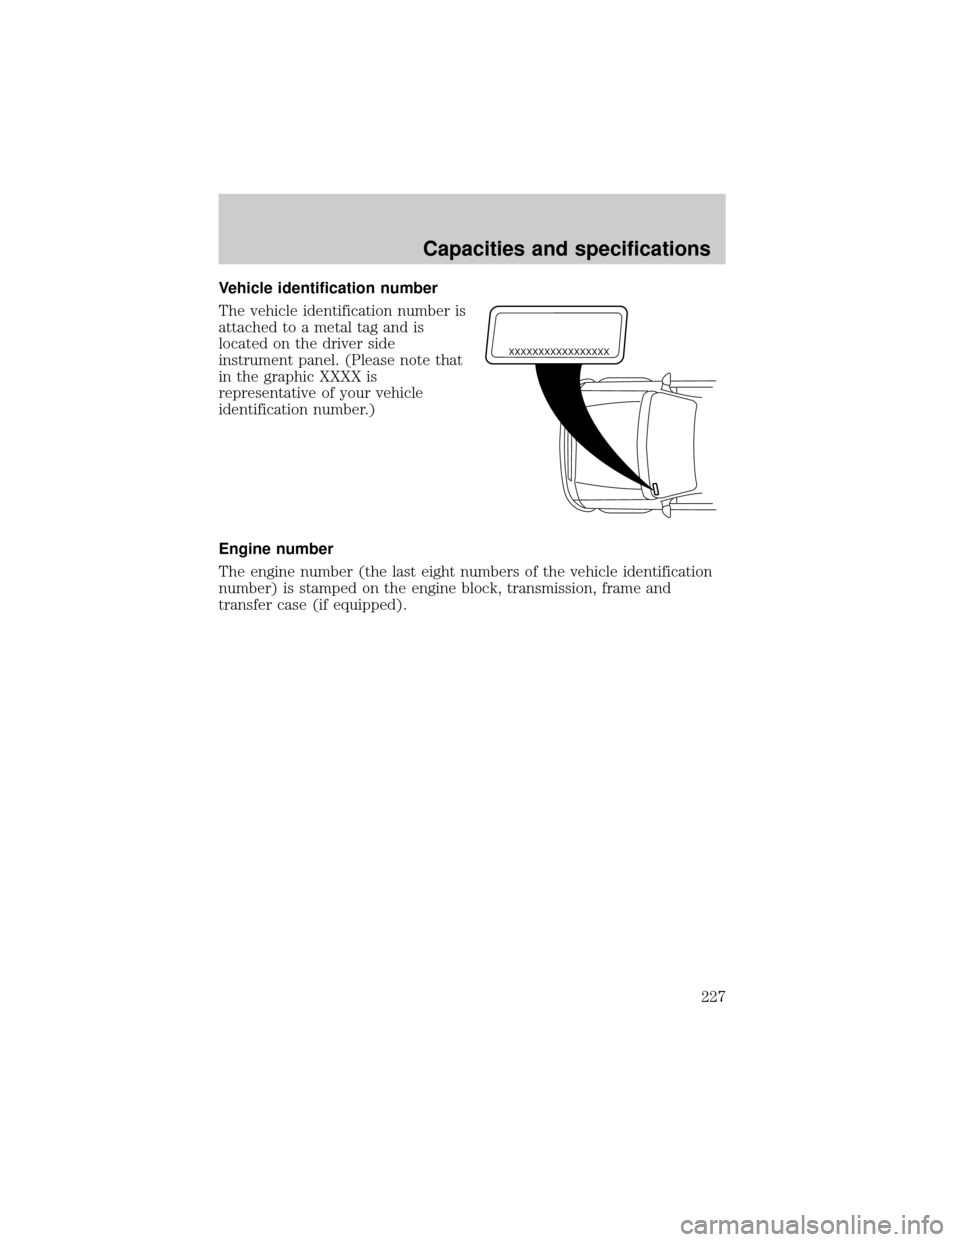
Vehicle identification number
The vehicle identification number is
attached to a metal tag and is
located on the driver side
instrument panel. (Please note that
in the graphic XXXX is
representative of your vehicle
identification number.)
Engine number
The engine number (the last eight numbers of the vehicle identification
number) is stamped on the engine block, transmission, frame and
transfer case (if equipped).
XXXXXXXXXXXXXXXXX
Capacities and specifications
227
Page 242 of 248

Cleaning your vehicle ...............215
engine compartment ..............217
exterior ............................215±216
exterior lamps .........................217
instrument cluster lens ..........218
instrument panel ....................218
interior .....................................219
mirrors .....................................216
plastic parts ............................216
safety belts ..............................219
washing ....................................215
waxing .....................................215
wheels ......................................216
windows ..................................219
wiper blades ............................217
woodtone trim ........................219
Climate control (see Air
conditioning or Heating) ............29
Clock ..........................42, 49, 56, 66
Compass, electronic ....................83
calibration .................................84
set zone adjustment .................84
Console ........................................88
Controls
power seat .......................105±106
Coolant
checking and adding ..............179
coolant temperature light ........11
refill capacities ................183, 221
specifications ..................223±224
Cruise control (see Speed
control) ........................................75
Customer Assistance ................153
Ford accessories for your
vehicle .....................................235
Ford Extended
Service Plan ............................228
Getting assistance outside the
U.S. and Canada .....................234Getting roadside assistance ...153
Getting the service
you need .................................228
Ordering additional owner's
literature .................................238
The Dispute Settlement
Board .......................................230
Utilizing the
Mediation/Arbitration
Program ...................................234
D
Daytime running lamps (see
Lamps) .........................................27
Defrost
rear window ..............................38
Dipstick
automatic transmission
fluid ..........................................187
engine oil .................................175
Doors
lubricant specifications ..........223
Driving under special
conditions
through water .........................152
E
Electronic message center .........22
Emergencies, roadside
jump-starting ..........................165
Emission control system ..........207
Engine ................................224±225
check engine/service engine
soon light ....................................9
cleaning ...................................217
coolant .....................................179
fail-safe coolant ......................184
Index
242
Page 244 of 248

Headlamps ...................................27
aiming ......................................214
autolamp system .......................28
bulb specifications ..................214
daytime running lights .............27
flash to pass ..............................28
high beam ...........................12, 28
replacing bulbs .......................209
turning on and off ....................27
warning chime ..........................16
Heating ........................................29
heating and air conditioning
system .......................................29
HomeLink universal
transceiver (see Garage door
opener) ..................................79±82
Hood ..........................................173
I
Ignition .........................73, 224±225
Infant seats
(see Safety seats) .....................127
Inspection/maintenance (I/M)
testing ........................................208
Instrument panel
cleaning ...................................218
cluster ..................................8, 218
lighting up panel
and interior ...............................27
location of components ..............8
J
Jack ............................................161
positioning ...............................161
storage .....................................161
Jump-starting your vehicle ......165K
Keyless entry system .................98
autolock .....................................91
keypad .......................................98
programming entry code .........99
Keys .......................................95±97
key in ignition chime ...............16
positions of the ignition ...........73
L
Lamps
autolamp system .......................28
bulb replacement
specifications chart ................214
cargo lamps ...............................27
daytime running light ...............27
headlamps .................................27
headlamps, flash to pass ..........28
instrument panel, dimming .....27
interior lamps ...................27, 213
replacing bulbs ...............209±213
Lane change indicator
(see Turn signal) ........................72
Lights, warning and indicator ......8
air bag ........................................10
air suspension ...........................13
anti-lock brakes (ABS) ....12, 139
brake ..........................................12
charging system ........................13
check engine ...............................9
fuel cap light .............................10
high beam .................................12
low coolant ................................11
low fuel ........................................8
oil pressure ...............................13
overdrive off ..............................14
safety belt .................................11
speed control ............................79
Index
244
Page 248 of 248
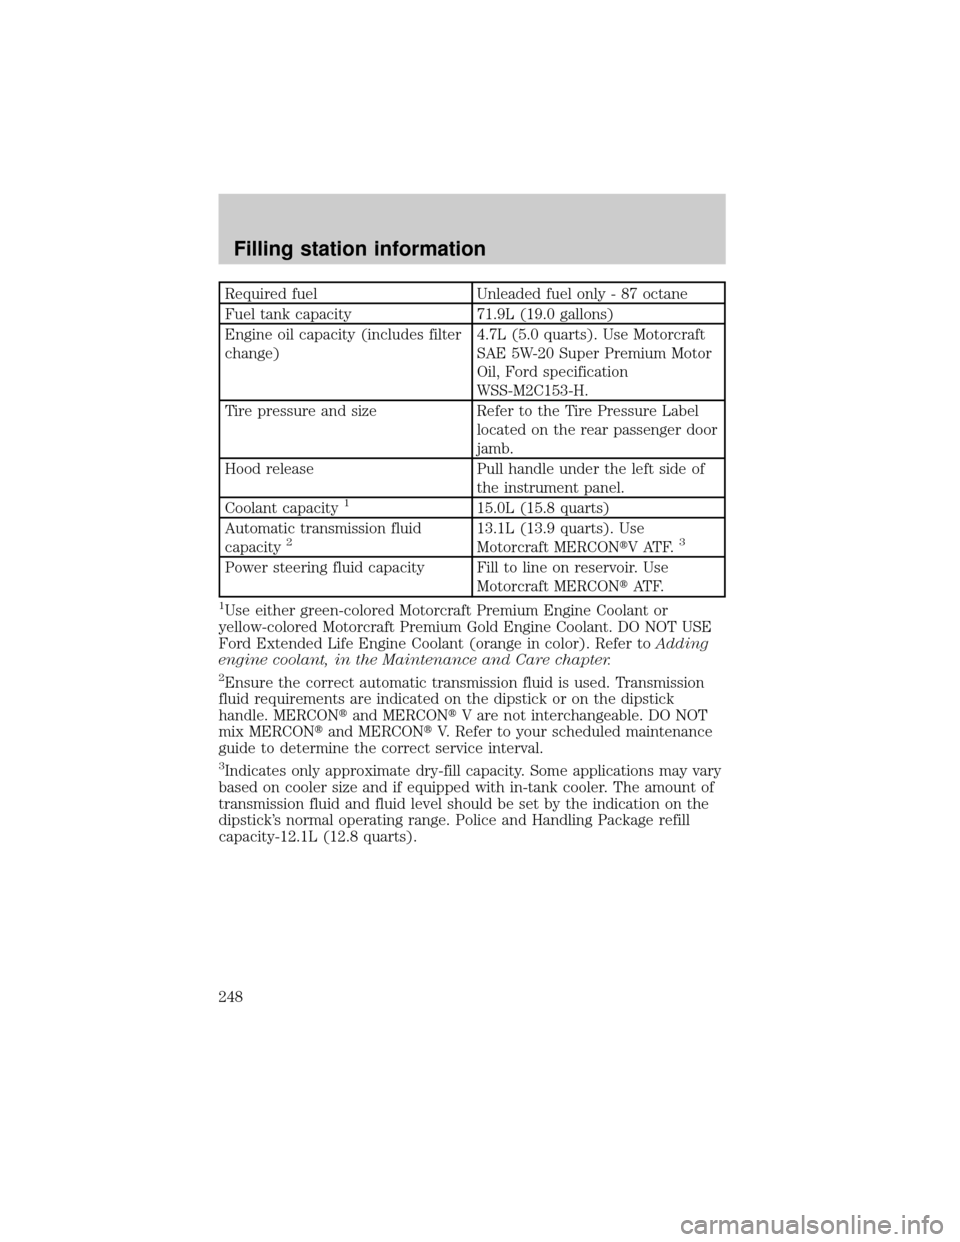
Required fuel Unleaded fuel only - 87 octane
Fuel tank capacity 71.9L (19.0 gallons)
Engine oil capacity (includes filter
change)4.7L (5.0 quarts). Use Motorcraft
SAE 5W-20 Super Premium Motor
Oil, Ford specification
WSS-M2C153-H.
Tire pressure and size Refer to the Tire Pressure Label
located on the rear passenger door
jamb.
Hood release Pull handle under the left side of
the instrument panel.
Coolant capacity
115.0L (15.8 quarts)
Automatic transmission fluid
capacity
213.1L (13.9 quarts). Use
Motorcraft MERCONtV ATF.3
Power steering fluid capacity Fill to line on reservoir. Use
Motorcraft MERCONtAT F.
1Use either green-colored Motorcraft Premium Engine Coolant or
yellow-colored Motorcraft Premium Gold Engine Coolant. DO NOT USE
Ford Extended Life Engine Coolant (orange in color). Refer toAdding
engine coolant, in the Maintenance and Care chapter.
2Ensure the correct automatic transmission fluid is used. Transmission
fluid requirements are indicated on the dipstick or on the dipstick
handle. MERCONtand MERCONtV are not interchangeable. DO NOT
mix MERCONtand MERCONtV. Refer to your scheduled maintenance
guide to determine the correct service interval.
3Indicates only approximate dry-fill capacity. Some applications may vary
based on cooler size and if equipped with in-tank cooler. The amount of
transmission fluid and fluid level should be set by the indication on the
dipstick's normal operating range. Police and Handling Package refill
capacity-12.1L (12.8 quarts).
Filling station information
248