remote control FORD CROWN VICTORIA 2001 2.G Owners Manual
[x] Cancel search | Manufacturer: FORD, Model Year: 2001, Model line: CROWN VICTORIA, Model: FORD CROWN VICTORIA 2001 2.GPages: 248, PDF Size: 1.87 MB
Page 85 of 248
![FORD CROWN VICTORIA 2001 2.G Owners Manual 2. Press and hold the COMP side of
the control for approximately six
seconds until ªCº appears in the
mirror display.
3. Drive the vehicle slowly (less
than 5 km/h [3 mph]) in circles or
on your eve FORD CROWN VICTORIA 2001 2.G Owners Manual 2. Press and hold the COMP side of
the control for approximately six
seconds until ªCº appears in the
mirror display.
3. Drive the vehicle slowly (less
than 5 km/h [3 mph]) in circles or
on your eve](/img/11/4777/w960_4777-84.png)
2. Press and hold the COMP side of
the control for approximately six
seconds until ªCº appears in the
mirror display.
3. Drive the vehicle slowly (less
than 5 km/h [3 mph]) in circles or
on your everyday routine until the
display reads a direction.
4. The compass is now calibrated.
FUEL DOOR RELEASE
Your vehicle is equipped with a
locking fuel door. To open the door,
press the control located on the
door.
Fuel filler door override release
If the remote release is inoperative,
open the trunk, then pull the
override release handle located
inside the trunk to open the fuel
filler door.
COMP MIRROR
NW
FUEL TRUNK
Controls and features
85
Page 86 of 248
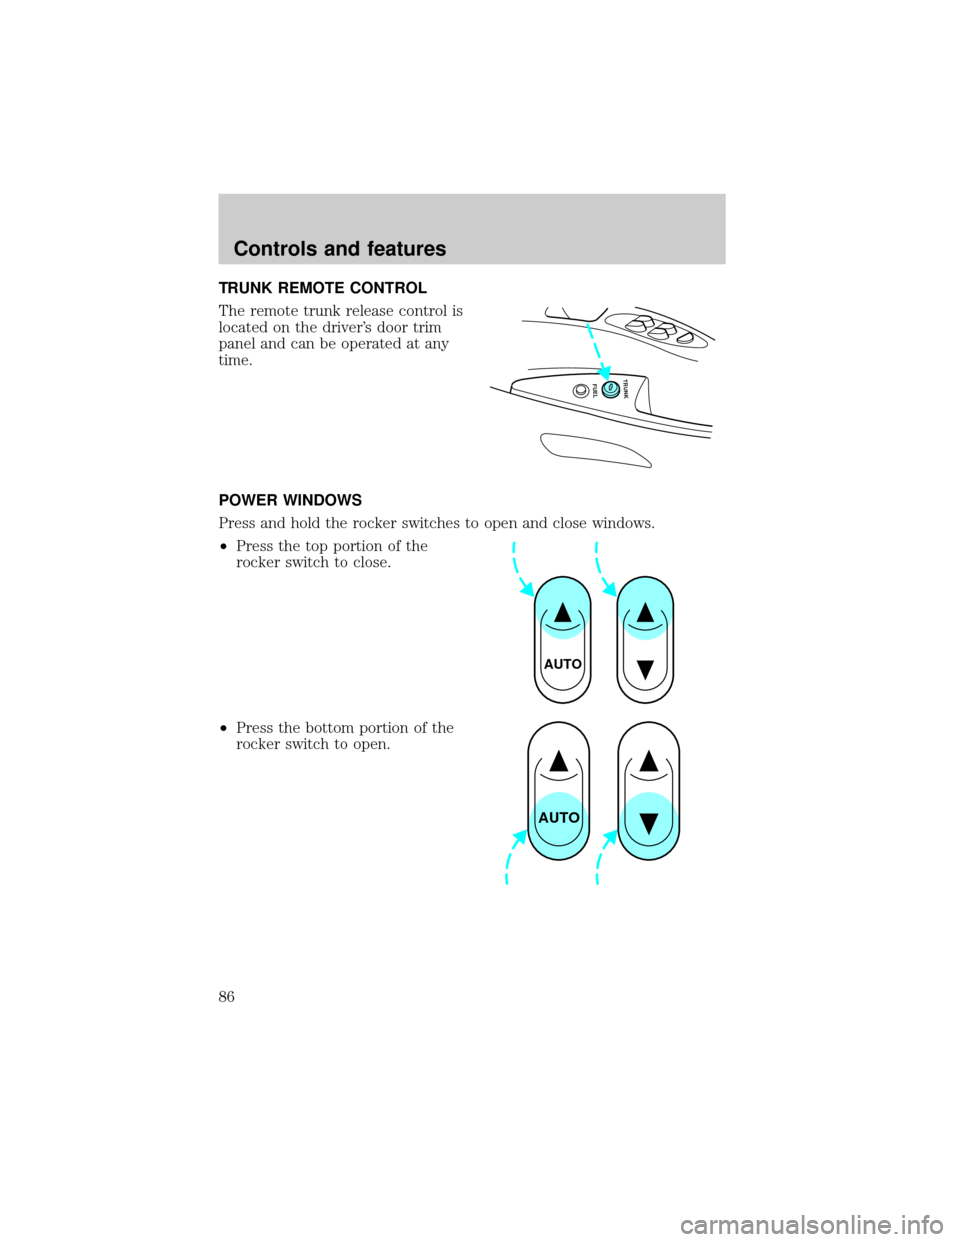
TRUNK REMOTE CONTROL
The remote trunk release control is
located on the driver's door trim
panel and can be operated at any
time.
POWER WINDOWS
Press and hold the rocker switches to open and close windows.
²Press the top portion of the
rocker switch to close.
²Press the bottom portion of the
rocker switch to open.
FUEL TRUNK
AUTO
AUTO
Controls and features
86
Page 87 of 248
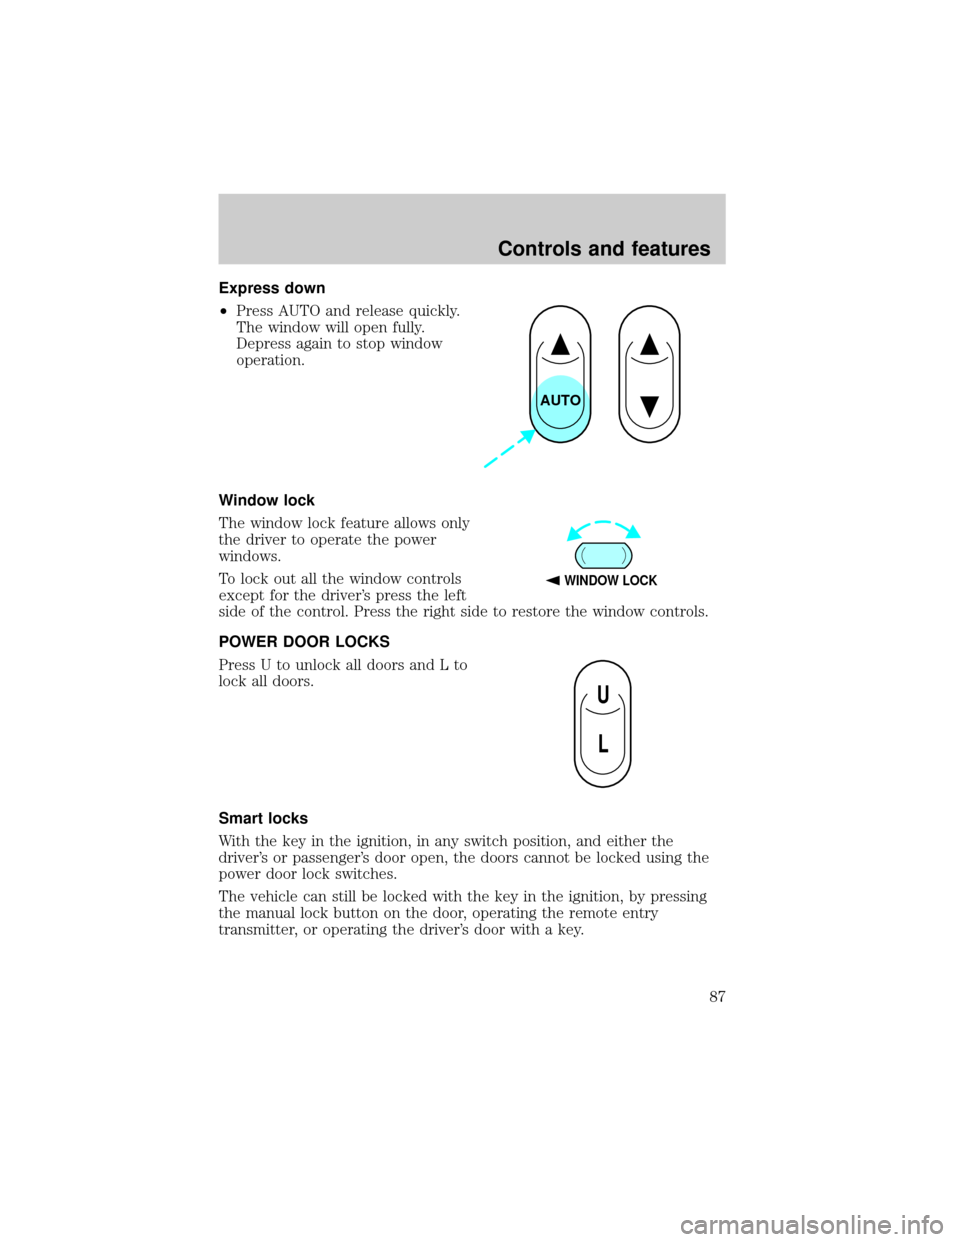
Express down
²Press AUTO and release quickly.
The window will open fully.
Depress again to stop window
operation.
Window lock
The window lock feature allows only
the driver to operate the power
windows.
To lock out all the window controls
except for the driver's press the left
side of the control. Press the right side to restore the window controls.
POWER DOOR LOCKS
Press U to unlock all doors and L to
lock all doors.
Smart locks
With the key in the ignition, in any switch position, and either the
driver's or passenger's door open, the doors cannot be locked using the
power door lock switches.
The vehicle can still be locked with the key in the ignition, by pressing
the manual lock button on the door, operating the remote entry
transmitter, or operating the driver's door with a key.
AUTO
WINDOW LOCK
U
L
Controls and features
87
Page 89 of 248
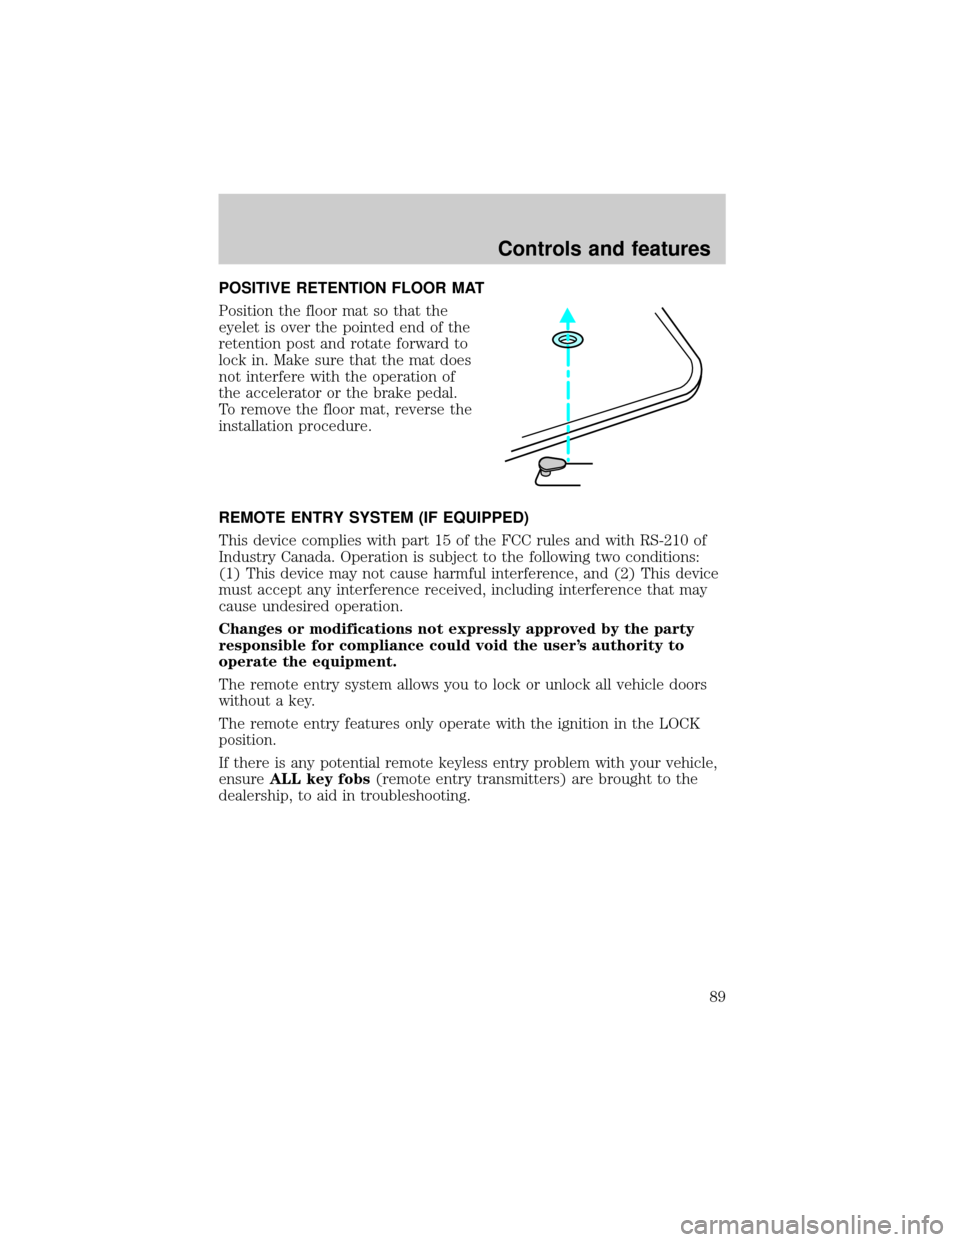
POSITIVE RETENTION FLOOR MAT
Position the floor mat so that the
eyelet is over the pointed end of the
retention post and rotate forward to
lock in. Make sure that the mat does
not interfere with the operation of
the accelerator or the brake pedal.
To remove the floor mat, reverse the
installation procedure.
REMOTE ENTRY SYSTEM (IF EQUIPPED)
This device complies with part 15 of the FCC rules and with RS-210 of
Industry Canada. Operation is subject to the following two conditions:
(1) This device may not cause harmful interference, and (2) This device
must accept any interference received, including interference that may
cause undesired operation.
Changes or modifications not expressly approved by the party
responsible for compliance could void the user's authority to
operate the equipment.
The remote entry system allows you to lock or unlock all vehicle doors
without a key.
The remote entry features only operate with the ignition in the LOCK
position.
If there is any potential remote keyless entry problem with your vehicle,
ensureALL key fobs(remote entry transmitters) are brought to the
dealership, to aid in troubleshooting.
Controls and features
89
Page 93 of 248
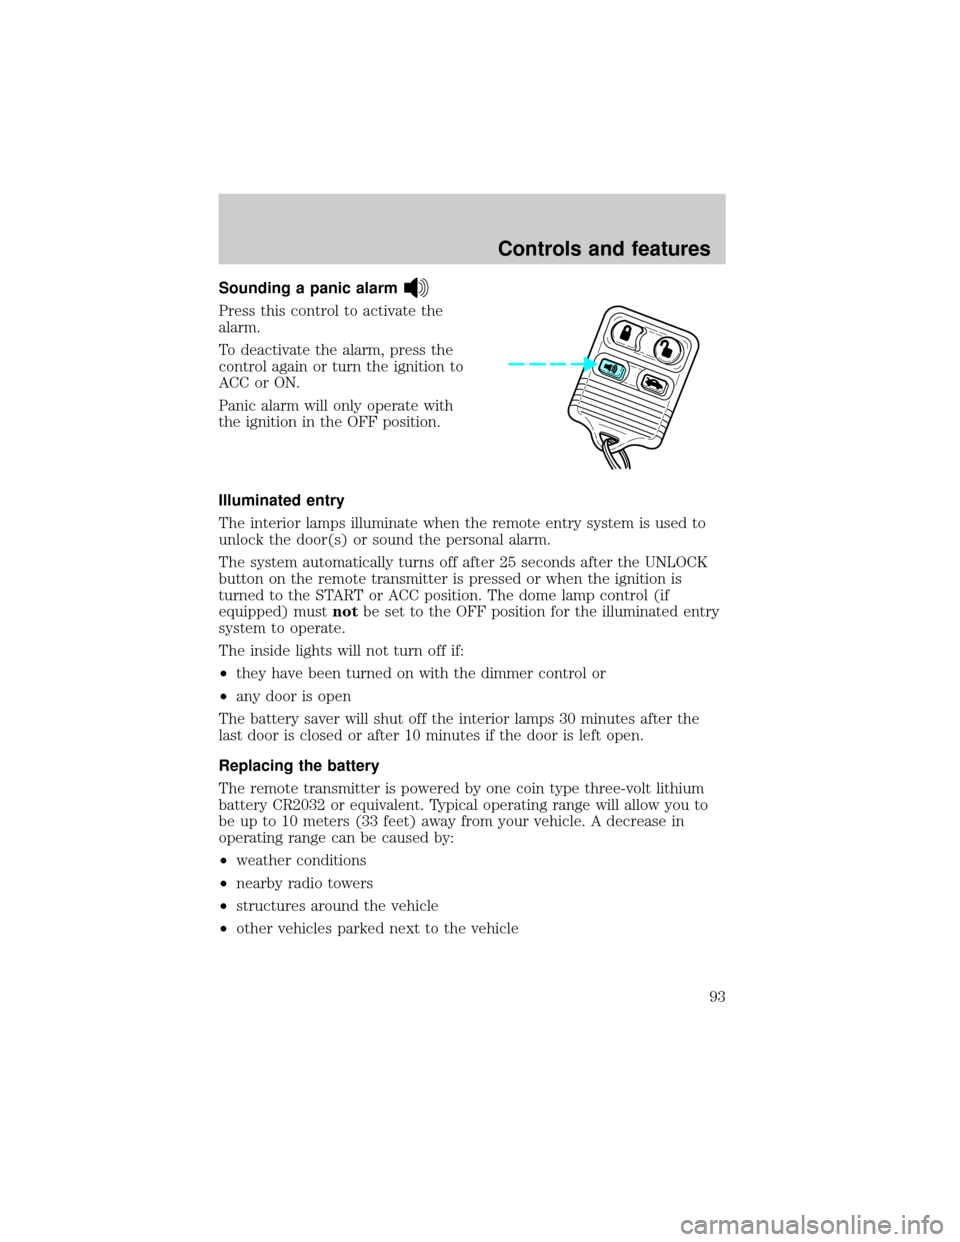
Sounding a panic alarm
Press this control to activate the
alarm.
To deactivate the alarm, press the
control again or turn the ignition to
ACC or ON.
Panic alarm will only operate with
the ignition in the OFF position.
Illuminated entry
The interior lamps illuminate when the remote entry system is used to
unlock the door(s) or sound the personal alarm.
The system automatically turns off after 25 seconds after the UNLOCK
button on the remote transmitter is pressed or when the ignition is
turned to the START or ACC position. The dome lamp control (if
equipped) mustnotbe set to the OFF position for the illuminated entry
system to operate.
The inside lights will not turn off if:
²they have been turned on with the dimmer control or
²any door is open
The battery saver will shut off the interior lamps 30 minutes after the
last door is closed or after 10 minutes if the door is left open.
Replacing the battery
The remote transmitter is powered by one coin type three-volt lithium
battery CR2032 or equivalent. Typical operating range will allow you to
be up to 10 meters (33 feet) away from your vehicle. A decrease in
operating range can be caused by:
²weather conditions
²nearby radio towers
²structures around the vehicle
²other vehicles parked next to the vehicle
Controls and features
93
Page 94 of 248
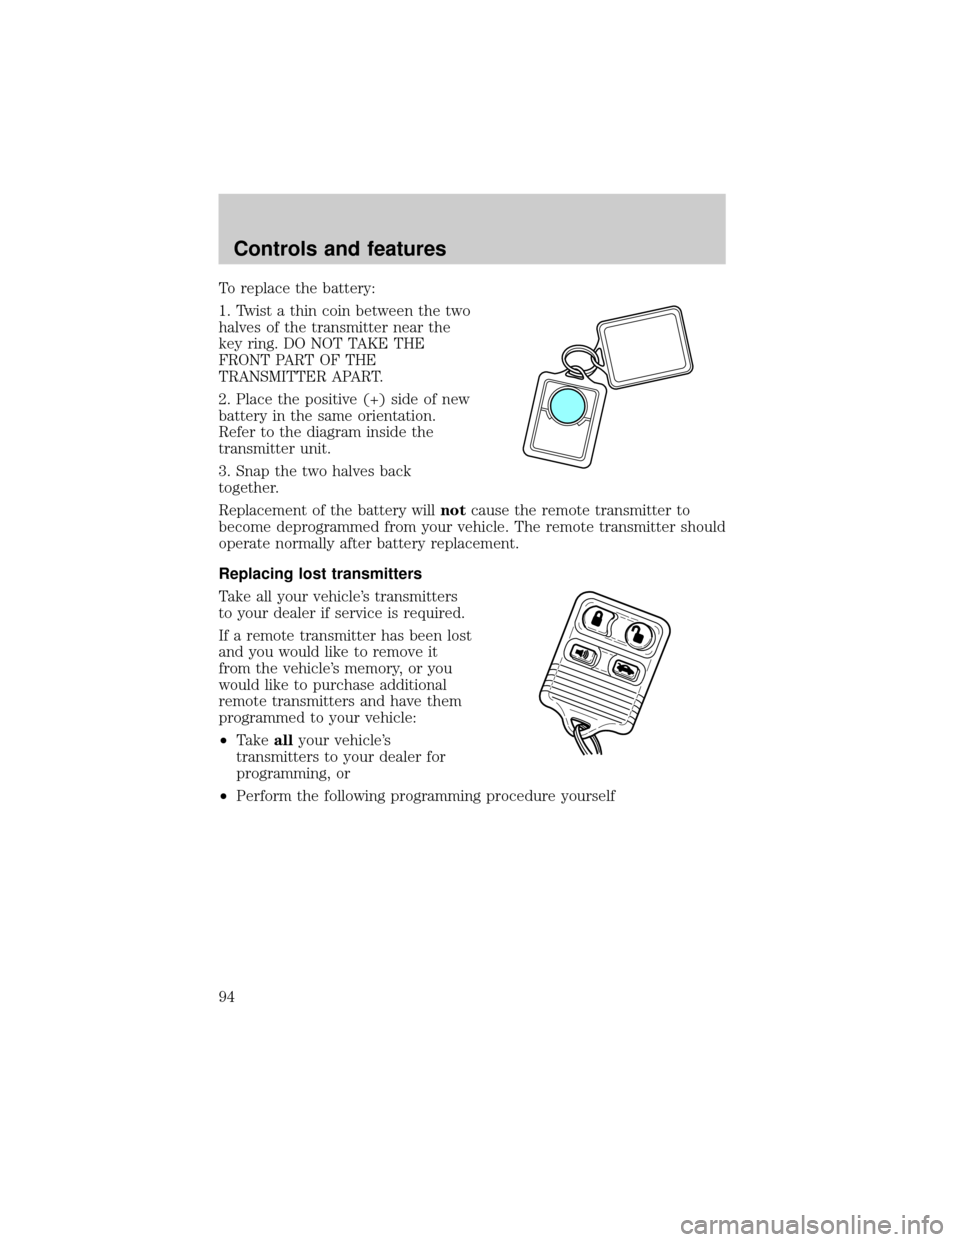
To replace the battery:
1. Twist a thin coin between the two
halves of the transmitter near the
key ring. DO NOT TAKE THE
FRONT PART OF THE
TRANSMITTER APART.
2. Place the positive (+) side of new
battery in the same orientation.
Refer to the diagram inside the
transmitter unit.
3. Snap the two halves back
together.
Replacement of the battery willnotcause the remote transmitter to
become deprogrammed from your vehicle. The remote transmitter should
operate normally after battery replacement.
Replacing lost transmitters
Take all your vehicle's transmitters
to your dealer if service is required.
If a remote transmitter has been lost
and you would like to remove it
from the vehicle's memory, or you
would like to purchase additional
remote transmitters and have them
programmed to your vehicle:
²Takeallyour vehicle's
transmitters to your dealer for
programming, or
²Perform the following programming procedure yourself
Controls and features
94
Page 95 of 248
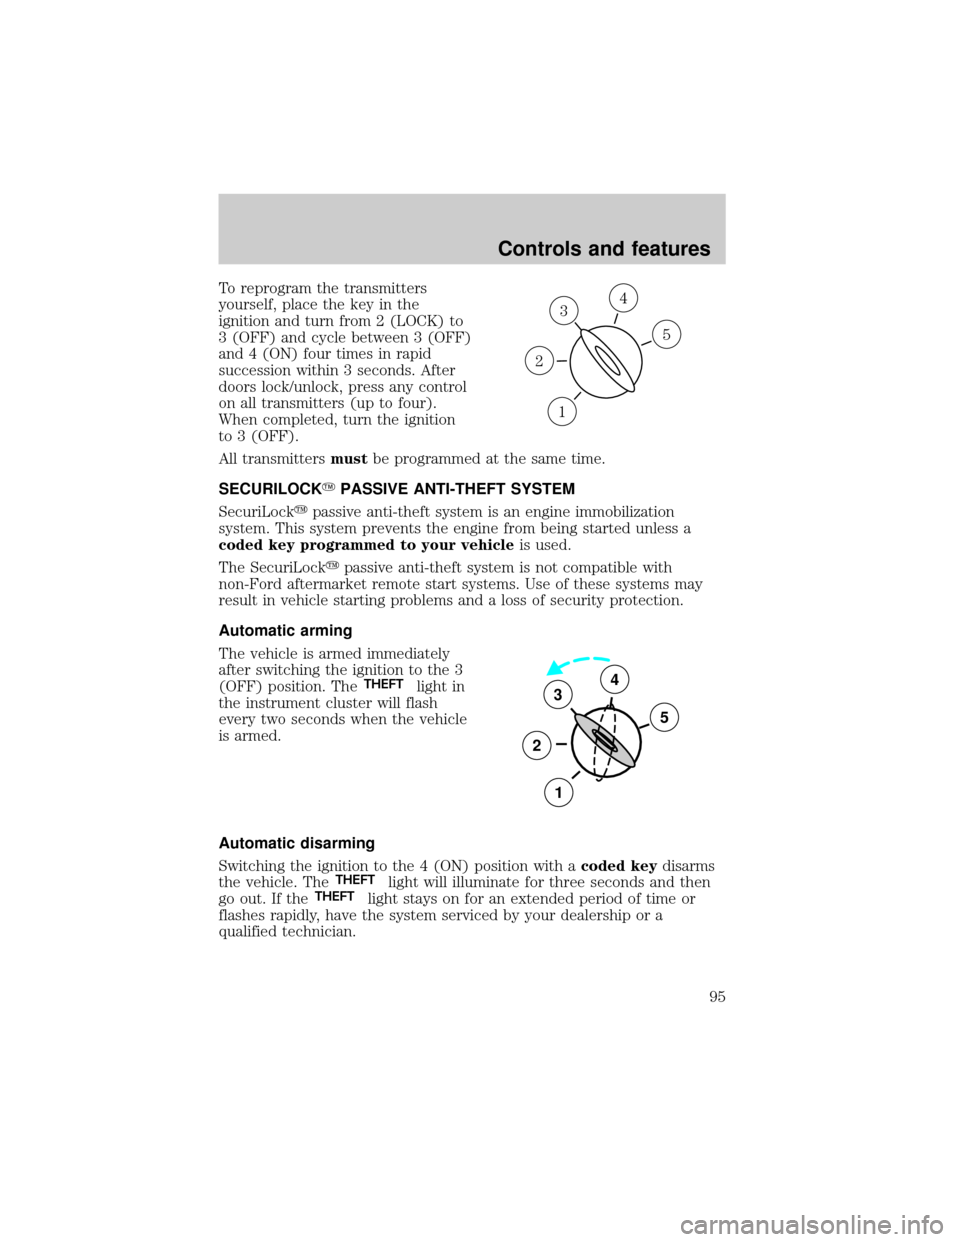
To reprogram the transmitters
yourself, place the key in the
ignition and turn from 2 (LOCK) to
3 (OFF) and cycle between 3 (OFF)
and 4 (ON) four times in rapid
succession within 3 seconds. After
doors lock/unlock, press any control
on all transmitters (up to four).
When completed, turn the ignition
to 3 (OFF).
All transmittersmustbe programmed at the same time.
SECURILOCKYPASSIVE ANTI-THEFT SYSTEM
SecuriLockypassive anti-theft system is an engine immobilization
system. This system prevents the engine from being started unless a
coded key programmed to your vehicleis used.
The SecuriLockypassive anti-theft system is not compatible with
non-Ford aftermarket remote start systems. Use of these systems may
result in vehicle starting problems and a loss of security protection.
Automatic arming
The vehicle is armed immediately
after switching the ignition to the 3
(OFF) position. The
THEFTlight in
the instrument cluster will flash
every two seconds when the vehicle
is armed.
Automatic disarming
Switching the ignition to the 4 (ON) position with acoded keydisarms
the vehicle. The
THEFTlight will illuminate for three seconds and then
go out. If theTHEFTlight stays on for an extended period of time or
flashes rapidly, have the system serviced by your dealership or a
qualified technician.
3
1
2
5
4
3
2
1
5
4
Controls and features
95
Page 98 of 248
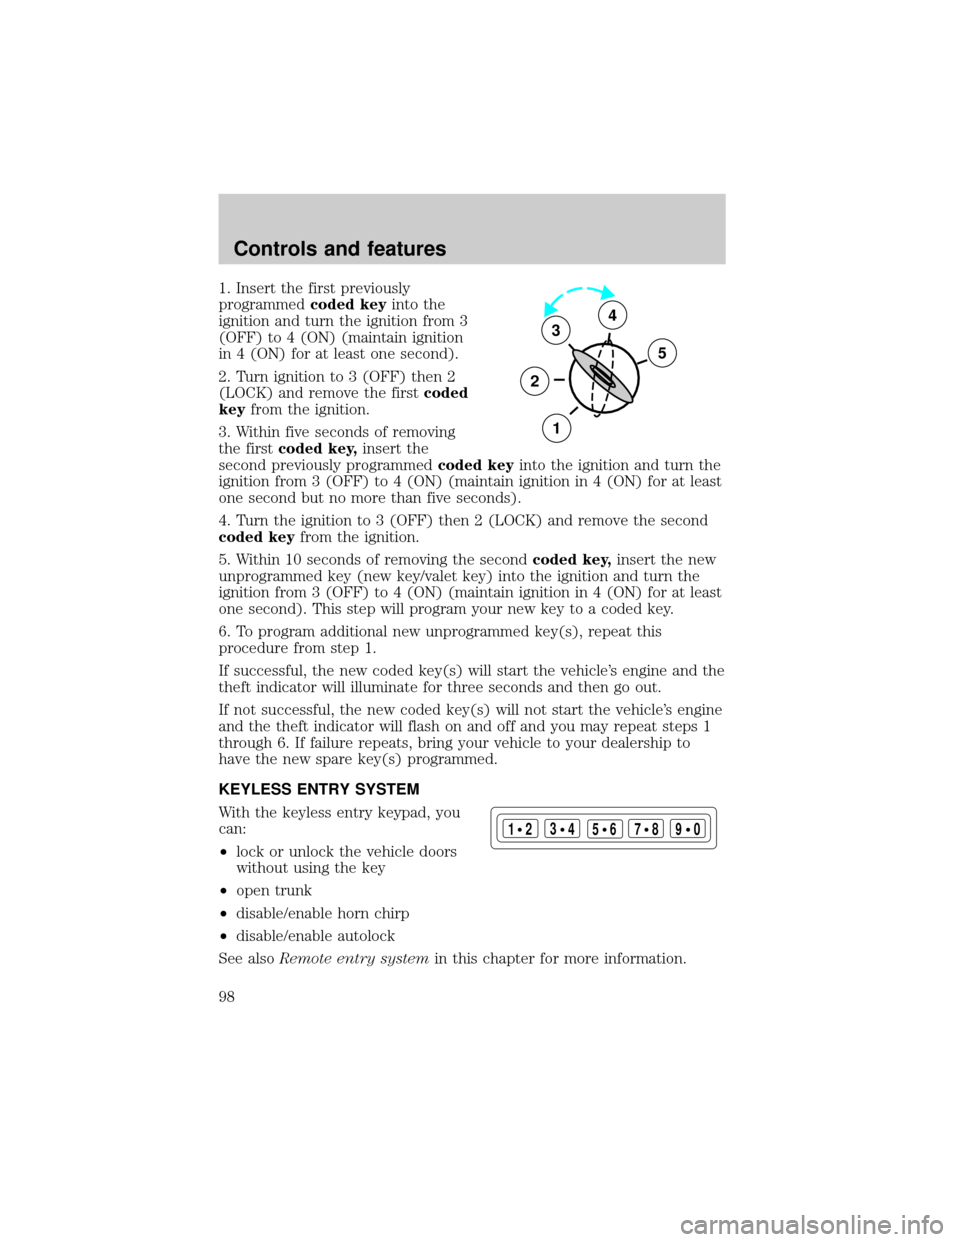
1. Insert the first previously
programmedcoded keyinto the
ignition and turn the ignition from 3
(OFF) to 4 (ON) (maintain ignition
in 4 (ON) for at least one second).
2. Turn ignition to 3 (OFF) then 2
(LOCK) and remove the firstcoded
keyfrom the ignition.
3. Within five seconds of removing
the firstcoded key,insert the
second previously programmedcoded keyinto the ignition and turn the
ignition from 3 (OFF) to 4 (ON) (maintain ignition in 4 (ON) for at least
one second but no more than five seconds).
4. Turn the ignition to 3 (OFF) then 2 (LOCK) and remove the second
coded keyfrom the ignition.
5. Within 10 seconds of removing the secondcoded key,insert the new
unprogrammed key (new key/valet key) into the ignition and turn the
ignition from 3 (OFF) to 4 (ON) (maintain ignition in 4 (ON) for at least
one second). This step will program your new key to a coded key.
6. To program additional new unprogrammed key(s), repeat this
procedure from step 1.
If successful, the new coded key(s) will start the vehicle's engine and the
theft indicator will illuminate for three seconds and then go out.
If not successful, the new coded key(s) will not start the vehicle's engine
and the theft indicator will flash on and off and you may repeat steps 1
through 6. If failure repeats, bring your vehicle to your dealership to
have the new spare key(s) programmed.
KEYLESS ENTRY SYSTEM
With the keyless entry keypad, you
can:
²lock or unlock the vehicle doors
without using the key
²open trunk
²disable/enable horn chirp
²disable/enable autolock
See alsoRemote entry systemin this chapter for more information.
3
2
1
5
4
123
45678
90
Controls and features
98
Page 245 of 248

traction control active ..............14
turn signal indicator .................12
Load limits .................................147
GAWR ......................................147
GVWR ......................................147
trailer towing ..........................147
Locks
autolock .....................................91
childproof ..................................88
doors ..........................................87
Lubricant specifications ...223±224
Lumbar support, seats .............107
M
Message center ...........................22
reset button ..............................23
select button .............................23
Mirrors
automatic dimming rearview
mirror ........................................83
cleaning ...................................216
side view mirrors (power) .......88
Motorcraft parts ................203, 220
O
Octane rating ............................202
Odometer .....................................19
Oil (see Engine oil) ..................175
Overdrive .............................74, 145
P
Panic alarm feature, remote
entry system ................................93
Parking brake ............................139Parts (see Motorcraft parts) ....220
Passenger Occupant
Classification Sensor .................109
Pedals (see Power adjustable
foot pedals) .................................71
Power distribution box
(see Fuses) ...............................159
Power door locks ..................87, 91
Power steering ..........................142
fluid, checking and adding ....187
fluid, refill capacity ................221
fluid, specifications .........223±224
R
Radio ............................................38
Rear window defroster ...............38
Relays ................................156, 161
Remote entry system ...........89, 93
illuminated entry ......................93
locking/unlocking doors ...........90
opening the trunk .....................92
panic alarm ...............................93
replacement/additional
transmitters ...............................94
replacing the batteries .............93
S
Safety belts (see Safety
restraints) ............16, 107, 111±115
Safety defects, reporting ..........240
Safety restraints ........107, 111±115
belt minder .............................117
cleaning the safety belts .......120,
219
extension assembly ................116
for adults .........................112±114
Index
245
Page 246 of 248

for children .....................125±126
lap belt ....................................115
Occupant Classification
Sensor ......................................109
warning light and
chime ...................11, 16, 116±117
Safety seats for children ..........127
Seat belts (see Safety
restraints) ..................................107
Seats ..........................................103
child safety seats ....................127
cleaning ...................................219
SecuriLock passive anti-theft
system ....................................95±97
Servicing your vehicle ..............172
Spark plugs,
specifications .............220, 224±225
Special notice ................................3
Specification chart,
lubricants ...........................223±224
Speed control ..............................75
Speedometer ...............................18
Starting your vehicle ........134, 136
jump starting ..........................165
Steering
speed sensitive .......................142
Steering wheel
tilting .........................................74
T
Tires ...........................161, 194±196
changing ..........................161±162
checking the pressure ............196
replacing ..................................197rotating ....................................196
snow tires and chains ............198
tire grades ...............................195
treadwear ................................195
Towing .......................................149
recreational towing .................151
trailer towing ..........................149
wrecker ....................................171
Traction control ..................72, 140
off light ......................................14
Traction-lok rear axle ...............147
Transmission .............................143
fluid, checking and adding
(automatic) .............................187
fluid, refill capacities ..............221
lubricant specifications ..223±224
Trip odometer .............................20
Trunk .........................................101
remote release ....................86, 92
Turn signal ............................12, 72
V
Vehicle dimensions ...................225
Vehicle Identification Number
(VIN) ..........................................227
Vehicle loading ..........................147
Ventilating your vehicle ...........137
W
Warning chimes ...........................16
Warning lights (see Lights) .........8
Washer fluid ..............................179
Water, Driving through .............152
Index
246