steering FORD CROWN VICTORIA 2002 2.G User Guide
[x] Cancel search | Manufacturer: FORD, Model Year: 2002, Model line: CROWN VICTORIA, Model: FORD CROWN VICTORIA 2002 2.GPages: 240, PDF Size: 1.88 MB
Page 146 of 240
Speed sensitive steering (except police vehicles)
The steering in your vehicle is speed sensitive. At high speeds, steering
assist will decrease to improve steering feel. At lower speeds,
maneuverability will be increased.
If the amount of effort required to steer your vehicle changes at a
constant vehicle speed, have the power steering system checked by your
dealer or a qualified service technician.
AIR SUSPENSION SYSTEM (IF EQUIPPED)
The air suspension system is designed to improve ride, handling and
general vehicle performance during:
²Certain road conditions
²Steering maneuvers
²Braking
²Accelerations
This system keeps the rear of your vehicle at a constant level by
automatically adding air or releasing air from the springs.
If you exceed the load limit, the rear air suspension may not operate.
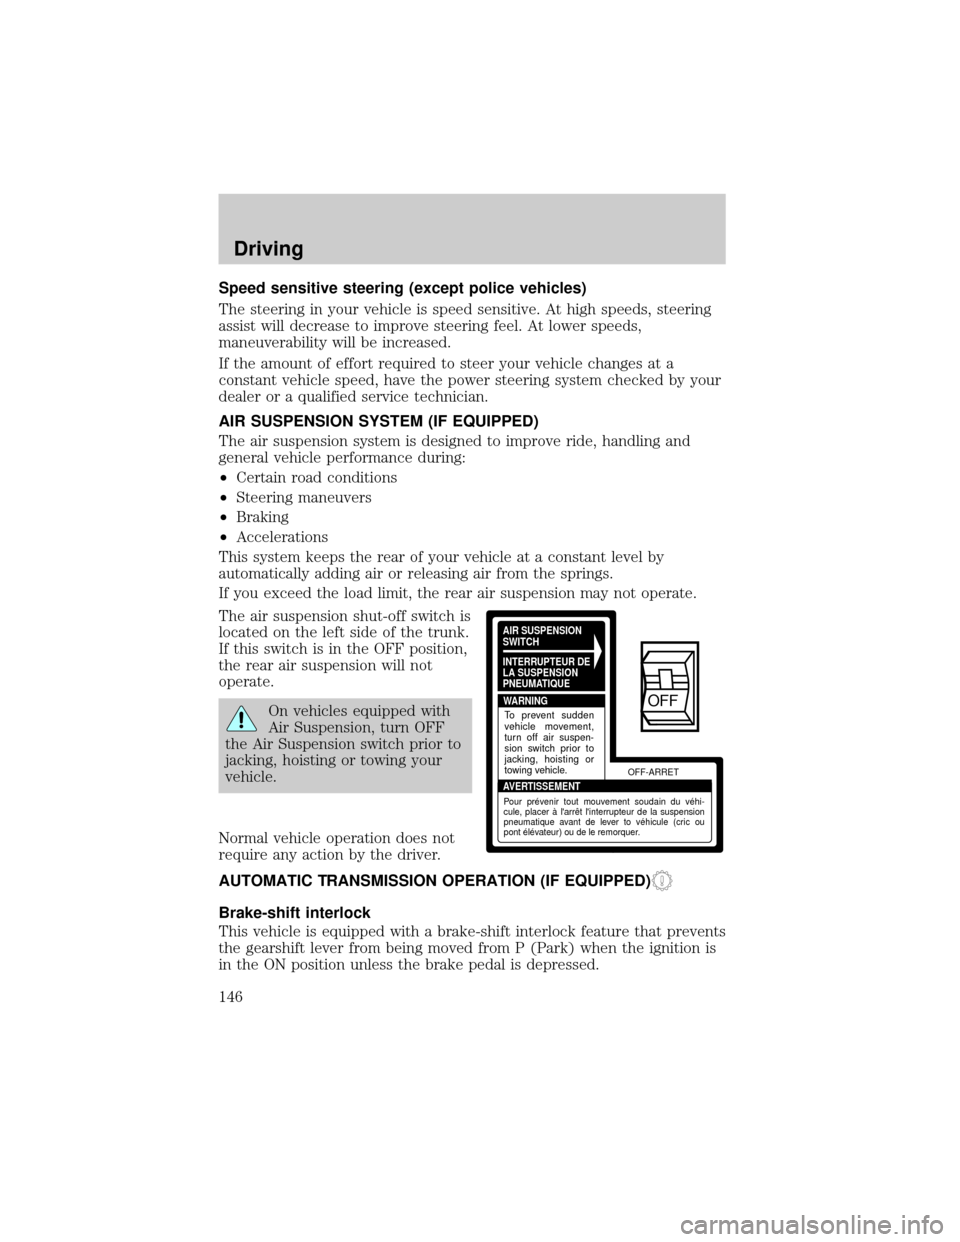
The air suspension shut-off switch is
located on the left side of the trunk.
If this switch is in the OFF position,
the rear air suspension will not
operate.
On vehicles equipped with
Air Suspension, turn OFF
the Air Suspension switch prior to
jacking, hoisting or towing your
vehicle.
Normal vehicle operation does not
require any action by the driver.
AUTOMATIC TRANSMISSION OPERATION (IF EQUIPPED)
Brake-shift interlock
This vehicle is equipped with a brake-shift interlock feature that prevents
the gearshift lever from being moved from P (Park) when the ignition is
in the ON position unless the brake pedal is depressed.
AIR SUSPENSION
SWITCH
INTERRUPTEUR DE
LA SUSPENSION
PNEUMATIQUE
WARNING
AVERTISSEMENTOFF-ARRET
To prevent sudden
vehicle movement,
turn off air suspen-
sion switch prior to
jacking, hoisting or
towing vehicle.
Pour prévenir tout mouvement soudain du véhi-
cule, placer à l'arrêt l'interrupteur de la suspension
pneumatique avant de lever to véhicule (cric ou
pont élévateur) ou de le remorquer.
OFF
Driving
146
Page 157 of 240

U.S. Ford or Mercury vehicle customers who require roadside assistance,
call 1±800±241±3673; Lincoln vehicle customers call 1±800±521±4140.
Canadian customers who require roadside assistance, call
1±800±665±2006.
If you need to arrange roadside assistance for yourself, Ford Motor
Company will reimburse a reasonable amount. To obtain reimbursement
information, U.S. Ford or Mercury vehicles customers call
1-800-241-3673; Lincoln vehicle customers call 1±800±521±4140.
Canadian customers who need to obtain reimbursement information, call
1±800±665±2006.
ROADSIDE COVERAGE BEYOND BASIC WARRANTY
In the United States, you may purchase additional roadside assistance
coverage beyond this period through the Ford Auto Club by contacting
your Ford or Lincoln Mercury dealer.
Similarly in Canada, for uninterrupted Roadside Assistance coverage, you
may purchase extended coverage prior to your Basic Warranty's Roadside
Assistance expiring. For more information and enrollment, contact
1±877±294±2582 or visit our website at www.ford.ca.
HAZARD FLASHER
Use only in an emergency to warn traffic of vehicle breakdown,
approaching danger, etc. The hazard flashers can be operated when the
ignition is off.
²The hazard lights control is
located on top of the steering
column.
²Depress hazard lights control to
activate all hazard flashers
simultaneously.
²Depress control again to turn the
flashers off.
Roadside Emergencies
157
Page 160 of 240
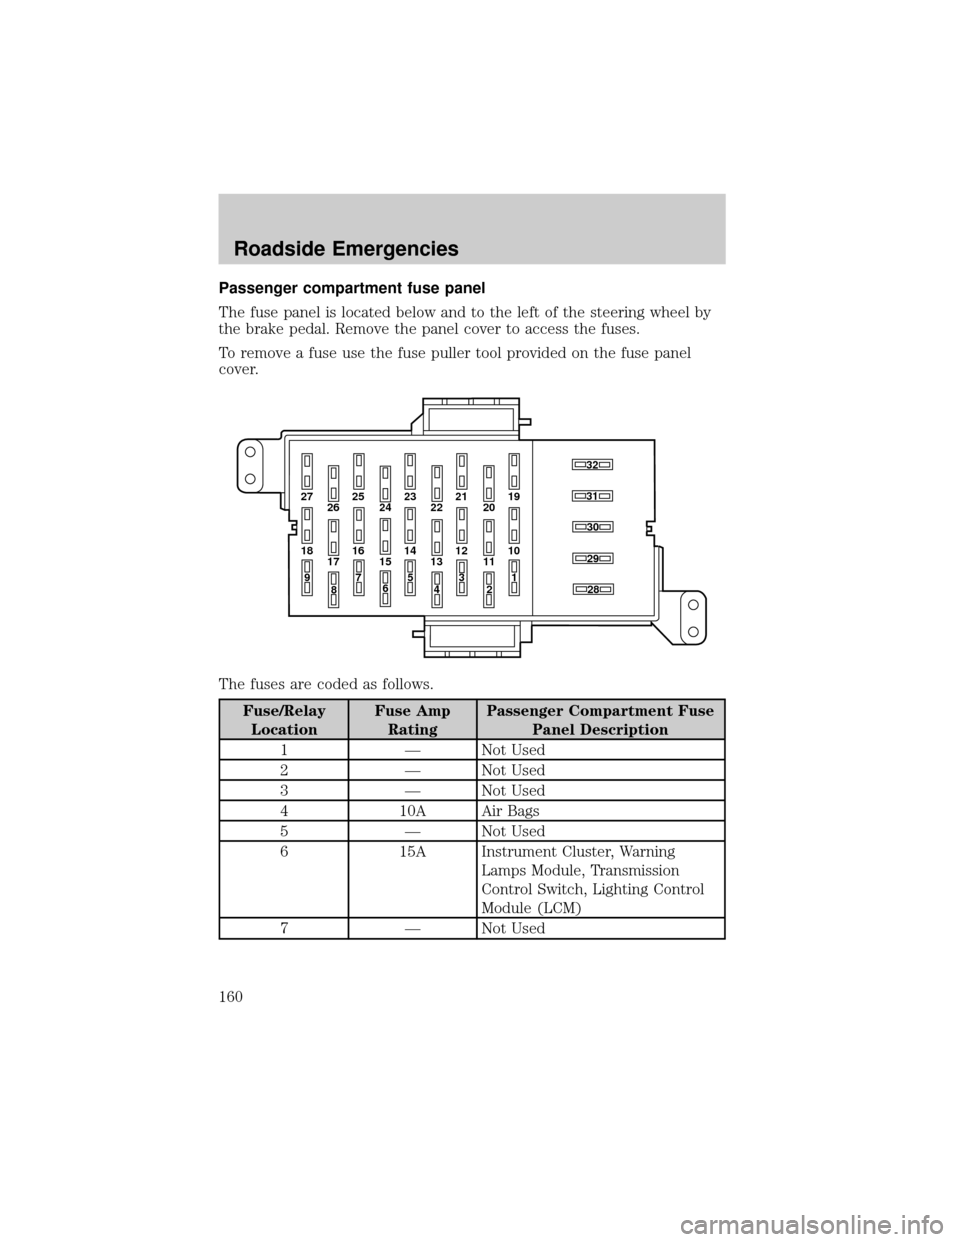
Passenger compartment fuse panel
The fuse panel is located below and to the left of the steering wheel by
the brake pedal. Remove the panel cover to access the fuses.
To remove a fuse use the fuse puller tool provided on the fuse panel
cover.
The fuses are coded as follows.
Fuse/Relay
LocationFuse Amp
RatingPassenger Compartment Fuse
Panel Description
1 Ð Not Used
2 Ð Not Used
3 Ð Not Used
4 10A Air Bags
5 Ð Not Used
6 15A Instrument Cluster, Warning
Lamps Module, Transmission
Control Switch, Lighting Control
Module (LCM)
7 Ð Not Used
27 25
26 2423 21
2219
20
18 16
17 1514 12
131030
32
31
28
29
11
97
8653
41
2
Roadside Emergencies
160
Page 161 of 240
Fuse/Relay
LocationFuse Amp
RatingPassenger Compartment Fuse
Panel Description
8 25A Power Train Control Module
(PCM) Power Relay, Coil-on
-Plugs, Radio Noise Capacitor,
Passive Anti-theft System (PATS)
9 Ð Not Used
10 10A Rear Window Defrost
11 Ð Not Used
12 Ð Not Used
13 5A Radio
14 10A Traction Control Switch, Anti-lock
Brakes (ABS), Instrument Cluster
15 15A Speed Control Servo, Main Light
Switch Illumination, Lighting
Control Module (LCM), Clock,
Police Power Relay
16 15A Reversing lamps, Turn Signals,
Shift Lock, DRL Module, EVO
Steering, Electronic Day/Night
Mirror
17 30A Wiper Motor, Wiper Control
Module
18 30A Heater Blower Motor
19 20A Auxiliary Power Point
20 Ð Not Used
21 15A Multifunction Switch, Lighting
Control Module (LCM), PATS
Indicator, Parking Lamps,
Instrument Panel Light
22 15A Speed Control Servo, Hazard
Lights
Roadside Emergencies
161
Page 164 of 240

Fuse/Relay
LocationFuse Amp
RatingPower Distribution Box
Description
10 50A** See Fuses 1, 2, 6, 7, 10, 11, 13
and Circuit Breaker 14
11 50A** See Fuses 4, 8, 16 and Circuit
Breaker 12
12 30A** PCM Power Relay, PCM, Natural
Gas Vehicle Module
13 50A** High Speed Cooling Fan Relay
14 40A** Rear Window Defrost Relay, Also
see Fuse 17
15 40A** Anti-Lock Brake Module
16 50A** Police Option Fuse Holder
17 30A CB Cooling Fan Relay
Relay 1 Ð Rear Defrost Relay
Relay 2 Ð Horn Relay
Relay 3 Ð Cooling Fan Relay
Relay 4 Ð Air Suspension Pump Relay,
Police Power Relay
* Mini Fuses ** Maxi Fuses
Relays
Relays are located in the power distribution box and should be replaced
by qualified technicians.
CHANGING THE TIRES
If you get a flat tire while driving, do not apply the brake heavily.
Instead, gradually decrease your speed. Hold the steering wheel firmly
and slowly move to a safe place on the side of the road.
The use of tire sealants is not recommended and may compromise the
integrity of your tires. The use of tire sealants may also affect your tire
pressure monitoring system (if equipped).
Temporary spare tire information
Your vehicle may have a temporary or full-size spare tire. The temporary
spare tire for your vehicle is labeled as such. It is smaller than a regular
tire and is designed for emergency use only. Replace this tire with a
full-size tire as soon as possible.
Roadside Emergencies
164
Page 188 of 240
CLEANING THE INSTRUMENT PANEL
Clean the instrument panel with a damp cloth, then dry with a dry cloth.
Avoid cleaners or polish that increase the gloss of the upper portion of
the instrument panel. The dull finish in this area helps protect the driver
from undesirable windshield reflection.
Your vehicle is designed with painted controls and features which
are particularly sensitive to certain products such as insect
repellent and suntan lotion. When operating the various features
on your vehicle, be certain to wash or wipe your hands clean if
you have been in contact with any of these types of products in
order to avoid possible damage to the painted surfaces.
Do not use chemical solvents or strong detergents when cleaning
the steering wheel or instrument panel to avoid contamination of
the air bag system.
Cleaning the instrument cluster lens
Wipe the cluster area with a soft, damp cotton towel. Dry the area with a
clean, dry towel.
CLEANING SEATS EQUIPPED WITH SIDE AIR BAGS
Remove dust and loose dirt with a vacuum cleaner. In order to remove
stains and soil, clean with Extra Strength Upholstery Cleaner
(E8AZ-19523±AA).
Never saturate the seat covers with any cleaning solution.
Do not use chemical solvents or strong detergents when cleaning
the seat where the side air bag is mounted. Such products could
contaminate the side air bag system and affect performance of the side
air bag in a collision. The air bag may not function correctly and not
provide injury reduction benefits.
CLEANING THE INTERIOR FABRIC, CARPETS AND CLOTH SEATS
Remove dust and loose dirt with a vacuum cleaner. Remove light stains
and soil with Extra Strength Upholstery Cleaner (E8AZ-19523±AA).
Never saturate the seat covers with cleaning solution.
Do not use household cleaning products or glass cleaners, which
can stain and discolor the fabric and affect the flame retardant
abilities of the seat materials.
Cleaning
188
Page 193 of 240
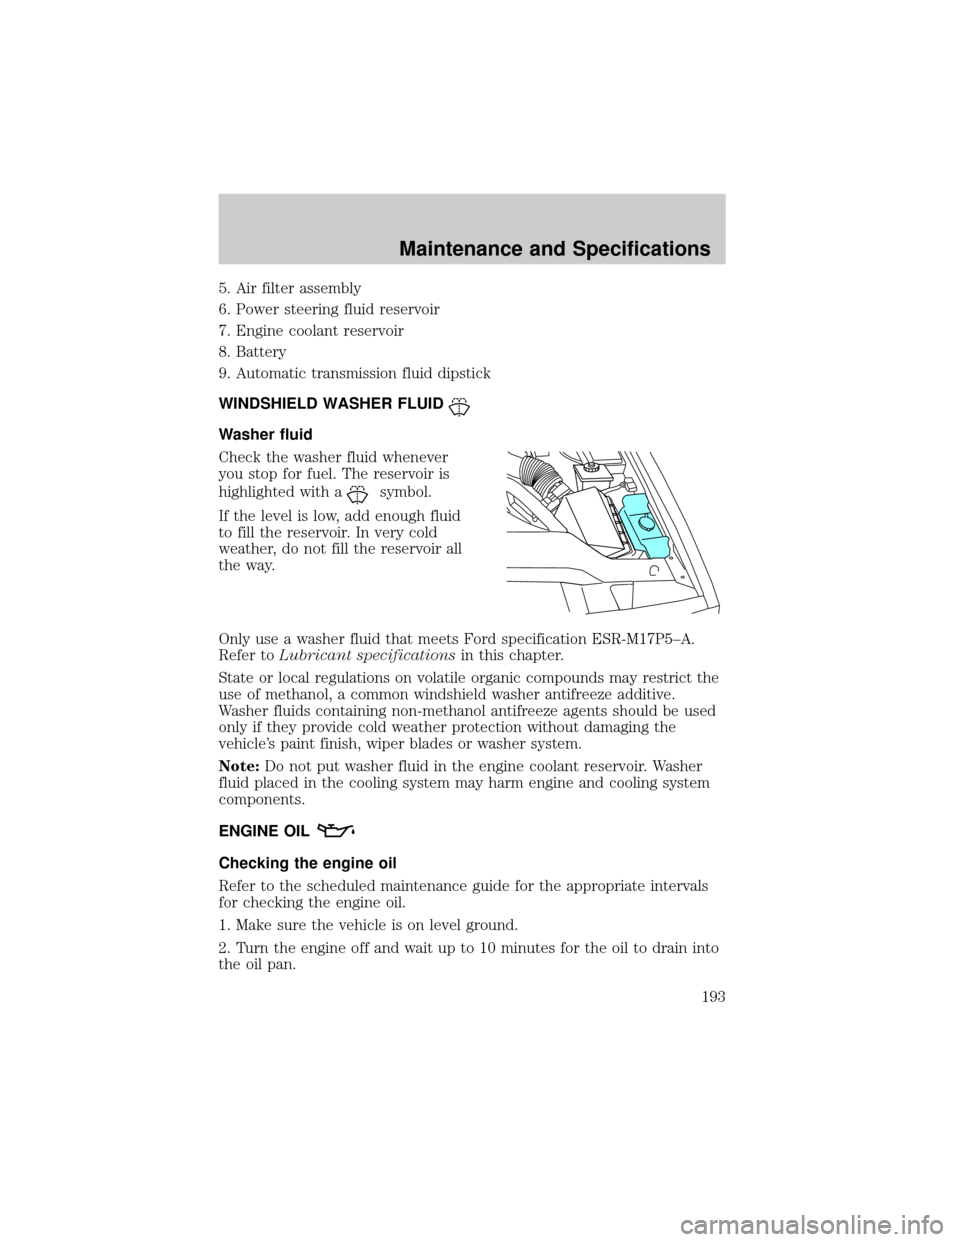
5. Air filter assembly
6. Power steering fluid reservoir
7. Engine coolant reservoir
8. Battery
9. Automatic transmission fluid dipstick
WINDSHIELD WASHER FLUID
Washer fluid
Check the washer fluid whenever
you stop for fuel. The reservoir is
highlighted with a
symbol.
If the level is low, add enough fluid
to fill the reservoir. In very cold
weather, do not fill the reservoir all
the way.
Only use a washer fluid that meets Ford specification ESR-M17P5±A.
Refer toLubricant specificationsin this chapter.
State or local regulations on volatile organic compounds may restrict the
use of methanol, a common windshield washer antifreeze additive.
Washer fluids containing non-methanol antifreeze agents should be used
only if they provide cold weather protection without damaging the
vehicle's paint finish, wiper blades or washer system.
Note:Do not put washer fluid in the engine coolant reservoir. Washer
fluid placed in the cooling system may harm engine and cooling system
components.
ENGINE OIL
Checking the engine oil
Refer to the scheduled maintenance guide for the appropriate intervals
for checking the engine oil.
1. Make sure the vehicle is on level ground.
2. Turn the engine off and wait up to 10 minutes for the oil to drain into
the oil pan.
Maintenance and Specifications
193
Page 205 of 240

If the engine reaches a preset over-temperature condition, the engine
will automatically switch to alternating cylinder operation. Each disabled
cylinder acts as an air pump and cools the engine.
When this occurs the vehicle will still operate. However:
²The engine power will be limited.
²The air conditioning system will be disabled.
Continued operation will increase the engine temperature:
²The
symbol will begin to flash.
²If your vehicle is equipped with digital gauges, the gauge bars will
flash and a tone will sound every five seconds for one minute.
²The engine will completely shut down, causing steering and braking
effort to increase.
Once the engine temperature cools, the engine can be re-started. Take
your vehicle to a service facility as soon as possible to minimize engine
damage.
When fail-safe mode is activated
You have limited engine power when in the fail-safe mode, so drive the
vehicle with caution. The vehicle will not be able to maintain high-speed
operation and the engine will run rough. Remember that the engine is
capable of completely shutting down automatically to prevent engine
damage, therefore:
1. Pull off the road as soon as safely possible and turn off the engine.
2. Arrange for the vehicle to be taken to a service facility.
3. If this is not possible, wait a short period for the engine to cool.
4. Check the coolant level and replenish if low.
Never remove the coolant reservoir cap while the engine is
running or hot.
5. Re-start the engine and take your vehicle to a service facility.
Driving the vehicle without repairing the engine problem
increases the chance of engine damage. Take your vehicle to a
service facility as soon as possible.
Maintenance and Specifications
205
Page 215 of 240

CHECKING AND ADDING POWER STEERING FLUID
Check the power steering fluid.
Refer to the scheduled maintenance
guide for the service interval
schedules. If adding fluid is
necessary, use only MERCONtAT F.
1. Start the engine and let it run until it reaches normal operating
temperature (the engine coolant temperature gauge indicator will be
near the center of the normal area between H and C).
2. While the engine idles, turn the steering wheel left and right several
times.
3. Turn the engine off.
4. Check the fluid level in the
reservoir. It should be between the
MIN and MAX lines. Do not add
fluid if the level is in this range.
5. If the fluid is low, add fluid in small amounts, continuously checking
the level until it reaches the range between the MIN and MAX lines. Be
sure to put the cap back on the reservoir.
DONOTOVERFILLPOWERSTEERINGFLUID
MAX
MIN
Maintenance and Specifications
215
Page 225 of 240

REFILL CAPACITIES
Fluid Ford Part Name Capacity
Engine oil (includes
filter change)Motorcraft SAE 5W-20
Premium Synthetic
Blend Motor Oil4.7L (5.0 quarts)
Brake fluid Motorcraft High
Performance DOT 3
Motor Vehicle Brake
Fluid
1
Fill to line on reservoir
Power steering fluid Motorcraft MERCONt
AT FFill to line on reservoir
Transmission fluid
2Motorcraft
MERCONtVATF13.2L (13.9 quarts)3
Engine coolant4Motorcraft Premium
Engine Coolant
(green-colored) or
Motorcraft Premium
Gold Engine Coolant
(yellow-colored)15.0L (15.8 quarts)
Fuel tank N/A 71.9L (19.0 gallons)
Rear axle lubricant
5Motorcraft SAE
80W-90 Premium Rear
Axle Lubricant1.8L (3.75 pints)
Windshield washer
fluidUltra-Clear Windshield
Washer ConcentrateFill to line on reservoir
1Use only brake fluids certified to meet Ford specifications. Refer to
Lubricant Specificationsin this chapter. DOT 3 fluid is recommended.
However, if DOT 3 is not available, DOT 4 fluid can be used.
2Ensure the correct automatic transmission fluid is used. MERCONtand
MERCONtV are not interchangeable. DO NOT MIX MERCONtand
MERCONtV. Refer to the scheduled maintenance guide to determine
the correct service interval.
3Indicates only approximate dry-fill capacity. Some applications may vary
based on cooler size and if equipped with an in-tank cooler. The amount
of transmission fluid and fluid level should be set by the indication on
the dipstick's normal operating range. Police or Handling Package refill
capacity-12.1L (12.8 quarts).
Maintenance and Specifications
225