set clock FORD CROWN VICTORIA 2002 2.G Owners Manual
[x] Cancel search | Manufacturer: FORD, Model Year: 2002, Model line: CROWN VICTORIA, Model: FORD CROWN VICTORIA 2002 2.GPages: 240, PDF Size: 1.88 MB
Page 25 of 240
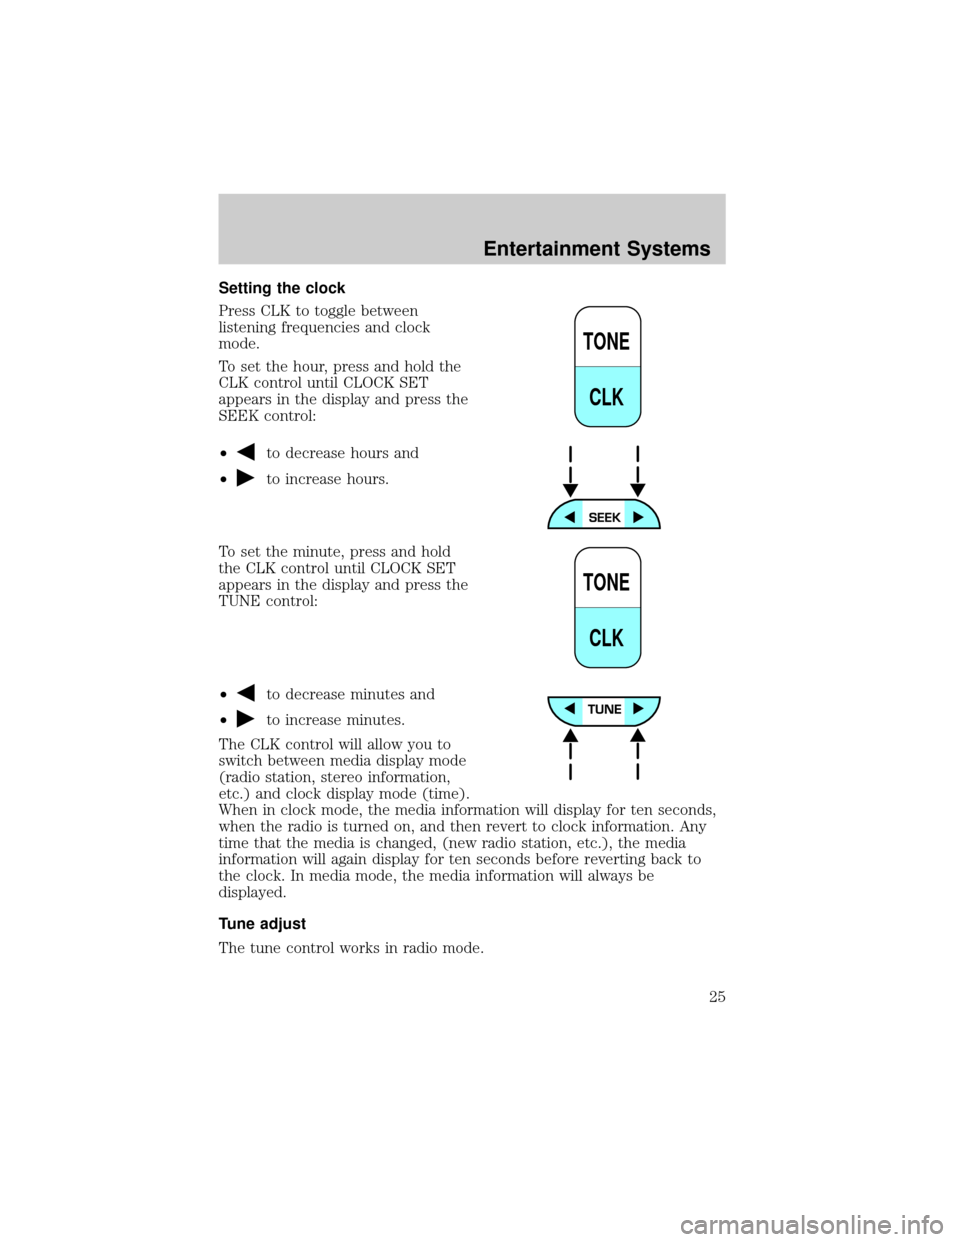
Setting the clock
Press CLK to toggle between
listening frequencies and clock
mode.
To set the hour, press and hold the
CLK control until CLOCK SET
appears in the display and press the
SEEK control:
┬▓
to decrease hours and
┬▓
to increase hours.
To set the minute, press and hold
the CLK control until CLOCK SET
appears in the display and press the
TUNE control:
┬▓
to decrease minutes and
┬▓
to increase minutes.
The CLK control will allow you to
switch between media display mode
(radio station, stereo information,
etc.) and clock display mode (time).
When in clock mode, the media information will display for ten seconds,
when the radio is turned on, and then revert to clock information. Any
time that the media is changed, (new radio station, etc.), the media
information will again display for ten seconds before reverting back to
the clock. In media mode, the media information will always be
displayed.
Tune adjust
The tune control works in radio mode.
TONE
CLK
TONE
CLK
Entertainment Systems
25
Page 30 of 240
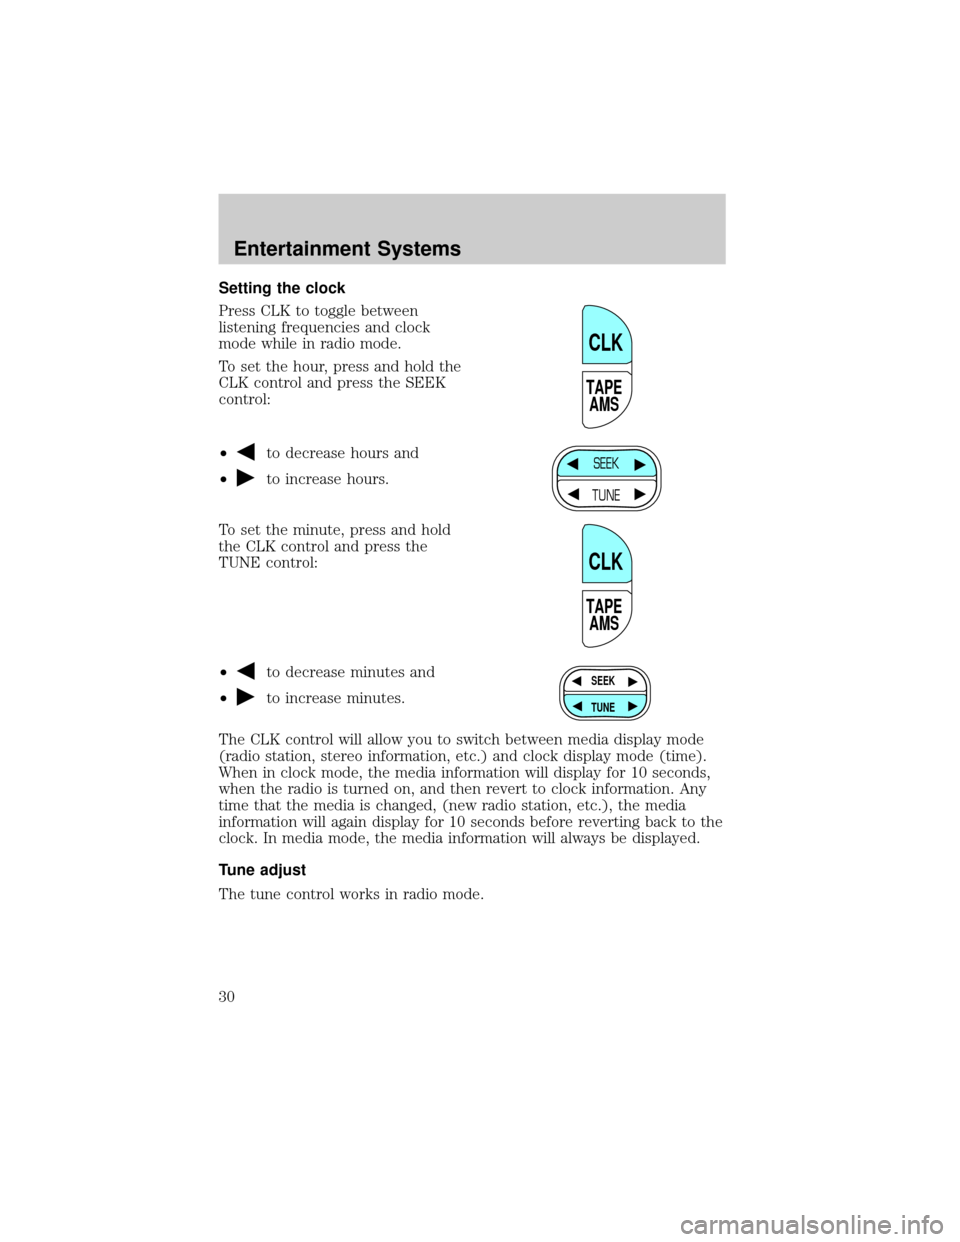
Setting the clock
Press CLK to toggle between
listening frequencies and clock
mode while in radio mode.
To set the hour, press and hold the
CLK control and press the SEEK
control:
┬▓
to decrease hours and
┬▓
to increase hours.
To set the minute, press and hold
the CLK control and press the
TUNE control:
┬▓
to decrease minutes and
┬▓
to increase minutes.
The CLK control will allow you to switch between media display mode
(radio station, stereo information, etc.) and clock display mode (time).
When in clock mode, the media information will display for 10 seconds,
when the radio is turned on, and then revert to clock information. Any
time that the media is changed, (new radio station, etc.), the media
information will again display for 10 seconds before reverting back to the
clock. In media mode, the media information will always be displayed.
Tune adjust
The tune control works in radio mode.
TAPE
AMS
CLK
SEEK
TUNE
TAPE
AMS
CLK
SEEK
TUNE
Entertainment Systems
30
Page 36 of 240
AM/FM select in CD or CD changer mode (if equipped)
The AM/FM control to stop CD play and begin radio play.
Radio station memory preset
The radio is equipped with four or six station memory preset controls.
These controls can be used to select up to four or six preset AM stations
and eight or twelve FM stations (four to six in FM1 and four to six in
FM2).
Setting memory preset stations
1. Select the frequency band with the AM/FM select control.
2. Select a station. Refer toTune adjustorSeek functionfor more
information on selecting a station.
3. Press and hold a memory preset control until the sound returns,
indicating the station is held in memory on the control you selected.
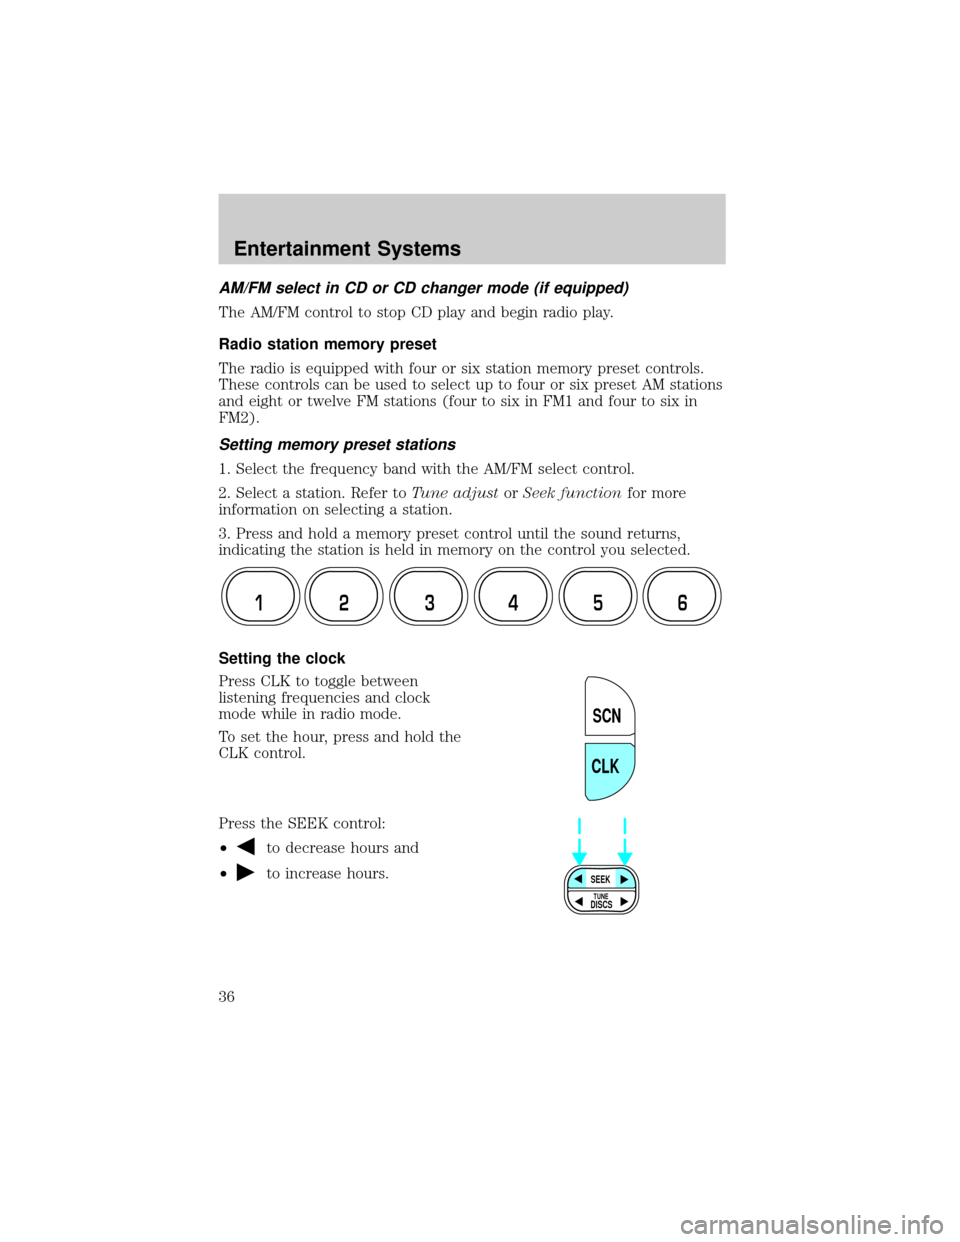
Setting the clock
Press CLK to toggle between
listening frequencies and clock
mode while in radio mode.
To set the hour, press and hold the
CLK control.
Press the SEEK control:
┬▓
to decrease hours and
┬▓
to increase hours.
12 3456
SCN
CLK
SEEK
DISCS
TUNE
Entertainment Systems
36
Page 44 of 240
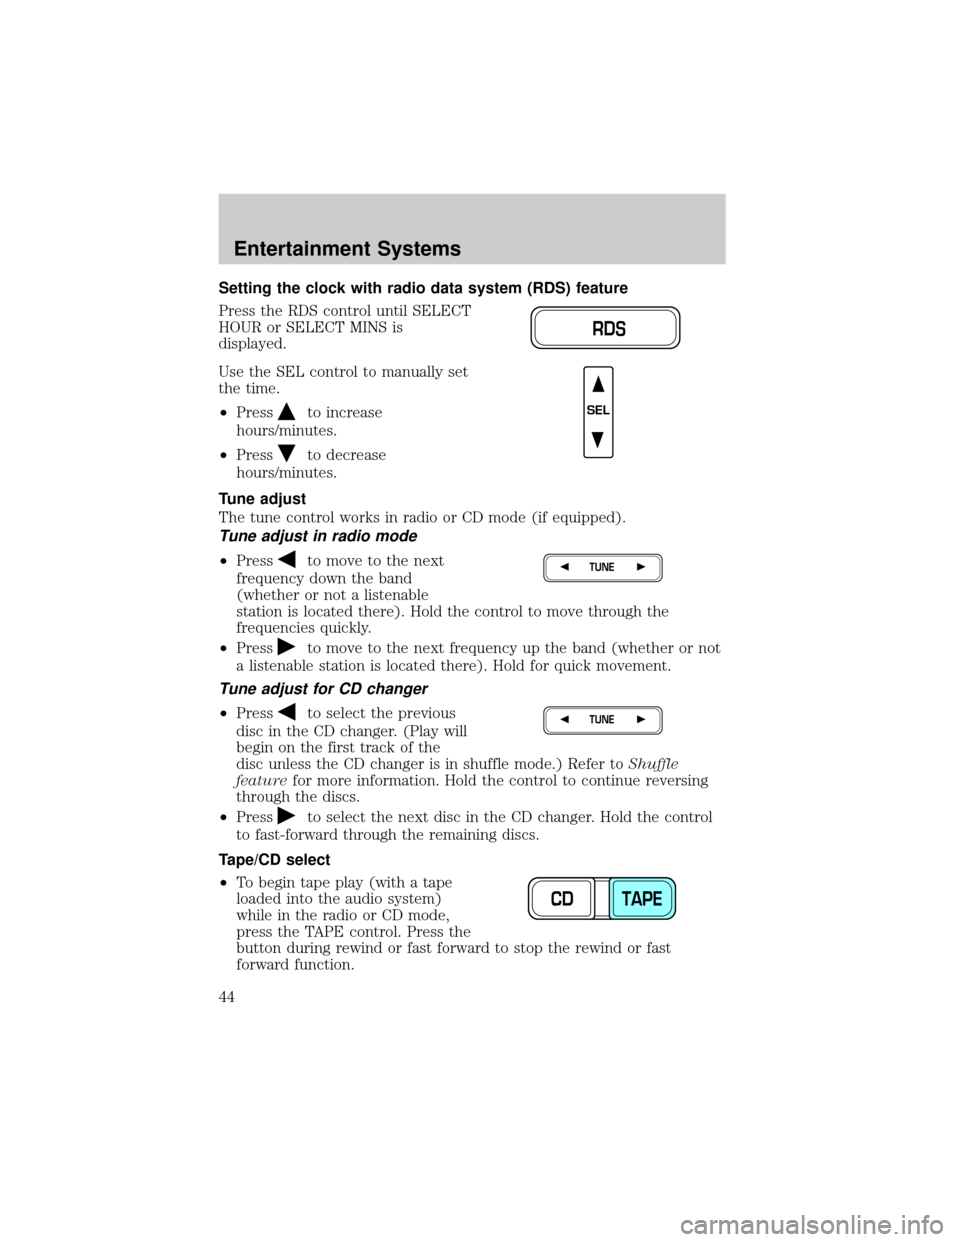
Setting the clock with radio data system (RDS) feature
Press the RDS control until SELECT
HOUR or SELECT MINS is
displayed.
Use the SEL control to manually set
the time.
┬▓Press
to increase
hours/minutes.
┬▓Press
to decrease
hours/minutes.
Tune adjust
The tune control works in radio or CD mode (if equipped).
Tune adjust in radio mode
┬▓Pressto move to the next
frequency down the band
(whether or not a listenable
station is located there). Hold the control to move through the
frequencies quickly.
┬▓Press
to move to the next frequency up the band (whether or not
a listenable station is located there). Hold for quick movement.
Tune adjust for CD changer
┬▓Pressto select the previous
disc in the CD changer. (Play will
begin on the first track of the
disc unless the CD changer is in shuffle mode.) Refer toShuffle
featurefor more information. Hold the control to continue reversing
through the discs.
┬▓Press
to select the next disc in the CD changer. Hold the control
to fast-forward through the remaining discs.
Tape/CD select
┬▓To begin tape play (with a tape
loaded into the audio system)
while in the radio or CD mode,
press the TAPE control. Press the
button during rewind or fast forward to stop the rewind or fast
forward function.
RDS
SEL
TUNE
TUNE
CD TAPE
Entertainment Systems
44
Page 63 of 240
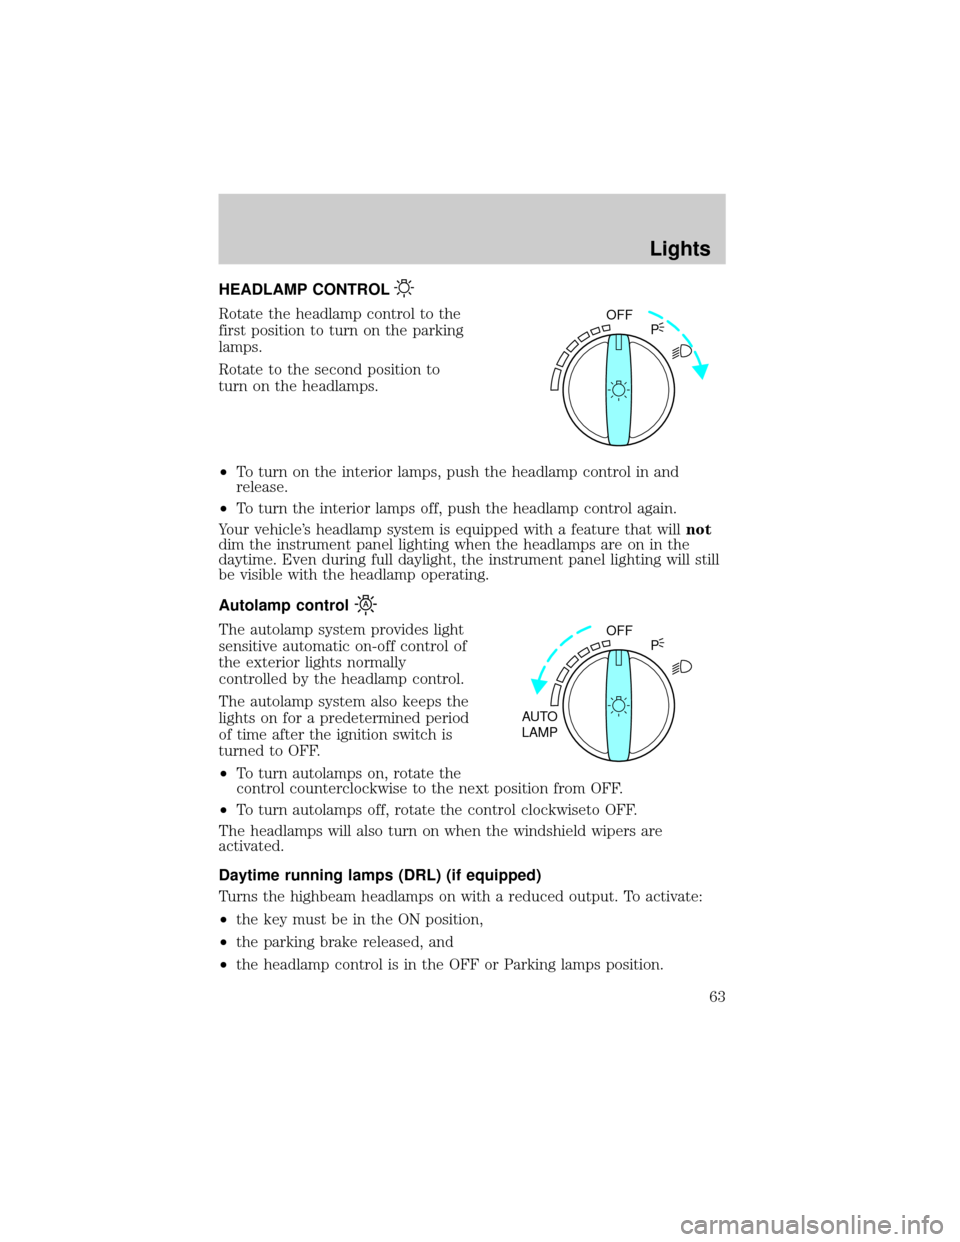
HEADLAMP CONTROL
Rotate the headlamp control to the
first position to turn on the parking
lamps.
Rotate to the second position to
turn on the headlamps.
┬▓To turn on the interior lamps, push the headlamp control in and
release.
┬▓To turn the interior lamps off, push the headlamp control again.
Your vehicle's headlamp system is equipped with a feature that willnot
dim the instrument panel lighting when the headlamps are on in the
daytime. Even during full daylight, the instrument panel lighting will still
be visible with the headlamp operating.
Autolamp control
The autolamp system provides light
sensitive automatic on-off control of
the exterior lights normally
controlled by the headlamp control.
The autolamp system also keeps the
lights on for a predetermined period
of time after the ignition switch is
turned to OFF.
┬▓To turn autolamps on, rotate the
control counterclockwise to the next position from OFF.
┬▓To turn autolamps off, rotate the control clockwiseto OFF.
The headlamps will also turn on when the windshield wipers are
activated.
Daytime running lamps (DRL) (if equipped)
Turns the highbeam headlamps on with a reduced output. To activate:
┬▓the key must be in the ON position,
┬▓the parking brake released, and
┬▓the headlamp control is in the OFF or Parking lamps position.
OFF
P
OFF
AUTO
LAMPP
Lights
63
Page 199 of 240
If the battery has been disconnected or a new battery has been installed,
the clock must be reset once the battery is reconnected.
┬▓Always dispose of automotive
batteries in a responsible manner.
Follow your local authorized
standards for disposal. Call your
local authorized recycling center
to find out more about recycling
automotive batteries.
ENGINE COOLANT
Checking engine coolant
The concentration and level of engine coolant should be checked at the
mileage intervals listed in the scheduled maintenance guide. The coolant
concentration should be maintained at 50/50 coolant and water, which
equates to a freeze point of -36É C (-34É F). Coolant concentration
testing is possible with a hydrometer or antifreeze tester (such as the
Rotunda Battery and Antifreeze Tester, 014┬▒R1060). The level of coolant
should be maintained at the ªcold fullº of ªcold fill rangeº level in the
coolant reservoir. If the level falls below, add coolant per the instructions
in theAdding engine coolantsection.
Your vehicle was factory-filled with a 50/50 engine coolant and water
concentration. If the concentration of coolant falls below 40% or above
60%, the engine parts could become damaged or not work properly.A
50┬▒50 mixture of coolant and water provides the following:
²Freeze protection down to -36É C (-34É F).
²Boiling protection up to 129É C (265É F).
┬▓Protection against rust and other forms of corrosion.
┬▓Enables calibrated gauges to work properly.
LEAD
RETURN
RECYCLE
Maintenance and Specifications
199
Page 234 of 240

child safety belts ....................127
Child safety seats ......................130
attaching with tether straps ..135
in front seat ............................132
in rear seat ......................132, 134
Cleaning your vehicle
engine compartment ..............186
exterior ....................................189
instrument cluster lens ..........188
instrument panel ....................188
interior .....................................188
plastic parts ............................187
safety belts ..............................189
washing ....................................184
waxing .....................................184
wheels ......................................185
windows ..................................189
wiper blades ............................187
Climate control (see Air
conditioning or Heating) ......54, 56
Clock ..........................25, 30, 36, 44
Compass, electronic ....................77
calibration .................................78
set zone adjustment .................77
Console ........................................90
Controls
power seat .......................106, 108
steering column ........................83
Coolant
checking and adding ..............199
coolant temperature light ........13
refill capacities ................203, 225
specifications ..................226, 228
Cruise control (see Speed
control) ........................................79
Customer Assistance ................156
Ford accessories for your
vehicle .....................................190Ford Extended Service
Plan ..........................................177
Getting assistance outside the
U.S. and Canada .....................181
Getting roadside assistance ...156
Getting the service you
need .........................................175
Ordering additional owner's
literature .................................182
The Dispute Settlement
Board .......................................178
Utilizing the
Mediation/Arbitration
Program ...................................180
D
Daytime running lamps
(see Lamps) ................................63
Defrost
rear window ..............................62
Dipstick
automatic transmission
fluid ..........................................216
engine oil .................................193
Doors
lubricant specifications ..........226
Driving under special
conditions
through water .........................150
E
Electronic message center .........83
Emergencies, roadside
jump-starting ..........................169
Emission control system ..........213
Engine ........................................228
check engine/service engine
soon light ..................................10
Index
234