light FORD E-150 2002 Owner's Manual
[x] Cancel search | Manufacturer: FORD, Model Year: 2002, Model line: E-150, Model: FORD E-150 2002Pages: 256, PDF Size: 3.52 MB
Page 80 of 256
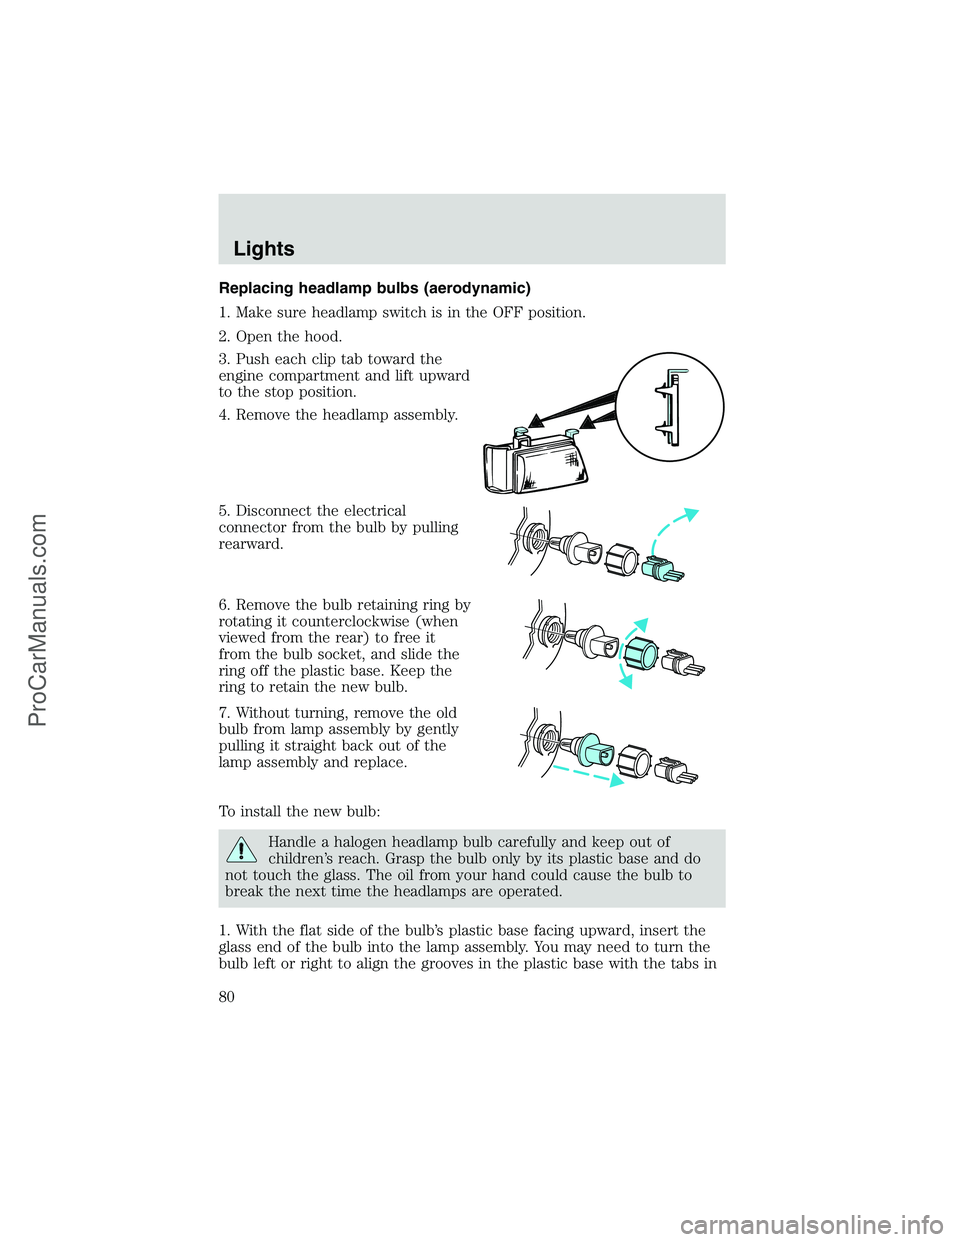
Replacing headlamp bulbs (aerodynamic)
1. Make sure headlamp switch is in the OFF position.
2. Open the hood.
3. Push each clip tab toward the
engine compartment and lift upward
to the stop position.
4. Remove the headlamp assembly.
5. Disconnect the electrical
connector from the bulb by pulling
rearward.
6. Remove the bulb retaining ring by
rotating it counterclockwise (when
viewed from the rear) to free it
from the bulb socket, and slide the
ring off the plastic base. Keep the
ring to retain the new bulb.
7. Without turning, remove the old
bulb from lamp assembly by gently
pulling it straight back out of the
lamp assembly and replace.
To install the new bulb:
Handle a halogen headlamp bulb carefully and keep out of
children’s reach. Grasp the bulb only by its plastic base and do
not touch the glass. The oil from your hand could cause the bulb to
break the next time the headlamps are operated.
1. With the flat side of the bulb’s plastic base facing upward, insert the
glass end of the bulb into the lamp assembly. You may need to turn the
bulb left or right to align the grooves in the plastic base with the tabs in
Lights
80
ProCarManuals.com
Page 81 of 256
the lamp assembly. When the grooves are aligned, push the bulb into the
socket until the plastic base contacts the rear of the lamp assembly.
2. Install the bulb retaining ring over the plastic base until it contacts the
rear of the lamp assembly by rotating clockwise until you feel a“stop.”
3. Install the electrical connector into the rear of the plastic base until it
snaps, locking it into position.
4. Install the headlamp assembly into the vehicle and secure it with the
clip tabs.
5. Turn the headlamps on and make sure they work properly. If the
headlamp was correctly aligned before you changed the bulb, you should
not need to align it again.
Replacing headlamp bulbs (low series)
1. Make sure headlamp switch is in OFF position.
2. Open the hood.
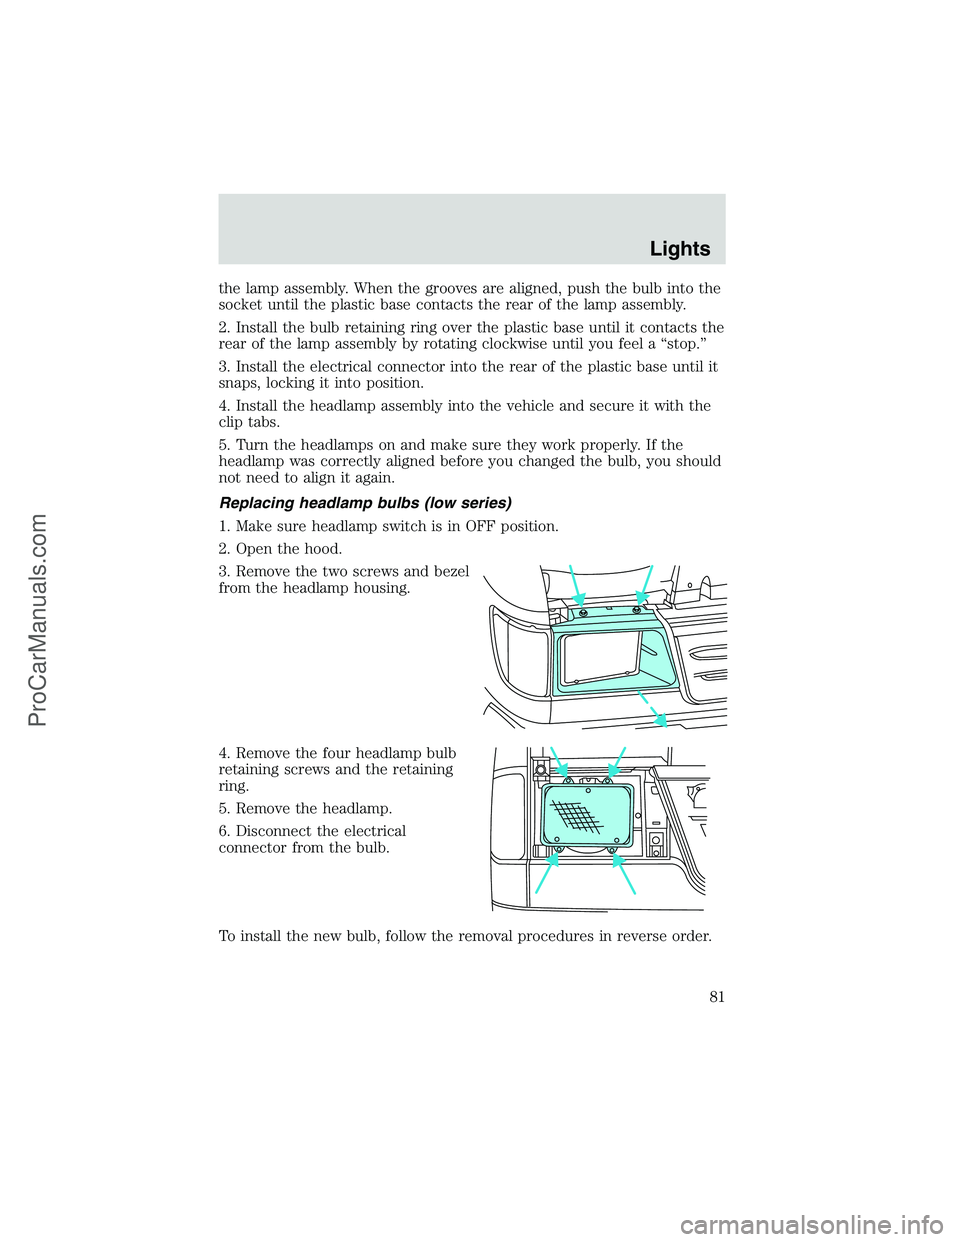
3. Remove the two screws and bezel
from the headlamp housing.
4. Remove the four headlamp bulb
retaining screws and the retaining
ring.
5. Remove the headlamp.
6. Disconnect the electrical
connector from the bulb.
To install the new bulb, follow the removal procedures in reverse order.
Lights
81
ProCarManuals.com
Page 82 of 256
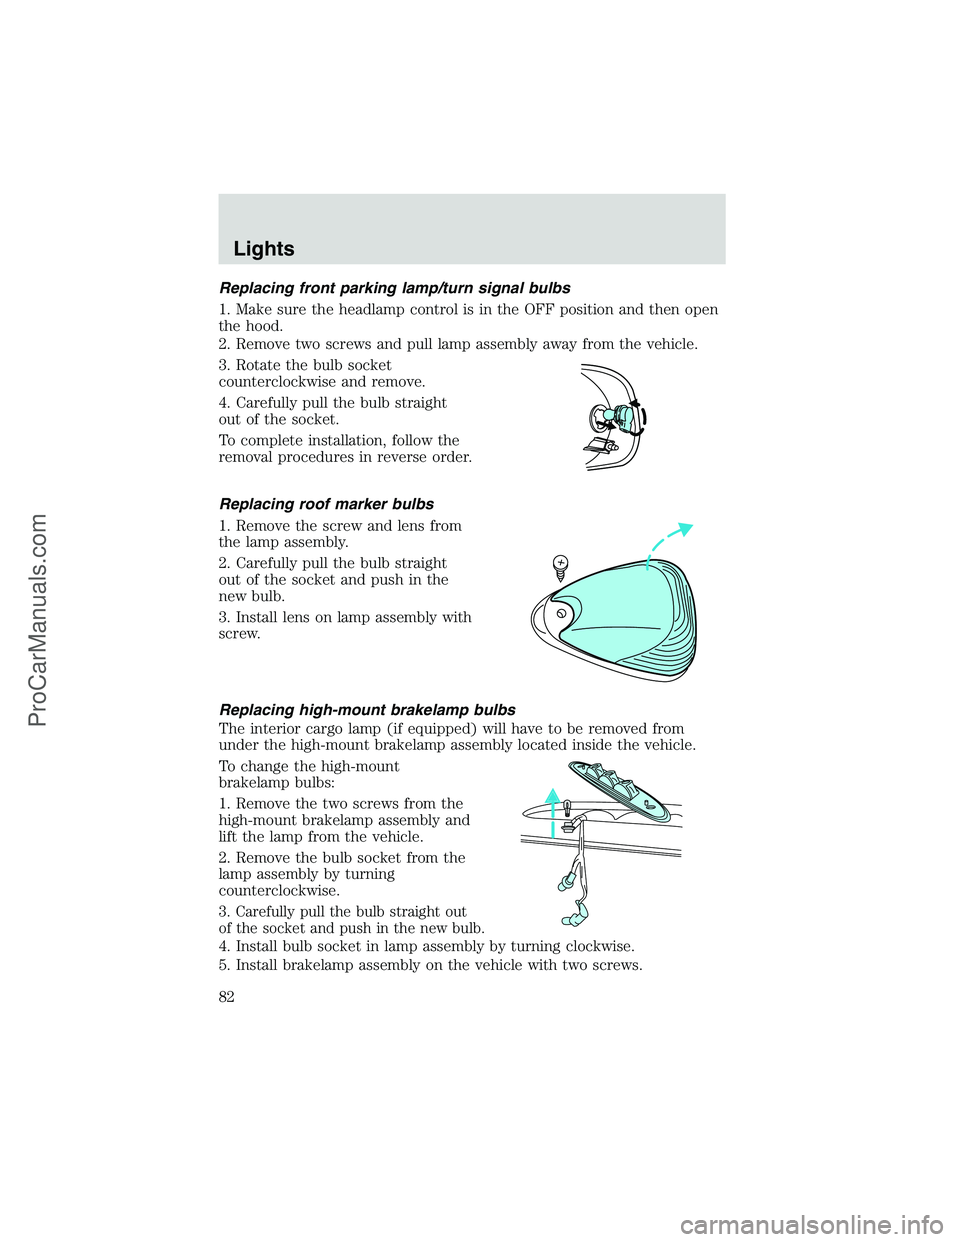
Replacing front parking lamp/turn signal bulbs
1. Make sure the headlamp control is in the OFF position and then open
the hood.
2. Remove two screws and pull lamp assembly away from the vehicle.
3. Rotate the bulb socket
counterclockwise and remove.
4. Carefully pull the bulb straight
out of the socket.
To complete installation, follow the
removal procedures in reverse order.
Replacing roof marker bulbs
1. Remove the screw and lens from
the lamp assembly.
2. Carefully pull the bulb straight
out of the socket and push in the
new bulb.
3. Install lens on lamp assembly with
screw.
Replacing high-mount brakelamp bulbs
The interior cargo lamp (if equipped) will have to be removed from
under the high-mount brakelamp assembly located inside the vehicle.
To change the high-mount
brakelamp bulbs:
1. Remove the two screws from the
high-mount brakelamp assembly and
lift the lamp from the vehicle.
2. Remove the bulb socket from the
lamp assembly by turning
counterclockwise.
3. Carefully pull the bulb straight out
of the socket and push in the new bulb.
4. Install bulb socket in lamp assembly by turning clockwise.
5. Install brakelamp assembly on the vehicle with two screws.
Lights
82
ProCarManuals.com
Page 83 of 256
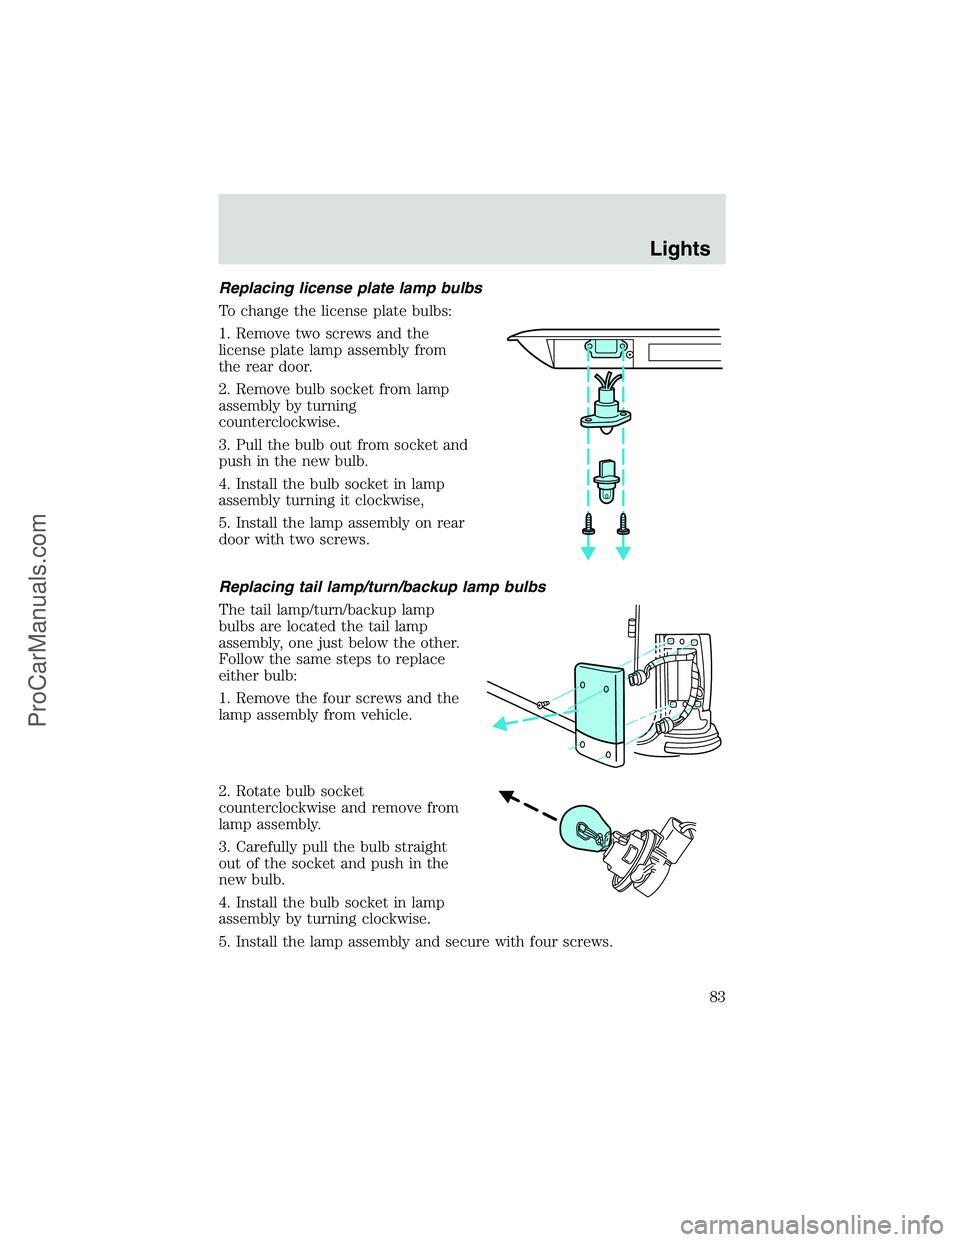
Replacing license plate lamp bulbs
To change the license plate bulbs:
1. Remove two screws and the
license plate lamp assembly from
the rear door.
2. Remove bulb socket from lamp
assembly by turning
counterclockwise.
3. Pull the bulb out from socket and
push in the new bulb.
4. Install the bulb socket in lamp
assembly turning it clockwise,
5. Install the lamp assembly on rear
door with two screws.
Replacing tail lamp/turn/backup lamp bulbs
The tail lamp/turn/backup lamp
bulbs are located the tail lamp
assembly, one just below the other.
Follow the same steps to replace
either bulb:
1. Remove the four screws and the
lamp assembly from vehicle.
2. Rotate bulb socket
counterclockwise and remove from
lamp assembly.
3. Carefully pull the bulb straight
out of the socket and push in the
new bulb.
4. Install the bulb socket in lamp
assembly by turning clockwise.
5. Install the lamp assembly and secure with four screws.
Lights
83
ProCarManuals.com
Page 86 of 256
Never adjust the steering wheel when the vehicle is moving.
AUXILIARY POWER POINT
Power outlets are designed for
accessory plugs only. Do not
hang any type of accessory or
accessory bracket from the plug.
Improper use of the power
outlet can cause damage not
covered by your warranty.
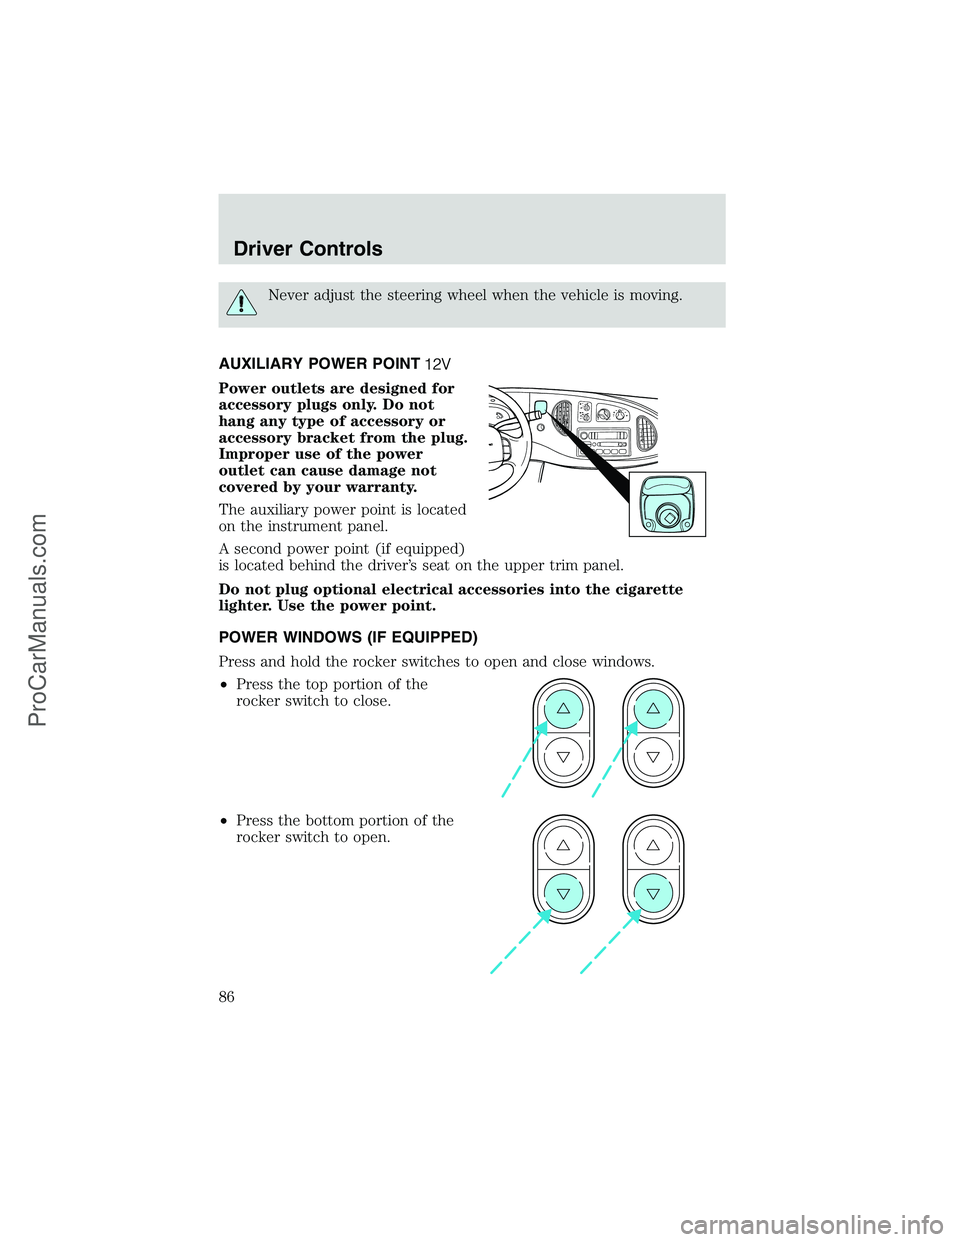
The auxiliary power point is located
on the instrument panel.
A second power point (if equipped)
is located behind the driver’s seat on the upper trim panel.
Do not plug optional electrical accessories into the cigarette
lighter. Use the power point.
POWER WINDOWS (IF EQUIPPED)
Press and hold the rocker switches to open and close windows.
•Press the top portion of the
rocker switch to close.
•Press the bottom portion of the
rocker switch to open.
Driver Controls
86
ProCarManuals.com
Page 92 of 256
Indicator light (if equipped)
This light comes on when either the
SET ACCEL or RES controls are
pressed. It turns off when the speed
control OFF control is pressed, the
brake is applied or the ignition is
turned to the OFF position.
OVERDRIVE CONTROL
Activating overdrive
(Overdrive) is the normal drive position for the best fuel economy.
The overdrive function allows automatic upshifts and downshifts through
all available gears.
Deactivating overdrive
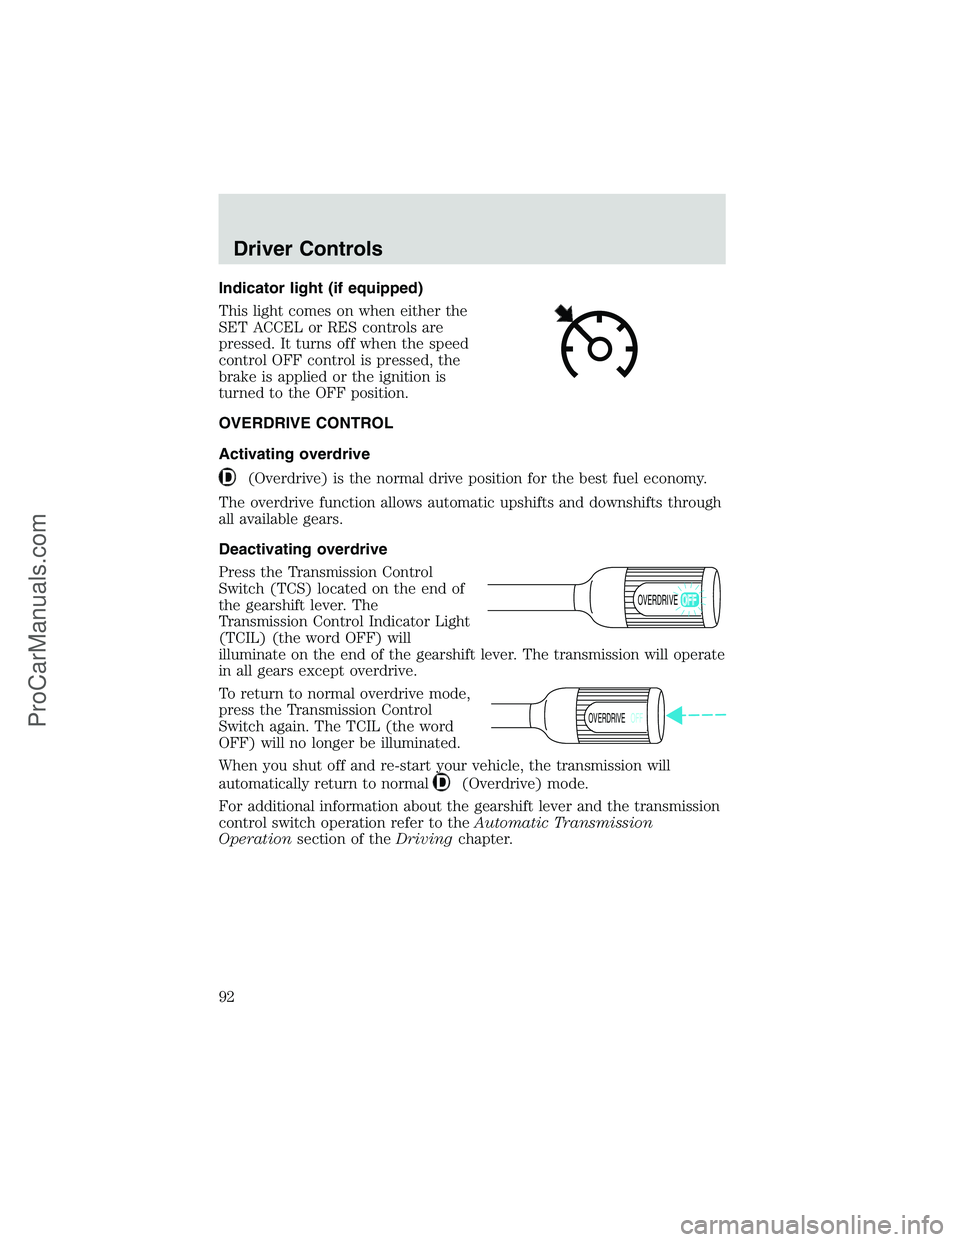
Press the Transmission Control
Switch (TCS) located on the end of
the gearshift lever. The
Transmission Control Indicator Light
(TCIL) (the word OFF) will
illuminate on the end of the gearshift lever. The transmission will operate
in all gears except overdrive.
To return to normal overdrive mode,
press the Transmission Control
Switch again. The TCIL (the word
OFF) will no longer be illuminated.
When you shut off and re-start your vehicle, the transmission will
automatically return to normal
(Overdrive) mode.
For additional information about the gearshift lever and the transmission
control switch operation refer to theAutomatic Transmission
Operationsection of theDrivingchapter.
OVERDRIVE
OVERDRIVEOFF
Driver Controls
92
ProCarManuals.com
Page 93 of 256
OVERHEAD CONSOLE (IF EQUIPPED)
The appearance of your vehicle’s overhead console will vary according to
your option package.
Storage compartment (if equipped)
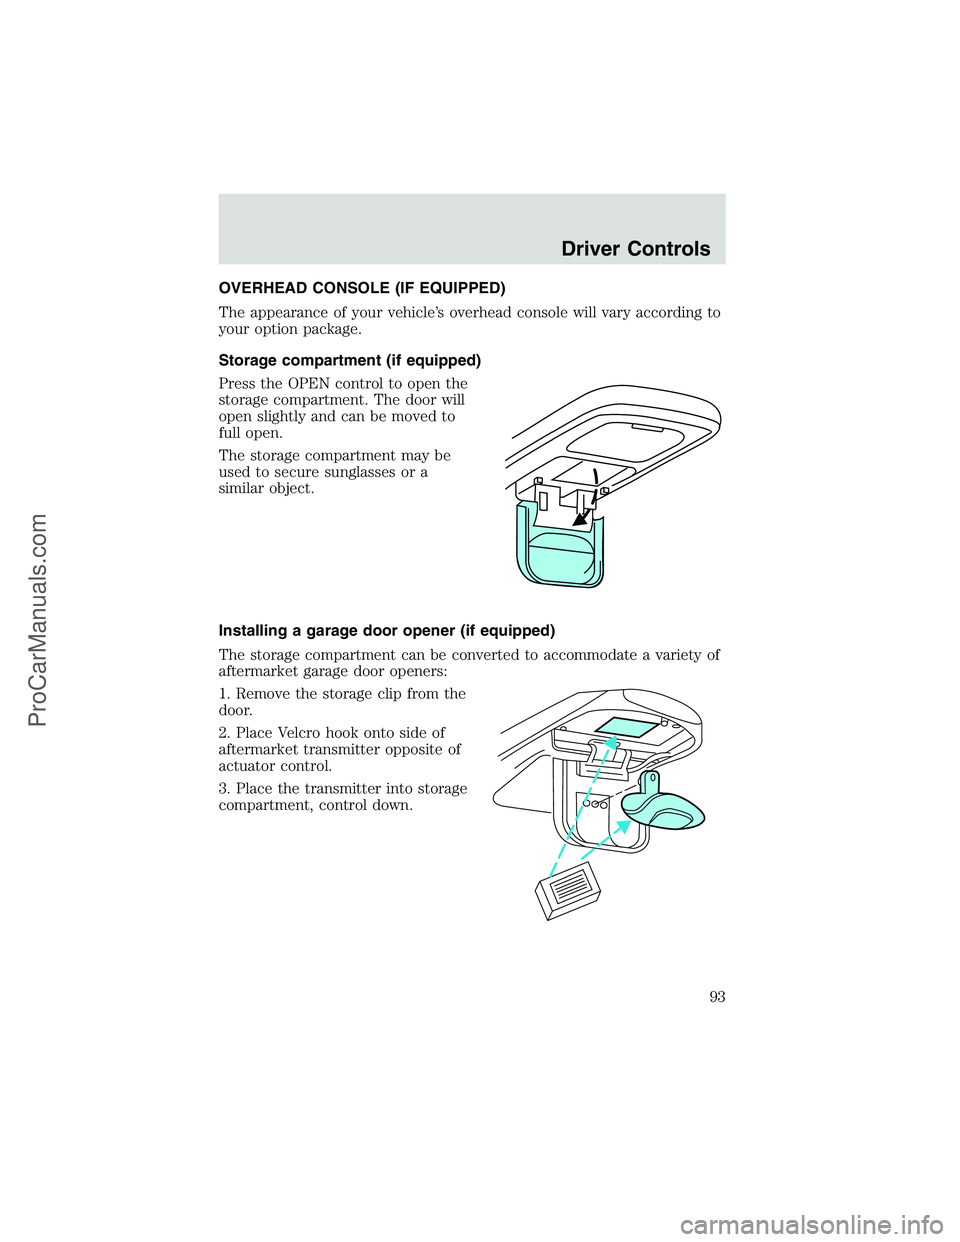
Press the OPEN control to open the
storage compartment. The door will
open slightly and can be moved to
full open.
The storage compartment may be
used to secure sunglasses or a
similar object.
Installing a garage door opener (if equipped)
The storage compartment can be converted to accommodate a variety of
aftermarket garage door openers:
1. Remove the storage clip from the
door.
2. Place Velcro hook onto side of
aftermarket transmitter opposite of
actuator control.
3. Place the transmitter into storage
compartment, control down.
Driver Controls
93
ProCarManuals.com
Page 100 of 256
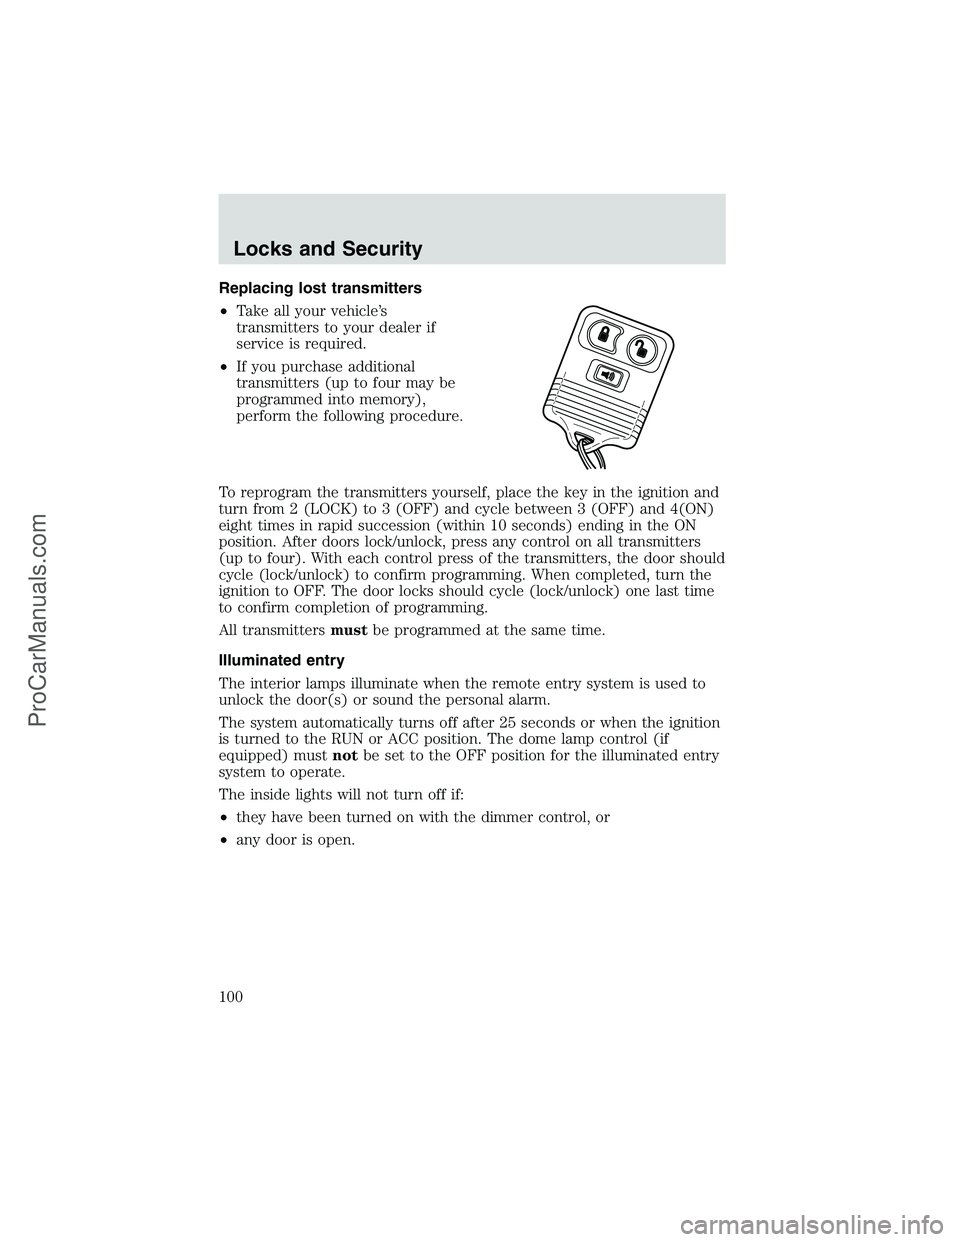
Replacing lost transmitters
•Take all your vehicle’s
transmitters to your dealer if
service is required.
•If you purchase additional
transmitters (up to four may be
programmed into memory),
perform the following procedure.
To reprogram the transmitters yourself, place the key in the ignition and
turn from 2 (LOCK) to 3 (OFF) and cycle between 3 (OFF) and 4(ON)
eight times in rapid succession (within 10 seconds) ending in the ON
position. After doors lock/unlock, press any control on all transmitters
(up to four). With each control press of the transmitters, the door should
cycle (lock/unlock) to confirm programming. When completed, turn the
ignition to OFF. The door locks should cycle (lock/unlock) one last time
to confirm completion of programming.
All transmittersmustbe programmed at the same time.
Illuminated entry
The interior lamps illuminate when the remote entry system is used to
unlock the door(s) or sound the personal alarm.
The system automatically turns off after 25 seconds or when the ignition
is turned to the RUN or ACC position. The dome lamp control (if
equipped) mustnotbe set to the OFF position for the illuminated entry
system to operate.
The inside lights will not turn off if:
•they have been turned on with the dimmer control, or
•any door is open.
Locks and Security
100
ProCarManuals.com
Page 114 of 256
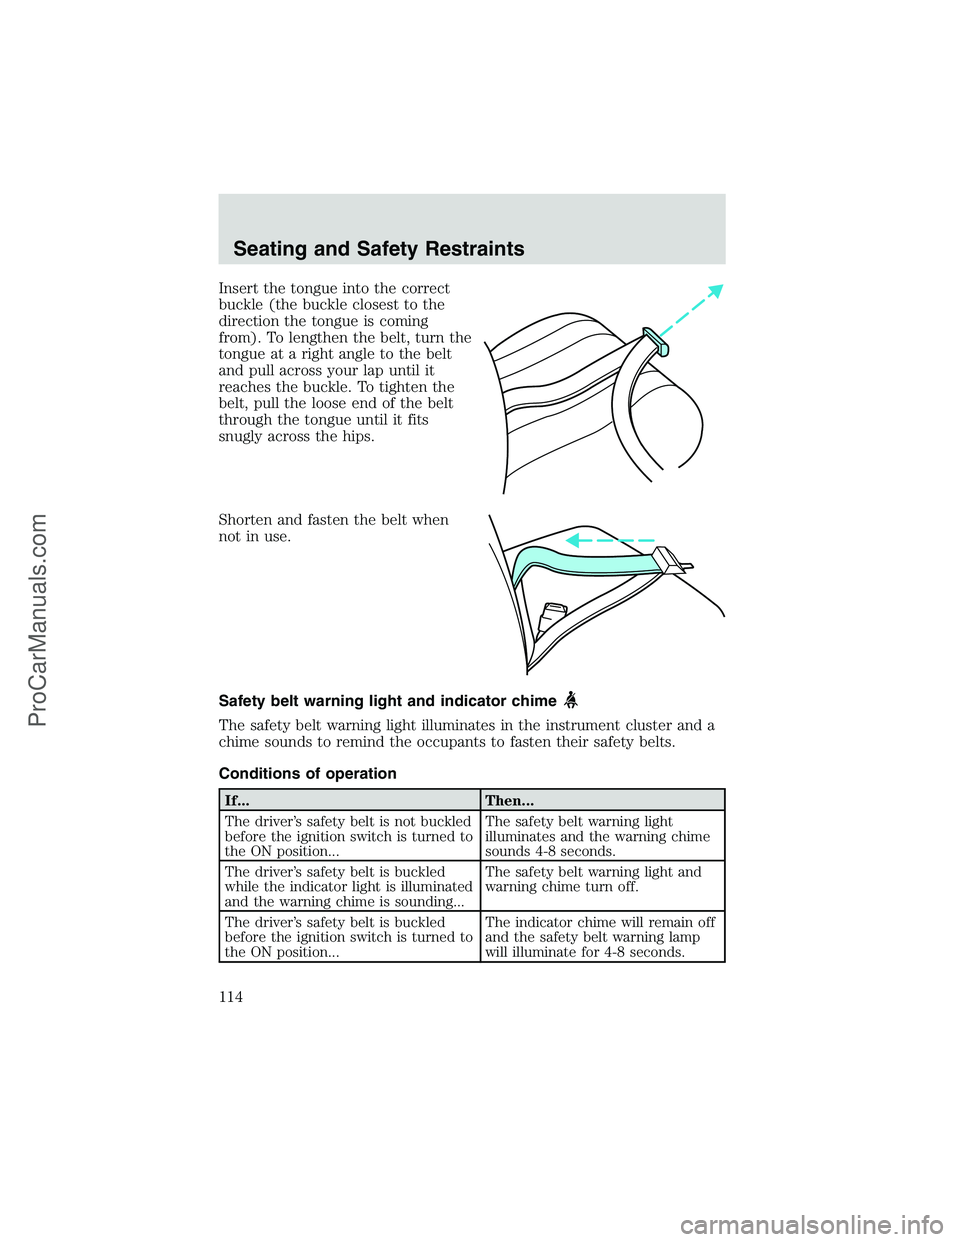
Insert the tongue into the correct
buckle (the buckle closest to the
direction the tongue is coming
from). To lengthen the belt, turn the
tongue at a right angle to the belt
and pull across your lap until it
reaches the buckle. To tighten the
belt, pull the loose end of the belt
through the tongue until it fits
snugly across the hips.
Shorten and fasten the belt when
not in use.
Safety belt warning light and indicator chime
The safety belt warning light illuminates in the instrument cluster and a
chime sounds to remind the occupants to fasten their safety belts.
Conditions of operation
If... Then...
The driver’s safety belt is not buckled
before the ignition switch is turned to
the ON position...The safety belt warning light
illuminates and the warning chime
sounds 4-8 seconds.
The driver’s safety belt is buckled
while the indicator light is illuminated
and the warning chime is sounding...The safety belt warning light and
warning chime turn off.
The driver’s safety belt is buckled
before the ignition switch is turned to
the ON position...The indicator chime will remain off
and the safety belt warning lamp
will illuminate for 4-8 seconds.
Seating and Safety Restraints
114
ProCarManuals.com
Page 115 of 256
BeltMinder
The BeltMinder feature is a supplemental warning to the safety belt
warning function. This feature provides additional reminders to the
driver that the driver’s safety belt is unbuckled by intermittently
sounding a chime and illuminating the safety belt warning lamp in the
instrument cluster.
If... Then...
The driver’s safety belt is not
buckled approximately 5
seconds after the safety belt
warning light has turned off...The BeltMinder feature is activated -
the safety belt warning light
illuminates and the warning chime
sounds for 6 seconds every 30
seconds, repeating for approximately
5 minutes or until safety belt is
buckled.
The driver’s safety belt is
buckled while the safety belt
indicator light is illuminated
and the safety belt warning
chime is sounding...The BeltMinder feature will not
activate.
The driver’s safety belt is
buckled before the ignition
switch is turned to the ON
position...The BeltMinder feature will not
activate.
The purpose of the BeltMinder is to remind occasional wearers to wear
safety belts all of the time.
The following are reasons most often given for not wearing safety belts:
(All statistics based on U.S. data)
Reasons given... Consider...
“Crashes are rare events”36700 crashes occur every day.The
more we drive, the more we are
exposed to“rare”events, even for
good drivers.1 in 4 of us will be
seriously injured in a crash during
our lifetime.
“I’m not going far”3of4fatal crashes occur within25
miles of home.
Seating and Safety Restraints
115
ProCarManuals.com