key FORD E-150 2006 Owner's Manual
[x] Cancel search | Manufacturer: FORD, Model Year: 2006, Model line: E-150, Model: FORD E-150 2006Pages: 256, PDF Size: 2.82 MB
Page 157 of 256
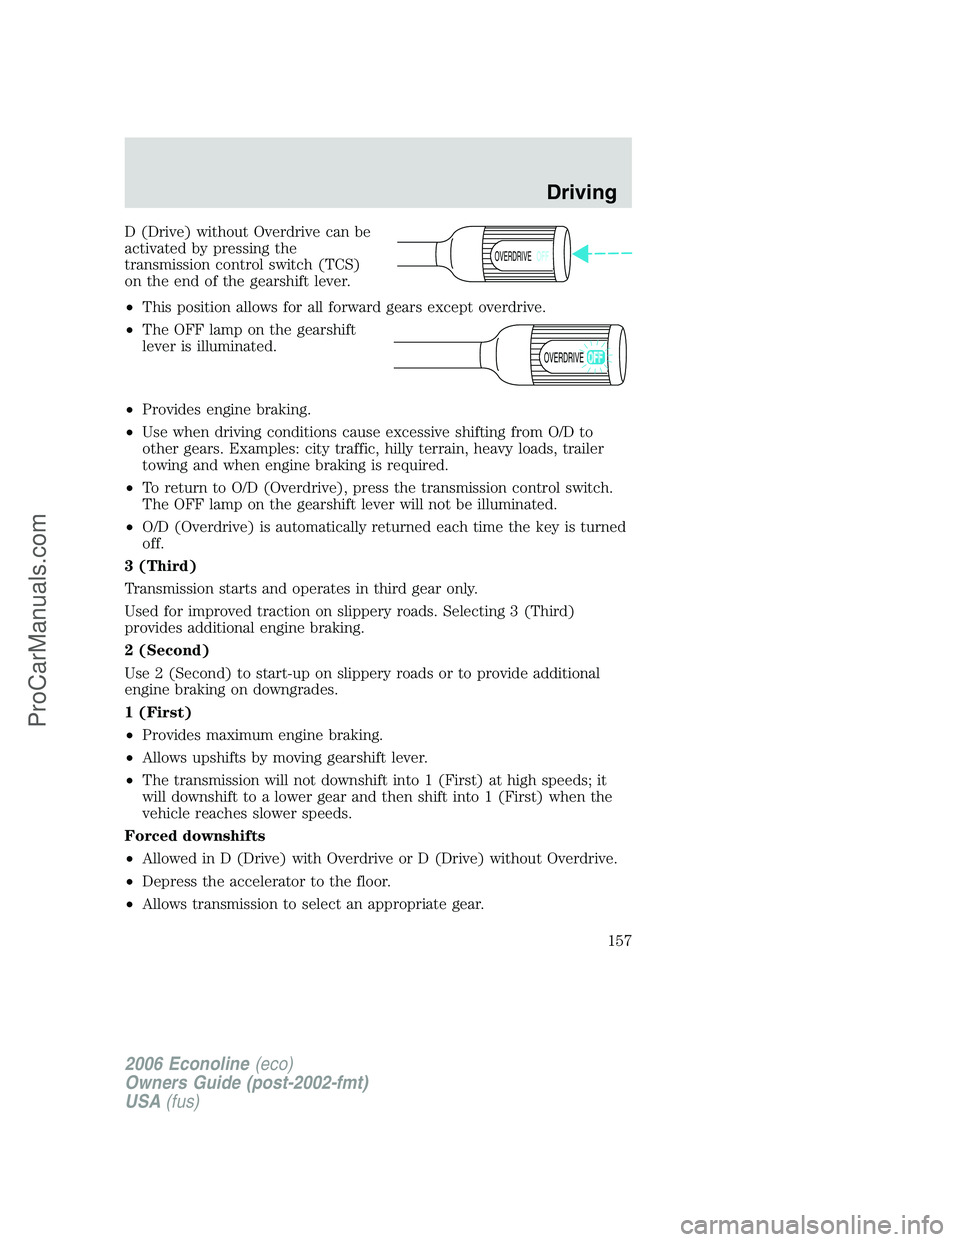
D (Drive) without Overdrive can be
activated by pressing the
transmission control switch (TCS)
on the end of the gearshift lever.
•This position allows for all forward gears except overdrive.
•The OFF lamp on the gearshift
lever is illuminated.
•Provides engine braking.
•Use when driving conditions cause excessive shifting from O/D to
other gears. Examples: city traffic, hilly terrain, heavy loads, trailer
towing and when engine braking is required.
•To return to O/D (Overdrive), press the transmission control switch.
The OFF lamp on the gearshift lever will not be illuminated.
•O/D (Overdrive) is automatically returned each time the key is turned
off.
3 (Third)
Transmission starts and operates in third gear only.
Used for improved traction on slippery roads. Selecting 3 (Third)
provides additional engine braking.
2 (Second)
Use 2 (Second) to start-up on slippery roads or to provide additional
engine braking on downgrades.
1 (First)
•Provides maximum engine braking.
•Allows upshifts by moving gearshift lever.
•The transmission will not downshift into 1 (First) at high speeds; it
will downshift to a lower gear and then shift into 1 (First) when the
vehicle reaches slower speeds.
Forced downshifts
•Allowed in D (Drive) with Overdrive or D (Drive) without Overdrive.
•Depress the accelerator to the floor.
•Allows transmission to select an appropriate gear.
OVERDRIVEOFF
OVERDRIVE
2006 Econoline(eco)
Owners Guide (post-2002-fmt)
USA(fus)
Driving
157
ProCarManuals.com
Page 160 of 256
ROADSIDE ASSISTANCE
Getting roadside assistance
To fully assist you should you have a vehicle concern, Ford Motor
Company offers a complimentary roadside assistance program. This
program is separate from the New Vehicle Limited Warranty. The service
is available:
•24–hours, seven days a week
•for the New Vehicle Limited Warranty period of three years or 36,000
miles (60,000 km), whichever occurs first on Ford and Mercury
vehicles, and four years or 50,000 miles (80,000 km) on Lincoln
vehicles.
Roadside assistance will cover:
•a flat tire change with a good spare (except Ford GT which has a tire
inflation kit)
•battery jump start
•lock-out assistance (key replacement cost is the customer’s
responsibility)
•fuel delivery – Independent Service Contractors, if not prohibited by
state, local or municipal law shall deliver up to 2.0 gallons (7.5L) of
gasoline or 5 gallons (18.9L) of diesel fuel to a disabled vehicle. Fuel
delivery service is limited to two no-charge occurrences within a
12-month period.
•winch out – available within 100 feet (30.5 meters) of a paved or
county maintained road, no recoveries.
•towing – Ford/Mercury/Lincoln eligible vehicle towed to an authorized
dealer within 35 miles (56.3 km) of the disablement location or to the
nearest authorized dealer. If a member requests to be towed to an
authorized dealer more than 35 miles (56.3 km) from the disablement
location, the member shall be responsible for any mileage costs in
excess of 35 miles (56.3 km).
Trailers shall be covered up to $100 if the disabled eligible vehicle
requires service at the nearest authorized dealer. If the trailer is disabled,
but the towing vehicle is operational, the trailer does not qualify for any
roadside services.
2006 Econoline(eco)
Owners Guide (post-2002-fmt)
USA(fus)
Roadside Emergencies
160
ProCarManuals.com
Page 162 of 256
HAZARD FLASHER
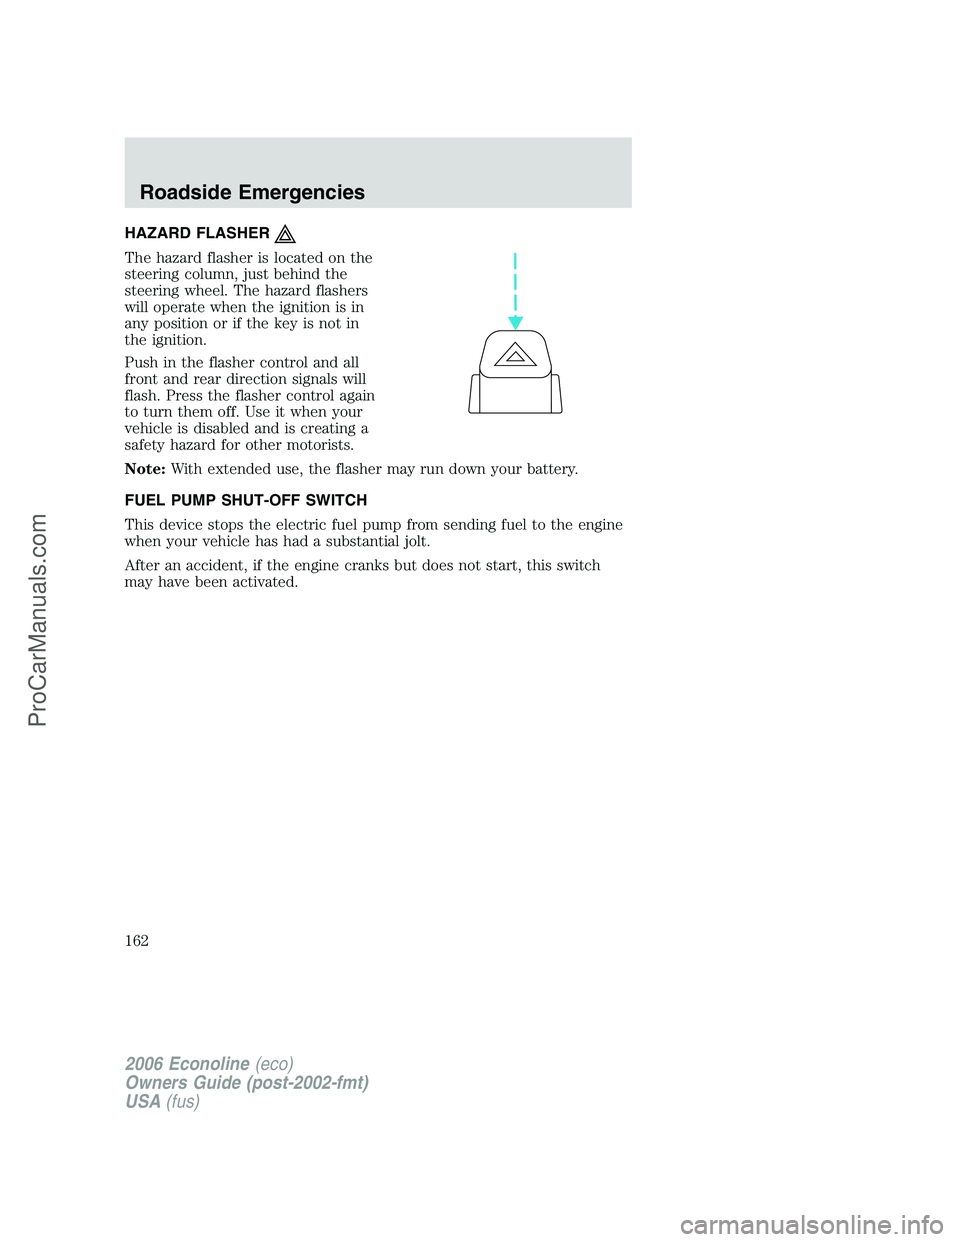
The hazard flasher is located on the
steering column, just behind the
steering wheel. The hazard flashers
will operate when the ignition is in
any position or if the key is not in
the ignition.
Push in the flasher control and all
front and rear direction signals will
flash. Press the flasher control again
to turn them off. Use it when your
vehicle is disabled and is creating a
safety hazard for other motorists.
Note:With extended use, the flasher may run down your battery.
FUEL PUMP SHUT-OFF SWITCH
This device stops the electric fuel pump from sending fuel to the engine
when your vehicle has had a substantial jolt.
After an accident, if the engine cranks but does not start, this switch
may have been activated.
2006 Econoline(eco)
Owners Guide (post-2002-fmt)
USA(fus)
Roadside Emergencies
162
ProCarManuals.com
Page 163 of 256
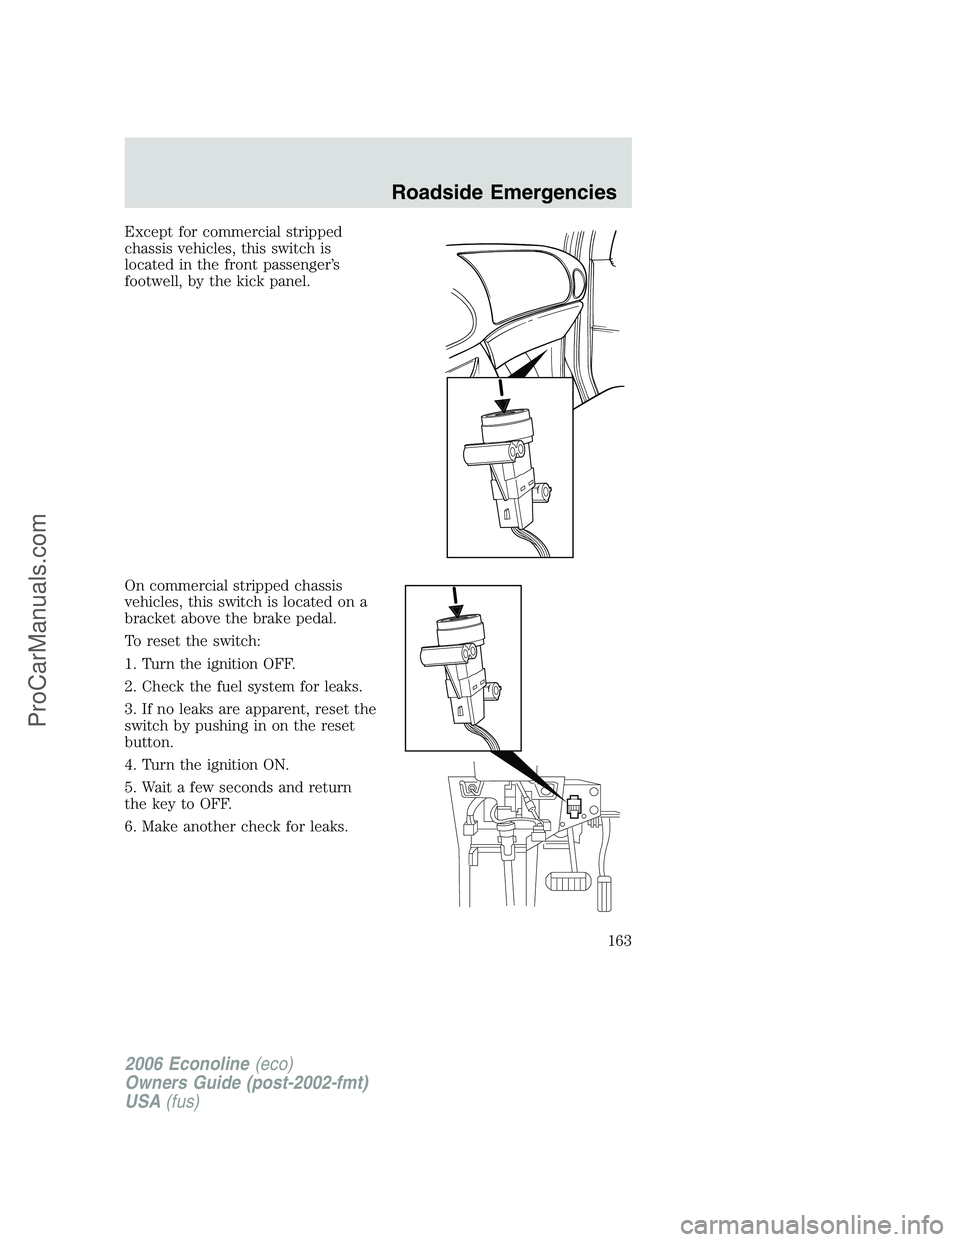
Except for commercial stripped
chassis vehicles, this switch is
located in the front passenger’s
footwell, by the kick panel.
On commercial stripped chassis
vehicles, this switch is located on a
bracket above the brake pedal.
To reset the switch:
1. Turn the ignition OFF.
2. Check the fuel system for leaks.
3. If no leaks are apparent, reset the
switch by pushing in on the reset
button.
4. Turn the ignition ON.
5. Wait a few seconds and return
the key to OFF.
6. Make another check for leaks.
2006 Econoline(eco)
Owners Guide (post-2002-fmt)
USA(fus)
Roadside Emergencies
163
ProCarManuals.com
Page 165 of 256
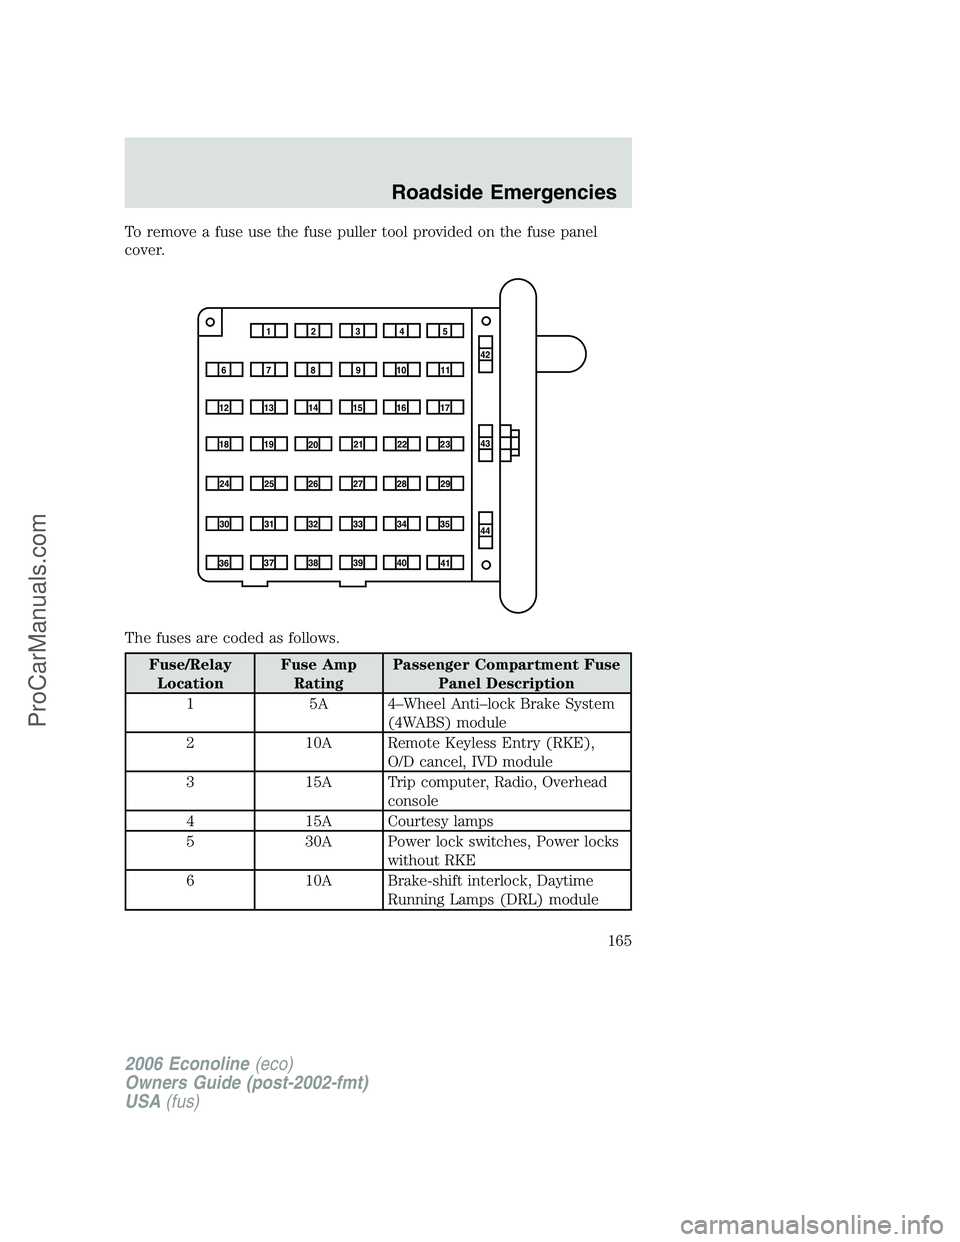
To remove a fuse use the fuse puller tool provided on the fuse panel
cover.
The fuses are coded as follows.
Fuse/Relay
LocationFuse Amp
RatingPassenger Compartment Fuse
Panel Description
1 5A 4–Wheel Anti–lock Brake System
(4WABS) module
2 10A Remote Keyless Entry (RKE),
O/D cancel, IVD module
3 15A Trip computer, Radio, Overhead
console
4 15A Courtesy lamps
5 30A Power lock switches, Power locks
without RKE
6 10A Brake-shift interlock, Daytime
Running Lamps (DRL) module
1234
5
7
689101142
43
44 13 12 14
15 16 17
19 18
2021 22 23
25 24
26 27 28 29
31 30 32 33 3435
37
3638 3940
41
2006 Econoline(eco)
Owners Guide (post-2002-fmt)
USA(fus)
Roadside Emergencies
165
ProCarManuals.com
Page 180 of 256
5. Repeat this tightness check procedure when servicing the spare tire
pressure (every six months, as per yourscheduled maintenance
information),or at any time that the spare tire is disturbed through
service of other components.
6. If removed, install the spare tire lock (if equipped) into the bumper
drive tube with the spare tire lock key (if equipped) and jack handle.
WHEEL LUG NUT TORQUE SPECIFICATIONS
On vehicles equipped with single rear wheels, retighten the lug nuts to
the specified torque at 500 miles (800 km) after any wheel disturbance
(tire rotation, changing a flat tire, wheel removal, etc.).
On vehicles equipped with dual rear wheels, retighten the wheel lug nuts
to the specified torque at 100 miles (160 km), and again at 500 miles
(800 km) of new vehicle operation and after any wheel disturbance (tire
rotation, changing a flat tire, wheel removal, etc.).
Bolt size Wheel lug nut torque*
lb.ft. N•m
E-150: 1/2–20 100 135
E-250, E-350 and
E-450: 9/16–18140 190
* Torque specifications are for nut and bolt threads free of dirt and
rust. Use only Ford recommended replacement fasteners.
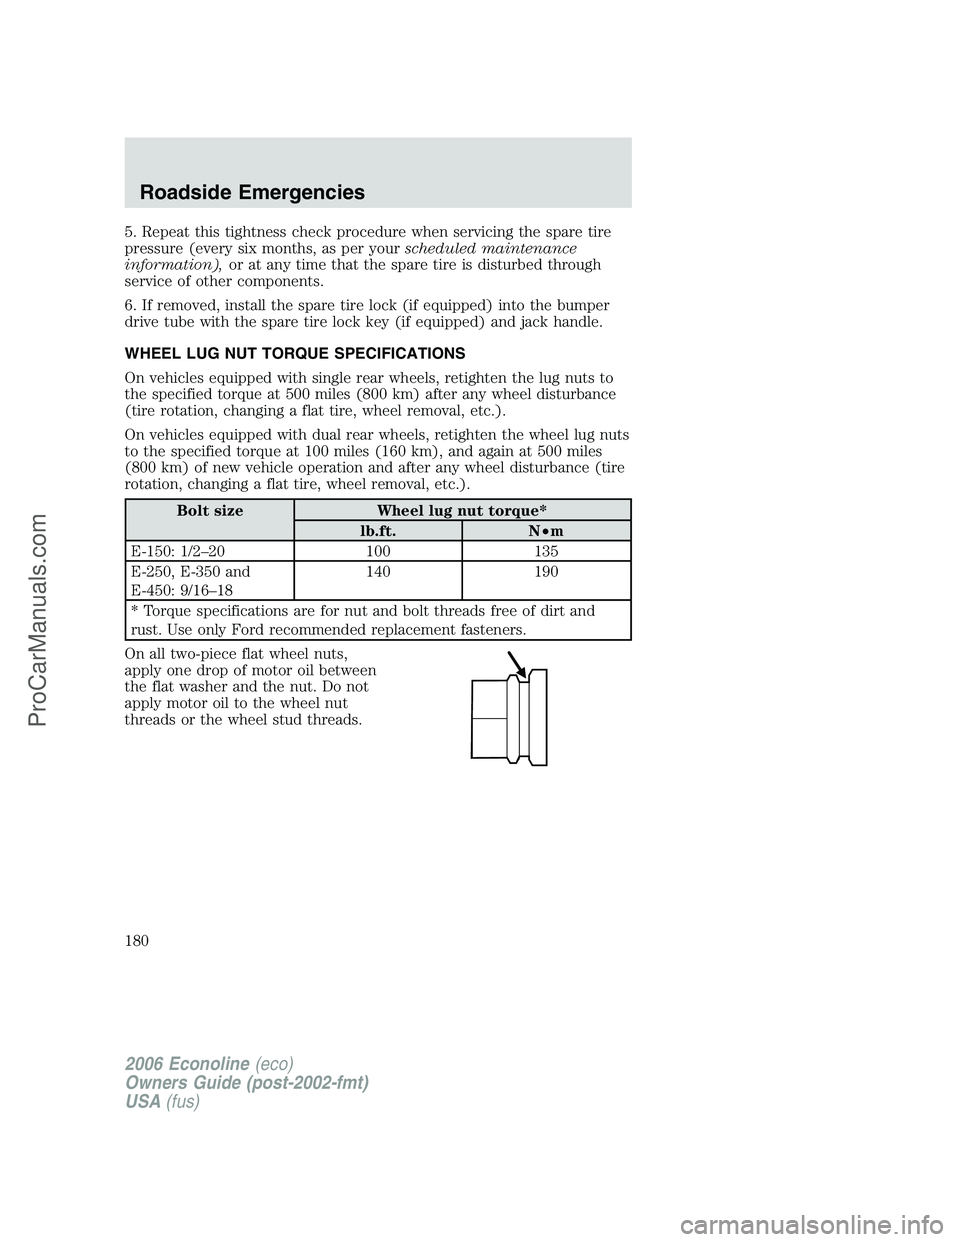
On all two-piece flat wheel nuts,
apply one drop of motor oil between
the flat washer and the nut. Do not
apply motor oil to the wheel nut
threads or the wheel stud threads.
2006 Econoline(eco)
Owners Guide (post-2002-fmt)
USA(fus)
Roadside Emergencies
180
ProCarManuals.com
Page 200 of 256
SERVICE RECOMMENDATIONS
To help you service your vehicle we providescheduled maintenance
informationwhich makes tracking routine service easy.
If your vehicle requires professional service, your authorized dealer can
provide the necessary parts and service. Check yourWarranty
Guide/Owner Information Guideto find out which parts and services
are covered.
Use only recommended fuels, lubricants, fluids and service parts
conforming to specifications. Motorcraft parts are designed and built to
provide the best performance in your vehicle.
PRECAUTIONS WHEN SERVICING YOUR VEHICLE
•Do not work on a hot engine.
•Make sure that nothing gets caught in moving parts.
•Do not work on a vehicle with the engine running in an enclosed
space, unless you are sure you have enough ventilation.
•Keep all open flames and other lit material away from the battery and
all fuel related parts.
Working with the engine off
1. Set the parking brake and shift to P (Park).
2. Turn off the engine and remove the key.
3. Block the wheels.
Working with the engine on
1. Set the parking brake and shift to P (Park).
2. Block the wheels.
To reduce the risk of vehicle damage and/or personal burn
injuries do not start your engine with the air cleaner removed
and do not remove it while the engine is running.
2006 Econoline(eco)
Owners Guide (post-2002-fmt)
USA(fus)
Maintenance and Specifications
200
ProCarManuals.com
Page 248 of 256
F
Fail safe cooling ........................214
Fluid capacities .........................232
Four-Wheel Drive vehicles
preparing to drive your
vehicle .....................................148
Fuel ............................................215
calculating fuel economy .......220
cap ...........................................217
capacity ...................................232
choosing the right fuel ...........218
comparisons with EPA fuel
economy estimates .................223
detergent in fuel .....................219
filling your vehicle with
fuel ...........................215, 217, 220
filter, specifications ........215, 231
fuel pump shut-off switch .....162
improving fuel economy ........220
octane rating ...........219, 239–240
quality ......................................219
running out of fuel .................219
safety information relating to
automotive fuels .....................215
Fuses ..........................................164
G
Garage door opener ....................45
Gas cap (see Fuel cap) ............217
Gas mileage
(see Fuel economy) .................220
Gauges .........................................16
H
Hazard flashers .........................162
Headlamps ...................................34
bulb specifications ....................39daytime running lights .............35
flash to pass ..............................35
high beam .................................35
replacing bulbs .........................40
turning on and off ....................34
Heating
heater only system .............31, 33
heating and air conditioning
system .......................................32
Hood ..........................................201
I
Ignition .......................139, 239–240
Infant seats (see Safety seats) ..89
Inspection/maintenance (I/M)
testing ........................................225
Instrument panel
cleaning ...................................197
cluster ........................................12
lighting up panel and
interior .......................................36
J
Jump-starting your vehicle ......181
K
Keys .............................................54
positions of the ignition .........139
L
Lamps
bulb replacement
specifications chart ..................39
daytime running light ...............35
headlamps .................................34
headlamps, flash to pass ..........35
instrument panel, dimming .....36
2006 Econoline(eco)
Owners Guide (post-2002-fmt)
USA(fus)
Index
248
ProCarManuals.com