key FORD E-250 2008 Owner's Guide
[x] Cancel search | Manufacturer: FORD, Model Year: 2008, Model line: E-250, Model: FORD E-250 2008Pages: 285, PDF Size: 2.81 MB
Page 183 of 285
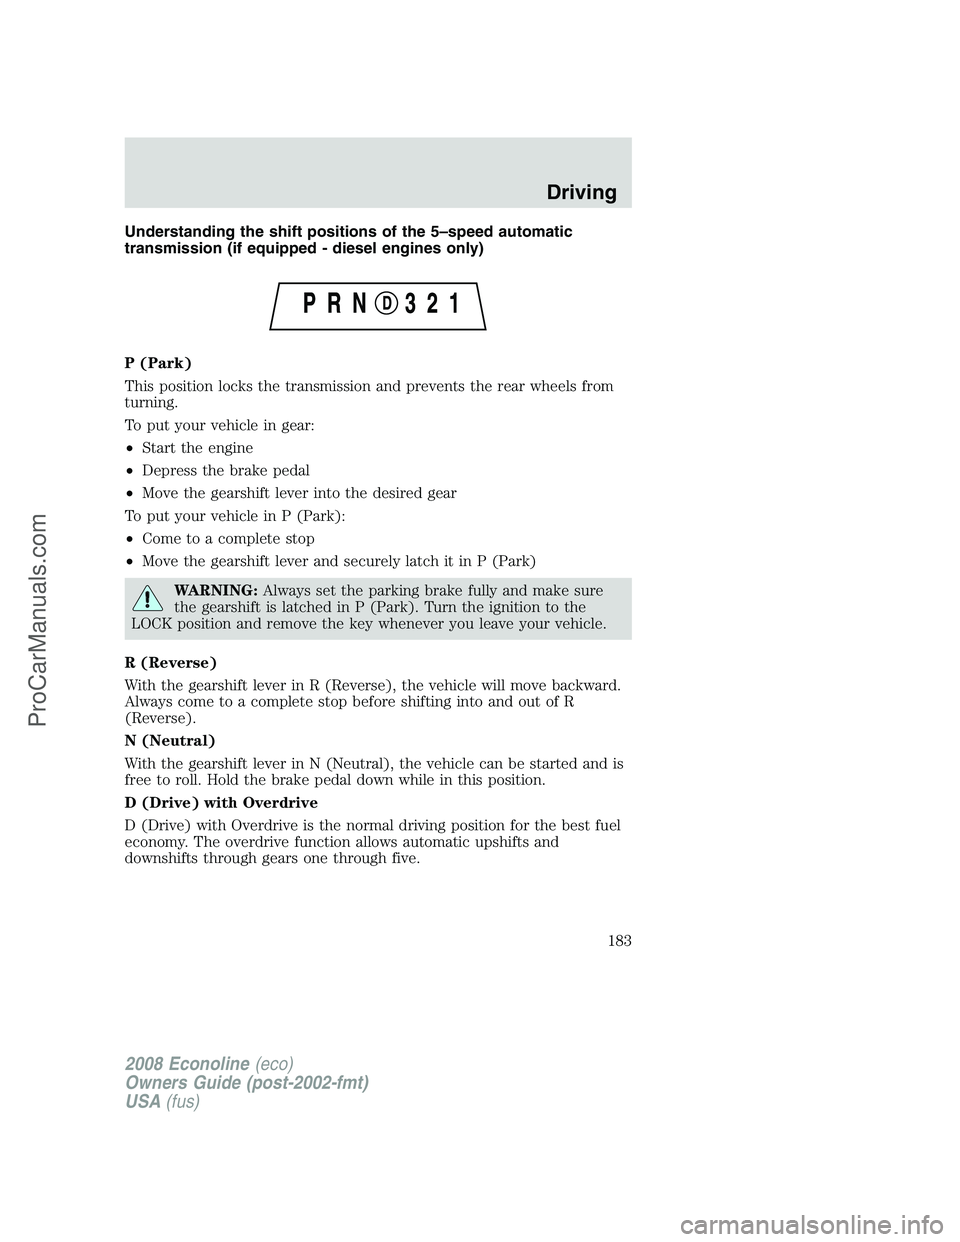
Understanding the shift positions of the 5–speed automatic
transmission (if equipped - diesel engines only)
P (Park)
This position locks the transmission and prevents the rear wheels from
turning.
To put your vehicle in gear:
•Start the engine
•Depress the brake pedal
•Move the gearshift lever into the desired gear
To put your vehicle in P (Park):
•Come to a complete stop
•Move the gearshift lever and securely latch it in P (Park)
WARNING:Always set the parking brake fully and make sure
the gearshift is latched in P (Park). Turn the ignition to the
LOCK position and remove the key whenever you leave your vehicle.
R (Reverse)
With the gearshift lever in R (Reverse), the vehicle will move backward.
Always come to a complete stop before shifting into and out of R
(Reverse).
N (Neutral)
With the gearshift lever in N (Neutral), the vehicle can be started and is
free to roll. Hold the brake pedal down while in this position.
D (Drive) with Overdrive
D (Drive) with Overdrive is the normal driving position for the best fuel
economy. The overdrive function allows automatic upshifts and
downshifts through gears one through five.
2008 Econoline(eco)
Owners Guide (post-2002-fmt)
USA(fus)
Driving
183
ProCarManuals.com
Page 184 of 285
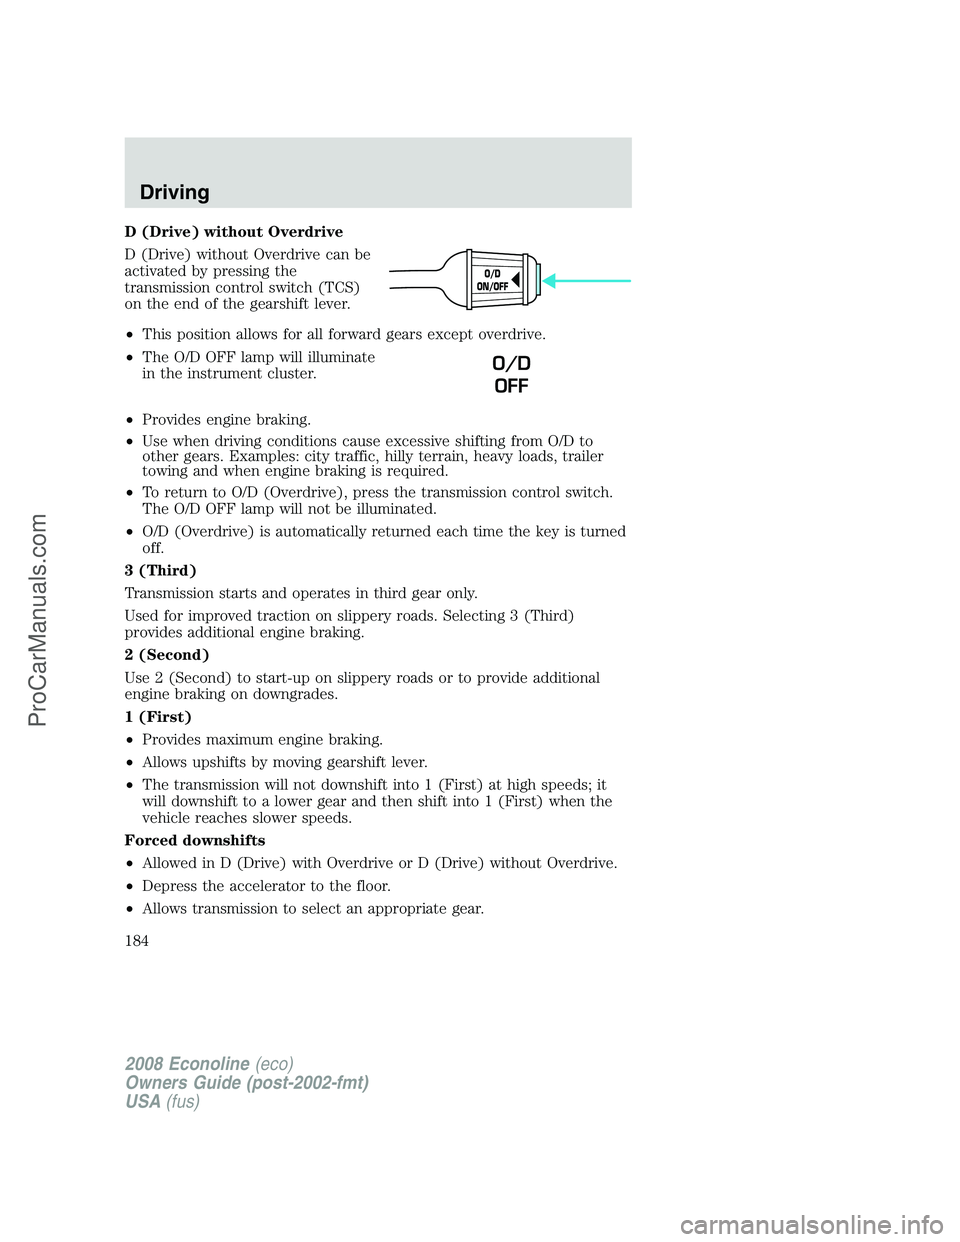
D (Drive) without Overdrive
D (Drive) without Overdrive can be
activated by pressing the
transmission control switch (TCS)
on the end of the gearshift lever.
•This position allows for all forward gears except overdrive.
•The O/D OFF lamp will illuminate
in the instrument cluster.
•Provides engine braking.
•Use when driving conditions cause excessive shifting from O/D to
other gears. Examples: city traffic, hilly terrain, heavy loads, trailer
towing and when engine braking is required.
•To return to O/D (Overdrive), press the transmission control switch.
The O/D OFF lamp will not be illuminated.
•O/D (Overdrive) is automatically returned each time the key is turned
off.
3 (Third)
Transmission starts and operates in third gear only.
Used for improved traction on slippery roads. Selecting 3 (Third)
provides additional engine braking.
2 (Second)
Use 2 (Second) to start-up on slippery roads or to provide additional
engine braking on downgrades.
1 (First)
•Provides maximum engine braking.
•Allows upshifts by moving gearshift lever.
•The transmission will not downshift into 1 (First) at high speeds; it
will downshift to a lower gear and then shift into 1 (First) when the
vehicle reaches slower speeds.
Forced downshifts
•Allowed in D (Drive) with Overdrive or D (Drive) without Overdrive.
•Depress the accelerator to the floor.
•Allows transmission to select an appropriate gear.
O/D
ON/OFF
O/D
OFF
2008 Econoline(eco)
Owners Guide (post-2002-fmt)
USA(fus)
Driving
184
ProCarManuals.com
Page 189 of 285
ROADSIDE ASSISTANCE
Getting roadside assistance
To fully assist you should you have a vehicle concern, Ford Motor
Company offers a complimentary roadside assistance program. This
program is separate from the New Vehicle Limited Warranty. The service
is available:
•24–hours, seven days a week
•for the coverage period listed on the Roadside Assistance Card
included in your Owner Guide portfolio.
Roadside assistance will cover:
•a flat tire change with a good spare (except vehicles that have been
supplied with a tire inflation kit)
•battery jump start
•lock-out assistance (key replacement cost is the customer’s
responsibility)
•fuel delivery – Independent Service Contractors, if not prohibited by
state, local or municipal law shall deliver up to 2.0 gallons (7.5L) of
gasoline or 5 gallons (18.9L) of diesel fuel to a disabled vehicle. Fuel
delivery service is limited to two no-charge occurrences within a
12-month period.
•winch out – available within 100 feet (30.5 meters) of a paved or
county maintained road, no recoveries.
•towing – Ford/Mercury/Lincoln eligible vehicle towed to an authorized
dealer within 35 miles (56.3 km) of the disablement location or to the
nearest authorized dealer. If a member requests to be towed to an
authorized dealer more than 35 miles (56.3 km) from the disablement
location, the member shall be responsible for any mileage costs in
excess of 35 miles (56.3 km).
Trailers shall be covered up to $200 if the disabled eligible vehicle
requires service at the nearest authorized dealer. If the trailer is disabled,
but the towing vehicle is operational, the trailer does not qualify for any
roadside services.
Canadian customers refer to your Customer Information Guide
for information on:
•coverage period
•exact fuel amounts
2008 Econoline(eco)
Owners Guide (post-2002-fmt)
USA(fus)
Roadside Emergencies
189
ProCarManuals.com
Page 190 of 285
•towing of your disabled vehicle
•emergency travel expense reimbursement
•travel planning benefits
In Canada, for uninterrupted Roadside Assistance coverage, you may
purchase extended coverage prior to your Basic Warranty’s Roadside
Assistance expiring. For more information and enrollment, contact
1–877–294–2582 or visit our website at www.ford.ca.
Using roadside assistance
Complete the roadside assistance identification card and place it in your
wallet for quick reference. In the United States, this card is found in the
Owner Guide portfolio in the glove compartment. In Canada, the card is
found in theOwner Information Guidein the glove compartment.
U.S. Ford, Mercury and Lincoln vehicle customers who require Roadside
Assistance, call 1-800-241-3673.
Canadian customers who require roadside assistance, call
1-800-665-2006.
Motorhome customers in the U.S and Canada should contact
1-800-444-3311.
If you need to arrange roadside assistance for yourself, Ford Motor
Company will reimburse a reasonable amount for towing to the nearest
dealership within 35 miles. To obtain reimbursement information, U.S.
Ford, Mercury and Lincoln vehicle customers call 1-800-241-3673.
Customers will be asked to submit their original receipts.
Canadian customers who need to obtain reimbursement information, call
1-800-665-2006.
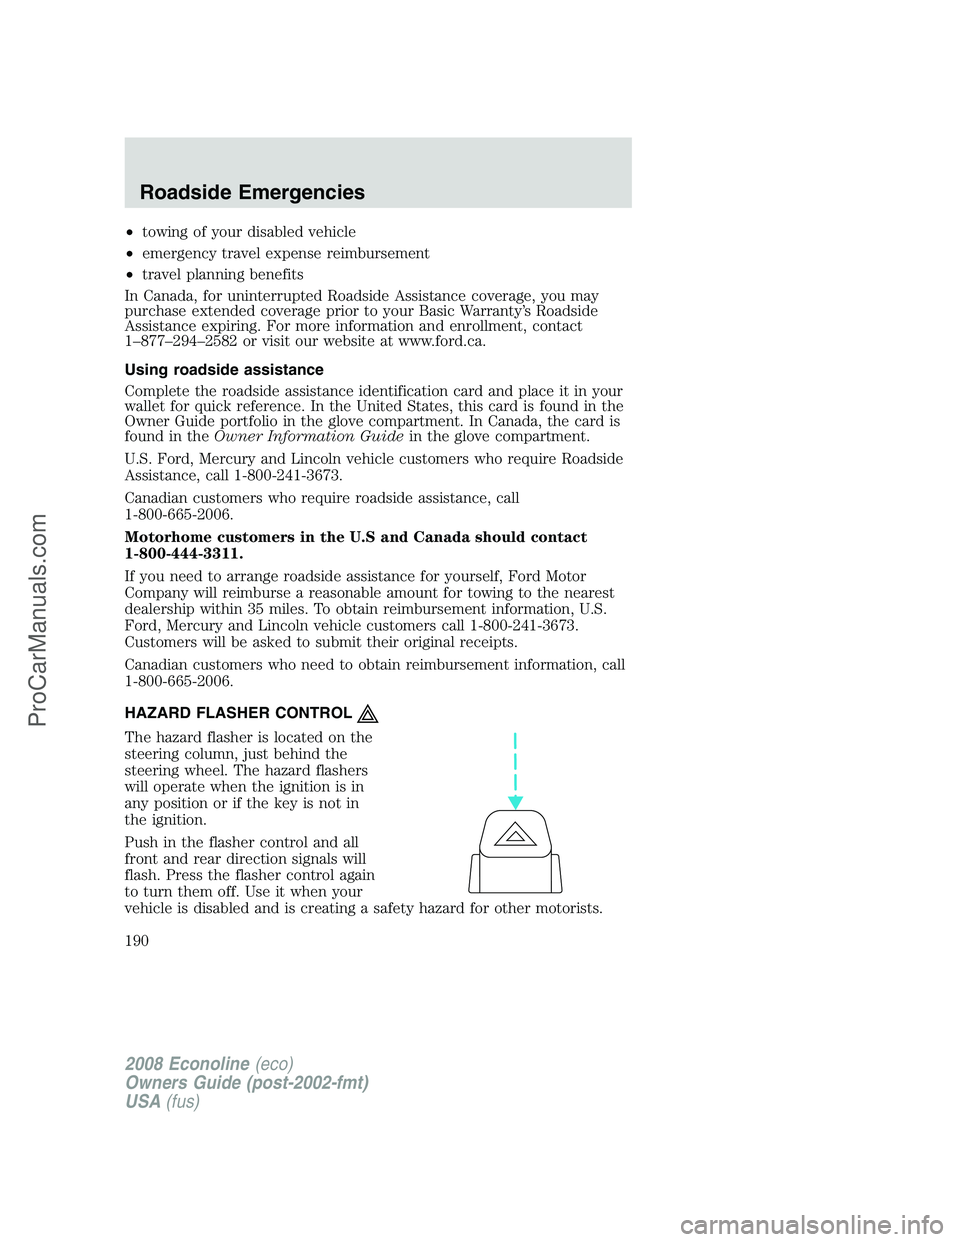
HAZARD FLASHER CONTROL
The hazard flasher is located on the
steering column, just behind the
steering wheel. The hazard flashers
will operate when the ignition is in
any position or if the key is not in
the ignition.
Push in the flasher control and all
front and rear direction signals will
flash. Press the flasher control again
to turn them off. Use it when your
vehicle is disabled and is creating a safety hazard for other motorists.
2008 Econoline(eco)
Owners Guide (post-2002-fmt)
USA(fus)
Roadside Emergencies
190
ProCarManuals.com
Page 192 of 285
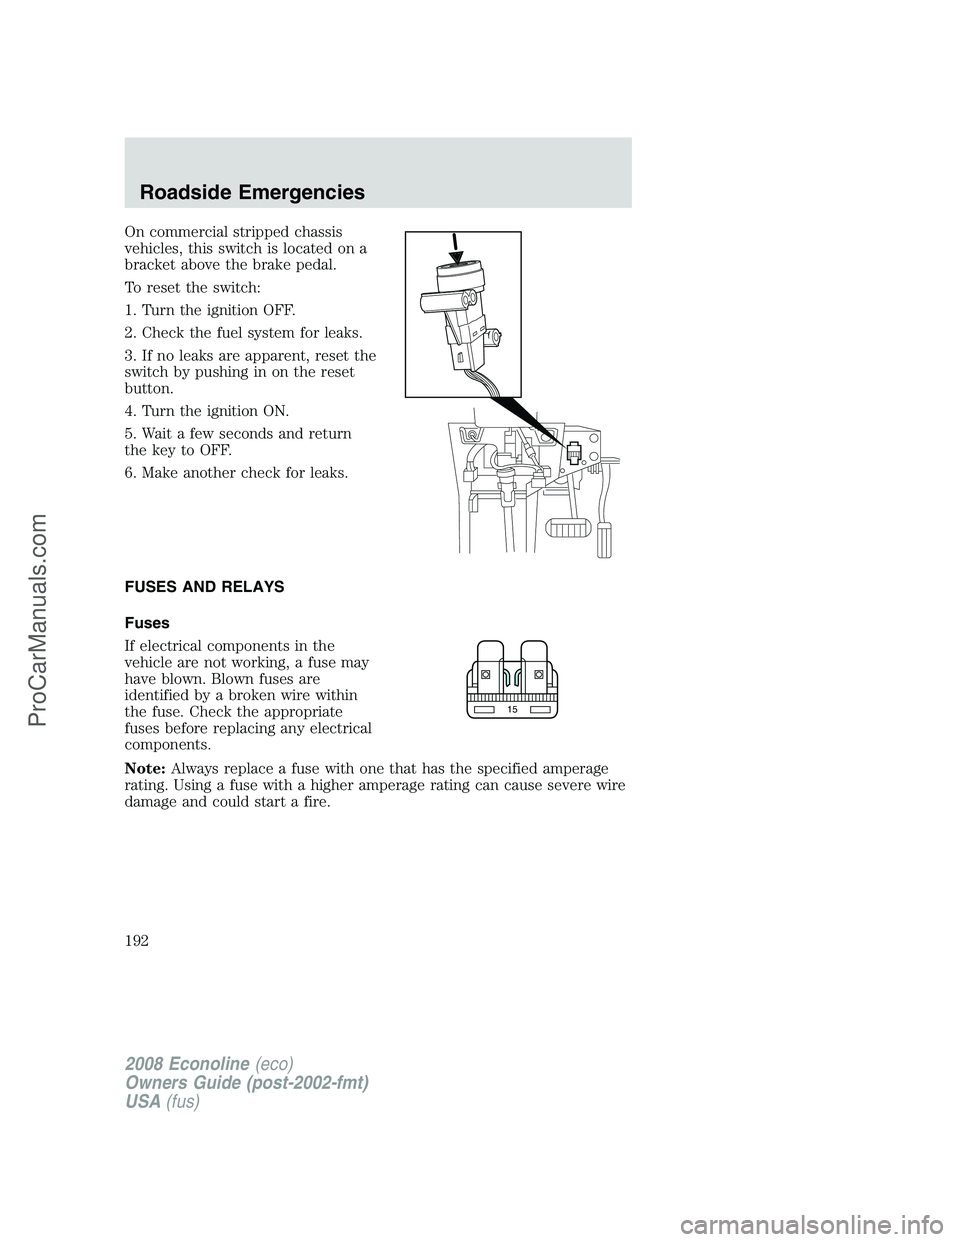
On commercial stripped chassis
vehicles, this switch is located on a
bracket above the brake pedal.
To reset the switch:
1. Turn the ignition OFF.
2. Check the fuel system for leaks.
3. If no leaks are apparent, reset the
switch by pushing in on the reset
button.
4. Turn the ignition ON.
5. Wait a few seconds and return
the key to OFF.
6. Make another check for leaks.
FUSES AND RELAYS
Fuses
If electrical components in the
vehicle are not working, a fuse may
have blown. Blown fuses are
identified by a broken wire within
the fuse. Check the appropriate
fuses before replacing any electrical
components.
Note:Always replace a fuse with one that has the specified amperage
rating. Using a fuse with a higher amperage rating can cause severe wire
damage and could start a fire.
15
2008 Econoline(eco)
Owners Guide (post-2002-fmt)
USA(fus)
Roadside Emergencies
192
ProCarManuals.com
Page 194 of 285
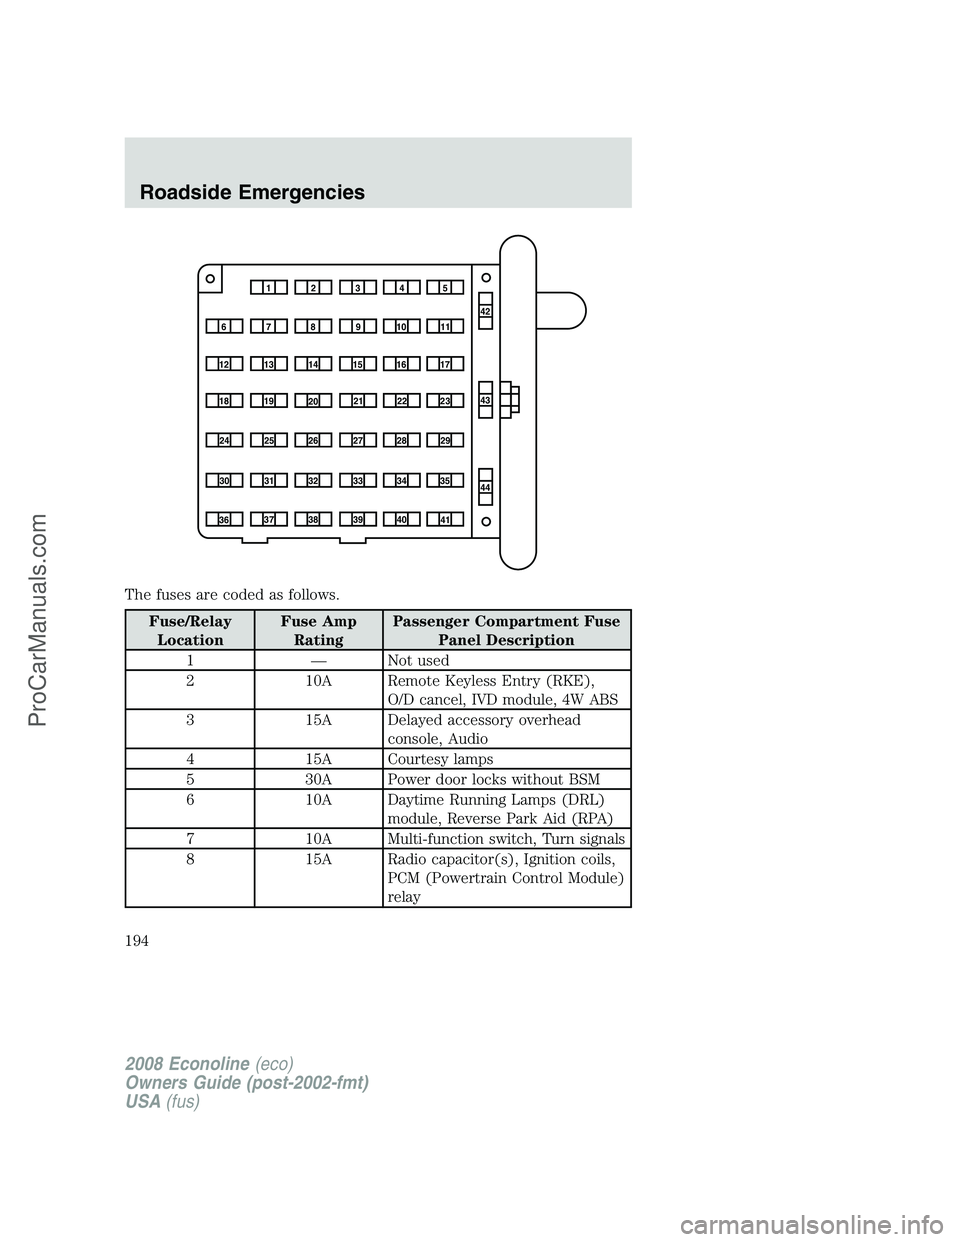
The fuses are coded as follows.
Fuse/Relay
LocationFuse Amp
RatingPassenger Compartment Fuse
Panel Description
1 — Not used
2 10A Remote Keyless Entry (RKE),
O/D cancel, IVD module, 4W ABS
3 15A Delayed accessory overhead
console, Audio
4 15A Courtesy lamps
5 30A Power door locks without BSM
6 10A Daytime Running Lamps (DRL)
module, Reverse Park Aid (RPA)
7 10A Multi-function switch, Turn signals
8 15A Radio capacitor(s), Ignition coils,
PCM (Powertrain Control Module)
relay
1234
5
7
689101142
43
44 13 12 14
15 16 17
19 18
2021 22 23
25 24
26 27 28 29
31 30 32 33 3435
37
3638 3940
41
2008 Econoline(eco)
Owners Guide (post-2002-fmt)
USA(fus)
Roadside Emergencies
194
ProCarManuals.com
Page 209 of 285
5. Repeat this tightness check procedure when servicing the spare tire
pressure (every six months, as per yourscheduled maintenance
information),or at any time that the spare tire is disturbed through
service of other components.
6. If removed, install the spare tire lock (if equipped) into the bumper
drive tube with the spare tire lock key (if equipped) and jack handle.
WHEEL LUG NUT TORQUE SPECIFICATIONS
On vehicles equipped with single rear wheels, retighten the lug nuts to
the specified torque at 100 miles (160 km) after any wheel disturbance
(tire rotation, changing a flat tire, wheel removal, etc.).
On vehicles equipped with dual rear wheels, retighten the wheel lug nuts
to the specified torque at 100 miles (160 km), and again at 500 miles
(800 km) of new vehicle operation and after any wheel disturbance (tire
rotation, changing a flat tire, wheel removal, etc.).
Bolt size and wheel
lug nut typeWheel lug nut torque*
lb.ft. N•m
9/16 x 18 conical lug
nut150 200
9/16 x 18 two-piece
lug nut140 190
* Torque specifications are for nut and bolt threads free of dirt and
rust. Use only Ford recommended replacement fasteners.
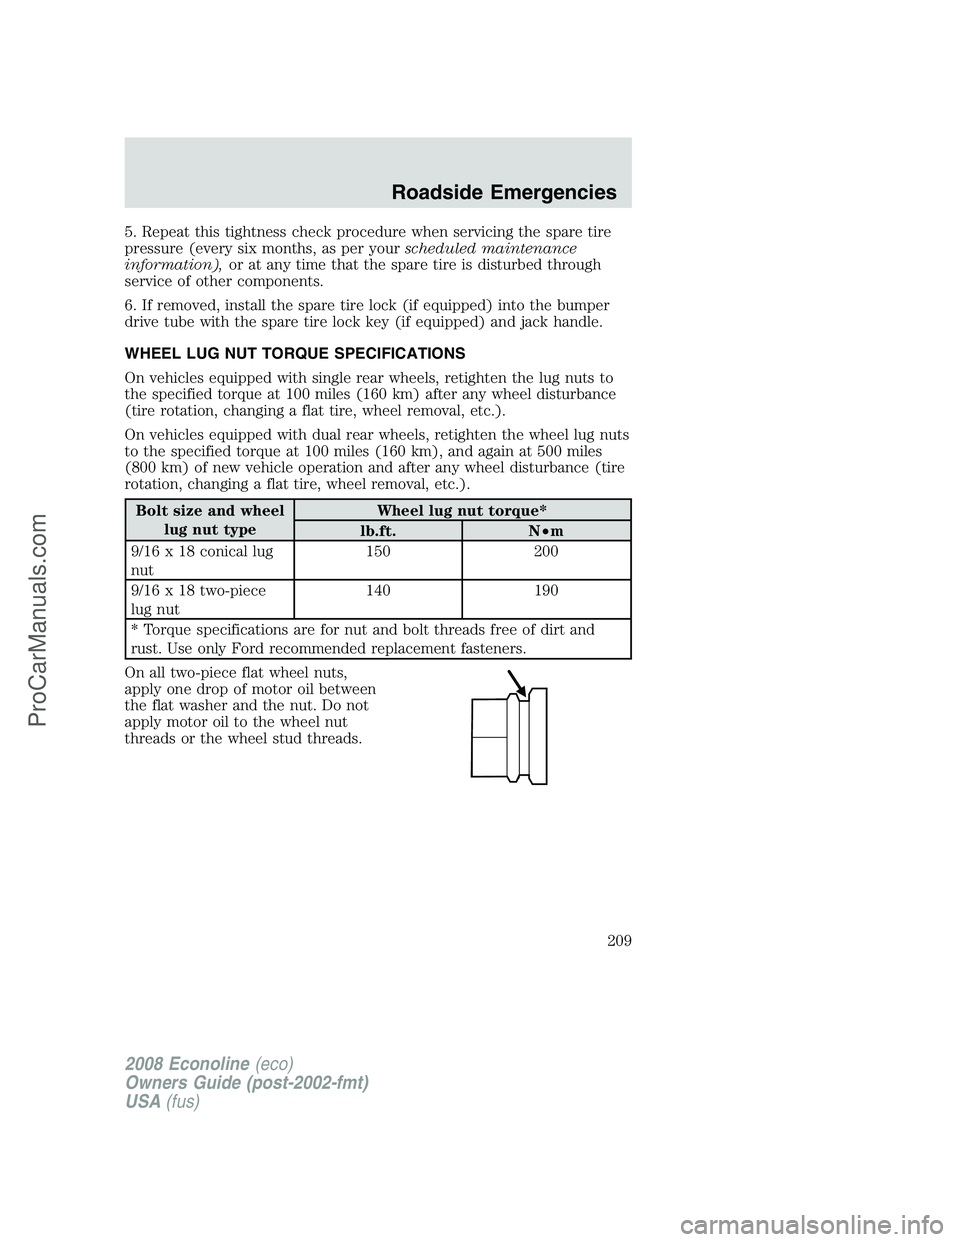
On all two-piece flat wheel nuts,
apply one drop of motor oil between
the flat washer and the nut. Do not
apply motor oil to the wheel nut
threads or the wheel stud threads.
2008 Econoline(eco)
Owners Guide (post-2002-fmt)
USA(fus)
Roadside Emergencies
209
ProCarManuals.com
Page 233 of 285
SERVICE RECOMMENDATIONS
To help you service your vehicle, we providescheduled maintenance
informationwhich makes tracking routine service easy.
If your vehicle requires professional service, your authorized dealer can
provide the necessary parts and service. Check yourWarranty
Guide/Customer Information Guideto find out which parts and
services are covered.
Use only recommended fuels, lubricants, fluids and service parts
conforming to specifications. Motorcraft parts are designed and built to
provide the best performance in your vehicle.
PRECAUTIONS WHEN SERVICING YOUR VEHICLE
•Do not work on a hot engine.
•Make sure that nothing gets caught in moving parts.
•Do not work on a vehicle with the engine running in an enclosed
space, unless you are sure you have enough ventilation.
•Keep all open flames and other burning (cigarettes) material away
from the battery and all fuel related parts.
Working with the engine off
1. Set the parking brake and ensure the gearshift is securely latched in P
(Park).
2. Turn off the engine and remove the key.
3. Block the wheels to prevent the vehicle from moving unexpectedly.
2008 Econoline(eco)
Owners Guide (post-2002-fmt)
USA(fus)
Maintenance and Specifications
233
ProCarManuals.com
Page 261 of 285
These temporary malfunctions can be corrected by filling the fuel tank
with good quality fuel, properly tightening the fuel cap or letting the
electrical system dry out. After three driving cycles without these or any
other temporary malfunctions present, theService engine soon
indicator should stay off the next time the engine is started. A driving
cycle consists of a cold engine startup followed by mixed city/highway
driving. No additional vehicle service is required.
If theService engine soon
indicator remains on, have your vehicle
serviced at the first available opportunity. Although some malfunctions
detected by the OBD-II may not have symptoms that are apparent,
continued driving with theService engine soon
indicator on can
result in increased emissions, lower fuel economy, reduced engine and
transmission smoothness, and lead to more costly repairs.
Readiness for Inspection/Maintenance (I/M) testing
Some state/provincial and local governments may have
Inspection/Maintenance (I/M) programs to inspect the emission control
equipment on your vehicle. Failure to pass this inspection could prevent
you from getting a vehicle registration. Your vehicle may not pass the I/M
test if theService engine soon
indicator is on or not working
properly (bulb is burned out), or if the OBD-II system has determined
that some of the emission control systems have not been properly
checked. In this case, the vehicle is considered not ready for I/M testing.
If theService engine soon
indicator is on or the bulb does not
work, the vehicle may need to be serviced. Refer to the On board
diagnostics (OBD-II) description in this chapter.
If the vehicle’s engine or transmission has just been serviced, or the
battery has recently run down or been replaced, the OBD-II system may
indicate that the vehicle is not ready for I/M testing. To determine if the
vehicle is ready for I/M testing, turn the ignition key to the on position
for 15 seconds without cranking the engine. If theService engine
soon
indicator blinks eight times, it means that the vehicle is not
ready for I/M testing; if theService engine soon
indicator stays on
solid, it means that the vehicle is ready for I/M testing.
The OBD-II system is designed to check the emission control system
during normal driving. A complete check may take several days. If the
vehicle is not ready for I/M testing, the following driving cycle consisting
of mixed city and highway driving may be performed:
15 minutes of steady driving on an expressway/highway followed by
20 minutes of stop-and-go driving with at least four 30-second idle periods.
2008 Econoline(eco)
Owners Guide (post-2002-fmt)
USA(fus)
Maintenance and Specifications
261
ProCarManuals.com
Page 282 of 285
Flexible Fuel Vehicle (FFV) ....249
Fluid capacities .........................271
Four-Wheel Drive vehicles
preparing to drive your
vehicle .....................................174
Fuel ............................................249
calculating fuel economy .......256
cap ...........................................252
capacity ...................................271
choosing the right fuel ...........254
comparisons with EPA fuel
economy estimates .................259
detergent in fuel .....................254
filling your vehicle with
fuel ...........................249, 252, 256
filter, specifications ........249, 270
fuel pump shut-off switch .....191
improving fuel economy ........256
octane rating ...................254, 274
quality ......................................255
running out of fuel .................256
safety information relating to
automotive fuels .....................249
Fuel - flex fuel vehicle
(FFV) .................................249, 254
Fuses ..................................192–193
G
Garage door opener ....................49
Gas cap (see Fuel cap) ............252
Gas mileage
(see Fuel economy) .................256
Gauges .........................................17
H
Hazard flashers .........................190
Headlamps ...................................35aiming ........................................38
bulb specifications ....................41
daytime running lights .............36
flash to pass ..............................36
high beam .................................36
replacing bulbs .........................42
turning on and off ....................35
Heating
heater only system .............32, 34
heating and air conditioning
system .......................................33
Hood ..........................................234
I
Ignition ...............................162, 274
Illuminated visor mirror .............48
Infant seats
(see Safety seats) .....................101
Inspection/maintenance (I/M)
testing ........................................261
Instrument panel
cleaning ...................................230
cluster ........................................12
lighting up panel and
interior .......................................37
J
Jack ............................................200
positioning ...............................200
storage .....................................200
Jump-starting your vehicle ......210
K
Keyless entry system
autolock .....................................58
Keys .............................................68
positions of the ignition .........162
2008 Econoline(eco)
Owners Guide (post-2002-fmt)
USA(fus)
Index
282
ProCarManuals.com