lights FORD E-350 2001 Owners Manual
[x] Cancel search | Manufacturer: FORD, Model Year: 2001, Model line: E-350, Model: FORD E-350 2001Pages: 224, PDF Size: 1.99 MB
Page 10 of 224
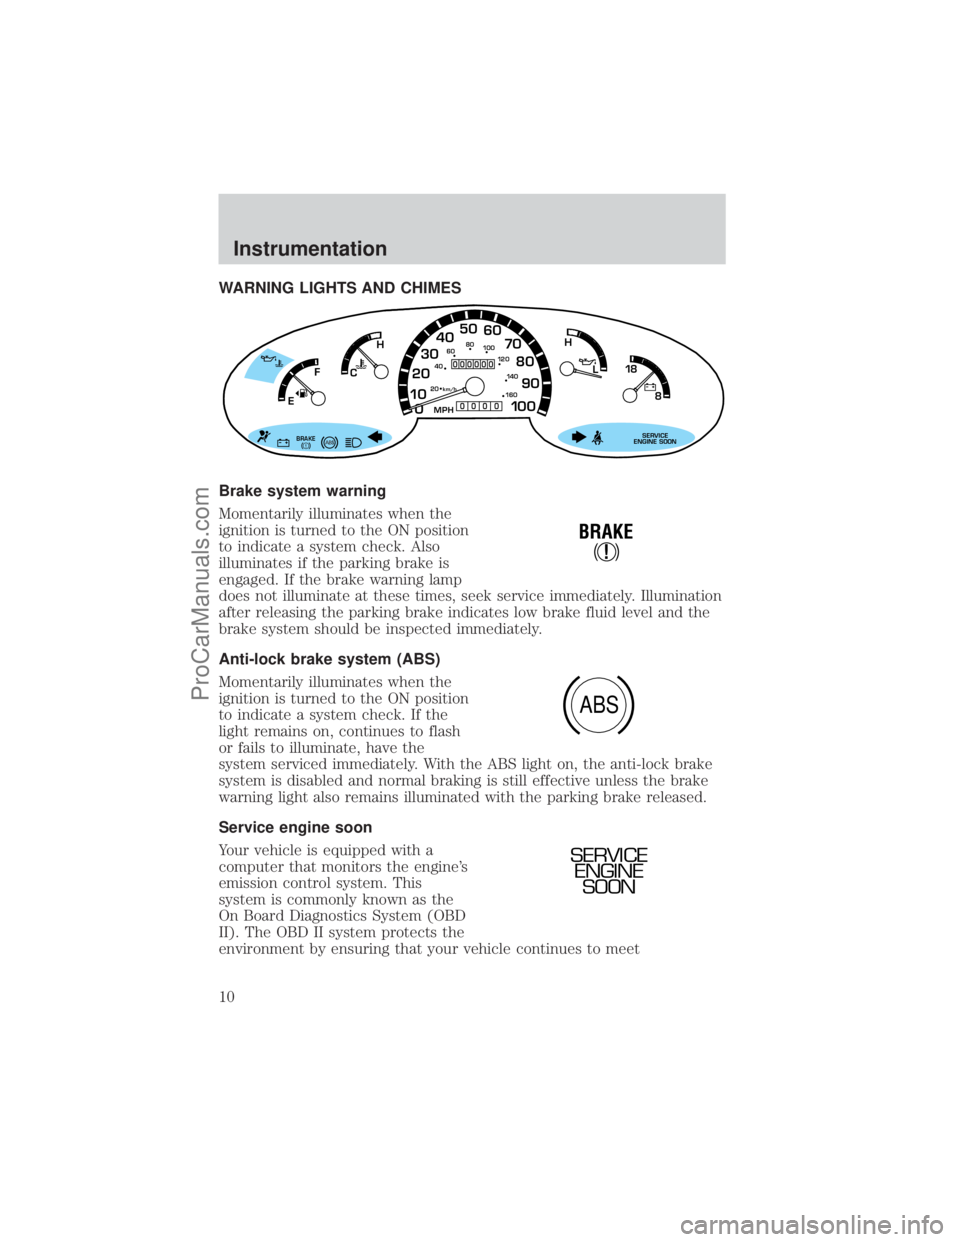
WARNING LIGHTS AND CHIMES
Brake system warning
Momentarily illuminates when the
ignition is turned to the ON position
to indicate a system check. Also
illuminates if the parking brake is
engaged. If the brake warning lamp
does not illuminate at these times, seek service immediately. Illumination
after releasing the parking brake indicates low brake fluid level and the
brake system should be inspected immediately.
Anti-lock brake system (ABS)
Momentarily illuminates when the
ignition is turned to the ON position
to indicate a system check. If the
light remains on, continues to flash
or fails to illuminate, have the
system serviced immediately. With the ABS light on, the anti-lock brake
system is disabled and normal braking is still effective unless the brake
warning light also remains illuminated with the parking brake released.
Service engine soon
Your vehicle is equipped with a
computer that monitors the engine's
emission control system. This
system is commonly known as the
On Board Diagnostics System (OBD
II). The OBD II system protects the
environment by ensuring that your vehicle continues to meet
0 1020304050
60
70
80
90
10 0
20 km/h
406080
10 0
12 0
14 0
H
L
16 0
MPH
000000
0000
BRAKE
18
8
SERVICE
ENGINE SOON
FH
C
E
!
BRAKE
ABS
SERVICE
ENGINE
SOON
Instrumentation
10
ProCarManuals.com
Page 13 of 224
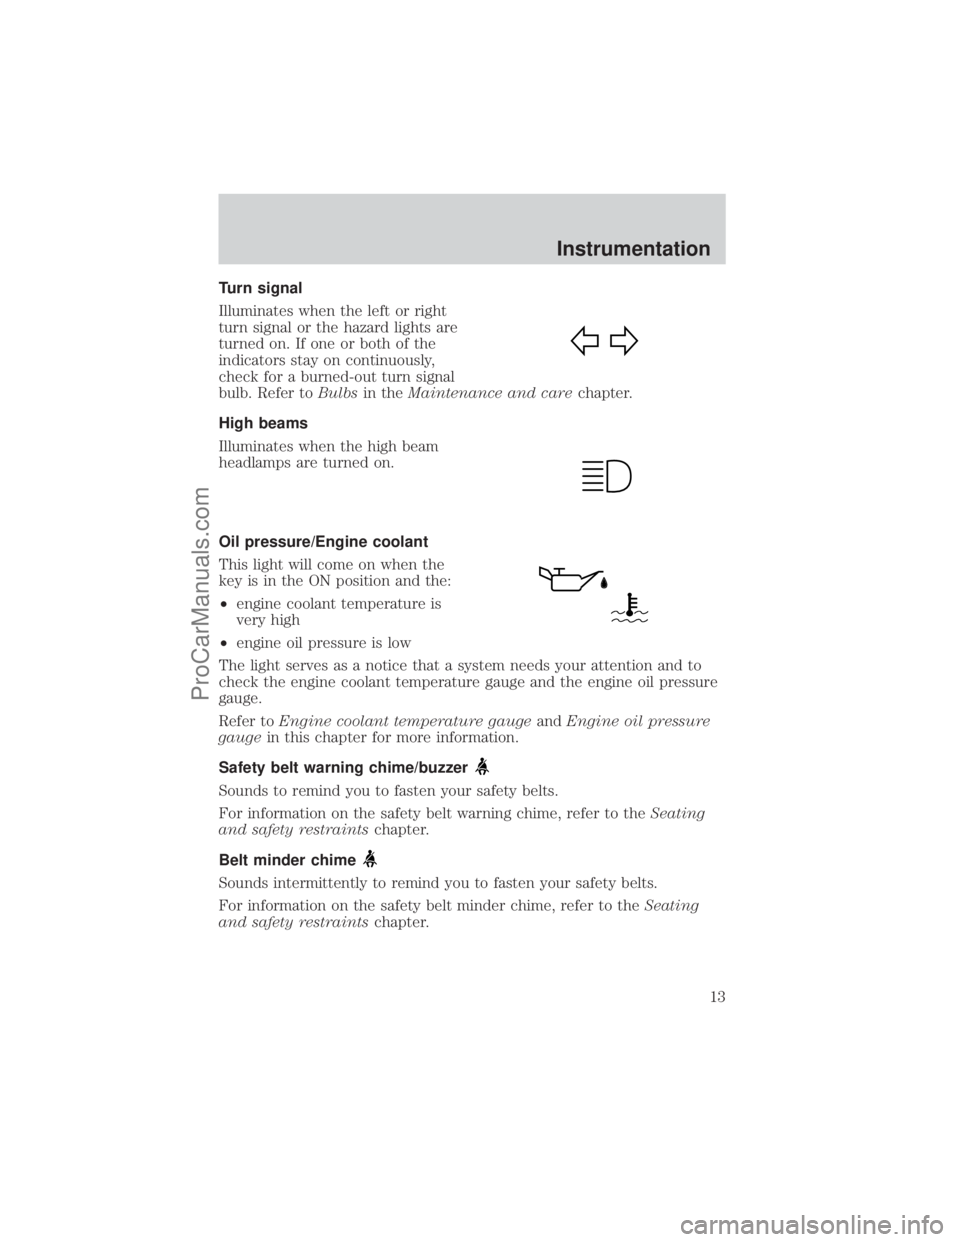
Turn signal
Illuminates when the left or right
turn signal or the hazard lights are
turned on. If one or both of the
indicators stay on continuously,
check for a burned-out turn signal
bulb. Refer toBulbsin theMaintenance and carechapter.
High beams
Illuminates when the high beam
headlamps are turned on.
Oil pressure/Engine coolant
This light will come on when the
key is in the ON position and the:
²engine coolant temperature is
very high
²engine oil pressure is low
The light serves as a notice that a system needs your attention and to
check the engine coolant temperature gauge and the engine oil pressure
gauge.
Refer toEngine coolant temperature gaugeandEngine oil pressure
gaugein this chapter for more information.
Safety belt warning chime/buzzer
Sounds to remind you to fasten your safety belts.
For information on the safety belt warning chime, refer to theSeating
and safety restraintschapter.
Belt minder chime
Sounds intermittently to remind you to fasten your safety belts.
For information on the safety belt minder chime, refer to theSeating
and safety restraintschapter.
Instrumentation
13
ProCarManuals.com
Page 49 of 224
Radio reception factors
Three factors can affect radio reception:
²Distance/strength.The further an FM signal travels, the weaker it is.
The listenable range of the average FM station is approximately 40 km
(24 miles). This range can be affected by ªsignal modulation.º Signal
modulation is a process radio stations use to increase their
strength/volume relative to other stations.
²Terrain.Hills, mountains and tall buildings between your vehicle's
antenna and the radio station signal can cause FM reception problems.
Static can be caused on AM stations by power lines, electric fences,
traffic lights and thunderstorms. Moving away from an interfering
structure (out of its ªshadowº) returns your reception to normal.
²Station overload.Weak signals are sometimes captured by stronger
signals when you pass a broadcast tower. A stronger signal may
temporarily overtake a weaker signal and play while the weak station
frequency is displayed.
The audio system automatically switches to single channel reception if it
will improve the reception of a station normally received in stereo.
Audio system warranties and service
Refer to the ªWarranty Guideº for audio system warranty information.
If service is necessary, see your dealer or a qualified technician.
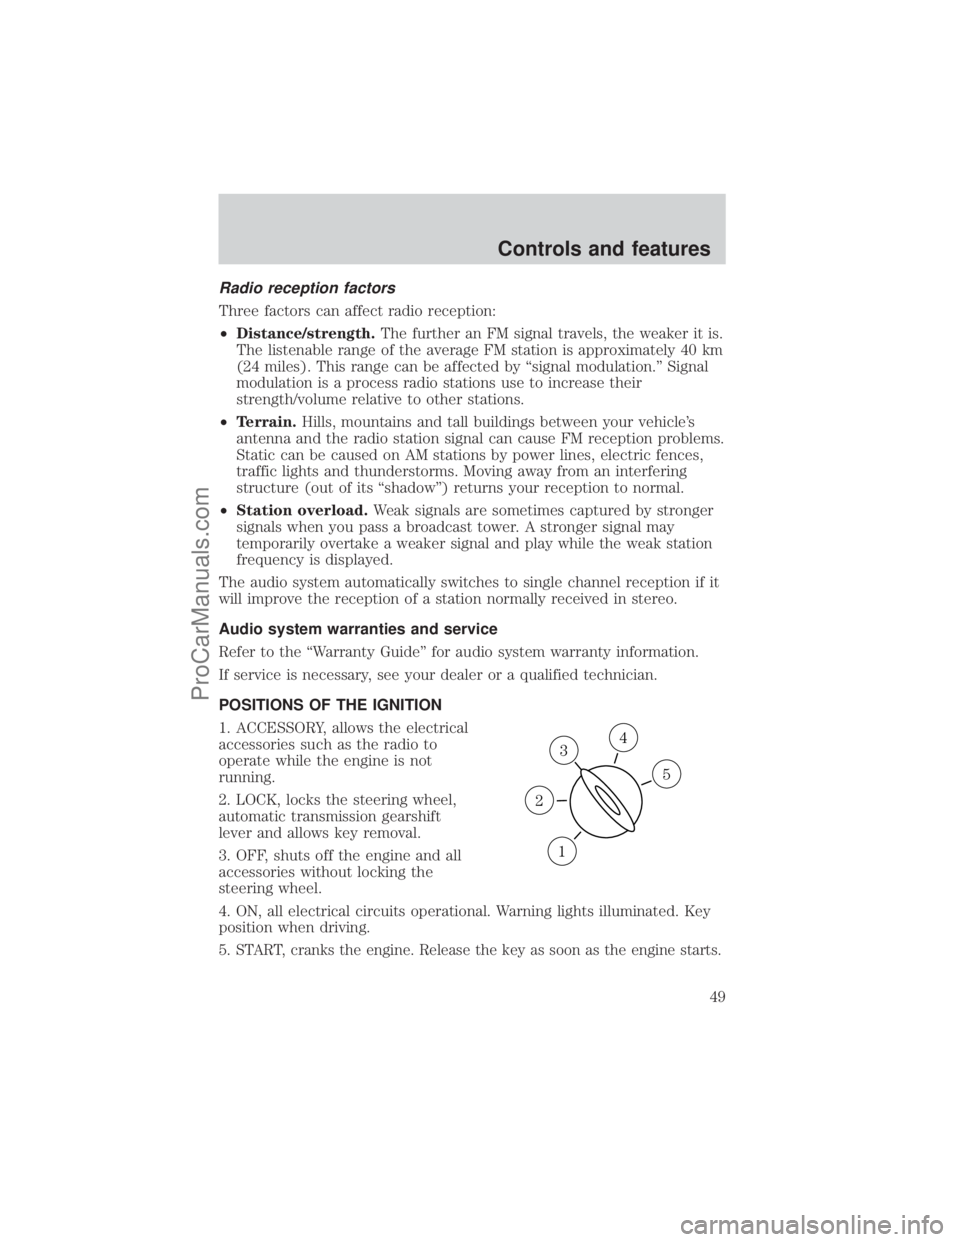
POSITIONS OF THE IGNITION
1. ACCESSORY, allows the electrical
accessories such as the radio to
operate while the engine is not
running.
2. LOCK, locks the steering wheel,
automatic transmission gearshift
lever and allows key removal.
3. OFF, shuts off the engine and all
accessories without locking the
steering wheel.
4. ON, all electrical circuits operational. Warning lights illuminated. Key
position when driving.
5.
START, cranks the engine. Release the key as soon as the engine starts.
3
1
2
5
4
Controls and features
49
ProCarManuals.com
Page 60 of 224
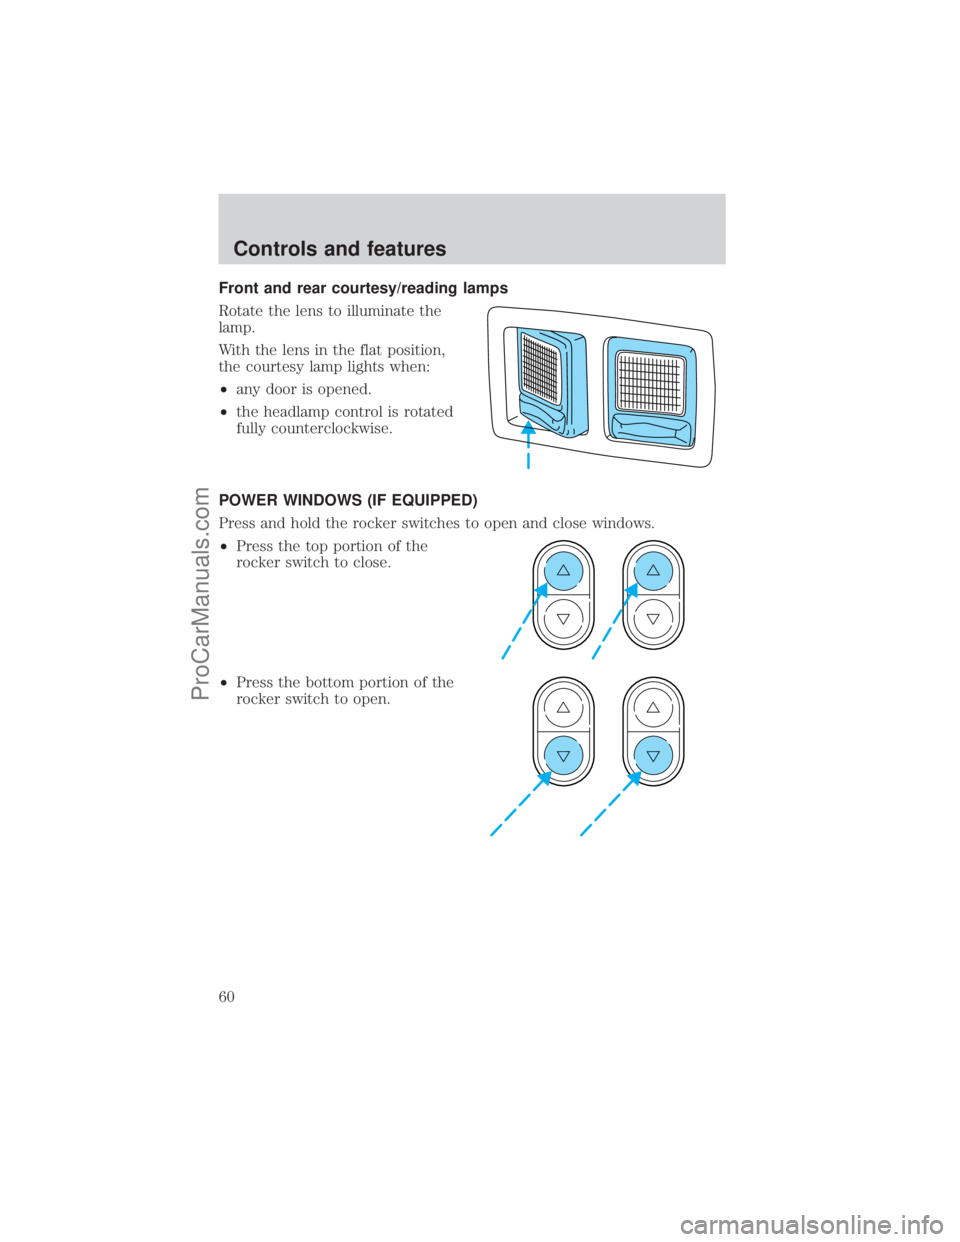
Front and rear courtesy/reading lamps
Rotate the lens to illuminate the
lamp.
With the lens in the flat position,
the courtesy lamp lights when:
²any door is opened.
²the headlamp control is rotated
fully counterclockwise.
POWER WINDOWS (IF EQUIPPED)
Press and hold the rocker switches to open and close windows.
²Press the top portion of the
rocker switch to close.
²Press the bottom portion of the
rocker switch to open.
Controls and features
60
ProCarManuals.com
Page 65 of 224
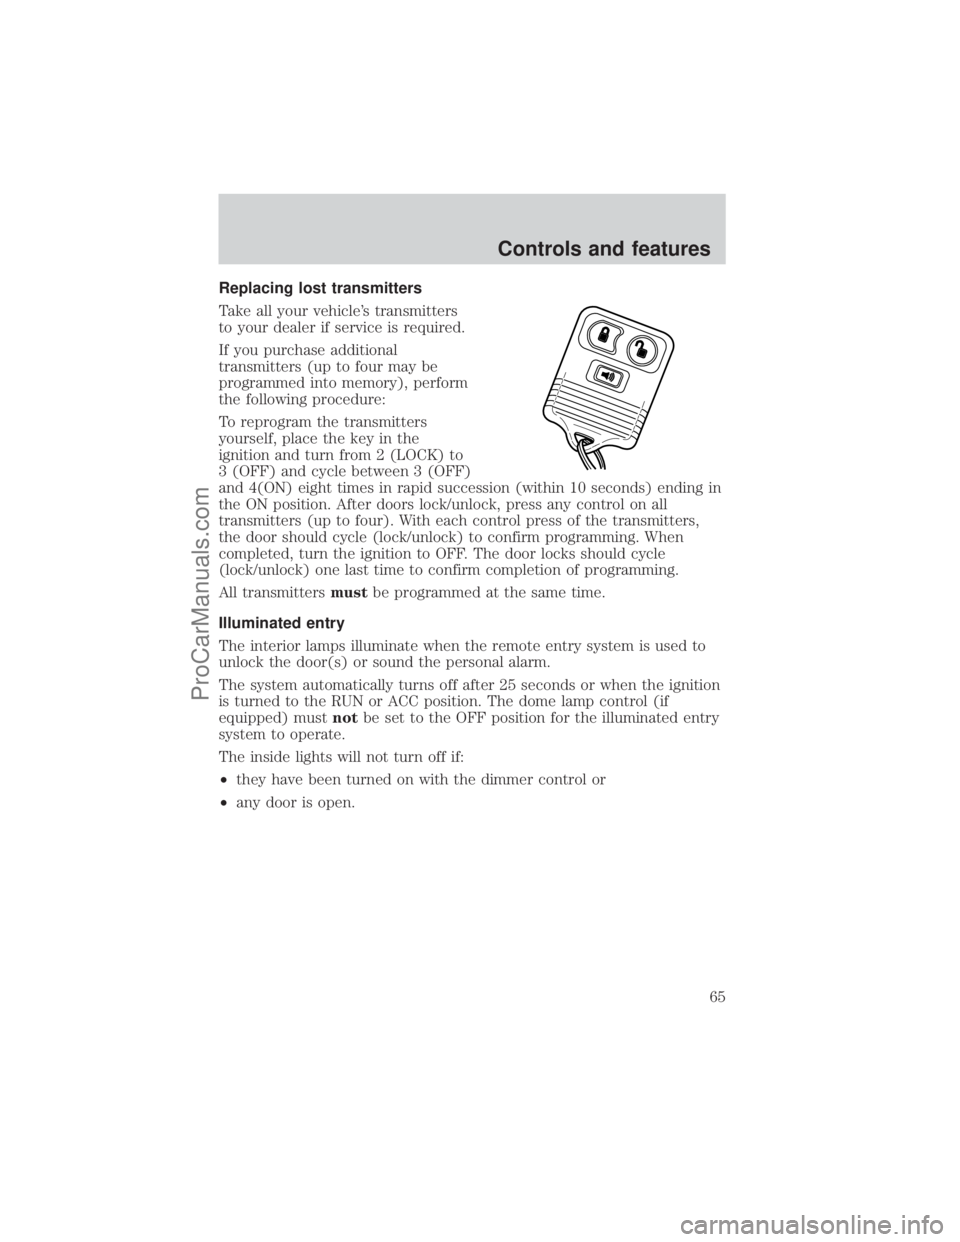
Replacing lost transmitters
Take all your vehicle's transmitters
to your dealer if service is required.
If you purchase additional
transmitters (up to four may be
programmed into memory), perform
the following procedure:
To reprogram the transmitters
yourself, place the key in the
ignition and turn from 2 (LOCK) to
3 (OFF) and cycle between 3 (OFF)
and 4(ON) eight times in rapid succession (within 10 seconds) ending in
the ON position. After doors lock/unlock, press any control on all
transmitters (up to four). With each control press of the transmitters,
the door should cycle (lock/unlock) to confirm programming. When
completed, turn the ignition to OFF. The door locks should cycle
(lock/unlock) one last time to confirm completion of programming.
All transmittersmustbe programmed at the same time.
Illuminated entry
The interior lamps illuminate when the remote entry system is used to
unlock the door(s) or sound the personal alarm.
The system automatically turns off after 25 seconds or when the ignition
is turned to the RUN or ACC position. The dome lamp control (if
equipped) mustnotbe set to the OFF position for the illuminated entry
system to operate.
The inside lights will not turn off if:
²they have been turned on with the dimmer control or
²any door is open.
Controls and features
65
ProCarManuals.com
Page 99 of 224
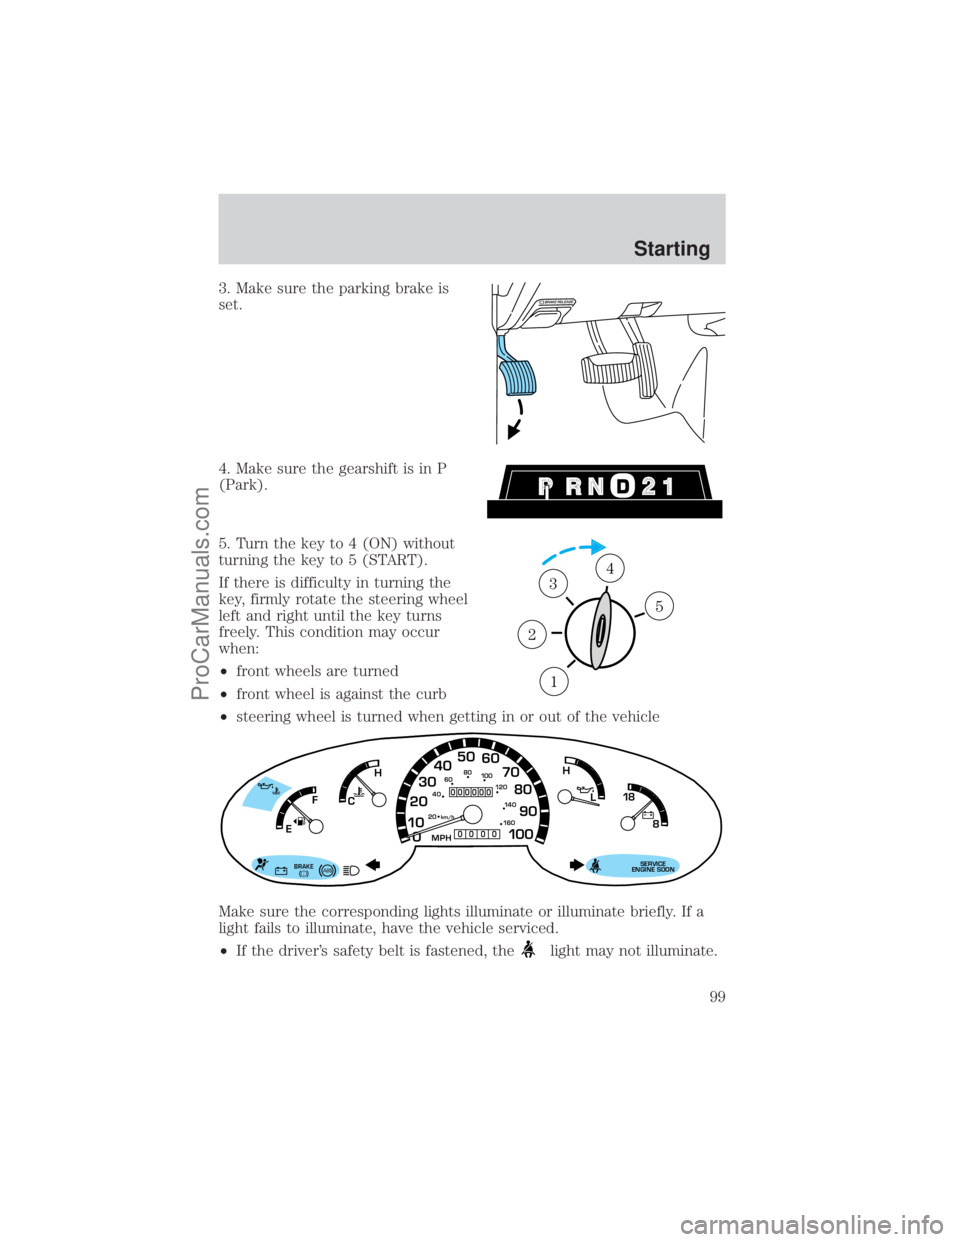
3. Make sure the parking brake is
set.
4. Make sure the gearshift is in P
(Park).
5. Turn the key to 4 (ON) without
turning the key to 5 (START).
If there is difficulty in turning the
key, firmly rotate the steering wheel
left and right until the key turns
freely. This condition may occur
when:
²front wheels are turned
²front wheel is against the curb
²steering wheel is turned when getting in or out of the vehicle
Make sure the corresponding lights illuminate or illuminate briefly. If a
light fails to illuminate, have the vehicle serviced.
²If the driver's safety belt is fastened, the
light may not illuminate.
1
2
34
5
0 1020304050
60
70
80
90
10 0
20 km/h
406080
10 0
12 0
14 0
H
L
16 0
MPH
000000
0000
BRAKE
18
8
SERVICE
ENGINE SOON
FH
C
E
Starting
99
ProCarManuals.com
Page 122 of 224
If you need to arrange roadside assistance for yourself, Ford will
reimburse a reasonable amount. To obtain reimbursement information in
the United States:
²Ford or Mercury vehicles customers call 1-800-241-3673
²Lincoln vehicle customers call 1±800±521±4140
To obtain reimbursement information in Canada, customers call
1±800±665±2006.
Roadside coverage beyond basic warranty
In the United States, you may purchase additional roadside assistance
coverage beyond this period through the Ford Auto Club by contacting
your Ford or Lincoln Mercury dealer.
Similarly in Canada, you may purchase additional coverage beyond the
basic coverage period by consulting the Ford Roadside Assistance Club
brochure or by calling 1±877±294±CLUB (1±877±294±2582).
HAZARD FLASHER
Use only in an emergency to warn traffic of vehicle breakdown,
approaching danger, etc. The hazard flashers can be operated when the
ignition is off.
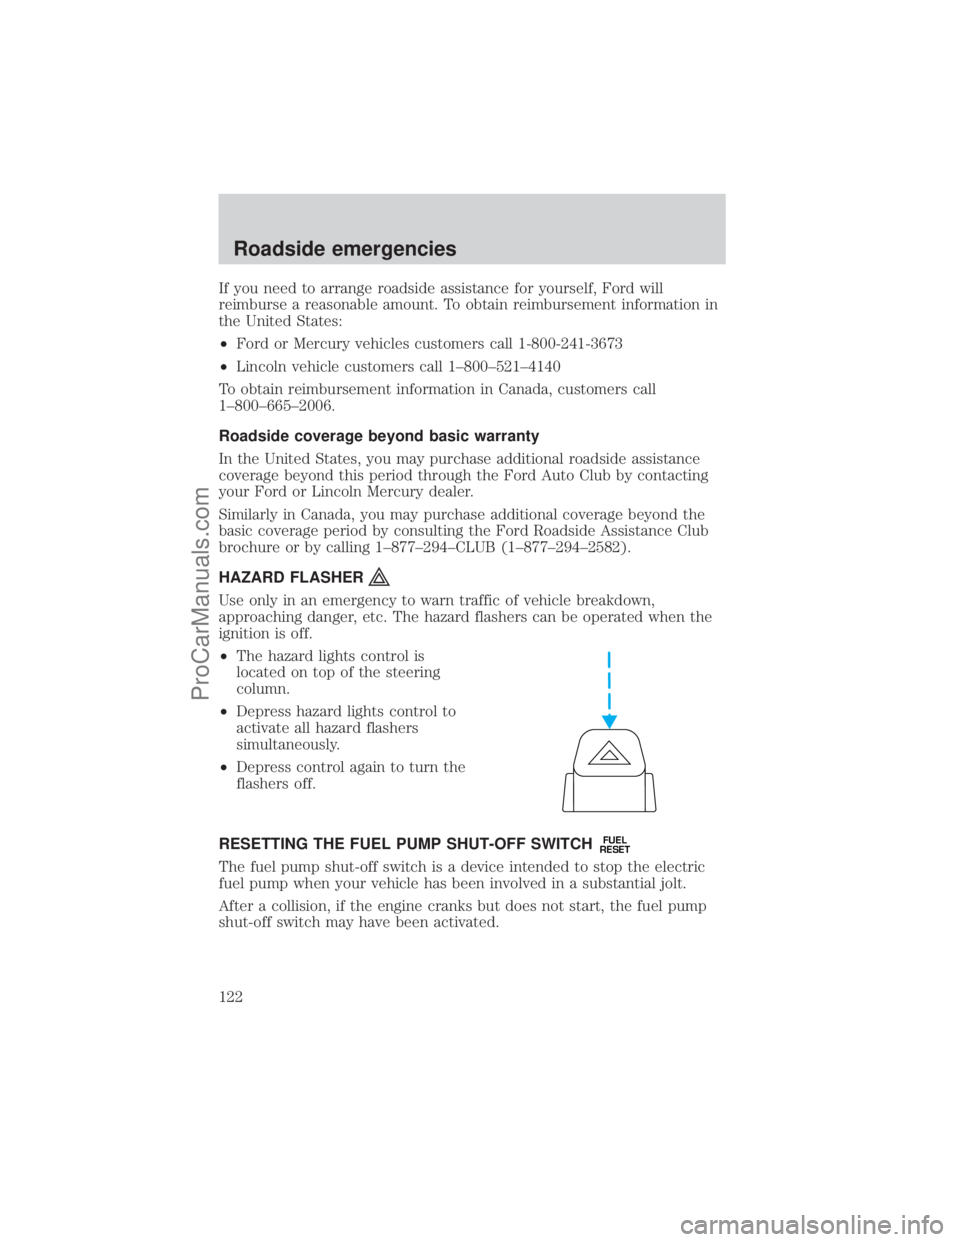
²The hazard lights control is
located on top of the steering
column.
²Depress hazard lights control to
activate all hazard flashers
simultaneously.
²Depress control again to turn the
flashers off.
RESETTING THE FUEL PUMP SHUT-OFF SWITCH
FUEL
RESET
The fuel pump shut-off switch is a device intended to stop the electric
fuel pump when your vehicle has been involved in a substantial jolt.
After a collision, if the engine cranks but does not start, the fuel pump
shut-off switch may have been activated.
Roadside emergencies
122
ProCarManuals.com
Page 130 of 224
Fuse/Relay
LocationFuse Amp
RatingPower Distribution Box Description
9 30A** PCM Power Relay, Engine Compartment
Fuse 4
10 60A** Auxiliary Battery Relay, Engine
Compartment Fuses 14, 22
11 30A** IDM Relay (Diesel Only)
12 60A** Engine Compartment Fuses 25, 27
13 50A** Blower Motor Relay (Blower Motor)
14 30A** Trailer Running Lamps Relay, Trailer
Backup Lamps Relay
15 40A** Main Light Switch, Daytime Running
Lights (DRL)
16 50A** Auxiliary Blower Motor Relay
17 30A** Fuel Pump Relay
18 60A** I/P Fuses 40, 41,26, 33, 39
19 60A** 4WABS Module
20 20A** Electric Brake Controller
21 50A** Modified Vehicle Power
22 40A** Trailer Battery Charge Relay, Modified
Vehicles
23 60A** Ignition Switch, Fuse Panel
24 Ð Not Used
25 20A* NGV Module (Natural Gas Only)
26 10A* A/C Clutch (4.2L Only)
27 15A* DRL Module, Horn Relay
28 Ð PCM Diode
29 Ð Not Used
A Ð Not Used
B Ð Stop Lamp Relay
C Ð Trailer Backup Lamps Relay
D Ð Trailer Running Lamps Relay
E Ð Trailer Battery Charge Relay
Roadside emergencies
130
ProCarManuals.com
Page 181 of 224
Illumination of the ªService Engine Soonº light, charging system warning
light or the temperature warning light, fluid leaks, strange odors, smoke
or loss of engine power, could indicate that the emission control system
is not working properly.
Exhaust leaks may result in entry of harmful and potentially
lethal fumes into the passenger compartment.
Do not make any unauthorized changes to your vehicle or engine. By
law, vehicle owners and anyone who manufactures, repairs, services,
sells, leases, trades vehicles, or supervises a fleet of vehicles are not
permitted to intentionally remove an emission control device or prevent
it from working. Information about your vehicle's emission system is on
the Vehicle Emission Control Information Decal located on or near the
engine. This decal identifies engine displacement and gives some tune up
specifications.
Please consult your ªWarranty Guideº for complete emission warranty
information.
Readiness for Inspection/Maintenance (I/M) testing
In some localities, it may be a legal requirement to pass an I/M test of
the on-board diagnostics system. If your ªCheck Engine/Service Engine
Soonº light is on, refer to the description in theWarning Lights and
Chimessection of theInstrumentationchapter. Your vehicle may not
pass the I/M test with the ªCheck Engine/Service Engine Soonº light on.
If the vehicle's powertrain system or its battery has just been serviced,
the on-board diagnostics system is reset to a ªnot ready for I/M testº
condition. To ready the on-board diagnostics system for I/M testing, a
minimum of 30 minutes of city and highway driving is necessary as
described below:
²First, at least 10 minutes of driving on an expressway or highway.
²Next, at least 20 minutes driving in stop-and-go, city-type traffic with
at least four idle periods.
Allow the vehicle to sit for at least eight hours without starting the
engine. Then, start the engine and complete the above driving cycle. The
engine must warm up to its normal operating temperature. Once started,
do not turn off the engine until the above driving cycle is complete.
Maintenance and care
181
ProCarManuals.com
Page 187 of 224
Function Number of
bulbsTrade number
Headlamps (low series) 2 H5054
Headlamps (high series) 2 9007
Park lamp and turn signal (front) 2 3157 AK (amber)
Back-up lamps 2 3156K
License plate lamp 1 168
Stop/tail/turn/side marker lamp 2 3357 K
High-mount brakelamp 2 912
Cargo lamp 1 211-2
Dome lamp (standard) 1 912
Map/reading lamp 2 211-2
All replacement bulbs are clear in color except where noted.
To replace all instrument panel lights - see your dealer
AIMING THE HEADLAMPS
The headlamps on your vehicle are properly aimed at the assembly plant.
If your vehicle has been in an accident the alignment of your headlamps
should be checked by a qualified service technician.
CLEANING AND CARING FOR YOUR VEHICLE
Refer to the Customer Assistance chapter for a list of Ford-approved
cleaners, polishes and waxes.
Washing your vehicle
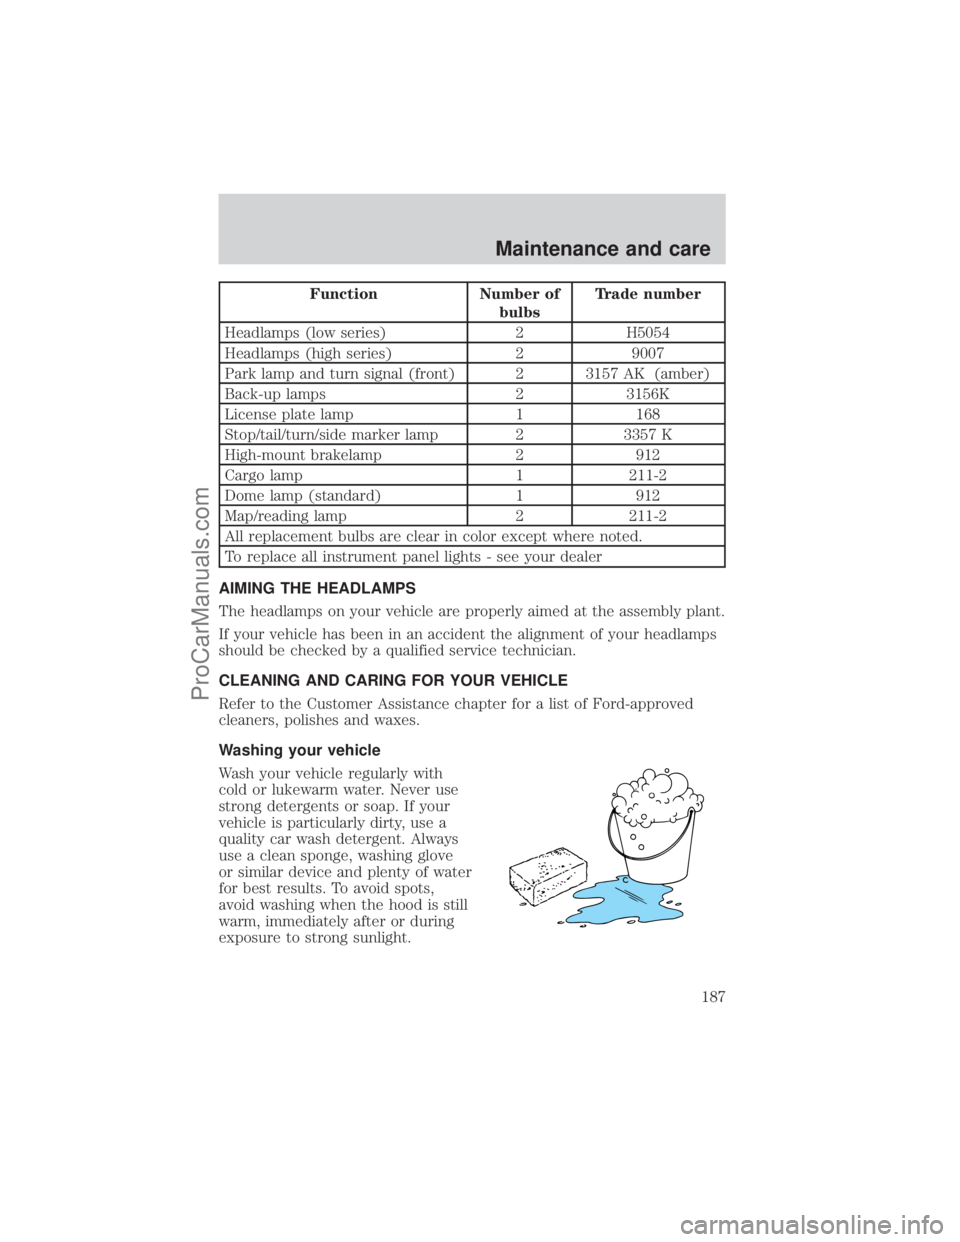
Wash your vehicle regularly with
cold or lukewarm water. Never use
strong detergents or soap. If your
vehicle is particularly dirty, use a
quality car wash detergent. Always
use a clean sponge, washing glove
or similar device and plenty of water
for best results. To avoid spots,
avoid washing when the hood is still
warm, immediately after or during
exposure to strong sunlight.
Maintenance and care
187
ProCarManuals.com