clock FORD E SERIES 1998 4.G Owners Manual
[x] Cancel search | Manufacturer: FORD, Model Year: 1998, Model line: E SERIES, Model: FORD E SERIES 1998 4.GPages: 144, PDF Size: 2.14 MB
Page 14 of 144
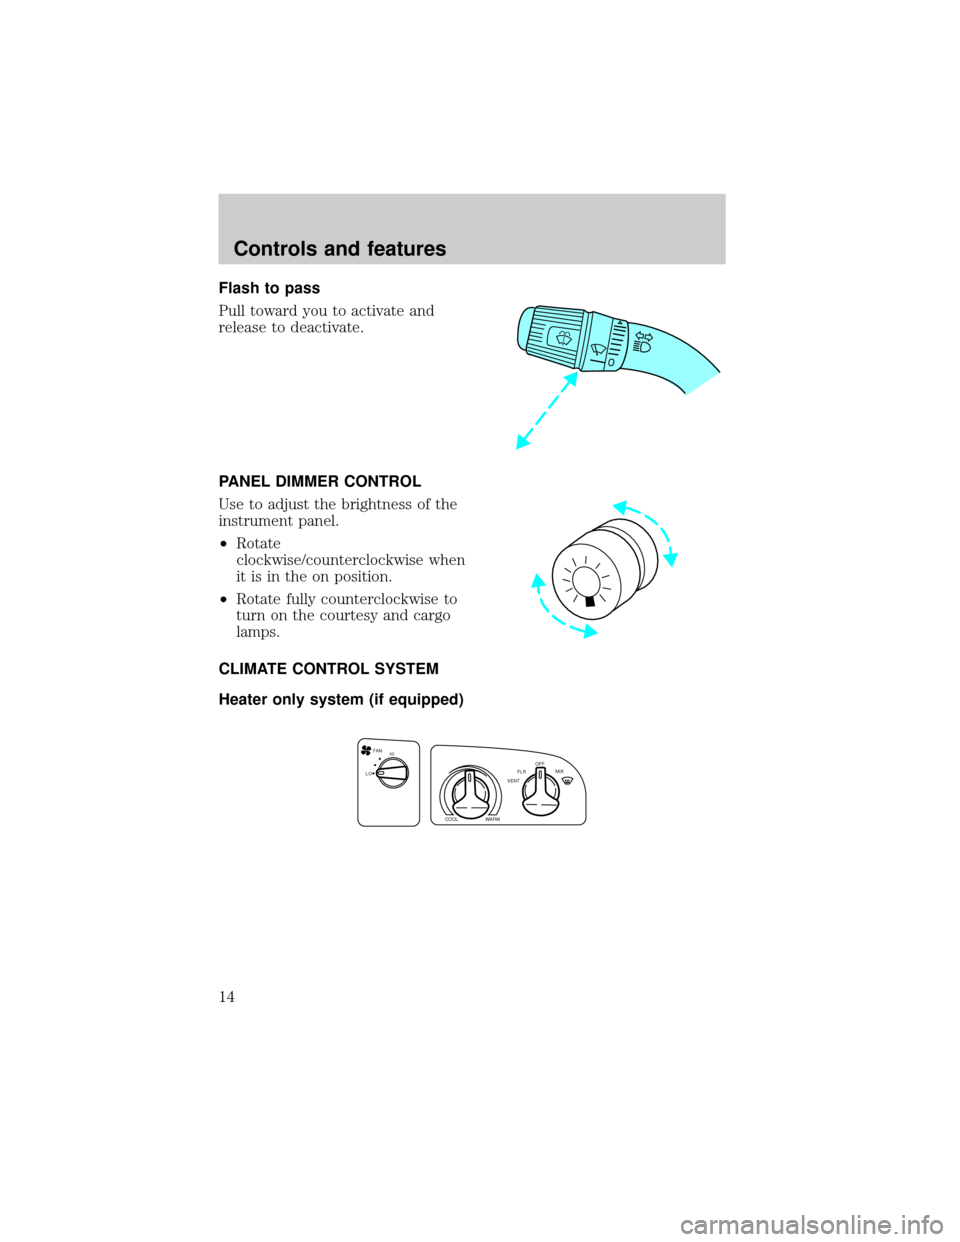
Flash to pass
Pull toward you to activate and
release to deactivate.
PANEL DIMMER CONTROL
Use to adjust the brightness of the
instrument panel.
²Rotate
clockwise/counterclockwise when
it is in the on position.
²Rotate fully counterclockwise to
turn on the courtesy and cargo
lamps.
CLIMATE CONTROL SYSTEM
Heater only system (if equipped)
FAN
LOHI
COOLWARM
VENTFLROFF
MIX
Controls and features
14
Page 36 of 144
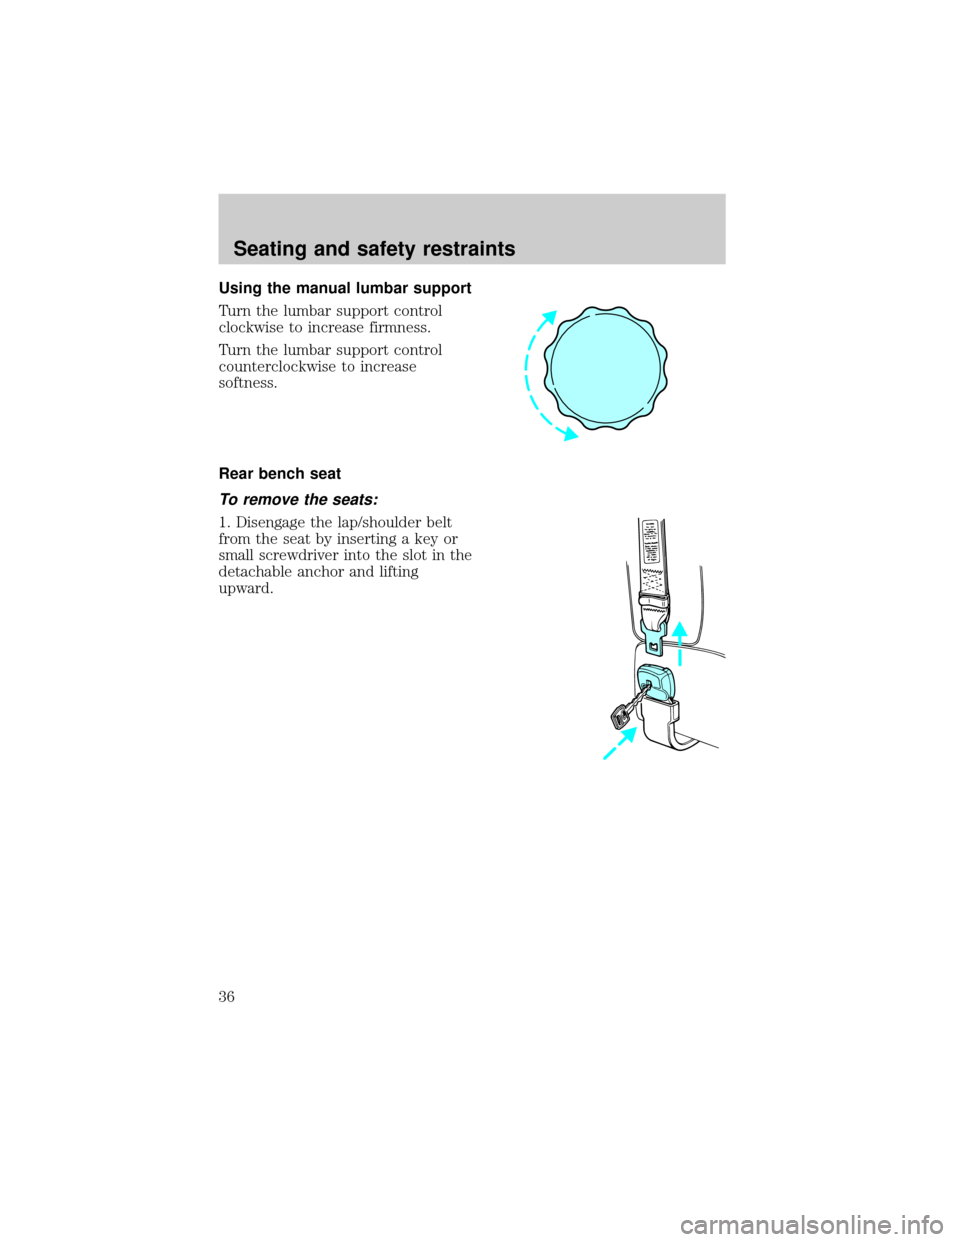
Using the manual lumbar support
Turn the lumbar support control
clockwise to increase firmness.
Turn the lumbar support control
counterclockwise to increase
softness.
Rear bench seat
To remove the seats:
1. Disengage the lap/shoulder belt
from the seat by inserting a key or
small screwdriver into the slot in the
detachable anchor and lifting
upward.
Seating and safety restraints
36
Page 85 of 144
CHANGING THE TIRES
If you get a flat tire while driving, do not apply the brake heavily.
Instead, gradually decrease your speed. Hold the steering wheel firmly
and slowly move to a safe place on the side of the road.
Spare tire information
The spare tire for your vehicle is stowed under the rear of your vehicle
(except cutaway and stripped chassis models).
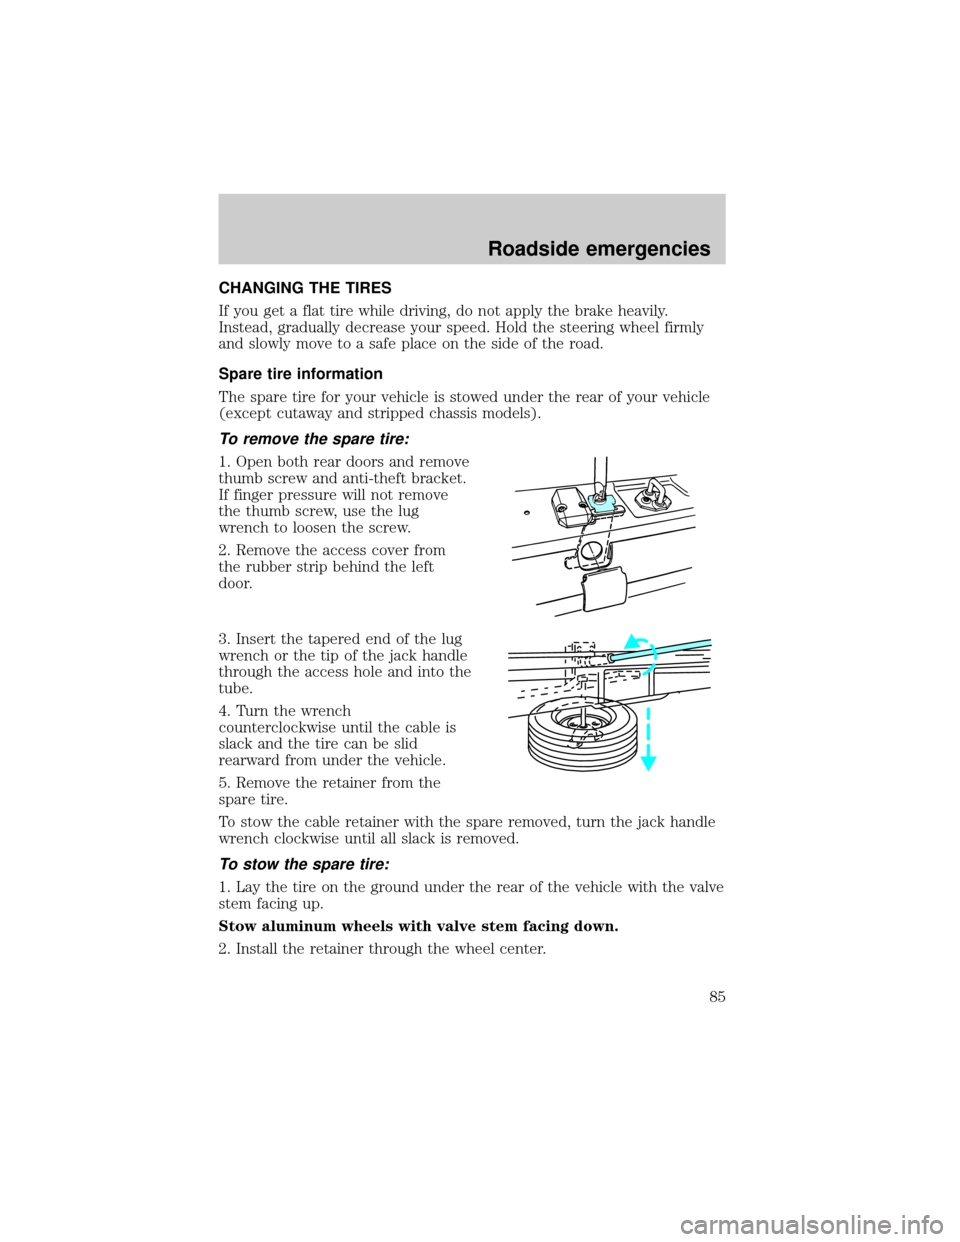
To remove the spare tire:
1. Open both rear doors and remove
thumb screw and anti-theft bracket.
If finger pressure will not remove
the thumb screw, use the lug
wrench to loosen the screw.
2. Remove the access cover from
the rubber strip behind the left
door.
3. Insert the tapered end of the lug
wrench or the tip of the jack handle
through the access hole and into the
tube.
4. Turn the wrench
counterclockwise until the cable is
slack and the tire can be slid
rearward from under the vehicle.
5. Remove the retainer from the
spare tire.
To stow the cable retainer with the spare removed, turn the jack handle
wrench clockwise until all slack is removed.
To stow the spare tire:
1. Lay the tire on the ground under the rear of the vehicle with the valve
stem facing up.
Stow aluminum wheels with valve stem facing down.
2. Install the retainer through the wheel center.
Roadside emergencies
85
Page 86 of 144
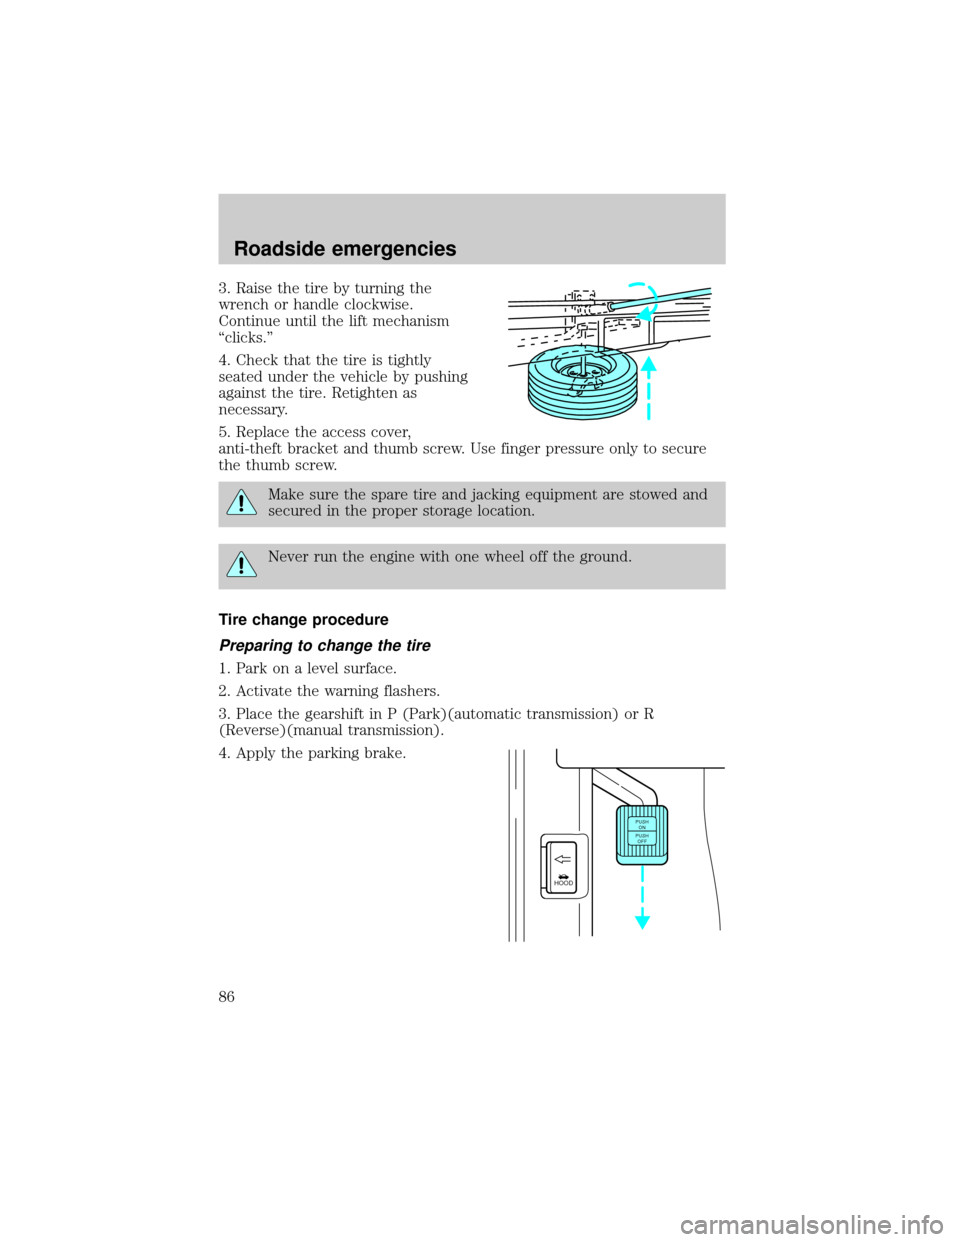
3. Raise the tire by turning the
wrench or handle clockwise.
Continue until the lift mechanism
ªclicks.º
4. Check that the tire is tightly
seated under the vehicle by pushing
against the tire. Retighten as
necessary.
5. Replace the access cover,
anti-theft bracket and thumb screw. Use finger pressure only to secure
the thumb screw.
Make sure the spare tire and jacking equipment are stowed and
secured in the proper storage location.
Never run the engine with one wheel off the ground.
Tire change procedure
Preparing to change the tire
1. Park on a level surface.
2. Activate the warning flashers.
3. Place the gearshift in P (Park)(automatic transmission) or R
(Reverse)(manual transmission).
4. Apply the parking brake.
HOOD
PUSH
ON
PUSH
OFF
Roadside emergencies
86
Page 87 of 144
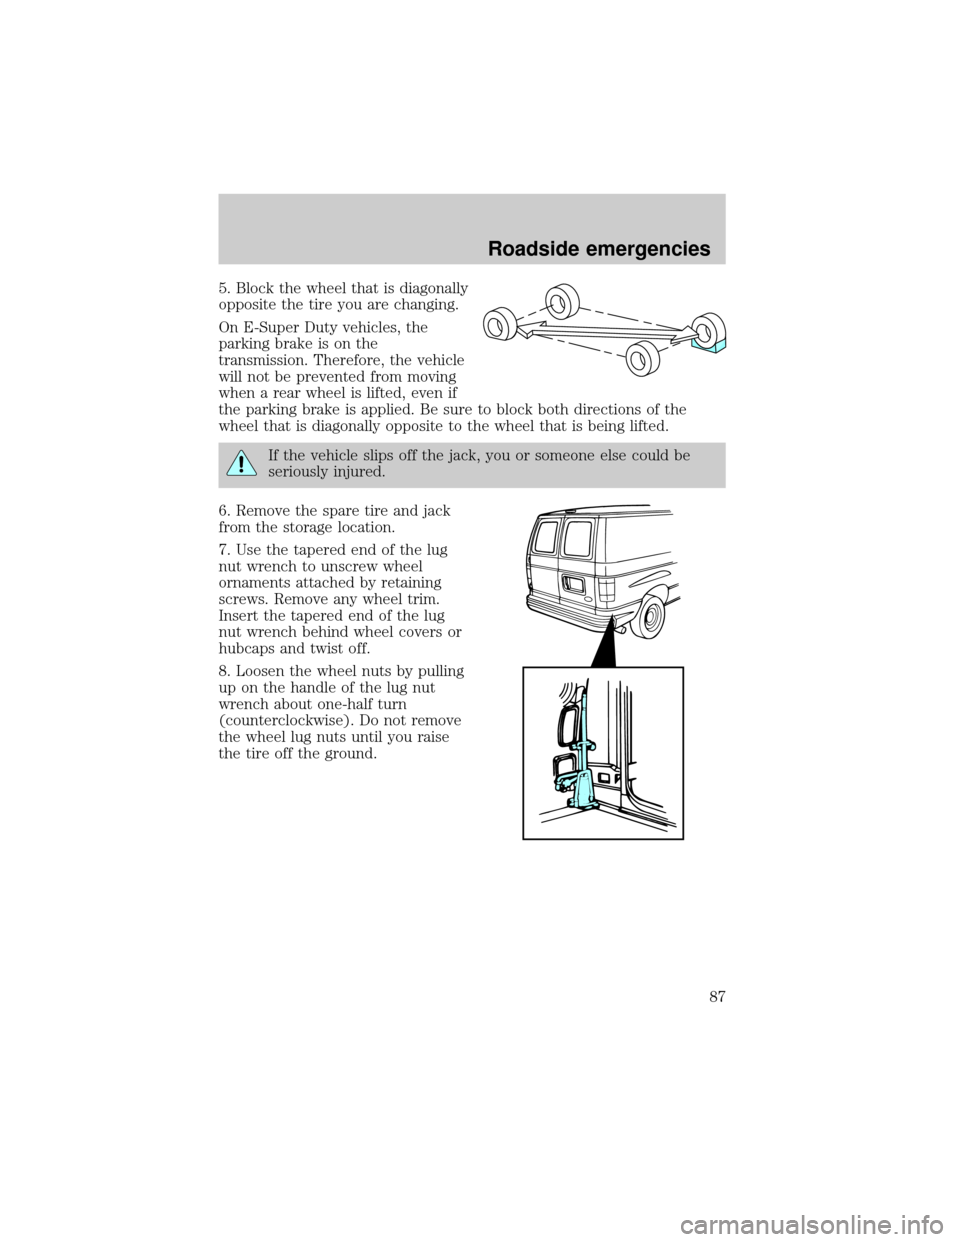
5. Block the wheel that is diagonally
opposite the tire you are changing.
On E-Super Duty vehicles, the
parking brake is on the
transmission. Therefore, the vehicle
will not be prevented from moving
when a rear wheel is lifted, even if
the parking brake is applied. Be sure to block both directions of the
wheel that is diagonally opposite to the wheel that is being lifted.
If the vehicle slips off the jack, you or someone else could be
seriously injured.
6. Remove the spare tire and jack
from the storage location.
7. Use the tapered end of the lug
nut wrench to unscrew wheel
ornaments attached by retaining
screws. Remove any wheel trim.
Insert the tapered end of the lug
nut wrench behind wheel covers or
hubcaps and twist off.
8. Loosen the wheel nuts by pulling
up on the handle of the lug nut
wrench about one-half turn
(counterclockwise). Do not remove
the wheel lug nuts until you raise
the tire off the ground.
Roadside emergencies
87
Page 89 of 144
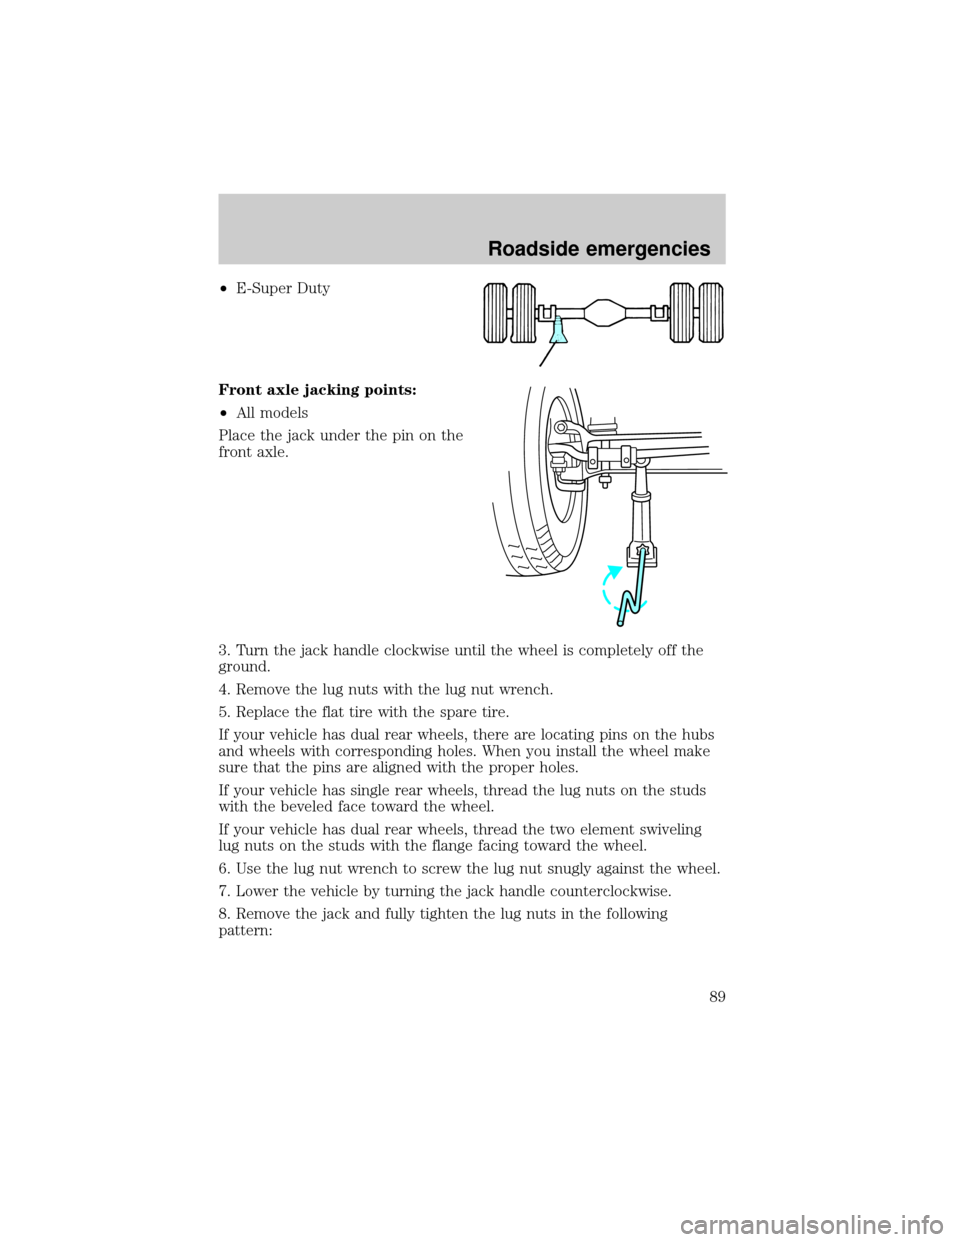
²E-Super Duty
Front axle jacking points:
²All models
Place the jack under the pin on the
front axle.
3. Turn the jack handle clockwise until the wheel is completely off the
ground.
4. Remove the lug nuts with the lug nut wrench.
5. Replace the flat tire with the spare tire.
If your vehicle has dual rear wheels, there are locating pins on the hubs
and wheels with corresponding holes. When you install the wheel make
sure that the pins are aligned with the proper holes.
If your vehicle has single rear wheels, thread the lug nuts on the studs
with the beveled face toward the wheel.
If your vehicle has dual rear wheels, thread the two element swiveling
lug nuts on the studs with the flange facing toward the wheel.
6. Use the lug nut wrench to screw the lug nut snugly against the wheel.
7. Lower the vehicle by turning the jack handle counterclockwise.
8. Remove the jack and fully tighten the lug nuts in the following
pattern:
Roadside emergencies
89
Page 102 of 144
maintenance, refer toAdding engine coolantin this chapter.
Automotive fluids are not interchangeable; do not use engine coolant,
antifreeze or windshield washer fluid outside of its specified function and
vehicle location.
Adding engine coolant
Do not put engine coolant in the container for the windshield
washer fluid.
If sprayed on the windshield, engine coolant could make it difficult to see
through the windshield.
When the engine is cool, add a 50/50 mixture of engine coolant and
water to the engine coolant recovery reservoir-DO NOT ADD DIRECTLY
TO THE RADIATOR. Add straight water only in an emergency, but you
should replace it with a 50/50 mixture of coolant and distilled water as
soon as possible.
Check the coolant level in the coolant recovery reservoir the next few
times you drive the vehicle. If necessary, add enough of a 50/50 mixture
of coolant and water to bring the liquid level to the fill line on the
reservoir.
Never remove the coolant recovery cap while the engine is
running or hot.
If you must remove the coolant recovery cap, follow these steps to avoid
personal injury:
1. Before you remove the cap, turn the engine off and let it cool.
2. When the engine is cool, wrap a thick cloth around the cap. Slowly
turn cap counterclockwise until pressure begins to release.
3. Step back while the pressure releases.
4. When you are sure that all the pressure has been released, use the
cloth to turn it counterclockwise and remove the cap.
Use Ford Premium Cooling System Fluid E2FZ-19549±AA (in Canada,
Motorcraft CXC-8±B) or an equivalent premium engine coolant that
meets Ford specification ESE-M97B44±A. Ford Premium Engine Coolant
is an optimized formula that will protect all metals and rubber elastomers
used in Ford cooling systems for four years or 80,000 km (50,000 miles).
Maintenance and care
102
Page 109 of 144
3. The relearning process will automatically complete as you drive the
vehicle.
²If you do not allow the engine to relearn its idle, the idle quality of
your vehicle may be adversely affected until the idle is eventually
relearned.
²If the battery has been disconnected or a new battery has been
installed, the clock and the preset radio stations must be reset once
the battery is reconnected.
²Always dispose of automotive
batteries in a responsible manner.
Follow your community's
standards for disposal. Call your
local recycling center to find out
more about recycling automotive batteries.
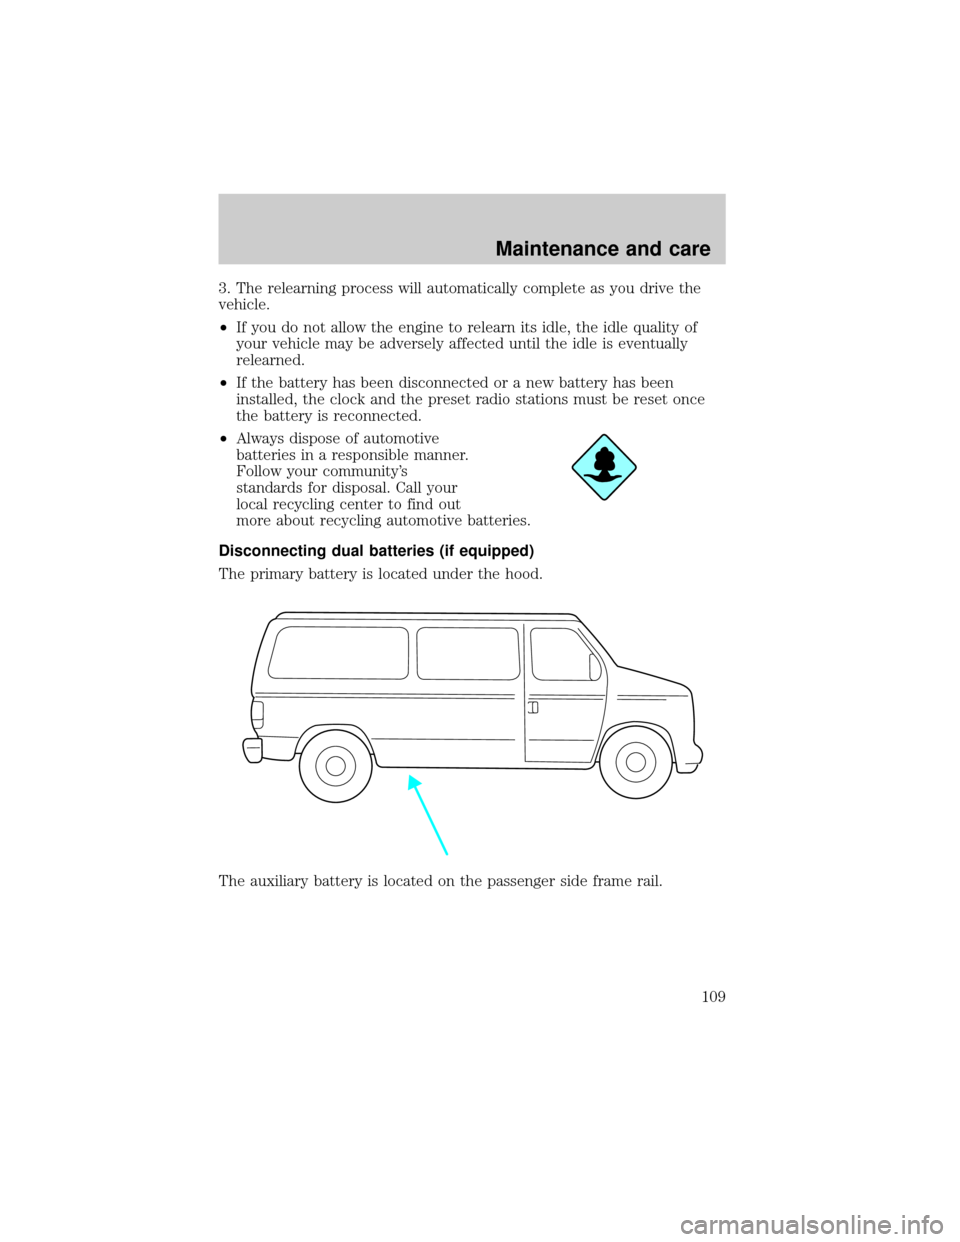
Disconnecting dual batteries (if equipped)
The primary battery is located under the hood.
The auxiliary battery is located on the passenger side frame rail.
Maintenance and care
109
Page 124 of 144
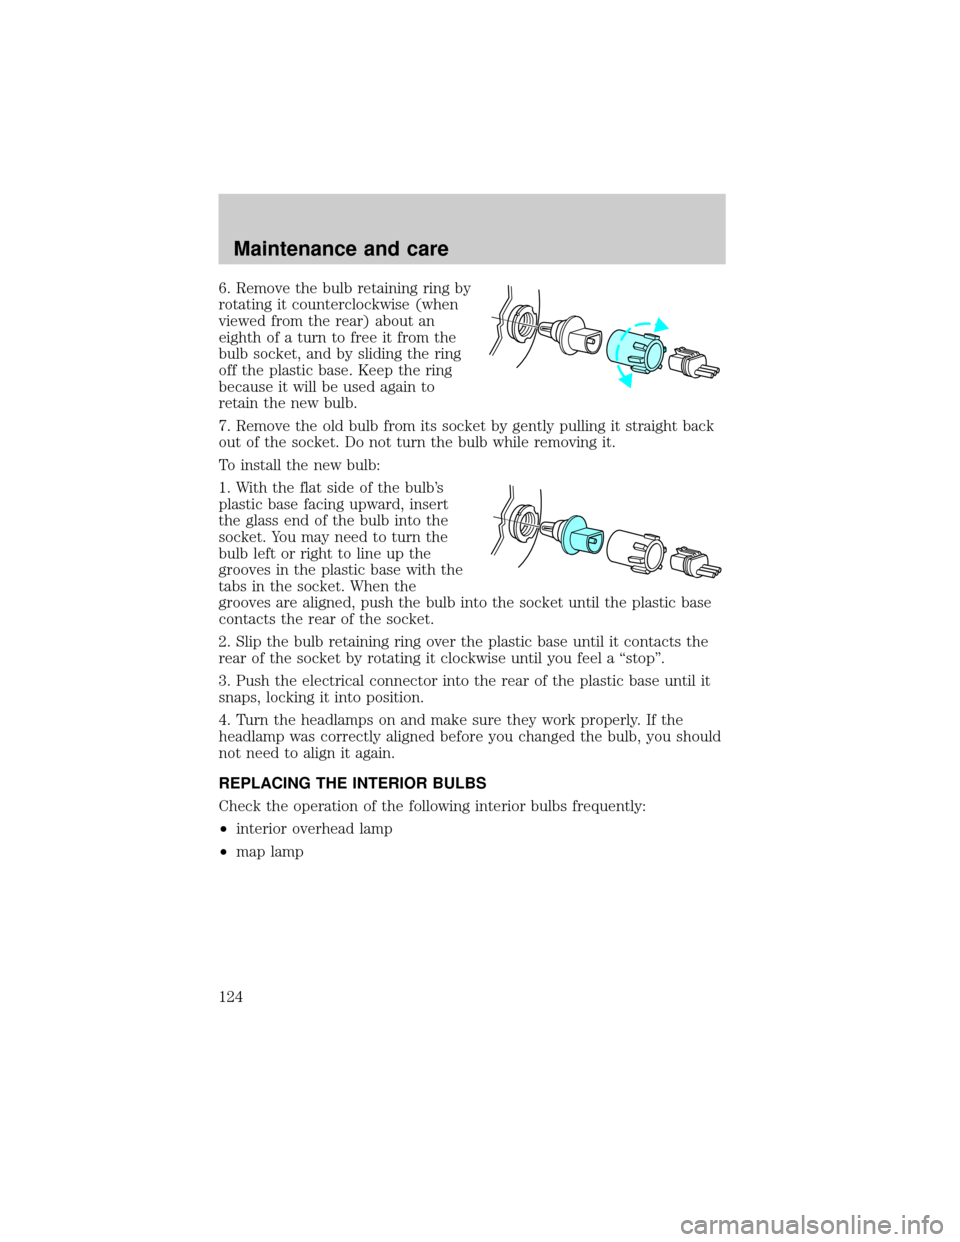
6. Remove the bulb retaining ring by
rotating it counterclockwise (when
viewed from the rear) about an
eighth of a turn to free it from the
bulb socket, and by sliding the ring
off the plastic base. Keep the ring
because it will be used again to
retain the new bulb.
7. Remove the old bulb from its socket by gently pulling it straight back
out of the socket. Do not turn the bulb while removing it.
To install the new bulb:
1. With the flat side of the bulb's
plastic base facing upward, insert
the glass end of the bulb into the
socket. You may need to turn the
bulb left or right to line up the
grooves in the plastic base with the
tabs in the socket. When the
grooves are aligned, push the bulb into the socket until the plastic base
contacts the rear of the socket.
2. Slip the bulb retaining ring over the plastic base until it contacts the
rear of the socket by rotating it clockwise until you feel a ªstopº.
3. Push the electrical connector into the rear of the plastic base until it
snaps, locking it into position.
4. Turn the headlamps on and make sure they work properly. If the
headlamp was correctly aligned before you changed the bulb, you should
not need to align it again.
REPLACING THE INTERIOR BULBS
Check the operation of the following interior bulbs frequently:
²interior overhead lamp
²map lamp
Maintenance and care
124