key FORD E SERIES 2006 4.G Owners Manual
[x] Cancel search | Manufacturer: FORD, Model Year: 2006, Model line: E SERIES, Model: FORD E SERIES 2006 4.GPages: 248, PDF Size: 2.54 MB
Page 1 of 248
Introduction 4
Instrument Cluster 12
Warning and control lights 12
Gauges 16
Entertainment Systems 18
AM/FM stereo 18
AM/FM stereo with single CD 20
AM/FM stereo with in-dash six CD 24
Climate Controls 30
Heater only 30
Manual heating and air conditioning 31
Lights 33
Headlamps 33
Turn signal control 37
Bulb replacement 38
Driver Controls 43
Windshield wiper/washer control 43
Steering wheel adjustment 44
Power windows 47
Mirrors 48
Speed control 49
Locks and Security 53
Keys 53
Locks 53
Table of Contents
1
2006 Econoline(eco)
Owners Guide (post-2002-fmt)
USA(fus)
Page 15 of 248
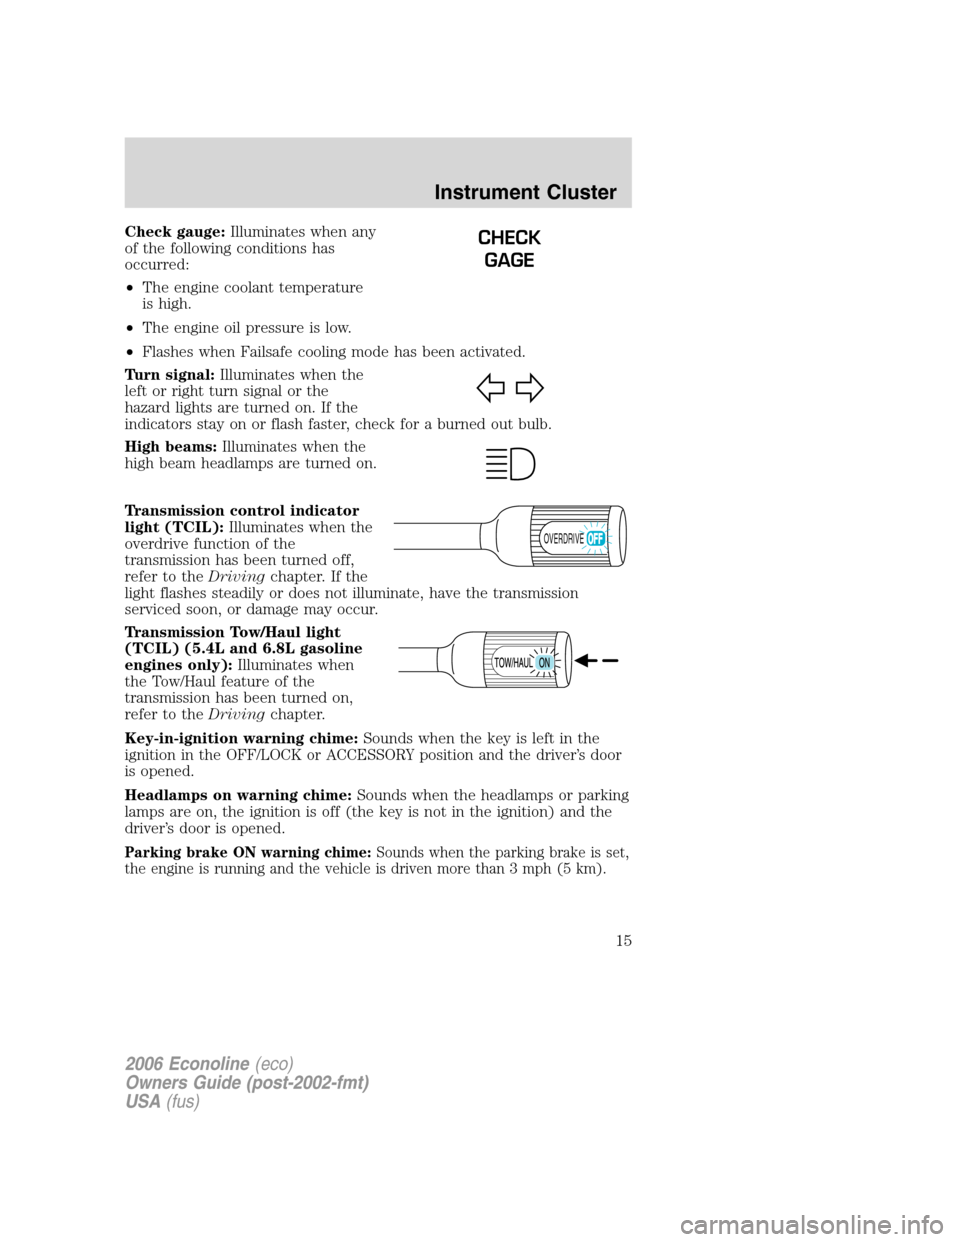
Check gauge:Illuminates when any
of the following conditions has
occurred:
•The engine coolant temperature
is high.
•The engine oil pressure is low.
•Flashes when Failsafe cooling mode has been activated.
Turn signal:Illuminates when the
left or right turn signal or the
hazard lights are turned on. If the
indicators stay on or flash faster, check for a burned out bulb.
High beams:Illuminates when the
high beam headlamps are turned on.
Transmission control indicator
light (TCIL):Illuminates when the
overdrive function of the
transmission has been turned off,
refer to theDrivingchapter. If the
light flashes steadily or does not illuminate, have the transmission
serviced soon, or damage may occur.
Transmission Tow/Haul light
(TCIL) (5.4L and 6.8L gasoline
engines only):Illuminates when
the Tow/Haul feature of the
transmission has been turned on,
refer to theDrivingchapter.
Key-in-ignition warning chime:Sounds when the key is left in the
ignition in the OFF/LOCK or ACCESSORY position and the driver’s door
is opened.
Headlamps on warning chime:Sounds when the headlamps or parking
lamps are on, the ignition is off (the key is not in the ignition) and the
driver’s door is opened.
Parking brake ON warning chime:Sounds when the parking brake is set,
the engine is running and the vehicle is driven more than 3 mph (5 km).
CHECK
GAGE
OVERDRIVE
2006 Econoline(eco)
Owners Guide (post-2002-fmt)
USA(fus)
Instrument Cluster
15
Page 33 of 248
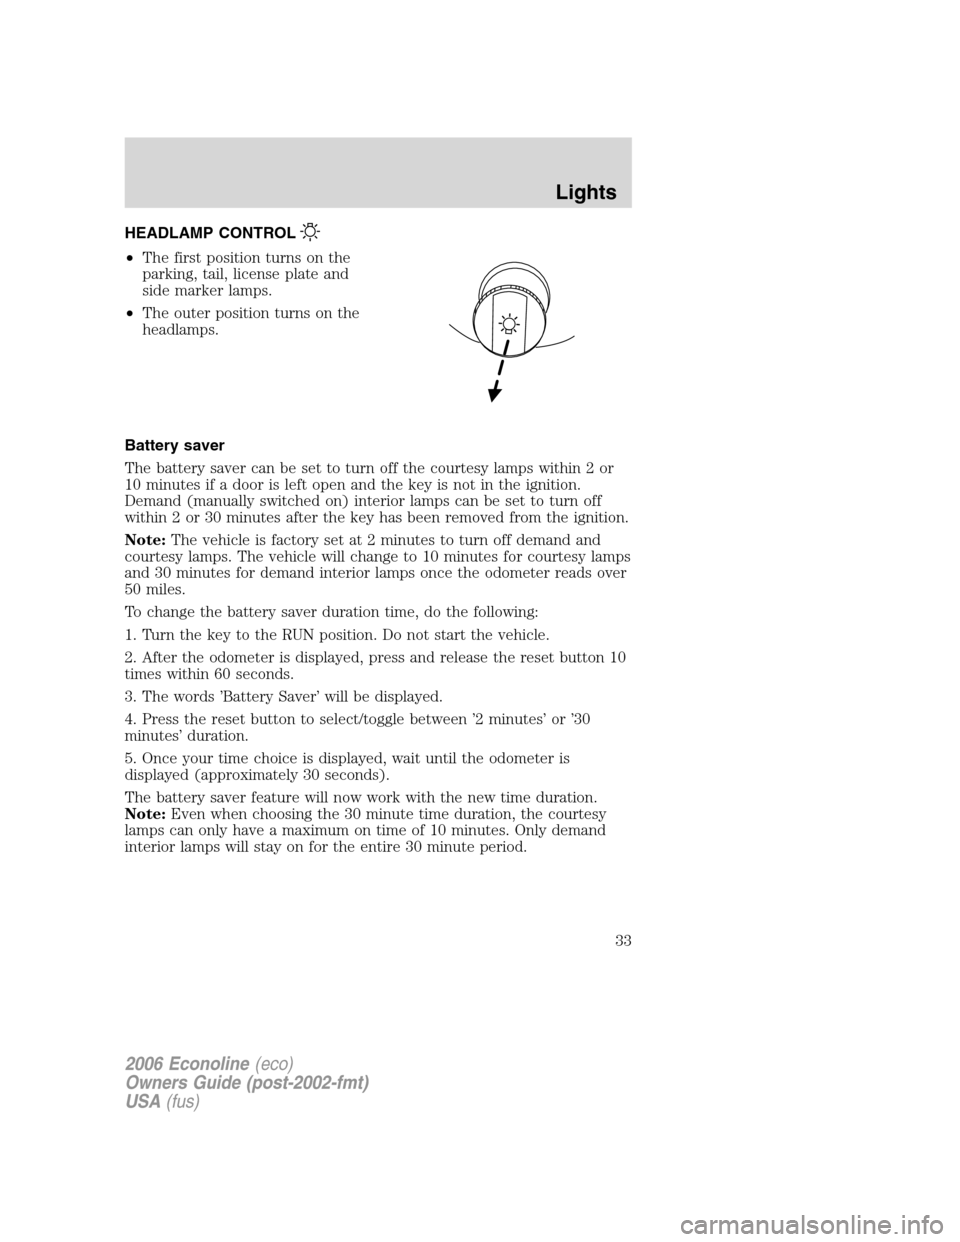
HEADLAMP CONTROL
•The first position turns on the
parking, tail, license plate and
side marker lamps.
•The outer position turns on the
headlamps.
Battery saver
The battery saver can be set to turn off the courtesy lamps within 2 or
10 minutes if a door is left open and the key is not in the ignition.
Demand (manually switched on) interior lamps can be set to turn off
within 2 or 30 minutes after the key has been removed from the ignition.
Note:The vehicle is factory set at 2 minutes to turn off demand and
courtesy lamps. The vehicle will change to 10 minutes for courtesy lamps
and 30 minutes for demand interior lamps once the odometer reads over
50 miles.
To change the battery saver duration time, do the following:
1. Turn the key to the RUN position. Do not start the vehicle.
2. After the odometer is displayed, press and release the reset button 10
times within 60 seconds.
3. The words ’Battery Saver’ will be displayed.
4. Press the reset button to select/toggle between ’2 minutes’ or ’30
minutes’ duration.
5. Once your time choice is displayed, wait until the odometer is
displayed (approximately 30 seconds).
The battery saver feature will now work with the new time duration.
Note:Even when choosing the 30 minute time duration, the courtesy
lamps can only have a maximum on time of 10 minutes. Only demand
interior lamps will stay on for the entire 30 minute period.
2006 Econoline(eco)
Owners Guide (post-2002-fmt)
USA(fus)
Lights
33
Page 38 of 248
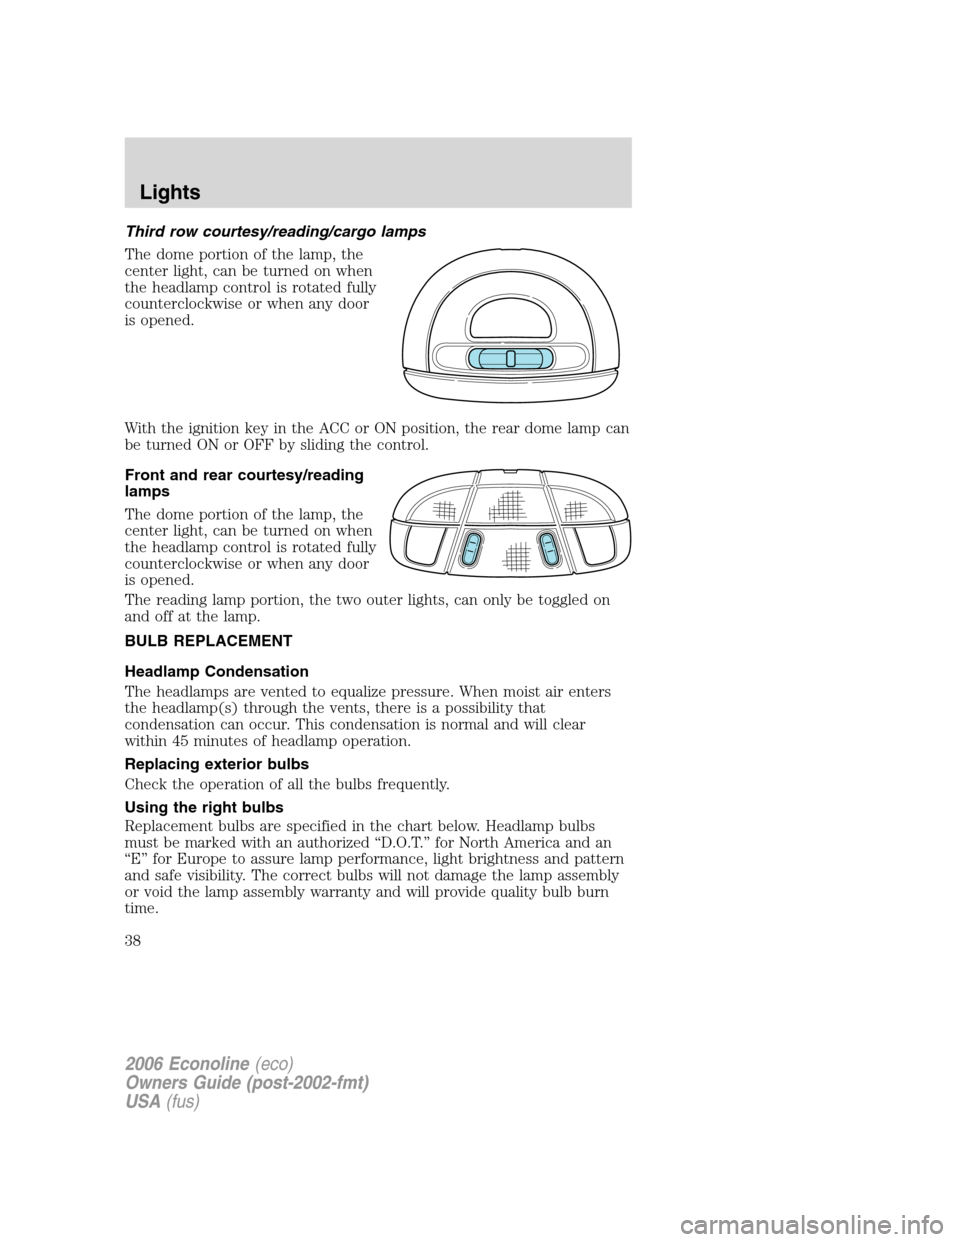
Third row courtesy/reading/cargo lamps
The dome portion of the lamp, the
center light, can be turned on when
the headlamp control is rotated fully
counterclockwise or when any door
is opened.
With the ignition key in the ACC or ON position, the rear dome lamp can
be turned ON or OFF by sliding the control.
Front and rear courtesy/reading
lamps
The dome portion of the lamp, the
center light, can be turned on when
the headlamp control is rotated fully
counterclockwise or when any door
is opened.
The reading lamp portion, the two outer lights, can only be toggled on
and off at the lamp.
BULB REPLACEMENT
Headlamp Condensation
The headlamps are vented to equalize pressure. When moist air enters
the headlamp(s) through the vents, there is a possibility that
condensation can occur. This condensation is normal and will clear
within 45 minutes of headlamp operation.
Replacing exterior bulbs
Check the operation of all the bulbs frequently.
Using the right bulbs
Replacement bulbs are specified in the chart below. Headlamp bulbs
must be marked with an authorized “D.O.T.” for North America and an
“E” for Europe to assure lamp performance, light brightness and pattern
and safe visibility. The correct bulbs will not damage the lamp assembly
or void the lamp assembly warranty and will provide quality bulb burn
time.
2006 Econoline(eco)
Owners Guide (post-2002-fmt)
USA(fus)
Lights
38
Page 53 of 248
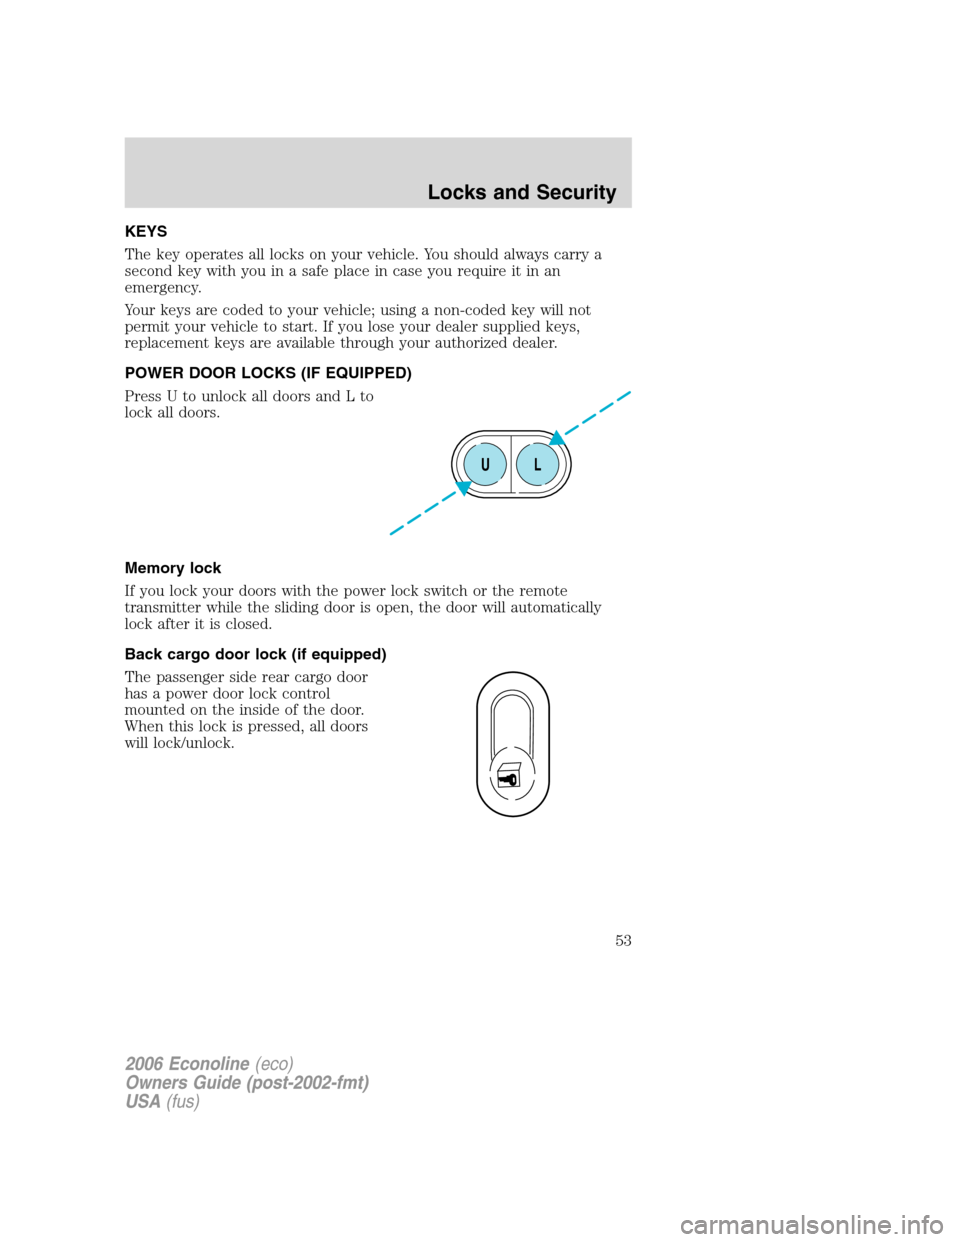
KEYS
The key operates all locks on your vehicle. You should always carry a
second key with you in a safe place in case you require it in an
emergency.
Your keys are coded to your vehicle; using a non-coded key will not
permit your vehicle to start. If you lose your dealer supplied keys,
replacement keys are available through your authorized dealer.
POWER DOOR LOCKS (IF EQUIPPED)
Press U to unlock all doors and L to
lock all doors.
Memory lock
If you lock your doors with the power lock switch or the remote
transmitter while the sliding door is open, the door will automatically
lock after it is closed.
Back cargo door lock (if equipped)
The passenger side rear cargo door
has a power door lock control
mounted on the inside of the door.
When this lock is pressed, all doors
will lock/unlock.
UL
2006 Econoline(eco)
Owners Guide (post-2002-fmt)
USA(fus)
Locks and Security
53
Page 54 of 248
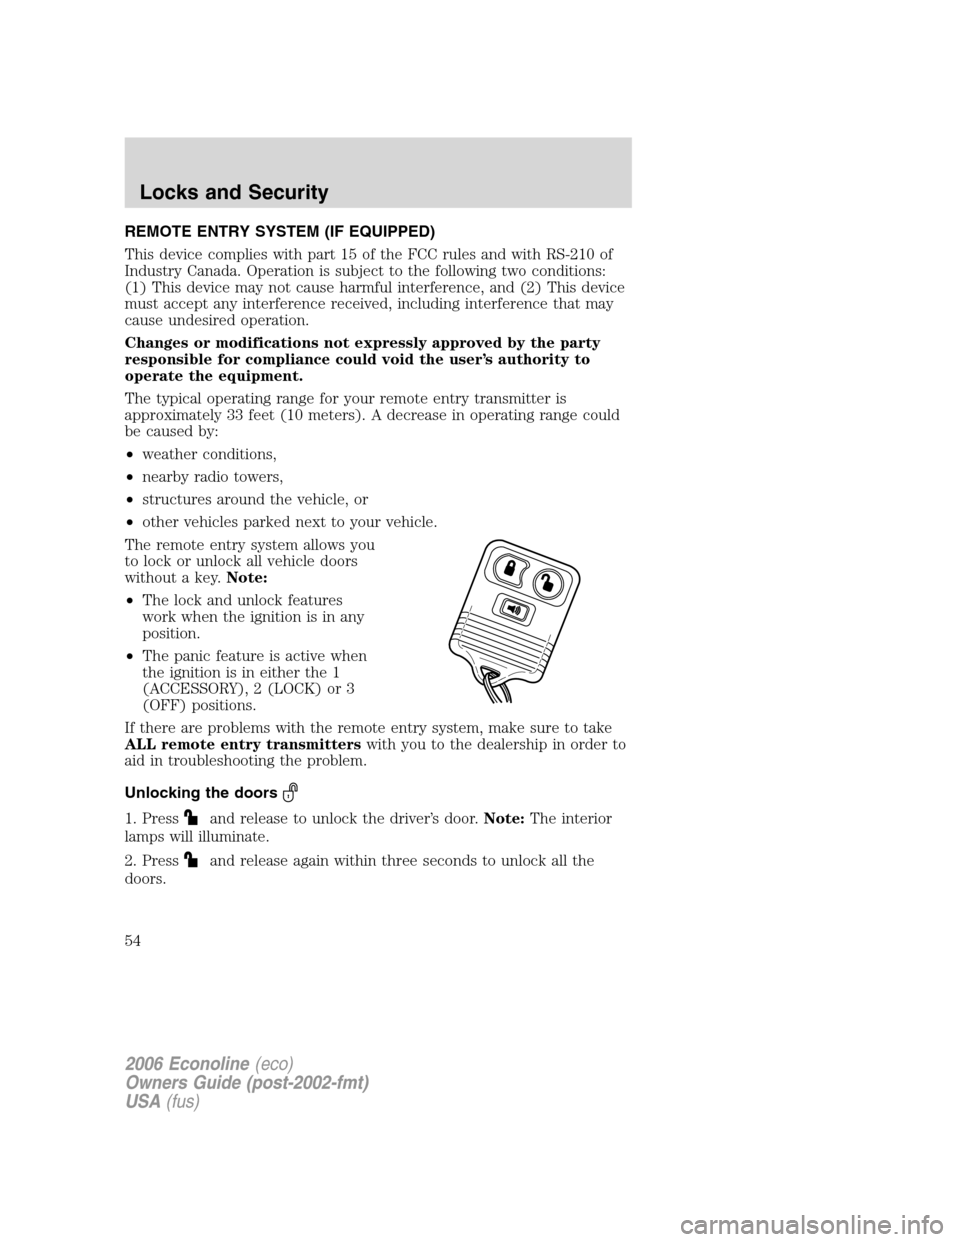
REMOTE ENTRY SYSTEM (IF EQUIPPED)
This device complies with part 15 of the FCC rules and with RS-210 of
Industry Canada. Operation is subject to the following two conditions:
(1) This device may not cause harmful interference, and (2) This device
must accept any interference received, including interference that may
cause undesired operation.
Changes or modifications not expressly approved by the party
responsible for compliance could void the user’s authority to
operate the equipment.
The typical operating range for your remote entry transmitter is
approximately 33 feet (10 meters). A decrease in operating range could
be caused by:
•weather conditions,
•nearby radio towers,
•structures around the vehicle, or
•other vehicles parked next to your vehicle.
The remote entry system allows you
to lock or unlock all vehicle doors
without a key.Note:
•The lock and unlock features
work when the ignition is in any
position.
•The panic feature is active when
the ignition is in either the 1
(ACCESSORY), 2 (LOCK) or 3
(OFF) positions.
If there are problems with the remote entry system, make sure to take
ALL remote entry transmitterswith you to the dealership in order to
aid in troubleshooting the problem.
Unlocking the doors
1. Pressand release to unlock the driver’s door.Note:The interior
lamps will illuminate.
2. Press
and release again within three seconds to unlock all the
doors.
2006 Econoline(eco)
Owners Guide (post-2002-fmt)
USA(fus)
Locks and Security
54
Page 55 of 248
Locking the doors
1. Pressand release to lock all the doors.
2. Press
and release again within three seconds to confirm that all the
doors are closed and locked.Note:The doors will lock again, and the
horn will chirp once.
Sounding a panic alarm
Press
to activate the alarm. Press the control again, or turn the
ignition to the 1 (ACCESSORY) or 4 (ON) position to deactivate the
alarm.
Note:The panic alarm will only operate when the ignition is in the 2
(LOCK) or 3 (OFF) position.
Replacing the battery
The remote entry transmitter uses one coin type three-volt lithium
battery CR2032 or equivalent.
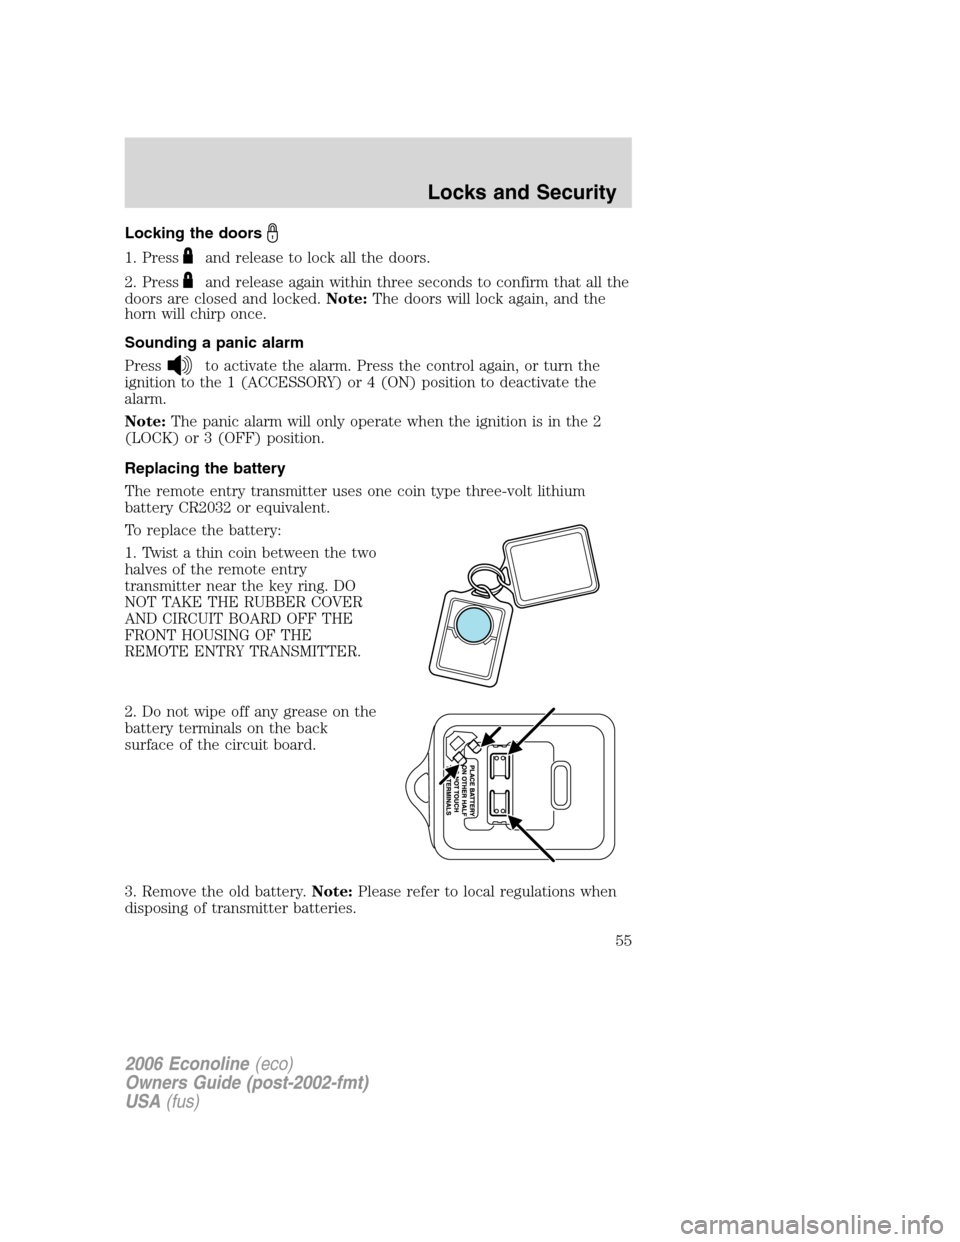
To replace the battery:
1. Twist a thin coin between the two
halves of the remote entry
transmitter near the key ring. DO
NOT TAKE THE RUBBER COVER
AND CIRCUIT BOARD OFF THE
FRONT HOUSING OF THE
REMOTE ENTRY TRANSMITTER.
2. Do not wipe off any grease on the
battery terminals on the back
surface of the circuit board.
3. Remove the old battery.Note:Please refer to local regulations when
disposing of transmitter batteries.
2006 Econoline(eco)
Owners Guide (post-2002-fmt)
USA(fus)
Locks and Security
55
Page 56 of 248
4. Insert the new battery. Refer to the diagram inside the remote entry
transmitter for the correct orientation of the battery. Press the battery
down to ensure that the battery is fully seated in the battery housing
cavity.
5. Snap the two halves back together.
Note:Replacement of the battery willnotcause the remote transmitter
to become deprogrammed from your vehicle. The remote transmitter
should operate normally after battery replacement.
Replacing lost remote entry transmitters
If you would like to have your remote entry transmitter reprogrammed
because you lost one, or would like to buy additional remote entry
transmitters, you can either reprogram them yourself, or takeall
remote entry transmittersto your authorized dealer for
reprogramming.
How to reprogram your remote entry transmitters
You must haveall remote entry transmitters(maximum of four)
available before beginning this procedure. If all remote entry transmitters
are not present during programming procedure, the ones missing during
programming will no longer operate the vehicle.
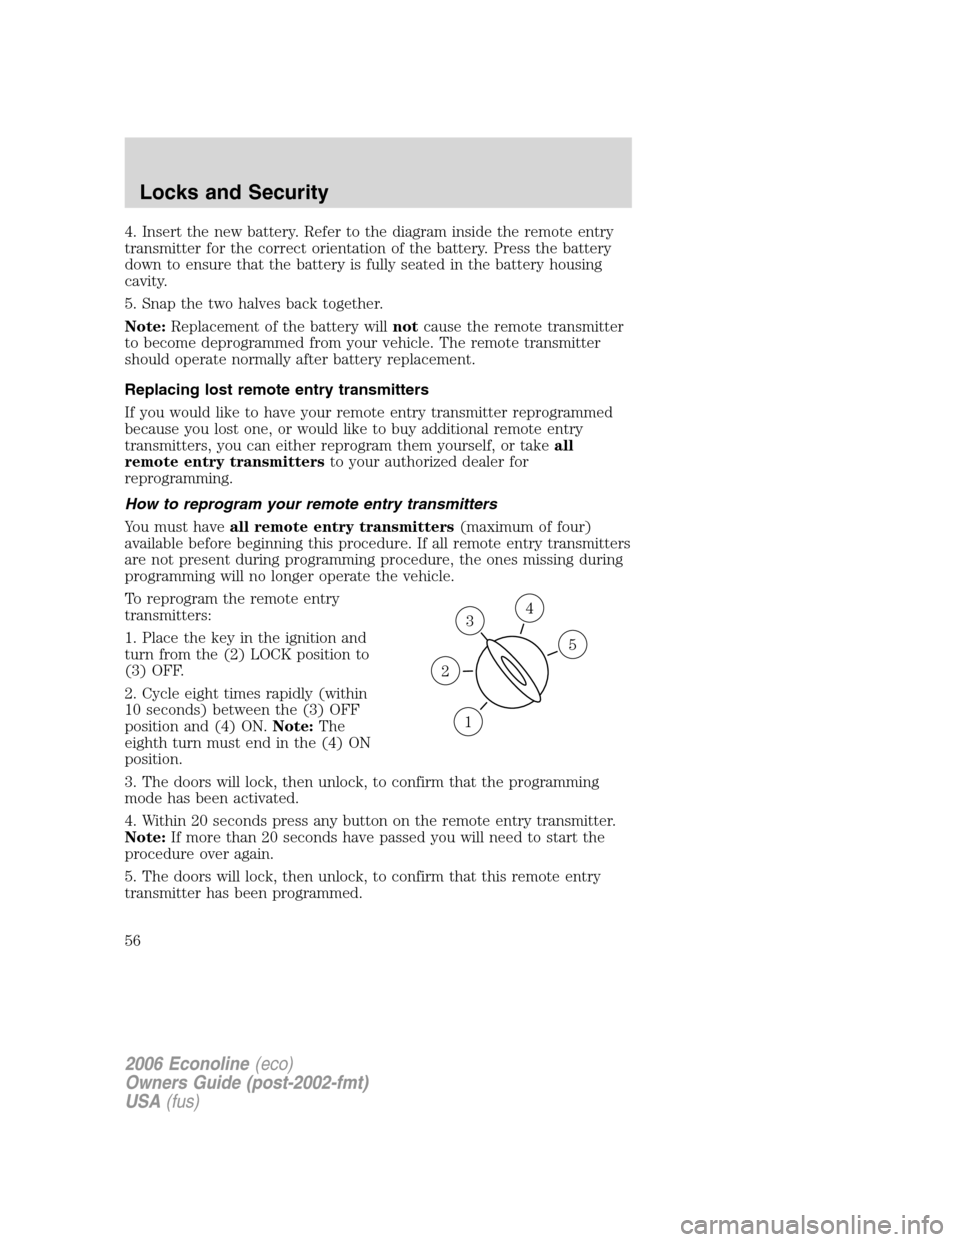
To reprogram the remote entry
transmitters:
1. Place the key in the ignition and
turn from the (2) LOCK position to
(3) OFF.
2. Cycle eight times rapidly (within
10 seconds) between the (3) OFF
position and (4) ON.Note:The
eighth turn must end in the (4) ON
position.
3. The doors will lock, then unlock, to confirm that the programming
mode has been activated.
4. Within 20 seconds press any button on the remote entry transmitter.
Note:If more than 20 seconds have passed you will need to start the
procedure over again.
5. The doors will lock, then unlock, to confirm that this remote entry
transmitter has been programmed.
3
1
2
5
4
2006 Econoline(eco)
Owners Guide (post-2002-fmt)
USA(fus)
Locks and Security
56
Page 60 of 248
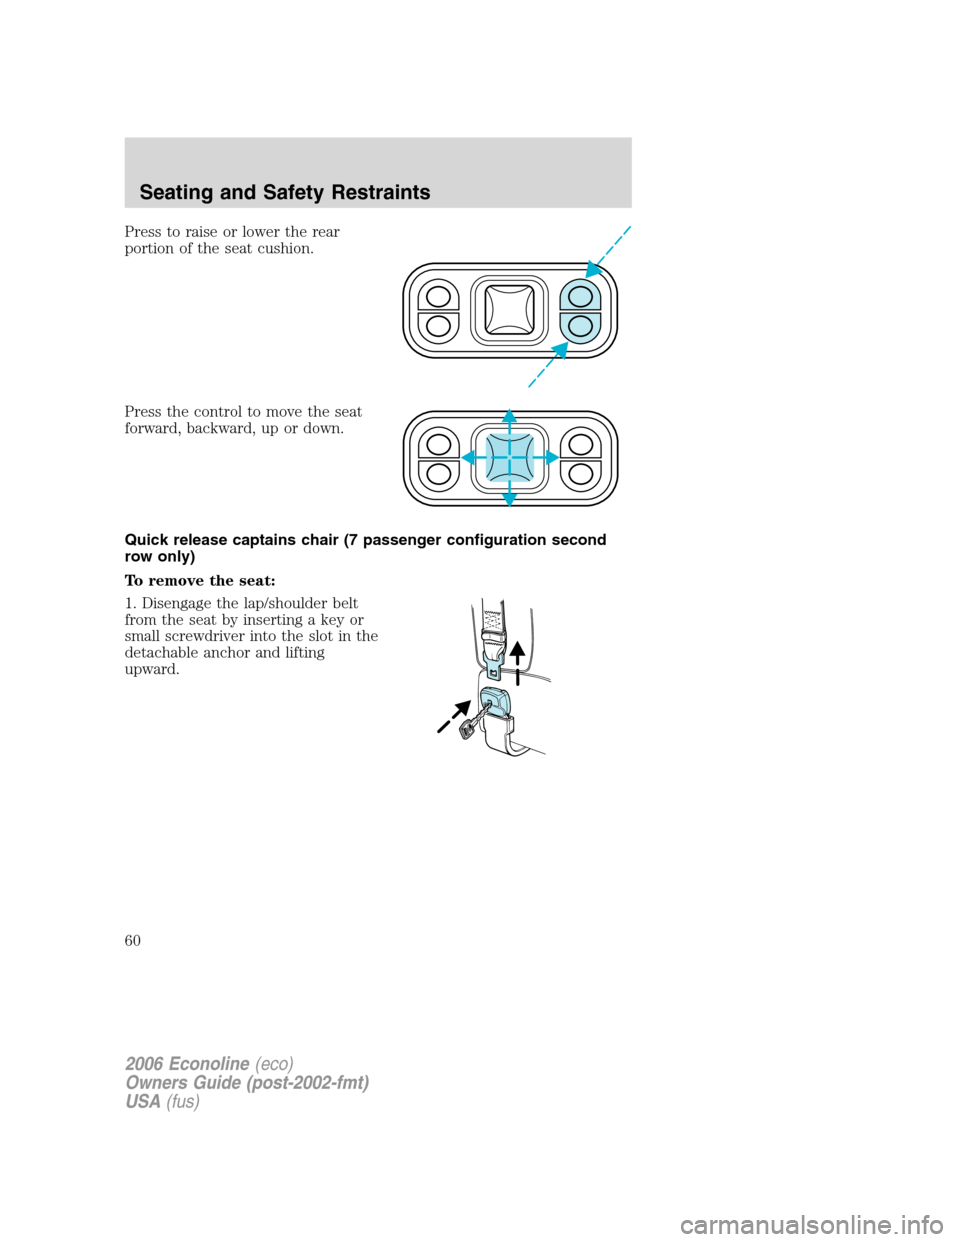
Press to raise or lower the rear
portion of the seat cushion.
Press the control to move the seat
forward, backward, up or down.
Quick release captains chair (7 passenger configuration second
row only)
To remove the seat:
1. Disengage the lap/shoulder belt
from the seat by inserting a key or
small screwdriver into the slot in the
detachable anchor and lifting
upward.
2006 Econoline(eco)
Owners Guide (post-2002-fmt)
USA(fus)
Seating and Safety Restraints
60
Page 62 of 248
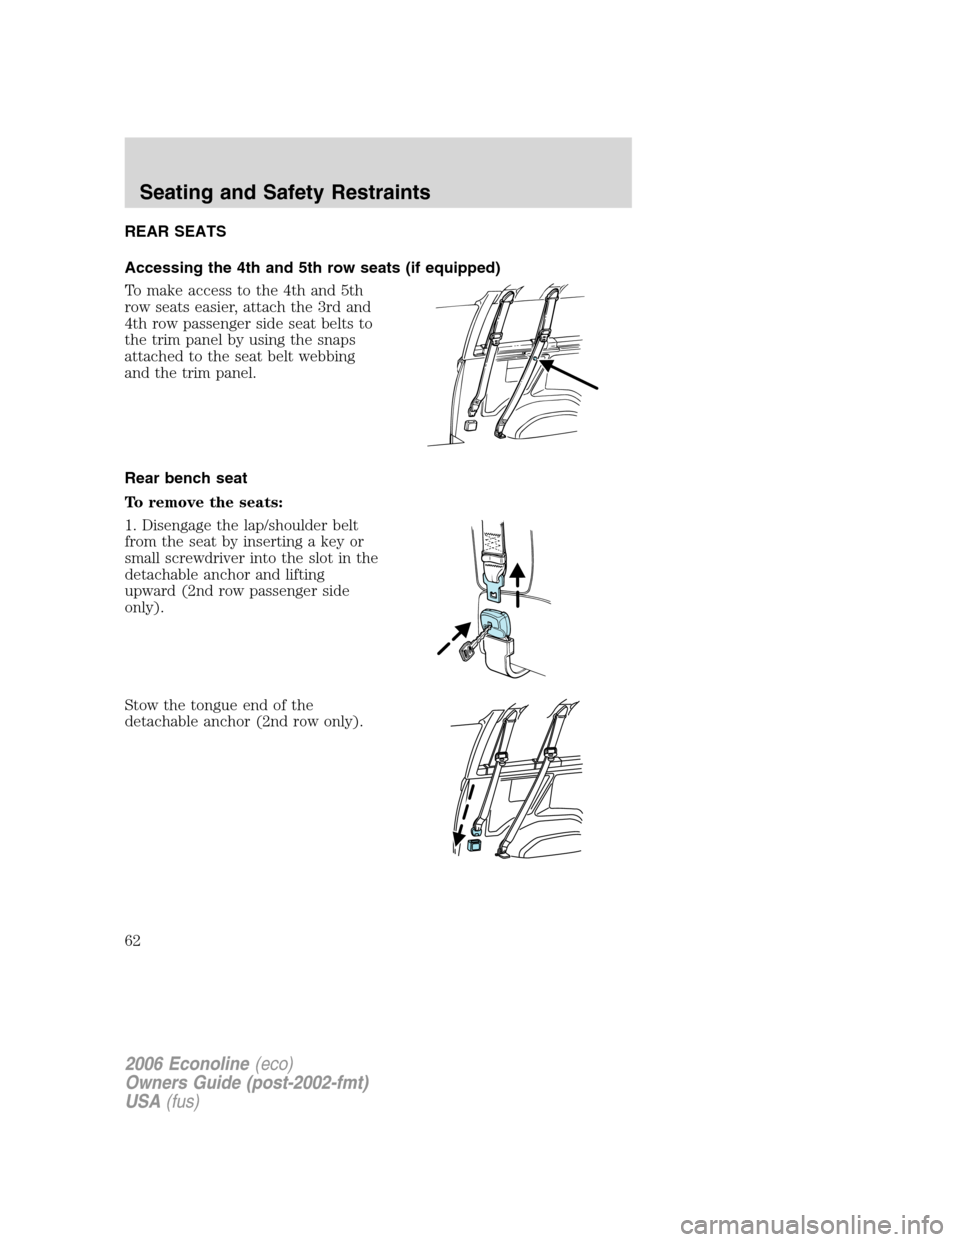
REAR SEATS
Accessing the 4th and 5th row seats (if equipped)
To make access to the 4th and 5th
row seats easier, attach the 3rd and
4th row passenger side seat belts to
the trim panel by using the snaps
attached to the seat belt webbing
and the trim panel.
Rear bench seat
To remove the seats:
1. Disengage the lap/shoulder belt
from the seat by inserting a key or
small screwdriver into the slot in the
detachable anchor and lifting
upward (2nd row passenger side
only).
Stow the tongue end of the
detachable anchor (2nd row only).
2006 Econoline(eco)
Owners Guide (post-2002-fmt)
USA(fus)
Seating and Safety Restraints
62