warning FORD E SERIES 2012 4.G Owner's Manual
[x] Cancel search | Manufacturer: FORD, Model Year: 2012, Model line: E SERIES, Model: FORD E SERIES 2012 4.GPages: 335, PDF Size: 2.34 MB
Page 31 of 335
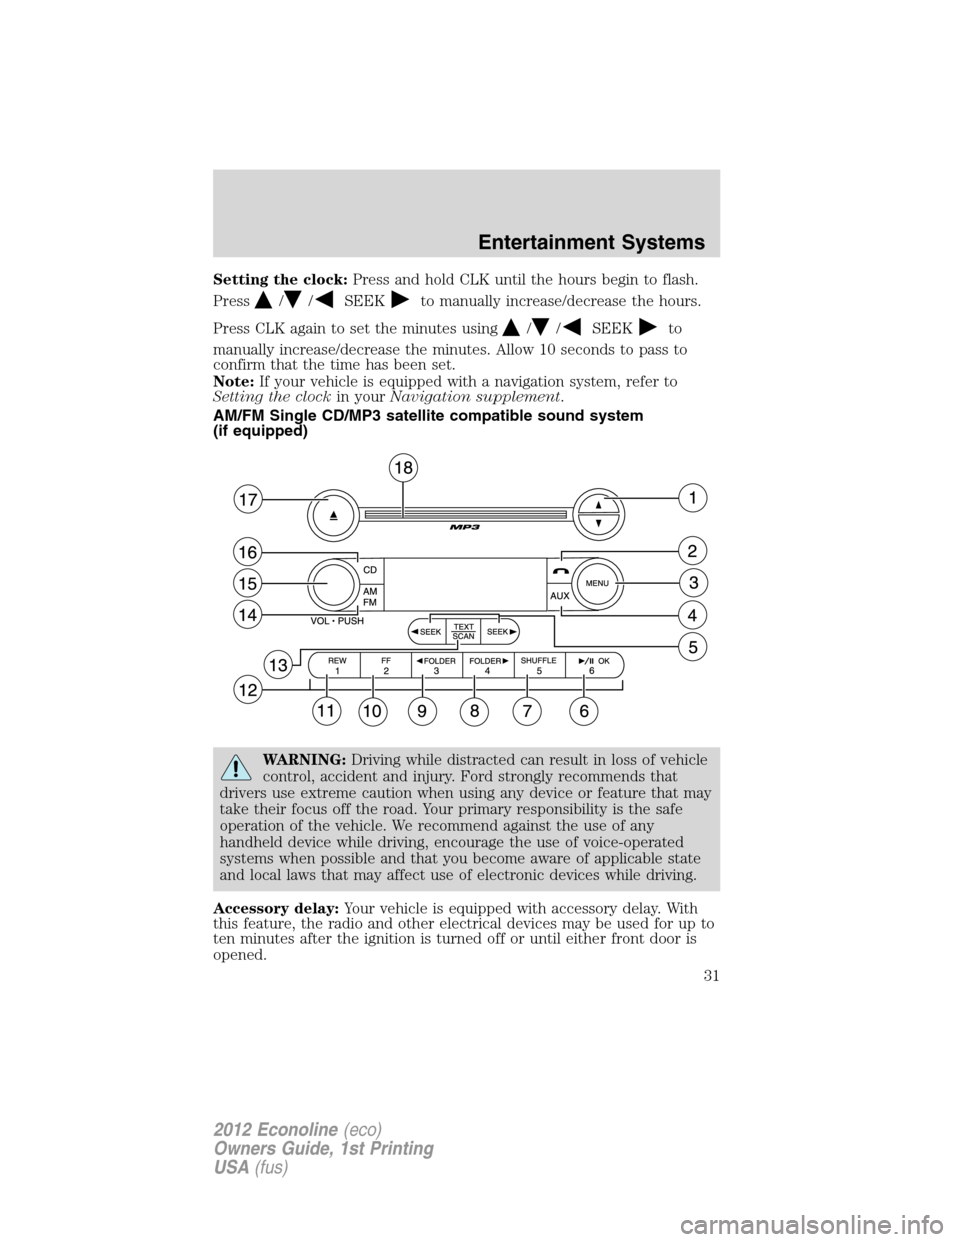
Setting the clock:Press and hold CLK until the hours begin to flash.
Press
//SEEKto manually increase/decrease the hours.
Press CLK again to set the minutes using
//SEEKto
manually increase/decrease the minutes. Allow 10 seconds to pass to
confirm that the time has been set.
Note:If your vehicle is equipped with a navigation system, refer to
Setting the clockin yourNavigation supplement.
AM/FM Single CD/MP3 satellite compatible sound system
(if equipped)
WARNING:Driving while distracted can result in loss of vehicle
control, accident and injury. Ford strongly recommends that
drivers use extreme caution when using any device or feature that may
take their focus off the road. Your primary responsibility is the safe
operation of the vehicle. We recommend against the use of any
handheld device while driving, encourage the use of voice-operated
systems when possible and that you become aware of applicable state
and local laws that may affect use of electronic devices while driving.
Accessory delay:Your vehicle is equipped with accessory delay. With
this feature, the radio and other electrical devices may be used for up to
ten minutes after the ignition is turned off or until either front door is
opened.
Entertainment Systems
31
2012 Econoline(eco)
Owners Guide, 1st Printing
USA(fus)
Page 38 of 335
17.(CD eject):Press to eject a
CD.
18.CD slot:Insert a CD label side
up in the CD slot.
Auxiliary input jack
WARNING:Driving while distracted can result in loss of vehicle
control, accident and injury. Ford strongly recommends that
drivers use extreme caution when using any device or feature that may
take their focus off the road. Your primary responsibility is the safe
operation of the vehicle. We recommend against the use of any
handheld device while driving, encourage the use of voice-operated
systems when possible and that you become aware of applicable state
and local laws that may affect use of electronic devices while driving.
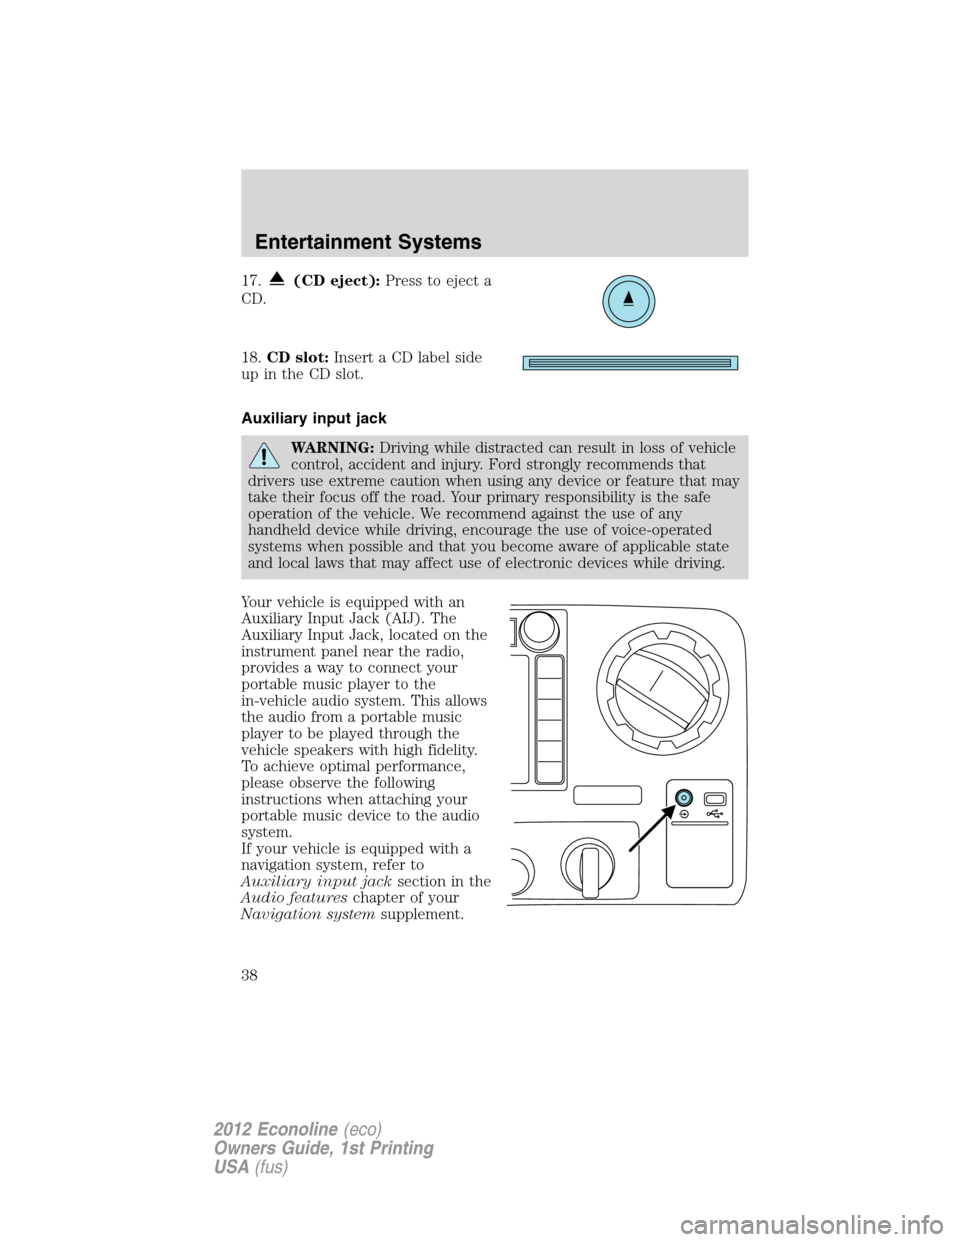
Your vehicle is equipped with an
Auxiliary Input Jack (AIJ). The
Auxiliary Input Jack, located on the
instrument panel near the radio,
provides a way to connect your
portable music player to the
in-vehicle audio system. This allows
the audio from a portable music
player to be played through the
vehicle speakers with high fidelity.
To achieve optimal performance,
please observe the following
instructions when attaching your
portable music device to the audio
system.
If your vehicle is equipped with a
navigation system, refer to
Auxiliary input jacksection in the
Audio featureschapter of your
Navigation systemsupplement.
Entertainment Systems
38
2012 Econoline(eco)
Owners Guide, 1st Printing
USA(fus)
Page 40 of 335
3. If the music sounds distorted at lower listening levels, turn the
portable music player volume down. If the problems persist, replace or
recharge the batteries in the portable music player.
4. The portable music player must be controlled in the same manner
when it is used with headphones as the AIJ does not provide control
(play, pause, etc.) over the attached portable music player.
5. For safety reasons, connecting or adjusting the settings on your
portable music player should not be attempted while the vehicle is
moving. Also, the portable music player should be stored in a secure
location, such as the center console or the glove box, when the vehicle is
in motion. The audio extension cable must be long enough to allow the
portable music player to be safely stored while the vehicle is in motion.
USB port (if equipped)
WARNING:Driving while distracted can result in loss of vehicle
control, accident and injury. Ford strongly recommends that
drivers use extreme caution when using any device or feature that may
take their focus off the road. Your primary responsibility is the safe
operation of the vehicle. We recommend against the use of any
handheld device while driving, encourage the use of voice-operated
systems when possible and that you become aware of applicable state
and local laws that may affect the use of electronic devices while
driving.
Entertainment Systems
40
2012 Econoline(eco)
Owners Guide, 1st Printing
USA(fus)
Page 52 of 335
Daytime running lamps (DRL) (if equipped)
Turns the headlamps on with a reduced output.
To activate:
•the ignition must be in the on position and
•the headlamp control is in the off or parking lamp position.
WARNING:Always remember to turn on your headlamps at
dusk or during inclement weather. The Daytime Running Lamp
(DRL) system does not activate the tail lamps and generally may not
provide adequate lighting during these conditions. Failure to activate
your headlamps under these conditions may result in a collision.
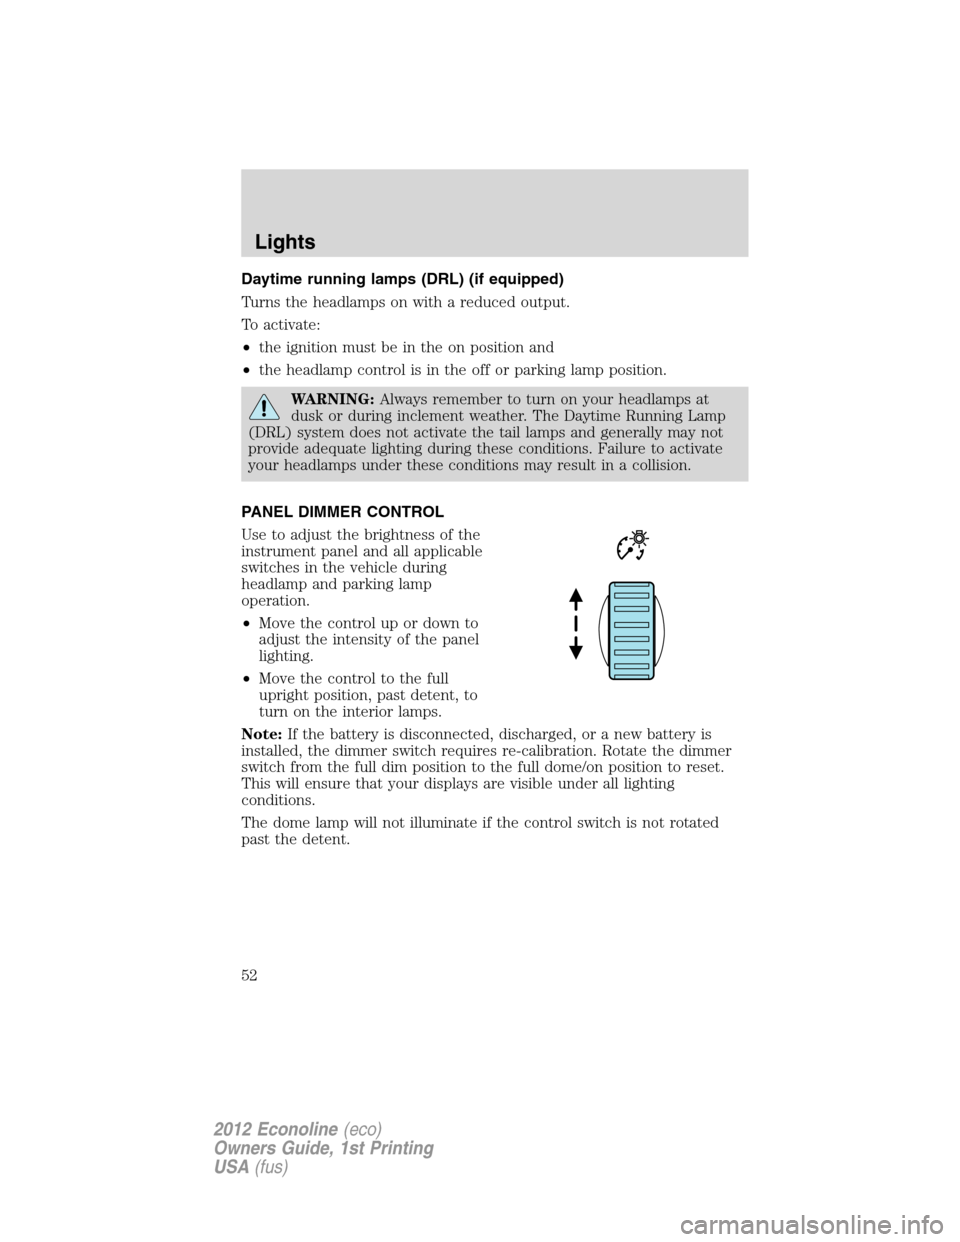
PANEL DIMMER CONTROL
Use to adjust the brightness of the
instrument panel and all applicable
switches in the vehicle during
headlamp and parking lamp
operation.
•Move the control up or down to
adjust the intensity of the panel
lighting.
•Move the control to the full
upright position, past detent, to
turn on the interior lamps.
Note:If the battery is disconnected, discharged, or a new battery is
installed, the dimmer switch requires re-calibration. Rotate the dimmer
switch from the full dim position to the full dome/on position to reset.
This will ensure that your displays are visible under all lighting
conditions.
The dome lamp will not illuminate if the control switch is not rotated
past the detent.
Lights
52
2012 Econoline(eco)
Owners Guide, 1st Printing
USA(fus)
Page 59 of 335
Replacing exterior bulbs
Check the operation of all bulbs frequently.
Replacing headlamp bulbs (aerodynamic)
1. Make sure the headlamp switch is in the off position, then open the
hood.
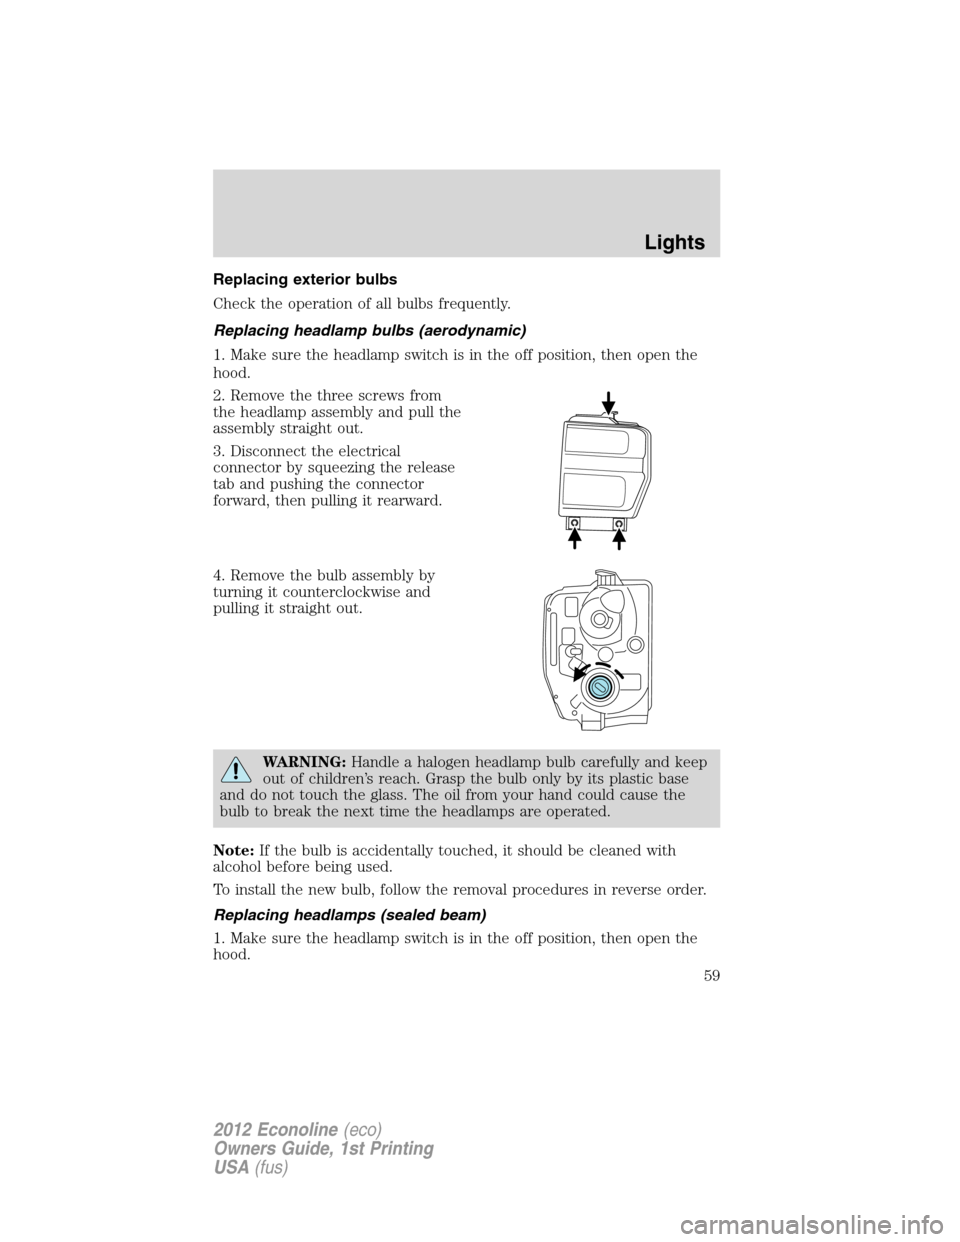
2. Remove the three screws from
the headlamp assembly and pull the
assembly straight out.
3. Disconnect the electrical
connector by squeezing the release
tab and pushing the connector
forward, then pulling it rearward.
4. Remove the bulb assembly by
turning it counterclockwise and
pulling it straight out.
WARNING:Handle a halogen headlamp bulb carefully and keep
out of children’s reach. Grasp the bulb only by its plastic base
and do not touch the glass. The oil from your hand could cause the
bulb to break the next time the headlamps are operated.
Note:If the bulb is accidentally touched, it should be cleaned with
alcohol before being used.
To install the new bulb, follow the removal procedures in reverse order.
Replacing headlamps (sealed beam)
1. Make sure the headlamp switch is in the off position, then open the
hood.
Lights
59
2012 Econoline(eco)
Owners Guide, 1st Printing
USA(fus)
Page 65 of 335
TILT STEERING WHEEL
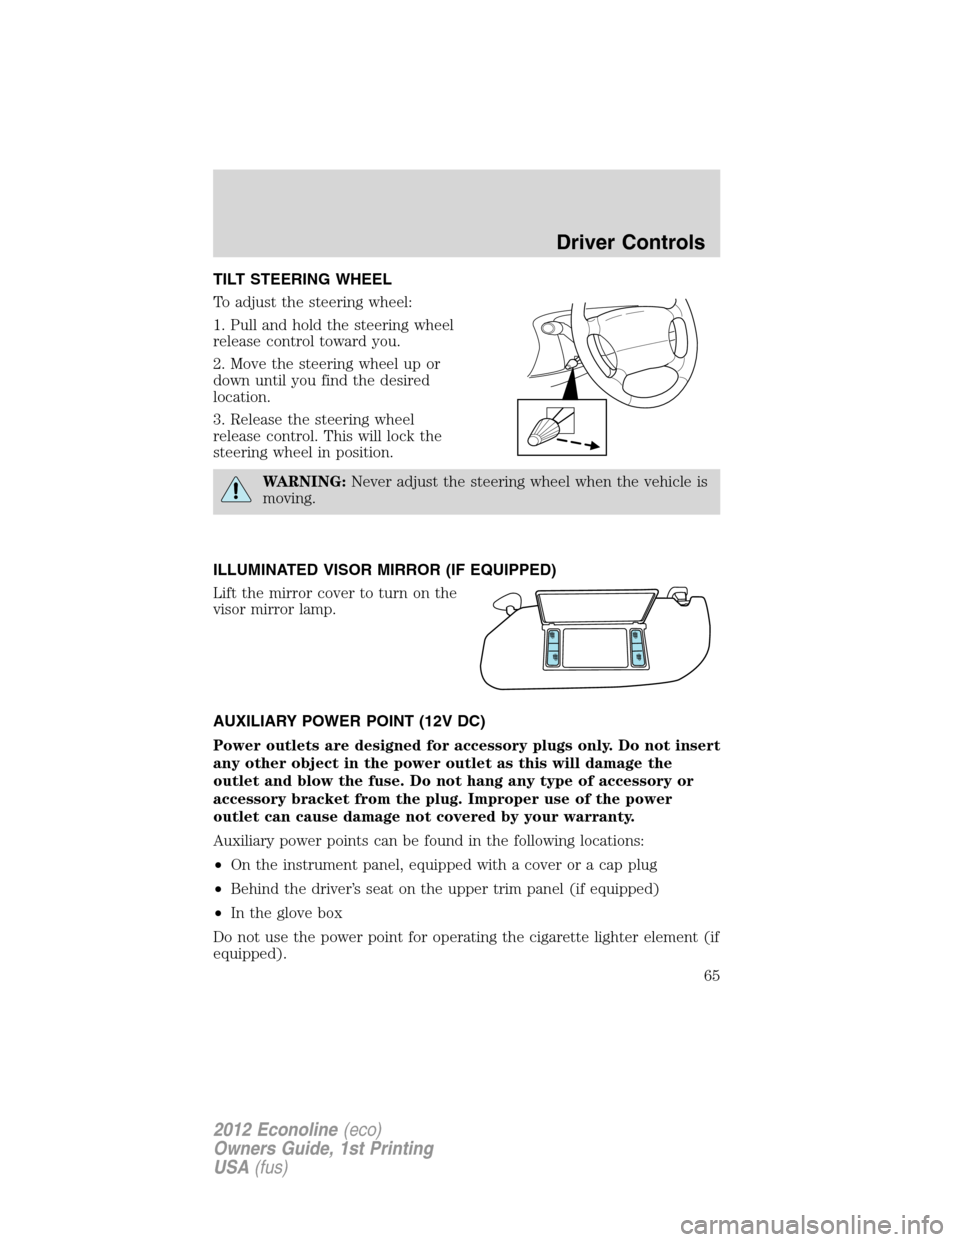
To adjust the steering wheel:
1. Pull and hold the steering wheel
release control toward you.
2. Move the steering wheel up or
down until you find the desired
location.
3. Release the steering wheel
release control. This will lock the
steering wheel in position.
WARNING:Never adjust the steering wheel when the vehicle is
moving.
ILLUMINATED VISOR MIRROR (IF EQUIPPED)
Lift the mirror cover to turn on the
visor mirror lamp.
AUXILIARY POWER POINT (12V DC)
Power outlets are designed for accessory plugs only. Do not insert
any other object in the power outlet as this will damage the
outlet and blow the fuse. Do not hang any type of accessory or
accessory bracket from the plug. Improper use of the power
outlet can cause damage not covered by your warranty.
Auxiliary power points can be found in the following locations:
•On the instrument panel, equipped with a cover or a cap plug
•Behind the driver’s seat on the upper trim panel (if equipped)
•In the glove box
Do not use the power point for operating the cigarette lighter element (if
equipped).
Driver Controls
65
2012 Econoline(eco)
Owners Guide, 1st Printing
USA(fus)
Page 66 of 335
Note:Do not plug optional electrical accessories into the cigarette
lighter socket (if equipped). Improper use of the lighter can cause
damage not covered by your warranty, and can result in fire or serious
injury.
To prevent the fuse from being blown, do not use the power point(s)
over the vehicle capacity of 12V DC/180W. If the power point is not
working, a fuse may have blown. Refer toFuses and relaysin the
Roadside Emergencieschapter for information on checking and
replacing fuses.
To have full capacity usage of your power point, the engine is required to
be running to avoid unintentional discharge of the battery. To prevent
the battery from being discharged:
•do not use the power point longer than necessary when the engine is
not running,
•do not leave battery chargers, video game adapters, computers and
other devices plugged in overnight or when the vehicle is parked for
extended periods.
Always keep the power point caps closed when not being used.
POWER WINDOWS (IF EQUIPPED)
WARNING:Do not leave children unattended in the vehicle and
do not let children play with the power windows. They may
seriously injure themselves.
WARNING:When closing the power windows, you should verify
they are free of obstructions and ensure that children and/or
pets are not in the proximity of the window openings.
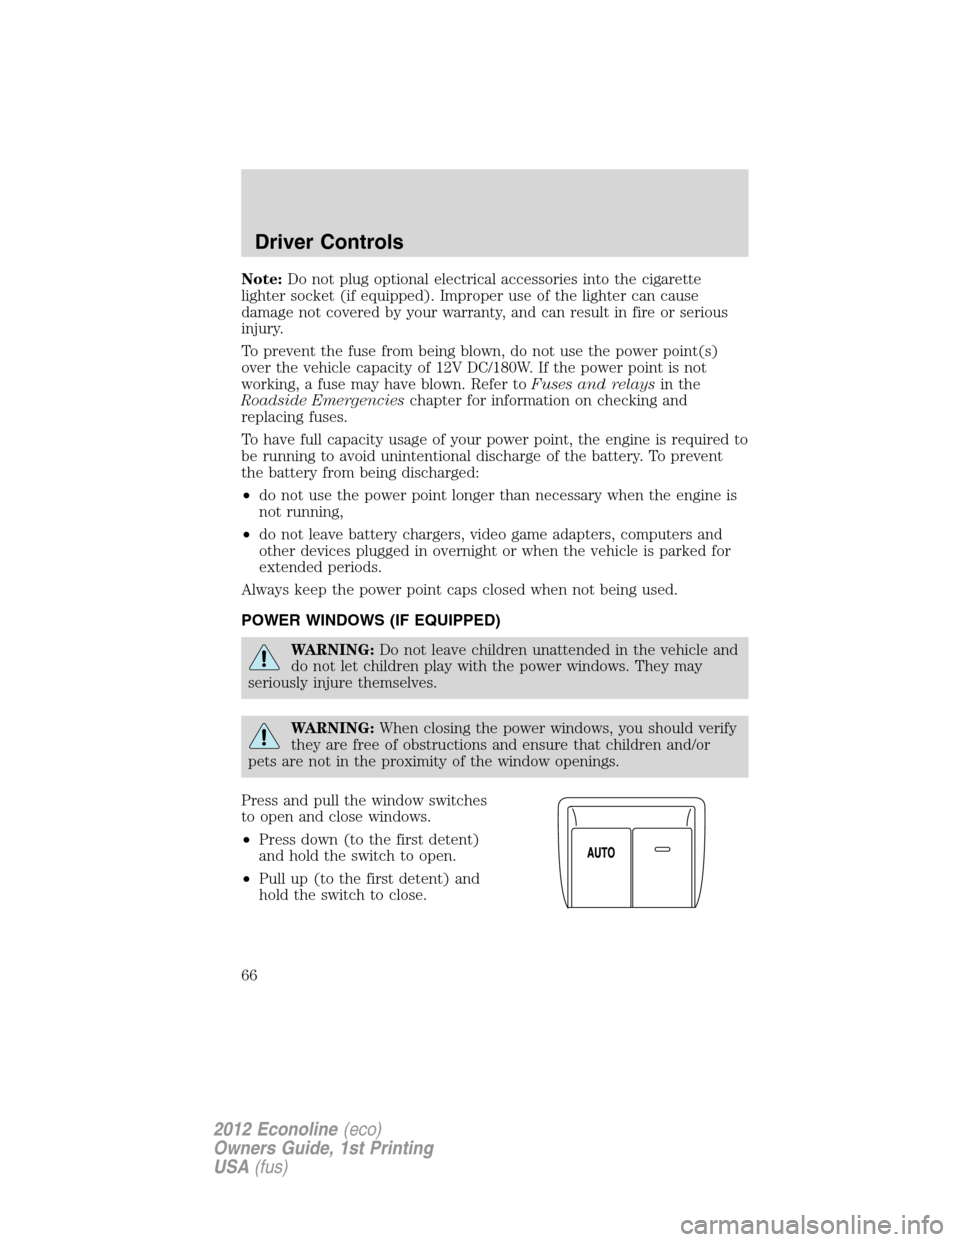
Press and pull the window switches
to open and close windows.
•Press down (to the first detent)
and hold the switch to open.
•Pull up (to the first detent) and
hold the switch to close.
Driver Controls
66
2012 Econoline(eco)
Owners Guide, 1st Printing
USA(fus)
Page 67 of 335
One-touch down
Allows the driver’s window to open fully without holding the control
down. Press the switch completely down to the second detent and
release quickly. The window will open fully. Momentarily press the switch
to any position to stop the window operation.
Accessory delay
With accessory delay, the window switches and radio may be used for up
to 10 minutes after the ignition switch is turned to the off position, or
until any door is opened.
INTERIOR MIRROR (IF EQUIPPED)
The interior rear view mirror has two pivot points on the support arm
which lets you adjust the mirror up or down and from side to side.
WARNING:Do not adjust the mirror while the vehicle is in
motion.
Automatic dimming interior rear view mirror (if equipped)
The interior rear view mirror has an auto-dimming function. The
electronic day/night mirror will change from the normal (high reflective)
state to the non-glare (darkened) state when bright lights (glare) reach
the mirror. When the mirror detects bright light from behind the vehicle,
it will automatically adjust (darken) to minimize glare.
The mirror will automatically return to the normal state whenever the
vehicle is placed in R (Reverse) to ensure a bright clear view when
backing up.
Do not block the sensors on the front and back of the interior
rear view mirror since this may impair proper mirror
performance.
Note:A rear center passenger and/or raised rear center headrest (if
equipped) may also block the light from reaching the sensor.
Do not clean the housing or glass of any mirror with harsh
abrasives, fuel or other petroleum-based cleaning products.
Note:If equipped with a rearview camera system, a video image will
display in the mirror or the navigation system display (if equipped) when
the vehicle is put in R (Reverse). As you shift into any other gear from R
(Reverse), the image will remain for a few seconds and then turn off.
Refer toRearview camera systemin theDrivingchapter.
Driver Controls
67
2012 Econoline(eco)
Owners Guide, 1st Printing
USA(fus)
Page 68 of 335
EXTERIOR MIRRORS
Power side view mirrors (if equipped)
WARNING:Do not adjust the mirror while the vehicle is in
motion.
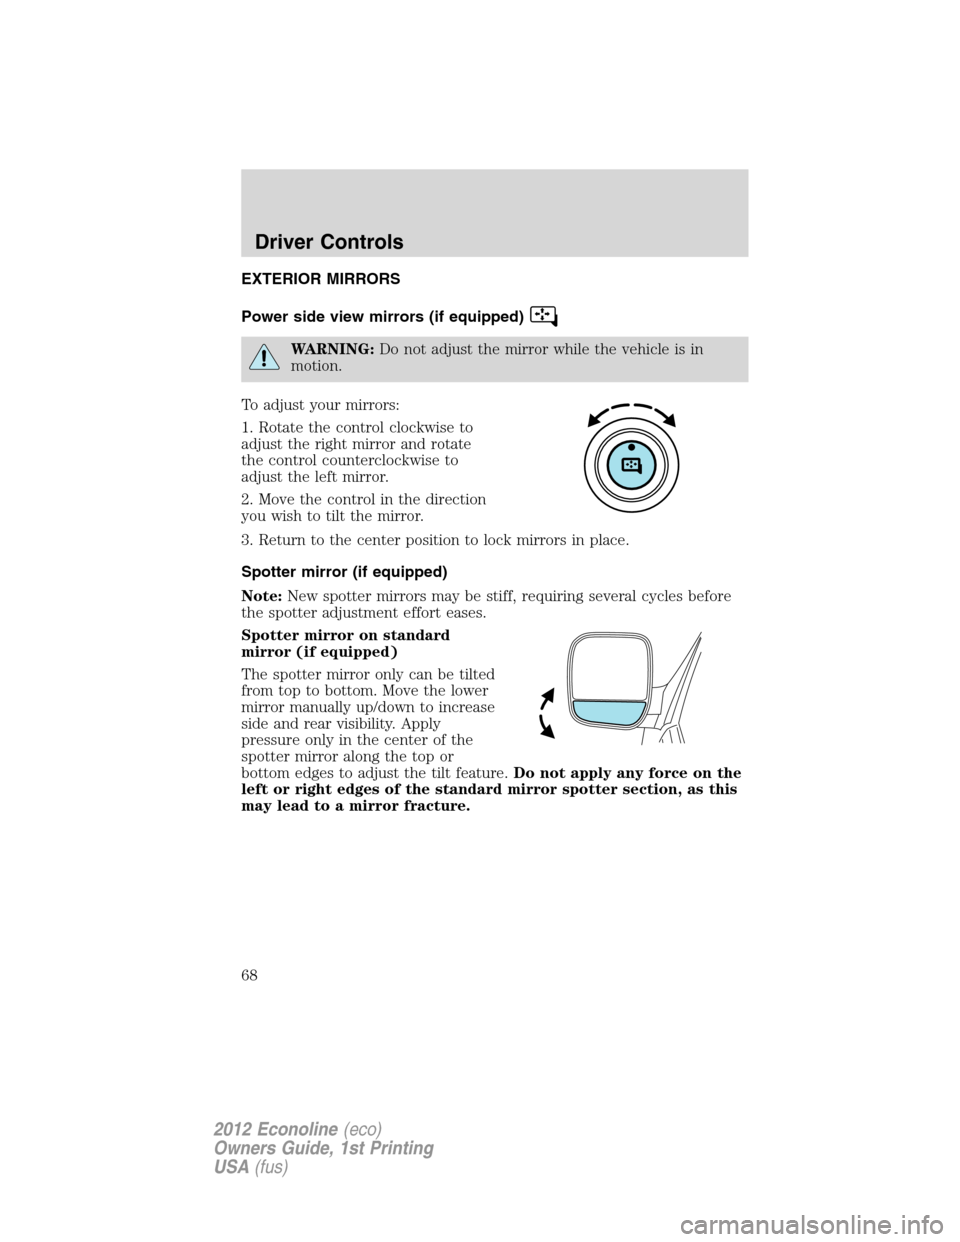
To adjust your mirrors:
1. Rotate the control clockwise to
adjust the right mirror and rotate
the control counterclockwise to
adjust the left mirror.
2. Move the control in the direction
you wish to tilt the mirror.
3. Return to the center position to lock mirrors in place.
Spotter mirror (if equipped)
Note:New spotter mirrors may be stiff, requiring several cycles before
the spotter adjustment effort eases.
Spotter mirror on standard
mirror (if equipped)
The spotter mirror only can be tilted
from top to bottom. Move the lower
mirror manually up/down to increase
side and rear visibility. Apply
pressure only in the center of the
spotter mirror along the top or
bottom edges to adjust the tilt feature.Do not apply any force on the
left or right edges of the standard mirror spotter section, as this
may lead to a mirror fracture.
Driver Controls
68
2012 Econoline(eco)
Owners Guide, 1st Printing
USA(fus)
Page 70 of 335
SPEED CONTROL (IF EQUIPPED)
With speed control set, you can maintain a set speed without keeping
your foot on the accelerator pedal.
WARNING:Do not use the speed control in heavy traffic or on
roads that are winding, slippery or unpaved.
Using speed control
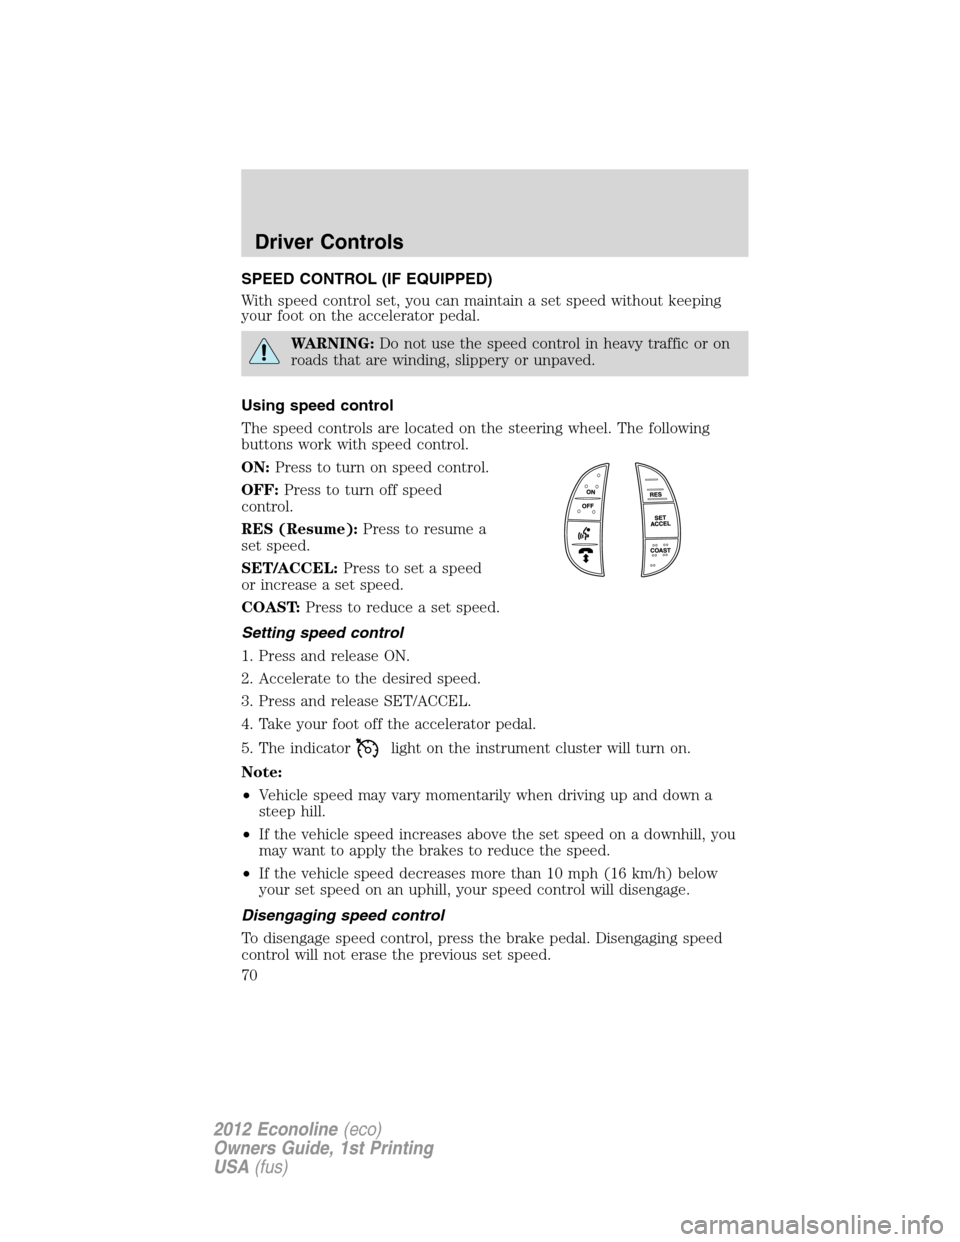
The speed controls are located on the steering wheel. The following
buttons work with speed control.
ON:Press to turn on speed control.
OFF:Press to turn off speed
control.
RES (Resume):Press to resume a
set speed.
SET/ACCEL:Press to set a speed
or increase a set speed.
COAST:Press to reduce a set speed.
Setting speed control
1. Press and release ON.
2. Accelerate to the desired speed.
3. Press and release SET/ACCEL.
4. Take your foot off the accelerator pedal.
5. The indicator
light on the instrument cluster will turn on.
Note:
•Vehicle speed may vary momentarily when driving up and down a
steep hill.
•If the vehicle speed increases above the set speed on a downhill, you
may want to apply the brakes to reduce the speed.
•If the vehicle speed decreases more than 10 mph (16 km/h) below
your set speed on an uphill, your speed control will disengage.
Disengaging speed control
To disengage speed control, press the brake pedal. Disengaging speed
control will not erase the previous set speed.
Driver Controls
70
2012 Econoline(eco)
Owners Guide, 1st Printing
USA(fus)