check engine FORD E SERIES 2014 4.G Owner's Manual
[x] Cancel search | Manufacturer: FORD, Model Year: 2014, Model line: E SERIES, Model: FORD E SERIES 2014 4.GPages: 438, PDF Size: 5.12 MB
Page 194 of 438
GENERAL INFORMATION
Have your vehicle serviced regularly to help maintain its roadworthiness
and resale value. There is a large network of Ford authorized dealers
who are there to help you with their professional servicing expertise. We
believe that their specially trained technicians are best qualified to
service your vehicle properly and expertly. They are supported by a wide
range of highly specialized tools developed specifically for servicing your
vehicle.
To help you service your vehicle, we provideScheduled Maintenance
Informationwhich makes tracking routine service easy.
If your vehicle requires professional service, your authorized dealer can
provide the necessary parts and service. Check your warranty
information to find out which parts and services are covered.
Use only recommended fuels, lubricants, fluids and service parts
conforming to specifications. Motorcraft® parts are designed and built to
provide the best performance in your vehicle.
Precautions
•Do not work on a hot engine.
•Make sure that nothing gets caught in moving parts.
•Do not work on a vehicle with the engine running in an enclosed
space, unless you are sure you have enough ventilation.
•Keep all open flames and other burning material (such as cigarettes)
away from the battery and all fuel related parts.
Working with the Engine Off
1. Set the parking brake and shift toP(Park).
2. Turn off the engine and remove the key (if equipped).
3. Block the wheels.
Working with the Engine On
WARNING:To reduce the risk of vehicle damage or personal
burn injuries, do not start your engine with the air cleaner
removed and do not remove it while the engine is running.
1. Set the parking brake and shift to positionP.
2. Block the wheels.
Maintenance193
2014 Econoline(eco)
Owners Guide gf, 1st Printing, November 2012
USA(fus)
Page 197 of 438
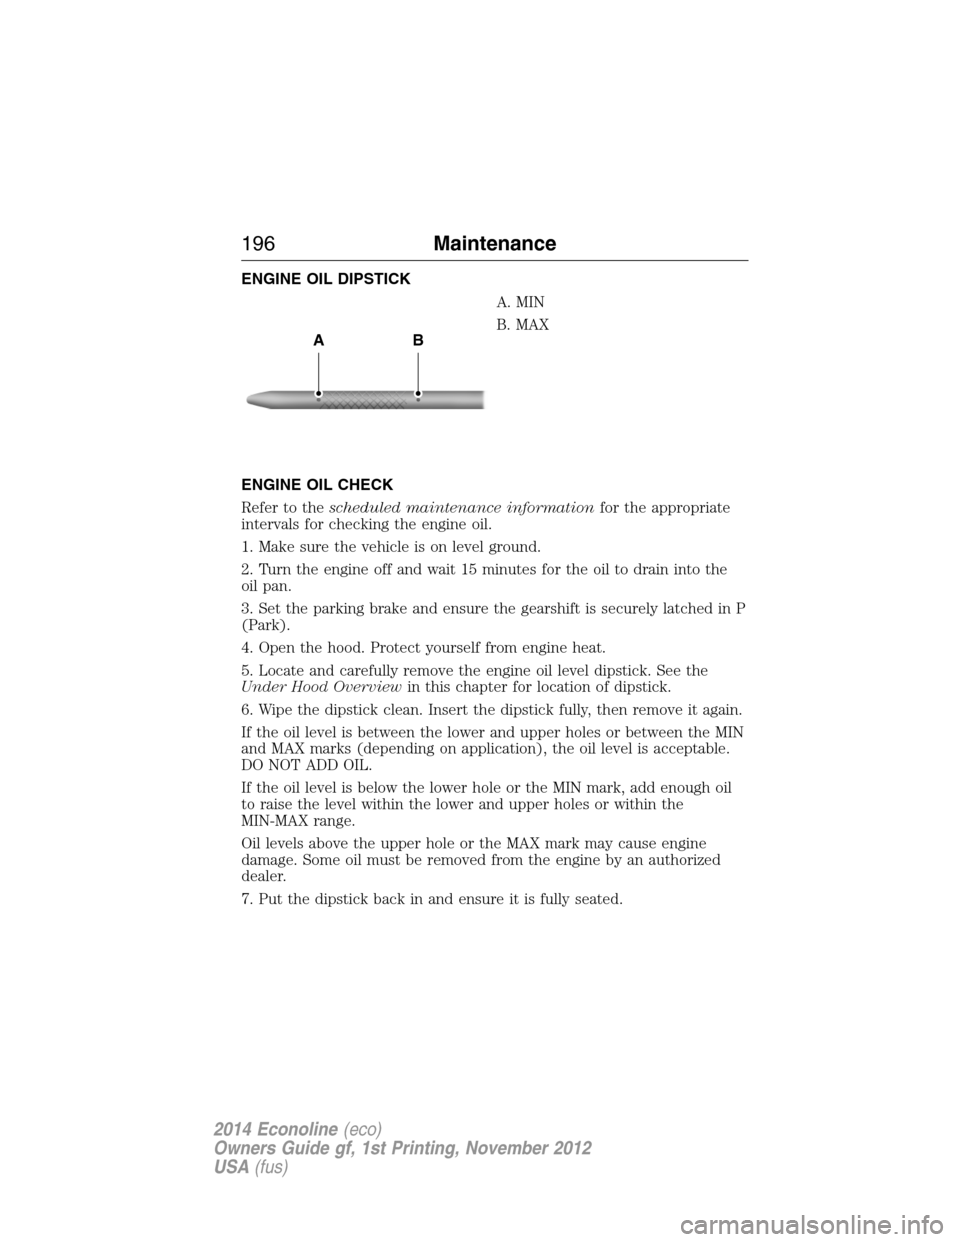
ENGINE OIL DIPSTICK
A. MIN
B. MAX
ENGINE OIL CHECK
Refer to thescheduled maintenance informationfor the appropriate
intervals for checking the engine oil.
1. Make sure the vehicle is on level ground.
2. Turn the engine off and wait 15 minutes for the oil to drain into the
oil pan.
3. Set the parking brake and ensure the gearshift is securely latched in P
(Park).
4. Open the hood. Protect yourself from engine heat.
5. Locate and carefully remove the engine oil level dipstick. See the
Under Hood Overviewin this chapter for location of dipstick.
6. Wipe the dipstick clean. Insert the dipstick fully, then remove it again.
If the oil level is between the lower and upper holes or between the MIN
and MAX marks (depending on application), the oil level is acceptable.
DO NOT ADD OIL.
If the oil level is below the lower hole or the MIN mark, add enough oil
to raise the level within the lower and upper holes or within the
MIN-MAX range.
Oil levels above the upper hole or the MAX mark may cause engine
damage. Some oil must be removed from the engine by an authorized
dealer.
7. Put the dipstick back in and ensure it is fully seated.
AB
196Maintenance
2014 Econoline(eco)
Owners Guide gf, 1st Printing, November 2012
USA(fus)
Page 198 of 438
Adding Engine Oil
Note:Do not remove the engine oil level dipstick or the filler cap when
the engine is running.
Note:Do not add engine oil further than the MAX mark. Oil levels above
the MAX mark may cause engine damage.
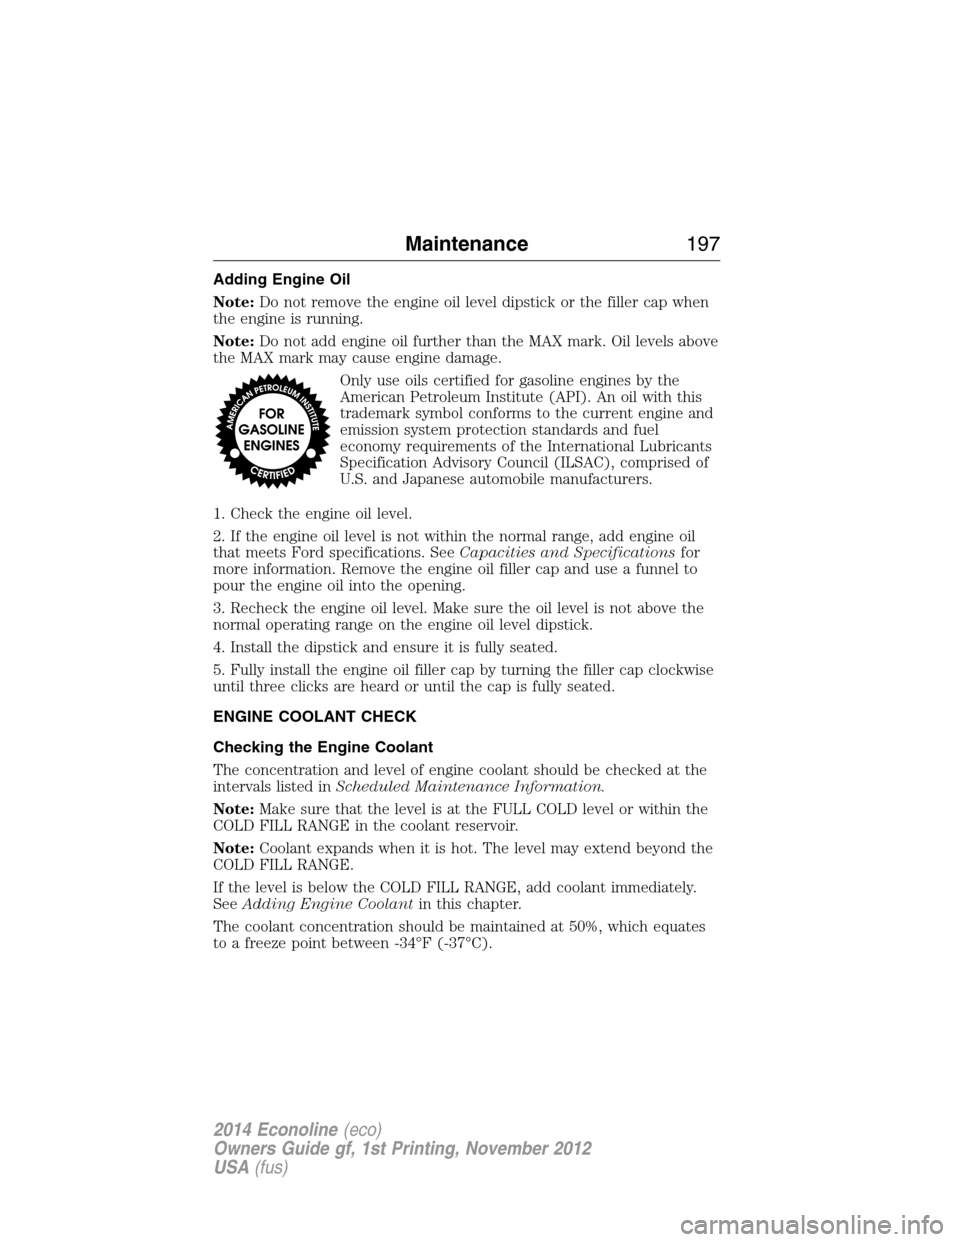
Only use oils certified for gasoline engines by the
American Petroleum Institute (API). An oil with this
trademark symbol conforms to the current engine and
emission system protection standards and fuel
economy requirements of the International Lubricants
Specification Advisory Council (ILSAC), comprised of
U.S. and Japanese automobile manufacturers.
1. Check the engine oil level.
2. If the engine oil level is not within the normal range, add engine oil
that meets Ford specifications. SeeCapacities and Specificationsfor
more information. Remove the engine oil filler cap and use a funnel to
pour the engine oil into the opening.
3. Recheck the engine oil level. Make sure the oil level is not above the
normal operating range on the engine oil level dipstick.
4. Install the dipstick and ensure it is fully seated.
5. Fully install the engine oil filler cap by turning the filler cap clockwise
until three clicks are heard or until the cap is fully seated.
ENGINE COOLANT CHECK
Checking the Engine Coolant
The concentration and level of engine coolant should be checked at the
intervals listed inScheduled Maintenance Information.
Note:Make sure that the level is at the FULL COLD level or within the
COLD FILL RANGE in the coolant reservoir.
Note:Coolant expands when it is hot. The level may extend beyond the
COLD FILL RANGE.
If the level is below the COLD FILL RANGE, add coolant immediately.
SeeAdding Engine Coolantin this chapter.
The coolant concentration should be maintained at 50%, which equates
to a freeze point between -34°F (-37°C).
Maintenance197
2014 Econoline(eco)
Owners Guide gf, 1st Printing, November 2012
USA(fus)
Page 200 of 438
•Do not use alcohol, methanol, brine or any engine coolants mixed with
alcohol or methanol antifreeze (coolant). Alcohol and other liquids can
cause engine damage from overheating or freezing.
•
Do not add extra inhibitors or additives to the coolant. These can be
harmful and compromise the corrosion protection of the engine coolant.
Unscrew the cap slowly. Any pressure will escape as you unscrew the cap.
Add prediluted engine coolant meeting the Ford specification. See
Capacities and Specificationsfor more information.
Whenever coolant has been added, the coolant level in the coolant
reservoir should be checked the next few times you drive the vehicle. If
necessary, add enough prediluted engine coolant to bring the coolant
level to the proper level.
Recycled Engine Coolant
Ford Motor Company does not recommend the use of recycled engine
coolant since a Ford-approved recycling process is not yet available.
Used engine coolant should be disposed of in an appropriate
manner. Follow your community’s regulations and standards for recycling
and disposing of automotive fluids.
Severe Climates
If you drive in extremely cold climates:
•It may be necessary to have a Ford authorized dealer increase the
coolant concentration above 50%.
•A coolant concentration of 60% will provide improved freeze point
protection. Engine coolant concentrations above 60% will decrease the
overheat protection characteristics of the engine coolant and may
cause engine damage.
If you drive in extremely hot climates:
•It may be necessary to have a Ford authorized dealer decrease the
coolant concentration to 40%.
•A coolant concentration of 40% will provide improved overheat
protection. Engine coolant concentrations below 40% will decrease the
corrosion/freeze protection characteristics of the engine coolant and
may cause engine damage.
Vehicles driven year-round in non-extreme climates should use prediluted
engine coolant for optimum cooling system and engine protection.
Maintenance199
2014 Econoline(eco)
Owners Guide gf, 1st Printing, November 2012
USA(fus)
Page 202 of 438
WARNING:Never remove the coolant reservoir cap while the
engine is running or hot.
You have limited engine power when in the fail-safe mode, so drive the
vehicle with caution. The vehicle will not be able to maintain high-speed
operation and the engine will run rough. Remember that the engine is
capable of completely shutting down automatically to prevent engine
damage, therefore:
1. Pull off the road as soon as safely possible and turn off the engine.
2. Arrange for the vehicle to be taken to an authorized dealer.
3. If this is not possible, wait a short period for the engine to cool.
4. Check the coolant level and replenish if low.
5. Restart the engine and take your vehicle to an authorized dealer.
Note:Driving the vehicle without repairing the engine problem increases
the chance of engine damage. Take your vehicle to an authorized dealer
as soon as possible.
TRANSMISSION FLUID CHECK
Checking Automatic Transmission Fluid (If Equipped)
Refer to yourscheduled maintenance informationfor scheduled
intervals for fluid checks and changes. Your transmission does not
consume fluid. However, the fluid level should be checked if the
transmission is not working properly, i.e., if the transmission slips or
shifts slowly or if you notice some sign of fluid leakage.
Automatic transmission fluid expands when warmed. To obtain an
accurate fluid check, drive the vehicle until it is at normal operating
temperature (approximately 20 miles [30 kilometers]). If your vehicle has
been operated for an extended period at high speeds, in city traffic
during hot weather or pulling a trailer, the vehicle should be turned off
for about 30 minutes to allow fluid to cool before checking.
1. Drive the vehicle 20 miles (30 kilometers) or until it reaches normal
operating temperature.
2. Park the vehicle on a level surface and engage the parking brake.
3. With the engine running, parking brake engaged and your foot on the
brake pedal, move the gearshift lever through all of the gear ranges.
Allow sufficient time for each gear to engage.
4. Latch the gearshift lever in P (Park) and leave the engine running.
Maintenance201
2014 Econoline(eco)
Owners Guide gf, 1st Printing, November 2012
USA(fus)
Page 209 of 438
POWER STEERING FLUID CHECK
WARNING:For E-350 and E-450 vehicles with the Hydro-Boost
Brake System, do not press the brake pedal after the engine has
been turned off. Pressing the brake pedal after the engine has been
turned off will give a false power steering fluid level reading.
Note:Do not operate the vehicle with a low power steering pump fluid
level (if the fluid level is below the MIN line on the reservoir).
Note:Do not fill the power steering pump reservoir above the MAX line,
as this may result in leaks from the reservoir.
Check the power steering fluid at the appropriate intervals. Refer to the
scheduled maintenance information.
1. Start the engine and let it run until it reaches normal operating
temperature.
2. While the engine idles, turn the steering wheel left and right several
times.
3. Turn the engine off.
4. Check the fluid level in the reservoir. It should be between the MIN
and MAX lines on the reservoir. Do not add fluid if the level is in this
range.
5. If the fluid is low, add fluid in small amounts, continuously checking
the level until it reaches the range between the MIN and MAX lines. Be
sure to put the cap back on the reservoir. Refer to the technical
specifications table in theCapacities and Specificationschapter for the
proper fluid type.
FUEL FILTER
Your vehicle is equipped with a lifetime fuel filter that is integrated with
the fuel tank. Regular maintenance or replacement is not needed.
WASHER FLUID CHECK
WARNING:If you operate your vehicle in temperatures below
40°F (5°C), use washer fluid with antifreeze protection. Failure
to use washer fluid with antifreeze protection in cold weather could
result in impaired windshield vision and increase the risk of injury or
accident.
208Maintenance
2014 Econoline(eco)
Owners Guide gf, 1st Printing, November 2012
USA(fus)
Page 214 of 438
AIR FILTER CHECK
WARNING:To reduce the risk of vehicle damage and or
personal burn injuries, do not start your engine with the air
cleaner removed and do not remove it while the engine is running.
Note:Failure to use the correct air filter element may result in severe
engine damage. The customer warranty may be void for any damage to
the engine if the correct air filter element is not used.
When changing the air filter element, use only the air filter element
listed. SeeMotorcraft® Part Numbersin theCapacities and
Specificationschapter.
SeeScheduled Maintenance Informationfor the appropriate intervals
for changing the air filter element.
Note:Failure to use the correct air filter element may result in severe
engine damage. The customer warranty may be void for any damage to
the engine if the correct air filter element is not used.
Changing the Air Filter Element
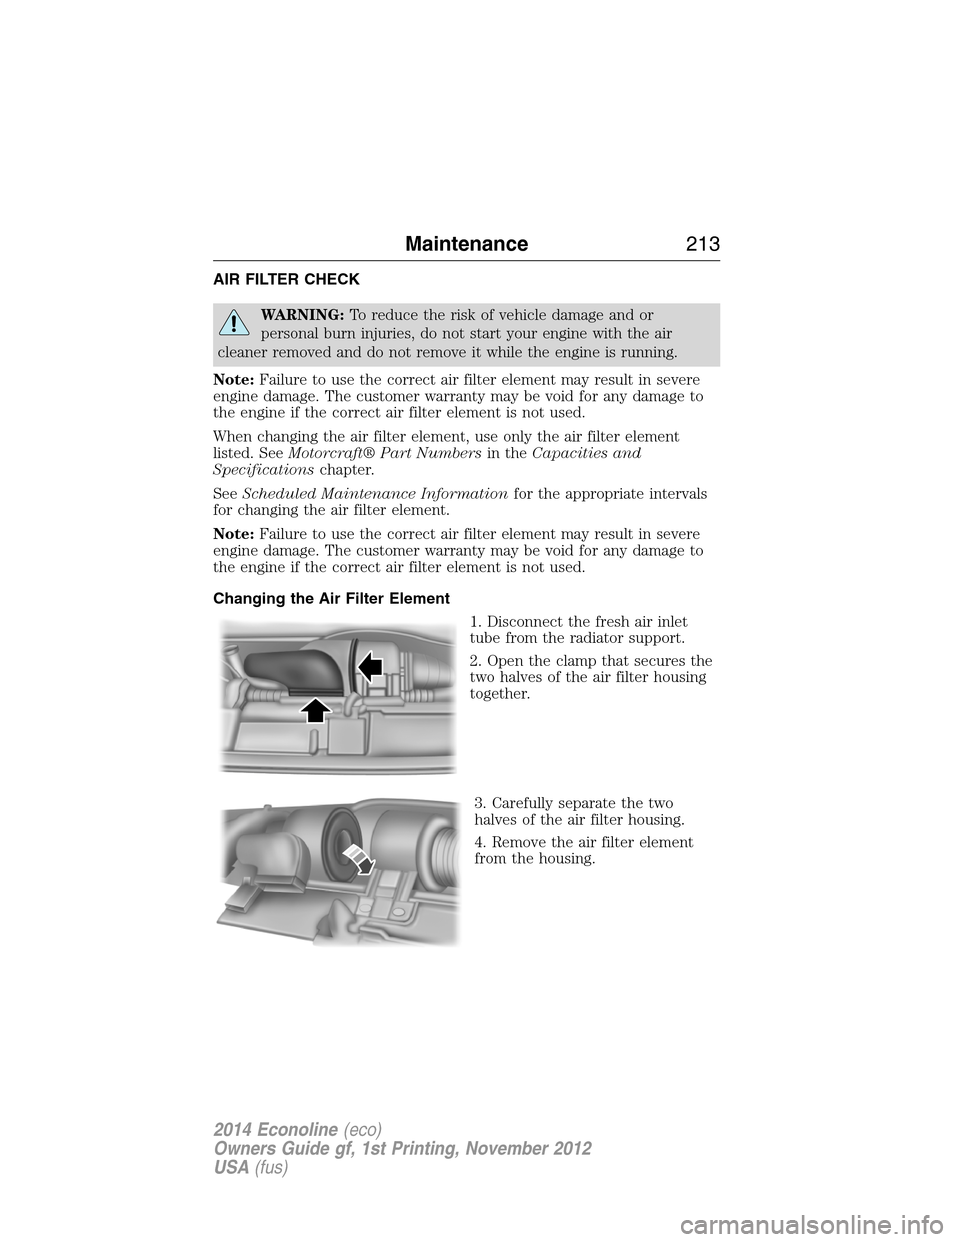
1. Disconnect the fresh air inlet
tube from the radiator support.
2. Open the clamp that secures the
two halves of the air filter housing
together.
3. Carefully separate the two
halves of the air filter housing.
4. Remove the air filter element
from the housing.
Maintenance213
2014 Econoline(eco)
Owners Guide gf, 1st Printing, November 2012
USA(fus)
Page 215 of 438
5. Install a new air filter element. Be careful not to crimp the filter
element edges between the air filter housing. This could cause filter
damage and allow unfiltered air to enter the engine if not properly
seated.
6. Replace the two halves of the air filter housing and secure the clamp.
7. Connect the fresh air inlet tube to the radiator support.
ADJUSTING THE HEADLAMPS
The headlamps on your vehicle are properly aimed at the assembly plant.
If your vehicle has been in an accident, an authorized dealer should
check the alignment of your headlamps.
Vertical and Horizontal Aim Adjustment (Sealed Beam Headlamps)
The headlamps on your vehicle are intended to be aimed using
mechanical aimers. If mechanical aimers are used and the cross-car sight
line is in any way blocked, set the legs of the universal adaptor all to the
same setting, such that the cross-car sight line is no longer blocked, per
the instructions for the brand of mechanical aimer used. You can also
aim the headlamps visually using the procedure below.
To adjust the headlamps:
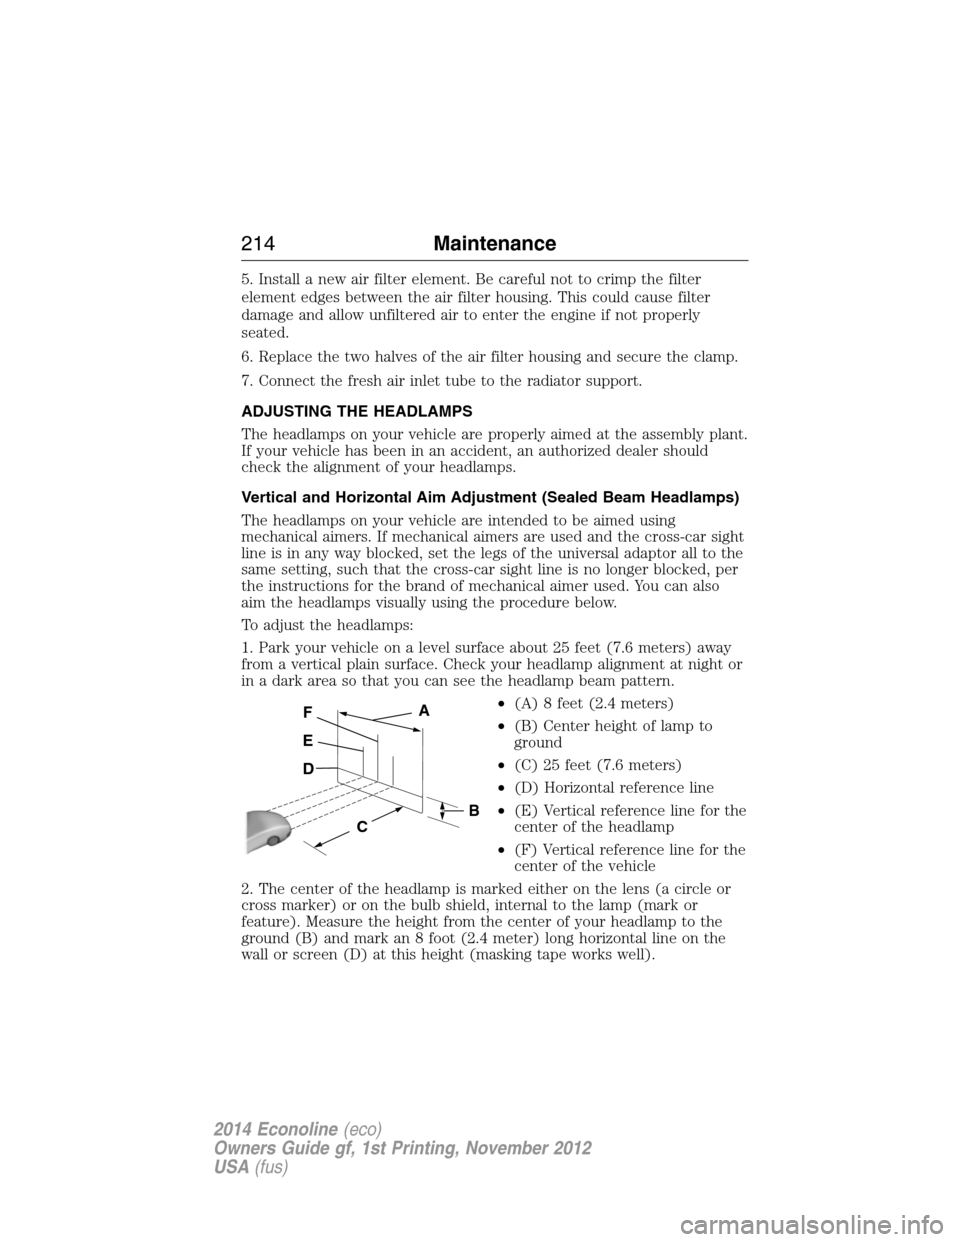
1. Park your vehicle on a level surface about 25 feet (7.6 meters) away
from a vertical plain surface. Check your headlamp alignment at night or
in a dark area so that you can see the headlamp beam pattern.
•(A) 8 feet (2.4 meters)
•(B) Center height of lamp to
ground
•(C) 25 feet (7.6 meters)
•(D) Horizontal reference line
•(E) Vertical reference line for the
center of the headlamp
•(F) Vertical reference line for the
center of the vehicle
2. The center of the headlamp is marked either on the lens (a circle or
cross marker) or on the bulb shield, internal to the lamp (mark or
feature). Measure the height from the center of your headlamp to the
ground (B) and mark an 8 foot (2.4 meter) long horizontal line on the
wall or screen (D) at this height (masking tape works well).
B
D
E
FA
C
214Maintenance
2014 Econoline(eco)
Owners Guide gf, 1st Printing, November 2012
USA(fus)
Page 232 of 438
Body
•Wash vehicle thoroughly to remove dirt, grease, oil, tar or mud from
exterior surfaces, rear-wheel housing and underside of front fenders.
•Periodically wash vehicles stored in exposed locations.
•Touch up raw or primed metal to prevent rust.
•Cover chrome and stainless steel parts with a thick coat of auto wax
to prevent discoloration. Re-wax as necessary when the vehicle is
washed.
•Lubricate hood latch, all door latches and trunk lid hinges with a light
grade oil.
•Cover interior trim to prevent fading.
•Keep all rubber parts free from oil and solvents.
Engine
•The engine oil and filter should be changed prior to storage, as used
engine oil contains contaminates that may cause engine damage.
•Start the engine every 15 days. Run at fast idle until it reaches normal
operating temperature.
•With your foot on the brake, shift through all the gears while the
engine is running.
Fuel system
•Fill the fuel tank with high-quality fuel until the first automatic shutoff
of the fuel pump nozzle.
Cooling system
•Protect against freezing temperatures.
•When removing vehicle from storage, check coolant fluid level.
Confirm there are no cooling system leaks, and fluid is at the
recommended level.
Battery
•Check and recharge as necessary. Keep connections clean.
•If storing your vehicle for more than 30 days without recharging the
battery, it may be advisable to disconnect the battery cables to ensure
battery charge is maintained for quick starting.
Note:If battery cables are disconnected, it will be necessary to reset
memory features.
Vehicle Care231
2014 Econoline(eco)
Owners Guide gf, 1st Printing, November 2012
USA(fus)
Page 273 of 438
TECHNICAL SPECIFICATIONS1Add the coolant type originally equipped in your vehicle.
Do not use supplemental engine oil additives in your engine. They are unnecessary and could lead
to engine damage that is not covered by your Ford warranty.3Indicates only approximate dry-fill capacity. Some applications may vary based on cooler size, if
equipped with an in-tank cooler, if equipped with an oil to air cooler and if equipped with a remote
filter assembly. The amount of transmission fluid and fluid level should be set by the indication on
the dipstick’s normal operating range.5Dana limited-slip axle (M60) requires 6 fl oz. (177 ml) of Additive Friction Modifier XL-3 or
equivalent meeting Ford specification EST-M2C118-A.6If your vehicle’s rear axle is filled with a synthetic rear axle lubricant it is considered lubricated
for life. These lubricants do not need to be checked or changed unless a leak is suspected, service
is required or the axle assembly has been submerged in water. The axle lubricant should be
changed any time the rear axle has been submerged in water.7Fill Dana rear axles to 1/4 inch to 9/16 inch (6 mm to 14 mm) below bottom of fill hole.8Optional fuel tank 55.0 gallons (208.0L).9Warning:The A/C refrigerant system contains refrigerant R–134a under high pressure. Opening
the A/C refrigerant system can cause personal injury. A/C refrigerant system is to be serviced only
by qualified personnel.
Item CapacityFord part name or
equivalentFord part number / Ford
specification
Brake fluid
1
Between MIN and MAX
on reservoirMotorcraft High
Performance DOT 4 LV
Motor Vehicle Brake FluidPM-20 / WSS-M6C65-A2
and ISO4925 Class 6
Door weatherstrips — Silicone Spray LubricantXL-6 /
ESR-M13P4-A
272Capacities and Specifications
2014 Econoline(eco)
Owners Guide gf, 1st Printing, November 2012
USA(fus)