fuel cap FORD E SERIES 2017 4.G Owners Manual
[x] Cancel search | Manufacturer: FORD, Model Year: 2017, Model line: E SERIES, Model: FORD E SERIES 2017 4.GPages: 318, PDF Size: 6.21 MB
Page 6 of 318
Hazard Warning Flashers...........................114
Fuel Shutoff
.....................................................114
Jump Starting the Vehicle..........................115
Transporting the Vehicle.............................117
Customer Assistance
Getting the Services You Need
.................118
In California (U.S. Only)..............................119
The Better Business Bureau (BBB) Auto Line Program (U.S. Only)
......................120
Utilizing the Mediation/Arbitration Program (Canada Only).........................121
Getting Assistance Outside the U.S. and Canada..........................................................121
Ordering Additional Owner's Literature......................................................122
Reporting Safety Defects (U.S. Only)..............................................................123
Reporting Safety Defects (Canada Only)..............................................................123
Fuses
Fuse Specification Chart............................125
Changing a Fuse
............................................132
Maintenance
General Information....................................134
Opening and Closing the Hood
...............134
Under Hood Overview................................135
Engine Oil Dipstick.......................................136
Engine Oil Check
...........................................136
Oil Change Indicator Reset.......................136
Engine Coolant Check.................................137
Automatic Transmission Fluid Check.............................................................141
Brake Fluid Check.........................................144
Power Steering Fluid Check
.....................144
Washer Fluid Check.....................................145
Changing the 12V Battery..........................145
Checking the Wiper Blades.......................147
Changing the Wiper Blades......................147 Adjusting the Headlamps..........................147
Removing a Headlamp
..............................150
Changing a Bulb
.............................................151
Bulb Specification Chart............................153
Changing the Engine Air Filter.................155
Vehicle Care
General Information
....................................156
Cleaning Products
........................................156
Cleaning the Exterior
...................................157
Waxing..............................................................158
Cleaning the Engine....................................158
Cleaning the Windows and Wiper Blades...........................................................159
Cleaning the Interior....................................159
Cleaning the Instrument Panel and Instrument Cluster Lens........................160
Cleaning Leather Seats
..............................160
Repairing Minor Paint Damage................161
Cleaning the Alloy Wheels.........................161
Vehicle Storage
..............................................161
Wheels and Tires
General Information
....................................164
Tire Care...........................................................165
Using Snow Chains......................................183
Tire Pressure Monitoring System...........184
Changing a Road Wheel............................187
Technical Specifications
.............................191
Capacities and Specific- ations
Engine Specifications - 6.2L
.....................192
Engine Specifications - 6.8L....................192
Motorcraft Parts - 6.2L...............................193
Motorcraft Parts - 6.8L
..............................194
Vehicle Identification Number.................195
Vehicle Certification Label
........................196
Transmission Code Designation.............196
Capacities and Specifications - 6.2L.....197
3
E-Series (TE4) Canada/United States of America, enUSA, First Printing Table of Contents
Page 9 of 318
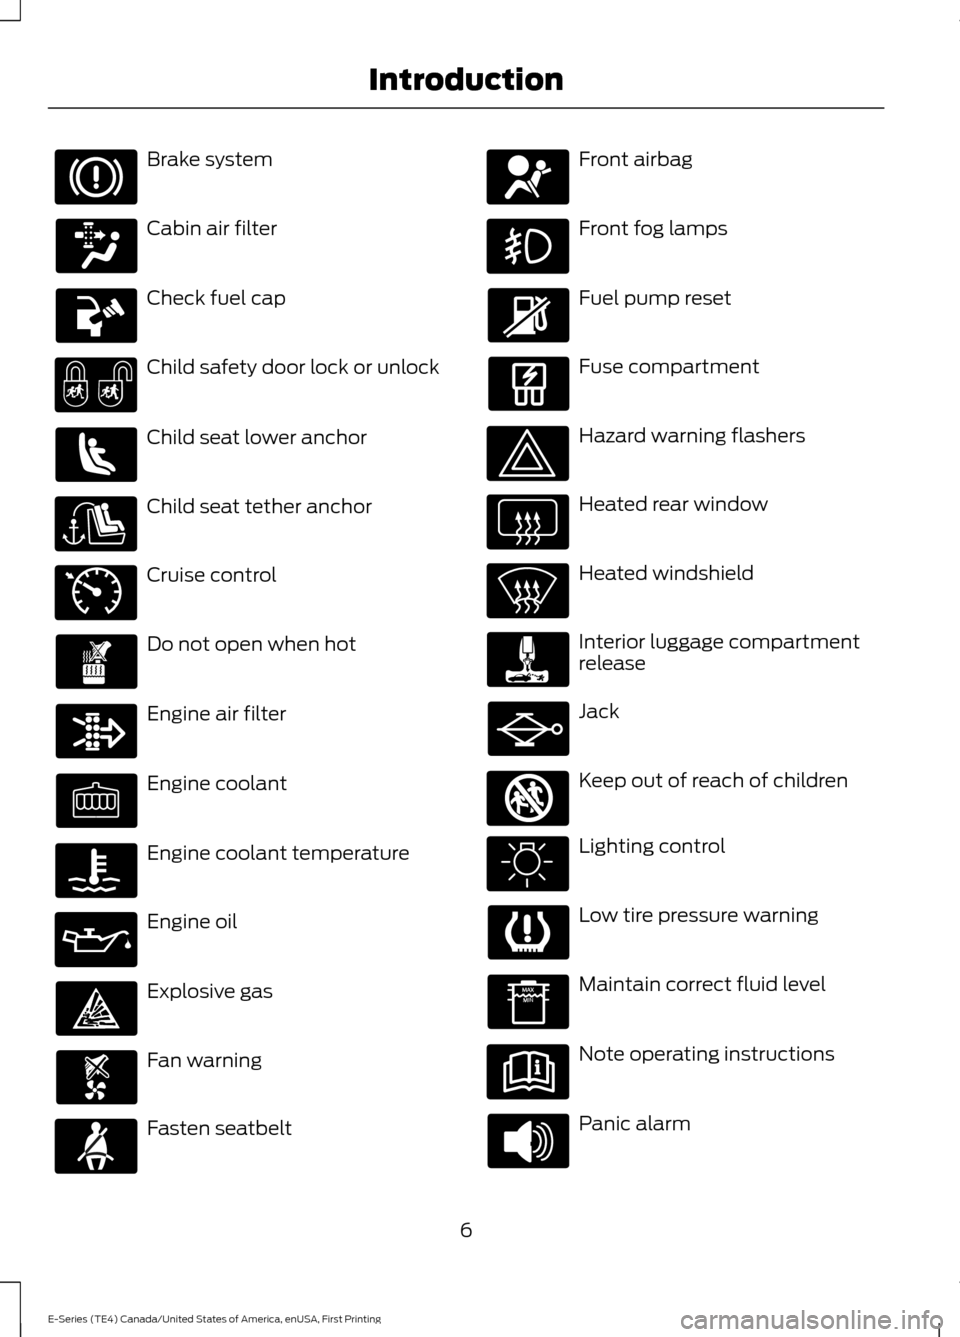
Brake system
Cabin air filter
Check fuel cap
Child safety door lock or unlock
Child seat lower anchor
Child seat tether anchor
Cruise control
Do not open when hot
Engine air filter
Engine coolant
Engine coolant temperature
Engine oil
Explosive gas
Fan warning
Fasten seatbelt Front airbag
Front fog lamps
Fuel pump reset
Fuse compartment
Hazard warning flashers
Heated rear window
Heated windshield
Interior luggage compartment
release
Jack
Keep out of reach of children
Lighting control
Low tire pressure warning
Maintain correct fluid level
Note operating instructions
Panic alarm
6
E-Series (TE4) Canada/United States of America, enUSA, First Printing Introduction E71340 E161353
Page 12 of 318
Note:
Including to the extent that any
law pertaining to Event Data Recorders
applies to SYNC or its features, please
note the following: Once 911 Assist (if
equipped) is enabled (set ON), 911 Assist
may, through any paired and connected
cell phone, disclose to emergency
services that the vehicle has been in a
crash involving the deployment of an
airbag or, in certain vehicles, the
activation of the fuel pump shut-off.
Certain versions or updates to 911 Assist
may also be capable of being used to
electronically or verbally provide to 911
operators the vehicle location (such as
latitude and longitude), and/or other
details about the vehicle or crash or
personal information about the
occupants to assist 911 operators to
provide the most appropriate emergency
services. If you do not want to disclose
this information, do not activate the 911
Assist feature. See SYNC™ (page 216).
Additionally, when you connect to
Traffic, Directions and Information (if
equipped, U.S. only), the service uses
GPS technology and advanced vehicle
sensors to collect the vehicle ’s current
location, travel direction, and speed
(“ vehicle travel information ”), only to
help provide you with the directions,
traffic reports, or business searches
that you request. If you do not want
Ford or its vendors to receive this
information, do not activate the
service. For more information, see
Traffic, Directions and Information,
Terms and Conditions. See
SYNC™
(page 216). CALIFORNIA PROPOSITION 65 WARNINGS
Some constituents of engine
exhaust, certain vehicle components,
certain fluids contained in vehicles
and certain products of component wear
contain or emit chemicals known to the
State of California to cause cancer and
birth defects or other reproductive harm. Battery posts, terminals and related
accessories contain lead and lead
compounds, chemicals known to the
State of California to cause cancer and
reproductive harm. Batteries also contain
other chemicals known to the State of
California to cause cancer. Wash your
hands after handling. PERCHLORATE
Certain components in your vehicle such
as airbag modules, seatbelt pretensioners
and remote control batteries may contain
perchlorate material. Special handling
may apply for service or vehicle end of life
disposal.
For more information visit:
Web Address
www.dtsc.ca.gov/hazard- ouswaste/perchlorate
FORD CREDIT
US Only
Ford Credit offers a full range of financing
and lease plans to help you acquire your
vehicle. If you have financed or leased your
vehicle through Ford Credit, thank you for
your business.
9
E-Series (TE4) Canada/United States of America, enUSA, First Printing Introduction
Page 53 of 318
The needle should move toward F when
you refuel your vehicle. If the needle points
to E after adding fuel, have an authorized
dealer check the system soon.
After refueling, some variability in the
position of the needle is normal:
•
It may take a short time for the needle
to reach F after leaving the gas station.
This is normal and depends upon the
slope of the pavement at the gas
station.
• The fuel amount dispensed into the
tank is a little less or more than the
gauge indicated. This is normal and
depends upon the slope of the
pavement at the gas station. •
If the gas station nozzle shuts off
before the tank is full, try a different
gas pump nozzle.
• There is a small reserve left in the tank
when the fuel gauge reaches empty.
Low Fuel Reminder
A low fuel reminder triggers when the fuel
gauge needle is at one-sixteenth or about
50 miles (80 km) to empty, whichever
occurs first.
Variations:
Note: The low fuel warning and distance-to-empty warning can appear at different fuel
gauge positions depending on fuel economy conditions. This variation is normal. Distance-to-empty
Fuel gauge position
Driving type (fuel economy
conditions)
30 miles to 80 miles (48 kmto 129 km)
1/16th
Highway driving
10 miles to 35 miles (16 kmto 56 km)
1/16th-1/4
Severe duty driving (trailer
towing, extended idle)
Engine Coolant Temperature
Gauge
Indicates engine coolant temperature. At
normal operating temperature, the level
indicator will be in the normal range. If the
engine coolant temperature exceeds the
normal range, stop the vehicle as soon as
safely possible, switch off the engine and
let the engine cool. WARNING
Never remove the coolant reservoir
cap while the engine is running or hot. Battery Voltage Gauge
Indicates the battery voltage when the
ignition is in the on position. If the pointer
moves and stays outside the normal
operating range, have an authorized dealer
check the vehicle
’s electrical system as
soon as possible.
Information Display
Odometer
Located in the bottom of the information
display, the gauge registers the distance
your vehicle travels.
50
E-Series (TE4) Canada/United States of America, enUSA, First Printing Instrument Cluster
Page 54 of 318
Trip Computer
See Information Displays (page 55).
Vehicle Settings and Personalization
See
Information Displays (page 55).
Engine Oil Pressure Gauge
Indicates the engine oil pressure. The
needle should stay in the normal operating
range. If the needle falls below the normal
range, stop the vehicle and switch off the
engine. Check the engine oil level and add
oil if needed. If the oil level is correct, have
an authorized dealer check the system.
WARNING LAMPS AND
INDICATORS
The following warning lamps and
indicators alert you to a vehicle condition
that may become serious. Some lamps
illuminate when you start your vehicle to
make sure they work. If any lamps remain
on after starting your vehicle, refer to the
respective system warning lamp for further
information.
Note: Some warning indicators appear in
the information display and function the
same as a warning lamp but do not display
when you start your vehicle.
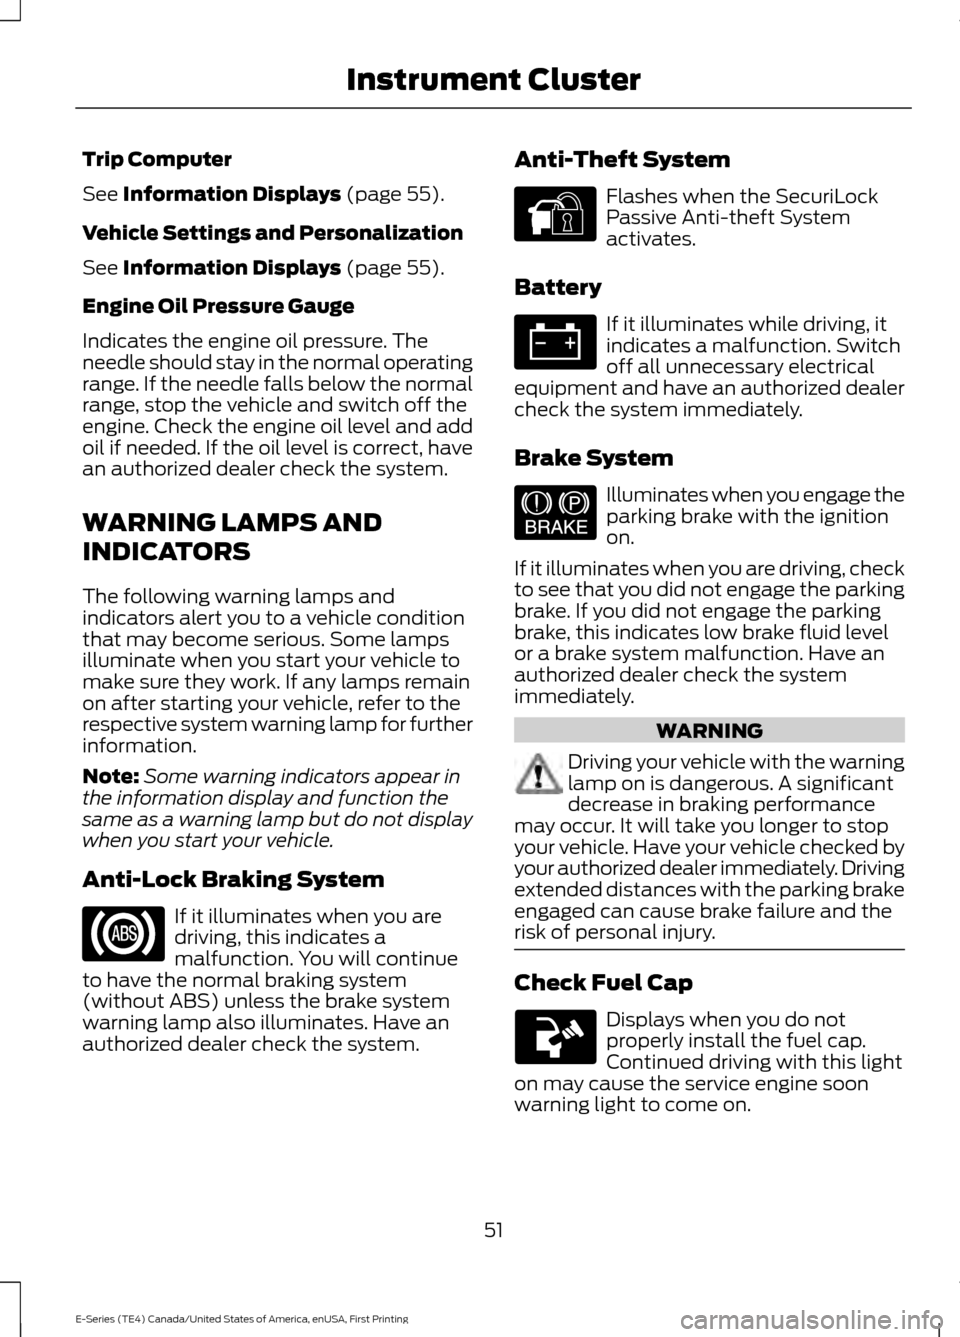
Anti-Lock Braking System If it illuminates when you are
driving, this indicates a
malfunction. You will continue
to have the normal braking system
(without ABS) unless the brake system
warning lamp also illuminates. Have an
authorized dealer check the system. Anti-Theft System Flashes when the SecuriLock
Passive Anti-theft System
activates.
Battery If it illuminates while driving, it
indicates a malfunction. Switch
off all unnecessary electrical
equipment and have an authorized dealer
check the system immediately.
Brake System Illuminates when you engage the
parking brake with the ignition
on.
If it illuminates when you are driving, check
to see that you did not engage the parking
brake. If you did not engage the parking
brake, this indicates low brake fluid level
or a brake system malfunction. Have an
authorized dealer check the system
immediately. WARNING
Driving your vehicle with the warning
lamp on is dangerous. A significant
decrease in braking performance
may occur. It will take you longer to stop
your vehicle. Have your vehicle checked by
your authorized dealer immediately. Driving
extended distances with the parking brake
engaged can cause brake failure and the
risk of personal injury. Check Fuel Cap
Displays when you do not
properly install the fuel cap.
Continued driving with this light
on may cause the service engine soon
warning light to come on.
51
E-Series (TE4) Canada/United States of America, enUSA, First Printing Instrument Cluster E144845 E144522
Page 79 of 318
FUEL QUALITY - GASOLINE
Choosing the Right Fuel
We recommend regular unleaded gasoline
with a minimum pump (R+M)/2 octane
rating of 87. Some fuel stations offer fuels
posted as regular unleaded gasoline with
an octane rating below 87, particularly in
high altitude areas. We do not recommend
fuels with an octane rating below 87.
For vehicles with EcoBoost engines, to
provide improved performance, we
recommend premium fuel for severe duty
usage such as trailer tow.
Do not use any fuel other than those
recommended because they could lead to
engine damage that may not be covered
by the vehicle Warranty.
Note:
Use of any fuel other than those
recommended can impair the emission
control system and cause a loss of vehicle
performance.
Do not use:
• Diesel fuel.
• Fuels containing kerosene or paraffin.
• Fuel containing more than 15% ethanol
or E85 fuel.
• Fuels containing methanol.
• Fuels containing metallic-based
additives, including manganese-based
compounds. •
Fuels containing the octane booster
additive, methylcyclopentadienyl
manganese tricarbonyl (MMT).
• Leaded fuel (using leaded fuel is
prohibited by law).
The use of fuels with metallic compounds
such as methylcyclopentadienyl
manganese tricarbonyl (commonly known
as MMT), which is a manganese-based
fuel additive, will impair engine
performance and affect the emission
control system.
Do not be concerned if the engine
sometimes knocks lightly. However, if the
engine knocks heavily while using fuel with
the recommended octane rating, contact
an authorized dealer to prevent any engine
damage.
FUEL QUALITY - E85
Choosing the Right Fuel - Flex Fuel
Vehicles
Flex fuel vehicles have a yellow fuel filler
cap or the fuel tank filler pipe will have a
yellow housing or bezel. Use regular unleaded gasoline with a
minimum pump (R+M)/2 octane rating of
87, or regular unleaded gasoline blended
with a maximum of 85% ethanol (E85).
Some fuel stations offer fuels posted as
regular unleaded gasoline with an octane
rating below 87, particularly in high altitude
areas. Fuels with octane levels below 87
are not recommended.
76
E-Series (TE4) Canada/United States of America, enUSA, First Printing Fuel and RefuelingE161513 E161513
Page 81 of 318
•
Keep the fuel pump nozzle in contact
with the fuel container while filling.
• Do not use a device that holds the fuel
pump nozzle lever in the fill position.
REFUELING WARNINGS
Fuel vapor burns violently and a fuel
fire can cause severe injuries.
Read and follow all the instructions
on the pump island.
Turn off your engine when you are
refueling.
Do not smoke if you are near fuel or
refueling your vehicle.
Keep sparks, flames and smoking
materials away from fuel.
Stay outside your vehicle and do not
leave the fuel pump unattended
when refueling your vehicle. This is
against the law in some places. Keep children away from the fuel
pump; never let children pump fuel.
Do not use personal electronic
devices while refueling.
Wait at least 10 seconds before
removing the fuel pump nozzle to
allow any residual fuel to drain into
the fuel tank. Stop refueling after the fuel pump
nozzle automatically shuts off for the
second time. Failure to follow this
will fill the expansion space in the fuel tank
and could lead to fuel overflowing. Do not remove the fuel pump nozzle
from its fully inserted position when
refueling. Use the following guidelines to avoid
electrostatic charge build-up when filling
an ungrounded fuel container:
•
Place approved fuel container on the
ground.
• Do not fill a fuel container while it is in
the vehicle (including the cargo area).
• Keep the fuel pump nozzle in contact
with the fuel container while filling.
• Do not use a device that would hold
the fuel pump handle in the fill position.
Fuel Filler Cap WARNINGS
The fuel system may be under
pressure. If you hear a hissing sound
near the fuel filler door, do not refuel
until the sound stops. Otherwise, fuel may
spray out, which could cause serious
personal injury. If you do not use the proper fuel filler
cap, excessive pressure or vacuum
in the fuel tank may damage the fuel
system or cause the fuel cap to disengage
in a collision, which may result in possible
personal injury. Note:
If you must replace the fuel filler cap,
replace it with a fuel filler cap that is
designed for your vehicle. The customer
warranty may be void for any damage to the
fuel tank or fuel system if the correct
genuine Ford, Motorcraft or other certified
fuel filler cap is not used.
Your fuel tank filler cap has an indexed
design with a 1/4th turn on and off feature.
When fueling your vehicle:
1. Put your vehicle in park (P).
2. Switch the engine off.
3. Carefully turn the filler cap counterclockwise until it spins off.
4. Pull to remove the cap from the fuel filler pipe.
78
E-Series (TE4) Canada/United States of America, enUSA, First Printing Fuel and Refueling
Page 82 of 318
5.
To install the cap, align the tabs on the
cap with the notches on the filler pipe.
6. Turn the filler cap clockwise 1/4 of a turn clockwise until it clicks at least
once.
If the Check Fuel Cap light or a Check Fuel
Cap message appears in the instrument
cluster and stays on after you start the
engine, you may not have installed the fuel
filler properly.
If the fuel cap light remains on, at the next
opportunity, safely pull off of the road,
remove the fuel filler cap, align the cap
properly and reinstall it. The check fuel cap
light or Check fuel cap message may not
reset immediately. It may take several
driving cycles for the indicators to turn off.
A driving cycle consists of an engine
start-up (after four or more hours with the
engine off) followed by normal city and
highway driving.
FUEL CONSUMPTION
Empty reserve is the amount of fuel
remaining in the tank after the fuel gauge
indicates empty. The amount of usable
fuel in the empty reserve varies and should
not be relied upon to increase driving range. •
The usable capacity of the fuel tank is
the amount of fuel that you can add to
the fuel tank when the fuel gauge
indicates empty, before the first fuel
filler nozzle automatic shutoff event.
• The advertised capacity is equal to the
volumetric difference between actual
fuel fill before the first fuel filler nozzle
automatic shutoff event and the fuel
quantity when the fuel gauge indicates
empty. See Capacities and
Specifications (page 192). It is the
usable capacity minus the empty
reserve.
• Due to the empty reserve, you may be
able to add more fuel than the
advertised capacity of the fuel tank
when the fuel gauge indicates empty.
Filling the Fuel Tank
For consistent results when refueling:
• Turn the ignition off before fueling; an
inaccurate reading results if the engine
is left running.
• Use the same fill rate
(low-medium-high) each time the tank
is filled.
• Allow no more than one automatic
shut-off when refueling.
Results are most accurate when the filling
method is consistent.
Calculating Fuel Economy
Do not measure fuel economy during the
first
1,000 mi (1,600 km) of driving (this is
your engine ’s break-in period). A more
accurate measurement is obtained after
2,000 mi (3,200 km)
to 3,000 mi
(4,800 km). Also, fuel expense, frequency
of fill ups or fuel gauge readings are not
accurate ways to measure fuel economy.
1. Fill the fuel tank completely and record
the initial odometer reading.
79
E-Series (TE4) Canada/United States of America, enUSA, First Printing Fuel and Refueling
Page 111 of 318
•
Shift to a lower gear when driving down
a long or steep hill. Do not apply the
brakes continuously, as they may
overheat and become less effective.
• If your transmission is equipped with a
Grade Assist or Tow/Haul feature, use
this feature when towing. This provides
engine braking and helps eliminate
excessive transmission shifting for
optimum fuel economy and
transmission cooling.
• If your vehicle is equipped with
AdvanceTrac with RSC, this system
may turn on during typical cornering
maneuvers with a heavily loaded trailer.
This is normal. Turning the corner at a
slower speed while towing may reduce
this tendency.
• If you are towing a trailer frequently in
hot weather, hilly conditions, at the
gross combined weight rating (or any
combination of these factors), consider
refilling your rear axle with synthetic
gear lubricant. See Capacities and
Specifications (page 192).
• Allow more distance for stopping with
a trailer attached. Anticipate stops and
brake gradually.
• Avoid parking on a grade. However, if
you must park on a grade:
1. Turn the steering wheel to point your vehicle tires away from traffic flow.
2. Set your vehicle parking brake.
3. Place the automatic transmission in position
P.
4. Place wheel chocks in front and back of the trailer wheels. (Chocks not
included with vehicle.) Your vehicle may be equipped with a
temporary or conventional spare tire. A
"temporary" spare tire is different in size
(diameter or width), tread-type
(All-Season or All Terrain) or is from a
different manufacturer than the road tires
on your vehicle. Consult information on the
tire label or Safety Compliance label for
limitations when using.
Launching or Retrieving a Boat or
Personal Watercraft (PWC)
Note:
Disconnect the wiring to the trailer
before
backing the trailer into the water.
Note: Reconnect the wiring to the trailer
after
removing the trailer from the water.
When backing down a ramp during boat
launching or retrieval:
• Do not allow the static water level to
rise above the bottom edge of the rear
bumper.
• Do not allow waves to break higher
than
6 in (15 cm) above the bottom
edge of the rear bumper.
Exceeding these limits may allow water to
enter vehicle components:
• Causing internal damage to the
components.
• Affecting driveability, emissions and
reliability.
Replace the rear axle lubricant anytime
the rear axle has been submerged in water.
Water may have contaminated the rear
axle lubricant, which is not normally
checked or changed unless a leak is
suspected or other axle repair is required.
108
E-Series (TE4) Canada/United States of America, enUSA, First Printing Towing
Page 139 of 318
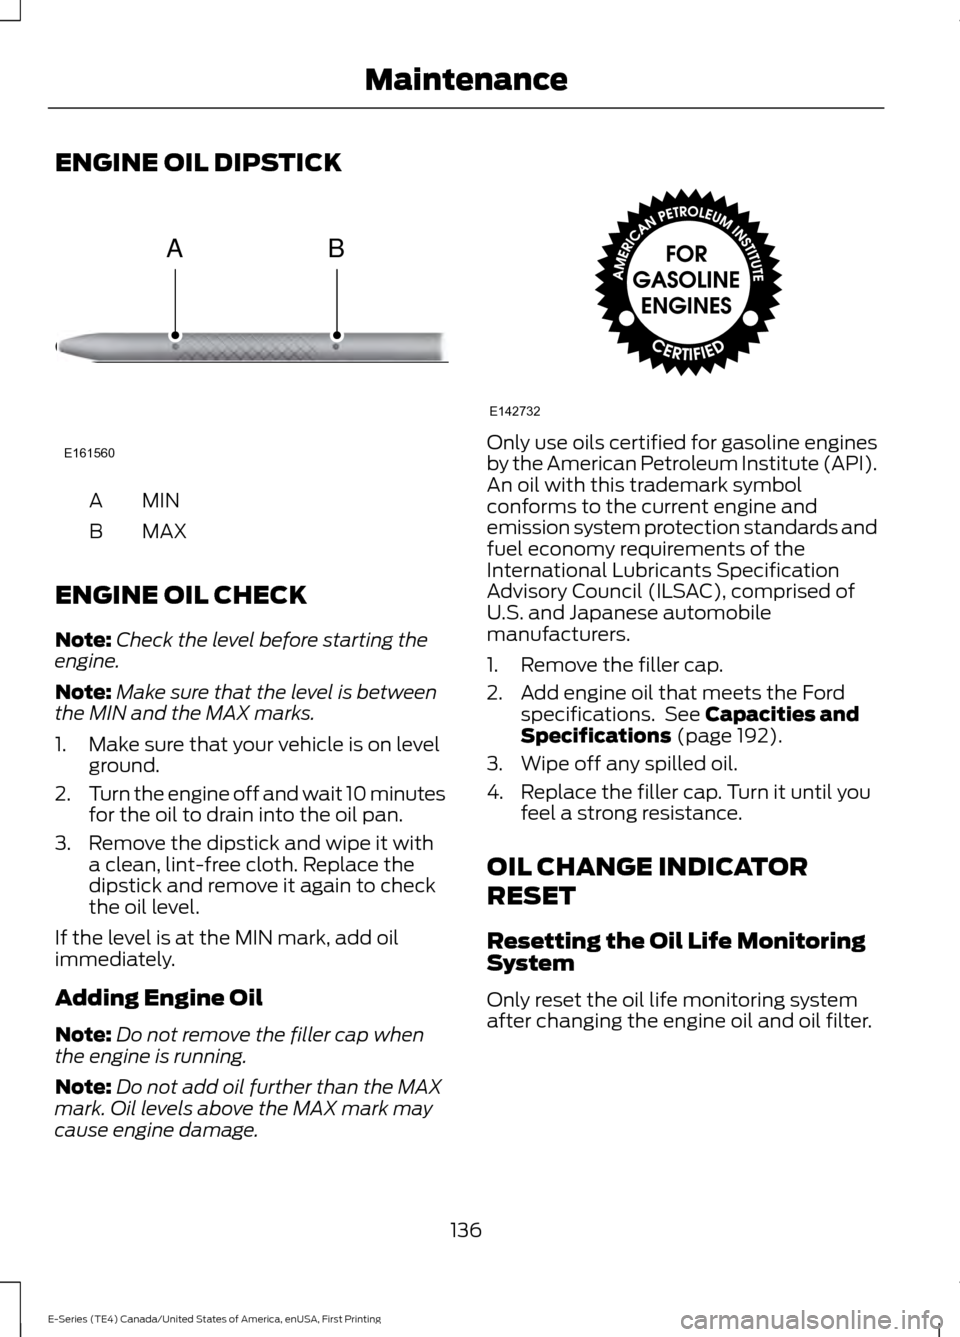
ENGINE OIL DIPSTICK
MINA
MAX
B
ENGINE OIL CHECK
Note: Check the level before starting the
engine.
Note: Make sure that the level is between
the MIN and the MAX marks.
1. Make sure that your vehicle is on level ground.
2. Turn the engine off and wait 10 minutes
for the oil to drain into the oil pan.
3. Remove the dipstick and wipe it with a clean, lint-free cloth. Replace the
dipstick and remove it again to check
the oil level.
If the level is at the MIN mark, add oil
immediately.
Adding Engine Oil
Note: Do not remove the filler cap when
the engine is running.
Note: Do not add oil further than the MAX
mark. Oil levels above the MAX mark may
cause engine damage. Only use oils certified for gasoline engines
by the American Petroleum Institute (API).
An oil with this trademark symbol
conforms to the current engine and
emission system protection standards and
fuel economy requirements of the
International Lubricants Specification
Advisory Council (ILSAC), comprised of
U.S. and Japanese automobile
manufacturers.
1. Remove the filler cap.
2. Add engine oil that meets the Ford
specifications. See Capacities and
Specifications (page 192).
3. Wipe off any spilled oil.
4. Replace the filler cap. Turn it until you feel a strong resistance.
OIL CHANGE INDICATOR
RESET
Resetting the Oil Life Monitoring
System
Only reset the oil life monitoring system
after changing the engine oil and oil filter.
136
E-Series (TE4) Canada/United States of America, enUSA, First Printing MaintenanceE161560
AB E142732