low beam FORD E SERIES 2017 4.G Owners Manual
[x] Cancel search | Manufacturer: FORD, Model Year: 2017, Model line: E SERIES, Model: FORD E SERIES 2017 4.GPages: 318, PDF Size: 6.21 MB
Page 55 of 318
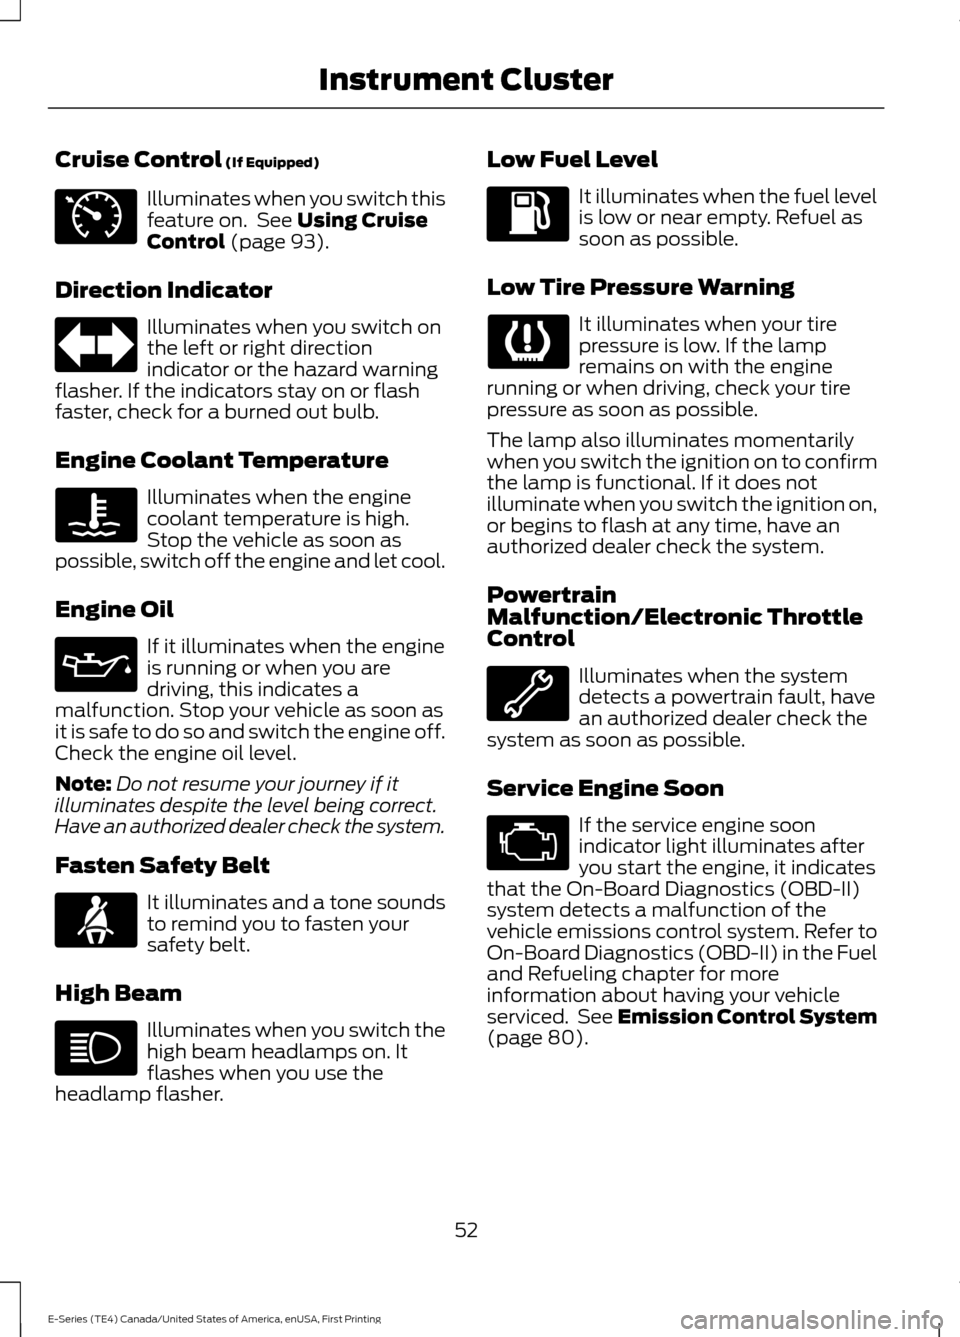
Cruise Control (If Equipped)
Illuminates when you switch this
feature on. See
Using Cruise
Control (page 93).
Direction Indicator Illuminates when you switch on
the left or right direction
indicator or the hazard warning
flasher. If the indicators stay on or flash
faster, check for a burned out bulb.
Engine Coolant Temperature Illuminates when the engine
coolant temperature is high.
Stop the vehicle as soon as
possible, switch off the engine and let cool.
Engine Oil If it illuminates when the engine
is running or when you are
driving, this indicates a
malfunction. Stop your vehicle as soon as
it is safe to do so and switch the engine off.
Check the engine oil level.
Note: Do not resume your journey if it
illuminates despite the level being correct.
Have an authorized dealer check the system.
Fasten Safety Belt It illuminates and a tone sounds
to remind you to fasten your
safety belt.
High Beam Illuminates when you switch the
high beam headlamps on. It
flashes when you use the
headlamp flasher. Low Fuel Level It illuminates when the fuel level
is low or near empty. Refuel as
soon as possible.
Low Tire Pressure Warning It illuminates when your tire
pressure is low. If the lamp
remains on with the engine
running or when driving, check your tire
pressure as soon as possible.
The lamp also illuminates momentarily
when you switch the ignition on to confirm
the lamp is functional. If it does not
illuminate when you switch the ignition on,
or begins to flash at any time, have an
authorized dealer check the system.
Powertrain
Malfunction/Electronic Throttle
Control Illuminates when the system
detects a powertrain fault, have
an authorized dealer check the
system as soon as possible.
Service Engine Soon If the service engine soon
indicator light illuminates after
you start the engine, it indicates
that the On-Board Diagnostics (OBD-II)
system detects a malfunction of the
vehicle emissions control system. Refer to
On-Board Diagnostics (OBD-II) in the Fuel
and Refueling chapter for more
information about having your vehicle
serviced. See Emission Control System
(page
80).
52
E-Series (TE4) Canada/United States of America, enUSA, First Printing Instrument ClusterE71340
Page 133 of 318
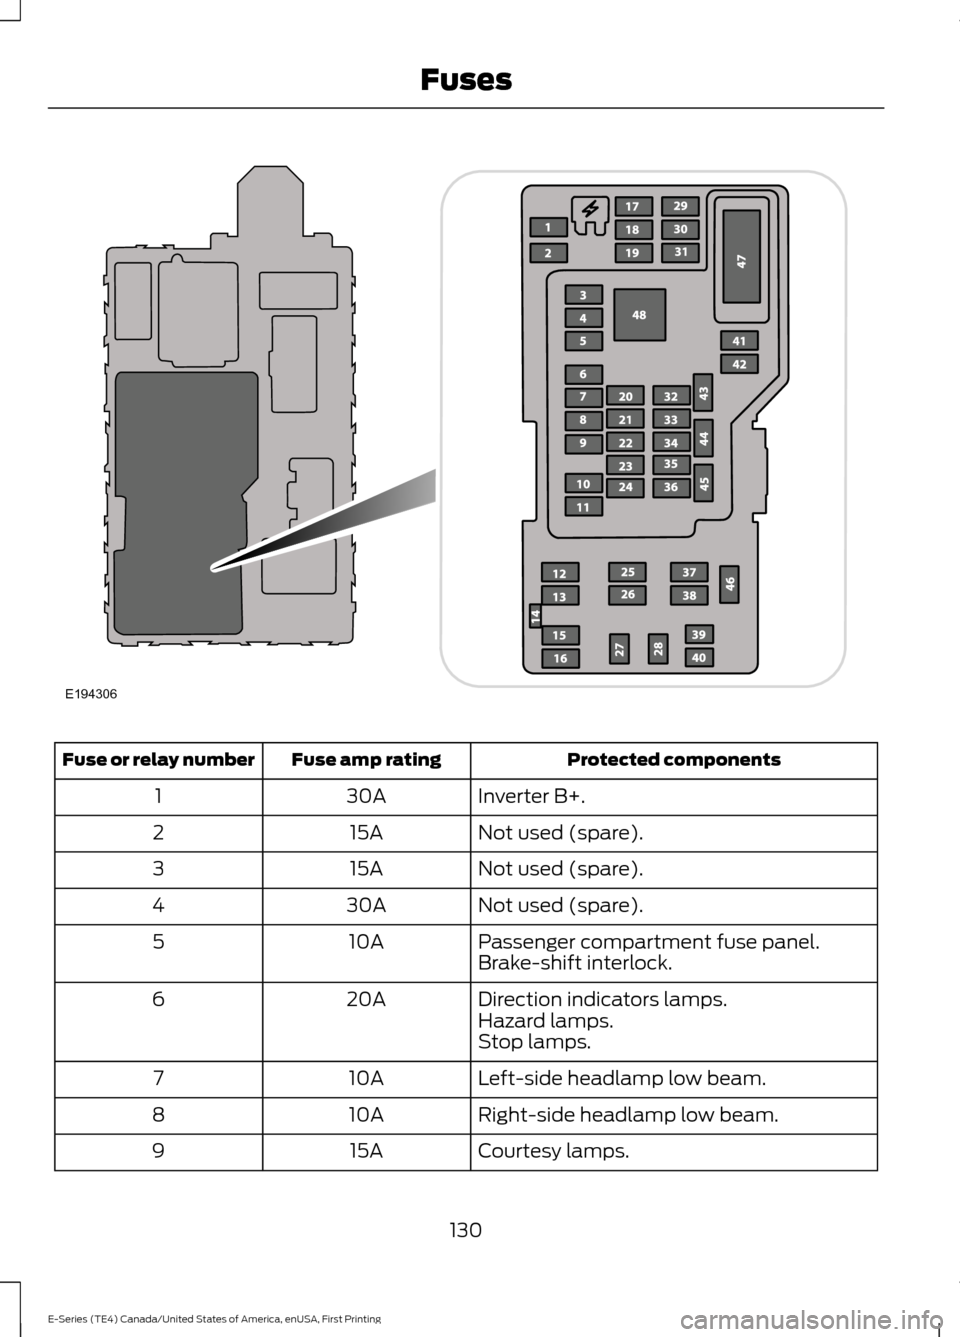
Protected components
Fuse amp rating
Fuse or relay number
Inverter B+.
30A
1
Not used (spare).
15A
2
Not used (spare).
15A
3
Not used (spare).
30A
4
Passenger compartment fuse panel.
10A
5
Brake-shift interlock.
Direction indicators lamps.
20A
6
Hazard lamps.
Stop lamps.
Left-side headlamp low beam.
10A
7
Right-side headlamp low beam.
10A
8
Courtesy lamps.
15A
9
130
E-Series (TE4) Canada/United States of America, enUSA, First Printing FusesE194306
Page 151 of 318
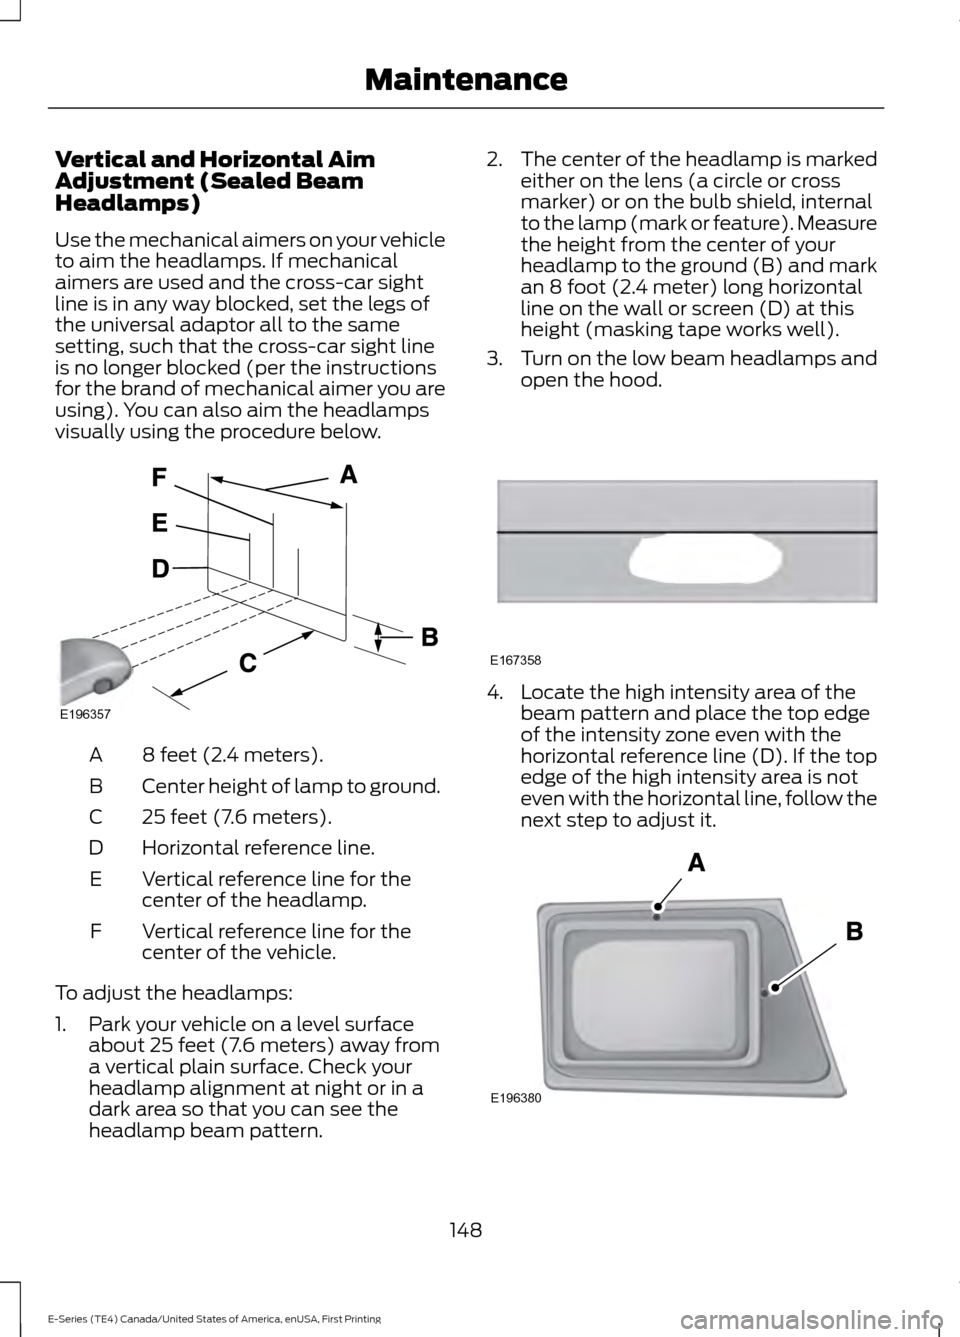
Vertical and Horizontal Aim
Adjustment (Sealed Beam
Headlamps)
Use the mechanical aimers on your vehicle
to aim the headlamps. If mechanical
aimers are used and the cross-car sight
line is in any way blocked, set the legs of
the universal adaptor all to the same
setting, such that the cross-car sight line
is no longer blocked (per the instructions
for the brand of mechanical aimer you are
using). You can also aim the headlamps
visually using the procedure below.
8 feet (2.4 meters).
A
Center height of lamp to ground.
B
25 feet (7.6 meters).
C
Horizontal reference line.
D
Vertical reference line for the
center of the headlamp.
E
Vertical reference line for the
center of the vehicle.
F
To adjust the headlamps:
1. Park your vehicle on a level surface about 25 feet (7.6 meters) away from
a vertical plain surface. Check your
headlamp alignment at night or in a
dark area so that you can see the
headlamp beam pattern. 2.
The center of the headlamp is marked
either on the lens (a circle or cross
marker) or on the bulb shield, internal
to the lamp (mark or feature). Measure
the height from the center of your
headlamp to the ground (B) and mark
an 8 foot (2.4 meter) long horizontal
line on the wall or screen (D) at this
height (masking tape works well).
3. Turn on the low beam headlamps and open the hood. 4. Locate the high intensity area of the
beam pattern and place the top edge
of the intensity zone even with the
horizontal reference line (D). If the top
edge of the high intensity area is not
even with the horizontal line, follow the
next step to adjust it. 148
E-Series (TE4) Canada/United States of America, enUSA, First Printing MaintenanceE196357 E167358 E196380
Page 152 of 318
5. Locate the vertical adjuster (A) for
each headlamp. Turn the adjuster
control either clockwise or
counterclockwise to adjust the vertical
aim of the headlamp.
6. In addition to the horizontal line marked in step 2, a pair of vertical lines
(E) must be marked at the center line
of the headlamps on the wall or screen.
7. On the wall or screen, locate the high intensity area of the beam pattern. The
left edge of the high intensity area
should be even with the vertical line
corresponding to the headlamp under
adjustment. If the left edge of the high
intensity area is not even with the
vertical line, follow the next step to
adjust it.
8. Locate the horizontal adjuster (B) for each headlamp. Turn it clockwise or
counterclockwise to place the left edge
of the high intensity area even with the
vertical line corresponding to the
headlamp under adjustment.
Vertical Aim Adjustment
Procedure (Aerodynamic
Headlamps)
You can only adjust the headlamps
vertically. Your vehicle does not require
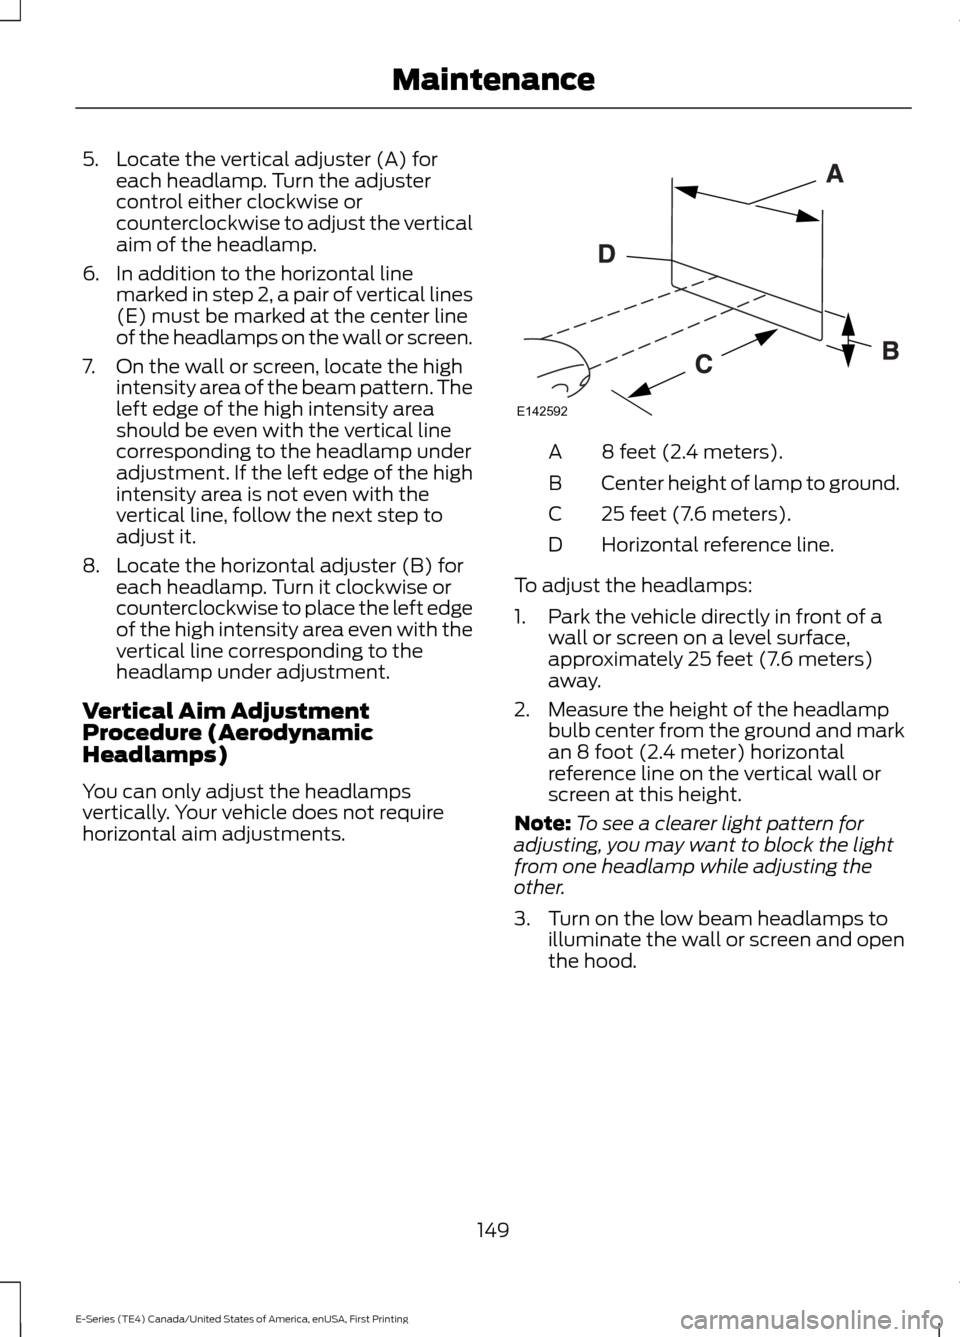
horizontal aim adjustments. 8 feet (2.4 meters).
A
Center height of lamp to ground.
B
25 feet (7.6 meters).
C
Horizontal reference line.
D
To adjust the headlamps:
1. Park the vehicle directly in front of a wall or screen on a level surface,
approximately 25 feet (7.6 meters)
away.
2. Measure the height of the headlamp bulb center from the ground and mark
an 8 foot (2.4 meter) horizontal
reference line on the vertical wall or
screen at this height.
Note: To see a clearer light pattern for
adjusting, you may want to block the light
from one headlamp while adjusting the
other.
3. Turn on the low beam headlamps to illuminate the wall or screen and open
the hood.
149
E-Series (TE4) Canada/United States of America, enUSA, First Printing MaintenanceE142592
Page 153 of 318
4.
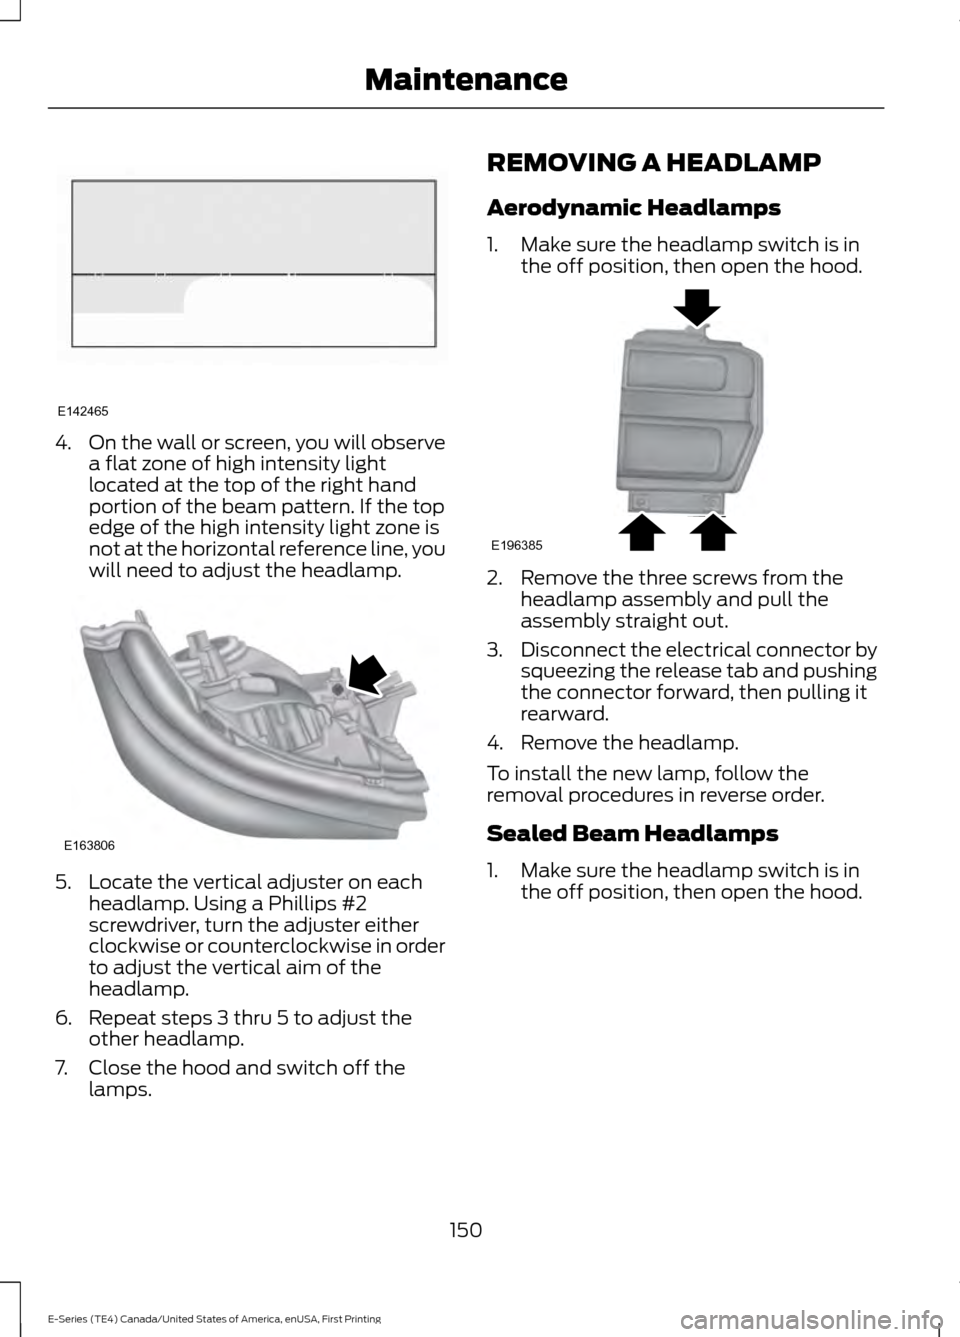
On the wall or screen, you will observe
a flat zone of high intensity light
located at the top of the right hand
portion of the beam pattern. If the top
edge of the high intensity light zone is
not at the horizontal reference line, you
will need to adjust the headlamp. 5. Locate the vertical adjuster on each
headlamp. Using a Phillips #2
screwdriver, turn the adjuster either
clockwise or counterclockwise in order
to adjust the vertical aim of the
headlamp.
6. Repeat steps 3 thru 5 to adjust the other headlamp.
7. Close the hood and switch off the lamps. REMOVING A HEADLAMP
Aerodynamic Headlamps
1. Make sure the headlamp switch is in
the off position, then open the hood. 2. Remove the three screws from the
headlamp assembly and pull the
assembly straight out.
3. Disconnect the electrical connector by
squeezing the release tab and pushing
the connector forward, then pulling it
rearward.
4. Remove the headlamp.
To install the new lamp, follow the
removal procedures in reverse order.
Sealed Beam Headlamps
1. Make sure the headlamp switch is in the off position, then open the hood.
150
E-Series (TE4) Canada/United States of America, enUSA, First Printing MaintenanceE142465 E163806 E196385
Page 155 of 318
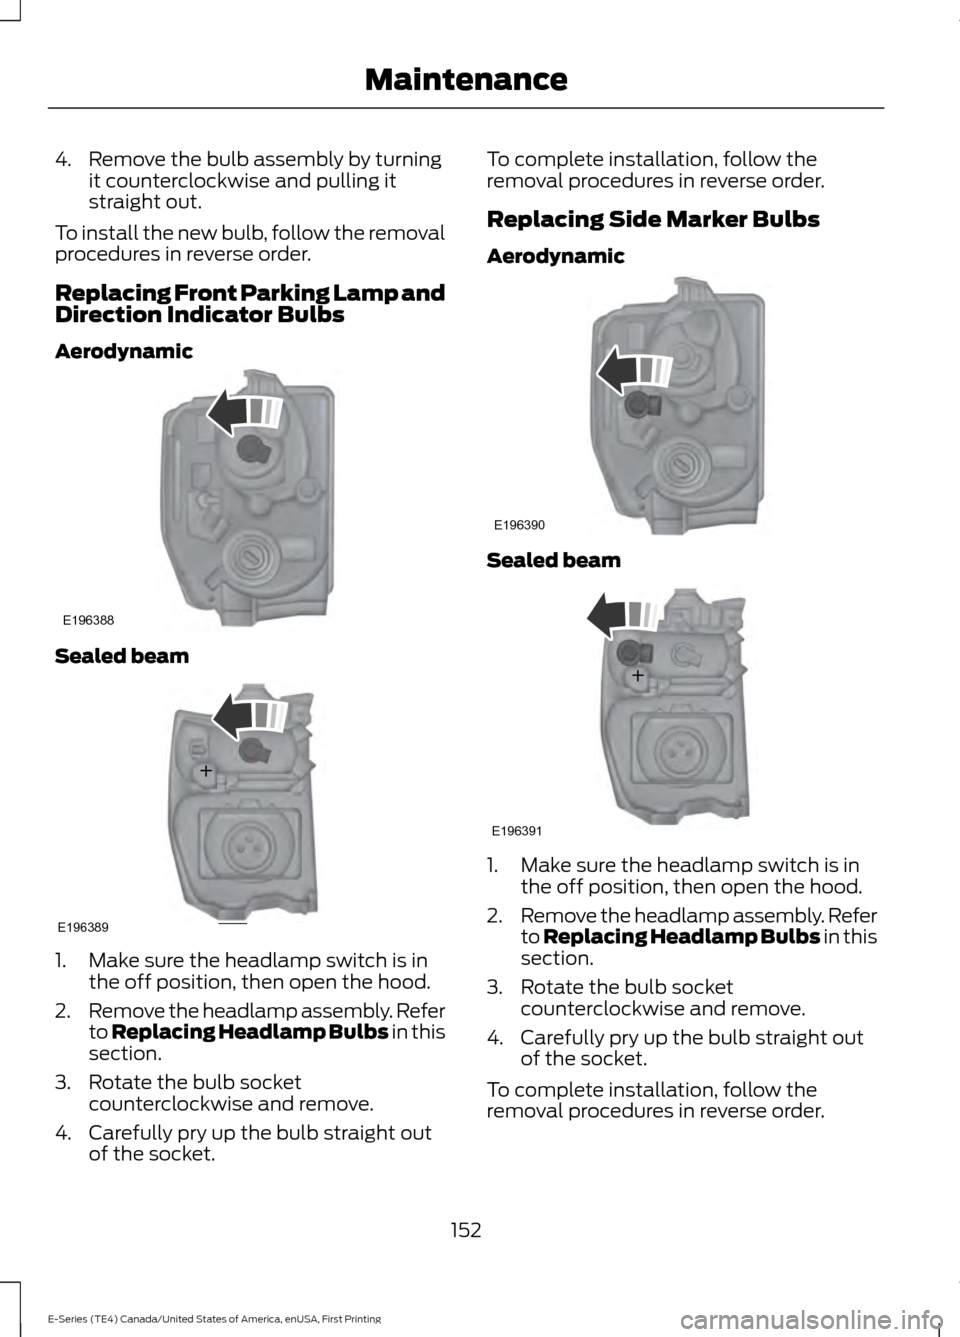
4. Remove the bulb assembly by turning
it counterclockwise and pulling it
straight out.
To install the new bulb, follow the removal
procedures in reverse order.
Replacing Front Parking Lamp and
Direction Indicator Bulbs
Aerodynamic Sealed beam
1. Make sure the headlamp switch is in
the off position, then open the hood.
2. Remove the headlamp assembly. Refer
to Replacing Headlamp Bulbs in this
section.
3. Rotate the bulb socket counterclockwise and remove.
4. Carefully pry up the bulb straight out of the socket. To complete installation, follow the
removal procedures in reverse order.
Replacing Side Marker Bulbs
Aerodynamic
Sealed beam
1. Make sure the headlamp switch is in
the off position, then open the hood.
2. Remove the headlamp assembly. Refer
to
Replacing Headlamp Bulbs in this
section.
3. Rotate the bulb socket counterclockwise and remove.
4. Carefully pry up the bulb straight out of the socket.
To complete installation, follow the
removal procedures in reverse order.
152
E-Series (TE4) Canada/United States of America, enUSA, First Printing MaintenanceE196388 E196389 E196390 E196391
Page 156 of 318
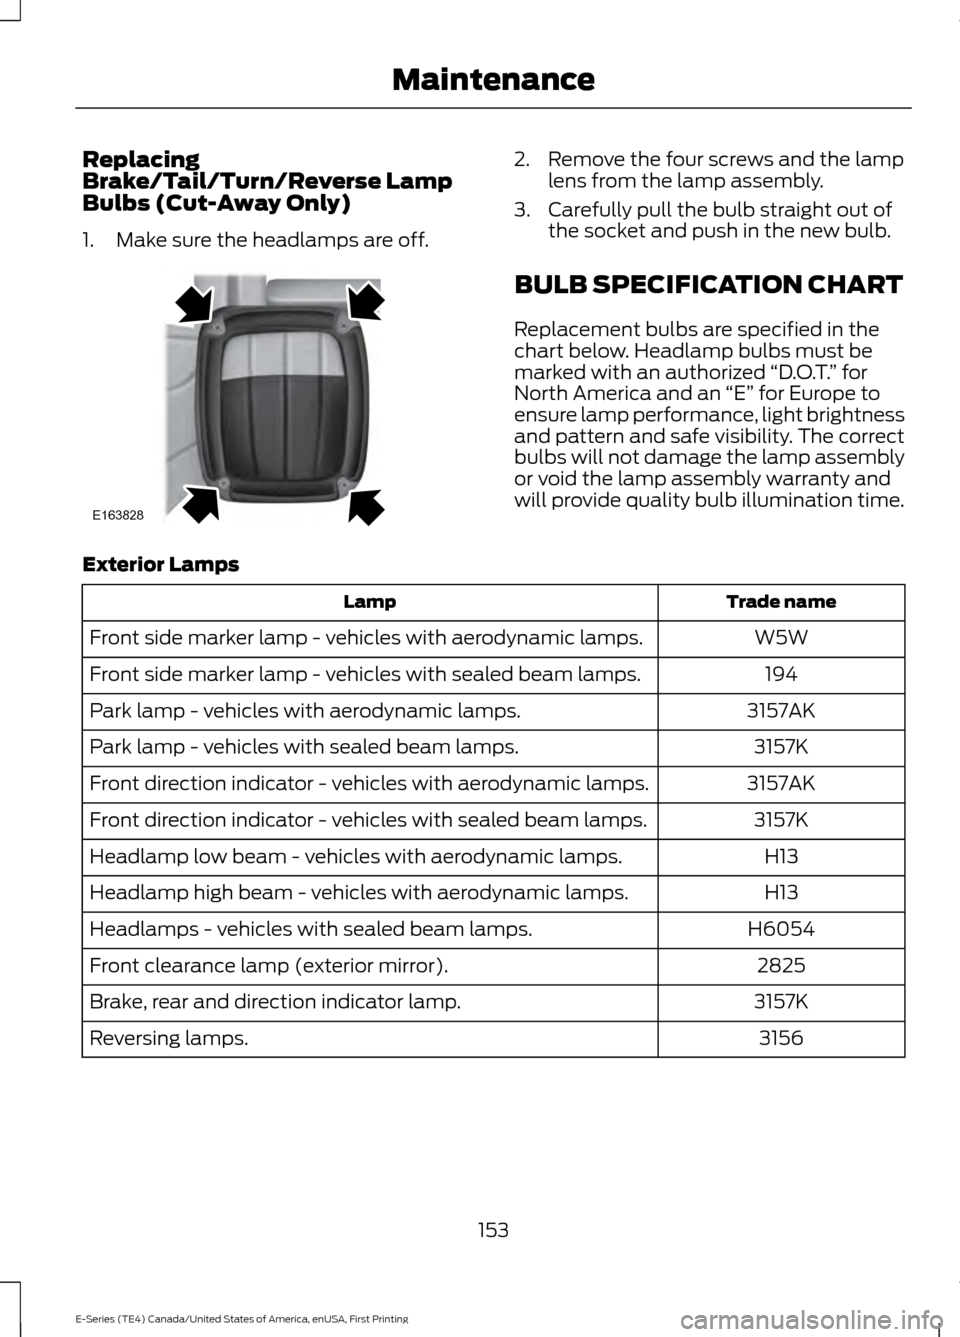
Replacing
Brake/Tail/Turn/Reverse Lamp
Bulbs (Cut-Away Only)
1. Make sure the headlamps are off. 2. Remove the four screws and the lamp
lens from the lamp assembly.
3. Carefully pull the bulb straight out of the socket and push in the new bulb.
BULB SPECIFICATION CHART
Replacement bulbs are specified in the
chart below. Headlamp bulbs must be
marked with an authorized “D.O.T.” for
North America and an “E” for Europe to
ensure lamp performance, light brightness
and pattern and safe visibility. The correct
bulbs will not damage the lamp assembly
or void the lamp assembly warranty and
will provide quality bulb illumination time.
Exterior Lamps Trade name
Lamp
W5W
Front side marker lamp - vehicles with aerodynamic lamps.
194
Front side marker lamp - vehicles with sealed beam lamps.
3157AK
Park lamp - vehicles with aerodynamic lamps.
3157K
Park lamp - vehicles with sealed beam lamps.
3157AK
Front direction indicator - vehicles with aerodynamic lamps.
3157K
Front direction indicator - vehicles with sealed beam lamps.
H13
Headlamp low beam - vehicles with aerodynamic lamps.
H13
Headlamp high beam - vehicles with aerodynamic lamps.
H6054
Headlamps - vehicles with sealed beam lamps.
2825
Front clearance lamp (exterior mirror).
3157K
Brake, rear and direction indicator lamp.
3156
Reversing lamps.
153
E-Series (TE4) Canada/United States of America, enUSA, First Printing MaintenanceE163828
Page 318 of 318
Using SYNC™ With Your Media
Player............................................................244
Accessing Your Play Menu............................. 249
Connecting Your Digital Media Player to the USB Port.......................................................... 244
Media Menu Features....................................... 247
Media Voice Commands................................ 246
System Settings.................................................. 251
What's Playing?................................................. 245
Using SYNC™ With Your Phone.............221
Accessing Features Through the Phone
Menu.................................................................. 225
Accessing Your Phone Settings................... 230
Making a Call....................................................... 224
Pairing a Cell Phone for the First Time.................................................................... 221
Pairing Subsequent Cell Phones.................. 222
Phone Options during an Active Call.........224
Phone Voice Commands................................ 222
Receiving Calls.................................................... 224
System Settings.................................................. 231
Text Messaging................................................... 228
Using Traction Control.................................90 Switching the System Off ............................... 90
System Indicator Lights and Messages........................................................... 90
Using Voice Recognition............................218 Initiating a Voice Session................................. 218
System Interaction and Feedback...............219
Utilizing the Mediation/Arbitration Program (Canada Only)...........................121
V
Vehicle Care
....................................................156
General Information.......................................... 156
Vehicle Certification Label........................196
Vehicle Identification Number.................195
Vehicle Storage..............................................161 Battery.................................................................... 162
Body........................................................................\
. 162
Brakes..................................................................... 162
Cooling system.................................................... 162
Engine..................................................................... 162
Fuel system........................................................... 162
General................................................................... 162
Miscellaneous...................................................... 163
Removing Vehicle From Storage.................. 163Tires........................................................................\
.
162
Ventilation See: Climate Control........................................... 63
VIN See: Vehicle Identification Number.............195
Voice Control
...................................................43
W
Warning Lamps and Indicators..................51 Anti-Lock Braking System................................. 51
Anti-Theft System................................................ 51
Battery....................................................................... 51
Brake System.......................................................... 51
Check Fuel Cap...................................................... 51
Cruise Control........................................................ 52
Direction Indicator................................................ 52
Engine Coolant Temperature........................... 52
Engine Oil................................................................ 52
Fasten Safety Belt................................................ 52
High Beam............................................................... 52
Low Fuel Level....................................................... 52
Low Tire Pressure Warning............................... 52
Powertrain Malfunction/Electronic Throttle Control................................................................. 52
Service Engine Soon............................................ 52
Traction Control System.................................... 53
Traction Control System Off............................ 53
Transmission Tow/Haul..................................... 53
Washer Fluid Check.....................................145
Washers See: Cleaning the Exterior................................ 157
See: Wipers and Washers................................. 44
Waxing..............................................................158
Wheel Nuts See: Changing a Road Wheel......................... 187
Wheels and Tires..........................................164 General Information.......................................... 164
Technical Specifications................................... 191
Windows and Mirrors....................................47
Windshield Washers
.....................................44
Windshield Wipers........................................44
Wiper Blades See: Checking the Wiper Blades................... 147
Wipers and Washers.....................................44
315
E-Series (TE4) Canada/United States of America, enUSA, First Printing Index