maintenance schedule FORD E SERIES 2017 4.G Owners Manual
[x] Cancel search | Manufacturer: FORD, Model Year: 2017, Model line: E SERIES, Model: FORD E SERIES 2017 4.GPages: 318, PDF Size: 6.21 MB
Page 7 of 318
Capacities and Specifications -
6.8L................................................................201
Audio System
General Information...................................206
Audio Unit - Vehicles With: AM/FM......207
Audio Unit - Vehicles With: AM/FM/CD/ SYNC...........................................................208
Digital Radio
...................................................210
Satellite Radio
................................................212
USB Port
...........................................................215
SYNC™
General Information....................................216
Using Voice Recognition............................218
Using SYNC™ With Your Phone
.............221
SYNC™ Applications and Services......234
SYNC™ AppLink ™
......................................242
Using SYNC™ With Your Media Player...........................................................244
SYNC™ Troubleshooting
.........................254
Accessories
Accessories....................................................263
Auxiliary Switches.......................................264
Ford Protect
Ford Protect
..................................................266
Scheduled Maintenance
General Maintenance Information
.......268
Normal Scheduled Maintenance............271
Special Operating Conditions Scheduled Maintenance..............................................273
Scheduled Maintenance Record............276
Appendices
End User License Agreement.................286
4
E-Series (TE4) Canada/United States of America, enUSA, First Printing Table of Contents
Page 13 of 318
We offer a number of convenient ways for
you to contact us and help to manage your
account.
Call 1-800-727-7000.
For more information about Ford Credit
and access to the Account Manager, go to
www.fordcredit.com.
REPLACEMENT PARTS
RECOMMENDATION
We have built your vehicle to the highest
standards using quality parts. We
recommend that you demand the use of
genuine Ford and Motorcraft parts
whenever your vehicle requires scheduled
maintenance or repair. You can clearly
identify genuine Ford and Motorcraft parts
by looking for the Ford, FoMoCo or
Motorcraft branding on the parts or their
packaging.
Scheduled Maintenance and
Mechanical Repairs
One of the best ways for you to make sure
that your vehicle provides years of service
is to have it maintained in line with our
recommendations using parts that
conform to the specifications detailed in
this Owner
’s Manual. Genuine Ford and
Motorcraft parts meet or exceed these
specifications.
Collision Repairs
We hope that you never experience a
collision, but accidents do happen.
Genuine Ford replacement collision parts
meet our stringent requirements for fit,
finish, structural integrity, corrosion
protection and dent resistance. During vehicle development we validate that
these parts deliver the intended level of
protection as a whole system. A great way
to know for sure you are getting this level
of protection is to use genuine Ford
replacement collision parts.
Warranty on Replacement Parts
Genuine Ford and Motorcraft replacement
parts are the only replacement parts that
benefit from a Ford Warranty. The Ford
Warranty may not cover damage caused
to your vehicle as a result of failed
non-Ford parts. For additional information,
refer to the terms and conditions of the
Ford Warranty.
SPECIAL NOTICES
New Vehicle Limited Warranty
For a detailed description of what is
covered and what is not covered by your
vehicle
’s New Vehicle Limited Warranty,
refer to the Warranty Guide that is
provided to you along with your Owner ’s
Manual.
Special Instructions
For your added safety, your vehicle is fitted
with sophisticated electronic controls. WARNINGS
You risk death or serious injury to
yourself and others if you do not
follow the instruction highlighted by
the warning symbol. Failure to follow the
specific warnings and instructions could
result in personal injury. Never
place front seat mounted
rear-facing child or infant seats in
front of an active passenger airbag. 10
E-Series (TE4) Canada/United States of America, enUSA, First Printing Introduction
Page 61 of 318
SYSTEM CHECK
TBC GAIN = XX.X or NO
TRAILER (if equipped)
TBC GAIN = XX.X or
OUTPUT = ////// (if
equipped)
XXX MILES TO E
OIL LIFE XXX% HOLD RESET = NEW
This displays the remaining oil life. An oil
change is required whenever indicated by
the message center and according to the
recommended maintenance schedule.
USE ONLY RECOMMENDED ENGINE OILS.
To reset the oil monitoring system to 100%
after each oil change, perform the
following:
1. Press and release the SELECT/RESET stem to display OIL LIFE XXX% HOLD
RESET = NEW.
2. Press and hold the SELECT/RESET stem for two seconds and release to
reset the oil life to 100%.
Note: To change oil life 100% value (if
equipped):
3. Once OIL LIFE SET TO XXX%
displays, release and press the
SELECT/RESET stem to change the oil
life start value. Each release and press
reduces the value by 10%.
UNITS ENG / METRIC
Displays the current units in English or
Metric.
AUTOLOCK
This feature automatically locks all vehicle
doors when you shift into any gear, putting
the vehicle in motion. AUTOUNLOCK
This feature automatically unlocks all
vehicle doors when you open the driver's
door within 10 minutes of switching the
ignition off.
COMPASS (if equipped)
Displays the vehicle's heading direction.
Note:
Driving near large buildings, bridges,
power lines and powerful broadcast
antennas may affect the compass reading.
Magnetic or metallic objects placed in, on
or near the vehicle may also affect compass
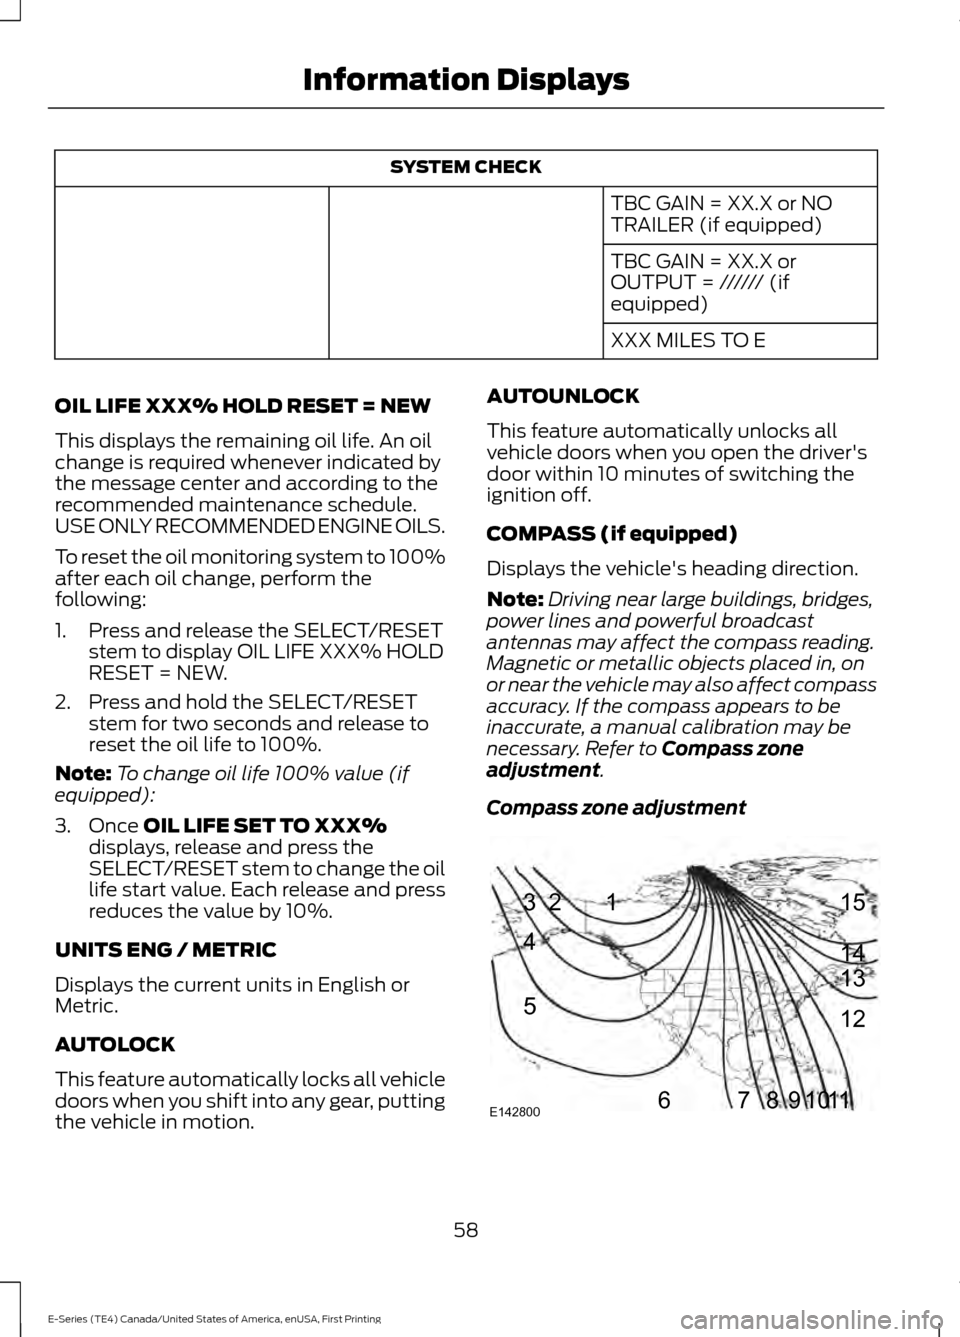
accuracy. If the compass appears to be
inaccurate, a manual calibration may be
necessary. Refer to
Compass zone
adjustment.
Compass zone adjustment 58
E-Series (TE4) Canada/United States of America, enUSA, First Printing Information Displays1
2
3
4
5
678910 1112 13 14 15
E142800
Page 83 of 318
2. Each time you fill the fuel tank, record
the amount of fuel added.
3. After at least three fill ups, fill the fuel tank and record the current odometer
reading.
4. Subtract your initial odometer reading from the current odometer reading.
To calculate L/100 km (liters per 100
kilometers) fuel consumption, multiply the
liters used by 100, then divide by kilometers
traveled. To calculate MPG (miles per
gallon) fuel consumption, divide miles
traveled by gallons used.
Keep a record for at least one month and
record the type of driving (city or highway).
This provides an accurate estimate of your
vehicle ’s fuel economy under current
driving conditions. Keeping records during
summer and winter will show how
temperature impacts fuel economy.
Conditions
• Heavily loading your vehicle reduces
fuel economy.
• Carrying unnecessary weight in your
vehicle may reduce fuel economy.
• Adding certain accessories to your
vehicle such as bug deflectors, rollbars
or light bars, running boards and ski
racks may reduce fuel economy.
• Using fuel blended with alcohol may
lower fuel economy.
• Fuel economy may decrease with lower
temperatures.
• Fuel economy may decrease when
driving short distances.
• You will get better fuel economy when
driving on flat terrain than when driving
on hilly terrain. EMISSION CONTROL SYSTEM WARNINGS
Do not park, idle or drive your vehicle
on dry grass or other dry ground
cover. The emission system heats up
the engine compartment and exhaust
system, creating the risk of fire. Exhaust leaks may result in entry of
harmful and potentially lethal fumes
into the passenger compartment. If
you smell exhaust fumes inside your
vehicle, have your vehicle inspected
immediately. Do not drive if you smell
exhaust fumes. Your vehicle has various emission control
components and a catalytic converter that
enables it to comply with applicable
exhaust emission standards.
To make sure that the catalytic converter
and other emission control components
continue to work properly:
•
Use only the specified fuel listed.
• Avoid running out of fuel.
• Do not turn off the ignition while your
vehicle is moving, especially at high
speeds.
• Have the items listed in scheduled
maintenance information performed
according to the specified schedule.
The scheduled maintenance items listed
in scheduled maintenance information are
essential to the life and performance of
your vehicle and to its emissions system.
If you use anything other than Ford,
Motorcraft or Ford-authorized parts for
maintenance replacements or for service
of components affecting emission control,
such non-Ford parts should be equivalent
to genuine Ford Motor Company parts in
performance and durability.
80
E-Series (TE4) Canada/United States of America, enUSA, First Printing Fuel and Refueling
Page 106 of 318
•
See the instructions included with
towing accessories for the proper
installation and adjustment
specifications.
• Service your vehicle more frequently if
you tow a trailer. See your scheduled
maintenance information.
• If you use a rental trailer, follow the
instructions the rental agency gives
you.
See Load limits in the Load Carrying
chapter for load specification terms found
on the tire label and Safety Compliance
label and instructions on calculating your
vehicle's load.
Remember to account for the trailer
tongue weight as part of your vehicle load
when calculating the total vehicle weight.
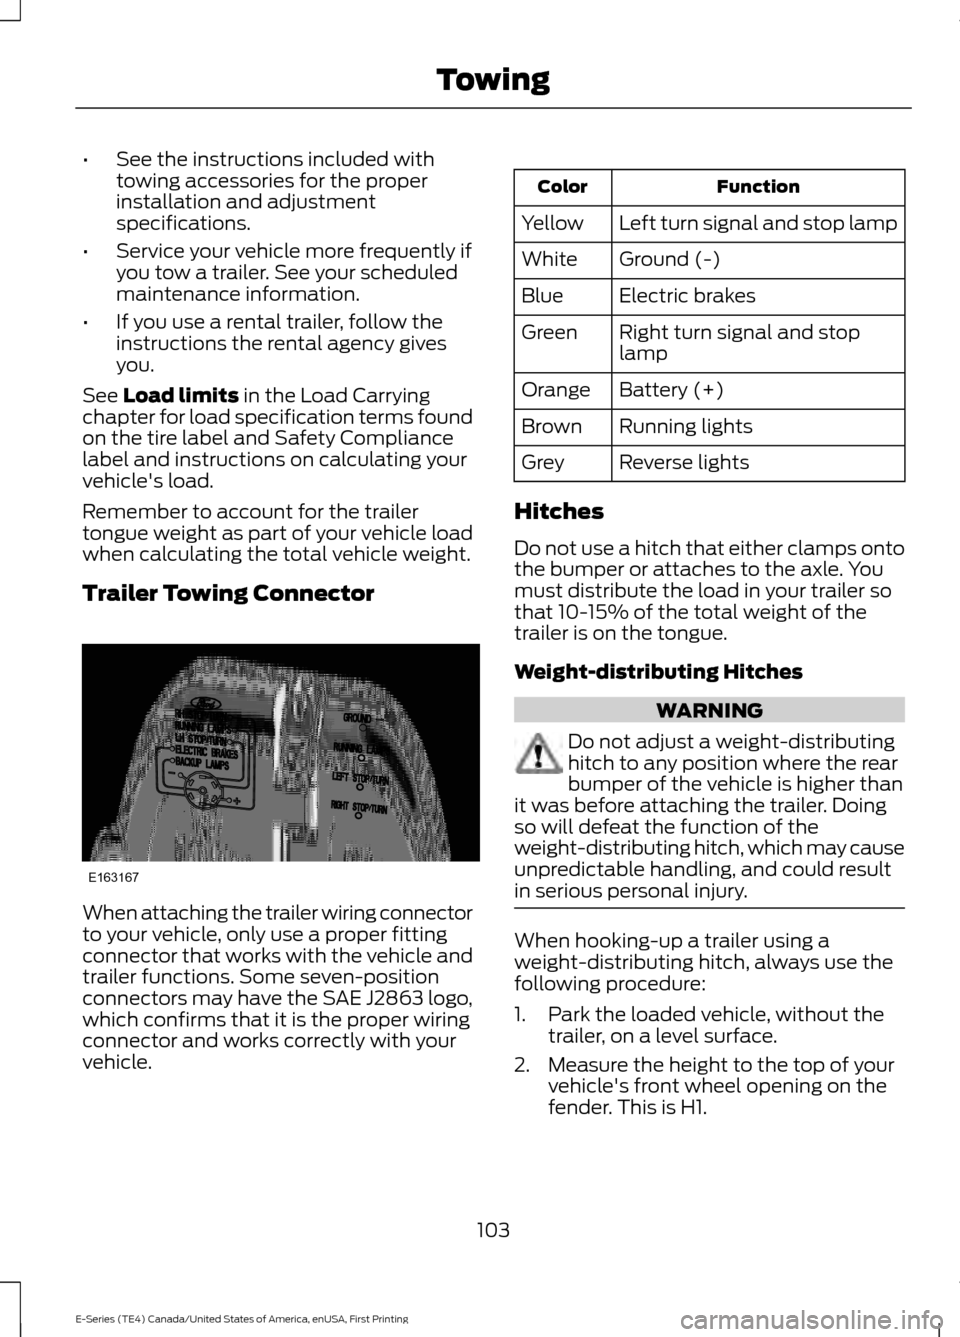
Trailer Towing Connector When attaching the trailer wiring connector
to your vehicle, only use a proper fitting
connector that works with the vehicle and
trailer functions. Some seven-position
connectors may have the SAE J2863 logo,
which confirms that it is the proper wiring
connector and works correctly with your
vehicle. Function
Color
Left turn signal and stop lamp
Yellow
Ground (-)
White
Electric brakes
Blue
Right turn signal and stop
lamp
Green
Battery (+)
Orange
Running lights
Brown
Reverse lights
Grey
Hitches
Do not use a hitch that either clamps onto
the bumper or attaches to the axle. You
must distribute the load in your trailer so
that 10-15% of the total weight of the
trailer is on the tongue.
Weight-distributing Hitches WARNING
Do not adjust a weight-distributing
hitch to any position where the rear
bumper of the vehicle is higher than
it was before attaching the trailer. Doing
so will defeat the function of the
weight-distributing hitch, which may cause
unpredictable handling, and could result
in serious personal injury. When hooking-up a trailer using a
weight-distributing hitch, always use the
following procedure:
1. Park the loaded vehicle, without the
trailer, on a level surface.
2. Measure the height to the top of your vehicle's front wheel opening on the
fender. This is H1.
103
E-Series (TE4) Canada/United States of America, enUSA, First Printing TowingE163167
Page 113 of 318
BREAKING-IN
You need to break in new tires for
approximately 300 miles (480
kilometers). During this time, your vehicle
may exhibit some unusual driving
characteristics.
Avoid driving too fast during the first 1000
miles (1600 kilometers). Vary your speed
frequently and change up through the
gears early. Do not labor the engine.
Do not tow during the first 1000 miles
(1600 kilometers).
REDUCED ENGINE
PERFORMANCE
WARNING
Continued operation will increase the
engine temperature and cause the
engine to shut down completely.
If the engine coolant temperature gauge
needle moves to the upper limit position,
the engine is overheating. See Gauges
(page 49).
You must only drive your vehicle for a short
distance if the engine overheats. The
distance you can travel depends on
ambient temperature, vehicle load and
terrain. The engine will continue to operate
with limited power for a short time.
If the engine temperature continues to rise,
the fuel supply to the engine will reduce.
The air conditioning will switch off and the
engine cooling fan will operate continually.
1. Reduce your speed gradually and stop
your vehicle as soon as it is safe to do
so.
2. Switch the engine off immediately to prevent severe engine damage.
3. Wait for the engine to cool down. 4. Check the coolant level. See
Engine
Coolant Check (page 137).
5. Have your vehicle checked by an authorized dealer as soon as possible.
ECONOMICAL DRIVING
Fuel economy is affected by several things
such as how you drive, the conditions you
drive under and how you maintain your
vehicle.
There are some things to keep in mind that
may improve your fuel economy:
• Accelerate and slow down in a smooth,
moderate fashion.
• Drive at steady speeds.
• Anticipate stops; slowing down may
eliminate the need to stop.
• Combine errands and minimize
stop-and-go driving (When running
errands, go to the furthest destination
first and then work your way back
home).
• Close the windows for high-speed
driving.
• Drive at reasonable speeds.
• Keep the tires properly inflated and use
only the recommended size.
• Use the recommended engine oil.
• Perform all regularly scheduled
maintenance.
There are also some things you may want
to avoid doing because they reduce your
fuel economy:
• Avoid sudden or hard accelerations.
• Avoid revving the engine before turning
off the car.
• Avoid long idle periods.
• Do not warm up your vehicle on cold
mornings.
• Reduce the use of air conditioning and
heat.
110
E-Series (TE4) Canada/United States of America, enUSA, First Printing Driving Hints
Page 121 of 318
GETTING THE SERVICES YOU
NEED
Warranty repairs to your vehicle must be
performed by an authorized dealer. While
any authorized dealer handling your vehicle
line will provide warranty service, we
recommend you return to your selling
authorized dealer who wants to ensure
your continued satisfaction.
Please note that certain warranty repairs
require special training and equipment, so
not all authorized dealers are authorized
to perform all warranty repairs. This means
that, depending on the warranty repair
needed, you may have to take your vehicle
to another authorized dealer.
A reasonable time must be allowed to
perform a repair after taking your vehicle
to the authorized dealer. Repairs will be
made using Ford or Motorcraft® parts, or
remanufactured or other parts that are
authorized by Ford.
Away From Home
If you are away from home when your
vehicle needs service, contact the Ford
Customer Relationship Center or use the
online resources listed below to find the
nearest authorized dealer.
In the United States:
Mailing address
Ford Motor Company
Customer Relationship Center
P.O. Box 6248
Dearborn, MI 48126
Telephone
1-800-392-3673 (FORD)
(TDD for the hearing impaired:
1-800-232-5952)
Additional information and resources are
available online:
Website
www.owner.ford.com
These are some of the items that can be
found online:
• U.S. dealer locator by Dealer Name,
City/State or Zip Code.
• Owner Manuals.
• Maintenance Schedules.
• Recalls.
• Ford Extended Service Plans.
• Ford Genuine Accessories.
• Service specials and promotions.
In Canada:
Mailing address
Customer Relationship Centre
Ford Motor Company of Canada, Limited
P.O. Box 2000
Oakville, Ontario L6K 0C8
Telephone
1-800-565-3673 (FORD) Website
www.ford.ca
Twitter
@FordServiceCA (English Canada)
@FordServiceQC (Quebec)
Additional Assistance
If you have questions or concerns, or are
unsatisfied with the service you are
receiving, follow these steps:
1. Contact your Sales Representative or Service Advisor at your selling or
servicing authorized dealer.
118
E-Series (TE4) Canada/United States of America, enUSA, First Printing Customer Assistance
Page 140 of 318
To reset the oil life monitoring system do
the following:
1.
Switch the ignition on. Do not start the
engine.
2. Fully press the accelerator and brake pedals at the same time.
3. Keep the accelerator and brake pedals
fully pressed.
4. After three seconds, a message displays confirming the reset procedure
is in progress.
5. After 25 seconds, a message displays confirming the reset procedure is
complete.
6. Release the accelerator and brake pedals.
7. Switch the ignition off.
ENGINE COOLANT CHECK WARNINGS
Do not add engine coolant when the
engine is hot. Steam and scalding
liquids released from a hot cooling
system can burn you badly. Also, spilling
coolant on hot engine parts can burn you. Do not put engine coolant in the
windshield washer fluid container. If
sprayed on the windshield, engine
coolant could make it difficult to see
through the windshield. To reduce the risk of personal injury,
make sure the engine is cool before
unscrewing the coolant pressure
relief cap. The cooling system is under
pressure. Steam and hot liquid can come
out forcefully when you loosen the cap
slightly. Do not add coolant further than the
MAX mark. When the engine is cold, check the
concentration and level of the coolant at
the intervals listed in the scheduled
maintenance information. See Scheduled
Maintenance
(page 268).
Note: Make sure that the coolant level is
between the
MIN and MAX marks on the
coolant reservoir.
Note: Coolant expands when it is hot. The
level may extend beyond the
MAX mark.
Maintain coolant concentration within
48% to 50%, which equates to a freeze
point between -30°F (-34°C) and -34°F
(-37°C). Coolant concentration should be
checked using a refractometer. We do not
recommend the use of hydrometers or
coolant test strips for measuring coolant
concentration.
Adding Coolant WARNING
Never remove the coolant reservoir
cap while the engine is running or hot.
Note:
Automotive fluids are not
interchangeable. Do not use coolant or
windshield washer fluid outside of its
specified function and vehicle location.
Note: Do not use stop leak pellets, cooling
system sealants, or non-specified additives
as they can cause damage to the engine
cooling or heating systems. Resulting
component damage may not be covered by
the vehicle Warranty.
137
E-Series (TE4) Canada/United States of America, enUSA, First Printing Maintenance
Page 142 of 318
Recycled Coolant
We do not recommend the use of recycled
coolant as an approved recycling process
is not yet available.
Dispose of used engine coolant in an
appropriate manner. Follow your
community
’s regulations and standards
for recycling and disposing of automotive
fluids.
Severe Climates
If you drive in extremely cold climates:
• It may be necessary to increase the
coolant concentration above 50%.
• A coolant concentration of 60%
provides improved freeze point
protection. Coolant concentrations
above 60% decrease the overheat
protection characteristics of the
coolant and may cause engine
damage.
If you drive in extremely hot climates:
• You can decrease the coolant
concentration to 40%.
• Coolant concentrations below 40%
decrease the freeze and corrosion
protection characteristics of the
coolant and may cause engine
damage.
Vehicles driven year-round in non-extreme
climates should use prediluted coolant for
optimum cooling system and engine
protection.
Coolant Change
At specific mileage intervals, as listed in
the scheduled maintenance information,
the coolant should be changed. Add
prediluted coolant approved to the correct
specification. See Capacities and
Specifications (page 192). Fail-Safe Cooling
Fail-safe cooling allows you to temporarily
drive your vehicle before any incremental
component damage occurs. The fail-safe
distance depends on ambient
temperature, vehicle load and terrain.
How Fail-Safe Cooling Works
If the engine begins to overheat, the
coolant temperature gauge moves toward
the red zone:
A warning lamp illuminates and
a message may appear in the
information display.
If the engine reaches a preset
over-temperature condition, the engine
automatically switches to alternating
cylinder operation. Each disabled cylinder
acts as an air pump and cools the engine.
When this occurs, your vehicle still
operates, however:
• Engine power is limited.
• The air conditioning system turns off.
Continued operation increases the engine
temperature, causing the engine to
completely shut down. Your steering and
braking effort increases in this situation.
When the engine temperature cools, you
can re-start the engine. Have your vehicle
checked as soon as possible to minimize
engine damage.
When Fail-Safe Mode Is Activated WARNINGS
Fail-safe mode is for use during
emergencies only. Operate your
vehicle in fail-safe mode only as long
as necessary to bring your vehicle to rest
in a safe location and seek immediate
repairs. When in fail-safe mode, your
139
E-Series (TE4) Canada/United States of America, enUSA, First Printing Maintenance
Page 144 of 318
1. Pull off the road as soon as safely
possible and shift the transmission into
park (P).
2. Leave the engine running until the coolant temperature gauge needle
returns to the normal position. After
several minutes, if the temperature
does not drop, follow the remaining
steps.
3. Switch the engine off and wait for it to
cool. Check the coolant level.
4. If the coolant level is at or below the minimum mark, add prediluted coolant
immediately.
5. If the coolant level is normal, restart the engine and continue.
AUTOMATIC TRANSMISSION
FLUID CHECK
Have an authorized dealer check and
change the transmission fluid and filter at
the correct service interval. See
Scheduled Maintenance
(page 268).
Do not use supplemental transmission
fluid additives, treatments or cleaning
agents. The use of these materials may
affect transmission operation and result
in damage to internal transmission
components.
Checking Automatic Transmission
Fluid
For scheduled intervals of the fluid checks
and changes, See
Scheduled
Maintenance (page 268). Your
transmission does not consume fluid.
However, the fluid level should be checked
if the transmission is not working properly,
i.e., if the transmission slips or shifts slowly
or if you notice some sign of fluid leakage. Automatic transmission fluid expands
when warmed. To obtain an accurate fluid
check, drive the vehicle until it is at normal
operating temperature (approximately
19 mi (30 km)
). Verify that the
transmission fluid temperature gauge,
located on the instrument cluster, is within
normal range.
1. Drive the vehicle
19 mi (30 km) until it
reaches normal operating temperature.
2. Park the vehicle on a level surface and
engage the parking brake.
3. With the engine running, parking brake
engaged and your foot on the brake
pedal, move the gearshift lever through
all of the gear ranges. Allow sufficient
time for each gear to engage.
4. Put the transmission in park (P) and leave the engine running.
5. Remove the dipstick, wiping it clean with a clean, dry lint free rag. If
necessary, refer to the Under Hood
Overview in this chapter for the
location of the dipstick.
6. Install the dipstick making sure it is fully
seated in the filler tube.
7. Remove the dipstick and inspect the fluid level. The fluid should be in the
designated area for normal operating
temperature or ambient temperature.
Low Fluid Level
Type A
141
E-Series (TE4) Canada/United States of America, enUSA, First Printing Maintenance