instrument cluster FORD E SERIES 2022 User Guide
[x] Cancel search | Manufacturer: FORD, Model Year: 2022, Model line: E SERIES, Model: FORD E SERIES 2022Pages: 300, PDF Size: 3.18 MB
Page 93 of 300
Fuel Filler Cap
WARNING: The fuel system may
be under pressure. If you hear a hissing
sound near the fuel filler inlet, do not
refuel until the sound stops. Otherwise,
fuel may spray out, which could cause
serious personal injury.
Note: If you must replace the fuel filler cap,
replace it with a fuel filler cap that is
designed for your vehicle. The customer
warranty may be void for any damage to the
fuel tank or fuel system if the correct
genuine Ford, Motorcraft or other certified
fuel filler cap is not used.
Your vehicle has a threaded fuel filler cap.
When fueling your vehicle:
1. Put your vehicle in park (P).
2. Switch the engine off.
3. Carefully turn the filler cap counterclockwise until it spins off.
4. Pull to remove the cap from the fuel filler pipe and place on the fuel door
hanging hook if equipped.
5. To install the fuel filler cap, hold the cap by the cover handle and place the
threaded end of the cap into filler pipe.
Turn the cap clockwise until it clicks at
least once.
If the Check Fuel Cap light or a Check Fuel
Cap message appears in the instrument
cluster and stays on after you start the
engine, you may not have installed the fuel
filler properly. If the fuel cap light remains on, at the next
opportunity, safely pull off of the road,
remove the fuel filler cap, align the cap
properly and reinstall it. The check fuel cap
light or Check fuel cap message may not
reset immediately. It may take several
driving cycles for the indicators to turn off.
A driving cycle consists of an engine
start-up (after four or more hours with the
engine off) followed by normal city and
highway driving.
FUEL CONSUMPTION
Advertised Capacity
The advertised capacity is the maximum
amount of fuel that you can add to the fuel
tank after running out of fuel. Included in
the advertised capacity is an empty
reserve. The empty reserve is an
unspecified amount of fuel that remains
in the fuel tank when the fuel gauge
indicates empty.
Note:
The amount of fuel in the empty
reserve varies and should not be relied upon
to increase driving range.
Fuel Economy
Your vehicle calculates fuel economy
figures through the trip computer average
fuel function. See
General Information
(page 65).
The first
1,000 mi (1,500 km) of driving is
the break-in period of the engine. A more
accurate measurement is obtained after
2,000 mi (3,000 km)
.
Impacting Fuel Economy
• Incorrect tire inflation pressures.
• Fully loading your vehicle.
• Carrying unnecessary weight.
90
E-Series (TE4) Canada/United States of America, enUSA, Edition date: 202010, First-Printing Fuel and Refueling
Page 100 of 300
Tow/Haul Mode
To activate tow/haul, press the
button on the gearshift lever.
The TOW HAUL indicator light
illuminates in the instrument cluster.
The tow/haul feature:
• Delays upshifts to reduce the frequency
of transmission shifting.
• Provides engine braking in all forward
gears, which slows your vehicle and
assists you in controlling your vehicle
when descending a slope.
• Depending on driving conditions and
load conditions, may downshift the
transmission, slow your vehicle and
control your vehicle speed when
descending a hill, without pressing the
accelerator pedal. The amount of
downshift braking provided varies
based upon the amount you press the
brake pedal.
The tow/haul feature improves
transmission operation when towing a
trailer or a heavy load. All transmission
gear ranges are available when using
tow/haul.
To deactivate the tow/haul feature and
return to normal driving mode, press the
button on the gearshift lever again. The
TOW HAUL light deactivates. Tow/haul
also deactivates when you power down
your vehicle. WARNING: Do not use tow/haul
when the road surface is slippery. Failure
to follow this instruction could result in
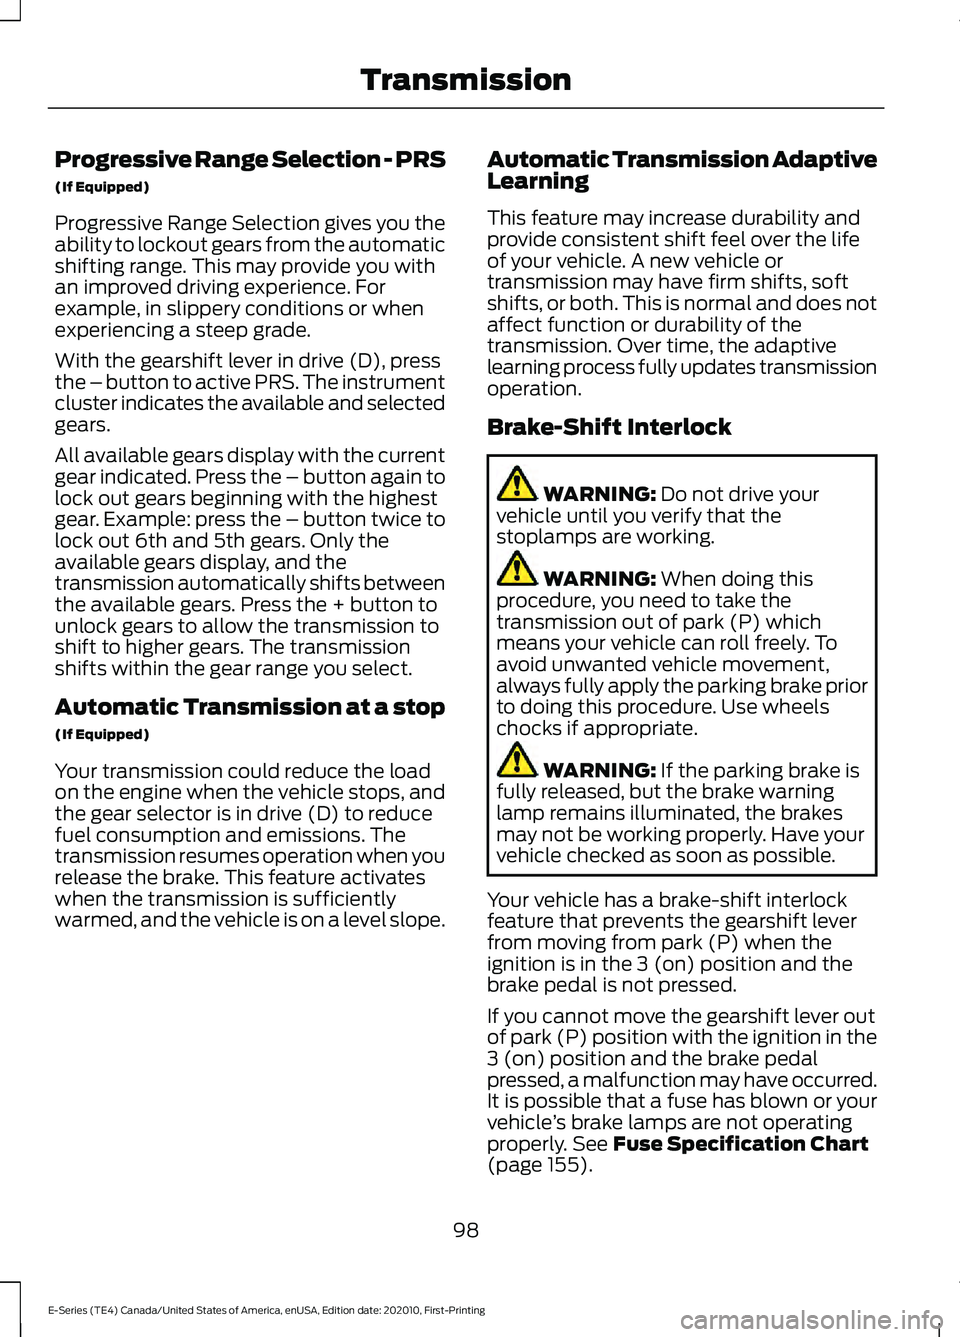
the loss of control of your vehicle. Understanding Your SelectShift
Automatic
™ Transmission Note:
When pressing the button on the
gearshift lever, you can cycle through the
available drive modes.
Your vehicle has a SelectShift Automatic ™
transmission gearshift lever. The
SelectShift Automatic transmission gives
you the ability to change gears up or down
without a clutch.
To prevent the engine from running at too
low an RPM, which may cause it to stall,
SelectShift still makes some downshifts
if it has determined that you have not
downshifted in time. Although SelectShift
makes some downshifts for you, it still
allows you to downshift at any time if the
SelectShift determines that damage to
the engine does not occur from
over-revving.
SelectShift does not upshift, even if the
engine is approaching the RPM limit. Shift
manually by pressing the + button.
Note: Engine damage may occur if you
maintain excessive engine revving without
shifting.
SelectShift does not automatically upshift,
even if the engine is approaching the RPM
limit. Shift manually by pressing the (+)
paddle.
97
E-Series (TE4) Canada/United States of America, enUSA, Edition date: 202010, First-Printing TransmissionE161509 E318028
Page 101 of 300
Progressive Range Selection - PRS
(If Equipped)
Progressive Range Selection gives you the
ability to lockout gears from the automatic
shifting range. This may provide you with
an improved driving experience. For
example, in slippery conditions or when
experiencing a steep grade.
With the gearshift lever in drive (D), press
the – button to active PRS. The instrument
cluster indicates the available and selected
gears.
All available gears display with the current
gear indicated. Press the – button again to
lock out gears beginning with the highest
gear. Example: press the – button twice to
lock out 6th and 5th gears. Only the
available gears display, and the
transmission automatically shifts between
the available gears. Press the + button to
unlock gears to allow the transmission to
shift to higher gears. The transmission
shifts within the gear range you select.
Automatic Transmission at a stop
(If Equipped)
Your transmission could reduce the load
on the engine when the vehicle stops, and
the gear selector is in drive (D) to reduce
fuel consumption and emissions. The
transmission resumes operation when you
release the brake. This feature activates
when the transmission is sufficiently
warmed, and the vehicle is on a level slope.
Automatic Transmission Adaptive
Learning
This feature may increase durability and
provide consistent shift feel over the life
of your vehicle. A new vehicle or
transmission may have firm shifts, soft
shifts, or both. This is normal and does not
affect function or durability of the
transmission. Over time, the adaptive
learning process fully updates transmission
operation.
Brake-Shift Interlock WARNING: Do not drive your
vehicle until you verify that the
stoplamps are working. WARNING:
When doing this
procedure, you need to take the
transmission out of park (P) which
means your vehicle can roll freely. To
avoid unwanted vehicle movement,
always fully apply the parking brake prior
to doing this procedure. Use wheels
chocks if appropriate. WARNING:
If the parking brake is
fully released, but the brake warning
lamp remains illuminated, the brakes
may not be working properly. Have your
vehicle checked as soon as possible.
Your vehicle has a brake-shift interlock
feature that prevents the gearshift lever
from moving from park (P) when the
ignition is in the 3 (on) position and the
brake pedal is not pressed.
If you cannot move the gearshift lever out
of park (P) position with the ignition in the
3 (on) position and the brake pedal
pressed, a malfunction may have occurred.
It is possible that a fuse has blown or your
vehicle ’s brake lamps are not operating
properly.
See Fuse Specification Chart
(page 155).
98
E-Series (TE4) Canada/United States of America, enUSA, Edition date: 202010, First-Printing Transmission
Page 107 of 300
PRINCIPLE OF OPERATION
The traction control system helps avoid
drive wheel spin and loss of traction.
If your vehicle begins to slide, the system
applies the brakes to individual wheels
and, when needed, reduces engine power
at the same time. If the wheels spin when
accelerating on slippery or loose surfaces,
the system reduces engine power in order
to increase traction.
USING TRACTION CONTROL
WARNING: The stability and
traction control light illuminates steadily
if the system detects a failure. Make sure
you did not manually disable the traction
control system using the information
display controls or the switch. If the
stability control and traction control light
is still illuminating steadily, have the
system serviced by an authorized dealer
immediately. Operating your vehicle with
the traction control disabled could lead
to an increased risk of loss of vehicle
control, vehicle rollover, personal injury
and death.
The system automatically turns on each
time you switch the ignition on.
If your vehicle is stuck in mud or snow,
switching traction control off may be
beneficial as this allows the wheels to spin.
Switching the System Off The switch for the traction
control system is located on the
instrument panel.
When you switch the system off, an
illuminated icon appears on the instrument
cluster. Use the switch again to return the traction
control system to normal operation.
System Indicator Lights and
Messages The traction control light
temporarily illuminates on
engine start-up and flashes
when a driving condition activates the
system. The traction control off light
temporarily illuminates on
engine start-up and stays on:
• When you switch the traction control
system off.
• If a problem occurs in the system.
104
E-Series (TE4) Canada/United States of America, enUSA, Edition date: 202010, First-Printing Traction ControlE194301 E138639 E225466
Page 115 of 300
WARNING: The system only warns
of vehicles detected by the radar sensor.
In some cases there may be no warning
or a delayed warning. Apply the brakes
when necessary. Failure to follow this
instruction could result in personal injury
or death.
Note: When you are following a vehicle and
you switch on a direction indicator, adaptive
cruise control may provide a small
temporary acceleration to help you pass.
Note: The brakes may emit noise when
applied by the system.
When a vehicle ahead of you enters the
same lane or a slower vehicle is ahead in
the same lane, the vehicle speed adjusts
to maintain a preset gap distance. A
vehicle graphic illuminates in the
instrument cluster.
Your vehicle maintains a consistent gap
from the vehicle ahead until:
• The vehicle in front of you accelerates
to a speed above the set speed.
• The vehicle in front of you moves out
of the lane you are in.
• Your vehicle speed falls below
12 mph
(20 km/h).
• You set a new gap distance.
The system applies the brakes to slow your
vehicle to maintain a safe gap distance
from the vehicle in front. The system only
applies limited braking. You can override
the system by applying the brakes.
If the system determines that its maximum
braking level is not sufficient, an audible
warning sounds, a message appears in the
information display and an indicator
flashes when the system continues to
brake. Take immediate action. Setting the Gap Distance
You can decrease or increase the distance
between your vehicle and the vehicle in
front by pressing the gap control. Press and release to decrease
the gap distance.
Press and release to increase the
gap distance.
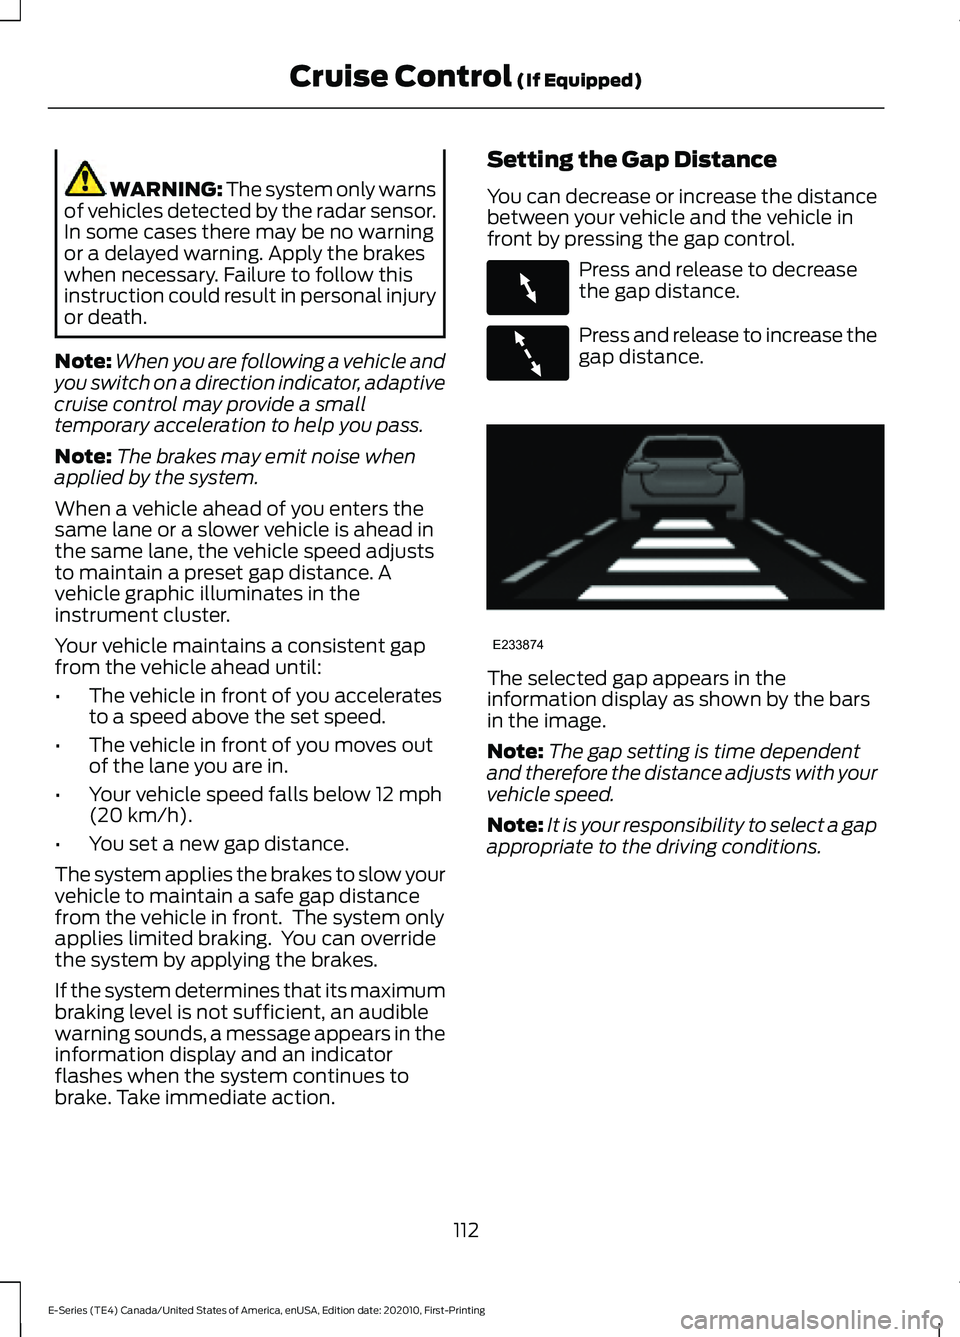
The selected gap appears in the
information display as shown by the bars
in the image.
Note:
The gap setting is time dependent
and therefore the distance adjusts with your
vehicle speed.
Note: It is your responsibility to select a gap
appropriate to the driving conditions.
112
E-Series (TE4) Canada/United States of America, enUSA, Edition date: 202010, First-Printing Cruise Control
(If Equipped)E263697 E263696 E233874
Page 171 of 300
If it illuminates when the engine is running
this indicates a malfunction. Stop your
vehicle as soon as it is safe to do so and
switch the engine off. Check the engine oil
level. If the oil level is sufficient, this
indicates a system malfunction. Have your
vehicle checked as soon as possible.
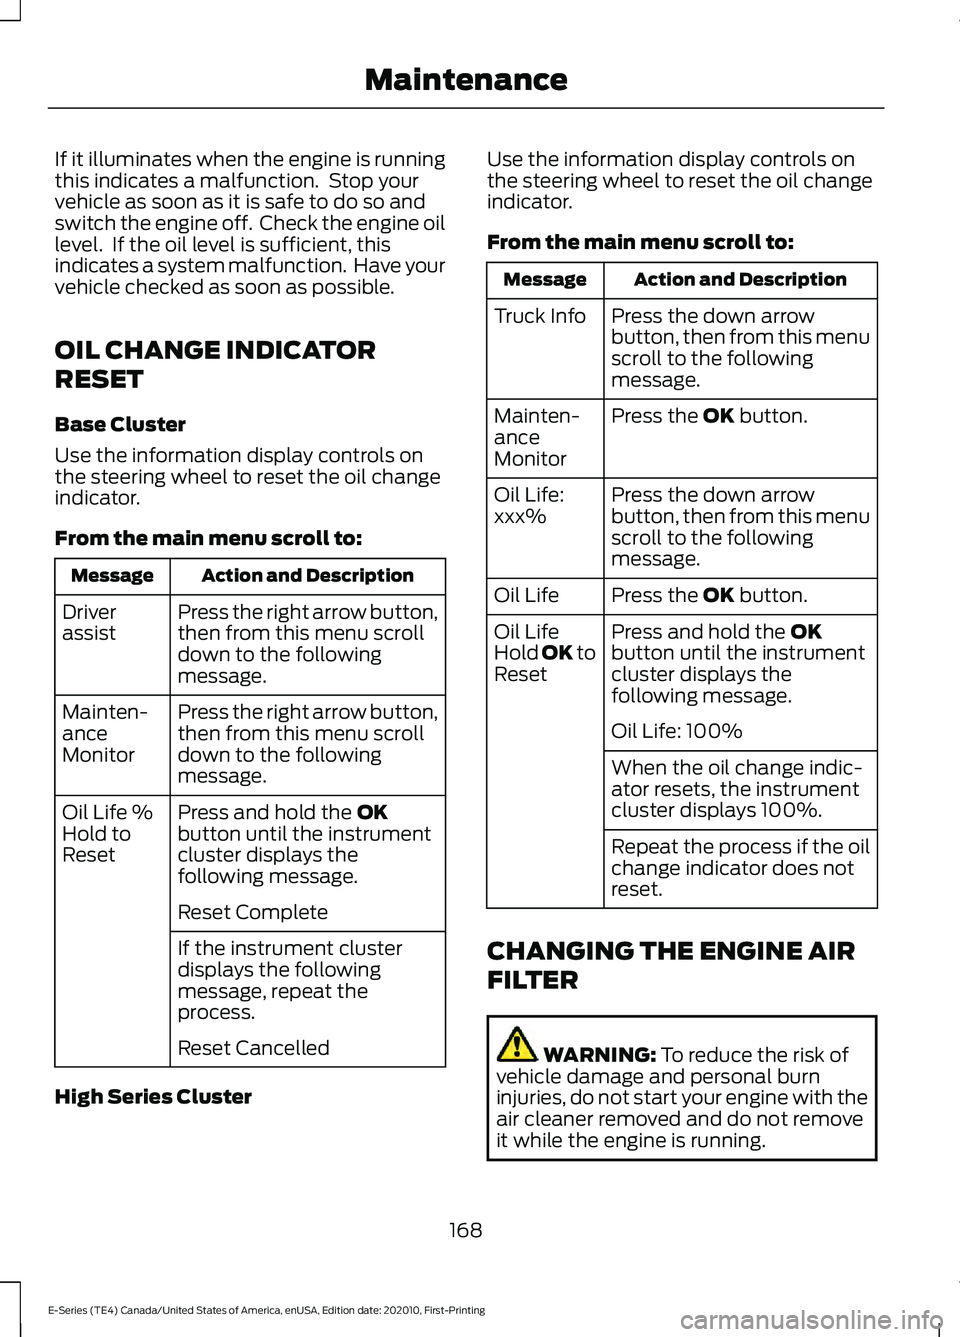
OIL CHANGE INDICATOR
RESET
Base Cluster
Use the information display controls on
the steering wheel to reset the oil change
indicator.
From the main menu scroll to:
Action and Description
Message
Press the right arrow button,
then from this menu scroll
down to the following
message.
Driver
assist
Press the right arrow button,
then from this menu scroll
down to the following
message.
Mainten-
ance
Monitor
Press and hold the OK
button until the instrument
cluster displays the
following message.
Oil Life %
Hold to
Reset
Reset Complete
If the instrument cluster
displays the following
message, repeat the
process.
Reset Cancelled
High Series Cluster Use the information display controls on
the steering wheel to reset the oil change
indicator.
From the main menu scroll to: Action and Description
Message
Press the down arrow
button, then from this menu
scroll to the following
message.
Truck Info
Press the
OK button.
Mainten-
ance
Monitor
Press the down arrow
button, then from this menu
scroll to the following
message.
Oil Life:
xxx%
Press the
OK button.
Oil Life
Press and hold the
OK
button until the instrument
cluster displays the
following message.
Oil Life
Hold OK to
Reset
Oil Life: 100%
When the oil change indic-
ator resets, the instrument
cluster displays 100%.
Repeat the process if the oil
change indicator does not
reset.
CHANGING THE ENGINE AIR
FILTER WARNING:
To reduce the risk of
vehicle damage and personal burn
injuries, do not start your engine with the
air cleaner removed and do not remove
it while the engine is running.
168
E-Series (TE4) Canada/United States of America, enUSA, Edition date: 202010, First-Printing Maintenance
Page 177 of 300
Checking Automatic Transmission
Fluid
For scheduled intervals of the fluid checks
and changes, See Scheduled
Maintenance (page 251). Your
transmission does not consume fluid.
However, if the transmission is not working
properly, for example, if the transmission
slips or shifts slowly, or if you notice some
sign of fluid leakage, check the fluid level
as soon as possible.
Automatic transmission fluid expands
when warmed. To obtain an accurate fluid
check, drive the vehicle until it is at normal
operating temperature, approximately
19 mi (30 km). Verify that the transmission
fluid temperature gauge on the instrument
cluster is within normal range.
1. Drive the vehicle
19 mi (30 km) until it
reaches normal operating temperature.
2. Park the vehicle on a level surface and
engage the parking brake.
3. With the engine running, parking brake
engaged and your foot on the brake
pedal, move the gearshift lever through
all of the gear ranges. Allow sufficient
time for each gear to engage.
4. Put the transmission in park (P) and leave the engine running.
5. Remove the dipstick, wiping it clean with a clean, dry, lint free rag.
6. Install the dipstick, fully seating it in the
filler tube.
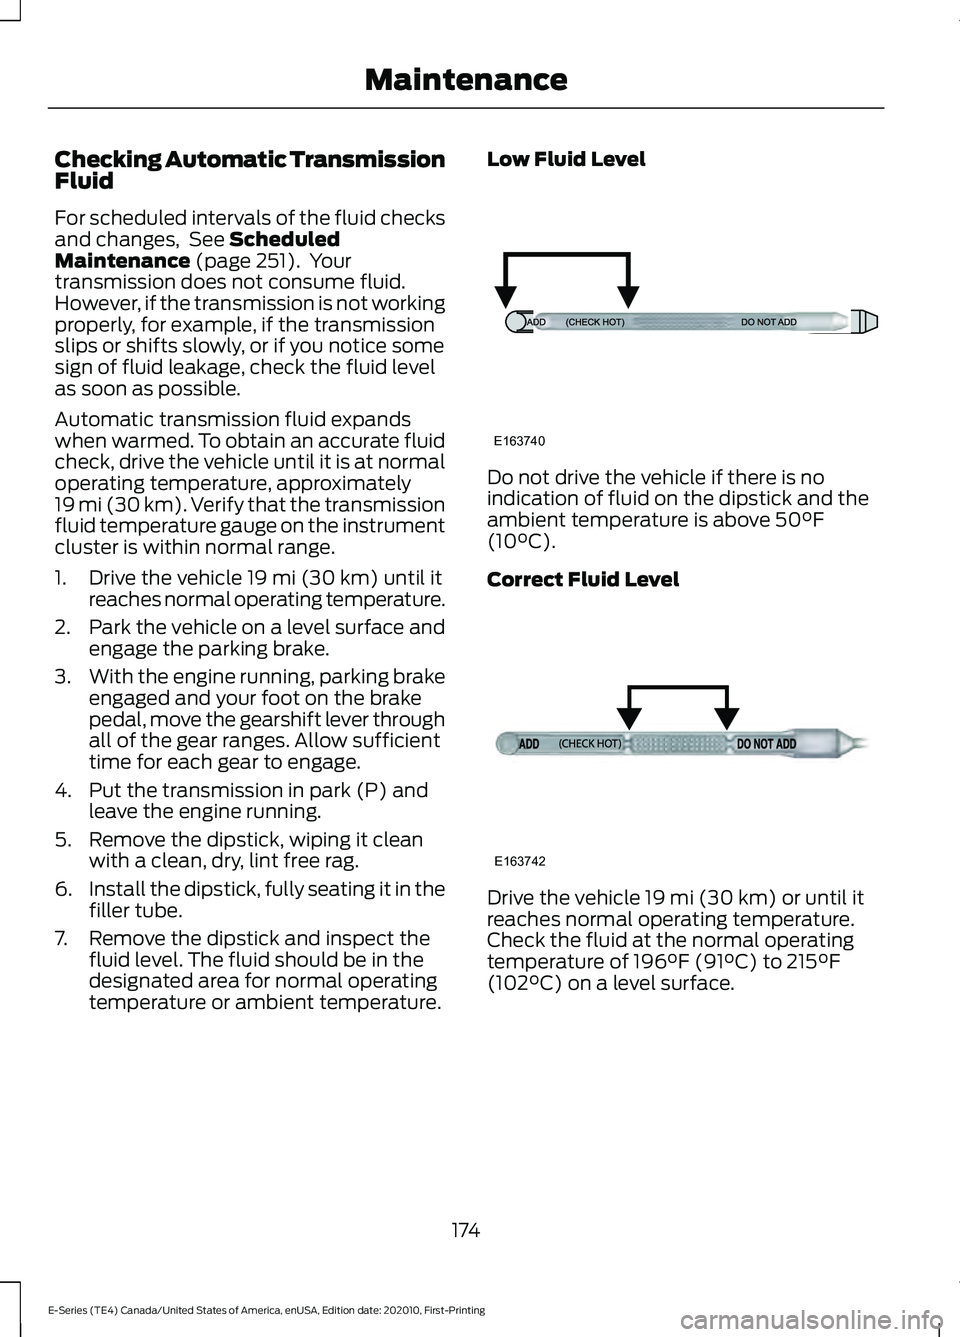
7. Remove the dipstick and inspect the fluid level. The fluid should be in the
designated area for normal operating
temperature or ambient temperature. Low Fluid Level
Do not drive the vehicle if there is no
indication of fluid on the dipstick and the
ambient temperature is above
50°F
(10°C).
Correct Fluid Level Drive the vehicle
19 mi (30 km) or until it
reaches normal operating temperature.
Check the fluid at the normal operating
temperature of
196°F (91°C) to 215°F
(102°C) on a level surface.
174
E-Series (TE4) Canada/United States of America, enUSA, Edition date: 202010, First-Printing MaintenanceE163740 E163742
Page 191 of 300
CLEANING THE INSTRUMENT
PANEL AND INSTRUMENT
CLUSTER LENS
WARNING: Do not use chemical
solvents or strong detergents when
cleaning the steering wheel or
instrument panel to avoid contamination
of the airbag system.
Note: Follow the same procedure as
cleaning leather seats for cleaning leather
instrument panels and leather interior trim
surfaces. See
Cleaning Leather Seats
(page 188).
Clean the instrument panel and cluster
lens with a clean, damp and soft cloth,
then use a clean, dry and soft cloth to dry
these areas.
• Avoid cleaners or polishes that increase
the gloss of the upper portion of the
instrument panel. The dull finish in this
area helps protect you from
undesirable windshield reflection.
• Do not use any household cleaning
products or glass cleaners as these
may damage the finish of the
instrument panel, interior trim and
cluster lens.
• Wash or wipe your hands clean if you
have been in contact with certain
products such as insect repellent and
suntan lotion to avoid possible damage
to the interior painted surfaces.
• Do not allow air fresheners and hand
sanitizers to spill onto interior surfaces.
If a spill occurs, wipe off immediately.
Your warranty may not cover these
damages.
If a staining liquid like coffee or juice has
been spilled on the instrument panel or on
interior trim surfaces: 1. Wipe up spilled liquid using a clean,
soft cloth as quickly as possible.
2. Use Motorcraft Premium Leather and Vinyl Cleaner or a commercially
available leather cleaning product for
automotive interiors. Test any cleaner
or stain remover on an inconspicuous
area.
3. Alternatively, wipe the surface with a clean, soft cloth and a mild soap and
water solution. Dry the area with a
clean, soft cloth.
4. If necessary, apply more soap and water solution or cleaning product to
a clean, soft cloth and press it onto the
soiled area. Allow this to set at room
temperature for 30 minutes.
5. Remove the soaked cloth, then with a clean, damp cloth, use a rubbing
motion for 60 seconds on the soiled
area.
6. Dry the area with a clean, soft cloth.
CLEANING LEATHER SEATS
Note: Follow the same procedure as
cleaning leather seats for cleaning leather
instrument panels and leather interior trim
surfaces.
For routine cleaning, wipe the surface with
a soft, damp cloth and a mild soap and
water solution. Dry the area with a clean,
soft cloth.
For cleaning and removing stains such as
dye transfer, use Motorcraft Premium
Leather and Vinyl Cleaner or a
commercially available leather cleaning
product for automotive interiors.
Note: Test any cleaner or stain remover on
an inconspicuous area.
188
E-Series (TE4) Canada/United States of America, enUSA, Edition date: 202010, First-Printing Vehicle Care
Page 293 of 300
C
Canceling the Set Speed............................110
Capacities and Specifications................223
Car Wash
See: Cleaning the Exterior............................... 185
Catalytic Converter........................................93
On-Board Diagnostics (OBD-II)..................... 94
Readiness for Inspection and Maintenance (I/M) Testing..................................................... 94
Changing a Bulb.............................................181 Lamp Assembly Condensation...................... 181
Replacing Brake/Tail/Turn/Reverse Lamp Bulbs (Cut-Away Only)............................... 183
Replacing Front Parking Lamp and Direction Indicator Bulbs................................................ 182
Replacing Headlamp Bulbs............................ 182
Replacing Side Marker Bulbs......................... 183
Changing a Fuse
...........................................163
Fuses....................................................................... 163
Changing a Road Wheel
.............................217
Dissimilar Spare Wheel and Tire Assembly
Information...................................................... 218
Tire Change Procedure..................................... 219
Changing the 12V Battery...........................177 Dual Batteries....................................................... 179
Reconnecting the Battery................................ 178
Changing the Engine Air Filter
.................168
Changing the Wiper Blades.....................180
Checking the Wiper Blades......................180
Child Restraint and Seatbelt Maintenance.................................................34
Child Restraint Positioning.........................28
Child Safety......................................................20 General Information............................................ 20
Cleaning Leather Seats
..............................188
Cleaning Products........................................184 Materials................................................................ 184
Cleaning the Engine....................................186
Cleaning the Exterior...................................185 Cleaning the Exterior Lamps.......................... 185
Cleaning the Exterior Precautions................185
Exterior Chrome Parts...................................... 185
Exterior Plastic Parts......................................... 185
Stripes or Graphics............................................ 185
Underbody............................................................ 186
Under Hood.......................................................... 186Cleaning the Instrument Panel and
Instrument Cluster Lens.........................188
Cleaning the Interior....................................187 Mirrors..................................................................... 187
Cleaning the Wheels...................................189
Cleaning the Windows and Wiper Blades............................................................187
Climate Control
...............................................74
Connected Vehicle......................................235
Connected Vehicle –
Troubleshooting............................................ 235
Connecting the Vehicle to a Mobile Network............................................................ 235
Connected Vehicle Limitations
..............235
Connected Vehicle Requirements.........235
Connected Vehicle – Troubleshooting........................................235
Connected Vehicle – Frequently Asked Questions......................................................... 235
Connecting a Bluetooth® Device...........241 Pairing a Device................................................... 241
Connecting the Vehicle to a Mobile Network
........................................................235
Connecting FordPass to the Modem.........235
Disabling the Connectivity Device...............235
Enabling and Disabling the Modem...........235
What Is the Modem.......................................... 235
Coolant Check See: Engine Coolant Check............................ 169
Cooling System Capacity and Specification
...............................................227
Crash Sensors and Airbag Indicator.......40
Cruise Control
................................................109
Cruise Control Indicators............................110
Cruise Control - Vehicles With: Adaptive Cruise Control
...............................................49
Cruise Control - Vehicles With: Cruise Control............................................................49
Customer Assistance
..................................149
Customer Information...............................259
Radio Frequency Certification
Labels................................................................ 259
D
Data Recording
..................................................9
Comfort, Convenience and Entertainment
Data........................................................................\
11
290
E-Series (TE4) Canada/United States of America, enUSA, Edition date: 202010, First-Printing Index
Page 296 of 300
Pre-Collision Assist...............................................
71
Traction Control..................................................... 72
Transmission.......................................................... 72
Installing Child Restraints...........................22 Child Seats.............................................................. 22
Using Lap and Shoulder Belts......................... 22
Using Tether Straps............................................. 24
Instrument Cluster........................................59
Instrument Lighting Dimmer.....................53
Instrument Panel............................................18
Interior Mirror...................................................58 Automatic Dimming Mirror............................... 58
Manual Dimming Mirror..................................... 58
Introduction.........................................................7
J
Jump Starting the Vehicle.........................146 Connecting the Jumper Cables..................... 146
Jump Starting...................................................... 146
Preparing Your Vehicle..................................... 146
Removing the Jumper Cables........................ 147
K
Keys and Remote Controls
.........................42
L
Lane Keeping System..................................119 Switching the System On and Off...............120
System Display.................................................... 120
System Settings.................................................. 120
Troubleshooting................................................... 121
Lighting Control..............................................52 Flashing the Headlamp High Beam..............53
Headlamp High Beam........................................ 52
Lighting...............................................................52 General Information............................................ 52
Limited Slip Differential............................100
Load Carrying
..................................................127
Load Limit........................................................127
Special Loading Instructions for Owners of
Pick-up Trucks and Utility-type
Vehicles............................................................... 131
Vehicle Loading - with and without a Trailer.................................................................. 127Locking and Unlocking.................................45
Autolock Feature.................................................. 46
Autounlock Feature............................................. 46
Enabling or Disabling Autolock and Autounlock........................................................ 46
Illuminated Entry.................................................. 46
Power Door Locks................................................ 45
Remote Control.................................................... 45
Lug Nuts See: Changing a Road Wheel......................... 217
M
Maintenance..................................................165 General Information.......................................... 165
Manual Climate Control...............................74 Heater Only System............................................. 74
Manual Climate Control..................................... 74
Manual Seats
...................................................78
Manual Lumbar .................................................... 78
Moving the Seat Backward and Forward............................................................... 78
Recline Adjustment............................................. 78
Message Center See: Information Displays................................. 65
Mirrors See: Windows and Mirrors................................ 57
Mobile Communications Equipment
......16
Motorcraft Parts...........................................223
N
Normal Scheduled Maintenance..........254
O
Oil Change Indicator Reset.......................168
Oil Check See: Engine Oil Check....................................... 167
Opening and Closing the Hood...............165
Ordering Additional Owner's Literature.......................................................153
Obtaining a French Owner ’s Manual..........153
Overriding Automatic High Beam Control.............................................................55
293
E-Series (TE4) Canada/United States of America, enUSA, Edition date: 202010, First-Printing Index