key FORD E SERIES 2024 User Guide
[x] Cancel search | Manufacturer: FORD, Model Year: 2024, Model line: E SERIES, Model: FORD E SERIES 2024Pages: 303, PDF Size: 6.95 MB
Page 85 of 303
GENERAL INFORMATION
WARNING: Extended idling at highengine speeds can produce very hightemperatures in the engine and exhaustsystem, creating the risk of fire or otherdamage.
WARNING: Do not park, idle ordrive your vehicle on dry grass or otherdry ground cover. The emission systemheats up the engine compartment andexhaust system, creating the risk of fire.
WARNING: Do not start the enginein a closed garage or in other enclosedareas. Exhaust fumes are toxic. Alwaysopen the garage door before you startthe engine. Failure to follow thisinstruction could result in personal injuryor death.
WARNING: Exhaust leaks mayresult in entry of harmful and potentiallylethal fumes into the passengercompartment. If you smell exhaustfumes inside your vehicle, have yourvehicle inspected immediately. Do notdrive if you smell exhaust fumes.
The powertrain control system meets allCanadian interference-causing equipmentstandard requirements regulating theimpulse electrical field or radio noise.
Note:If you use your vehicle regularly abovethe altitude of 7,500 ft (2,286 m) and underthe temperature of -4.0°F (-20°C), it isrecommended to use the alternative engineoil. See Capacities and Specifications(page 226).
If you disconnect the battery, your vehiclemay exhibit some unusual drivingcharacteristics for approximately 6 mi(10 km) after you reconnect it. This isbecause the engine management systemmust realign itself with the engine. You candisregard any unusual drivingcharacteristics during this period.
When you start the engine, avoid pressingthe accelerator pedal before and duringoperation. Only use the accelerator pedalwhen you have difficulty starting theengine.
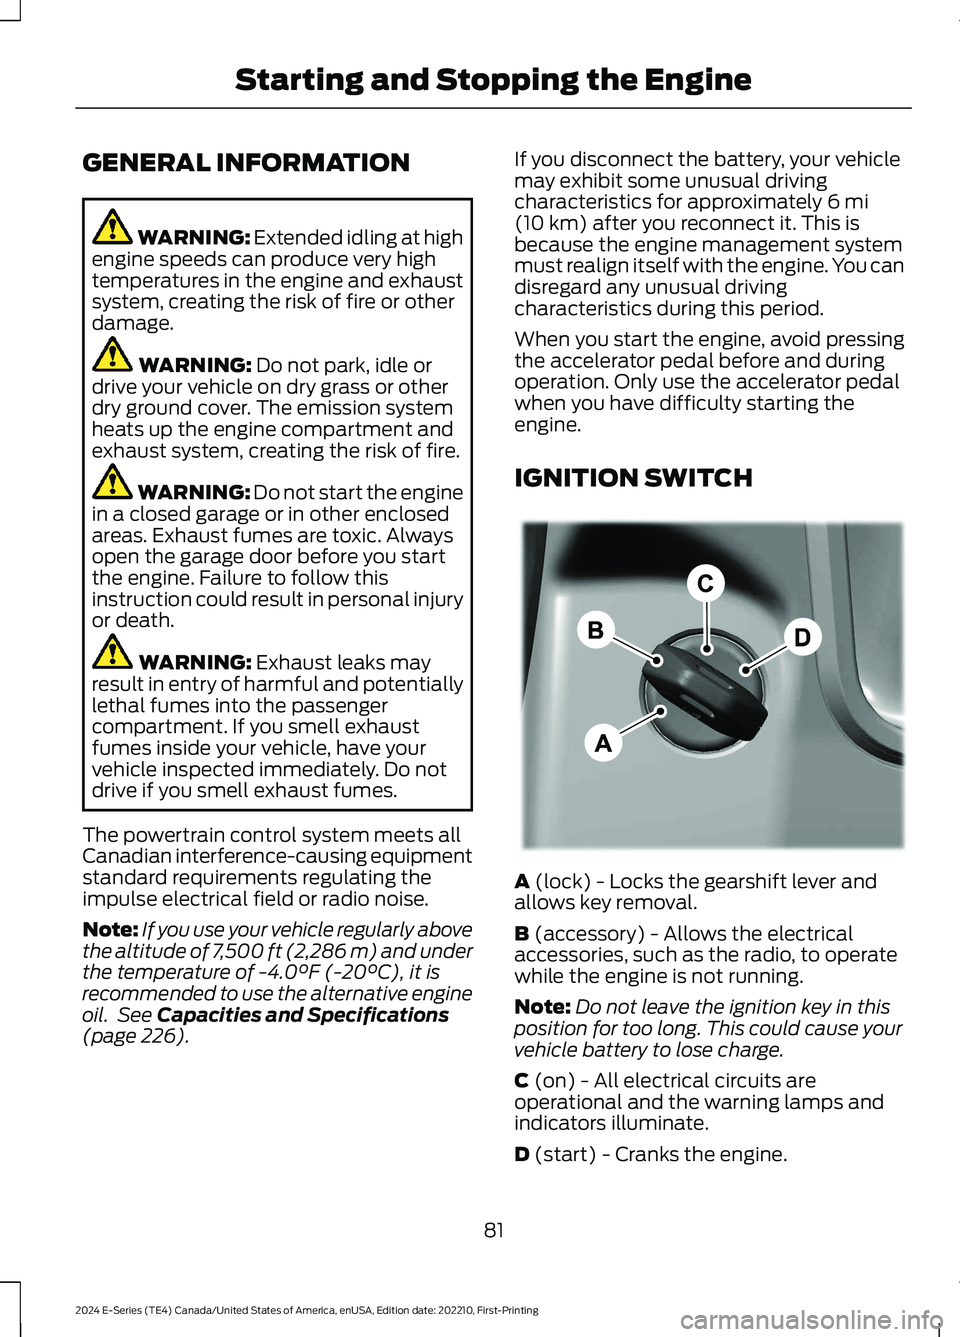
IGNITION SWITCH
A (lock) - Locks the gearshift lever andallows key removal.
B (accessory) - Allows the electricalaccessories, such as the radio, to operatewhile the engine is not running.
Note:Do not leave the ignition key in thisposition for too long. This could cause yourvehicle battery to lose charge.
C (on) - All electrical circuits areoperational and the warning lamps andindicators illuminate.
D (start) - Cranks the engine.
81
2024 E-Series (TE4) Canada/United States of America, enUSA, Edition date: 202210, First-PrintingStarting and Stopping the EngineE369097
Page 86 of 303
STARTING A GASOLINE
ENGINE
When you start the engine, the idle speedincreases helping to warm up the engine.If the engine idle speed does not slowdown, have your vehicle checked as soonas possible.
Before starting the engine check thefollowing:
•Make sure all occupants fasten theirseatbelts.
•Make sure the headlamps andelectrical accessories are off.
•Make sure the parking brake is on.
•Make sure the transmission is in park(P) or neutral (N).
•Turn the ignition key to the on position.
Note:Do not press the accelerator pedal.
1.Fully press the brake pedal.
2.Turn the key to the start position tostart the engine. Release the key whenthe engine starts.
Note:The engine may continue crankingfor up to 15 seconds or until it starts.
Note:If you cannot start the engine on thefirst try, wait for a short period and try again.
Failure to Start
If you cannot start the engine after threeattempts, wait 10 seconds and follow thisprocedure:
1.Fully press the brake pedal.
2.Shift into park (P).
3.Fully press and hold the acceleratorpedal.
4.Attempt to start your vehicle and waituntil the engine stops cranking.
5.Release the accelerator pedal.
6.Start the engine.
Stopping the Engine When YourVehicle is Stationary
1.Shift into park (P) or neutral (N).
2.Turn the key to the off position.
3.Apply the parking brake.
Stopping the Engine When YourVehicle is Moving
WARNING: Switching off theengine when your vehicle is still movingresults in a significant decrease inbraking assistance. Higher effort isrequired to apply the brakes and to stopyour vehicle. A significant decrease insteering assistance could also occur. Thesteering does not lock, but higher effortcould be required to steer your vehicle.When you switch the ignition off, someelectrical circuits, for example airbags,also turn off. If you unintentionally switchthe ignition off, shift into neutral (N) andrestart the engine.
1.Switch the ignition off to stop theengine.
2.Put the transmission into neutral (N)and use the brakes to bring your vehicleto a safe stop.
3.When your vehicle has stopped, shiftinto park (P).
4.Apply the parking brake.
Guarding Against Exhaust Fumes
WARNING: Exhaust leaks mayresult in entry of harmful and potentiallylethal fumes into the passengercompartment. If you smell exhaustfumes inside your vehicle, have yourvehicle inspected immediately. Do notdrive if you smell exhaust fumes.
82
2024 E-Series (TE4) Canada/United States of America, enUSA, Edition date: 202210, First-PrintingStarting and Stopping the Engine
Page 98 of 303
Your vehicle may not pass the I/M test ifthe service engine soon indicator is on ornot working properly (bulb is burned out),or if the OBD-II system has determinedthat some of the emission control systemshave not been properly checked. In thiscase, the vehicle is not ready for I/Mtesting.
If the vehicle’s engine or transmission hasjust been serviced, or the battery hasrecently run down or been replaced, theOBD-II system may indicate that thevehicle is not ready for I/M testing. Todetermine if the vehicle is ready for I/Mtesting, turn the ignition key to the onposition for 15 seconds without crankingthe engine. If the service engine soonindicator blinks eight times, it means thatthe vehicle is not ready for I/M testing; ifthe service engine soon indicator stays onsolid, it means that your vehicle is readyfor I/M testing.
The OBD-II system checks the emissioncontrol system during normal driving. Acomplete check may take several days.
If the vehicle is not ready for I/M testing,you can perform the following driving cycleconsisting of mixed city and highwaydriving:
1.15 minutes of steady driving on anexpressway or highway followed by 20minutes of stop-and-go driving with atleast four 30-second idle periods.
2.Allow your vehicle to sit for at leasteight hours with the ignition off. Then,start the vehicle and complete theabove driving cycle. The vehicle mustwarm up to its normal operatingtemperature. Once started, do not turnoff the vehicle until the above drivingcycle is complete.
If the vehicle is still not ready for I/Mtesting, you need to repeat the abovedriving cycle.
94
2024 E-Series (TE4) Canada/United States of America, enUSA, Edition date: 202210, First-PrintingEngine Emission Control
Page 99 of 303
AUTOMATIC TRANSMISSION
WARNING: Apply the parkingbrake, shift into park (P), switch theignition off and remove the key beforeyou leave your vehicle. Failure to followthis instruction could result in personalinjury or death.
Putting your vehicle in or out ofgear:
1.Fully press down the brake pedal.
2.Move the gearshift lever into thepreferred gear.
3.When you finish driving, come to acomplete stop.
4.Move the gearshift lever and securelylatch it in park (P).
5.Release the brake pedal and thetransmission remains in the selectedgear.
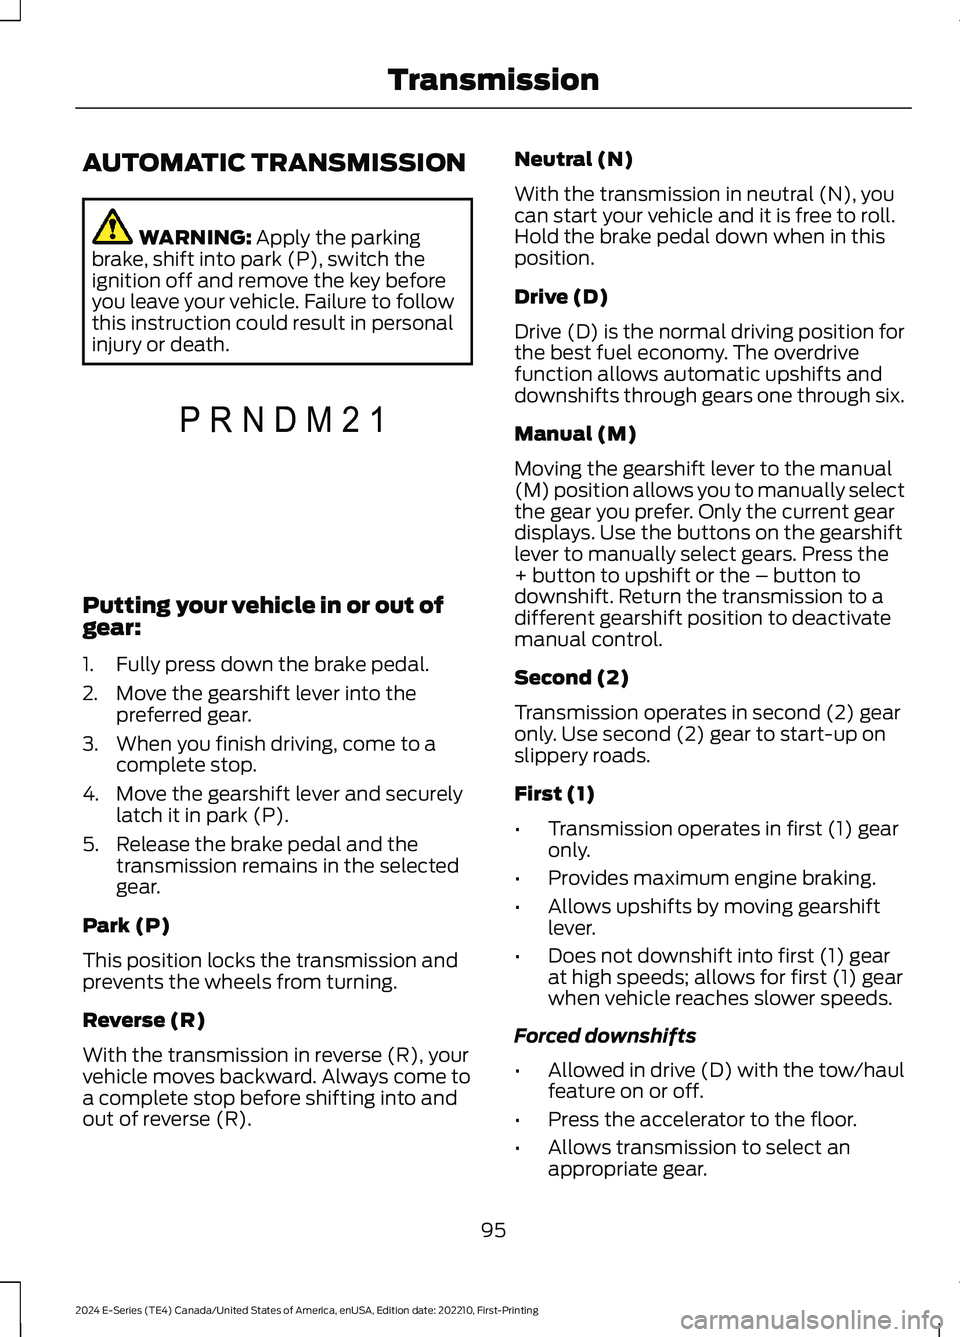
Park (P)
This position locks the transmission andprevents the wheels from turning.
Reverse (R)
With the transmission in reverse (R), yourvehicle moves backward. Always come toa complete stop before shifting into andout of reverse (R).
Neutral (N)
With the transmission in neutral (N), youcan start your vehicle and it is free to roll.Hold the brake pedal down when in thisposition.
Drive (D)
Drive (D) is the normal driving position forthe best fuel economy. The overdrivefunction allows automatic upshifts anddownshifts through gears one through six.
Manual (M)
Moving the gearshift lever to the manual(M) position allows you to manually selectthe gear you prefer. Only the current geardisplays. Use the buttons on the gearshiftlever to manually select gears. Press the+ button to upshift or the – button todownshift. Return the transmission to adifferent gearshift position to deactivatemanual control.
Second (2)
Transmission operates in second (2) gearonly. Use second (2) gear to start-up onslippery roads.
First (1)
•Transmission operates in first (1) gearonly.
•Provides maximum engine braking.
•Allows upshifts by moving gearshiftlever.
•Does not downshift into first (1) gearat high speeds; allows for first (1) gearwhen vehicle reaches slower speeds.
Forced downshifts
•Allowed in drive (D) with the tow/haulfeature on or off.
•Press the accelerator to the floor.
•Allows transmission to select anappropriate gear.
95
2024 E-Series (TE4) Canada/United States of America, enUSA, Edition date: 202210, First-PrintingTransmissionPRNDM21E307627
Page 101 of 303
Progressive Range Selection - PRS
(If Equipped)
Progressive Range Selection gives you theability to lockout gears from the automaticshifting range. This may provide you withan improved driving experience. Forexample, in slippery conditions or whenexperiencing a steep grade.
With the gearshift lever in drive (D), pressthe – button to active PRS. The instrumentcluster indicates the available and selectedgears.
All available gears display with the currentgear indicated. Press the – button again tolock out gears beginning with the highestgear. Example: press the – button twice tolock out 6th and 5th gears. Only theavailable gears display, and thetransmission automatically shifts betweenthe available gears. Press the + button tounlock gears to allow the transmission toshift to higher gears. The transmissionshifts within the gear range you select.
Automatic Transmission AdaptiveLearning
This feature may increase durability andprovide consistent shift feel over the lifeof your vehicle. A new vehicle ortransmission may have firm shifts, softshifts, or both. This is normal and does notaffect function or durability of thetransmission. Over time, the adaptivelearning process fully updates transmissionoperation.
Brake-Shift Interlock
WARNING: Do not drive yourvehicle until you verify that thestoplamps are working.
WARNING: When doing thisprocedure, you need to take thetransmission out of park (P) whichmeans your vehicle can roll freely. Toavoid unwanted vehicle movement,apply the parking brake prior to doingthis procedure. Use wheel chocks ifappropriate.
WARNING: If the parking brake isfully released, but the brake warninglamp remains illuminated, the brakesmay not be working properly. Have yourvehicle checked as soon as possible.
Your vehicle has a brake-shift interlockfeature that prevents the gearshift leverfrom moving from park (P) when theignition is in the 3 (on) position and thebrake pedal is not pressed.
If you cannot move the gearshift lever outof park (P) position with the ignition in the3 (on) position and the brake pedalpressed, a malfunction may have occurred.It is possible that a fuse has blown or yourvehicle’s brake lamps are not operatingproperly. See Fuse Specification Chart(page 150).
If the fuse is not blown and the brakelamps are working properly, the followingprocedure allows you to move the gearshiftlever from park (P):
1.Apply the parking brake. Switch theignition key to 1 (off), then remove thekey.
2.Move the steering column to the fulldown and full rearward position,toward the driver seat.
3.Remove the gearshift lever boot.
97
2024 E-Series (TE4) Canada/United States of America, enUSA, Edition date: 202210, First-PrintingTransmission
Page 104 of 303
The sound of the pump operating may beheard by the driver. This is a normalcharacteristic of the system.
The reserve system provides reducedbraking power, so the vehicle should beoperated under these conditions withcaution, and only to seek service repair andremoval of the vehicle from the roadway.
Note:For vehicles with the Hydromaxsystem operating under normal conditions,the noise of the fluid flowing through thebooster may be heard whenever you applythe brake. This condition is normal. Vehicleservice is not required.
If braking performance or pedal responsebecomes very poor, even when youstrongly press the pedal, it may indicatethe presence of air in the hydraulic systemor leakage of fluid. Stop your vehicle assoon as it is safe to do so. Have the systemchecked as soon as possible.
HINTS ON DRIVING WITH
ANTI-LOCK BRAKES
The anti-lock brake system does noteliminate the risks when:
•You drive too closely to the vehicle infront of you.
•Your vehicle is hydroplaning.
•You take corners too fast.
•The road surface is poor.
Note: If the system activates, the brakepedal could pulse and may travel further.Maintain pressure on the brake pedal. Youmay also hear a noise from the system. Thisis normal.
PARKING BRAKE
WARNING: Apply the parkingbrake, shift into park (P), switch theignition off and remove the key beforeyou leave your vehicle. Failure to followthis instruction could result in personalinjury or death.
Apply the parking brake whenever you parkyour vehicle.
•For vehicles with a foot operatedparking brake, press the pedal down.
•For vehicles with a hand operatedparking brake, pull the parking brakelever up.
It illuminates when you switchthe ignition on and apply theparking brake. It also illuminatesmomentarily when you switchthe ignition on to confirm thelamp is functional. If it does notilluminate when you switch the ignition onor begins to flash at any time, have thesystem checked by an authorized dealer.
If it illuminates when your vehicle ismoving, make sure you disengage theparking brake.
If the parking brake is disengaged, thisindicates a low brake fluid level or a brakesystem fault. Have your vehicle checkedas soon as possible.
To release the parking brake:
•For vehicles with a foot operatedparking brake, pull the parking brakerelease lever.
•For vehicles with a hand operatedparking brake, push the parking brakelever down.
100
2024 E-Series (TE4) Canada/United States of America, enUSA, Edition date: 202210, First-PrintingBrakesE270480 E67024
Page 118 of 303
DRIVER ALERT (IF EQUIPPED)
WARNING: You are responsible forcontrolling your vehicle at all times. Thesystem is designed to be an aid and doesnot relieve you of your responsibility todrive with due care and attention. Failureto follow this instruction could result inthe loss of control of your vehicle,personal injury or death.
WARNING: The system may notfunction if the sensor is blocked.
WARNING: Take regular restbreaks if you feel tired. Do not wait forthe system to warn you.
WARNING: Certain driving stylesmay result in the system warning youeven if you are not feeling tired.
WARNING: In cold and severeweather conditions the system may notfunction. Rain, snow and spray can alllimit sensor performance.
WARNING: The system will notoperate if the sensor cannot track theroad lane markings.
WARNING: If damage occurs in theimmediate area surrounding the sensor,have your vehicle checked as soon aspossible.
WARNING: The system may notcorrectly operate if your vehicle is fittedwith a suspension kit not approved byus.
Note:Keep the windshield free fromobstructions. For example, bird droppings,insects and snow or ice.
Note:If the camera is blocked or if thewindshield is damaged, the system may notfunction.
Note:The system remembers the lastsetting when you start your vehicle, unlessit detects a MyKey™.
Note:If enabled in the menu, the systemactivates at speeds above 40 mph(64 km/h).
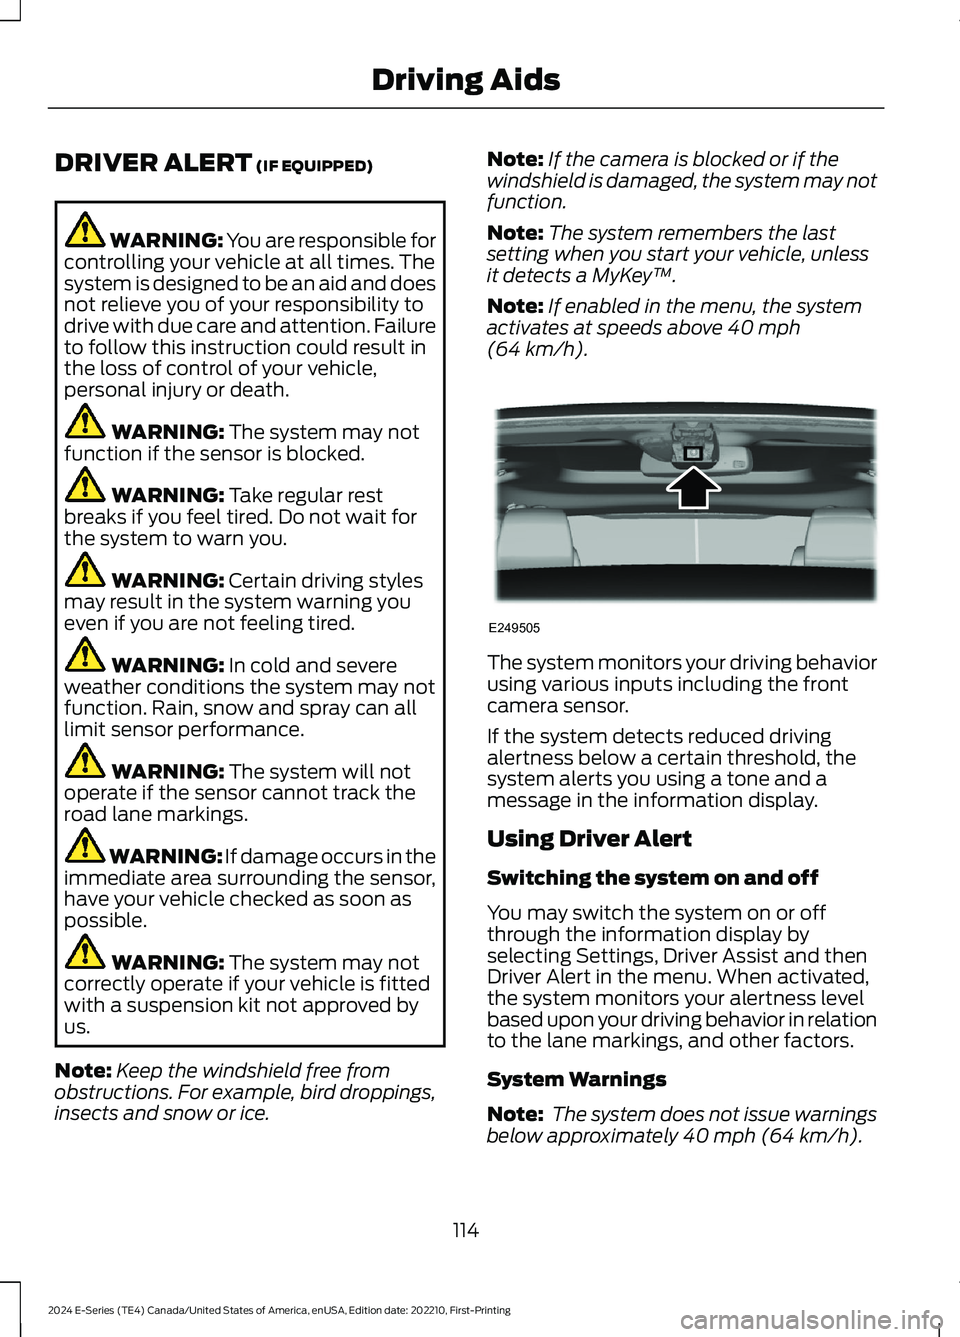
The system monitors your driving behaviorusing various inputs including the frontcamera sensor.
If the system detects reduced drivingalertness below a certain threshold, thesystem alerts you using a tone and amessage in the information display.
Using Driver Alert
Switching the system on and off
You may switch the system on or offthrough the information display byselecting Settings, Driver Assist and thenDriver Alert in the menu. When activated,the system monitors your alertness levelbased upon your driving behavior in relationto the lane markings, and other factors.
System Warnings
Note: The system does not issue warningsbelow approximately 40 mph (64 km/h).
114
2024 E-Series (TE4) Canada/United States of America, enUSA, Edition date: 202210, First-PrintingDriving AidsE249505
Page 124 of 303
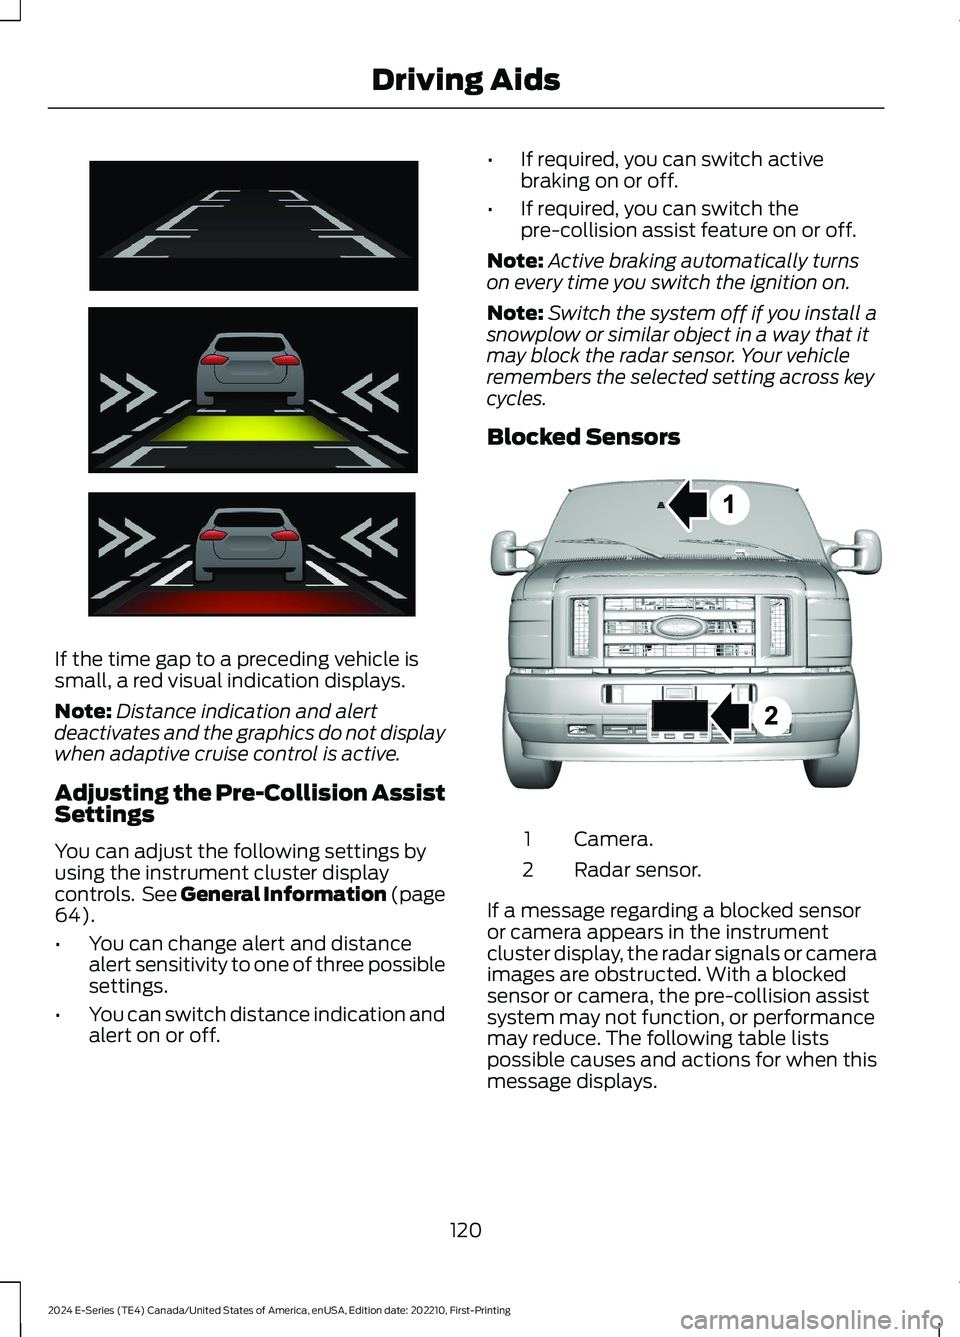
If the time gap to a preceding vehicle issmall, a red visual indication displays.
Note:Distance indication and alertdeactivates and the graphics do not displaywhen adaptive cruise control is active.
Adjusting the Pre-Collision AssistSettings
You can adjust the following settings byusing the instrument cluster displaycontrols. See General Information (page64).
•You can change alert and distancealert sensitivity to one of three possiblesettings.
•You can switch distance indication andalert on or off.
•If required, you can switch activebraking on or off.
•If required, you can switch thepre-collision assist feature on or off.
Note:Active braking automatically turnson every time you switch the ignition on.
Note:Switch the system off if you install asnowplow or similar object in a way that itmay block the radar sensor. Your vehicleremembers the selected setting across keycycles.
Blocked Sensors
Camera.1
Radar sensor.2
If a message regarding a blocked sensoror camera appears in the instrumentcluster display, the radar signals or cameraimages are obstructed. With a blockedsensor or camera, the pre-collision assistsystem may not function, or performancemay reduce. The following table listspossible causes and actions for when thismessage displays.
120
2024 E-Series (TE4) Canada/United States of America, enUSA, Edition date: 202210, First-PrintingDriving AidsE254791 E310549
Page 146 of 303
ROADSIDE ASSISTANCE
Vehicles Sold in the United States:Getting Roadside Assistance
If you have a vehicle concern, Ford MotorCompany offers a complimentary roadsideassistance program. This program isseparate from the New Vehicle LimitedWarranty.
The service is available:
•24 hours a day, seven days a week.
•For the coverage period supplied withyour vehicle.
Knowing your vehicle's VIN, mileage andyour specific location allows help to get toyou faster.
Roadside Assistance covers:
•A flat tire change with a good spare(except vehicles supplied with a tireinflation kit).
•Battery jump start.
•Lock-out assistance (key replacementcost is the customer's responsibility).
•Fuel delivery — independent servicecontractors, if not prohibited by state,local or municipal law, shall deliver upto 2 gal (8 L) of gasoline or 5 gal (20 L)of diesel fuel to a disabled vehicle.Roadside assistance limits fuel deliveryservice to two no-charge occurrenceswithin a 12-month period.
•Winch out — available within 100 ft(30 m) of a paved or countymaintained road, no recoveries.
•Towing — independent servicecontractors, if not prohibited by state,local or municipal law, shall tow Fordeligible vehicles to an authorized dealerwithin 50 mi (80 km) of thedisablement location or to the nearestauthorized dealer. If a memberrequests a tow to an authorized dealerthat is more than 50 mi (80 km) fromthe disablement location, the membershall be responsible for any mileagecosts in excess of 50 mi (80 km).Warranty towing, non-warranty towingand collision towing are available.
•Roadside Assistance includes up to$200 for a towed trailer if the disabledeligible vehicle requires service at thenearest authorized dealer. If the towingvehicle is operational but the trailer isnot, then the trailer does not qualify forany roadside services.
Vehicles Sold in the United States:Using Roadside Assistance
United States vehicle customers whorequire Roadside Assistance, call1-800-241-3673.
If you need to arrange roadside assistanceon your own, Ford Motor Companyreimburses a reasonable amount fortowing to the nearest dealership within50 mi (80 km). To obtain reimbursementinformation, United States vehiclecustomers call 1-800-241-3673.Customers need to submit their originalreceipts.
Vehicles Sold in Canada: GettingRoadside Assistance
If you have a vehicle concern, Ford MotorCompany of Canada, Limited offers acomplimentary roadside assistanceprogram. This program is eligible withinCanada or the continental United States.
The service is available 24 hours a day,seven days a week.
142
2024 E-Series (TE4) Canada/United States of America, enUSA, Edition date: 202210, First-PrintingCrash and Breakdown Information
Page 220 of 303
How Temperature Affects Your TirePressure
The tire pressure monitoring systemmonitors tire pressure in each pneumatictire. When driving in a normal manner, atypical passenger tire inflation pressuremay increase about 2–4 psi (14–28 kPa)from a cold start situation. If the vehicle isstationary overnight with the outsidetemperature significantly lower than thedaytime temperature, the tire pressure maydecrease about 3 psi (21 kPa) for a drop of30°F (17°C) in ambient temperature. Thislower pressure value may be detected bythe tire pressure monitoring system asbeing significantly lower than therecommended inflation pressure andactivate the system warning light for lowtire pressure. If the low tire pressurewarning light is on, visually check each tireto verify that no tire is flat. If one or moretires are flat, repair as necessary. Checkthe air pressure in the road tires. If any tireis under-inflated, carefully drive the vehicleto the nearest location where air can beadded to the tires. Inflate all the tires tothe recommended inflation pressure.
Tire Pressure Monitoring System ResetProcedure
WARNING: To determine therequired pressure(s) for your vehicle, seethe Safety Compliance CertificationLabel (on the door hinge pillar,door-latch post or the door edge thatmeets the door-latch post, next to thedriver seat) or the Tire Label on theB-Pillar or the edge of the driver door.
Note:You need to perform the tire pressuremonitoring system reset procedure aftereach tire rotation.
To provide the vehicle's load carryingcapability, some vehicles require differentrecommended tire pressures in the fronttires as compared to the rear tires. The tirepressure monitoring system on thesevehicles illuminate the low tire pressurewarning light at two different pressures:one for the front tires and one for the reartires.
Since tires need to be rotated to provideconsistent performance and maximum tirelife, the tire pressure monitoring systemneeds to know when the tires are rotatedto determine which set of tires are on thefront and which are on the rear. With thisinformation, the system can detect andproperly warn of low tire pressures.
System reset tips:
•To reduce the chances of interferencefrom another vehicle, perform thesystem reset procedure at least 3 ft(1 m) away from another vehicleundergoing the system reset procedureat the same time.
•Do not wait more than two minutesbetween resetting each tire sensor orthe system can time-out and you haveto repeat the entire procedure on allfour wheels.
•A double horn sounds indicating theneed to repeat the procedure.
Performing the System Reset Procedure- Single Rear Wheel
Read the entire procedure beforeattempting.
1.Drive the vehicle above 20 mph(32 km/h) for at least two minutes,then park in a safe location where youcan easily get to all four tires and haveaccess to an air pump.
2.Place the ignition in the off position andkeep the key in the ignition.
216
2024 E-Series (TE4) Canada/United States of America, enUSA, Edition date: 202210, First-PrintingWheels and Tires