check engine FORD E SERIES 2024 Owner's Manual
[x] Cancel search | Manufacturer: FORD, Model Year: 2024, Model line: E SERIES, Model: FORD E SERIES 2024Pages: 303, PDF Size: 6.95 MB
Page 140 of 303
REDUCED ENGINE
PERFORMANCE
WARNING: If you continue to driveyour vehicle when the engine isoverheating, the engine could stopwithout warning. Failure to follow thisinstruction could result in the loss ofcontrol of your vehicle.
If the engine coolant temperature gaugeneedle moves to the upper limit position,the engine is overheating. See Gauges(page 58).
You must only drive your vehicle for a shortdistance if the engine overheats. Thedistance you can travel depends onambient temperature, vehicle load andterrain. The engine continues to operatewith limited power for a short period oftime.
If the engine temperature continues to rise,the fuel supply to the engine reduces. Theair conditioning switches off and the enginecooling fan operates continually.
1.Gradually reduce your speed and stopyour vehicle as soon as it is safe to doso.
2.Immediately switch the engine off toprevent severe engine damage.
3.Wait for the engine to cool down.
4.Check the coolant level. See EngineCoolant Check (page 165).
5.Have your vehicle checked as soon aspossible.
ECONOMICAL DRIVING
Fuel economy is affected by several thingssuch as how you drive, the conditions youdrive under and how you maintain yourvehicle.
There are some things to keep in mind thatmay improve fuel economy:
•Accelerate and slow down in a smooth,moderate fashion.
•Drive at reasonable and steady speeds.
•Anticipate stops.
•Minimize stop and go driving.
•Close the windows when driving athigher speed.
•Keep the tires properly inflated and useonly the recommended size.
•Use the recommended engine oil.
•Perform all regularly scheduledmaintenance.
Avoid these actions; they reduce fueleconomy:
•Sudden or hard accelerations.
•Revving the engine before turning it off.
•Idle for periods longer than one minute.
•Warm up your vehicle on coldmornings.
•Using air conditioning.
•Using speed control in hilly terrain.
•Resting your foot on the brake pedalwhile driving.
•Driving with the wheels out ofalignment.
Conditions:
•Adding certain accessories to yourvehicle may reduce fuel economy. Forexample, bug deflectors, rollbars, lightbars, running boards, ski racks orluggage racks.
•Using fuel blended with alcohol maylower fuel economy.
•Fuel economy may decrease with lowertemperatures during the first 5–10 mi(12–16 km) of driving.
136
2024 E-Series (TE4) Canada/United States of America, enUSA, Edition date: 202210, First-PrintingDriving Hints
Page 141 of 303
•Driving on flat terrain offers improvedfuel economy as compared to drivingon hilly terrain.
•Transmissions give their best fueleconomy when operated in the topcruise gear and with steady pressureon the gas pedal.
BREAKING-IN
You need to break in new tires forapproximately 300 mi (480 km). Duringthis time, your vehicle may exhibit someunusual driving characteristics.
Avoid driving too fast during the first1,000 mi (1,600 km). Vary your speedfrequently and change up through thegears early. Do not labor the engine.
Do not tow during the first 1,000 mi(1,600 km).
DRIVING THROUGH WATER
WARNING: Do not drive throughflowing or deep water as you may losecontrol of your vehicle.
Note:Driving through standing water cancause vehicle damage.
Note:Engine damage can occur if waterenters the air filter.
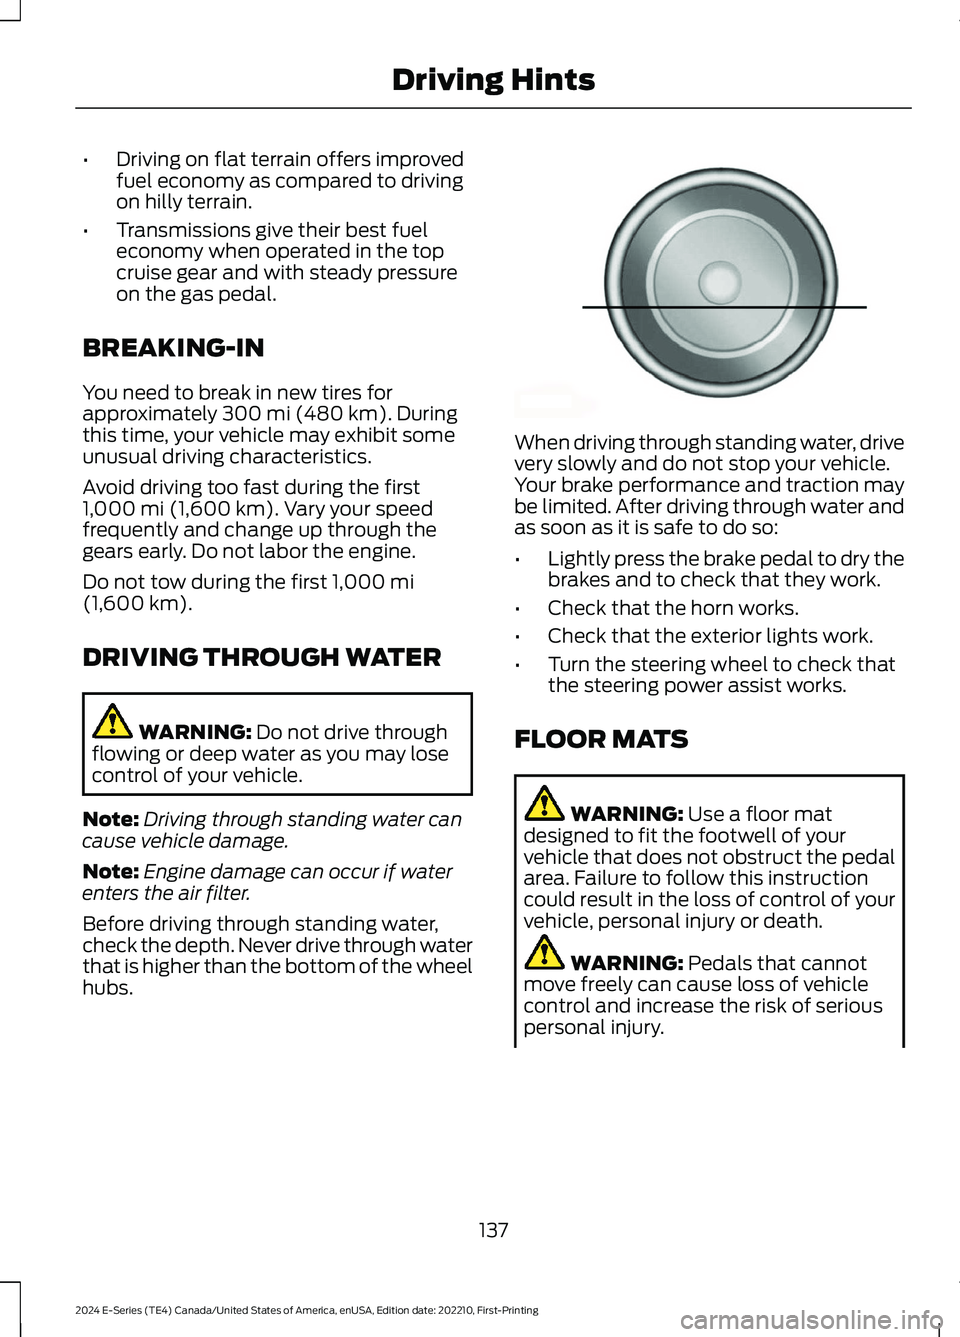
Before driving through standing water,check the depth. Never drive through waterthat is higher than the bottom of the wheelhubs.
When driving through standing water, drivevery slowly and do not stop your vehicle.Your brake performance and traction maybe limited. After driving through water andas soon as it is safe to do so:
•Lightly press the brake pedal to dry thebrakes and to check that they work.
•Check that the horn works.
•Check that the exterior lights work.
•Turn the steering wheel to check thatthe steering power assist works.
FLOOR MATS
WARNING: Use a floor matdesigned to fit the footwell of yourvehicle that does not obstruct the pedalarea. Failure to follow this instructioncould result in the loss of control of yourvehicle, personal injury or death.
WARNING: Pedals that cannotmove freely can cause loss of vehiclecontrol and increase the risk of seriouspersonal injury.
137
2024 E-Series (TE4) Canada/United States of America, enUSA, Edition date: 202210, First-PrintingDriving HintsE176913
Page 147 of 303
This program is separate from the NewVehicle Limited Warranty, but the coverageis concurrent with the powertrain coverageperiod of your vehicle. Canadian roadsidecoverage and benefits may differ from theU.S. coverage. For complete details, seeyour Warranty Guide atwww.ford.com/support/warranty/.
Download the Sykes4Ford RoadsideAssistance App for access to your roadsideassistance services.
If you require more information, please callus in Canada at 1-800-665-2006, or visitour website at www.ford.ca.
Ford Motor Company reserves the right tomodify or discontinue Roadside Assistanceat any time. Certain restrictions apply toRoadside Assistance benefits.
For further details, call1-800-241-3673 (United States)1-800-665-2006 (Canada)
POST-COLLISION BRAKING
How Does Post-Collision BrakingWork
In the event of a moderate to severe crash,the braking system reduces the vehicle’sspeed to prevent or reduce the impact ofa potential secondary crash.
Post-Collision Braking Limitations
Post-collision braking does not activate ifany of the following occur:
•The anti-lock braking system isdamaged during the collision.
•Electronic stability control is disabled.
Overriding Post-Collision Braking
You can override post-collision braking bypressing the brake or accelerator pedal.
Post-Collision Braking Indicators
It flashes when a post-collisionbraking event is occurring.
AUTOMATIC CRASH SHUTOFF
WHAT IS AUTOMATIC CRASHSHUTOFF
The automatic crash shutoff is designedto stop the fuel going to the engine in theevent of a moderate or severe crash.
Note:Not every impact causes a shutoff.
AUTOMATIC CRASH SHUTOFFPRECAUTIONS
WARNING: If your vehicle has beeninvolved in a crash, have the fuel systemchecked. Failure to follow this instructioncould result in fire, personal injury ordeath.
RE-ENABLING YOUR VEHICLE
1.Switch the ignition off.
2.Attempt to start your vehicle.
3.Switch the ignition off.
4.Attempt to start your vehicle.
Note:If your vehicle does not start after thethird attempt, have your vehicle checked assoon as possible.
143
2024 E-Series (TE4) Canada/United States of America, enUSA, Edition date: 202210, First-PrintingCrash and Breakdown InformationE138639
Page 165 of 303
GENERAL INFORMATION
Have your vehicle serviced regularly to helpmaintain its roadworthiness and resalevalue. There is a large network ofauthorized dealers that are there to helpyou with their professional servicingexpertise. We believe that their speciallytrained technicians are best qualified toservice your vehicle properly and expertly.They are supported by a wide range ofhighly specialized tools developedspecifically for servicing your vehicle.
If your vehicle requires professional service,an authorized dealer can provide thenecessary parts and service. Check yourwarranty information to find out whichparts and services are covered.
Use only recommended fuels, lubricants,fluids and service parts conforming tospecifications. Motorcraft® parts aredesigned and built to provide the bestperformance in your vehicle.
Precautions
•Do not work on a hot engine.
•Make sure that nothing gets caught inmoving parts.
•Do not work on a vehicle with theengine running in an enclosed space,unless you are sure you have enoughventilation.
•Keep all open flames and other burningmaterial (such as cigarettes) awayfrom the battery and all fuel relatedparts.
Working with the Engine Off
1.Set the parking brake and shift thetransmission to park (P).
2.Switch off the engine.
3.Block the wheels.
Working with the Engine On
WARNING: To reduce the risk ofvehicle damage and personal burninjuries, do not start your engine with theair cleaner removed and do not removeit while the engine is running.
1.Set the parking brake and shift thetransmission to park (P).
2.Block the wheels.
OPENING AND CLOSING THE
HOOD
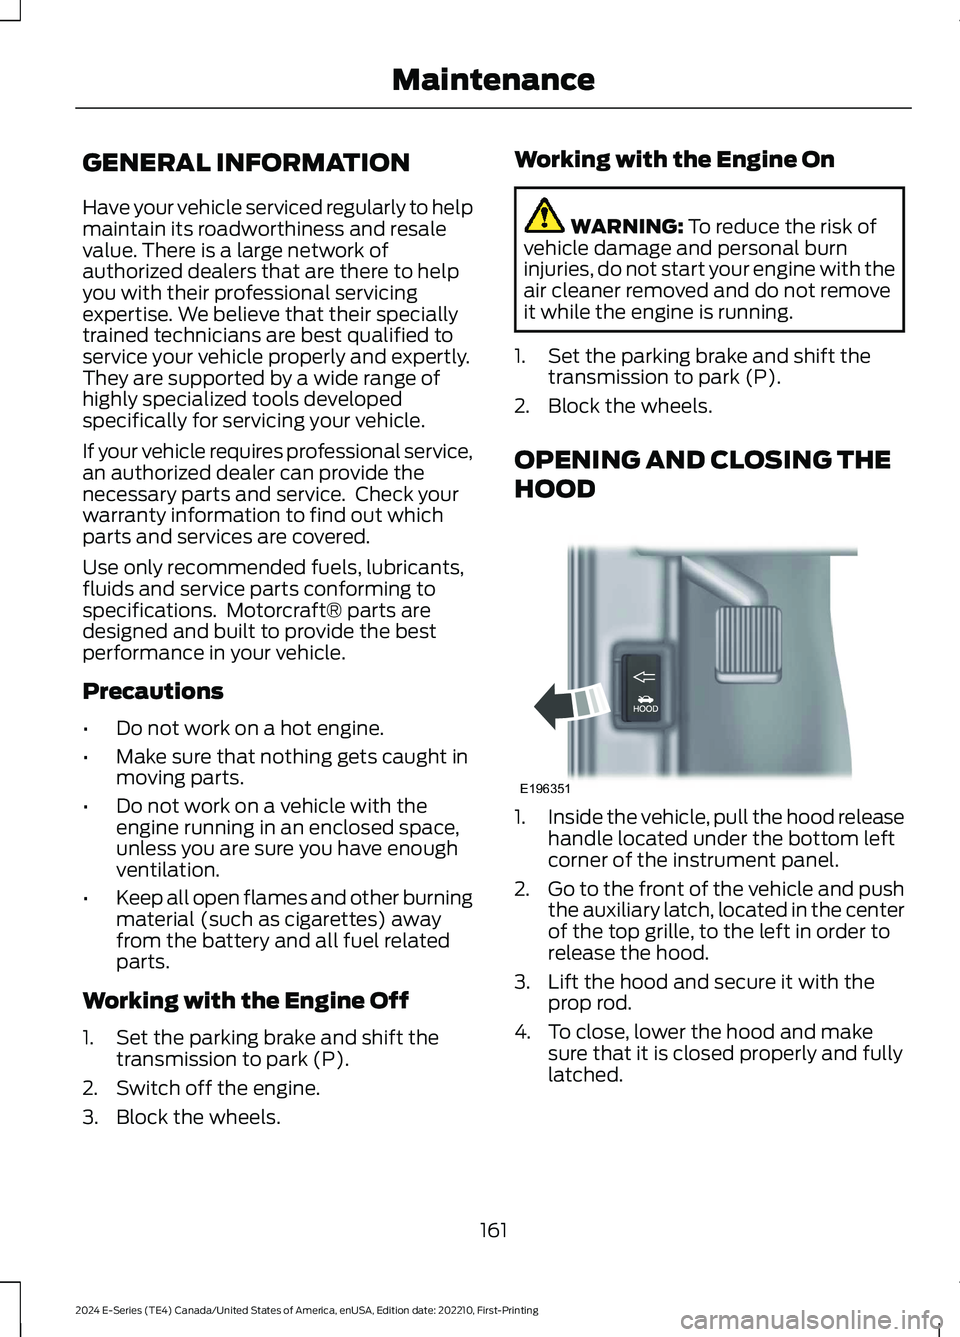
1.Inside the vehicle, pull the hood releasehandle located under the bottom leftcorner of the instrument panel.
2.Go to the front of the vehicle and pushthe auxiliary latch, located in the centerof the top grille, to the left in order torelease the hood.
3.Lift the hood and secure it with theprop rod.
4.To close, lower the hood and makesure that it is closed properly and fullylatched.
161
2024 E-Series (TE4) Canada/United States of America, enUSA, Edition date: 202210, First-PrintingMaintenanceE196351
Page 166 of 303
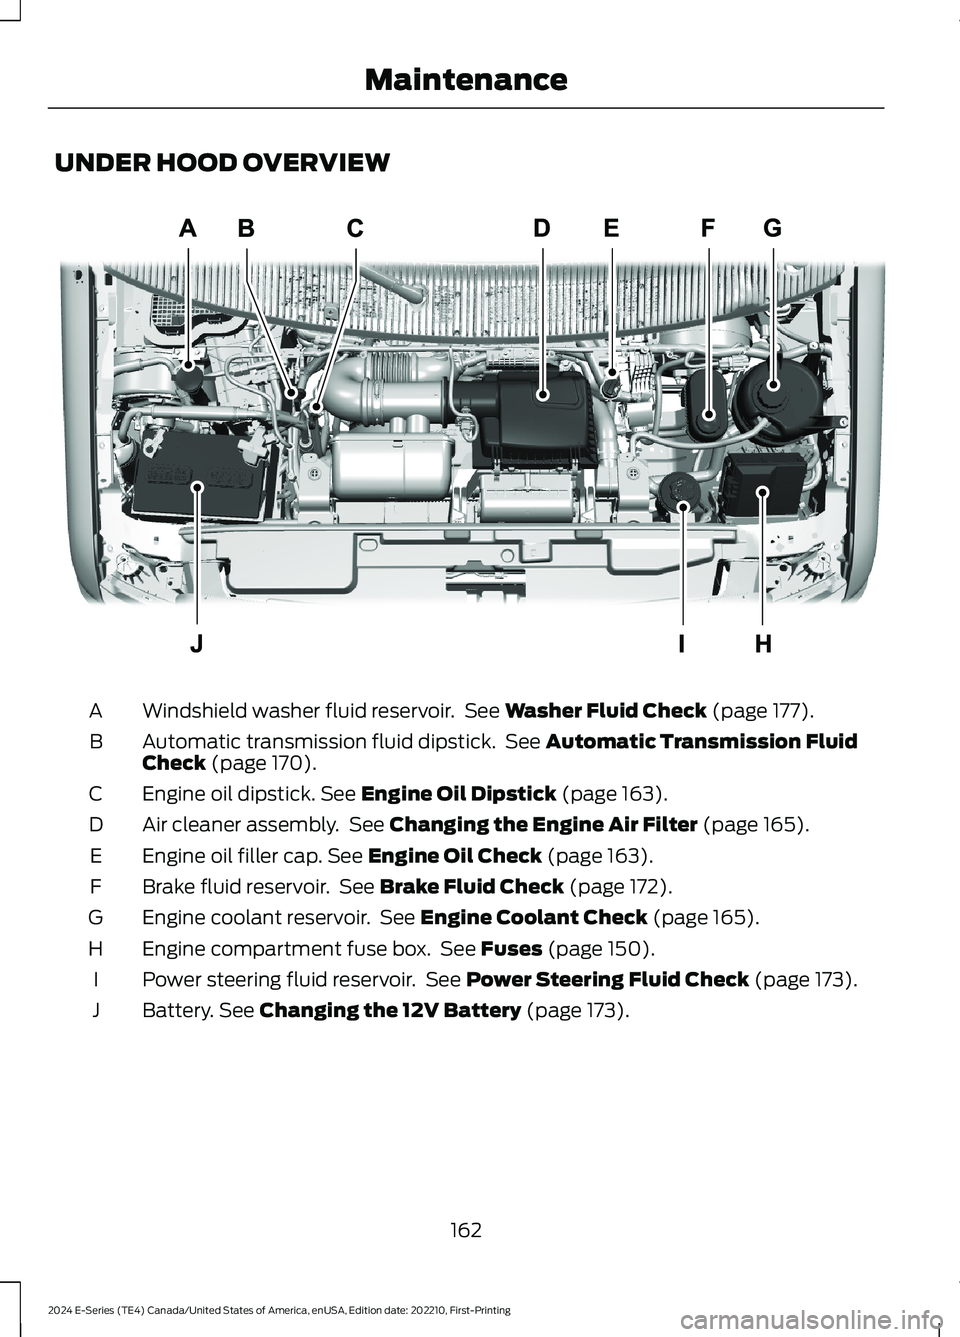
UNDER HOOD OVERVIEW
Windshield washer fluid reservoir. See Washer Fluid Check (page 177).A
Automatic transmission fluid dipstick. See Automatic Transmission FluidCheck (page 170).B
Engine oil dipstick. See Engine Oil Dipstick (page 163).C
Air cleaner assembly. See Changing the Engine Air Filter (page 165).D
Engine oil filler cap. See Engine Oil Check (page 163).E
Brake fluid reservoir. See Brake Fluid Check (page 172).F
Engine coolant reservoir. See Engine Coolant Check (page 165).G
Engine compartment fuse box. See Fuses (page 150).H
Power steering fluid reservoir. See Power Steering Fluid Check (page 173).I
Battery. See Changing the 12V Battery (page 173).J
162
2024 E-Series (TE4) Canada/United States of America, enUSA, Edition date: 202210, First-PrintingMaintenanceE312299
Page 167 of 303
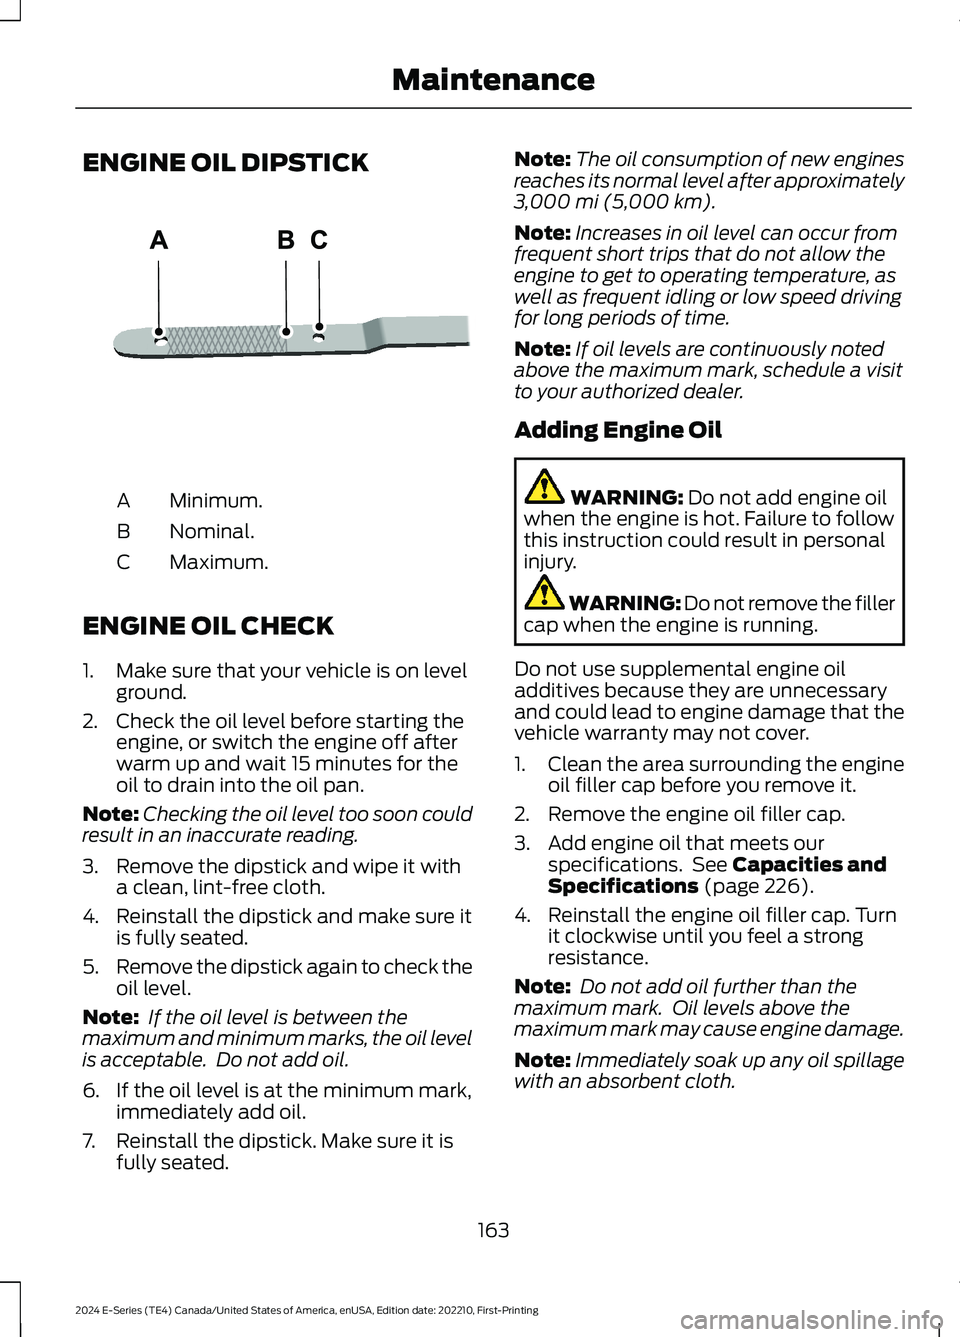
ENGINE OIL DIPSTICK
Minimum.A
Nominal.B
Maximum.C
ENGINE OIL CHECK
1.Make sure that your vehicle is on levelground.
2.Check the oil level before starting theengine, or switch the engine off afterwarm up and wait 15 minutes for theoil to drain into the oil pan.
Note:Checking the oil level too soon couldresult in an inaccurate reading.
3.Remove the dipstick and wipe it witha clean, lint-free cloth.
4.Reinstall the dipstick and make sure itis fully seated.
5.Remove the dipstick again to check theoil level.
Note: If the oil level is between themaximum and minimum marks, the oil levelis acceptable. Do not add oil.
6.If the oil level is at the minimum mark,immediately add oil.
7.Reinstall the dipstick. Make sure it isfully seated.
Note:The oil consumption of new enginesreaches its normal level after approximately3,000 mi (5,000 km).
Note:Increases in oil level can occur fromfrequent short trips that do not allow theengine to get to operating temperature, aswell as frequent idling or low speed drivingfor long periods of time.
Note:If oil levels are continuously notedabove the maximum mark, schedule a visitto your authorized dealer.
Adding Engine Oil
WARNING: Do not add engine oilwhen the engine is hot. Failure to followthis instruction could result in personalinjury.
WARNING: Do not remove the fillercap when the engine is running.
Do not use supplemental engine oiladditives because they are unnecessaryand could lead to engine damage that thevehicle warranty may not cover.
1.Clean the area surrounding the engineoil filler cap before you remove it.
2.Remove the engine oil filler cap.
3.Add engine oil that meets ourspecifications. See Capacities andSpecifications (page 226).
4.Reinstall the engine oil filler cap. Turnit clockwise until you feel a strongresistance.
Note: Do not add oil further than themaximum mark. Oil levels above themaximum mark may cause engine damage.
Note:Immediately soak up any oil spillagewith an absorbent cloth.
163
2024 E-Series (TE4) Canada/United States of America, enUSA, Edition date: 202210, First-PrintingMaintenanceE250320
Page 168 of 303
Engine Oil Pressure Warning Lamp
WARNING: If it illuminates whenyou are driving do not continue yourjourney, even if the oil level is correct.Have your vehicle checked.
It illuminates when you switchthe ignition on.
If it illuminates when the engineis running this indicates a malfunction.Stop your vehicle as soon as it is safe todo so and switch the engine off. Check theengine oil level. If the oil level is sufficient,this indicates a system malfunction. Haveyour vehicle checked as soon as possible.
OIL CHANGE INDICATOR
RESET
Base Cluster
Use the information display controls onthe steering wheel to reset the oil changeindicator.
From the main menu scroll to:
Action and DescriptionMessage
Press the right arrow button,then from this menu scrolldown to the followingmessage.
Driverassist
Press the right arrow button,then from this menu scrolldown to the followingmessage.
Mainten-anceMonitor
Press and hold the OKbutton until the instrumentcluster displays thefollowing message.
Oil Life %Hold toReset
Action and DescriptionMessage
Reset Complete
If the instrument clusterdisplays the followingmessage, repeat theprocess.
Reset Cancelled
High Series Cluster
Use the information display controls onthe steering wheel to reset the oil changeindicator.
From the main menu scroll to:
Action and DescriptionMessage
Press the down arrowbutton, then from this menuscroll to the followingmessage.
Truck Info
Press the OK button.Mainten-anceMonitor
Press the down arrowbutton, then from this menuscroll to the followingmessage.
Oil Life:xxx%
Press the OK button.Oil Life
Press and hold the OKbutton until the instrumentcluster displays thefollowing message.
Oil LifeHold OK toReset
Oil Life: 100%
When the oil change indic-ator resets, the instrumentcluster displays 100%.
Repeat the process if the oilchange indicator does notreset.
164
2024 E-Series (TE4) Canada/United States of America, enUSA, Edition date: 202210, First-PrintingMaintenanceE67022
Page 169 of 303
CHANGING THE ENGINE AIR
FILTER
WARNING: To reduce the risk ofvehicle damage and personal burninjuries, do not start your engine with theair cleaner removed and do not removeit while the engine is running.
Note: Failure to use the correct air filterelement may result in severe enginedamage. The customer warranty may bevoid for any damage to the engine if thecorrect air filter element is not used.
When changing the air filter element, useonly the air filter element listed. SeeMotorcraft Parts (page 227). The air filterelement should be replaced at theappropriate intervals. See NormalScheduled Maintenance (page 252).
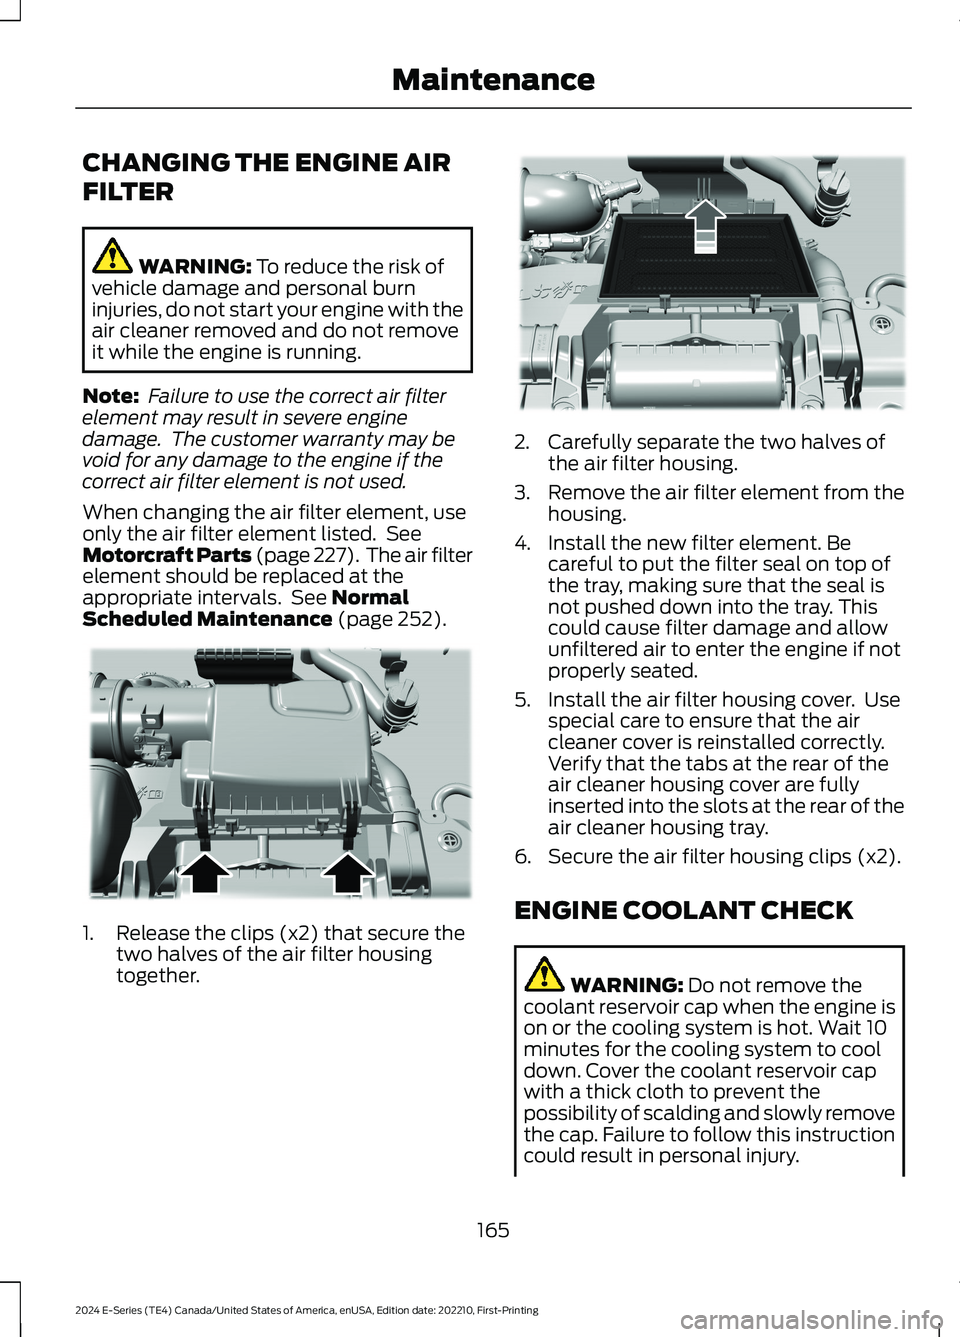
1.Release the clips (x2) that secure thetwo halves of the air filter housingtogether.
2.Carefully separate the two halves ofthe air filter housing.
3.Remove the air filter element from thehousing.
4.Install the new filter element. Becareful to put the filter seal on top ofthe tray, making sure that the seal isnot pushed down into the tray. Thiscould cause filter damage and allowunfiltered air to enter the engine if notproperly seated.
5.Install the air filter housing cover. Usespecial care to ensure that the aircleaner cover is reinstalled correctly.Verify that the tabs at the rear of theair cleaner housing cover are fullyinserted into the slots at the rear of theair cleaner housing tray.
6.Secure the air filter housing clips (x2).
ENGINE COOLANT CHECK
WARNING: Do not remove thecoolant reservoir cap when the engine ison or the cooling system is hot. Wait 10minutes for the cooling system to cooldown. Cover the coolant reservoir capwith a thick cloth to prevent thepossibility of scalding and slowly removethe cap. Failure to follow this instructioncould result in personal injury.
165
2024 E-Series (TE4) Canada/United States of America, enUSA, Edition date: 202210, First-PrintingMaintenanceE310547 E310548
Page 170 of 303
WARNING: To reduce the risk ofpersonal injury, make sure the engine iscool before unscrewing the coolantpressure relief cap. The cooling systemis under pressure. Steam and hot liquidcan come out forcefully when you loosenthe cap slightly.
When the engine is cold, check theconcentration and level of the coolant atthe intervals listed in the scheduledmaintenance information. See ScheduledMaintenance (page 249).
Note:Make sure that the coolant level isbetween the MIN and MAX marks on thecoolant reservoir.
Note:Coolant expands when it is hot. Thelevel may extend beyond the MAX mark.
Maintain coolant concentration within48% to 50%, which equates to a freezepoint between -29°F (-34°C) and -35°F(-37°C). Use a refractometer to checkcoolant concentration. Do not usehydrometers or coolant test strips formeasuring coolant concentration.
Adding Coolant
WARNING: Do not add coolantwhen the vehicle is on or the coolingsystem is hot. Failure to follow thisinstruction could result in personal injury.
WARNING: Do not put coolant inthe windshield washer reservoir. Ifsprayed on the windshield, coolant couldmake it difficult to see through thewindshield.
WARNING: Do not remove thecoolant reservoir cap when the engine ison or the cooling system is hot. Wait 10minutes for the cooling system to cooldown. Cover the coolant reservoir capwith a thick cloth to prevent thepossibility of scalding and slowly removethe cap. Failure to follow this instructioncould result in personal injury.
WARNING: Do not add coolantfurther than the MAX mark.
Note: Automotive fluids are notinterchangeable. Do not use coolant orwindshield washer fluid outside of itsspecified function and vehicle location.
Note:Do not use stop leak pellets, coolingsystem sealants, or non-specified additivesas they can cause damage to the enginecooling or heating systems. Resultingcomponent damage may not be covered bythe vehicle warranty.
Always use prediluted coolant approvedto the correct specification to avoidplugging the small passageways in theengine cooling system. See Capacitiesand Specifications (page 226). Do notmix different colors or types of coolant inyour vehicle. Mixing of engine coolants orusing an incorrect coolant may harm theengine or cooling system components andmay not be covered by the vehiclewarranty.
Note:If prediluted coolant is not available,use the approved concentrated coolantdiluting it to 50/50 with distilled water. SeeCapacities and Specifications (page 226).Using water that has not been deionizedmay contribute to deposit formation,corrosion and plugging of the small coolingsystem passageways.
166
2024 E-Series (TE4) Canada/United States of America, enUSA, Edition date: 202210, First-PrintingMaintenance
Page 171 of 303
Note:Coolants marketed for all makes andmodels may not be approved to Fordspecifications and may damage the coolingsystem. Resulting component damage maynot be covered by the vehicle warranty.
If the coolant level is at or below theminimum mark, add prediluted coolantimmediately.
Top up the coolant level as follows:
1.Unscrew the cap slowly. Any pressureescapes as you unscrew the cap.
2.Add prediluted coolant approved tothe correct specification. SeeCapacities and Specifications (page226).
3.Add enough prediluted coolant toreach the correct level.
4.Replace the coolant reservoir cap. Turnthe cap clockwise until it contacts thehard stop.
5.Check the coolant level the next fewtimes you drive your vehicle. Ifnecessary, add enough predilutedengine coolant to bring the coolantlevel to the correct level.
If you have to add more than 1.1 qt (1 L) ofengine coolant per month, have yourvehicle checked as soon as possible.Operating an engine with a low coolantlevel can result in engine overheating andpossible engine damage.
Note:During normal vehicle operation, thecoolant may change color, and slightlydarken. As long as the coolant is clear anduncontaminated, this color change does notindicate the coolant has degraded nor doesit require the coolant to be drained, thesystem to be flushed, or the coolant to bereplaced.
In case of emergency, you can add a largeamount of water without coolant to reacha vehicle service location. In this instance,qualified personnel:
1.Must drain the cooling system.
2.Chemically clean the coolant system.
3.Refill with coolant that meets thecorrect specification. See Capacitiesand Specifications (page 226).
Water alone, without coolant, can causeengine damage from corrosion,overheating or freezing.
Do not use the following as a coolantsubstitute:
•Alcohol.
•Methanol.
•Brine.
•Any coolant mixed with alcohol ormethanol antifreeze.
Alcohol and other liquids can cause enginedamage from overheating or freezing.
Do not add extra inhibitors or additives tothe coolant. These can be harmful andcompromise the corrosion protection ofthe coolant.
Recycled Coolant
We do not recommend the use of recycledcoolant as an approved recycling processis not yet available.
Dispose of used engine coolant in anappropriate manner.
Follow your community's regulations andstandards for recycling and disposing ofautomotive fluids.
167
2024 E-Series (TE4) Canada/United States of America, enUSA, Edition date: 202210, First-PrintingMaintenance