turn FORD E350 2011 User Guide
[x] Cancel search | Manufacturer: FORD, Model Year: 2011, Model line: E350, Model: FORD E350 2011Pages: 339, PDF Size: 2.29 MB
Page 24 of 339
AUTOUNLOCK (if equipped)
This feature automatically unlocks all vehicle doors when the driver’s
door is opened within 10 minutes of the ignition being turned off.
Press and hold the SELECT/RESET stem to turn this feature on or off.
Press the SELECT/RESET stem for the next setup menu item or wait for
more than four seconds to return to the info menu.
REAR PARK AID (if equipped)
This feature sounds a warning tone to warn the driver of obstacles near
the rear bumper, and functions only when R (Reverse) gear is selected.
Press and hold the SELECT/RESET stem to turn this feature on or off.
(You can also choose to turn this feature on/off when the vehicle is
placed in reverse.)
Press the SELECT/RESET stem for the next setup menu item or wait for
more than four seconds to return to the info menu.
COMPASS (if equipped)
The compass heading is displayed as one of N, NE, E, SE, S, SW, W and
NW in the message center display.
The compass reading may be affected when you drive near large
buildings, bridges, power lines and powerful broadcast antenna. Magnetic
or metallic objects placed in, on or near the vehicle may also affect
compass accuracy.
Usually, when something affects the compass readings, the compass will
correct itself after a few days of operating your vehicle in normal
conditions. If the compass still appears to be inaccurate, a manual
calibration may be necessary. Refer toCompass zone adjustment.
Most geographic areas (zones) have a magnetic north compass point that
varies slightly from the northerly direction on maps. This variation is up
to four degrees between adjacent zones and will become noticeable as
the vehicle crosses multiple zones. A correct zone setting will eliminate
this error. Refer toCompass calibration adjustment.
Instrument Cluster
24
2011 Econoline(eco)
Owners Guide, 3rd Printing
USA(fus)
Page 26 of 339
Note:If the SELECT/RESET stem is pressed during the calibration or
three minutes has elapsed since the beginning of the calibration without
driving the vehicle, the message center reverts back to normal operation
and the CAL will display until a successful calibration is carried out.
5. Slowly drive the vehicle in a circle less than 3 mph (5 km/h ) until the
CIRCLE SLOWLY TO CALIBRATE message changes to CALIBRATION
COMPLETED.
LANGUAGE = ENGLISH / SPANISH / FRENCH
Allows you to choose which language the message center will display in.
Selectable languages are English, Spanish, or French.
Waiting four seconds or pressing the RESET button cycles the message
center through each of the language choices.
Press the RESET button to set the language choice when the language
you want appears.
Press the SELECT/RESET stem for the next setup menu item or wait for
more than four seconds to return to the info menu.
HOLD RESET FOR SYSTEM CHECK
Press and hold the SELECT/RESET stem to select system check when
HOLD RESET FOR SYSTEM CHECK is displayed in the message center.
For each of the monitored systems, the message center will indicate
either an ok message or a warning message for two seconds. Pressing the
SELECT/RESET stem cycles the message center through each of the
systems being monitored.
The sequence of the system check report and how it appears in the
message center is as follows:
1. XXX% OIL LIFE (Gas engine only)
2. ENGINE HOURS
3. ENGINE IDLE HOURS
4. CHARGING SYSTEM
5. BRAKE SYSTEM
6. TBC GAIN = XX.X
NO TRAILER (if equipped and no trailer connected)
7. TBC GAIN = XX.X
OUTPUT = ////// (if equipped and trailer connected)
8. XX MILES TO E FUEL LEVEL XXX
System warnings
System warnings alert you to possible problems or malfunctions in your
vehicle’s operating systems.
Instrument Cluster
26
2011 Econoline(eco)
Owners Guide, 3rd Printing
USA(fus)
Page 29 of 339
AUDIO SYSTEMS
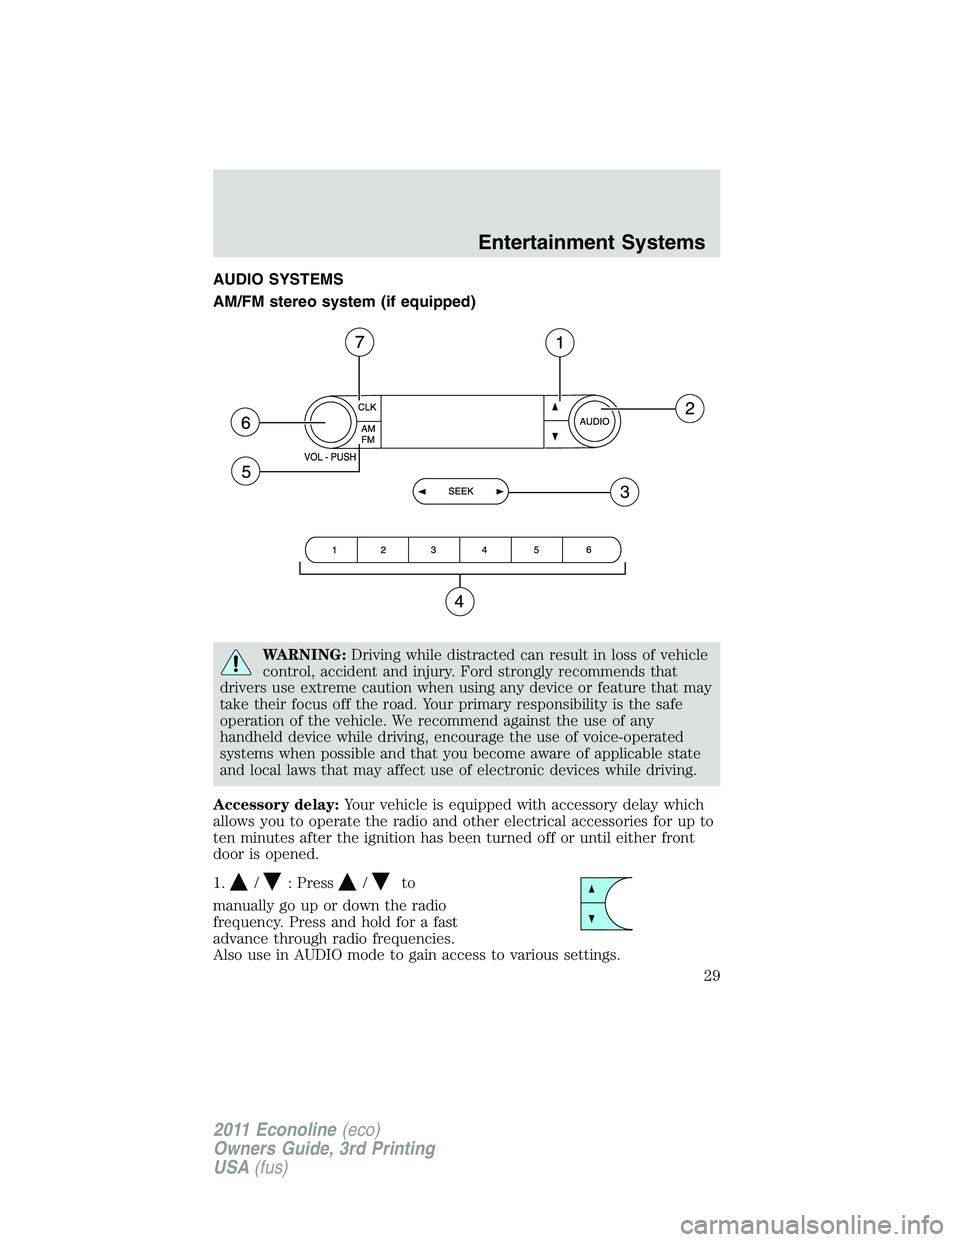
AM/FM stereo system (if equipped)
WARNING:Driving while distracted can result in loss of vehicle
control, accident and injury. Ford strongly recommends that
drivers use extreme caution when using any device or feature that may
take their focus off the road. Your primary responsibility is the safe
operation of the vehicle. We recommend against the use of any
handheld device while driving, encourage the use of voice-operated
systems when possible and that you become aware of applicable state
and local laws that may affect use of electronic devices while driving.
Accessory delay:Your vehicle is equipped with accessory delay which
allows you to operate the radio and other electrical accessories for up to
ten minutes after the ignition has been turned off or until either front
door is opened.
1.
/: Press/to
manually go up or down the radio
frequency. Press and hold for a fast
advance through radio frequencies.
Also use in AUDIO mode to gain access to various settings.
Entertainment Systems
29
2011 Econoline(eco)
Owners Guide, 3rd Printing
USA(fus)
Page 30 of 339
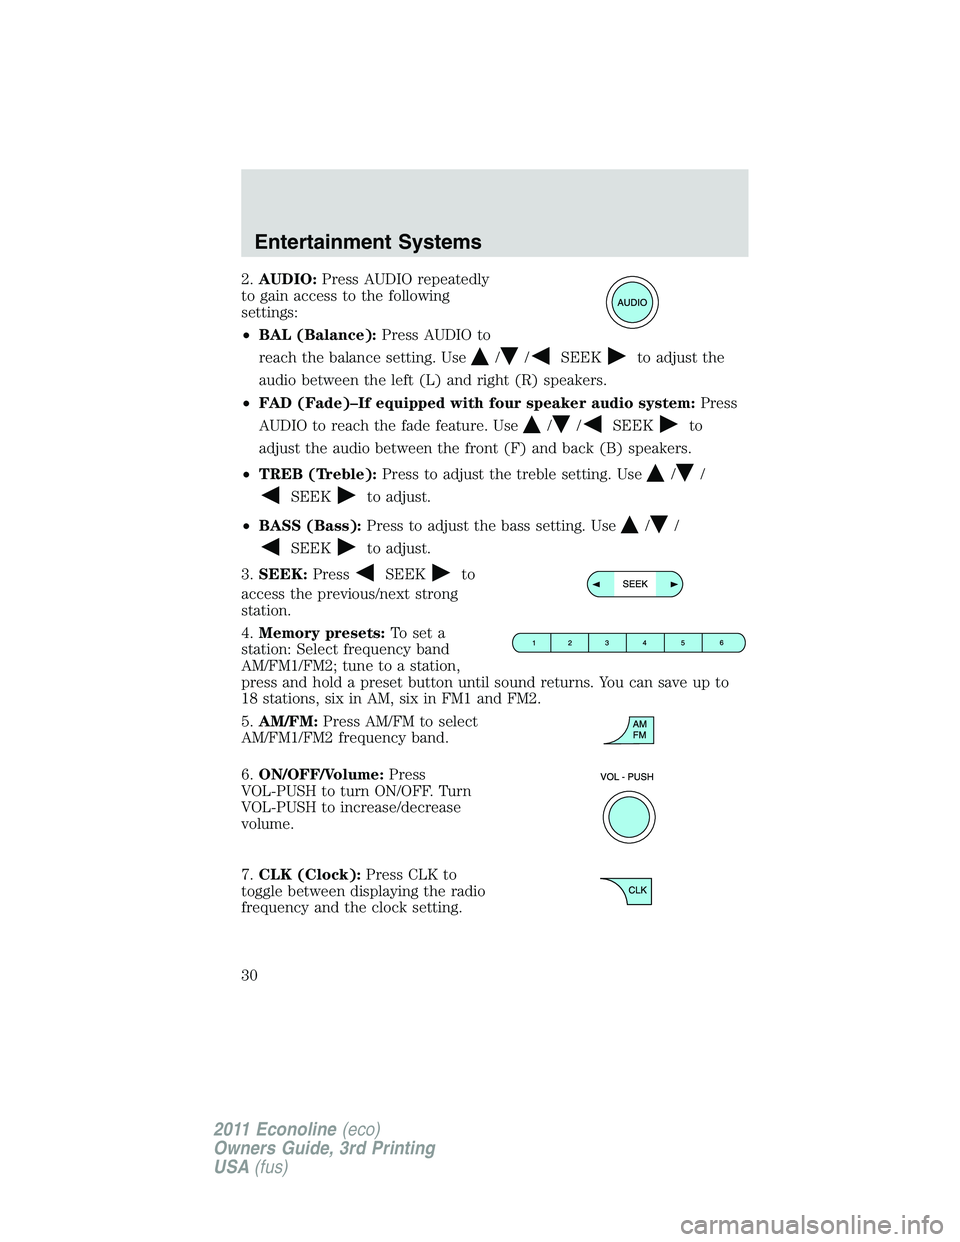
2.AUDIO:Press AUDIO repeatedly
to gain access to the following
settings:
•BAL (Balance):Press AUDIO to
reach the balance setting. Use
//SEEKto adjust the
audio between the left (L) and right (R) speakers.
•FAD (Fade)–If equipped with four speaker audio system:Press
AUDIO to reach the fade feature. Use
//SEEKto
adjust the audio between the front (F) and back (B) speakers.
•TREB (Treble):Press to adjust the treble setting. Use
//
SEEKto adjust.
•BASS (Bass):Press to adjust the bass setting. Use
//
SEEKto adjust.
3.SEEK:Press
SEEKto
access the previous/next strong
station.
4.Memory presets:To set a
station: Select frequency band
AM/FM1/FM2; tune to a station,
press and hold a preset button until sound returns. You can save up to
18 stations, six in AM, six in FM1 and FM2.
5.AM/FM:Press AM/FM to select
AM/FM1/FM2 frequency band.
6.ON/OFF/Volume:Press
VOL-PUSH to turn ON/OFF. Turn
VOL-PUSH to increase/decrease
volume.
7.CLK (Clock):Press CLK to
toggle between displaying the radio
frequency and the clock setting.
Entertainment Systems
30
2011 Econoline(eco)
Owners Guide, 3rd Printing
USA(fus)
Page 31 of 339
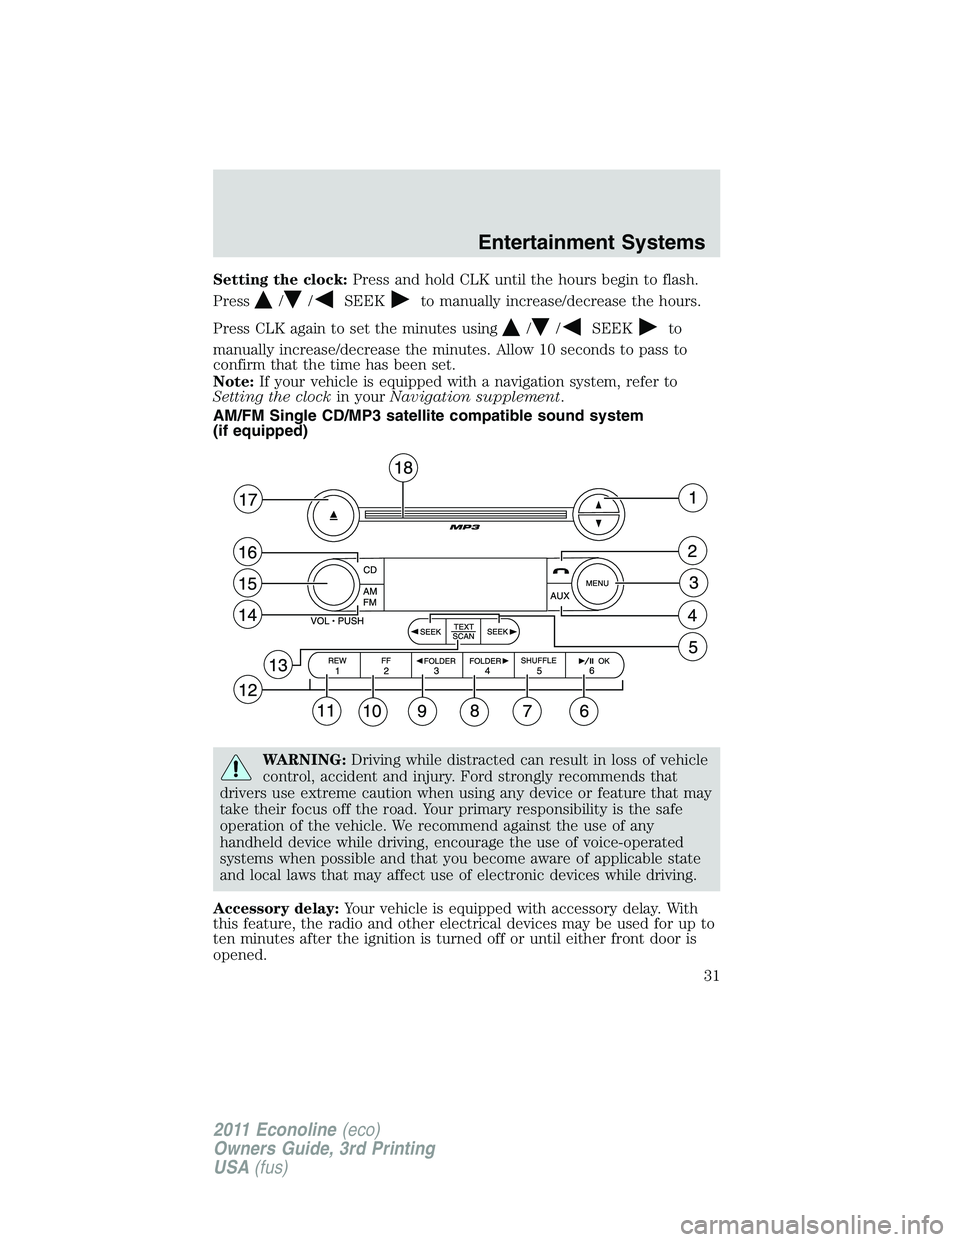
Setting the clock:Press and hold CLK until the hours begin to flash.
Press
//SEEKto manually increase/decrease the hours.
Press CLK again to set the minutes using
//SEEKto
manually increase/decrease the minutes. Allow 10 seconds to pass to
confirm that the time has been set.
Note:If your vehicle is equipped with a navigation system, refer to
Setting the clockin yourNavigation supplement.
AM/FM Single CD/MP3 satellite compatible sound system
(if equipped)
WARNING:Driving while distracted can result in loss of vehicle
control, accident and injury. Ford strongly recommends that
drivers use extreme caution when using any device or feature that may
take their focus off the road. Your primary responsibility is the safe
operation of the vehicle. We recommend against the use of any
handheld device while driving, encourage the use of voice-operated
systems when possible and that you become aware of applicable state
and local laws that may affect use of electronic devices while driving.
Accessory delay:Your vehicle is equipped with accessory delay. With
this feature, the radio and other electrical devices may be used for up to
ten minutes after the ignition is turned off or until either front door is
opened.
Entertainment Systems
31
2011 Econoline(eco)
Owners Guide, 3rd Printing
USA(fus)
Page 33 of 339
CANT SAVE will appear in the display.) When the chosen song is
playing on any satellite radio channel, the system will alert you with
an audible prompt. Press OK while SONG ALERT is in the display and
the system will take you to the channel playing the desired song. You
can save up to 20 songs. If you attempt to save a song when the
system is full, the display will read REPLACE SONG? Press OK to
access the saved songs and press
/to cycle through the saved
songs. When the song appears in the display that you would like to
replace, press OK. SONG REPLACED will appear in the display.
•DELETE SONG:Press OK to delete a song from the system’s
memory. Press
/to cycle through the saved songs. When the
song appears in the display that you would like to delete, press OK.
The song will appear in the display for confirmation. Press OK again
and the display will read SONG DELETED. If you do not want to
delete the currently listed song, press
/to select either
RETURN or CANCEL.
Note:If there are no songs presently saved, the display will read NO
SONGS.
•DELETE ALL SONGS:Press OK to delete all song’s from the
system’s memory. The display will read ARE YOU SURE ? Press OK to
confirm deletion of all saved songs and the display will read ALL
DELETED.
Note:If there are no songs presently saved, the display will read NO
SONGS.
•ENABLE ALERTS / DISABLE ALERTS:Press OK to enable/disable
the satellite alert status which alerts you when your selected songs are
playing on a satellite radio channel. (The system default is disabled.)
SONG ALERTS ENABLED/DISABLED will appear in the display. The
menu listing will display the opposite state. For example, if you have
chosen to enable the song alerts, the menu listing will read DISABLE
as the alerts are currently on, so your other option is to turn them off.
Satellite radio is available only with a valid SIRIUS radio
subscription. Check with your authorized dealer for availability.
AUTOSET:Press MENU until the display reads AUTOSET. Autoset
allows you to set the strongest local radio stations without losing your
original manually set preset stations for AM/FM1/FM2. Use
/to
turn on/off.
When the six strongest stations are filled, the station stored in preset 1
will begin playing. If there are less than six strong stations, the system
will store the last one in the remaining presets.
Entertainment Systems
33
2011 Econoline(eco)
Owners Guide, 3rd Printing
USA(fus)
Page 34 of 339

RBDS:Available only in FM mode. This feature allows you to search
RBDS-equipped stations for a certain category of music format:
CLASSIC, COUNTRY, INFORM, JAZZ/RB, ROCK, etc.
To activate,press MENU repeatedly until RBDS (ON/OFF) appears in
the display. Use
/to toggle RBDS ON/OFF. When RBDS is OFF,
you will not be able to search for RBDS equipped stations or view the
station name or type.
To search for specific RBDS music categories:When the desired
category appears in the display, press
/to find the desired type,
then press and release
SEEK, SEEKor press and hold SCAN to
begin the search.
To view the station name or type:When the desired category appears
in the display, press TEXT/SCAN to toggle between displaying the station
type (COUNTRY, ROCK, etc.) or the station name (WYCD, WXYZ, etc.).
BASS:Press MENU to reach the bass setting. Use
/to adjust.
TREB (Treble):Press MENU to reach the treble setting. Use
/to
adjust.
BAL (Balance):Press MENU to reach the balance setting. Use
/
to adjust the audio between the left (L) and right (R) speakers. Press
OK to close and return to the main menu.
FADE (If equipped with four speaker audio system):Press MENU
to reach the fade setting. Use
/to adjust the audio between the
back (B) and front (F) speakers.
SPEED VOL (Speed sensitive volume, if equipped):Press MENU to
reach the SPEEDVOL setting. Radio volume automatically gets louder
with increasing vehicle speed to compensate for road and wind noise.
Use
/to adjust.
The default setting isoff;increasing your vehicle speed will not change
the volume level.
Adjust1–7:Increasing this setting from 1 (lowest setting) to 7 (highest
setting) allows the radio volume to automatically change slightly with
vehicle speed to compensate for road and wind noise.
Recommended level is1–3;SPEED OFF turns the feature off and level 7
is the maximum setting.
Entertainment Systems
34
2011 Econoline(eco)
Owners Guide, 3rd Printing
USA(fus)
Page 37 of 339
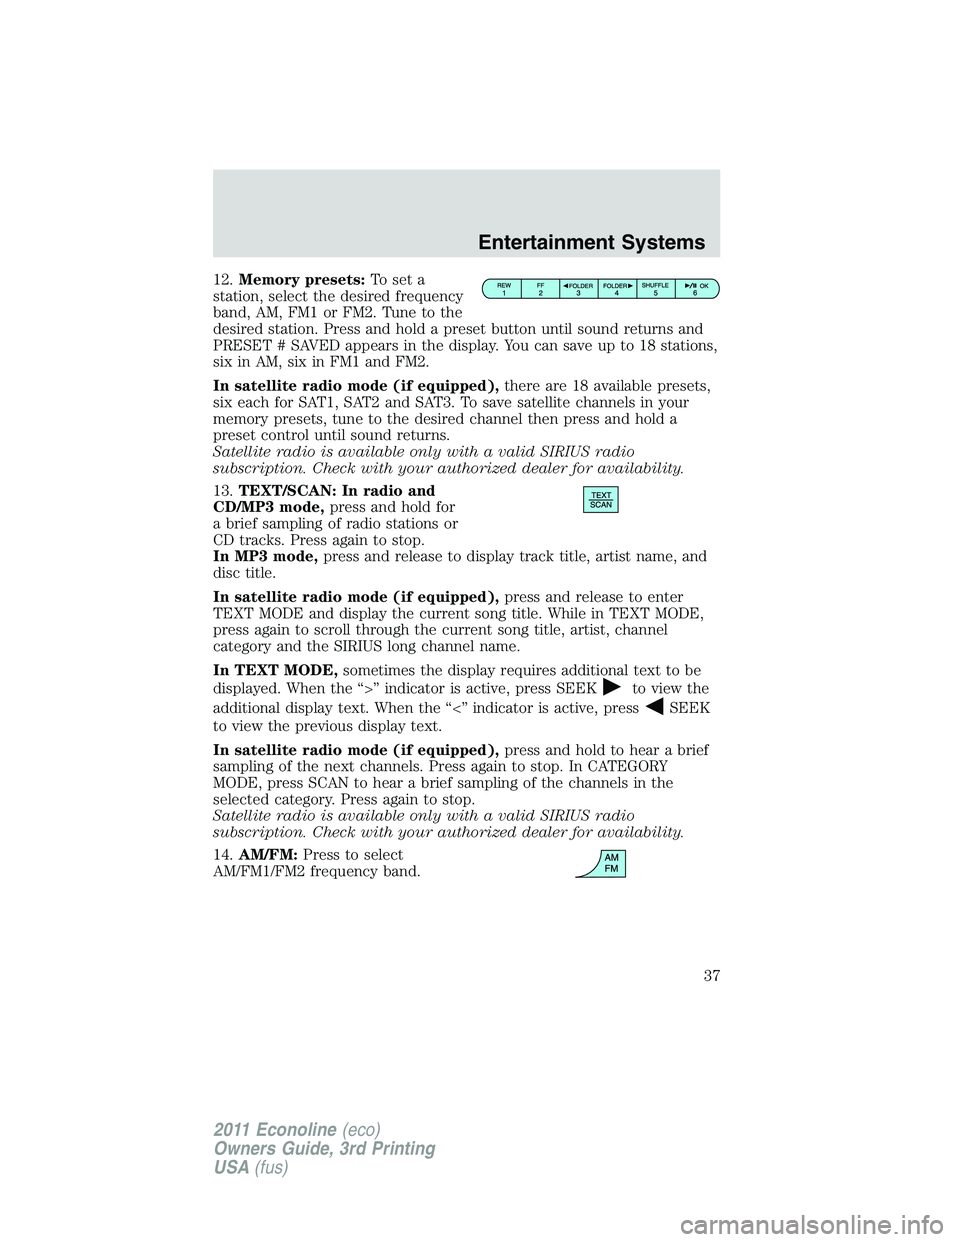
12.Memory presets:To set a
station, select the desired frequency
band, AM, FM1 or FM2. Tune to the
desired station. Press and hold a preset button until sound returns and
PRESET # SAVED appears in the display. You can save up to 18 stations,
six in AM, six in FM1 and FM2.
In satellite radio mode (if equipped),there are 18 available presets,
six each for SAT1, SAT2 and SAT3. To save satellite channels in your
memory presets, tune to the desired channel then press and hold a
preset control until sound returns.
Satellite radio is available only with a valid SIRIUS radio
subscription. Check with your authorized dealer for availability.
13.TEXT/SCAN: In radio and
CD/MP3 mode,press and hold for
a brief sampling of radio stations or
CD tracks. Press again to stop.
In MP3 mode,press and release to display track title, artist name, and
disc title.
In satellite radio mode (if equipped),press and release to enter
TEXT MODE and display the current song title. While in TEXT MODE,
press again to scroll through the current song title, artist, channel
category and the SIRIUS long channel name.
In TEXT MODE,sometimes the display requires additional text to be
displayed. When the “>” indicator is active, press SEEK
to view the
additional display text. When the “<” indicator is active, press
SEEK
to view the previous display text.
In satellite radio mode (if equipped),press and hold to hear a brief
sampling of the next channels. Press again to stop. In CATEGORY
MODE, press SCAN to hear a brief sampling of the channels in the
selected category. Press again to stop.
Satellite radio is available only with a valid SIRIUS radio
subscription. Check with your authorized dealer for availability.
14.AM/FM:Press to select
AM/FM1/FM2 frequency band.
Entertainment Systems
37
2011 Econoline(eco)
Owners Guide, 3rd Printing
USA(fus)
Page 38 of 339
15.ON/OFF/Volume:Press to turn
ON/OFF. Turn to increase/decrease
volume.
Note:If the volume is set above a
certain level and the ignition is
turned off, the volume will come back on at a “nominal” listening level
when the ignition switch is turned back on.
16.CD:Press to enter CD/MP3
mode. If a CD/MP3 is already loaded
into the system, CD/MP3 play will
begin where it ended last. If no CD is loaded, NO DISC will appear in the
display.
17.
(CD eject):Press to eject a
CD.
18.CD slot:Insert a CD label side
up in the CD slot.
Auxiliary input jack (if equipped)
WARNING:Driving while distracted can result in loss of vehicle
control, accident and injury. Ford strongly recommends that
drivers use extreme caution when using any device or feature that may
take their focus off the road. Your primary responsibility is the safe
operation of the vehicle. We recommend against the use of any
handheld device while driving, encourage the use of voice-operated
systems when possible and that you become aware of applicable state
and local laws that may affect use of electronic devices while driving.
Entertainment Systems
38
2011 Econoline(eco)
Owners Guide, 3rd Printing
USA(fus)
Page 39 of 339
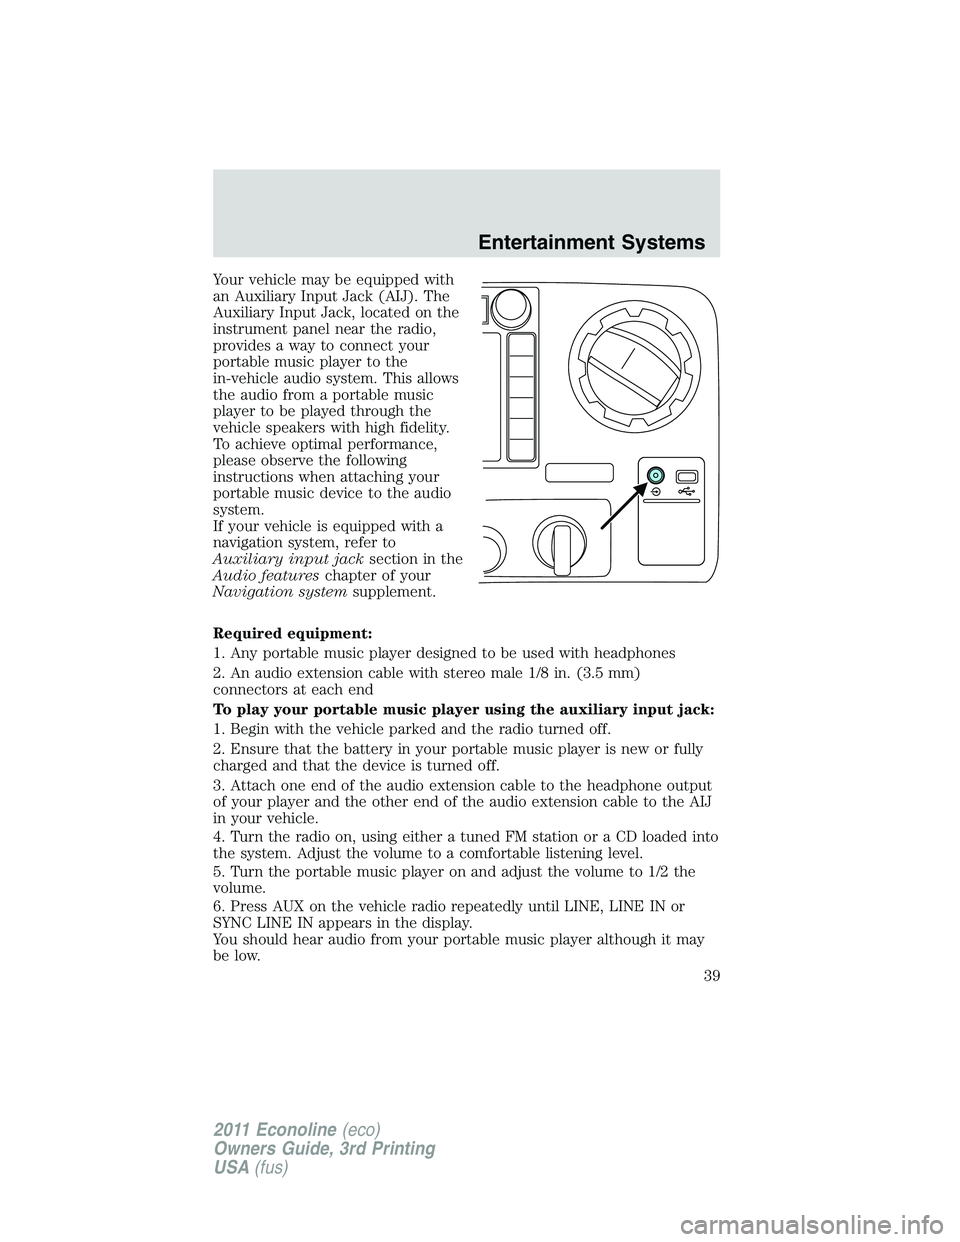
Your vehicle may be equipped with
an Auxiliary Input Jack (AIJ). The
Auxiliary Input Jack, located on the
instrument panel near the radio,
provides a way to connect your
portable music player to the
in-vehicle audio system. This allows
the audio from a portable music
player to be played through the
vehicle speakers with high fidelity.
To achieve optimal performance,
please observe the following
instructions when attaching your
portable music device to the audio
system.
If your vehicle is equipped with a
navigation system, refer to
Auxiliary input jacksection in the
Audio featureschapter of your
Navigation systemsupplement.
Required equipment:
1. Any portable music player designed to be used with headphones
2. An audio extension cable with stereo male 1/8 in. (3.5 mm)
connectors at each end
To play your portable music player using the auxiliary input jack:
1. Begin with the vehicle parked and the radio turned off.
2. Ensure that the battery in your portable music player is new or fully
charged and that the device is turned off.
3. Attach one end of the audio extension cable to the headphone output
of your player and the other end of the audio extension cable to the AIJ
in your vehicle.
4. Turn the radio on, using either a tuned FM station or a CD loaded into
the system. Adjust the volume to a comfortable listening level.
5. Turn the portable music player on and adjust the volume to 1/2 the
volume.
6. Press AUX on the vehicle radio repeatedly until LINE, LINE IN or
SYNC LINE IN appears in the display.
You should hear audio from your portable music player although it may
be low.
Entertainment Systems
39
2011 Econoline(eco)
Owners Guide, 3rd Printing
USA(fus)